height adjustment MAZDA MODEL CX-9 2009 Owners Manual (in English)
[x] Cancel search | Manufacturer: MAZDA, Model Year: 2009, Model line: MODEL CX-9, Model: MAZDA MODEL CX-9 2009Pages: 538, PDF Size: 12.18 MB
Page 16 of 538
Black plate (16,1)
CAUTION
When returning a rear-reclined
seatback to its upright position,
make sure you hold onto the
seatback with your other hand while
operating the lever. If the seatback is
not supported, it will flip forward
suddenly and could cause injury.
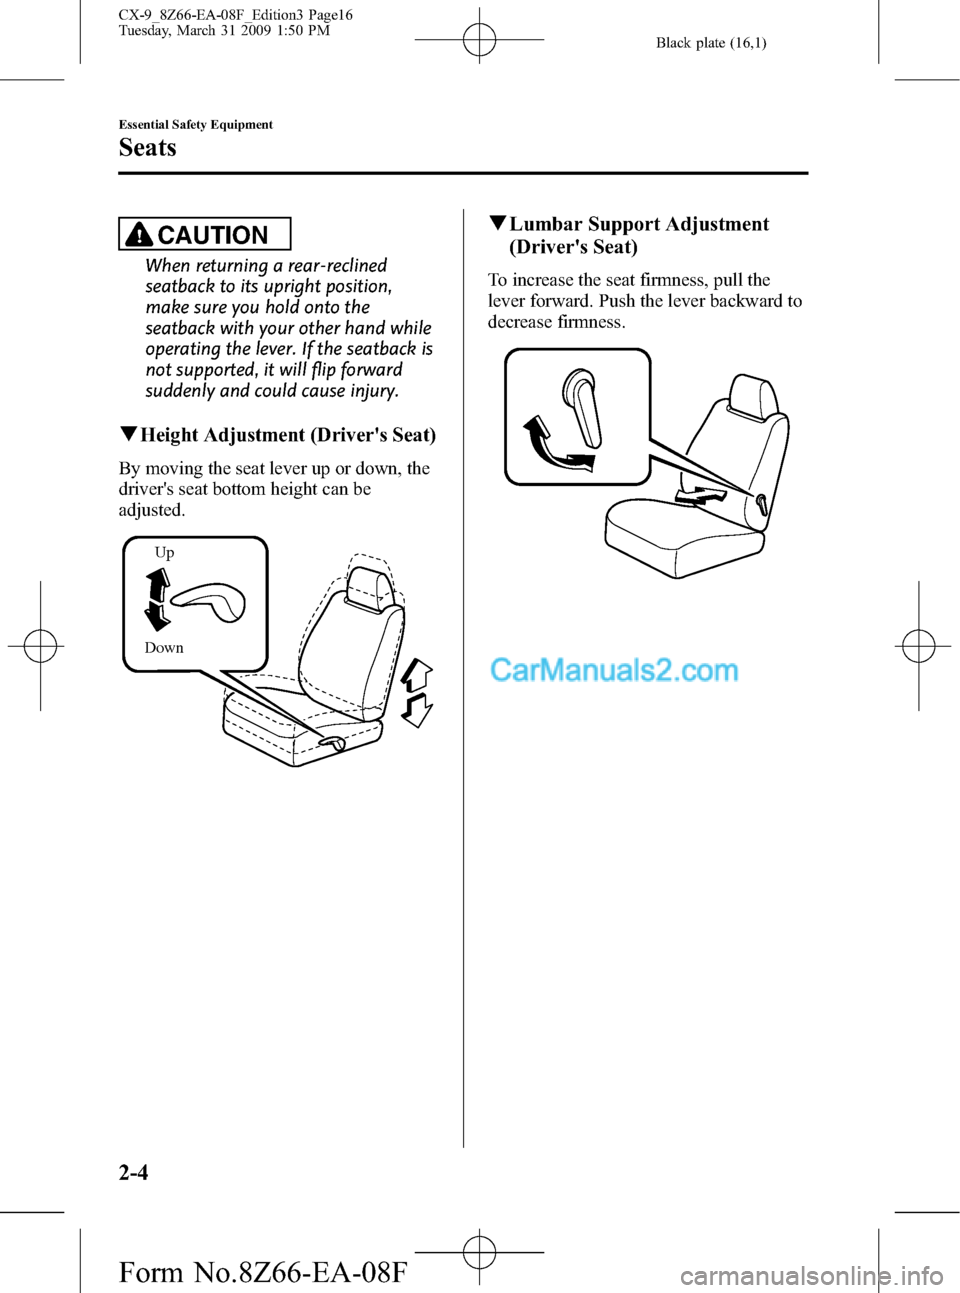
qHeight Adjustment (Driver's Seat)
By moving the seat lever up or down, the
driver's seat bottom height can be
adjusted.
DownUp
qLumbar Support Adjustment
(Driver's Seat)
To increase the seat firmness, pull the
lever forward. Push the lever backward to
decrease firmness.
2-4
Essential Safety Equipment
Seats
CX-9_8Z66-EA-08F_Edition3 Page16
Tuesday, March 31 2009 1:50 PM
Form No.8Z66-EA-08F
Page 18 of 538
Black plate (18,1)
qSeat Recline
WARNING
Do not drive with either front seat
reclined:
Sitting in a reclined position while the
vehicle is moving is dangerous
because you do not get the full
protection from seat belts. During
sudden braking or a collision, you
can slide under the lap belt and
suffer serious internal injuries. For
maximum protection, sit well back
and upright.
Always sit in the front passenger seat
properly with the seatback upright and
feet on the floor:
Your front passenger seat has weight
sensors, sitting in the front passenger
seat improperly out of position or
with the seatback reclined too far
while the vehicle is moving is
dangerous as it can take off weight
from the seat bottom and affect the
weight determination of the front
passenger sensing system. As a result
the front passenger will not have the
supplementary protection of the air
bag and seat belt pretensioner, which
could result in serious injury. Always
sit upright against the seatback with
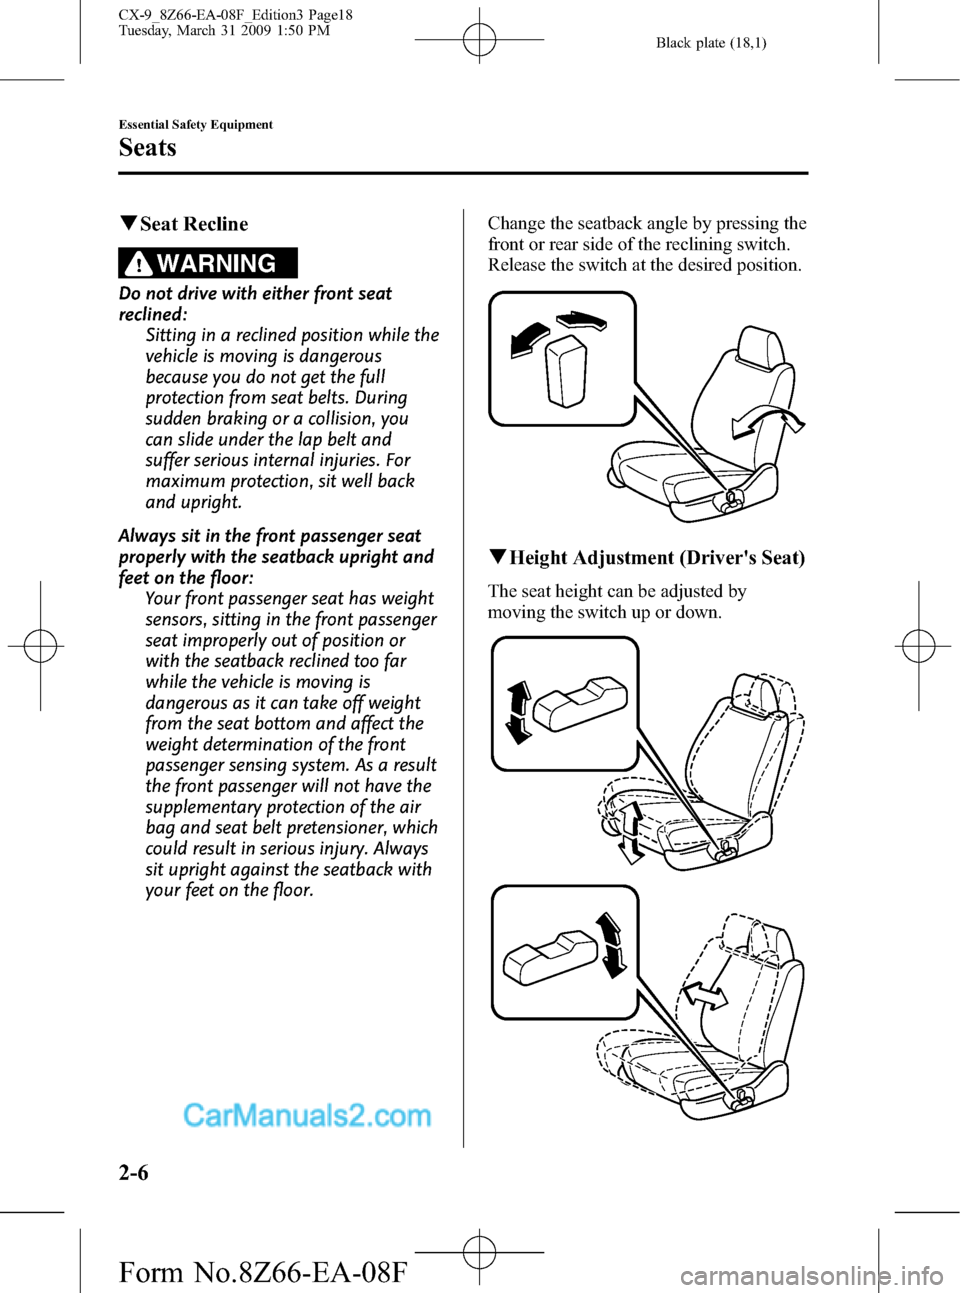
your feet on the floor.Change the seatback angle by pressing the
front or rear side of the reclining switch.
Release the switch at the desired position.
qHeight Adjustment (Driver's Seat)
The seat height can be adjusted by
moving the switch up or down.
2-6
Essential Safety Equipment
Seats
CX-9_8Z66-EA-08F_Edition3 Page18
Tuesday, March 31 2009 1:50 PM
Form No.8Z66-EA-08F
Page 19 of 538
Black plate (19,1)
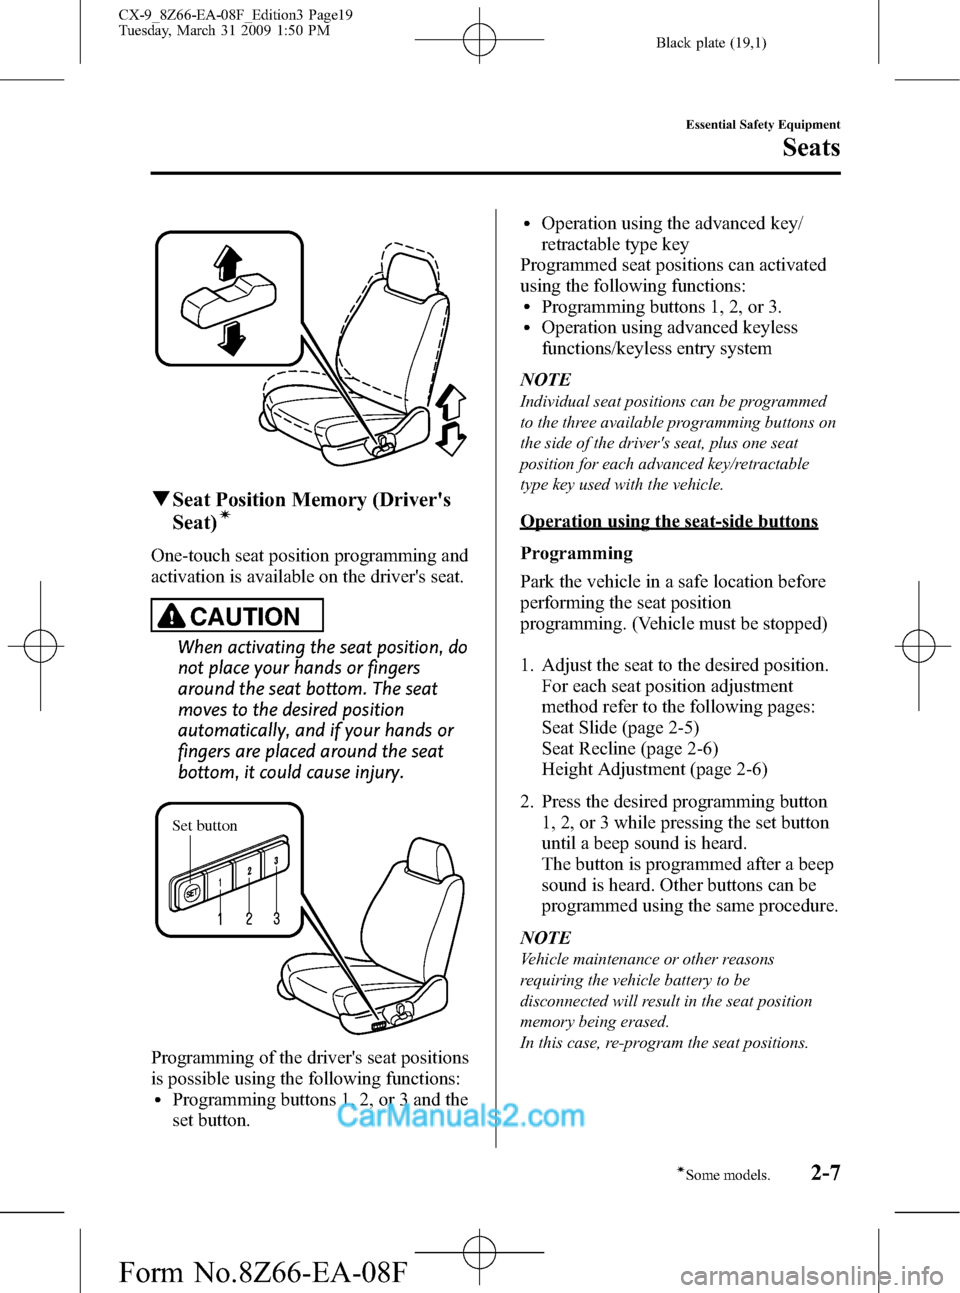
qSeat Position Memory (Driver's
Seat)í
One-touch seat position programming and
activation is available on the driver's seat.
CAUTION
When activating the seat position, do
not place your hands or fingers
around the seat bottom. The seat
moves to the desired position
automatically, and if your hands or
fingers are placed around the seat
bottom, it could cause injury.
Set button
Programming of the driver's seat positions
is possible using the following functions:
lProgramming buttons 1, 2, or 3 and the
set button.
lOperation using the advanced key/
retractable type key
Programmed seat positions can activated
using the following functions:
lProgramming buttons 1, 2, or 3.lOperation using advanced keyless
functions/keyless entry system
NOTE
Individual seat positions can be programmed
to the three available programming buttons on
the side of the driver's seat, plus one seat
position for each advanced key/retractable
type key used with the vehicle.
Operation using the seat-side buttons
Programming
Park the vehicle in a safe location before
performing the seat position
programming. (Vehicle must be stopped)
1. Adjust the seat to the desired position.
For each seat position adjustment
method refer to the following pages:
Seat Slide (page 2-5)
Seat Recline (page 2-6)
Height Adjustment (page 2-6)
2. Press the desired programming button
1, 2, or 3 while pressing the set button
until a beep sound is heard.
The button is programmed after a beep
sound is heard. Other buttons can be
programmed using the same procedure.
NOTE
Vehicle maintenance or other reasons
requiring the vehicle battery to be
disconnected will result in the seat position
memory being erased.
In this case, re-program the seat positions.
Essential Safety Equipment
Seats
2-7íSome models. CX-9_8Z66-EA-08F_Edition3 Page19
Tuesday, March 31 2009 1:50 PM
Form No.8Z66-EA-08F
Page 21 of 538
Black plate (21,1)
1. Adjust the seat to the desired position.
For each seat position adjustment
method, refer to the following pages:
Seat Slide (page 2-5)
Seat Recline (page 2-6)
Height Adjustment (page 2-6)
2. Press and hold the unlock button on the
advanced key/retractable type key
while pressing the set button until a
beep sound is heard.
The advanced key/retractable type key
is programmed after a beep sound is
heard.
Seat position activation
With the ignition switch in the LOCK
position, unlock the doors using any of
the following methods and open the
driver's door within about 40 seconds to
set the driver's seat to a pre-programmed
position.
lPress the unlock switch on the
advanced key/retractable type key.
lPress the request switch on a front door
or liftgate while the advanced key is
being carried.
NOTE
If any of the following occurs, the seat position
activation function cancels:
lPress the lock/unlock button while the key
is not inserted into the ignition switch.
lA seat adjustment switch is operated.lThe vehicle moves or starts to move.lThe selected programming button 1, 2, or 3
or the set button is pressed again.
lPress the request switch on a front door or
liftgate while the advanced key is being
carried.
lThe set switch is pressed.
Erasing memory
After the following conditions have been
met, press the lock button on the
advanced key/retractable type key while
pressing the set button until a beep sound
is heard.
lThe ignition switch is in the LOCK
position
(The auxiliary key/retractable type key
is removed from the ignition switch)
lThe driver's door is open
NOTE
Memory will also be erased if any of the
following operations are performed:
lThe advanced key/retractable type key code
has been changed.
Refer to Immobilizer System (with
Advanced Key) on page 3-50.
Refer to Immobilizer System (without
Advanced Key) on page 3-53.
Refer to Immobilizer System on page 3-53.
lThe vehicle battery is disconnected for
vehicle maintenance or other reasons.
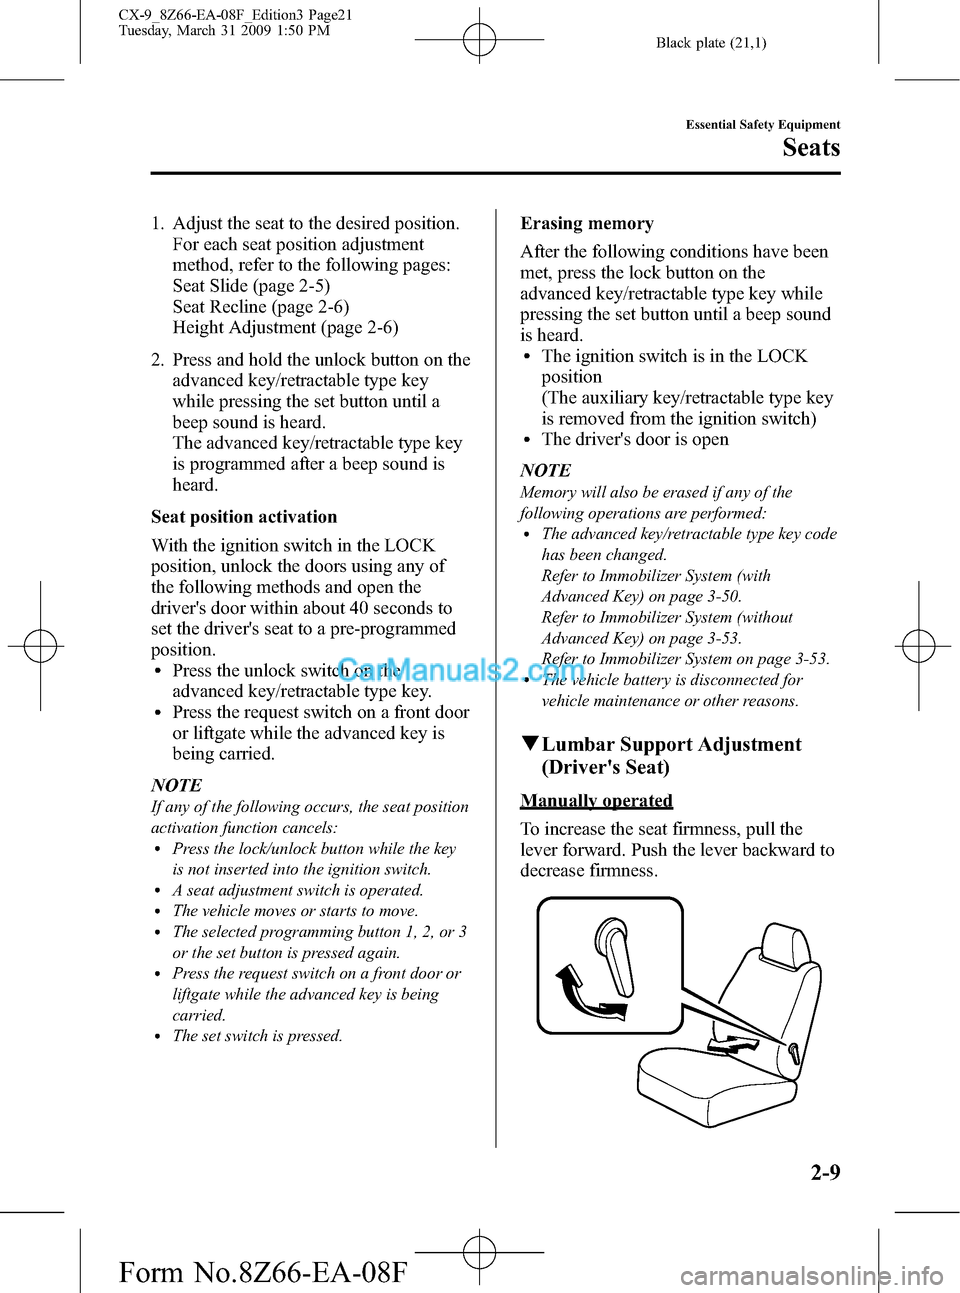
qLumbar Support Adjustment
(Driver's Seat)
Manually operated
To increase the seat firmness, pull the
lever forward. Push the lever backward to
decrease firmness.
Essential Safety Equipment
Seats
2-9
CX-9_8Z66-EA-08F_Edition3 Page21
Tuesday, March 31 2009 1:50 PM
Form No.8Z66-EA-08F
Page 28 of 538
Black plate (28,1)
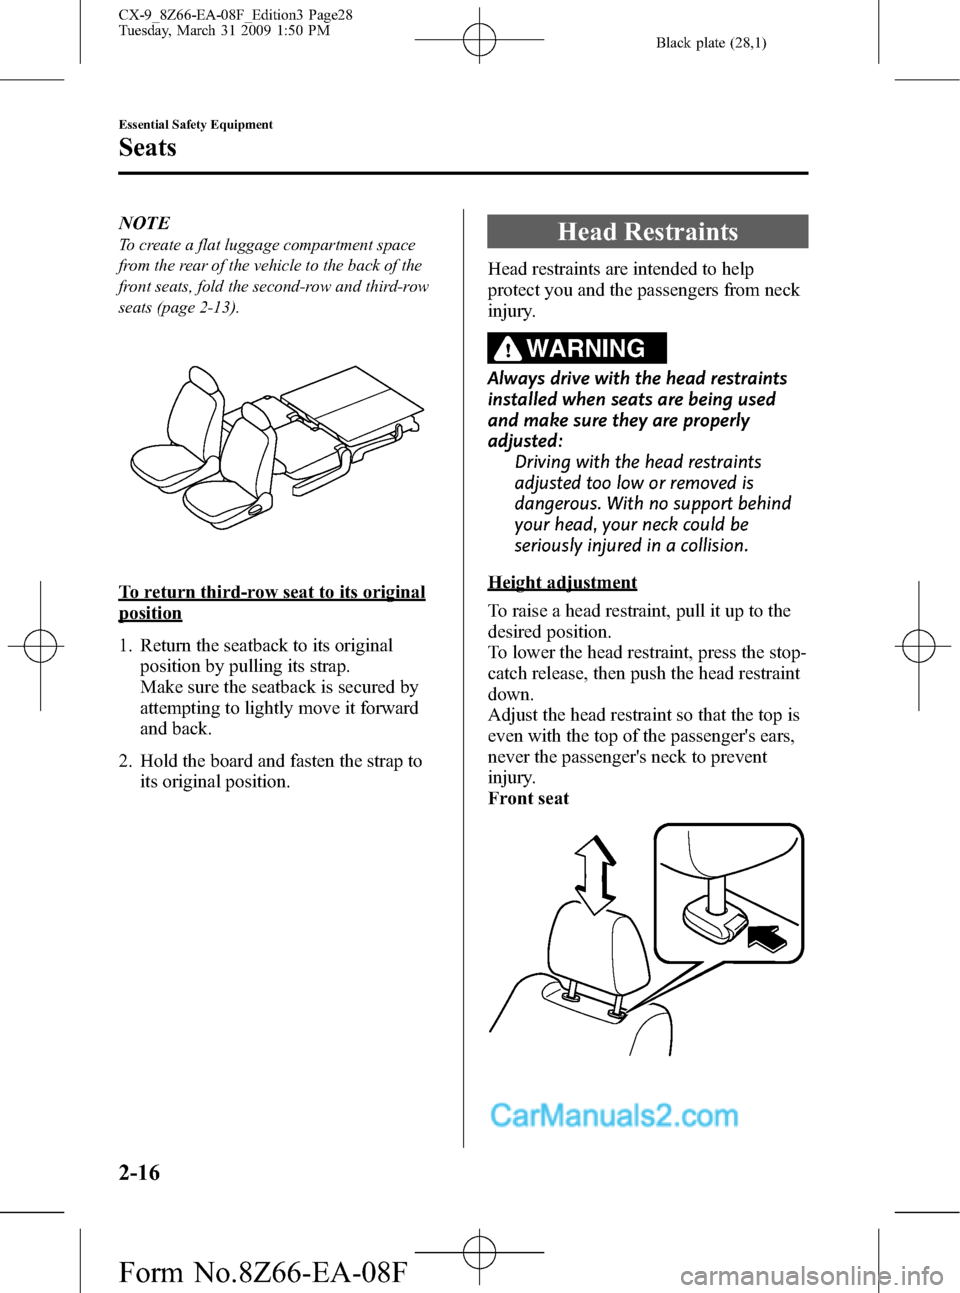
NOTE
To create a flat luggage compartment space
from the rear of the vehicle to the back of the
front seats, fold the second-row and third-row
seats (page 2-13).
To return third-row seat to its original
position
1. Return the seatback to its original
position by pulling its strap.
Make sure the seatback is secured by
attempting to lightly move it forward
and back.
2. Hold the board and fasten the strap to
its original position.
Head Restraints
Head restraints are intended to help
protect you and the passengers from neck
injury.
WARNING
Always drive with the head restraints
installed when seats are being used
and make sure they are properly
adjusted:
Driving with the head restraints
adjusted too low or removed is
dangerous. With no support behind
your head, your neck could be
seriously injured in a collision.
Height adjustment
To raise a head restraint, pull it up to the
desired position.
To lower the head restraint, press the stop-
catch release, then push the head restraint
down.
Adjust the head restraint so that the top is
even with the top of the passenger's ears,
never the passenger's neck to prevent
injury.
Front seat
2-16
Essential Safety Equipment
Seats
CX-9_8Z66-EA-08F_Edition3 Page28
Tuesday, March 31 2009 1:50 PM
Form No.8Z66-EA-08F
Page 161 of 538
Black plate (161,1)
WARNING
Always make sure the trailer hitch is securely attached before departure:
An unsecured trailer hitch is dangerous as it causes greater trailer sway from
crosswinds, rough roads or other causes, resulting in loss of control and a serious
accident.
Examine all trailer-hitch mounting bolts regularly and tighten any that are loose. If
the hitch is removed, seal any open mounting holes to prevent exhaust, dust, water,
dirt and other foreign elements from filtering in, possibly endangering personal
safety and damaging your vehicle.
Do not install a hitch that stiffens the bumper as it will reduce the bumper's
performance.
Make sure there are no exhaust gas leaks into the passenger compartment if any
mounting bolts are connected to the body:
Modifying your vehicle exhaust system is dangerous. Exhaust gas entering the
vehicle could cause loss of consciousness or even death.
When mounting the trailer hitch, make no modifications to the vehicle exhaust
system.
CAUTION
ØMake all hitch adjustments with actual loads. Do not load and unload vehicle
while adjusting hitch. This action will change the vehicle height.
ØDo not use an axle-mounted hitch. This may damage the axle and related parts.
qTires
When towing a trailer, make sure all tires are inflated to the recommended cold-tire
pressure, as indicated on the tire pressure chart on the driver's door frame. Trailer tire size,
load rating, and inflation pressures should conform to tire manufacturer specifications.
WARNING
Never use the temporary spare tire when towing:
Using the temporary spare tire on your vehicle when towing a trailer is dangerous as
it could result in tire failure, loss of control, and injury to vehicle occupants.
Before Driving Your Mazda
Towing
4-17
CX-9_8Z66-EA-08F_Edition3 Page161
Tuesday, March 31 2009 1:52 PM
Form No.8Z66-EA-08F