seat memory MAZDA MODEL CX-9 2015 Smart Start Guide (in English)
[x] Cancel search | Manufacturer: MAZDA, Model Year: 2015, Model line: MODEL CX-9, Model: MAZDA MODEL CX-9 2015Pages: 18, PDF Size: 5.42 MB
Page 3 of 18

34
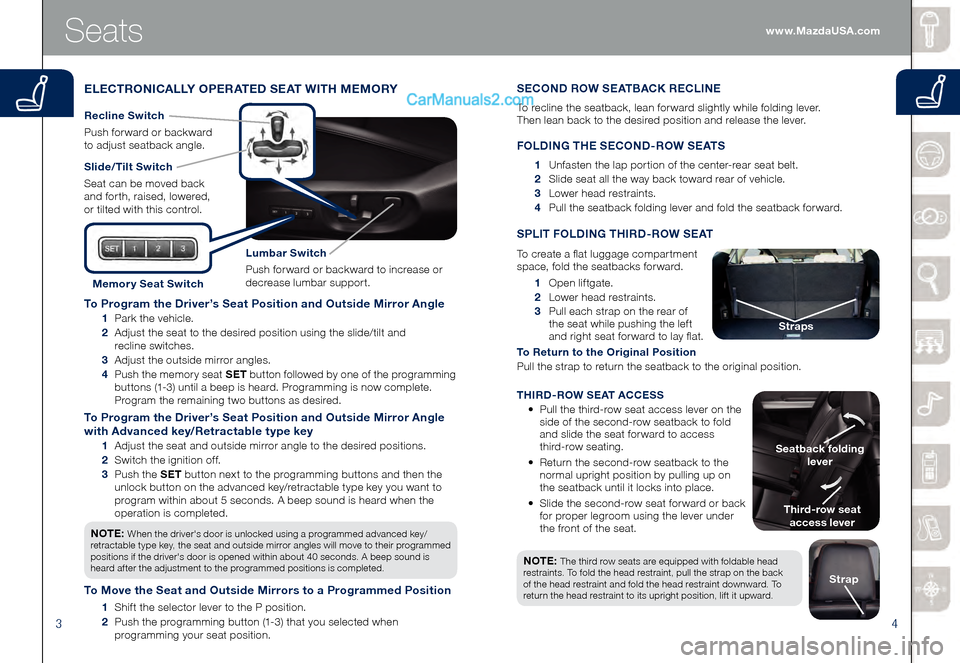
To Program the Driver’s Seat Position and Outside Mirror Angle
1 Park the vehicle.
2 Adjust the seat to the desired position using the slide/tilt and
recline switches.
3 Adjust the outside mirror angles.
4 Push the memory seat SET button followed by one of the programming
buttons (1-3) until a beep is heard. Programming is now complete.
Program the remaining two buttons as desired.
To Program the Driver’s Seat Position and Outside Mirror Angle
with Advanced key/Retractable type key
1 Adjust the seat and outside mirror angle to the desired positions.
2 Switch the ignition off.
3 Push the SET button next to the programming buttons and then the
unlock button on the advanced key/retractable type key you want to
program within about 5 seconds. A beep sound is heard when the
operation is completed.
NOTE:
When the driver's door is unlocked using a programmed advanced key/
retractable type key, the seat and outside mirror angles will move to their programmed
positions if the driver's door is opened within about 40 seconds. A beep sound is
heard after the adjustment to the programmed positions is completed.
To Move the Seat and Outside Mirrors to a Programmed Position
1 Shift the selector lever to the P position.
2 Push the programming button (1-3) that you selected when
programming your seat position.
Seats
ELECTRONICALLY OPERATED SEAT WITH MEMORY
Slide/Tilt Switch
Seat can be moved back
and forth, raised, lowered,
or tilted with this control.
Lumbar Switch
Push forward or backward to increase or
decrease lumbar support.
Recline Switch
Push forward or backward
to adjust seatback angle.
Memor y Seat Switch 1 Open liftgate.
2 Lower head restraints.
3 Pull each strap on the rear of
the seat while pushing the left
and right seat forward to lay flat.
To Return to the Original Position
Pull the strap to return the seatback to the original position.
SPLIT FOLDING THIRD-ROW SEAT
To create a flat luggage compartment
space, fold the seatbacks forward.
Third-row seat
access lever
Seatback folding
lever
Straps
NOTE: The third row seats are equipped with foldable head
restraints. To fold the head restraint, pull the strap on the back
of the head restraint and fold the head restraint downward. To
return the head restraint to its upright position, lift it upward.
Strap
SECOND ROW SEATBACK RECLINE
To recline the seatback, lean forward slightly while folding lever.
Then lean back to the desired position and release the lever.
FOLDING THE SECOND-ROW SEATS
1 Unfasten the lap portion of the center-rear seat belt.
2 Slide seat all the way back toward rear of vehicle.
3 Lower head restraints.
4 Pull the seatback folding lever and fold the seatback forward.
THIRD-ROW SEAT ACCESS
• Pull the third-row seat access lever on the
side of the second-row seatback to fold
and slide the seat forward to access
third-row seating.
• Return the second-row seatback to the
normal upright position by pulling up on
the seatback until it locks into place.
• Slide the second-row seat forward or back
for proper legroom using the lever under
the front of the seat. www.MazdaUSA.com
Page 17 of 18

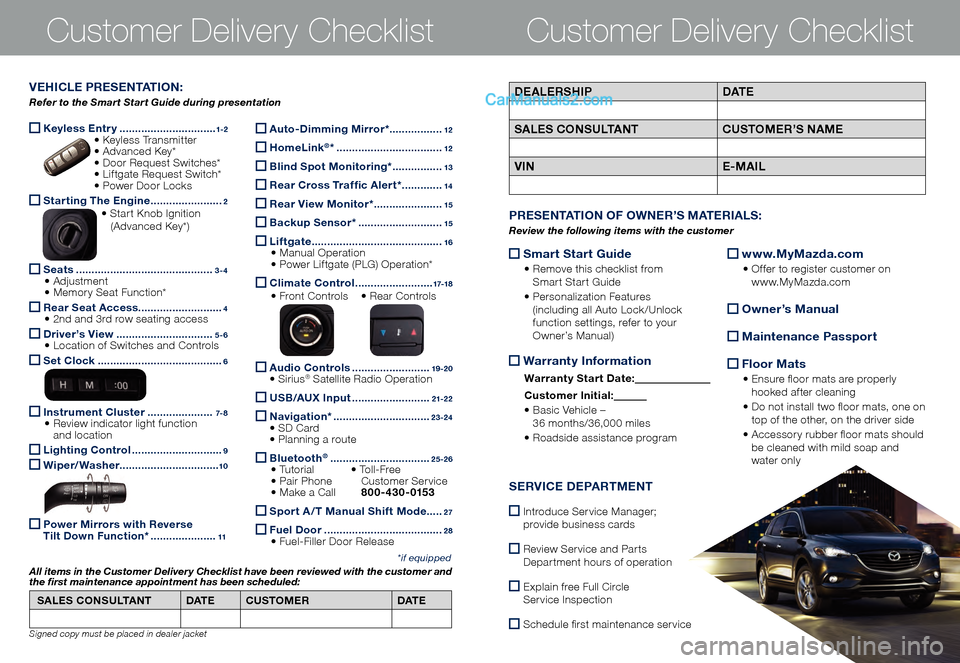
Keyless Entry ...............................1-2 • K
eyless Transmitter • Advanced Key* • Do or Request Switches* • Liftgate Request Switch* • Po wer Door Locks
Starting The Engine .......................2 • Start Knob Ignition (Advanced Key*)
Seats ............................................3-4 • Adjustment • Memory Seat Function*
Rear Seat Access
...........................4 • 2nd and 3rd row seating access
Driver’s View ...............................5-6 • Location of Switches and Controls
Set Clock ........................................6
Instrument Cluster .....................7- 8 • Review indicator light function
and location
Lighting Control .............................9
Wiper/Washer
................................10
Power Mirrors with Reverse
Tilt Down Function* .....................11
Customer Delivery ChecklistCustomer Delivery Checklist
*if equipped
DEALERSHIP DAT E
SALES CONSULTANT CUSTOMER’S NAME
VIN E-MAILVEHICLE PRESENTATION:
Refer to the Smart Start Guide during presentation
Auto-Dimming Mirror* .................12
HomeLink®* ..................................12
Blind Spot Monitoring* ................13
Rear Cross Traffic Alert* .............14
Rear View Monitor* ......................15
Backup Sensor* ...........................15
Liftgate ..........................................16 • Manual Operation • Power Liftgate (PLG) Operation*
Climate Control .........................17-18
• Front Controls • Re
ar Controls
Audio Controls .........................19 -2 0 • Sirius® Satellite Radio Operation
USB/AUX Input .........................21-2 2
Navigation* ...............................23-24 • SD Card • Planning a route
Bluetooth® ................................25-26 • Tutorial • To l l - F r e e • Pair Phone
Cu stomer Service • Make a Call 800-430-0153
Sport A /T Manual Shift Mode .....27
Fuel Door ......................................2 8 • Fuel-Filler Door Release
SALES CONSULTANT
DAT ECUSTOMER DAT E
All items in the Customer Deliver y Checklist have been reviewed with the customer and
the first maintenance appointment has been scheduled:
Signed copy must be placed in dealer jacket
Smart Start Guide
• Remove this checklist from
Smart Start Guide
• Personalization Features
(including all Auto Lock/Unlock
function settings, refer to your
Owner’s Manual)
Warranty Information
Warranty Start Date:
Customer Ini tial:
• Basic Vehicle –
36 months/36,000 miles
• Roadside assistance program
www.MyMazda.com
• Offer to register customer on
www.MyMazda.com
Owner’s Manual
Maintenance Passport
Floor Mats
• Ensure floor mats are properly
hooked after cleaning
• Do not install two floor mats, one on
top of the other, on the driver side
• Accessory rubber floor mats should
be cleaned with mild soap and
water only
PRESENTATION OF OWNER’S MATERIALS:
Review the following items with the customer
SERVICE DEPARTMENT
Introduce Service Manager;
provide business cards
Review Service and Parts
Department hours of operation
Explain free Full Circle
Service Inspection
Schedule first maintenance service