ev system MAZDA MODEL MX-30 EV 2022 Owners Manual
[x] Cancel search | Manufacturer: MAZDA, Model Year: 2022, Model line: MODEL MX-30 EV, Model: MAZDA MODEL MX-30 EV 2022Pages: 547, PDF Size: 79.35 MB
Page 172 of 547

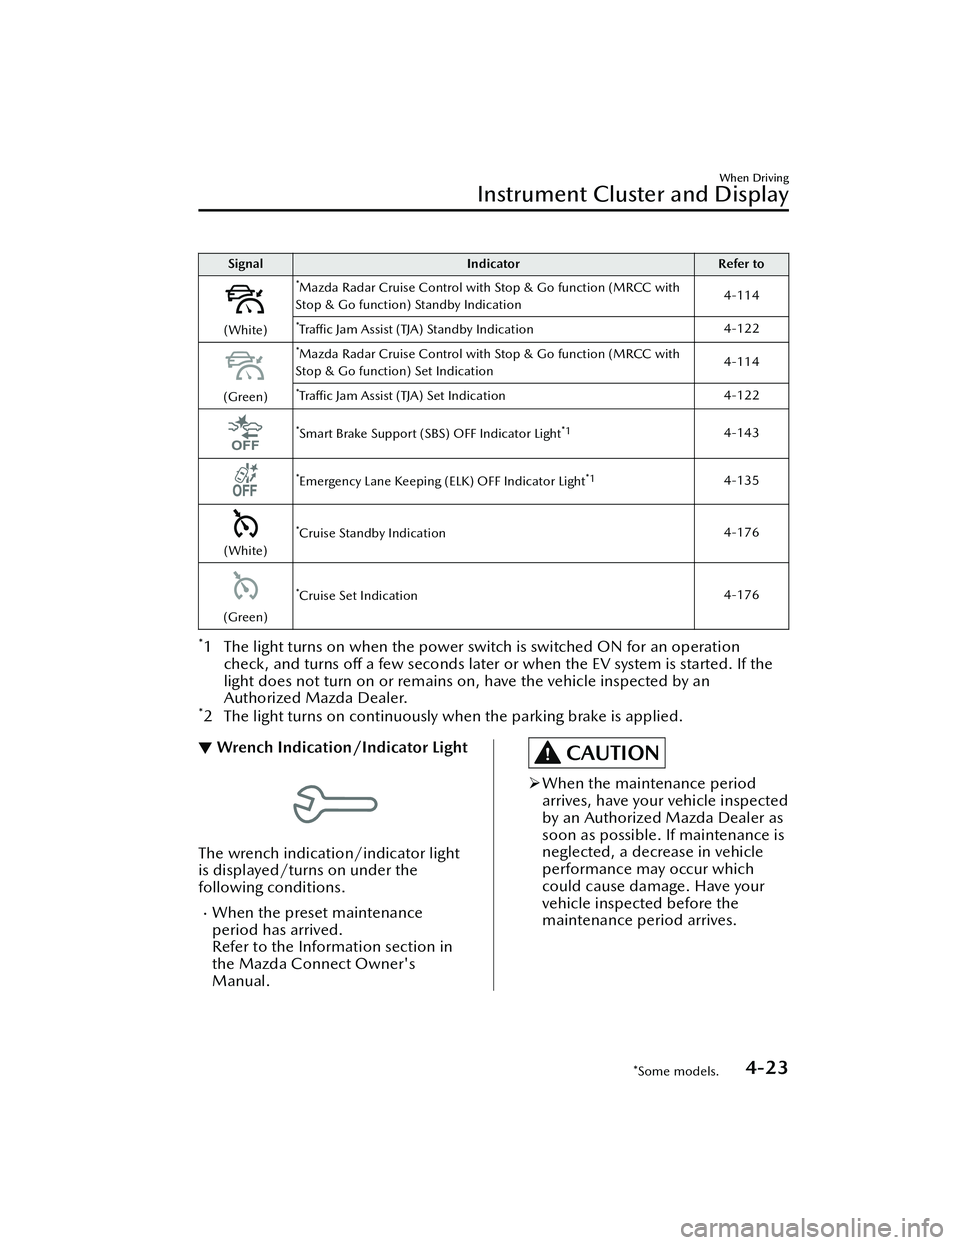
SignalIndicator Refer to
(White)
*Mazda Radar Cruise Control with Stop & Go function (MRCC with
Stop & Go function) Standby Indication 4-114
*Tra
ffic Jam Assist (TJA) Standby Indication 4-122
(Green)
*Mazda Radar Cruise Control with Stop & Go function (MRCC with
Stop & Go function) Set Indication 4-114
*Tra
ffic Jam Assist (TJA) Set Indication 4-122
*Smart Brake Support (SBS) OFF Indicator Light*14-143
*Emergency Lane Keeping (ELK) OFF Indicator Light*14-135
(White)
*Cruise Standby Indication 4-176
(Green)
*Cruise Set Indication4-176
*1 The light turns on when the power swit
ch is switched ON for an operation
check, and turns off a few seconds later or when the EV system is started. If the
light does not turn on or remains on, have the vehicle inspected by an
Authorized Mazda Dealer.
*2 The light turns on continuously when the parking brake is applied.
▼Wrench Indication/Indicator Light
The wrench indication/indicator light
is displayed/turns on under the
following conditions.
When the preset maintenance
period has arrived.
Refer to the Information section in
the Mazda Connect Owner's
Manual.
CAUTION
When the maintenance period
arrives, have your vehicle inspected
by an Authorized Mazda Dealer as
soon as possible. If maintenance is
neglected, a decrease in vehicle
performance may occur which
could cause damage. Have your
vehicle inspected before the
maintenance period arrives.
When Driving
Instrument Cluster and Display
*Some models.4-23
MX -30_8JD4-EA -21G_Edition2_new 2021-5-18 14:38:07
Page 173 of 547

Active Driving Display
▼Active Driving Display
1. Display
2. Dust-proof sheet
WARNING
Always adjust the display brightness
and position with the vehicle stopped:
Adjusting the display brightness and position while driving the vehicle is dangerous
as doing so could distract your attention from the road ahead and lead to an
accident.
CAUTION
Do not place beverages near the dust-proof sheet of the active driving display. If
water or other liquids are splashed on the dust-proof sheet, it could cause
damage.
Do not place objects or apply stickers above the active driving display or to the
dust-proof sheet as they will cause interference.
NOTE
Wearing polarized sunglasses wi ll reduce the visibility of the active driving display
due to the characteristics of the display.
If the battery has been removed and re-insta lled or the battery voltage is low, the
adjusted position may deviate.
The display may be difficult to view or temporarily
aff ected by weather conditions
such as rain, snow, light, and temperature.
If the audio system is removed, the active driving display cannot be operated.
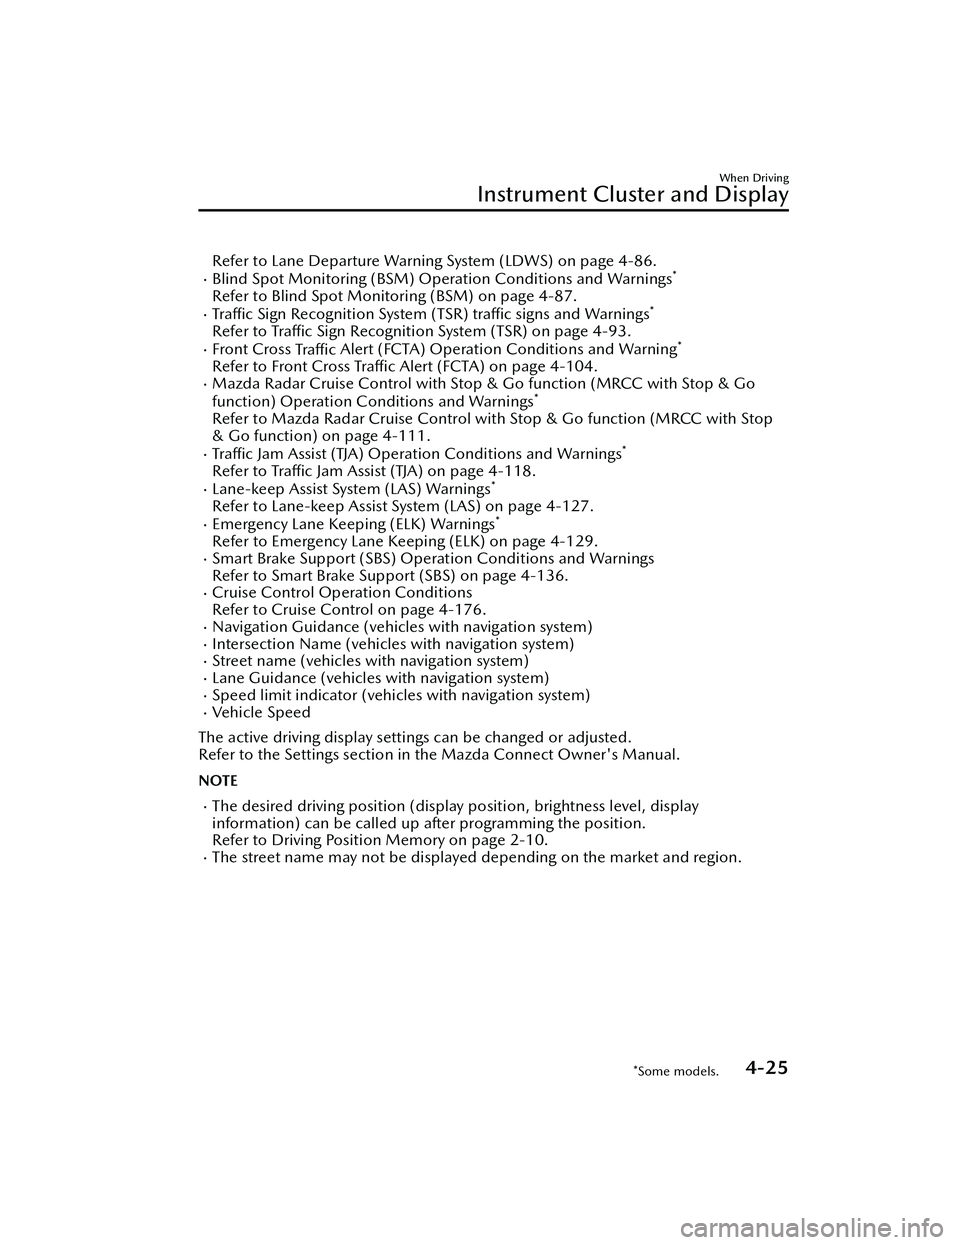
The active driving display indicates the following information:
Lane Departure Warning System (LDWS) Warnings*
When Driving
Instrument Cluster and Display
4-24*Some models.
MX-30_8JD4-EA -21G_Edition2_new 2021-5-18 14:38:07
Page 174 of 547

Refer to Lane Departure Warning System (LDWS) on page 4-86.Blind Spot Monitoring (BSM) Operation Conditions and Warnings*
Refer to Blind Spot Monitoring (BSM) on page 4-87.Traffic Sign Recognition System (TSR) tra ffic signs and Warnings*
Refer to Tra ffic Sign Recognition System (TSR) on page 4-93.Front Cross
Traffic Alert (FCTA) Operation Conditions and Warning*
Refer to Front Cross Tra
ffic Alert (FCTA) on page 4-104.Mazda Radar Cruise Contro l with Stop & Go function (MRCC with Stop & Go
function) Operation Co nditions and Warnings*
Refer to Mazda Radar Cruise Control with Stop & Go function (MRCC with Stop
& Go function) on page 4-111.
Tra ffic Jam Assist (TJA) Operation Conditions and Warnings*
Refer to Tra
ffic Jam Assist (TJA) on page 4-118.Lane-keep Assist System (LAS) Warnings*
Refer to Lane-keep Assist System (LAS) on page 4-127.Emergency Lane Keeping (ELK) Warnings*
Refer to Emergency Lane Keeping (ELK) on page 4-129.Smart Brake Support (SBS) Operation Conditions and Warnings
Refer to Smart Brake Support (SBS) on page 4-136.
Cruise Control Operation Conditions
Refer to Cruise Control on page 4-176.
Navigation Guidance (vehicles with navigation system)Intersection Name (vehicles with navigation system)Street name (vehicles with navigation system)Lane Guidance (vehicles with navigation system)Speed limit indicator (vehicles with navigation system)Vehicle Speed
The active driving display settings can be changed or adjusted.
Refer to the Settings section in the Mazda Connect Owner's Manual.
NOTE
The desired driving position (display position, brightness level, display
information) can be called up after programming the position.
Refer to Driving Position Memory on page 2-10.
The street name may not be displayed depending on the market and region.
When Driving
Instrument Cluster and Display
*Some models.4-25
MX -30_8JD4-EA -21G_Edition2_new 2021-5-18 14:38:07
Page 175 of 547

Selector Lever PositionFunctions
▼Selector Lever Position Functions
1. Selector lever
2. Lock-release button
3. Shift indicator
P (Park)
Position when parking the vehicle and
when starting the EV system.
WARNING
Always set the selector lever to P
position and set the parking brake:
Only setting the selector lever to the P
position without using the parking
brake to hold the vehicle is dangerous.
If P fails to hold, the vehicle could
move and cause an accident.
NOTE
When the lead-acid battery is
depleted, the parking lock does not
operate even if the selector lever is
shifted to the P position.
R (Reverse)
Position for reversing the vehicle.
A beep is activated to notify the driver
that the shift position is in the R
position.
N (Neutral)
Position where power generated by the
motor is not transmitted to the EV
Tra n s a x l e .
WARNING
Do not shift into N when driving the
vehicle:
If the selector lever is shifted to the N
position while driving , deceleration
using the regenerative braking is not
possible which could result in an
accident.
NOTE
Apply the parking brake or depress the
brake pedal before moving the selector
lever from N position to prevent the
vehicle from moving unexpectedly.
D (Drive)
Position for normal driving.
Shift indicator
The shift position turns on.
NOTE
The shift indicator turns on at the same
position as the shift position indication
in the instrument cluster.
▼
Shift Position Indication
When Driving
Selector Lever Position Functions
4-26
MX
-30_8JD4-EA -21G_Edition2_new 2021-5-18 14:38:07
Page 178 of 547

The driver’s seat belt is unfastened and the driver’s door is opened.
NOTE
When the AUTO P (parking lock) function operates, only the shift position changes
to the P position automatically. The shift po sition indication in the instrument cluster
will di ffer from the selector lever position because the selector lever position does
not change. Check the shift position indication in the instrument cluster and shift the
selector lever to the P position.
Neutral hold mode (autom atic car wash mode)
When in neutral hold mode (automatic car wash mode), a condition is maintained
for about 25 minutes in which the power switch is switched to ACC, the shift
position is in the N position, and the parking brake is released.
Use this mode when it is necessary to release the parking brake and change the shift
position to the N position, such as in an automatic car wash that moves the vehicle
by placing the front and rear tires on one side of the vehicle on a belt conveyor.
Operating neutral hold mode (automatic car wash mode)
Perform any of the following operations when the selector lever is in the N position
with the power switch switched ON (EV system on).
Operation method 1
1. Press the power switch with the brake pedal depressed to start the EV system.
2. Release the parking brake.
3. Shift the selector lever to the N position.
4. Turn o ff the AUTOHOLD.
5. Press the Electric Parking Brake (EPB) switch continuously for 2 seconds or longer (until a sound is activated).
6. Release the EPB switch and press the pow er switch within 5 seconds after the
sound was activated.
Operation method 2
1. Press the power switch with the brake pedal depressed to start the EV system.
2. Release the parking brake.
3. Shift the selector lever to the N position.
4. Turn o ff the AUTOHOLD.
5. Press the power switch with the EPB switch pressed and held while the brake
pedal is not depressed.
NOTE
When the selector lever is shifted from the N position to the D or R position while
neutral hold mode (automatic car wash mode) is operating , a message is displayed
on the multi-information display and the warning beep is activated.
Canceling neutral hold mode (automatic car wash mode)
If any of the following operations is performed, neutral hold mode (automatic car
wash mode) is canceled.
When Driving
Selector Lever Position Functions
4-29
MX -30_8JD4-EA -21G_Edition2_new 2021-5-18 14:38:07
Page 181 of 547

Shift-Lock System
▼Shift-Lock System
The shift-lock system prevents shifting
out of P unless the brake pedal is
depressed.
1. Depress and hold the brake pedal.
2. Press the power switch to start the
EV system.
3. Shift the selector lever while pressing the selector lever button.
NOTE
When the power switch is switched
OFF or to ACC, or ON (EV systemo ff), the selector lever cannot be
moved from the P position.
When canceling the shift-lock
system, switch the power switch ON
(EV system on) and shift the selector
lever with the brake pedal
depressed.
If the selector lever cannot be shifted
from the P position, the lead-acid
battery could be depleted.
Refer to Jump-Starting on page
7-12.
Driving Tips
▼ Driving Tips
When starting to drive the vehicle or
reversing the vehicle
WARNING
Do not shift the selector lever with the
accelerator pedal depressed when the
selector lever is in the P or N position:
Otherwise, the vehicle will suddenly
accelerate which could lead to an
accident. Shift the selector lever with
the brake pedal depressed.
1. Shift the selector lever with the
brake pedal depressed.
Forward: DReverse: R
2. Check the shift position indication in the instrument cluster.
3. Release the parking brake.
4. Gradually release the brake pedal and depress the accelerator pedal
to start driving the vehicle.
CAUTION
When visually checking at the rear of
the vehicle while reversing the vehicle,
your body twists around to the rear. Be
careful and make sure that the brake
pedal can be firmly depressed.
NOTE
When the shift position is in the R
position, the beep is activated to
notify the driver that the shift
position is in the R position.
When Driving
Selector Lever Position Functions
4-32
MX-30_8JD4-EA -21G_Edition2_new 2021-5-18 14:38:07
Page 183 of 547

Pa r k i n g t h e v e h i c l e
1. After completely stopping thevehicle, continue to depress the
brake pedal firmly.
2. Shift the selector lever to the P
position with the brake pedal
depressed.
3. Make sure that the shift position is in the P position using the shift
position indication in the
instrument cluster.
4. Apply the parking brake with the
brake pedal depressed.
5. Press the power switch to stop the
EV system.
CAUTION
Completely stop the vehicle before
shifting the selector lever to the P
position. If the selector lever is shifted
to the P position before the vehicle is
completely stopped, unnecessary force
will be applied to the EV transaxle
which could cause damage.
Other precautions
WARNING
Do not allow the vehicle to move in
reverse on an upslope while the
selector lever is in forward drive, or
move forward on an downslope while
the selector lever is in reverse drive:
Otherwise, the EV system could stop,
making the steering wheel difficult to
control, which could result in an
accident.
When Driving
Selector Lever Position Functions
4-34
MX -30_8JD4-EA -21G_Edition2_new 2021-5-18 14:38:07
Page 184 of 547

Lighting Control
▼Headlights
Turn the headlight switch to turn the head
lights and other exterior lights on or off.
When the taillights, parking lights, and th e license plate lights are turned on, the
lights-on indicator light in th e instrument cluster turns on.
NOTE
Do not leave the headlights and exterior lights on while the EV system is turned
o ff. Otherwise, the battery power could be depleted.
Headlights do not blind drivers approaching in the opposite direction no matter
what side of the road you must drive yo ur vehicle (left-hand or right-hand traffic).
Therefore, it is not necessary to adjust the optical axis of the headlights when
switching temporarily to driving on the opposite side of the road (left-hand or
right-hand tra ffic).
Power switch posi-
tion ACC or OFF ON
Switch Position OFF
*1AUTOOFF*1AUTO
Headlights Off Off OffOff
Auto
*2*4Auto*3*4
On
Daytime running
lights Off
Off OffOff Off
Taillights
Parking lights
License plate lights Off
Off On
Off On
*1 The light switch returns to the AUTO position automatically.
When Driving
Switches and Controls
4-35
MX
-30_8JD4-EA -21G_Edition2_new 2021-5-18 14:38:07
Page 185 of 547

*2 During the daytime, the daytime running lights turn on automatically. During the nighttime, theheadlights, parking lights, taillights, and the license plate lights turn on automatically.
*3 During the daytime, the daytime running lights, parking lights, taillights, and the license plate lights
turn on automatically. During the nighttime, the headlights, parking lights, taillights, and the license
plate lights turn on automatically.
*4 When the light switch is switched to the OFF posit ion while the vehicle is stopped, all of the lights
that are turned on turn o ff. When the light switch is switched from a position other than
to the
position while the vehicle is stopped,the daytime running lights or the headlights turn o ff.
When starting to drive the vehicle, the lights that are turned o ff turn on again.
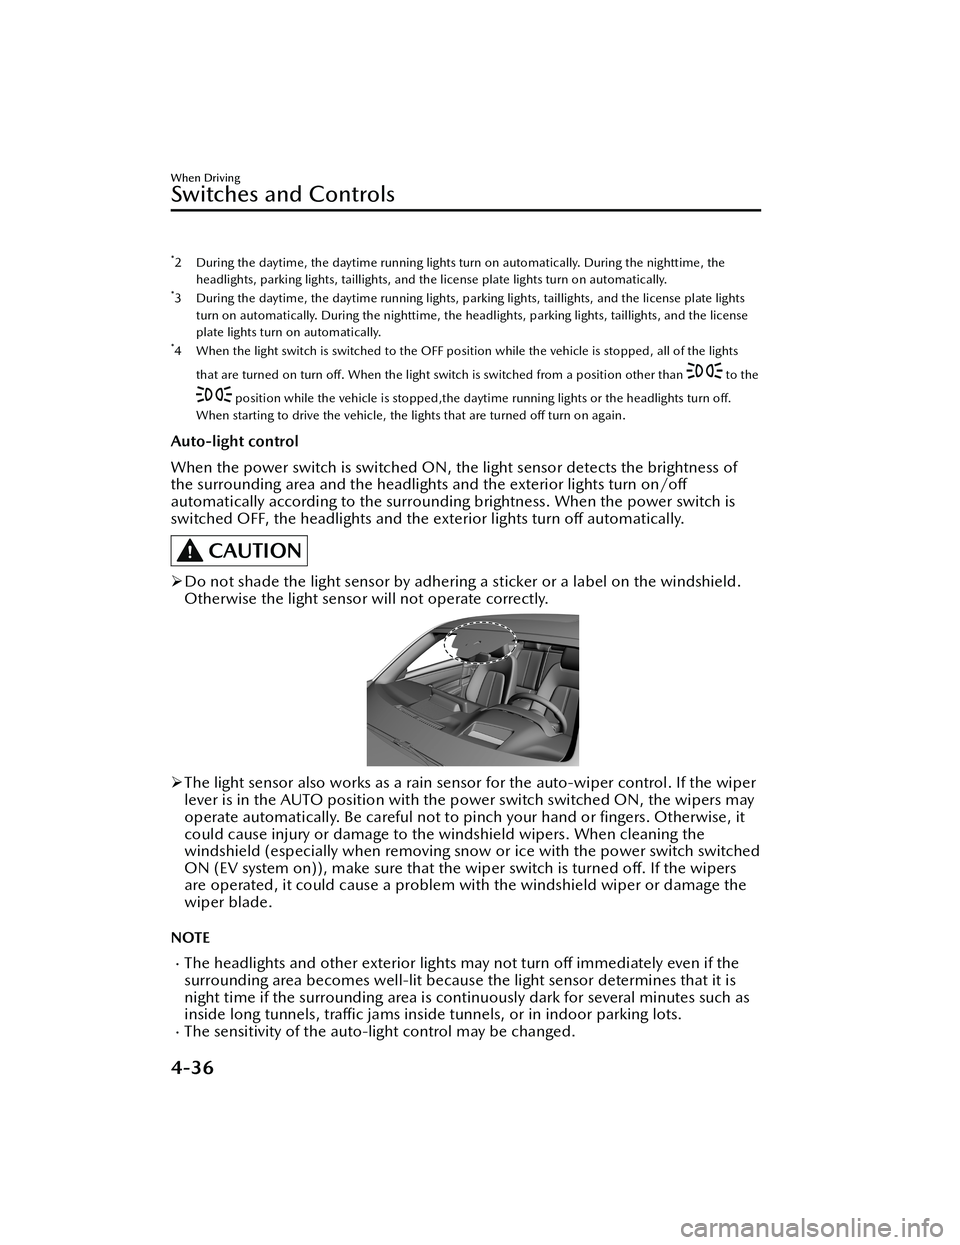
Auto-light control
When the power switch is switched ON, the light sensor detects the brightness of
the surrounding area and the headlights and the exterior lights turn on/off
automatically according to the surrounding brightness. When the power switch is
switched OFF, the headlights an d the exterior lights turn off automatically.
CAUTION
Do not shade the light sensor by adhering a sticker or a label on the windshield.
Otherwise the light sensor will not operate correctly.
The light sensor also works as a rain sensor for the auto-wiper control. If the wiper
lever is in the AUTO position with the power switch switched ON, the wipers may
operate automatically. Be careful not to pinch your hand or fingers. Otherwise, it
could cause injury or damage to the windshield wipers. When cleaning the
windshield (especially when removing snow or ice with the power switch switched
ON (EV system on)), make sure that the wiper switch is turned o ff. If the wipers
are operated, it could cause a problem wi th the windshield wiper or damage the
wiper blade.
NOTE
The headlights and other exte rior lights may not turn off immediately even if the
surrounding area becomes well-lit because the light sensor determines that it is
night time if the surrounding area is cont inuously dark for several minutes such as
inside long tunnels, traffi c jams inside tunnels, or in indoor parking lots.
The sensitivity of the auto-light control may be changed.
When Driving
Switches and Controls
4-36
MX-30_8JD4-EA -21G_Edition2_new 2021-5-18 14:38:07
Page 187 of 547

button is pressed while away from the
vehicle.
The following lights turn on when the
leaving home light is operated.
Low beams, Parking lights, Taillights,
License plate lights.
To turn on the lights
The headlights and the exterior lights
turn on when the unlock switch on the
key is pressed and the vehicle receives
the key signal with the power switch
and the headlight switch under the
following conditions:
Powe r sw i tch : OF F
Headlight switch: AUTO, , or
The headlights turn off after a certain
period of time has elapsed (30
seconds).
1. Lock button
2. Unlock button
NOTE
Operation of the leaving home light
can be turned on or o ff.
Refer to the Settings section in the
Mazda Connect Owner's Manual.
When the transmitter lock button is
pressed and the vehicle receives the
transmitter signal, the headlights turn
o ff.
When the headlight switch is turned
to the OFF position, the headlights
turn o ff.
▼ Headlight Leveling
The number of passengers and weight
of cargo in the luggage compartment
change the angle of the headlights.
Auto type
The angle of the headlights will be
automatically adjusted when turning
on the headlights.
A system malfunction or operation
conditions are indicated by a warning.
Refer to Exterior Light Warning
Indication/Warning Light on page
7-29.
Manual type
When adjusting the illumination angle
of the headlights, refer to the Settings
section in the Mazda Connect
Owner's Manual.
Select the proper headlight angle from
the following chart.
Front seat
Rearseat LoadIllumi-
nation angle
(num- ber)
Driver Passenger
× ――― 0
×× ――0
××× ―1
× × ××2
× ―― ×2.5
×: Yes
―: No
When Driving
Switches and Controls
4-38
MX -30_8JD4-EA -21G_Edition2_new 2021-5-18 14:38:07