dashboard warning lights MAZDA MODEL MX-5 2006 Quick Tips (in English)
[x] Cancel search | Manufacturer: MAZDA, Model Year: 2006, Model line: MODEL MX-5, Model: MAZDA MODEL MX-5 2006Pages: 14, PDF Size: 1.62 MB
Page 4 of 14

GETTING STARTED
Always check the Owner’s Manual for more operating information and safety features
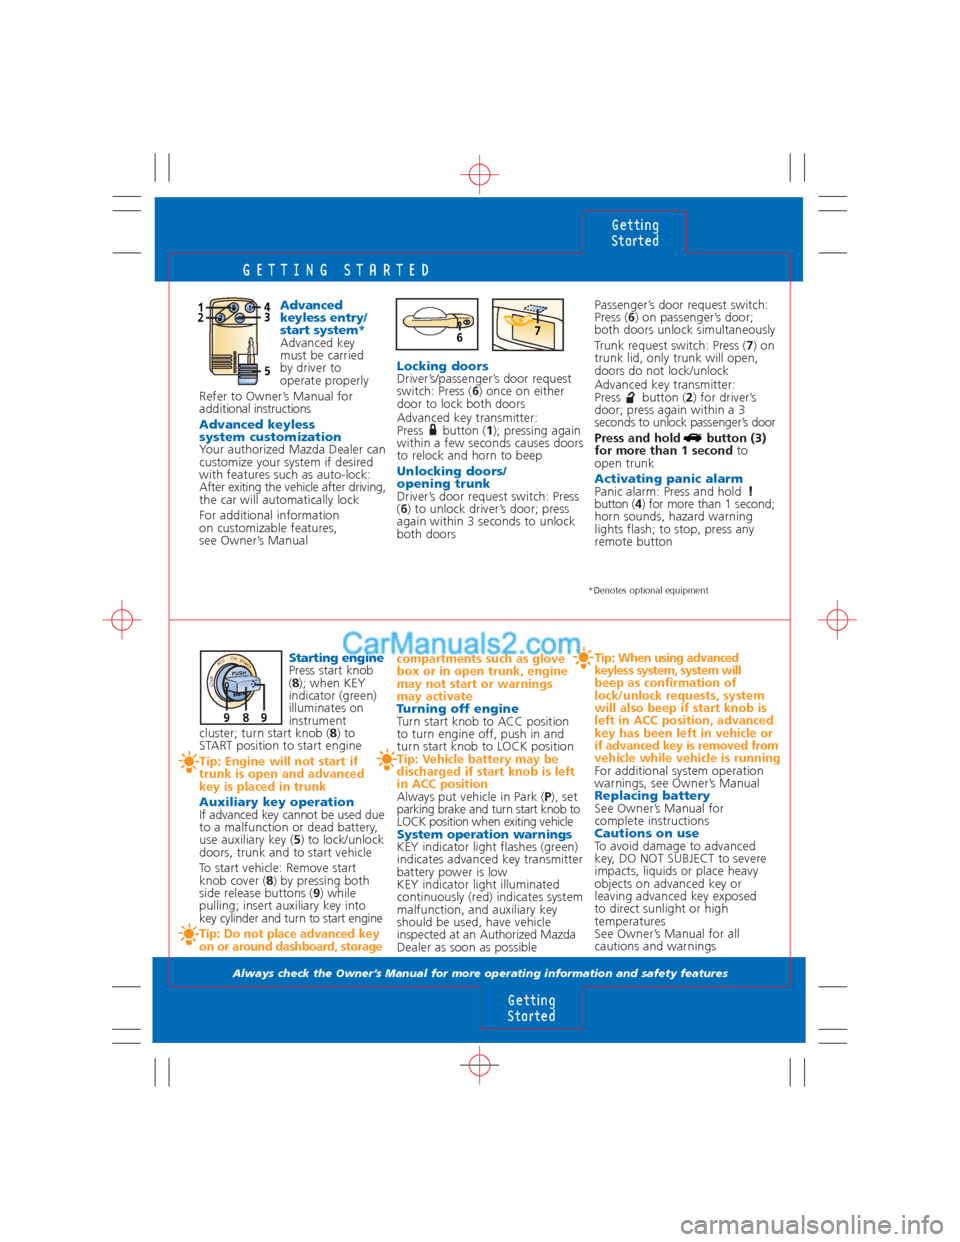
Advanced
keyless entry/
start system*
Advanced key
must be carried
by driver to
operate properly
Refer to Owner’s Manual for
additional instructions
Advanced keyless
system customization
Your authorized Mazda Dealer can
customize your system if desired
with features such as auto-lock:
After exiting the vehicle after driving,
the car will automatically lock
For additional information
on customizable features,
see Owner’s ManualPassenger’s door request switch:
Press (6) on passenger’s door;
both doors unlock simultaneously
Trunk request switch: Press (7) on
trunk lid, only trunk will open,
doors do not lock/unlock
Advanced key transmitter:
Press button (2) for driver’s
door; press again within a 3
seconds to unlock passenger’s door
Press and hold button (3)
for more than 1 secondto
open trunk
Activating panic alarmPanic alarm: Press and hold
button (4) for more than 1 second;
horn sounds, hazard warning
lights flash; to stop, press any
remote button
compartments such as glove
box or in open trunk, engine
may not start or warnings
may activate
Turning off engine
Turn start knob to ACC position
to turn engine off, push in and
turn start knob to LOCK position
Tip: Vehicle battery may be
discharged if start knob is left
in ACC position
Always put vehicle in Park (P), set
parking brake and turn start knob to
LOCK position when exiting vehicle
System operation warningsKEY indicator light flashes (green)
indicates advanced key transmitter
battery power is low
KEY indicator light illuminated
continuously (red) indicates system
malfunction, and auxiliary key
should be used, have vehicle
inspected at an Authorized Mazda
Dealer as soon as possible
Tip: When using advanced
keyless system, system will
beep as confirmation of
lock/unlock requests, system
will also beep if start knob is
left in ACC position, advanced
key has been left in vehicle or
if advanced key is removed from
vehicle while vehicle is running
For additional system operation
warnings, see Owner’s Manual
Replacing batterySee Owner’s Manual for
complete instructions
Cautions on useTo avoid damage to advanced
key, DO NOT SUBJECT to severe
impacts, liquids or place heavy
objects on advanced key or
leaving advanced key exposed
to direct sunlight or high
temperatures
See Owner’s Manual for all
cautions and warnings
Getting
Started
Getting
Started
124
5
3
*Denotes optional equipment
Starting enginePress start knob
(8); when KEY
indicator (green)
illuminates on
instrument
cluster; turn start knob (8) to
START position to start engine
Tip: Engine will not start if
trunk is open and advanced
key is placed in trunk
Auxiliary key operation
If advanced key cannot be used due
to a malfunction or dead battery,
use auxiliary key (5) to lock/unlock
doors, trunk and to start vehicle
To start vehicle: Remove start
knob cover (8) by pressing both
side release buttons (9) while
pulling; insert auxiliary key into
key cylinder and turn to start engine
Tip: Do not place advanced key
on or around dashboard, storageLocking doors
Driver’s/passenger’s door request
switch: Press (6) once on either
door to lock both doors
Advanced key transmitter:
Press button (1); pressing again
within a few seconds causes doors
to relock and horn to beep
Unlocking doors/
opening trunk
Driver’s door request switch: Press
(6) to unlock driver’s door; press
again within 3 seconds to unlock
both doors
LOCK ACC ON STARTPUSH
989
67
Page 5 of 14

GETTING STARTED
Always check the Owner’s Manual for more operating information and safety features
Getting
Started
Getting
Started
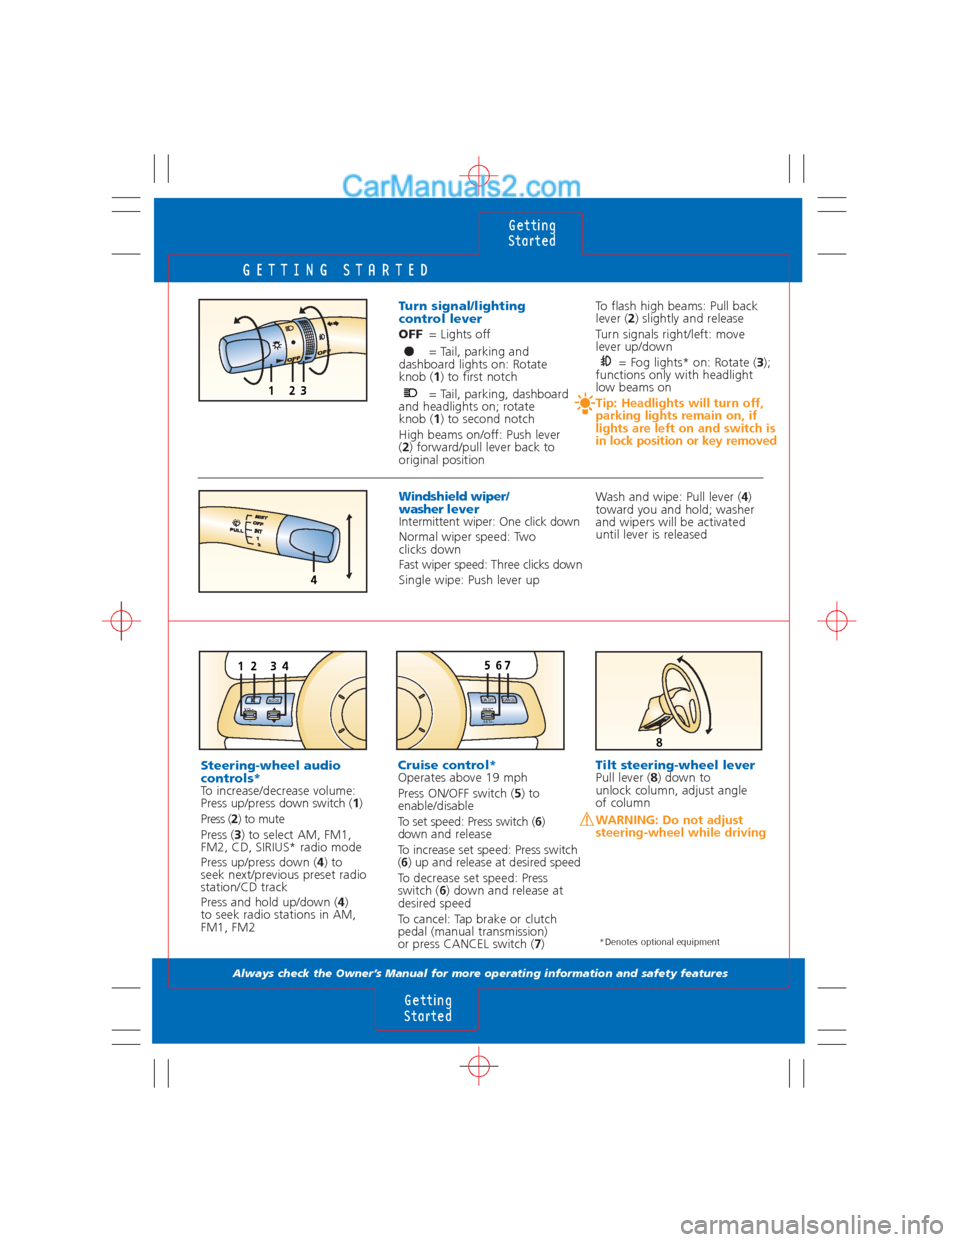
Steering-wheel audio
controls*
To increase/decrease volume:
Press up/press down switch (1)
Press (2) to mute
Press (3) to select AM, FM1,
FM2, CD, SIRIUS* radio mode
Press up/press down (4) to
seek next/previous preset radio
station/CD track
Press and hold up/down (4)
to seek radio stations in AM,
FM1, FM2
Tilt steering-wheel leverPull lever (8) down to
unlock column, adjust angle
of column
WARNING: Do not adjust
steering-wheel while driving Turn signal/lighting
control lever
OFF= Lights off
= Tail, parking and
dashboard lights on: Rotate
knob (1) to first notch
= Tail, parking, dashboard
and headlights on; rotate
knob (1) to second notch
High beams on/off: Push lever
(2) forward/pull lever back to
original position
To flash high beams: Pull back
lever (2) slightly and release
Turn signals right/left: move
lever up/down
= Fog lights* on: Rotate (3);
functions only with headlight
low beams on
Tip: Headlights will turn off,
parking lights remain on, if
lights are left on and switch is
in lock position or key removed132
4
Windshield wiper/
washerlever
Intermittent wiper: One click down
Normal wiper speed: Two
clicks down
Fast wiper speed: Three clicks down
Single wipe: Push lever upWash and wipe: Pull lever (4)
toward you and hold; washer
and wipers will be activated
until lever is released
Cruise control*Operates above 19 mph
Press ON/OFF switch (5) to
enable/disable
To set speed: Press switch (6)
downand release
To increase set speed: Press switch
(6) up and release at desired speed
To decrease set speed: Press
switch (6) down and release at
desired speed
To cancel: Tap brake or clutch
pedal (manual transmission)
or press CANCEL switch (7)
*Denotes optional equipment
8
23
VOL+
–MODE
1475
ON OFF CANCEL
RES/+
SET/–
6
Page 6 of 14

INSTRUMENT CLUSTER
Always check the Owner’s Manual for more operating information and safety features
Instrument
Cluster
Instrument
Cluster
CHE F
LF
A0.08
781011
433
16x1000r/min
P
80 1 2 345
6
7
R
N
D
M
9
2
0 20 406080100
120
140
240 80
60
40
20
0220 100200 120180 140160
km/hmph
5
GAUGES AND CONTROLS
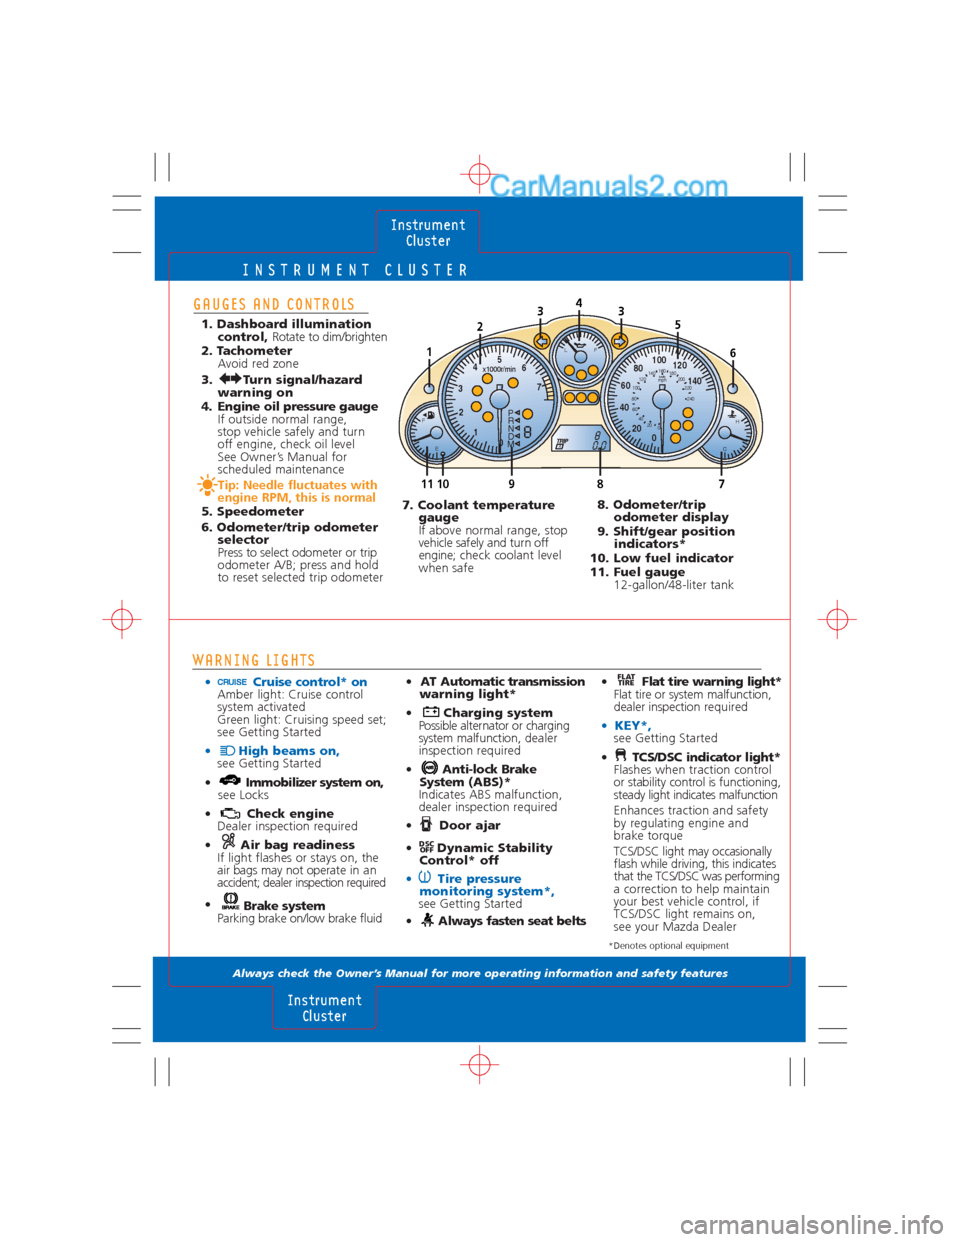
1. Dashboard illumination
control, Rotate to dim/brighten
2. Tachometer
Avoid red zone
3. Turn signal/hazard
warning on
4. Engine oil pressure gauge
If outside normal range,
stop vehicle safely and turn
off engine, check oil level
See Owner’s Manual for
scheduled maintenance
Tip: Needle fluctuates with
engine RPM, this is normal
5. Speedometer
6. Odometer/trip odometer
selector
Press to select odometer or trip
odometer A/B; press and hold
to reset selected trip odometer
• Cruise control* onAmber light: Cruise control
system activated
Green light: Cruising speed set;
see Getting Started
• High beams on,see Getting Started
• Immobilizer system on,
see Locks
• Check engine
Dealer inspection required
• Air bag readiness
If light flashes or stays on, the
air bags may not operate in an
accident; dealer inspection required
•
Brake system
Parking brake on/low brake fluid
• AT Automatic transmission
warning light*
• Charging system
Possible alternator or charging
system malfunction,dealer
inspection required
• Anti-lock Brake
System (ABS)*
Indicates ABS malfunction,
dealer inspection required
• Door ajar
• Dynamic Stability
Control* off
• Tire pressure
monitoring system*,
see Getting Started
• Always fasten seat belts
DSC
OFF
*Denotes optional equipment
WARNING LIGHTS
7. Coolant temperature
gauge
If above normal range, stop
vehicle safely and turn off
engine;check coolant level
when safe 8. Odometer/trip
odometer display
9. Shift/gear position
indicators*
10. Low fuel indicator
11. Fuel gauge
12-gallon/48-liter tank
• Flat tire warning light*
Flat tire or system malfunction,
dealer inspection required
• KEY*,see Getting Started
• TCS/DSC indicator light*
Flashes when traction control
or stability control is functioning,
steady light indicates malfunction
Enhances traction and safety
by regulating engine and
brake torque
TCS/DSC light may occasionally
flash while driving, this indicates
that the TCS/DSC was performing
a correction to help maintain
your best vehicle control, if
TCS/DSC light remains on,
see your Mazda Dealer
FLAT
TIRE