capacities MAZDA MODEL TRIBUTE 2001 Owners Manual (in English)
[x] Cancel search | Manufacturer: MAZDA, Model Year: 2001, Model line: MODEL TRIBUTE, Model: MAZDA MODEL TRIBUTE 2001Pages: 232, PDF Size: 2.4 MB
Page 1 of 232
Before driving
Introduction 2
Instrumentation 6
Controls and features 18
Seating and safety restraints 67
Starting and driving
Starting 102
Driving 107
Roadside emergencies 134
Servicing
Maintenance and care 155
Capacities and specifications 212
Customer assistance 217
Reporting safety defects 224
Index 225
All rights reserved. Reproduction by any means, electronic or mechanical including
photocopying, recording or by any information storage and retrieval system or translation
in whole or part is not permitted without written authorization from Mazda Corporation.
Mazda may change the contents without notice and without incurring obligation.
Copyright 2001 Mazda Corporation
Contents
1
Page 120 of 232

FOUR WHEEL DRIVE (4X4) SYSTEM (IF EQUIPPED)
4x4 system general information
WARNING: For important information regarding safe operation
of this type of vehicle, see Preparing to drive your vehicle in
this chapter.
Your vehicle is equipped with a 4x4 system. This 4x4 system can use all
four wheels to power the vehicle. This helps increase traction, enabling
you to drive your vehicle over terrain and road conditions not normally
traveled by two-wheel drive vehicles.
Power is always supplied to the front wheels and to the rear wheels
through the transaxle and Rotary Blade Coupling (RBC) unit that allows
you to select a four-wheel drive mode best suited for your current
driving conditions.
For the lubricant specification and refill capacity of the Power Take-Off
Unit and rear axle refer to theCapacities and specificationschapter.
Operating modes of the 4x4 system
The 4x4 system functions in two modes:
²The 4x4 AUTO mode provides
four-wheel drive with full power
delivered to the front axle at all
times, and to the rear axle as
required for increased traction.
This is appropriate for normal
on-road operating conditions,
such as dry road surfaces, wet pavement, snow and gravel.
²The 4x4 ON mode provides
four-wheel drive with full power
to both axles at all times. It is
only intended for severe or
off-road driving conditions, such
as deep snow and ice (where no
dry or wet pavement remains
uncovered) and shallow sand or mud.
LOCK
LOCK
Driving
120
Page 125 of 232
²Maximum Trailer Weight Rating:Maximum weight of a trailer the
vehicle is permitted to tow. The maximum trailer weight rating is
determined by subtracting the vehicle curb weight for each
engine/transmission combination, any required option weight for trailer
towing and the weight of the driver from the GCWR for the towing
vehicle.
²Maximum Trailer Weight:Maximum weight of a trailer the loaded
vehicle (including passengers and cargo) is permitted to tow. It is
determined by subtracting the weight of the loaded trailer towing
vehicle from the GCWR for the towing vehicle.
²Trailer Weight Range:Specified weight range that the trailer must
fall within that ranges from zero to the maximum trailer weight rating.
NOTE: Remember to figure in the tongue load of your loaded trailer
when figuring the total weight.
WARNING: Do not exceed the GVWR or the GAWR specified on
the certification label, this could affect vehicle handling and
cause an accident.
Do not use replacement tires with lower load carrying capacities
than the originals because they may lower the vehicle's GVWR
and GAWR limitations. Replacement tires with a higher limit than
the originals do not increase the GVWR and GAWR limitations.
The Safety Certification Label, found on the driver's door pillar, lists
several important vehicle weight rating limitations. Before adding any
additional equipment, refer to these limitations. If you are adding weight
to the front of your vehicle, (potentially including weight added to the
cab), the weight added should not exceed the front axle reserve capacity
(FARC). Additional frontal weight may be added to the front axle reserve
capacity provided you limit your payload in other ways (i.e. restrict the
number of passengers or amount of cargo carried).
You may add equipment throughout your vehicle if the total weight
added is equal to or less than the total axle reserve capacity (TARC)
weight. You should NEVER exceed the total axle reserve capacity.
Always ensure that the weight of passengers, cargo and equipment being
carried is within the weight limitations that have been established for
your vehicle including both gross vehicle weight and Front and rear
gross axle weight rating limits.
Driving
125
Page 169 of 232
BRAKE FLUID
Checking and adding brake fluid
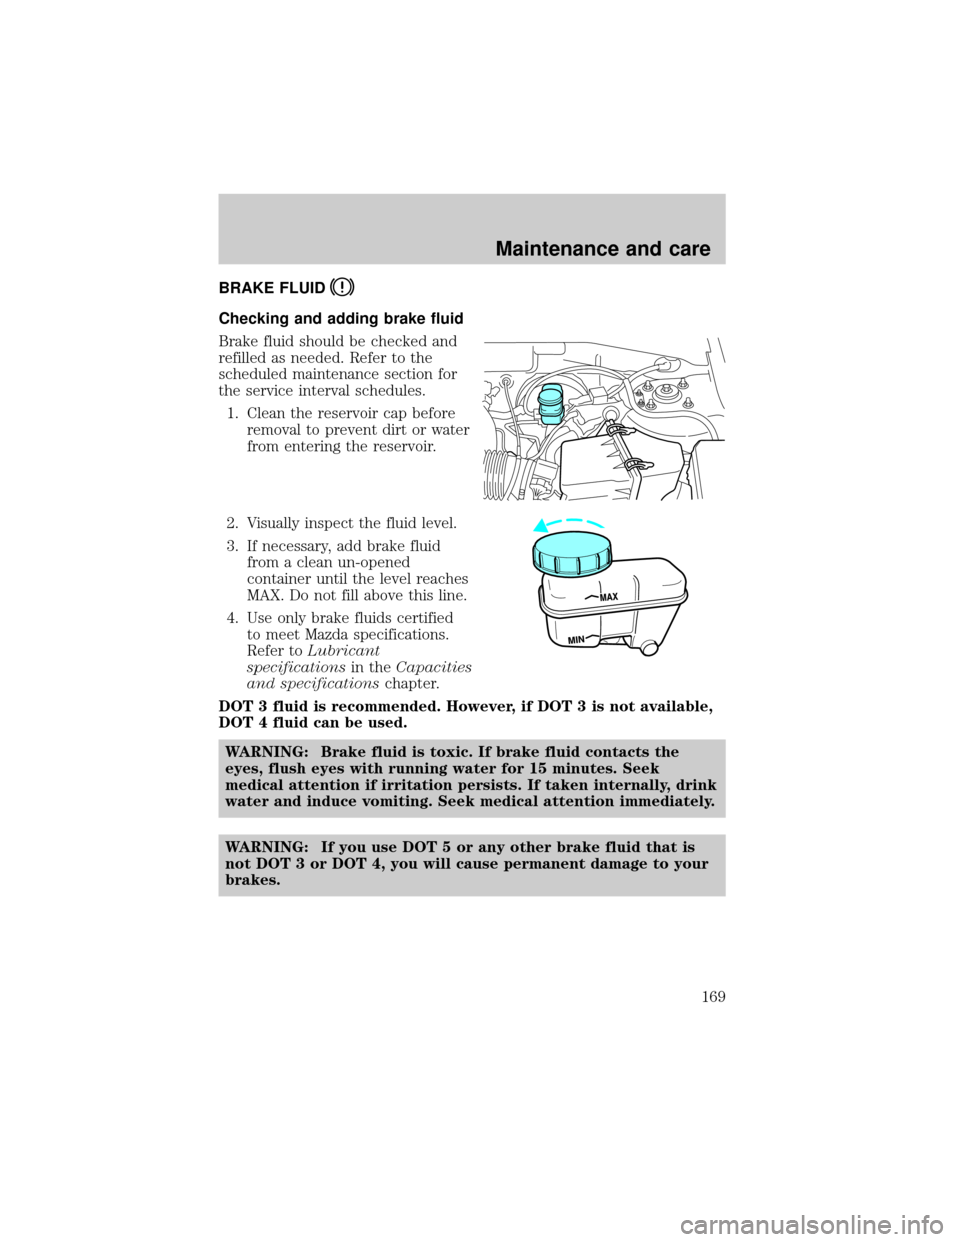
Brake fluid should be checked and
refilled as needed. Refer to the
scheduled maintenance section for
the service interval schedules.
1. Clean the reservoir cap before
removal to prevent dirt or water
from entering the reservoir.
2. Visually inspect the fluid level.
3. If necessary, add brake fluid
from a clean un-opened
container until the level reaches
MAX. Do not fill above this line.
4. Use only brake fluids certified
to meet Mazda specifications.
Refer toLubricant
specificationsin theCapacities
and specificationschapter.
DOT 3 fluid is recommended. However, if DOT 3 is not available,
DOT 4 fluid can be used.
WARNING: Brake fluid is toxic. If brake fluid contacts the
eyes, flush eyes with running water for 15 minutes. Seek
medical attention if irritation persists. If taken internally, drink
water and induce vomiting. Seek medical attention immediately.
WARNING: If you use DOT 5 or any other brake fluid that is
not DOT 3 or DOT 4, you will cause permanent damage to your
brakes.
Maintenance and care
169
Page 170 of 232
WARNING: Do not let the fluid level in the reservoir for the
master cylinder fall below the MIN mark. If master cylinder
runs dry, this may cause the brakes to fail.
CLUTCH FLUID (MANUAL TRANSAXLE)
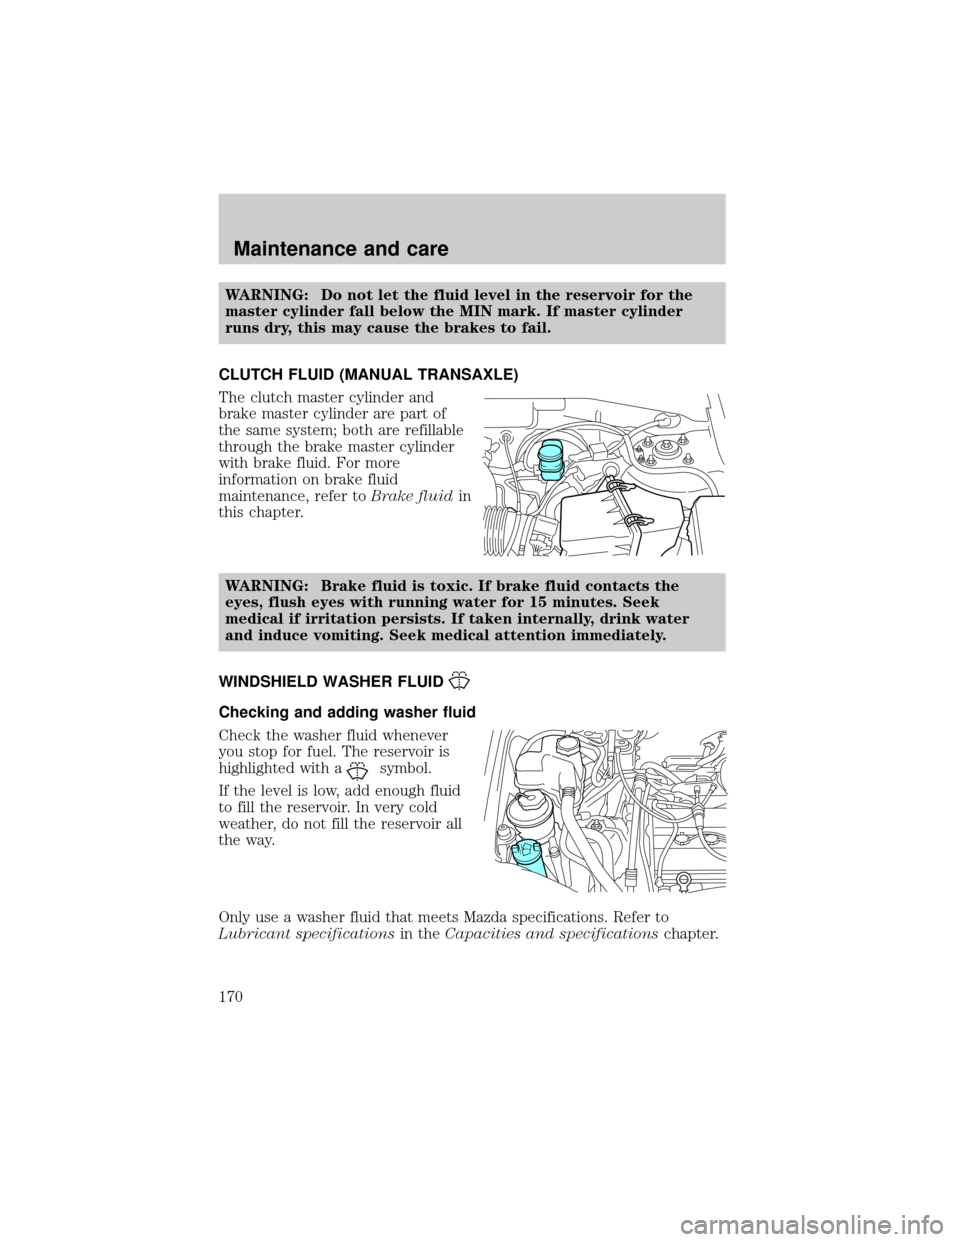
The clutch master cylinder and
brake master cylinder are part of
the same system; both are refillable
through the brake master cylinder
with brake fluid. For more
information on brake fluid
maintenance, refer toBrake fluidin
this chapter.
WARNING: Brake fluid is toxic. If brake fluid contacts the
eyes, flush eyes with running water for 15 minutes. Seek
medical if irritation persists. If taken internally, drink water
and induce vomiting. Seek medical attention immediately.
WINDSHIELD WASHER FLUID
Checking and adding washer fluid
Check the washer fluid whenever
you stop for fuel. The reservoir is
highlighted with a
symbol.
If the level is low, add enough fluid
to fill the reservoir. In very cold
weather, do not fill the reservoir all
the way.
Only use a washer fluid that meets Mazda specifications. Refer to
Lubricant specificationsin theCapacities and specificationschapter.
Maintenance and care
170
Page 175 of 232
If you have to add more than 1.0 liter (1.0 quart) of engine coolant per
month, have your dealer check the engine cooling system. Your cooling
system may have a leak. Operating an engine with a low level of coolant
can result in engine overheating and possible engine damage).
Recycled engine coolant
Not all coolant recycling processes produce coolant which meets
Mazda recommend coolants. Use of a recycled engine coolant
which does not meet the Mazda recommended coolant, may harm
engine and cooling system components.
Always dispose of used automotive fluids in a responsible manner.
Follow your community's regulations and standards for recycling and
disposing of automotive fluids.
Coolant refill capacity
To find out how much fluid your vehicle's cooling system can hold, refer
toRefill capacitiesin theCapacities and specificationschapter.
Fill your engine coolant reservoir as outlined inAdding engine coolant
in this chapter.
Severe climates
If you drive in extremely cold climates (less than ±36É C [±34É F]):
²it may be necessary to increase the coolant concentration
above 50%.
²NEVER increase the coolant concentration above 60%.
²increased engine coolant concentrations above 60% will
decrease the overheat protection characteristics of the engine
coolant and may cause engine damage.
²refer to the chart on the coolant container to ensure the
coolant concentration in your vehicle will provide adequate
freeze protection at the temperatures in which you drive in the
winter months.
If you drive in extremely hot climates:
²it is still necessary to maintain the coolant concentration
above 40%.
²NEVER decrease the coolant concentration below 40%.
Maintenance and care
175
Page 178 of 232
5. Remove the dipstick, wiping it clean with a clean, dry lint free rag. If
necessary, refer toIdentifying components in the engine
compartmentin this chapter for the location of the dipstick.
6. Install the dipstick making sure it is fully seated in the filler tube.
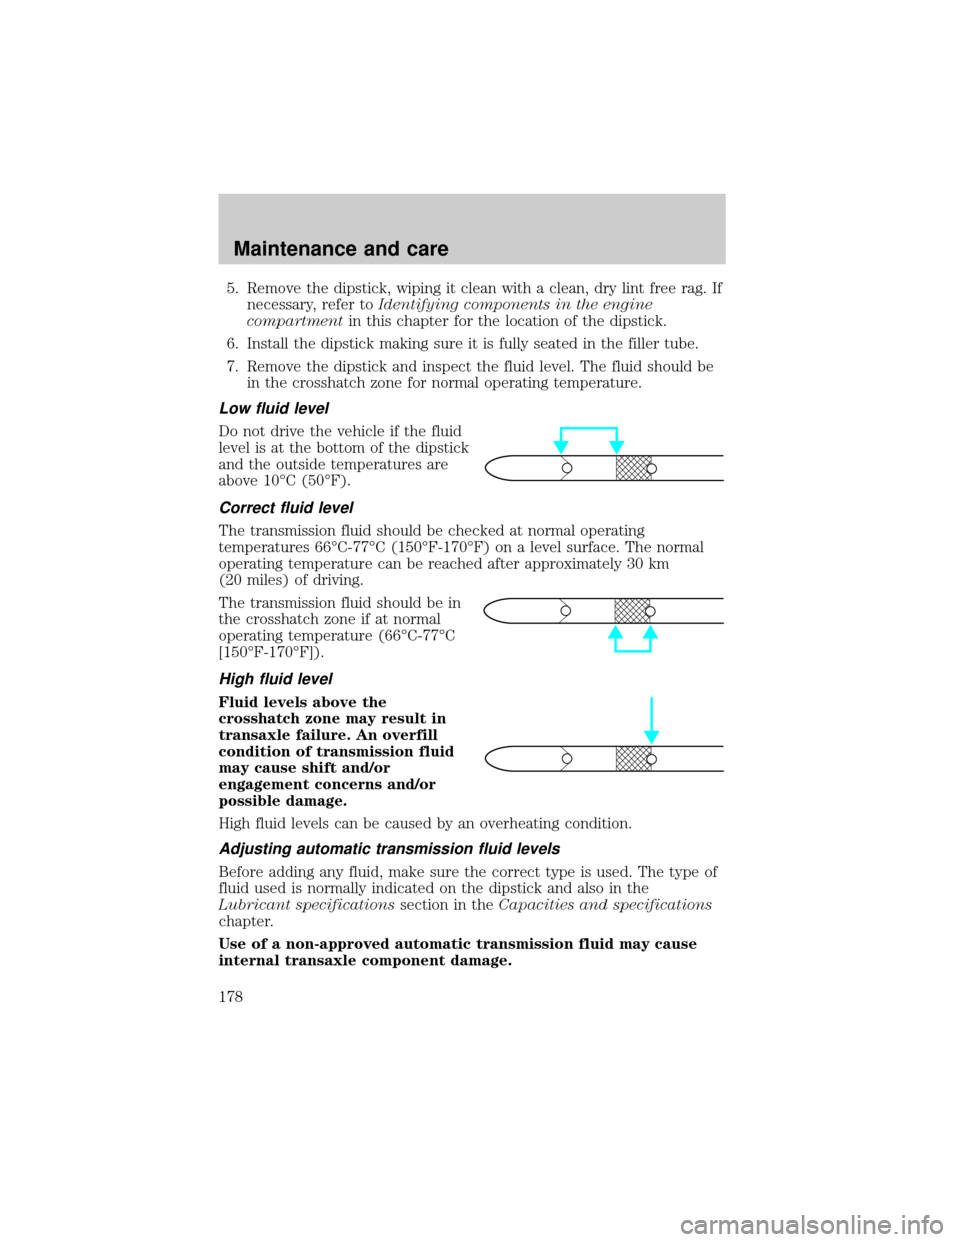
7. Remove the dipstick and inspect the fluid level. The fluid should be
in the crosshatch zone for normal operating temperature.
Low fluid level
Do not drive the vehicle if the fluid
level is at the bottom of the dipstick
and the outside temperatures are
above 10ÉC (50ÉF).
Correct fluid level
The transmission fluid should be checked at normal operating
temperatures 66ÉC-77ÉC (150ÉF-170ÉF) on a level surface. The normal
operating temperature can be reached after approximately 30 km
(20 miles) of driving.
The transmission fluid should be in
the crosshatch zone if at normal
operating temperature (66ÉC-77ÉC
[150ÉF-170ÉF]).
High fluid level
Fluid levels above the
crosshatch zone may result in
transaxle failure. An overfill
condition of transmission fluid
may cause shift and/or
engagement concerns and/or
possible damage.
High fluid levels can be caused by an overheating condition.
Adjusting automatic transmission fluid levels
Before adding any fluid, make sure the correct type is used. The type of
fluid used is normally indicated on the dipstick and also in the
Lubricant specificationssection in theCapacities and specifications
chapter.
Use of a non-approved automatic transmission fluid may cause
internal transaxle component damage.
Maintenance and care
178
Page 179 of 232
If necessary, add fluid in 250 mL (1/2 pint) increments through the filler
tube until the level is correct.
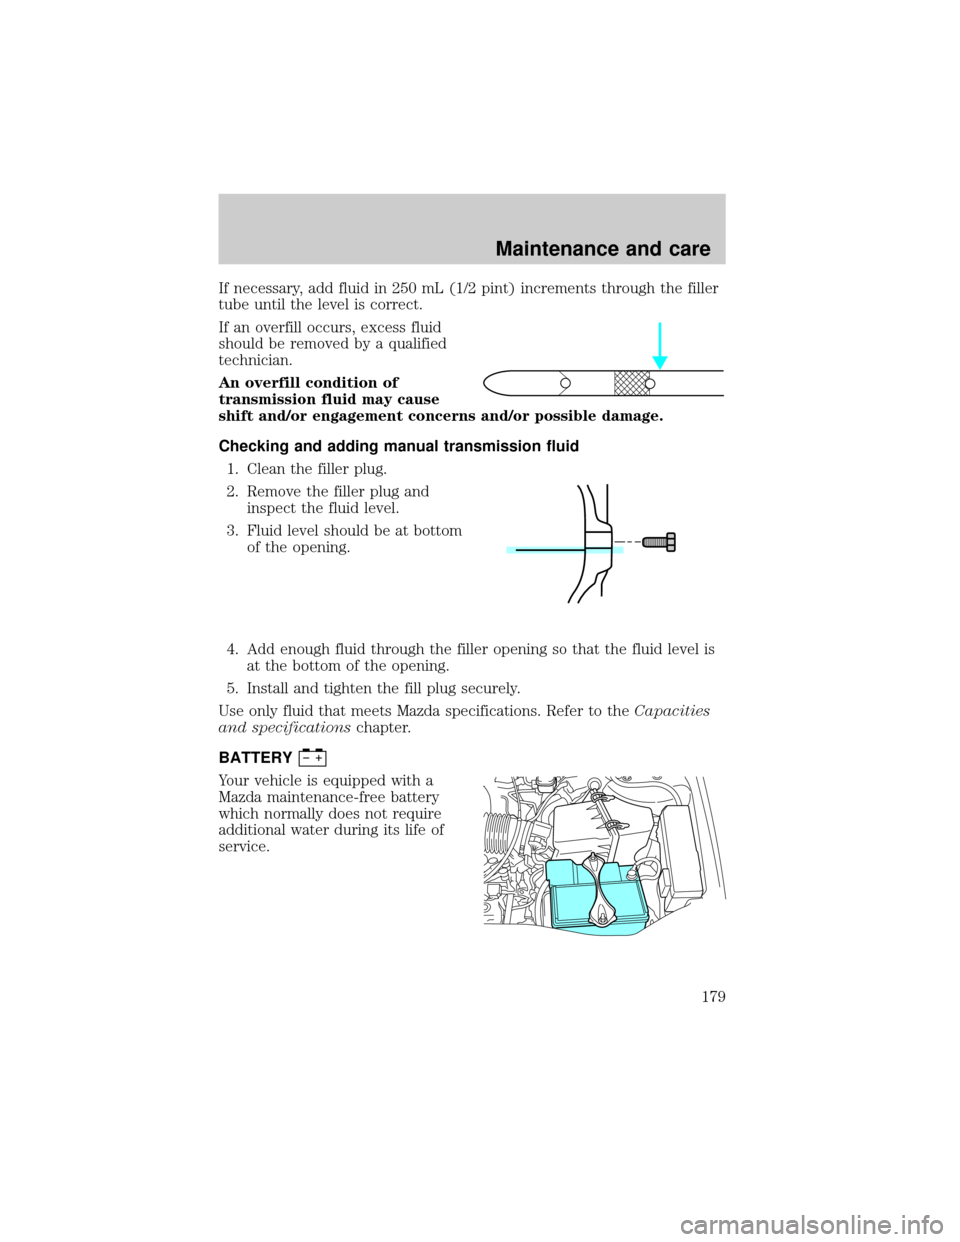
If an overfill occurs, excess fluid
should be removed by a qualified
technician.
An overfill condition of
transmission fluid may cause
shift and/or engagement concerns and/or possible damage.
Checking and adding manual transmission fluid
1. Clean the filler plug.
2. Remove the filler plug and
inspect the fluid level.
3. Fluid level should be at bottom
of the opening.
4. Add enough fluid through the filler opening so that the fluid level is
at the bottom of the opening.
5. Install and tighten the fill plug securely.
Use only fluid that meets Mazda specifications. Refer to theCapacities
and specificationschapter.
BATTERY
Your vehicle is equipped with a
Mazda maintenance-free battery
which normally does not require
additional water during its life of
service.
Maintenance and care
179
Page 195 of 232
Filling the tank
The advertised fuel capacity of the fuel tank on your vehicle is equal to
the rated refill capacity of the fuel tank as listed in theRefill capacities
section ofthe Capacities and specificationschapter.
The advertised capacity is the amount of the indicated capacity and the
empty reserve combined. Indicated capacity is the difference in the
amount of fuel in a full tank and a tank when the fuel gauge indicates
empty. Empty reserve is the small amount of fuel remaining in the fuel
tank after the fuel gauge indicates empty.
The amount of usable fuel in the empty reserve varies and should
not be relied upon to increase driving range. When refueling your
vehicle after the fuel gauge indicates empty, you might not be
able to refuel the full amount of the advertised capacity of the
fuel tank due to the empty reserve still present in the tank.
For consistent results when filling the fuel tank:
²Turn the engine/ignition switch to the off position prior to refueling,
an error in the reading will result if the engine is left running.
²Use the same filling rate setting (low Ð medium Ð high) each time
the tank is filled.
²Allow no more than 2 automatic click-offs when filling.
²Always use fuel with the recommended octane rating.
²Use a known quality gasoline, preferably a national brand.
²Use the same side of the same pump and have the vehicle facing the
same direction each time you fill up.
²Have the vehicle loading and distribution the same every time.
Your results will be most accurate if your filling method is consistent.
Calculating fuel economy
1. Fill the fuel tank completely and record the initial odometer reading
(in kilometers or miles).
2. Each time you fill the tank, record the amount of fuel added (in
liters or gallons).
3. After at least three to five tank fill-ups, fill the fuel tank and record
the current odometer reading.
4. Subtract your initial odometer reading from the current odometer
reading.
Maintenance and care
195
Page 212 of 232
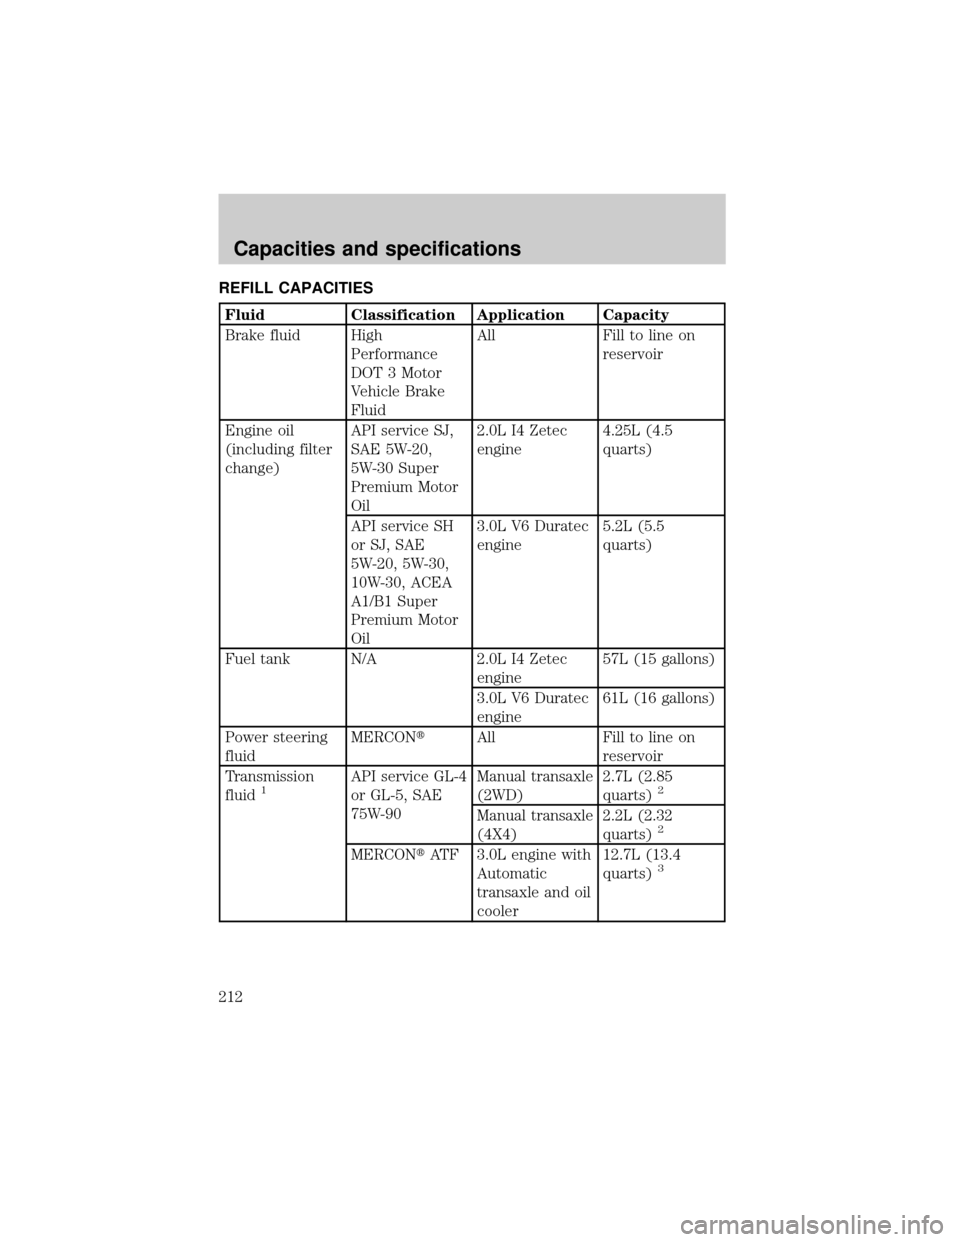
REFILL CAPACITIES
Fluid Classification Application Capacity
Brake fluid High
Performance
DOT 3 Motor
Vehicle Brake
FluidAll Fill to line on
reservoir
Engine oil
(including filter
change)API service SJ,
SAE 5W-20,
5W-30 Super
Premium Motor
Oil2.0L I4 Zetec
engine4.25L (4.5
quarts)
API service SH
or SJ, SAE
5W-20, 5W-30,
10W-30, ACEA
A1/B1 Super
Premium Motor
Oil3.0L V6 Duratec
engine5.2L (5.5
quarts)
Fuel tank N/A 2.0L I4 Zetec
engine57L (15 gallons)
3.0L V6 Duratec
engine61L (16 gallons)
Power steering
fluidMERCONtAll Fill to line on
reservoir
Transmission
fluid
1API service GL-4
or GL-5, SAE
75W-90Manual transaxle
(2WD)2.7L (2.85
quarts)2
Manual transaxle
(4X4)2.2L (2.32
quarts)2
MERCONtATF 3.0L engine with
Automatic
transaxle and oil
cooler12.7L (13.4
quarts)3
Capacities and specifications
212