ECO mode MAZDA MODEL TRIBUTE 2002 Owners Manual (in English)
[x] Cancel search | Manufacturer: MAZDA, Model Year: 2002, Model line: MODEL TRIBUTE, Model: MAZDA MODEL TRIBUTE 2002Pages: 256, PDF Size: 2.66 MB
Page 11 of 256

What you should do if thelight illuminates
Light turns on (without blinking):
This means that the OBD II system has detected a malfunction.
Temporary malfunctions may cause your
light to illuminate.
Examples are:
1. The vehicle has run out of fuel. (The engine may misfire or run
poorly.)
2. Poor fuel quality or water in the fuel.
3. The fuel cap may not have been properly installed and securely
tightened.
These temporary malfunctions can be corrected by filling the fuel tank
with high quality fuel of the recommended octane and/or properly
installing and securely tightening the fuel cap. After three driving cycles
without these or any other temporary malfunctions present, the
light should turn off. (A driving cycle consists of a cold engine startup
followed by mixed city/highway driving.) No additional vehicle service is
required.
If the
light remains on, have your vehicle serviced at the first
available opportunity.
NOTE:The
light will illuminate if vehicle refueling is conducted
with the engine running.
WARNING: Never refuel vehicle with the engine running.
Light is blinking:
Engine misfire is occurring which could damage your catalytic converter.
You should drive in a moderate fashion (avoid heavy acceleration and
deceleration) and have your vehicle serviced at the first available
opportunity.
WARNING: Under engine misfire conditions, excessive exhaust
temperatures could damage the catalytic converter, the fuel
system, interior floor coverings or other vehicle components,
possibly causing a fire.
Instrument Cluster
11
Page 20 of 256

Turn the control to raise or lower
the volume.
NOTE:To prevent the battery from being discharged, do not leave the
audio system on for a long period when the engine is not running.
NOTE:Once the system is turned off, press the VOL control again to
listen to the frequency last tuned to.
AM/FM select
Ensure that the ignition is in the
ACC or ON position for the radio to
operate. Press the AM or FM1/2
control to enter radio mode.
Band selection
Select AM by pressing the AM button and FM1 or FM2 by pressing the
FM1/2 button.
The selected mode will be indicated. If FM stereo is being received, ST
will be displayed.
Note:If the FM broadcast signal becomes weak, reception automatically
changes form STEREO to MONO for reduced noise and the ST indicator
will go out.
Tune audio control
The TUNE control is a multi-functional control which works in radio,
tape and CD modes to adjust the levels of bass, treble, balance, fade and
mid-range.
Entertainment Systems
20
Page 22 of 256

Scan function
The scan function works in radio
and CD mode.
Scan function in radio mode
Press the SCAN control to hear a brief sampling of all listenable stations
on the frequency band. Press the SCAN control again to disable scan
mode.
Scan function in CD mode
Press the SCAN control during CD play to hear the first ten seconds of
each track. Press the SCAN control again to stop the scan mode.
NOTE:If the unit is left in scan mode, normal play will resume where
scan was selected.
Seek function
The seek function control works in radio mode.
Seek function in radio mode
Press and momentarily hold the
SEEK control.
²Press
to find the next
listenable station up the
frequency band.
²Press
to find the next
listenable station down the
frequency band.
NOTE:If you continue to press and hold the control, the frequency will
continue changing without stopping. Release the control after the beep
sounds.
Entertainment Systems
22
Page 26 of 256

Turn the control to the right to
increase the mid-range.
Turn the control to the left to
decrease the mid-range.
The level will display.
Release the TUNE control when the
desired level is reached.
NOTE:Approximately 5 seconds
after selecting any mode, the
volume function will be
automatically selected. To reset the mid-range, press the TUNE control
for approximately 2 seconds. The unit will beep and CL will appear in
the display.
Radio station memory preset
The radio is equipped with six station memory preset controls. These
controls can be used to select up to six preset AM stations and 12 FM
stations (six in FM1 and six in FM2).
Setting memory preset stations
1. Select the frequency band with the AM/FM control.
2. Select a station.
3. Press and momentarily hold the desired preset control until a beep is
heard.
The preset control number will illuminate in the display. This indicates
the station is held in memory on the control you selected. Repeat this
procedure to store other stations in memory.
To tune one in the memory, select AM, FM1 or FM2 and then press its
channel preset button. The station frequency and the channel number
will be displayed.
Entertainment Systems
26
Page 30 of 256

NOTE:When a CD is ejected during play, the next CD will be played
automatically.
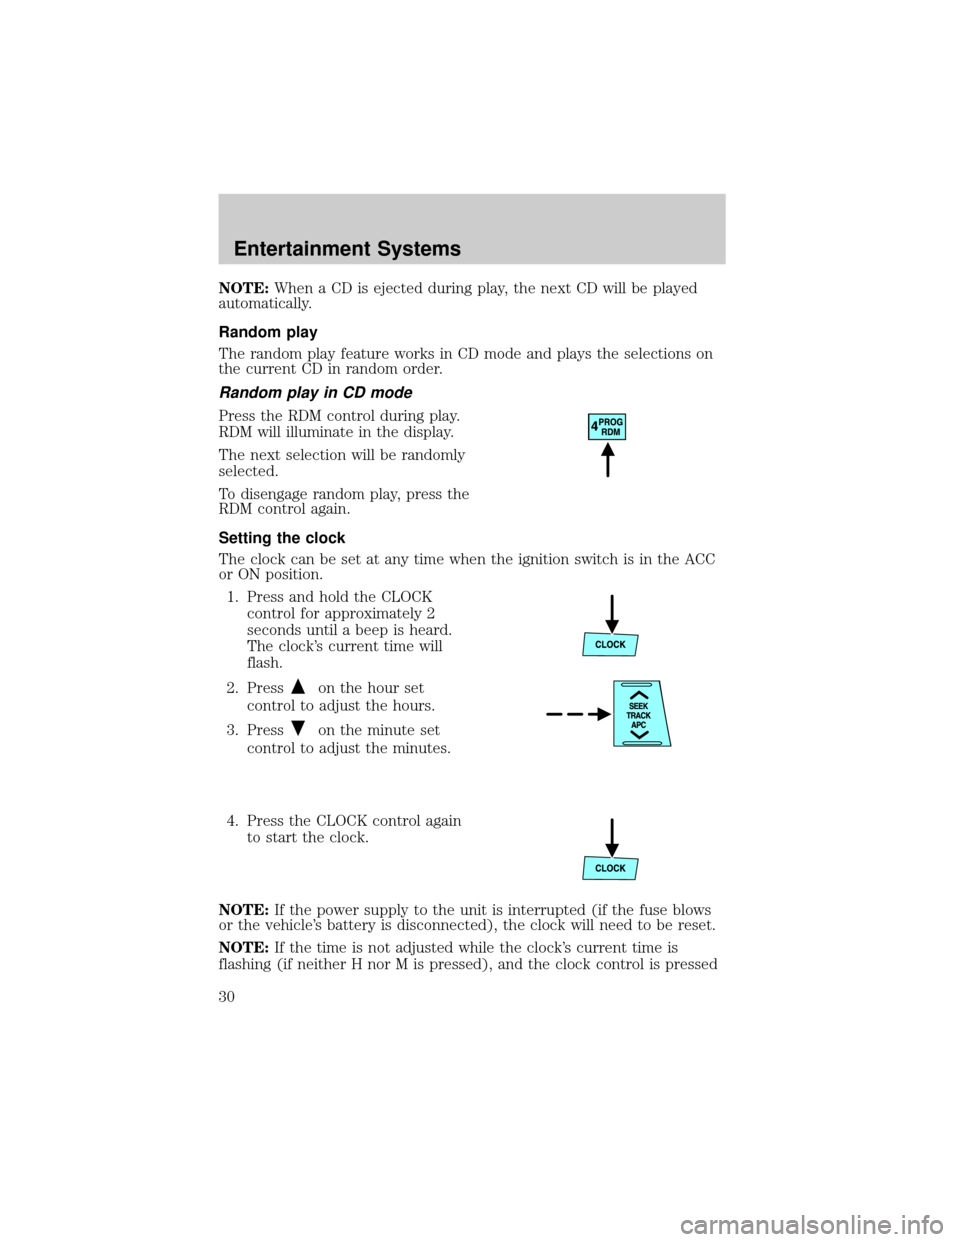
Random play
The random play feature works in CD mode and plays the selections on
the current CD in random order.
Random play in CD mode
Press the RDM control during play.
RDM will illuminate in the display.
The next selection will be randomly
selected.
To disengage random play, press the
RDM control again.
Setting the clock
The clock can be set at any time when the ignition switch is in the ACC
or ON position.
1. Press and hold the CLOCK
control for approximately 2
seconds until a beep is heard.
The clock's current time will
flash.
2. Press
on the hour set
control to adjust the hours.
3. Press
on the minute set
control to adjust the minutes.
4. Press the CLOCK control again
to start the clock.
NOTE:If the power supply to the unit is interrupted (if the fuse blows
or the vehicle's battery is disconnected), the clock will need to be reset.
NOTE:If the time is not adjusted while the clock's current time is
flashing (if neither H nor M is pressed), and the clock control is pressed
Entertainment Systems
30
Page 31 of 256

a second time, the minutes will be set to 00. If the clock's current time
setting is within the latter part of the hour (from 30 to 59 min), the hour
setting will automatically advance one hour.
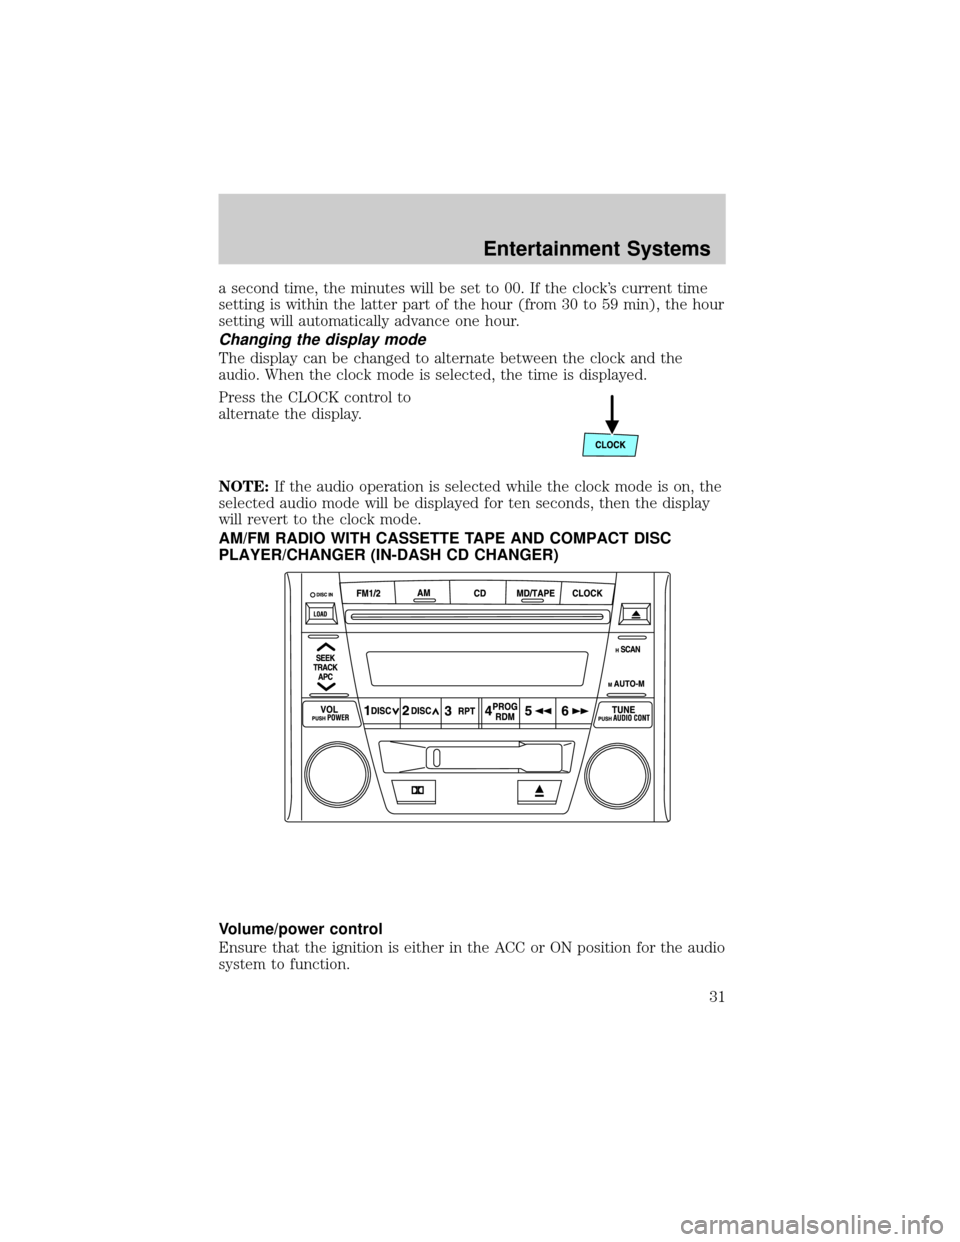
Changing the display mode
The display can be changed to alternate between the clock and the
audio. When the clock mode is selected, the time is displayed.
Press the CLOCK control to
alternate the display.
NOTE:If the audio operation is selected while the clock mode is on, the
selected audio mode will be displayed for ten seconds, then the display
will revert to the clock mode.
AM/FM RADIO WITH CASSETTE TAPE AND COMPACT DISC
PLAYER/CHANGER (IN-DASH CD CHANGER)
Volume/power control
Ensure that the ignition is either in the ACC or ON position for the audio
system to function.
Entertainment Systems
31
Page 32 of 256

Press the control to turn the audio
system on or off.
Turn the control to raise or lower
the volume.
NOTE:To prevent the battery from being discharged, do not leave the
audio system on for a long period when the engine is not running.
NOTE:Once the system is turned off, press the VOL control again to
listen to the frequency last tuned to.
AM/FM select
Ensure that the ignition is in the
ACC or ON position for the radio to
operate. Press the AM or FM1/2
control to enter radio mode.
Band selection
Select AM by pressing the AM button and FM1 or FM2 by pressing the
FM1/2 button.
The selected mode will be indicated. If FM stereo is being received, ST
will be displayed.
Note:If the FM broadcast signal becomes weak, reception automatically
changes form STEREO to MONO for reduced noise and the ST indicator
will go out.
Entertainment Systems
32
Page 34 of 256

Scan function
The scan function works in radio
and CD mode.
Scan function in radio mode
Press the SCAN control to hear a brief sampling of all listenable stations
on the frequency band. Press the SCAN control again to disable scan
mode.
Scan function in CD mode
Press the SCAN control during CD play to hear the first ten seconds of
each track. Press the SCAN control again to stop the scan mode.
NOTE:If the unit is left in scan mode, normal play will resume where
scan was selected.
Seek function
The seek function control works in radio mode.
Seek function in radio mode
Press and momentarily hold the
SEEK control.
²Press
to find the next
listenable station up the
frequency band.
²Press
to find the next
listenable station down the
frequency band.
NOTE:If you continue to press and hold the control, the frequency will
continue changing without stopping. Release the control after the beep
sounds.
Entertainment Systems
34
Page 38 of 256

Turn the control to the right to
increase the mid-range.
Turn the control to the left to
decrease the mid-range.
The level will display.
Release the TUNE control when the
desired level is reached.
NOTE:Approximately 5 seconds
after selecting any mode, the
volume function will be
automatically selected. To reset the mid-range, press the TUNE control
for approximately 2 seconds. The unit will beep and CL will appear in
the display.
Radio station memory preset
The radio is equipped with six station memory preset controls. These
controls can be used to select up to six preset AM stations and 12 FM
stations (six in FM1 and six in FM2).
Setting memory preset stations
1. Select the frequency band with the AM/FM control.
2. Select a station.
3. Press and momentarily hold the desired preset control until a beep is
heard.
The preset control number will illuminate in the display. This indicates
the station is held in memory on the control you selected. Repeat this
procedure to store other stations in memory.
To tune one in the memory, select AM, FM1 or FM2 and then press its
channel preset button. The station frequency and the channel number
will be displayed.
Entertainment Systems
38
Page 41 of 256

Repeat play in tape mode
Press the RPT control during play.
RPT will illuminate in the display.
The current selection will be
repeated.
To disengage repeat play, press the
RPT control again.
NOTE:RPT may not operate properly if:
²A tape was recorded at a low level.
²A tape has long, silent intervals.
²A tape is a live recording.
²A tape has very short intervals of less than 3 seconds.
Repeat play in CD mode
Press the RPT control during play.
RPT will illuminate in the display.
The current selection will be
repeated.
To disengage repeat play, press the
RPT control again.
Track search
Track search works in CD mode.
Press the
on the TRACK control
to skip forward to the beginning of
the next track.
Press the
on the TRACK control
to skip back to the beginning of the
current track.
Disc search
Disc search works in CD mode.
Entertainment Systems
41