ESP MAZDA MODEL TRIBUTE 2002 Owners Manual (in English)
[x] Cancel search | Manufacturer: MAZDA, Model Year: 2002, Model line: MODEL TRIBUTE, Model: MAZDA MODEL TRIBUTE 2002Pages: 256, PDF Size: 2.66 MB
Page 4 of 256
SAFETY AND ENVIRONMENT PROTECTION
Warning symbols in this guide
How can you reduce the risk of personal injury and prevent possible
damage to others, your vehicle and its equipment? In this guide, answers
to such questions are contained in comments highlighted by the warning
triangle symbol. These comments should be read and observed.
Warning symbols on your vehicle
When you see this symbol, it is
imperative that you consult the
relevant section of this guide before
touching or attempting adjustment
of any kind.
Protecting the environment
We must all play our part in
protecting the environment. Correct
vehicle usage and the authorized
disposal of waste cleaning and
lubrication materials are significant
steps towards this aim. Information in this respect is highlighted in this
guide with the tree symbol.
BREAKING-IN YOUR VEHICLE
There are no particular breaking-in rules for your vehicle. During the
first 1,600 km (1,000 miles) of driving, vary speeds frequently. This is
necessary to give the moving parts a chance to break in.
Introduction
4
Page 10 of 256
WARNING LIGHTS AND CHIMES
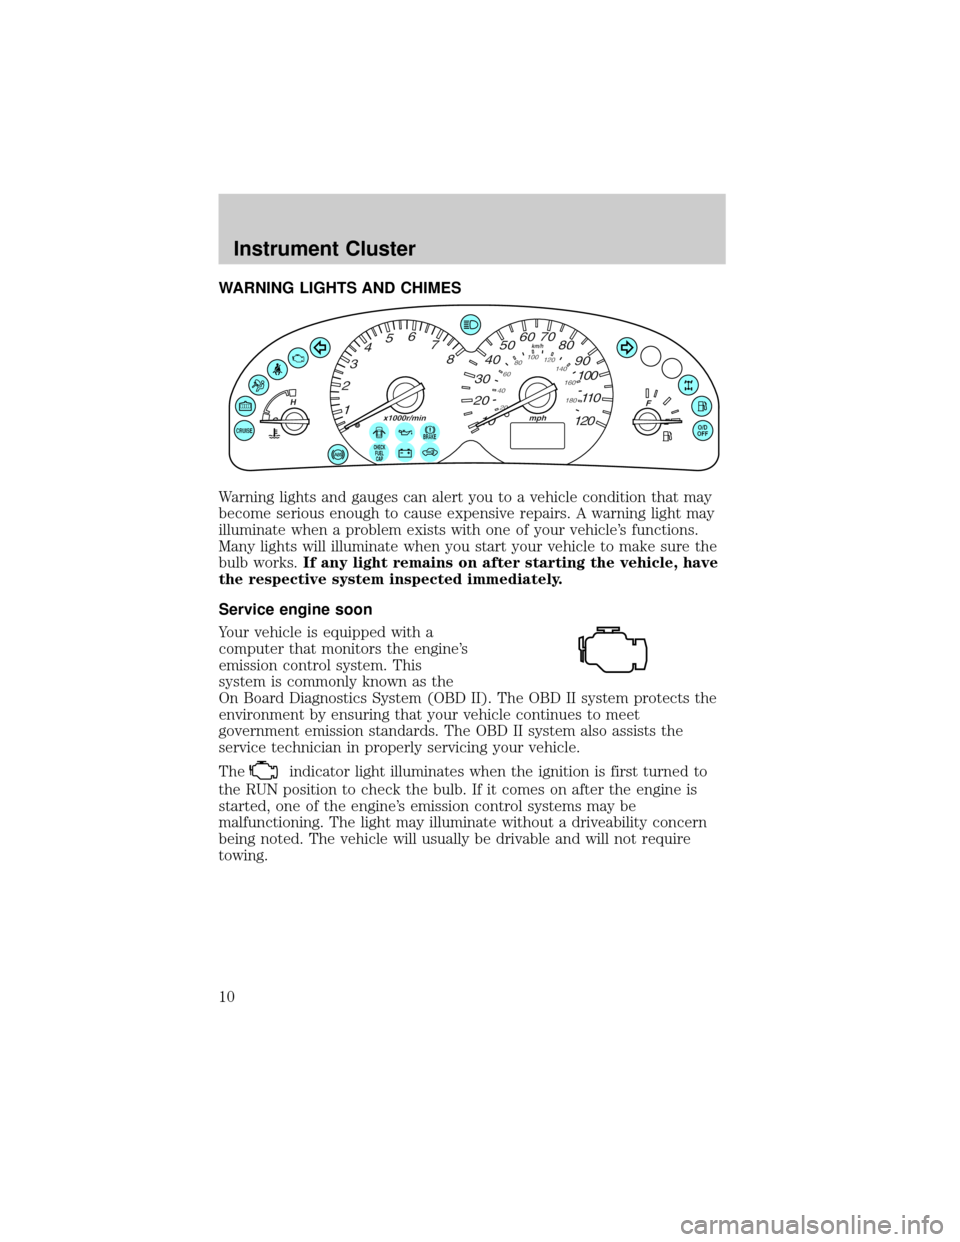
Warning lights and gauges can alert you to a vehicle condition that may
become serious enough to cause expensive repairs. A warning light may
illuminate when a problem exists with one of your vehicle's functions.
Many lights will illuminate when you start your vehicle to make sure the
bulb works.If any light remains on after starting the vehicle, have
the respective system inspected immediately.
Service engine soon
Your vehicle is equipped with a
computer that monitors the engine's
emission control system. This
system is commonly known as the
On Board Diagnostics System (OBD II). The OBD II system protects the
environment by ensuring that your vehicle continues to meet
government emission standards. The OBD II system also assists the
service technician in properly servicing your vehicle.
The
indicator light illuminates when the ignition is first turned to
the RUN position to check the bulb. If it comes on after the engine is
started, one of the engine's emission control systems may be
malfunctioning. The light may illuminate without a driveability concern
being noted. The vehicle will usually be drivable and will not require
towing.
CHECK
FUEL
CAP
Instrument Cluster
10
Page 78 of 256
Childproof door locks
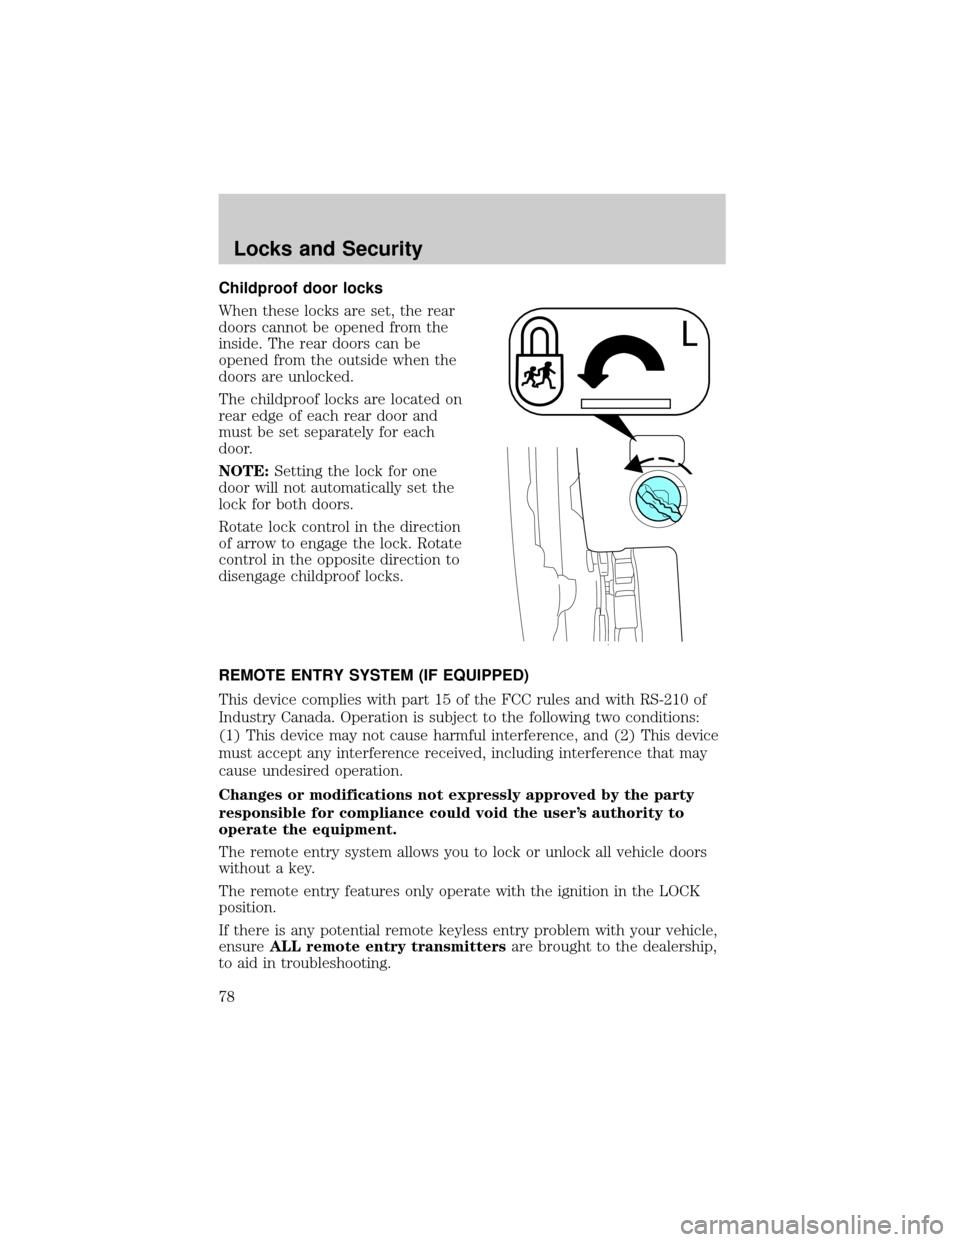
When these locks are set, the rear
doors cannot be opened from the
inside. The rear doors can be
opened from the outside when the
doors are unlocked.
The childproof locks are located on
rear edge of each rear door and
must be set separately for each
door.
NOTE:Setting the lock for one
door will not automatically set the
lock for both doors.
Rotate lock control in the direction
of arrow to engage the lock. Rotate
control in the opposite direction to
disengage childproof locks.
REMOTE ENTRY SYSTEM (IF EQUIPPED)
This device complies with part 15 of the FCC rules and with RS-210 of
Industry Canada. Operation is subject to the following two conditions:
(1) This device may not cause harmful interference, and (2) This device
must accept any interference received, including interference that may
cause undesired operation.
Changes or modifications not expressly approved by the party
responsible for compliance could void the user's authority to
operate the equipment.
The remote entry system allows you to lock or unlock all vehicle doors
without a key.
The remote entry features only operate with the ignition in the LOCK
position.
If there is any potential remote keyless entry problem with your vehicle,
ensureALL remote entry transmittersare brought to the dealership,
to aid in troubleshooting.
Locks and Security
78
Page 85 of 256
6. To program additional new unprogrammed key(s), repeat this
procedure from step 1.
If successful, the new coded key(s) will start the vehicle's engine and the
theft indicator will illuminate for three seconds and then go out.
If not successful, the new coded key(s) will not start the vehicle's engine
and the theft indicator will flash on and off and you may repeat steps 1
through 6. If failure repeats, bring your vehicle to your authorized Mazda
dealership to have the new spare key(s) programmed.
PERIMETER ALARM SYSTEM (IF EQUIPPED)
The perimeter anti-theft system will respond if unauthorized entry is
attempted.
If there is any potential perimeter anti-theft problem with your vehicle,
ensureALL remote entry transmittersare brought to authorized
Mazda dealership, to aid in troubleshooting.
Arming the system
When armed, this system will respond if unauthorized entry is
attempted. When unauthorized entry occurs, the system will flash the
headlamps, parking lamps and will sound the horn.
The system is ready to arm whenever key is removed from the ignition.
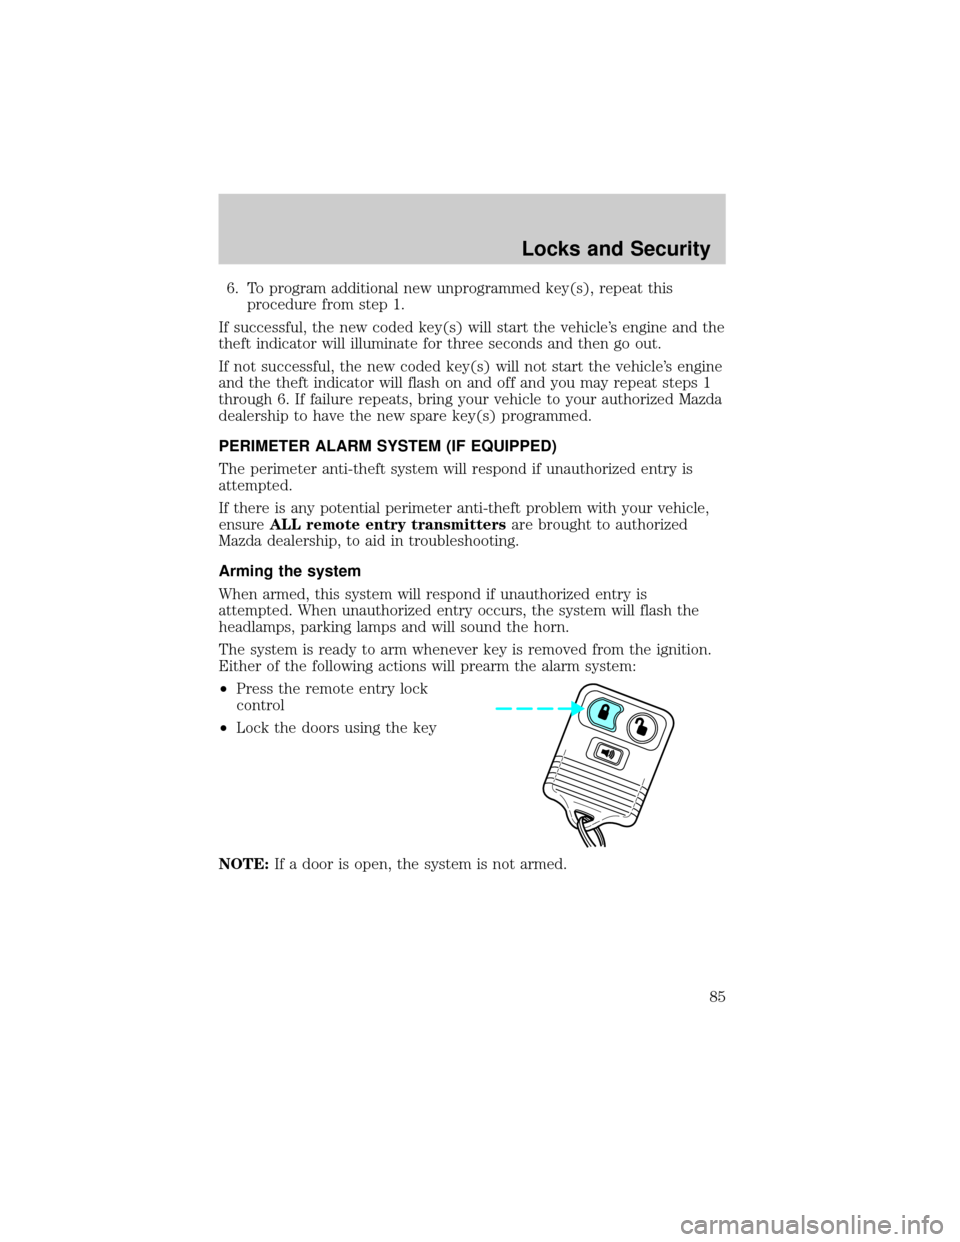
Either of the following actions will prearm the alarm system:
²Press the remote entry lock
control
²Lock the doors using the key
NOTE:If a door is open, the system is not armed.
Locks and Security
85
Page 100 of 256

Combination lap and shoulder belts
1. Insert the belt tongue into the
proper buckle (the buckle
closest to the direction the
tongue is coming from) until
you hear a snap and feel it
latch. Make sure the tongue is
securely fastened in the buckle.
2. To unfasten, push the release
button and remove the tongue
from the buckle.
The front and rear outboard safety restraints in the vehicle are
combination lap and shoulder belts. The front passenger and rear seat
outboard safety belts have two types of locking modes described below:
Vehicle sensitive mode
The vehicle sensitive mode is the normal retractor mode, allowing free
shoulder belt length adjustment to your movements and locking in
response to vehicle movement. For example, if the driver brakes
suddenly or turns a corner sharply, or the vehicle receives an impact of
approximately 8 km/h (5 mph) or more, the combination safety belts will
lock to help reduce forward movement of the driver and passengers.
Automatic locking mode
In this mode, the shoulder belt is automatically pre-locked. The belt will
still retract to remove any slack in the shoulder belt.
The automatic locking mode is not available on the driver safety belt.
Seating and Safety Restraints
100
Page 116 of 256

WARNING: All occupants of the vehicle including the driver
should always wear their safety belts even when an air bag SRS
is provided.
How does the side air bag system work?
The side air bag system consists of
the following:
²An inflatable nylon bag (air bag)
with a gas generator concealed
behind the outboard bolster of
the driver and front passenger
seatbacks.
²A special seat cover designed to
allow airbag deployment.
²The same warning light,
electronic control and diagnostic
unit as used for the front air
bags.
²The two side sensors are located
on the lower portion of the
b-pillar.
NOTE:A side air bag, in combination with seat belts, can help reduce
the risk of severe injuries in the event of a significant side impact
collision.
The side air bags are fitted on the outboard side of the seatbacks of the
front seats. In certain lateral collisions, the air bag on the side affected
by the collision will be inflated, even if the respective seat is not
occupied. The air bag was designed to inflate between the door panel
and occupant to further enhance the protection provided occupants in
side impact collisions.
The air bag SRS is designed to activate when the vehicle sustains lateral
deceleration sufficient to cause the sensors to close an electrical circuit
that initiates air bag inflation.
The fact that the air bags did not inflate in a collision does not mean that
something is wrong with the system. Rather, it means the forces were
not of the type sufficient to cause activation. Side air bags are designed
to inflate in side-impact collisions, not roll-over, rear-impact, frontal,
near-frontal or opposite side collisions, unless the collision causes
sufficient lateral deceleration.
Seating and Safety Restraints
116
Page 132 of 256

If starting a vehicle with a manual
transmission:
²Make sure the parking brake is
set.
²Push the clutch pedal to the
floor.
3. Turn the key to 3 (ON) without
turning the key to 4 (START).
Make sure the corresponding lights illuminate or illuminate briefly. If a
light fails to illuminate, have the vehicle serviced.
Note:If the driver's safety belt is fastened, the
light may not
illuminate.
Starting the engine
Note:Whenever you start your vehicle, release the key as soon as the
engine starts. Excessive cranking could damage the starter.
BRAKEO/D
OFF
CHECK
FUEL
CAP
Driving
132
Page 133 of 256
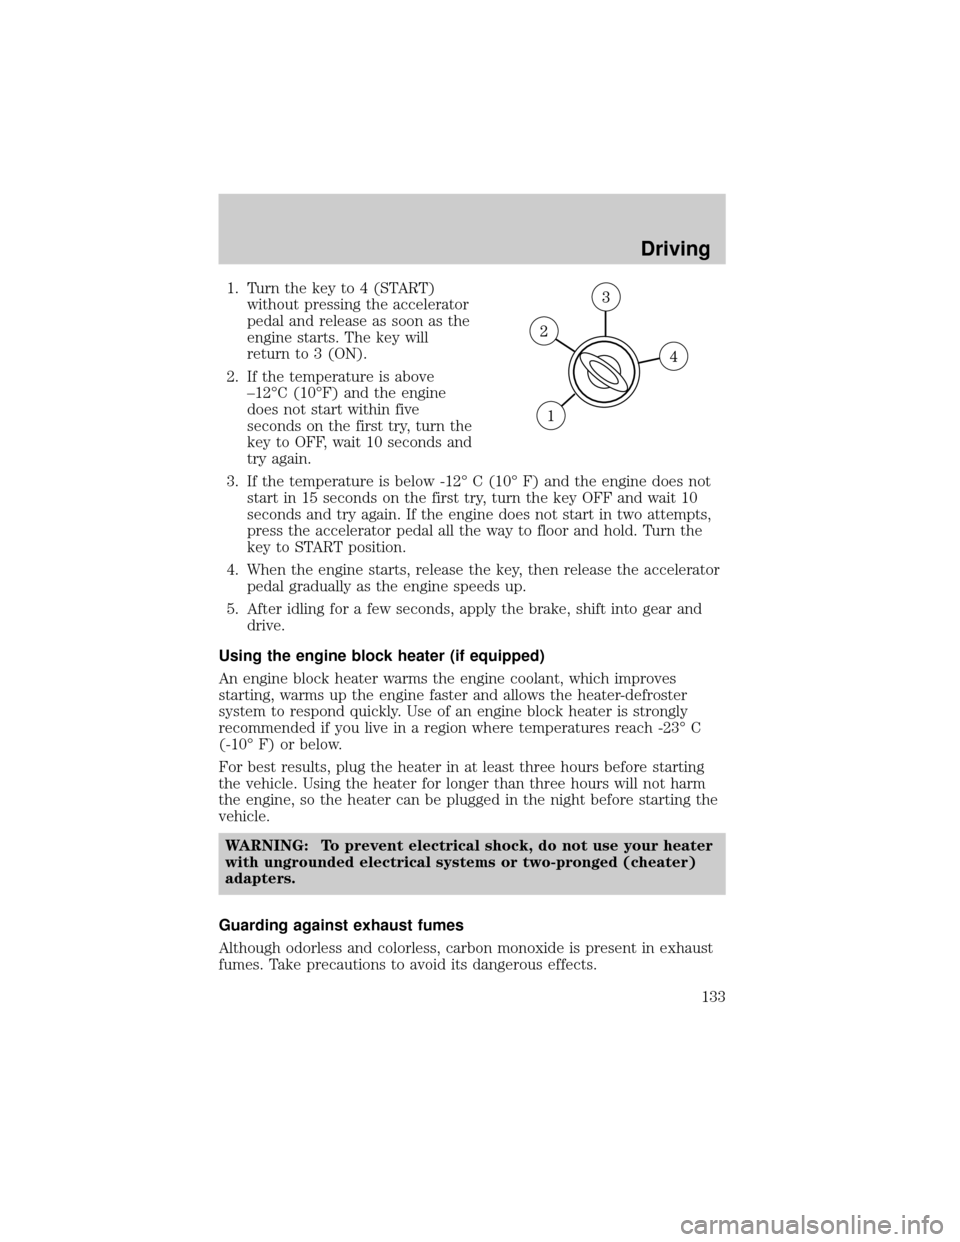
1. Turn the key to 4 (START)
without pressing the accelerator
pedal and release as soon as the
engine starts. The key will
return to 3 (ON).
2. If the temperature is above
±12ÉC (10ÉF) and the engine
does not start within five
seconds on the first try, turn the
key to OFF, wait 10 seconds and
try again.
3. If the temperature is below -12É C (10É F) and the engine does not
start in 15 seconds on the first try, turn the key OFF and wait 10
seconds and try again. If the engine does not start in two attempts,
press the accelerator pedal all the way to floor and hold. Turn the
key to START position.
4. When the engine starts, release the key, then release the accelerator
pedal gradually as the engine speeds up.
5. After idling for a few seconds, apply the brake, shift into gear and
drive.
Using the engine block heater (if equipped)
An engine block heater warms the engine coolant, which improves
starting, warms up the engine faster and allows the heater-defroster
system to respond quickly. Use of an engine block heater is strongly
recommended if you live in a region where temperatures reach -23É C
(-10É F) or below.
For best results, plug the heater in at least three hours before starting
the vehicle. Using the heater for longer than three hours will not harm
the engine, so the heater can be plugged in the night before starting the
vehicle.
WARNING: To prevent electrical shock, do not use your heater
with ungrounded electrical systems or two-pronged (cheater)
adapters.
Guarding against exhaust fumes
Although odorless and colorless, carbon monoxide is present in exhaust
fumes. Take precautions to avoid its dangerous effects.
Driving
133
Page 150 of 256

Maintain steering wheel control at all times, especially in rough
terrain. Since sudden changes in terrain can result in abrupt
steering wheel motion, make sure you grip the steering wheel
from the outside. Do not grip the spokes.
Drive cautiously to avoid vehicle damage from concealed objects
such as rocks and stumps.
You should either know the terrain or examine maps of the area before
driving. Map out your route before driving in the area. To maintain
steering and braking control of your vehicle, you must have all four
wheels on the ground and they must be rolling, not sliding or spinning.
Basic operating principles
²Drive slower in strong crosswinds which can affect the normal steering
characteristics of your vehicle.
²Be extremely careful when driving on pavement made slippery by
loose sand, water, gravel, snow or ice.
If your vehicle goes off the edge of the pavement
²If your vehicle goes off the edge of the pavement, slow down, but
avoid severe brake application, ease the vehicle back onto the
pavement only after reducing your speed. Do not turn the steering
wheel too sharply while returning to the road surface.
²It may be safer to stay on the apron or shoulder of the road and slow
down gradually before returning to the pavement. You may loose
control if you do not slow down or if you turn the steering wheel too
sharply or abruptly.
²It often may be less risky to strike small inanimate objects, such as
highway reflectors, with minor damage to your vehicle rather than
attempt a sudden return to the pavement which could cause the
vehicle to slide sideways out of control or roll over. Remember, your
safety and the safety of others should be your primary concern.
If your vehicle gets stuck
If your vehicle gets stuck in mud or snow it may be rocked out by
shifting between forward and reverse gears, stopping between shifts, in a
steady pattern. Press lightly on the accelerator in each gear.
Do not rock the vehicle if the engine is not at normal operating
temperature or damage to the transmission may occur.
Do not rock the vehicle for more than a few minutes or damage
to the transmission and tires may occur or the engine may
overheat.
Driving
150
Page 151 of 256

WARNING: Always set the parking brake fully and make sure
the gearshift is latched in P (Park). Turn the ignition to the
LOCK position and remove the key whenever you leave your
vehicle.
WARNING: If the parking brake is fully released, but the brake
warning lamp remains illuminated, the brakes may not be
working properly. See your authorized Mazda dealership.
Do not rock the vehicle if the engine is not at normal operating
temperature or damage to the transaxle may occur.
WARNING: Do not spin the wheels at over 56 km/h (35 mph).
The tires may fail and injure a passenger or bystander.
Emergency maneuvers
²In an unavoidable emergency situation where a sudden sharp turn
must be made, remember to avoid ªover-drivingº your vehicle, i.e.,
turn the steering wheel only as rapidly and as far as required to avoid
the emergency. Excessive steering will result in less vehicle control,
not more. Additionally, smooth variations of the accelerator and/or
brake pedal pressure should be utilized if changes in vehicle speed are
called for. Avoid abrupt steering, acceleration or braking. Use all
available road surface to return the vehicle to a safe direction of
travel.
²In the event of an emergency stop, avoid skidding the tires and do not
attempt any sharp steering wheel movements.
²If the vehicle goes from one type of surface to another (i.e., from
concrete to gravel) there will be a change in the way the vehicle
responds to a maneuver (steering, acceleration or barking). Again,
avoid these abrupt inputs.
Sand
When driving over sand, try to keep all four wheels on the most solid
area of the trail. Avoid reducing the tire pressures but shift to a lower
gear and drive steadily through the terrain. Apply the accelerator slowly
and avoid spinning the wheels.
If you must reduce the tire pressure for whatever reason in sand, make
sure you re-inflate the tires as soon as possible.
Driving
151