radio MAZDA MX-5 1997 Factory Repair Manual
[x] Cancel search | Manufacturer: MAZDA, Model Year: 1997, Model line: MX-5, Model: MAZDA MX-5 1997Pages: 514, PDF Size: 17.89 MB
Page 49 of 514
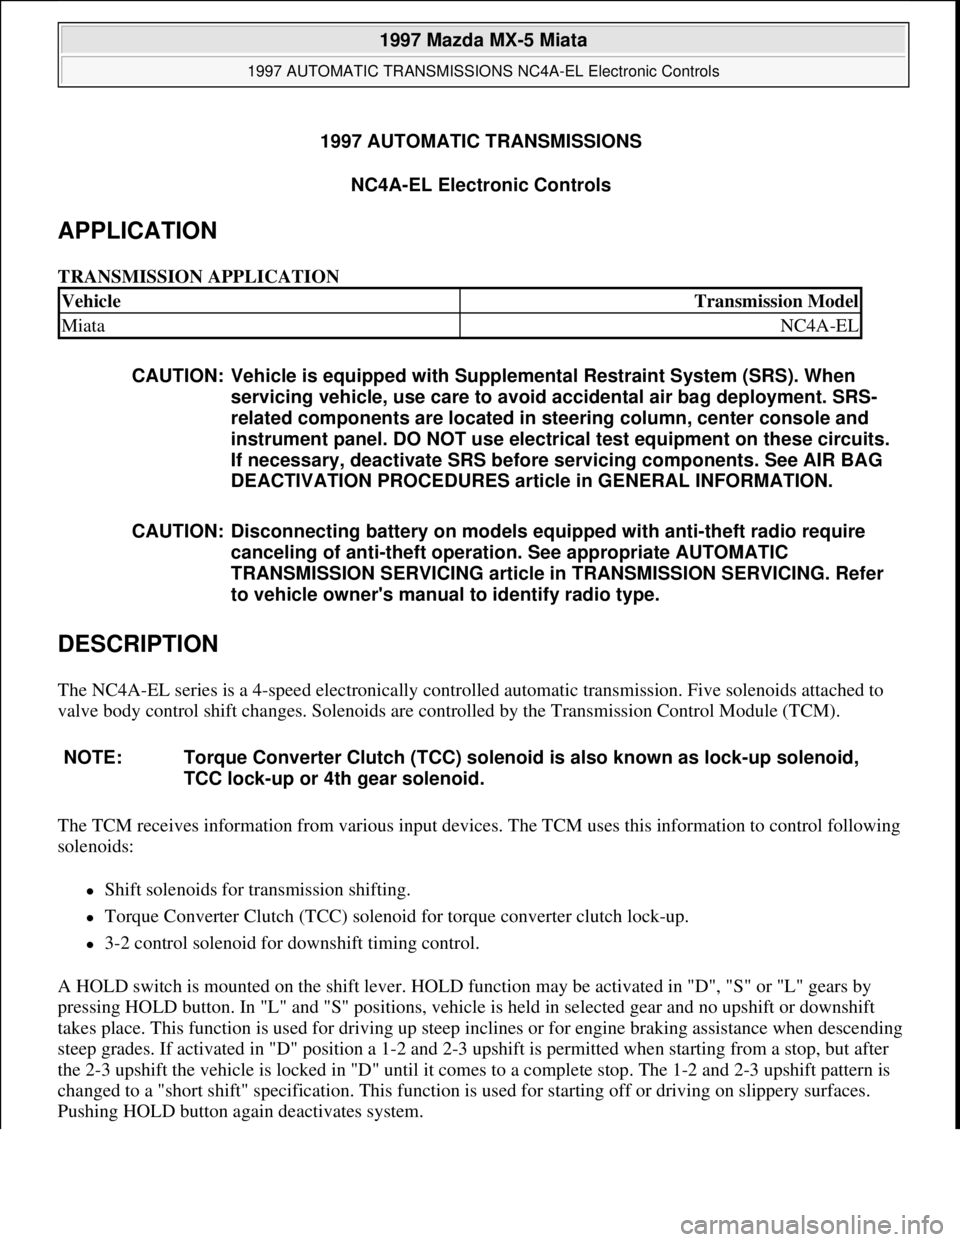
1997 AUTOMATIC TRANSMISSIONS
NC4A-EL Electronic Controls
APPLICATION
TRANSMISSION APPLICATION
DESCRIPTION
The NC4A-EL series is a 4-speed electronically controlled automatic transmission. Five solenoids attached to
valve body control shift changes. Solenoids are controlled by the Transmission Control Module (TCM).
The TCM receives information from various input devices. The TCM uses this information to control following
solenoids:
Shift solenoids for transmission shifting.
Torque Converter Clutch (TCC) solenoid for torque converter clutch lock-up.
3-2 control solenoid for downshift timing control.
A HOLD switch is mounted on the shift lever. HOLD function may be activated in "D", "S" or "L" gears by
pressing HOLD button. In "L" and "S" positions, vehicle is held in selected gear and no upshift or downshift
takes place. This function is used for driving up steep inclines or for engine braking assistance when descending
steep grades. If activated in "D" position a 1-2 and 2-3 upshift is permitted when starting from a stop, but after
the 2-3 upshift the vehicle is locked in "D" until it comes to a complete stop. The 1-2 and 2-3 upshift pattern is
changed to a "short shift" specification. This function is used for starting off or driving on slippery surfaces.
Pushin
g HOLD button again deactivates system.
VehicleTransmission Model
MiataNC4A-EL
CAUTION: Vehicle is equipped with Supplemental Restraint System (SRS). When
servicing vehicle, use care to avoid accidental air bag deployment. SRS-
related components are located in steering column, center console and
instrument panel. DO NOT use electrical test equipment on these circuits.
If necessary, deactivate SRS before servicing components. See AIR BAG
DEACTIVATION PROCEDURES article in GENERAL INFORMATION.
CAUTION: Disconnecting battery on models equipped with anti-theft radio require
canceling of anti-theft operation. See appropriate AUTOMATIC
TRANSMISSION SERVICING article in TRANSMISSION SERVICING. Refer
to vehicle owner's manual to identify radio type.
NOTE: Torque Converter Clutch (TCC) solenoid is also known as lock-up solenoid,
TCC lock-up or 4th gear solenoid.
1997 Mazda MX-5 Miata
1997 AUTOMATIC TRANSMISSIONS NC4A-EL Electronic Controls
1997 Mazda MX-5 Miata
1997 AUTOMATIC TRANSMISSIONS NC4A-EL Electronic Controls
Microsoft
Sunday, July 05, 2009 1:35:03 PMPage 1 © 2005 Mitchell Repair Information Company, LLC.
Microsoft
Sunday, July 05, 2009 1:35:38 PMPage 1 © 2005 Mitchell Repair Information Company, LLC.
Page 209 of 514
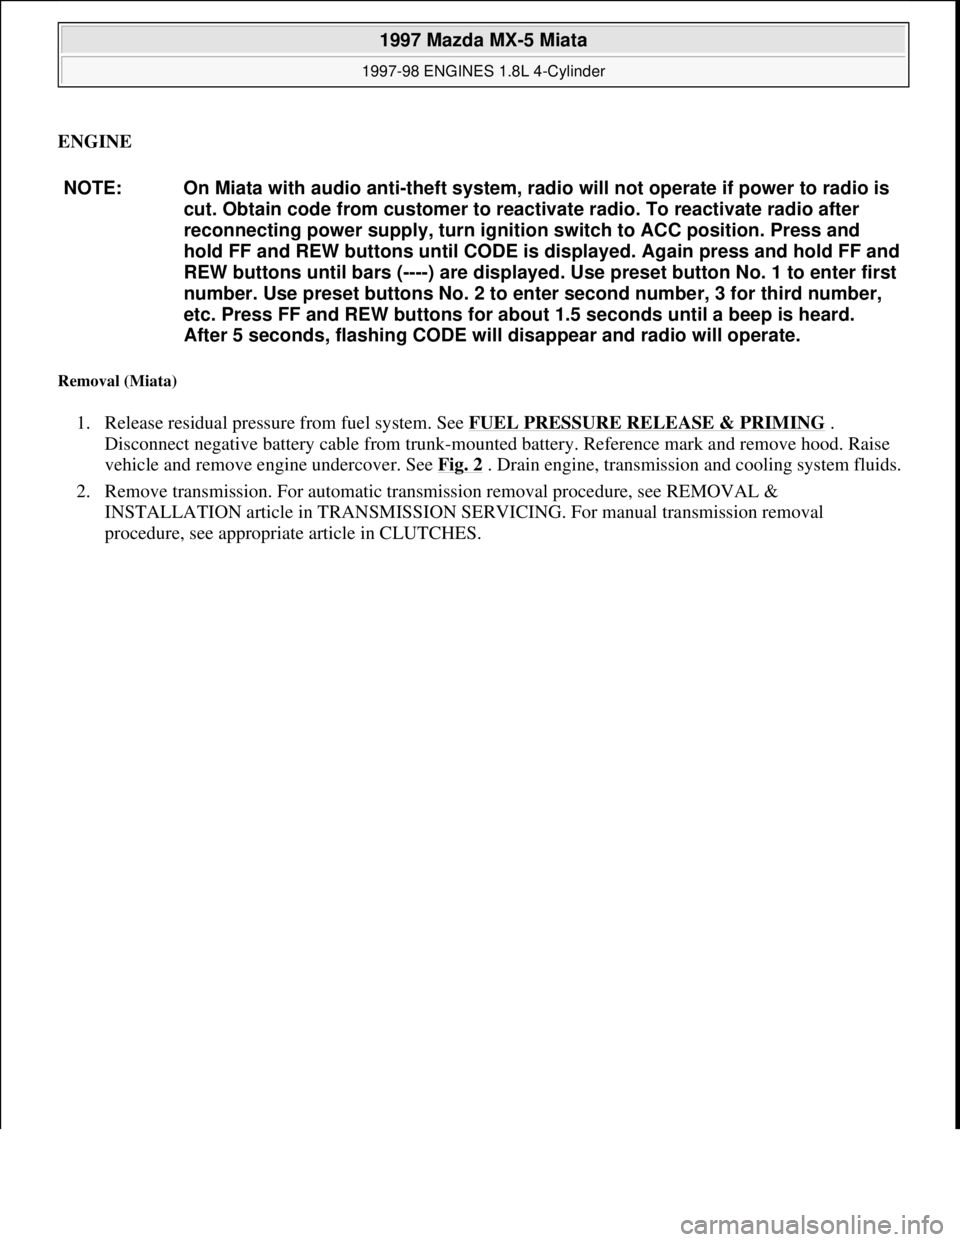
ENGINE
Removal (Miata)
1. Release residual pressure from fuel system. See FUEL PRESSURE RELEASE & PRIMING .
Disconnect negative battery cable from trunk-mounted battery. Reference mark and remove hood. Raise
vehicle and remove engine undercover. See Fig. 2
. Drain engine, transmission and cooling system fluids.
2. Remove transmission. For automatic transmission removal procedure, see REMOVAL &
INSTALLATION article in TRANSMISSION SERVICING. For manual transmission removal
procedure, see appropriate article in CLUTCHES. NOTE: On Miata with audio anti-theft system, radio will not operate if power to radio is
cut. Obtain code from customer to reactivate radio. To reactivate radio after
reconnecting power supply, turn ignition switch to ACC position. Press and
hold FF and REW buttons until CODE is displayed. Again press and hold FF and
REW buttons until bars (----) are displayed. Use preset button No. 1 to enter first
number. Use preset buttons No. 2 to enter second number, 3 for third number,
etc. Press FF and REW buttons for about 1.5 seconds until a beep is heard.
After 5 seconds, flashing CODE will disappear and radio will operate.
1997 Mazda MX-5 Miata
1997-98 ENGINES 1.8L 4-Cylinder
Microsoft
Sunday, July 05, 2009 1:55:15 PMPage 3 © 2005 Mitchell Repair Information Company, LLC.
Page 303 of 514
HEATER SYSTEM
1997 Heater System
DESCRIPTION & OPERATION
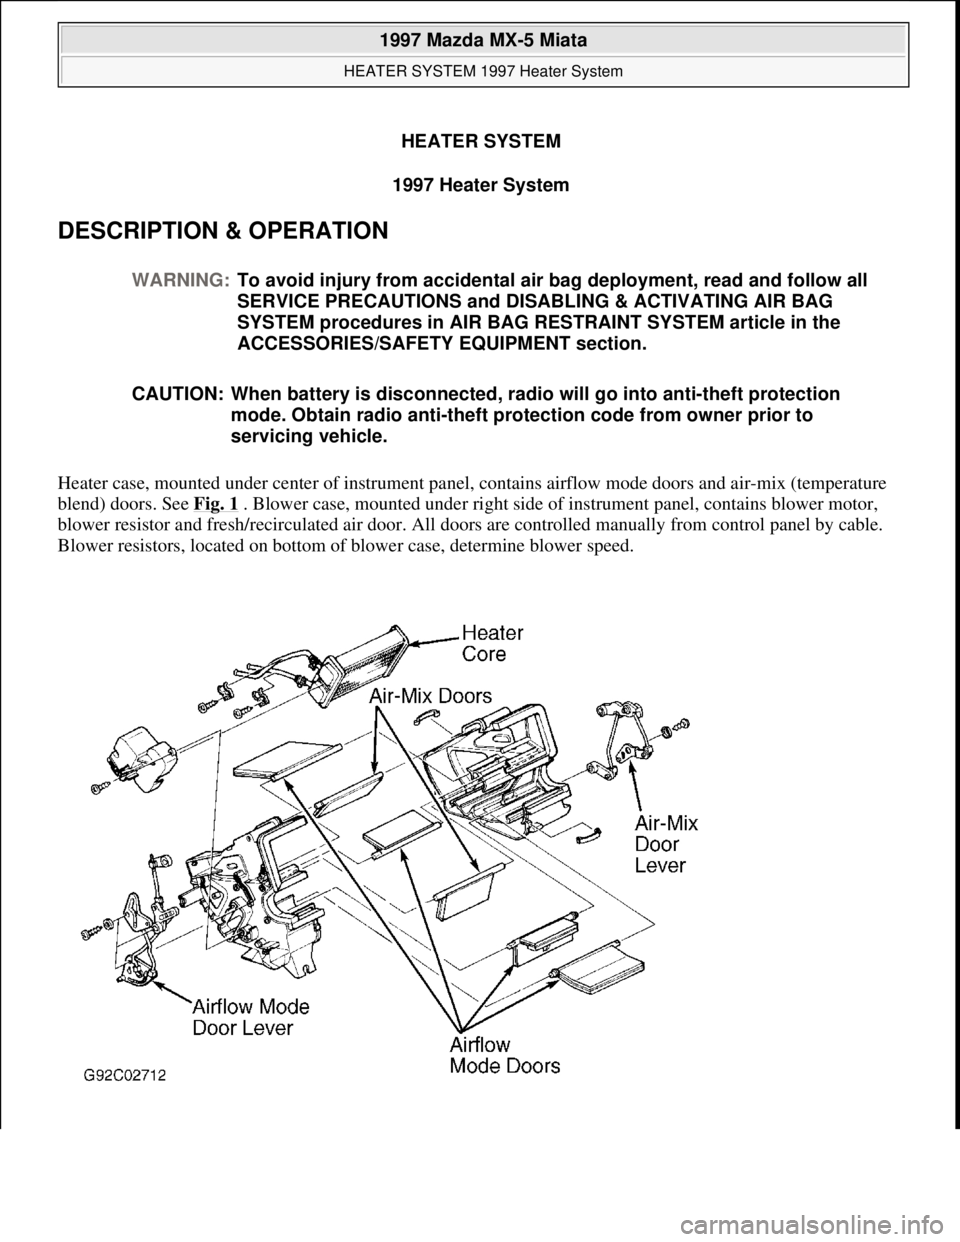
Heater case, mounted under center of instrument panel, contains airflow mode doors and air-mix (temperature
blend) doors. See Fig. 1
. Blower case, mounted under right side of instrument panel, contains blower motor,
blower resistor and fresh/recirculated air door. All doors are controlled manually from control panel by cable.
Blower resistors, located on bottom of blower case, determine blower speed. WARNING:To avoid injury from accidental air bag deployment, read and follow all
SERVICE PRECAUTIONS and DISABLING & ACTIVATING AIR BAG
SYSTEM procedures in AIR BAG RESTRAINT SYSTEM article in the
ACCESSORIES/SAFETY EQUIPMENT section.
CAUTION: When battery is disconnected, radio will go into anti-theft protection
mode. Obtain radio anti-theft protection code from owner prior to
servicing vehicle.
1997 Mazda MX-5 Miata
HEATER SYSTEM 1997 Heater System
1997 Mazda MX-5 Miata
HEATER SYSTEM 1997 Heater System
Microsoft
Sunday, July 05, 2009 1:46:56 PMPage 1 © 2005 Mitchell Repair Information Company, LLC.
Microsoft
Sunday, July 05, 2009 1:47:02 PMPage 1 © 2005 Mitchell Repair Information Company, LLC.
Page 307 of 514
Drain coolant. Disconnect heater hoses at engine compartment firewall. Remove grommets from holes (if
equipped). Remove instrument panel. See INSTRUMENT PANEL
. Remove heater unit. Disassemble heater
unit to remove heater core. See Fig. 1
. To install, reverse removal procedure. Fill cooling system.
INSTRUMENT PANEL
Removal & Installation
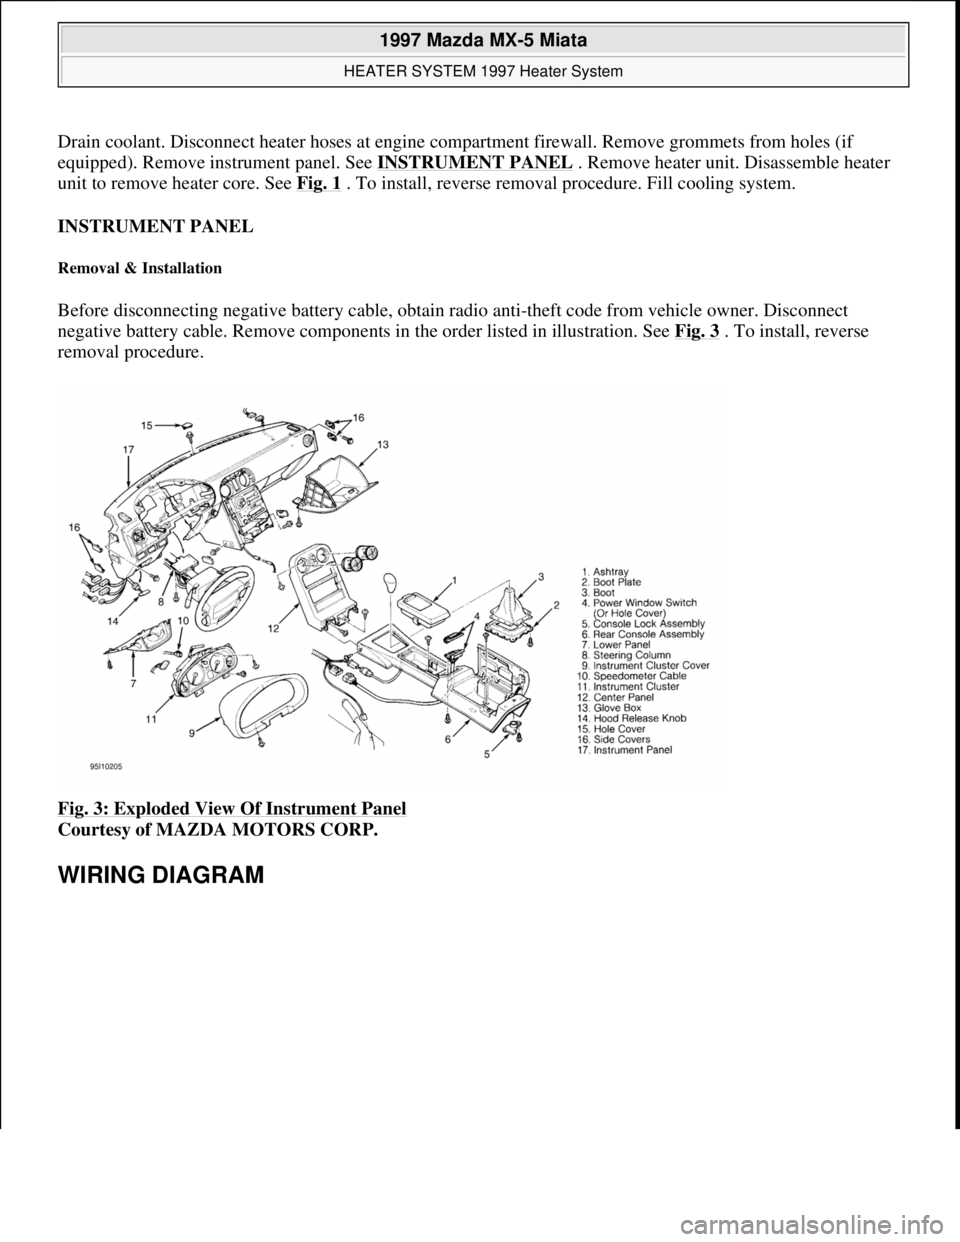
Before disconnecting negative battery cable, obtain radio anti-theft code from vehicle owner. Disconnect
negative battery cable. Remove components in the order listed in illustration. See Fig. 3
. To install, reverse
removal procedure.
Fig. 3: Exploded View Of Instrument Panel
Courtesy of MAZDA MOTORS CORP.
WIRING DIAGRAM
1997 Mazda MX-5 Miata
HEATER SYSTEM 1997 Heater System
Microsoft
Sunday, July 05, 2009 1:46:56 PMPage 5 © 2005 Mitchell Repair Information Company, LLC.
Page 310 of 514
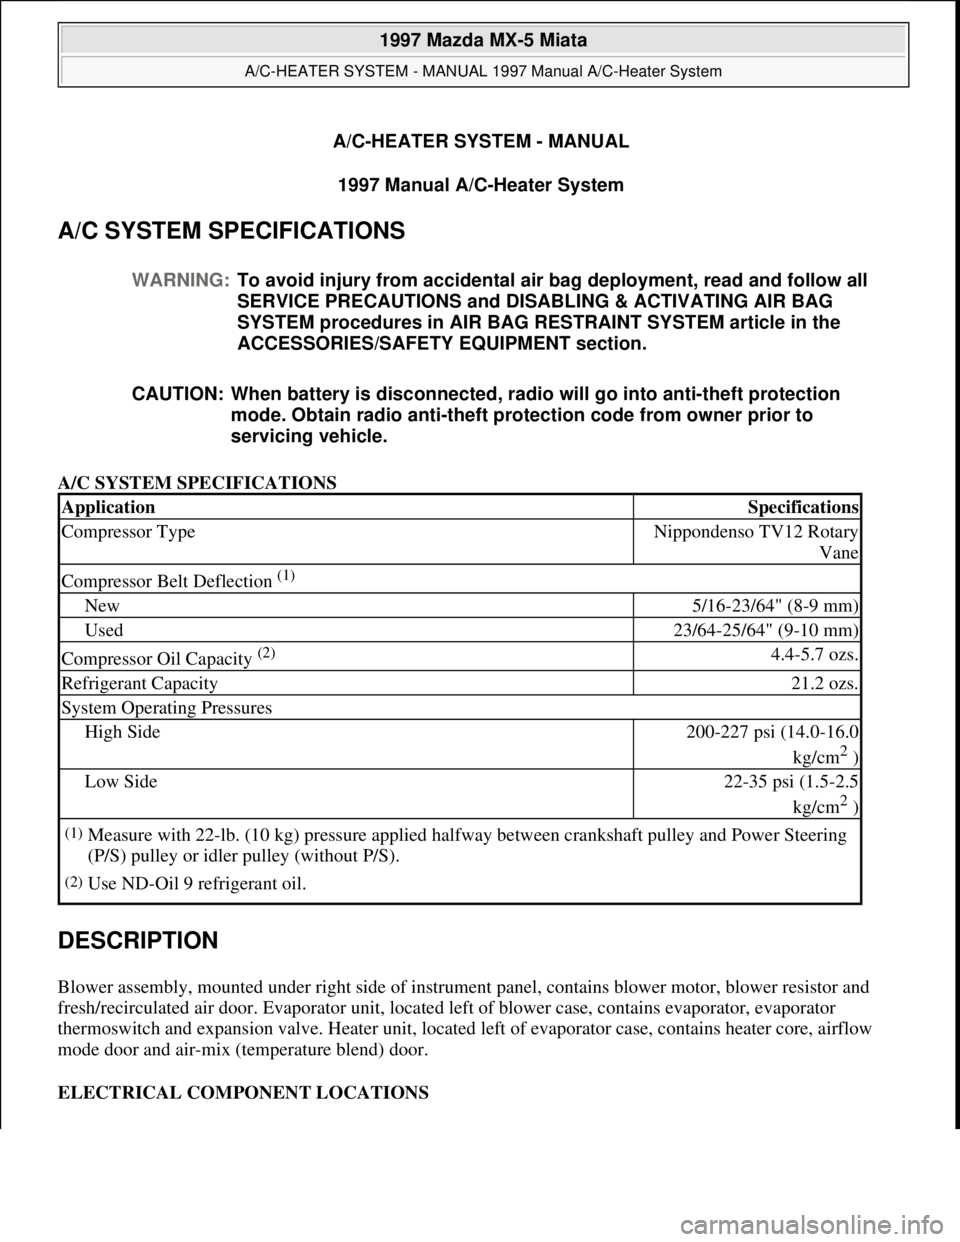
A/C-HEATER SYSTEM - MANUAL
1997 Manual A/C-Heater System
A/C SYSTEM SPECIFICATIONS
A/C SYSTEM SPECIFICATIONS
DESCRIPTION
Blower assembly, mounted under right side of instrument panel, contains blower motor, blower resistor and
fresh/recirculated air door. Evaporator unit, located left of blower case, contains evaporator, evaporator
thermoswitch and expansion valve. Heater unit, located left of evaporator case, contains heater core, airflow
mode door and air-mix (temperature blend) door.
ELECTRICAL COMPONENT LOCATIONS WARNING:To avoid injury from accidental air bag deployment, read and follow all
SERVICE PRECAUTIONS and DISABLING & ACTIVATING AIR BAG
SYSTEM procedures in AIR BAG RESTRAINT SYSTEM article in the
ACCESSORIES/SAFETY EQUIPMENT section.
CAUTION: When battery is disconnected, radio will go into anti-theft protection
mode. Obtain radio anti-theft protection code from owner prior to
servicing vehicle.
ApplicationSpecifications
Compressor TypeNippondenso TV12 Rotary
Vane
Compressor Belt Deflection (1)
New5/16-23/64" (8-9 mm)
Used23/64-25/64" (9-10 mm)
Compressor Oil Capacity (2) 4.4-5.7 ozs.
Refrigerant Capacity21.2 ozs.
System Operating Pressures
High Side200-227 psi (14.0-16.0
kg/cm
2 )
Low Side22-35 psi (1.5-2.5
kg/cm
2 )
(1)Measure with 22-lb. (10 kg) pressure applied halfway between crankshaft pulley and Power Steering
(P/S) pulley or idler pulley (without P/S).
(2)Use ND-Oil 9 refrigerant oil.
1997 Mazda MX-5 Miata
A/C-HEATER SYSTEM - MANUAL 1997 Manual A/C-Heater System
1997 Mazda MX-5 Miata
A/C-HEATER SYSTEM - MANUAL 1997 Manual A/C-Heater System
Microsoft
Sunday, July 05, 2009 1:41:48 PMPage 1 © 2005 Mitchell Repair Information Company, LLC.
Microsoft
Sunday, July 05, 2009 1:41:59 PMPage 1 © 2005 Mitchell Repair Information Company, LLC.
Page 316 of 514
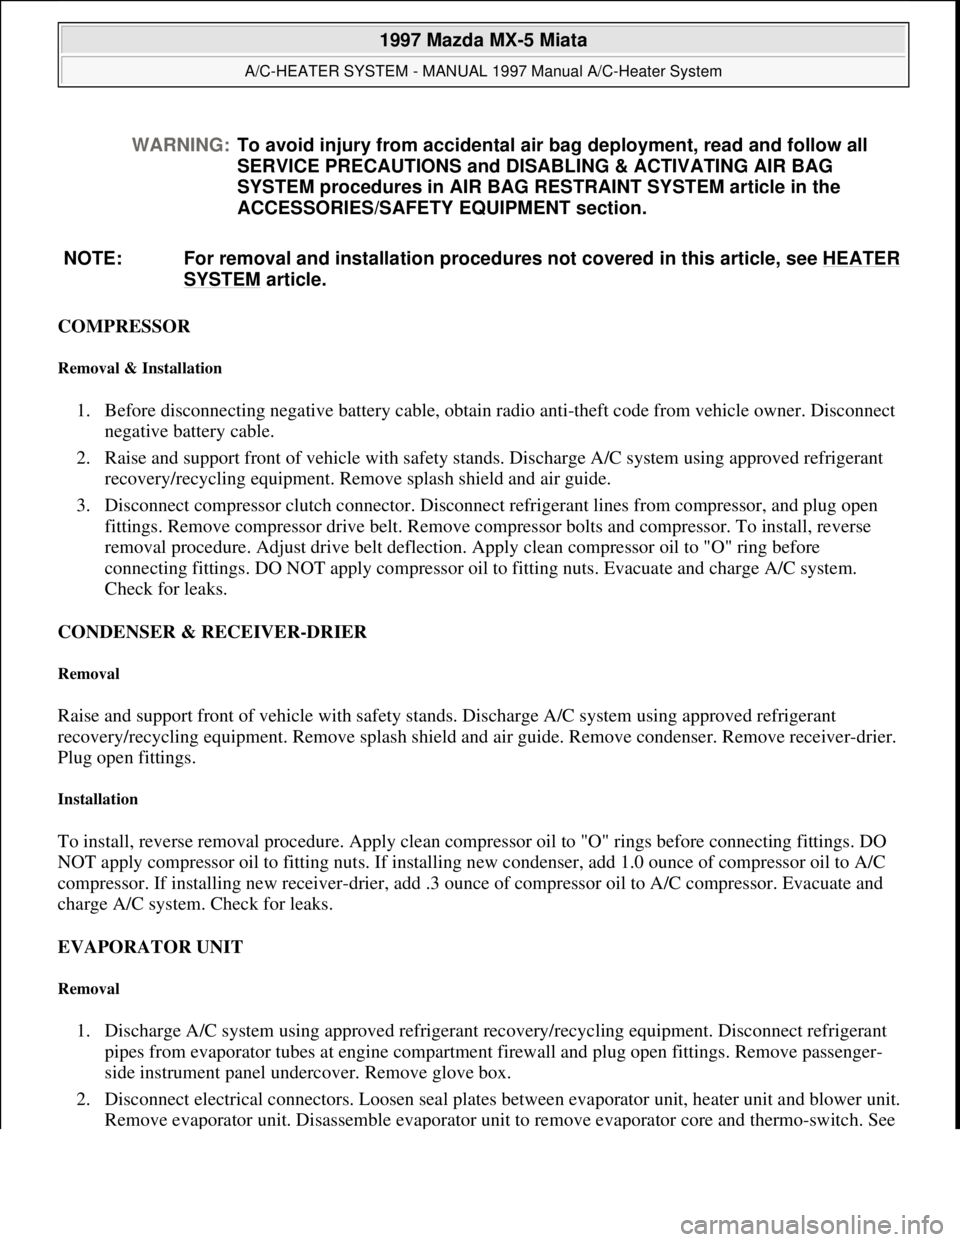
COMPRESSOR
Removal & Installation
1. Before disconnecting negative battery cable, obtain radio anti-theft code from vehicle owner. Disconnect
negative battery cable.
2. Raise and support front of vehicle with safety stands. Discharge A/C system using approved refrigerant
recovery/recycling equipment. Remove splash shield and air guide.
3. Disconnect compressor clutch connector. Disconnect refrigerant lines from compressor, and plug open
fittings. Remove compressor drive belt. Remove compressor bolts and compressor. To install, reverse
removal procedure. Adjust drive belt deflection. Apply clean compressor oil to "O" ring before
connecting fittings. DO NOT apply compressor oil to fitting nuts. Evacuate and charge A/C system.
Check for leaks.
CONDENSER & RECEIVER-DRIER
Removal
Raise and support front of vehicle with safety stands. Discharge A/C system using approved refrigerant
recovery/recycling equipment. Remove splash shield and air guide. Remove condenser. Remove receiver-drier.
Plug open fittings.
Installation
To install, reverse removal procedure. Apply clean compressor oil to "O" rings before connecting fittings. DO
NOT apply compressor oil to fitting nuts. If installing new condenser, add 1.0 ounce of compressor oil to A/C
compressor. If installing new receiver-drier, add .3 ounce of compressor oil to A/C compressor. Evacuate and
charge A/C system. Check for leaks.
EVAPORATOR UNIT
Removal
1. Discharge A/C system using approved refrigerant recovery/recycling equipment. Disconnect refrigerant
pipes from evaporator tubes at engine compartment firewall and plug open fittings. Remove passenger-
side instrument panel undercover. Remove glove box.
2. Disconnect electrical connectors. Loosen seal plates between evaporator unit, heater unit and blower unit.
Remove evaporator unit. Disassemble evaporator unit to remove evaporator core and thermo-switch. See WARNING:To avoid injury from accidental air bag deployment, read and follow all
SERVICE PRECAUTIONS and DISABLING & ACTIVATING AIR BAG
SYSTEM procedures in AIR BAG RESTRAINT SYSTEM article in the
ACCESSORIES/SAFETY EQUIPMENT section.
NOTE: For removal and installation procedures not covered in this article, see HEATER
SYSTEM article.
1997 Mazda MX-5 Miata
A/C-HEATER SYSTEM - MANUAL 1997 Manual A/C-Heater System
Microsoft
Sunday, July 05, 2009 1:41:48 PMPage 7 © 2005 Mitchell Repair Information Company, LLC.
Page 325 of 514
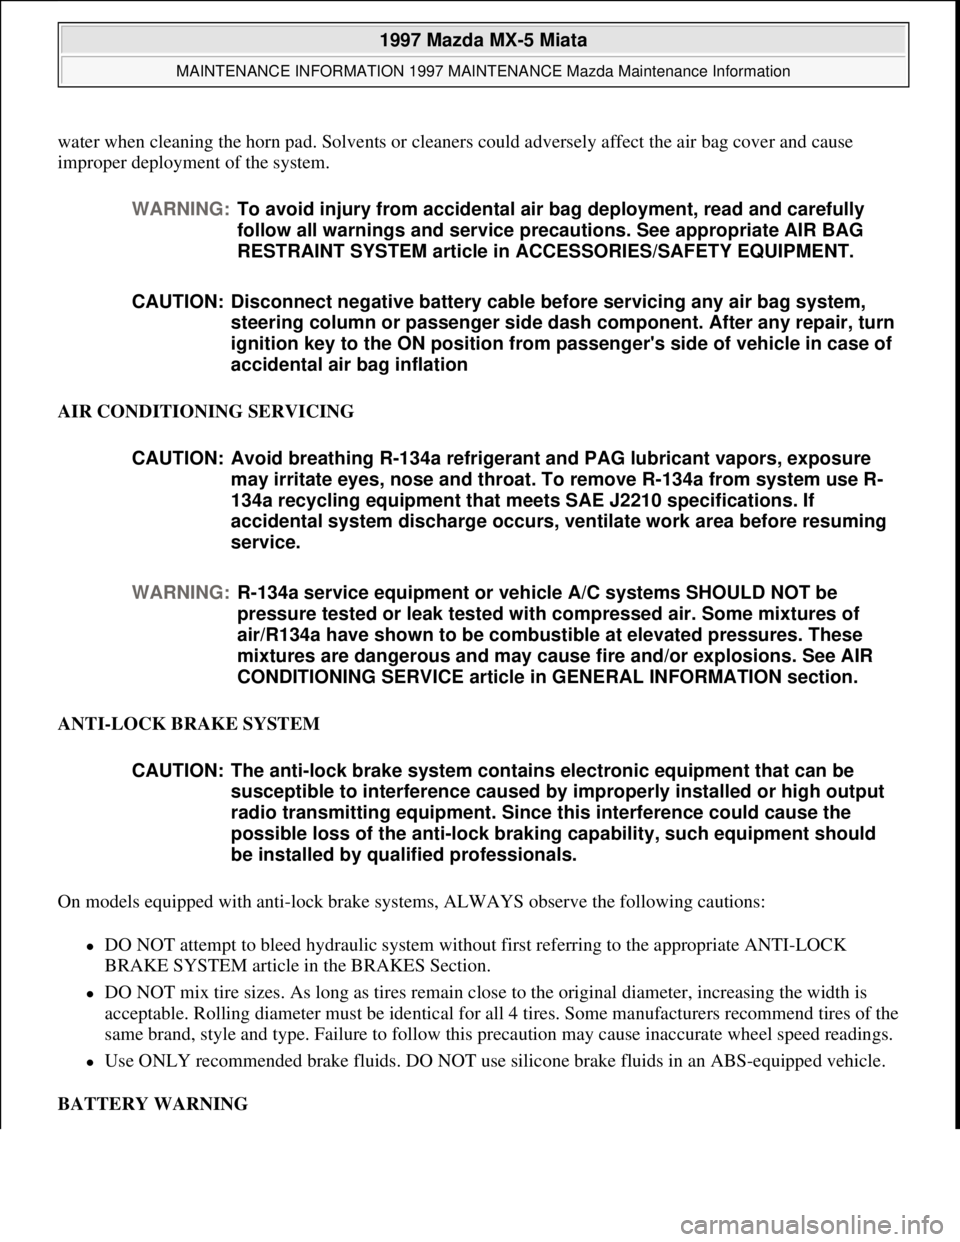
water when cleaning the horn pad. Solvents or cleaners could adversely affect the air bag cover and cause
improper deployment of the system.
AIR CONDITIONING SERVICING
ANTI-LOCK BRAKE SYSTEM
On models equipped with anti-lock brake systems, ALWAYS observe the following cautions:
DO NOT attempt to bleed hydraulic system without first referring to the appropriate ANTI-LOCK
BRAKE SYSTEM article in the BRAKES Section.
DO NOT mix tire sizes. As long as tires remain close to the original diameter, increasing the width is
acceptable. Rolling diameter must be identical for all 4 tires. Some manufacturers recommend tires of the
same brand, style and type. Failure to follow this precaution may cause inaccurate wheel speed readings.
Use ONLY recommended brake fluids. DO NOT use silicone brake fluids in an ABS-equipped vehicle.
BATTERY WARNING WARNING:To avoid injury from accidental air bag deployment, read and carefully
follow all warnings and service precautions. See appropriate AIR BAG
RESTRAINT SYSTEM article in ACCESSORIES/SAFETY EQUIPMENT.
CAUTION: Disconnect negative battery cable before servicing any air bag system,
steering column or passenger side dash component. After any repair, turn
ignition key to the ON position from passenger's side of vehicle in case of
accidental air bag inflation
CAUTION: Avoid breathing R-134a refrigerant and PAG lubricant vapors, exposure
may irritate eyes, nose and throat. To remove R-134a from system use R-
134a recycling equipment that meets SAE J2210 specifications. If
accidental system discharge occurs, ventilate work area before resuming
service.
WARNING:R-134a service equipment or vehicle A/C systems SHOULD NOT be
pressure tested or leak tested with compressed air. Some mixtures of
air/R134a have shown to be combustible at elevated pressures. These
mixtures are dangerous and may cause fire and/or explosions. See AIR
CONDITIONING SERVICE article in GENERAL INFORMATION section.
CAUTION: The anti-lock brake system contains electronic equipment that can be
susceptible to interference caused by improperly installed or high output
radio transmitting equipment. Since this interference could cause the
possible loss of the anti-lock braking capability, such equipment should
be installed by qualified professionals.
1997 Mazda MX-5 Miata
MAINTENANCE INFORMATION 1997 MAINTENANCE Mazda Maintenance Information
Microsoft
Sunday, July 05, 2009 1:41:19 PMPage 5 © 2005 Mitchell Repair Information Company, LLC.
Page 331 of 514
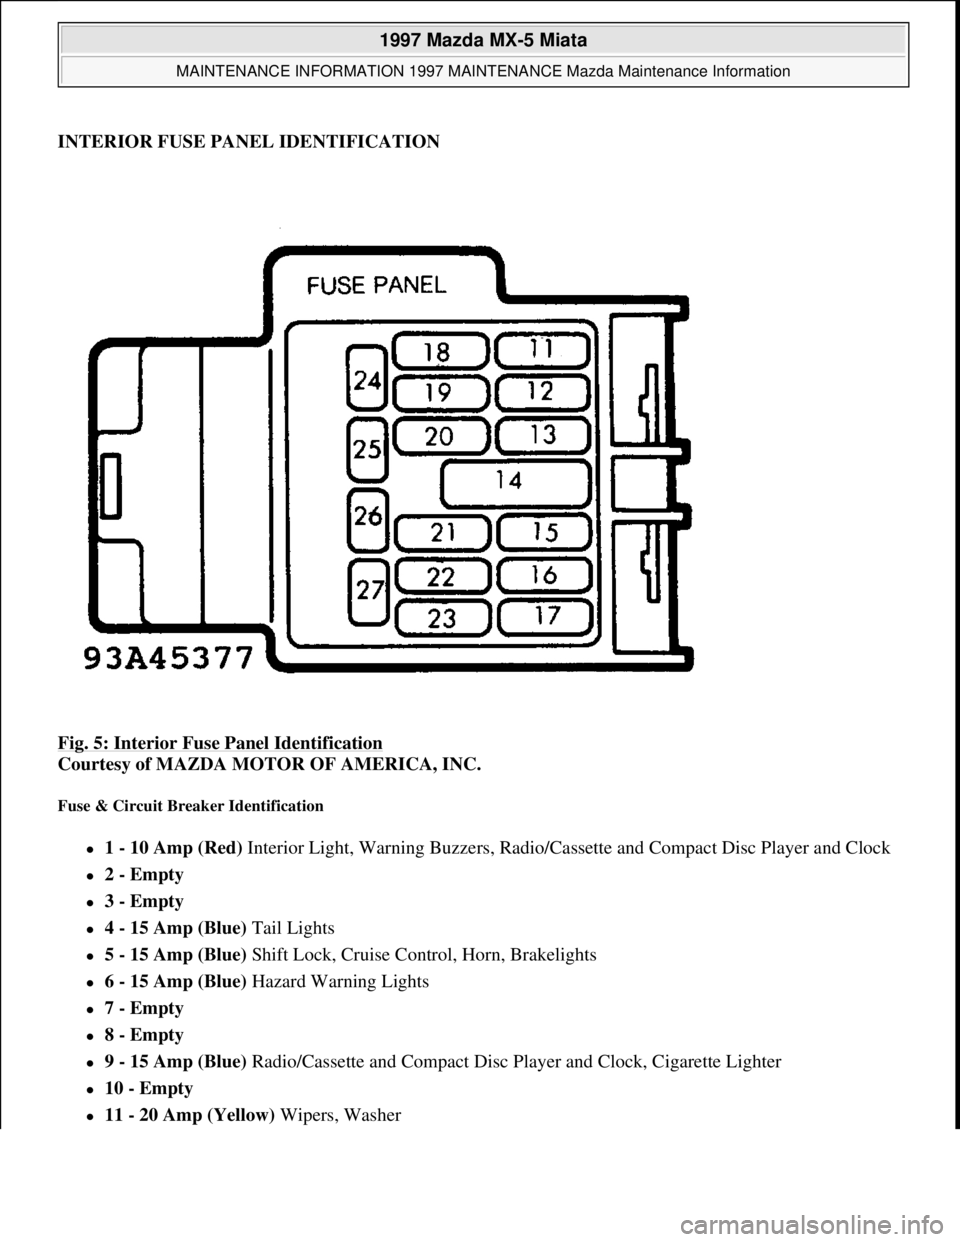
INTERIOR FUSE PANEL IDENTIFICATION
Fig. 5: Interior Fuse Panel Identification
Courtesy of MAZDA MOTOR OF AMERICA, INC.
Fuse & Circuit Breaker Identification
1 - 10 Amp (Red) Interior Light, Warning Buzzers, Radio/Cassette and Compact Disc Player and Clock
2 - Empty
3 - Empty
4 - 15 Amp (Blue) Tail Lights
5 - 15 Amp (Blue) Shift Lock, Cruise Control, Horn, Brakelights
6 - 15 Amp (Blue) Hazard Warning Lights
7 - Empty
8 - Empty
9 - 15 Amp (Blue) Radio/Cassette and Compact Disc Player and Clock, Cigarette Lighter
10 - Empty
11 - 20 Amp (Yellow) Wipers, Washer
1997 Mazda MX-5 Miata
MAINTENANCE INFORMATION 1997 MAINTENANCE Mazda Maintenance Information
Microsoft
Sunday, July 05, 2009 1:41:19 PMPage 11 © 2005 Mitchell Repair Information Company, LLC.
Page 399 of 514
STEERING COLUMN
1995-97 STEERING Mazda Motors Corp. - Steering Columns
DESCRIPTION & OPERATION
Steering columns are designed to be collapsible upon impact. The steering column consists of solid steering
shaft with a lower joint assembly. Some models are equipped with tilt steering. Turn signal, headlight, ignition
and windshield washer/wiper switches are mounted on column. Switches can be serviced by removing steering
wheel and column covers. All models are equipped with air bag restraint system consisting of an driver air bag
module, passenger air bag module (except 1995 MPV and 1995 Protege) and clockspring connector assembly
located in the steering column.
SYSTEM OPERATION CHECK
1. Turn ignition switch to ON or START position. AIR BAG warning light in instrument cluster should
illuminate for about 4-8 seconds, and then turn off. This indicates air bag system is functioning properly.
2. If any of the following conditions exists, air bag system is malfunctioning and requires servicing.
AIR BAG warning light does not illuminate as specified.
AIR BAG warning light remains illuminated for more than 8 seconds.
AIR BAG warning light illuminates while driving.
3. If air bag system components are replaced for any reason, air bag system must be checked for proper
function after repair. Repeat step 1). If AIR BAG warning light does not illuminate as specified, air bag
system is malfunctioning and servicing is required. See AIR BAG RESTRAINT SYSTEM article.
SERVICE PRECAUTIONS
Observe the following precautions when servicing air bag system.
Disable air bag system before servicing any air bag system or steering column component. See AIR BAG
DISABLING & ACTIVATING .
After disabling air bag system, wait at least one minute before servicing. Air bag system voltage is
maintained for approximately one minute after system is disabled. Failure to wait one minute before
servicing system may cause accidental air bag deployment and possible personal injury.
Obtain radio code number from customer and deactivate radio anti-theft function (if equipped) before
disconnecting battery.
Because of the critical operation requirements of system, DO NOT service any air bag system
component. Repairs are made by replacement only.
DO NOT use an ohmmeter to check resistance of air bag module, as it may cause air bag deployment.
When carrying a live (undeployed) air bag module, ensure trim cover is pointed away from your body. WARNING:To avoid injury from accidental air bag deployment, read and carefully
follow all WARNINGS and SERVICE PRECAUTIONS
.
1997 Mazda MX-5 Miata
STEERING COLUMN 1995-97 STEERING Mazda Motors Corp. - Steering Columns
1997 Mazda MX-5 Miata
STEERING COLUMN 1995-97 STEERING Mazda Motors Corp. - Steering Columns
Microsoft
Sunday, July 05, 2009 1:40:02 PMPage 1 © 2005 Mitchell Repair Information Company, LLC.
Microsoft
Sunday, July 05, 2009 1:40:07 PMPage 1 © 2005 Mitchell Repair Information Company, LLC.
Page 400 of 514
This minimizes chance of injury in the event of accidental air bag deployment.
When placing a live air bag module on any surface, always face trim cover upward to reduce motion of
module if it is accidentally deployed.
If an open circuit is present, replace entire wiring harness. DO NOT attempt to repair wire(s).
Air bag system clockspring MUST be aligned in neutral position, since its rotation ability is limited. DO
NOT turn steering wheel or column after removal of steering gear.
A double-lock mechanism is used on clockspring connectors. DO NOT use excessive force when
disconnecting connectors, as damage to connector may occur.
AIR BAG DISABLING & ACTIVATING
DISABLING SYSTEM (MIATA, MILLENIA, MPV, MX-6, PROTEGE & 626)
1. Obtain radio code from customer and deactivate audio anti-theft function (if equipped). Turn ignition off.
Disconnect and shield negative battery cable. Wait at least one minute for back-up power supply to be
depleted. Remove lower cover panel(s) below left side of instrument panel.
2. On MPV, remove lower steering column shroud. On all models, disconnect Orange and Blue clockspring
connectors for driver air bag module. See Fig. 1
. On all models except 1995 Protege and 1995 MPV,
remove glove box compartment. Disconnect Orange and Blue connectors for passenger air bag module.
See Fig. 2
.
ACTIVATING SYSTEM (MIATA, MILLENIA, MPV, MX-6, PROTEGE & 626)
1. Ensure negative battery cable is still disconnected. On all models except 1995 Protege and 1995 MPV,
reconnect Orange and Blue connector for passenger air bag module. Install glove box compartment.
2. On all models, reconnect Orange and Blue clockspring connectors for driver air bag module. Install lower
cover panel(s). On MPV, install lower steering column shroud. On all models, reconnect negative battery
cable.
3. Turn ignition on. Check AIR BAG warning light to ensure air bag system is operating properly. See
SYSTEM OPERATION CHECK
. Activate audio anti-theft function (if equipped).
DISABLING SYSTEM (MX-3, RX7 & 929)
1. Obtain radio code from customer and deactivate audio anti-theft function. Turn ignition off. Disconnect
and shield ne
gative battery cable. Wait at least one minute for back-up power supply to be depleted. WARNING:Wait about one minute after disabling air bag system before servicing. Air
bag system voltage is maintained for about one minute after system is
disabled. Failure to wait one minute before servicing system may cause
accidental air bag deployment and possible personal injury.
CAUTION: When battery is disconnected, vehicle computer and memory systems
may lose memory data. Driveability problems may exist until computer
systems have completed a relearn cycle.
1997 Mazda MX-5 Miata
STEERING COLUMN 1995-97 STEERING Mazda Motors Corp. - Steering Columns
Microsoft
Sunday, July 05, 2009 1:40:02 PMPage 2 © 2005 Mitchell Repair Information Company, LLC.