fuse MERCEDES-BENZ AMG GT ROADSTER 2016 Owners Manual
[x] Cancel search | Manufacturer: MERCEDES-BENZ, Model Year: 2016, Model line: AMG GT ROADSTER, Model: MERCEDES-BENZ AMG GT ROADSTER 2016Pages: 289, PDF Size: 5.97 MB
Page 6 of 289
Breakdown assistance
.....................244
Where will I find...? .............................. 244
Flat tyre ............................................... 247
Battery (vehicle) .................................. 250
Jump-starting ....................................... 253
Towing away and tow-starting ............. 256
Fuses ................................................... 259 Wheels and tyres
.............................. 261
Important safety notes ........................ 261
Operation ............................................ 261
Winter operation .................................. 263
Tyre pressure ....................................... 264
Changing a wheel ................................ 267
Wheel and tyre combinations .............. 272
Emergency spare wheel ....................... 273 Technical data
................................... 275
Information on technical data .............. 275
Vehicle electronics .............................. 275
Identification plates ............................. 276
Service products and capacities .......... 277
Vehicle data ......................................... 281 Contents
3
Page 14 of 289
Opening ......................................... 118
Problem (malfunction) ...................1
19
Fuel level
Calling up the range (on-board
computer) ...................................... 158
Gauge .............................................. 29
Fuel tank
Capacity ........................................ 278
Problem (malfunction) ................... 119
Fuses
Allocation chart ............................ .260
Before changing ............................ .259
Fuse box in the front-passenger
footwell .......................................... 259
Fuse box in the luggage compart-
ment .............................................. 260
Important safety notes .................. 259 G
G-Meter (on-board computer) .......... 167
Garage door opener
Clearing the memory ..................... 227
Frequencies ................................... 228
General notes ................................ 225
Important safety notes .................. 226
Opening/closing the garage door .. 227
Problems when programming ....... .227
Programming (button in the rear-
view mirror) ................................... 226
Synchronising the rolling code ....... 226
Gear indicator (on-board com-
puter) ................................................. .167
Gearshift paddles
see Steering wheel gearshift paddles
Gearshift program
SETUP (on-board computer) .......... 168
Genuine Mercedes-Benz parts ........... 22
Glove compartment .......................... 218
Google™ Local Search
See also Digital Owner's Manual ... 205 H
Handwriting recognition Switching text reader function
on/off ............................................ 207
Touchpad ....................................... 207 Hazard warning lamps
........................ 90
Head restraints
Adjusting ......................................... 80
Headlamp
Cleaning system (notes) ................ 280
Headlamp flasher ................................ 89
Headlamps
Misting up ........................................ 91
see Automatic headlamp mode
Heating
see Climate control
High-pressure cleaners .................... 239
Hill start assist .................................. 104
HOLD function
Activating ....................................... 138
Deactivating ................................... 138
Display message ............................ 187
Function/notes ............................ .138
Home address
See also Digital Owner's Manual ... 205
Horn ...................................................... 27 I
Ignition lock see Key positions
Immobiliser .......................................... 60
Indicator and warning lamp
Restraint system ............................ 199
Indicator and warning lamps
COLLISION PREVENTION ASSIST
PLUS .............................................. 202
Coolant .......................................... 200
Engine diagnostics ......................... 200
SPORT handling mode ................... 199
Indicator lamps
Display message ............................ 182
see Warning and indicator lamps
Indicators
see Turn signals
Instrument cluster
Overview .......................................... 29
Warning and indicator lamps ........... 29
Instrument cluster lighting .............. 165
Interior lighting
Automatic control system ................ 91
General notes .................................. 91
Overview .......................................... 91 Index
11
Page 137 of 289
right lane in the case of left-side traffic or the
left lane in the case of right-side traffic.
Vehicles with Audio 20: when you change
lanes, DISTRONIC PLUS monitors the left lane on left-hand-drive vehicles or the right lane onright-hand-drive vehicles.
Stopping G
WARNING
When leaving the vehicle, even if it is braked
only by DISTRONIC PLUS, it could roll away if:
R there is a malfunction in the system or in
the voltage supply.
R DISTRONIC PLUS has been deactivated
with the cruise control lever, e.g. by a vehi-
cle occupant or from outside the vehicle.
R the electrical system in the engine com-
partment, the battery or the fuses have
been tampered with.
R the battery is disconnected.
R the accelerator pedal has been depressed,
e.g. by a vehicle occupant.
There is a risk of an accident.
If you wish to exit the vehicle, always turn off
DISTRONIC PLUS and secure the vehicle
against rolling away.
Further information on deactivating DISTRONIC PLUS (Y page 135).
If DISTRONIC PLUS detects that the vehicle in
front is stopping, it brakes your vehicle until it is stationary.
Once your vehicle is stationary, it remains sta-
tionary and you do not need to depress the
brake.
i After a short period, the vehicle is secured
by the electric parking brake, thus relieving
the service brake.
i Depending on the specified minimum dis-
tance, your vehicle will come to a standstill at
a sufficient distance behind the vehicle in
front. The specified minimum distance is set
using the control on the cruise control lever. The electric parking brake secures the vehicle
automatically if DISTRONIC PLUS is activated
when the vehicle is stationary and:
R the driver's seat belt is not fastened and the
driver's door is open
R the engine is switched off, unless it is auto-
matically switched off by the ECO start/stop
function
R a system fault occurs
R the power supply is insufficient
If a fault occurs, the transmission may also shift
to position Pautomatically.
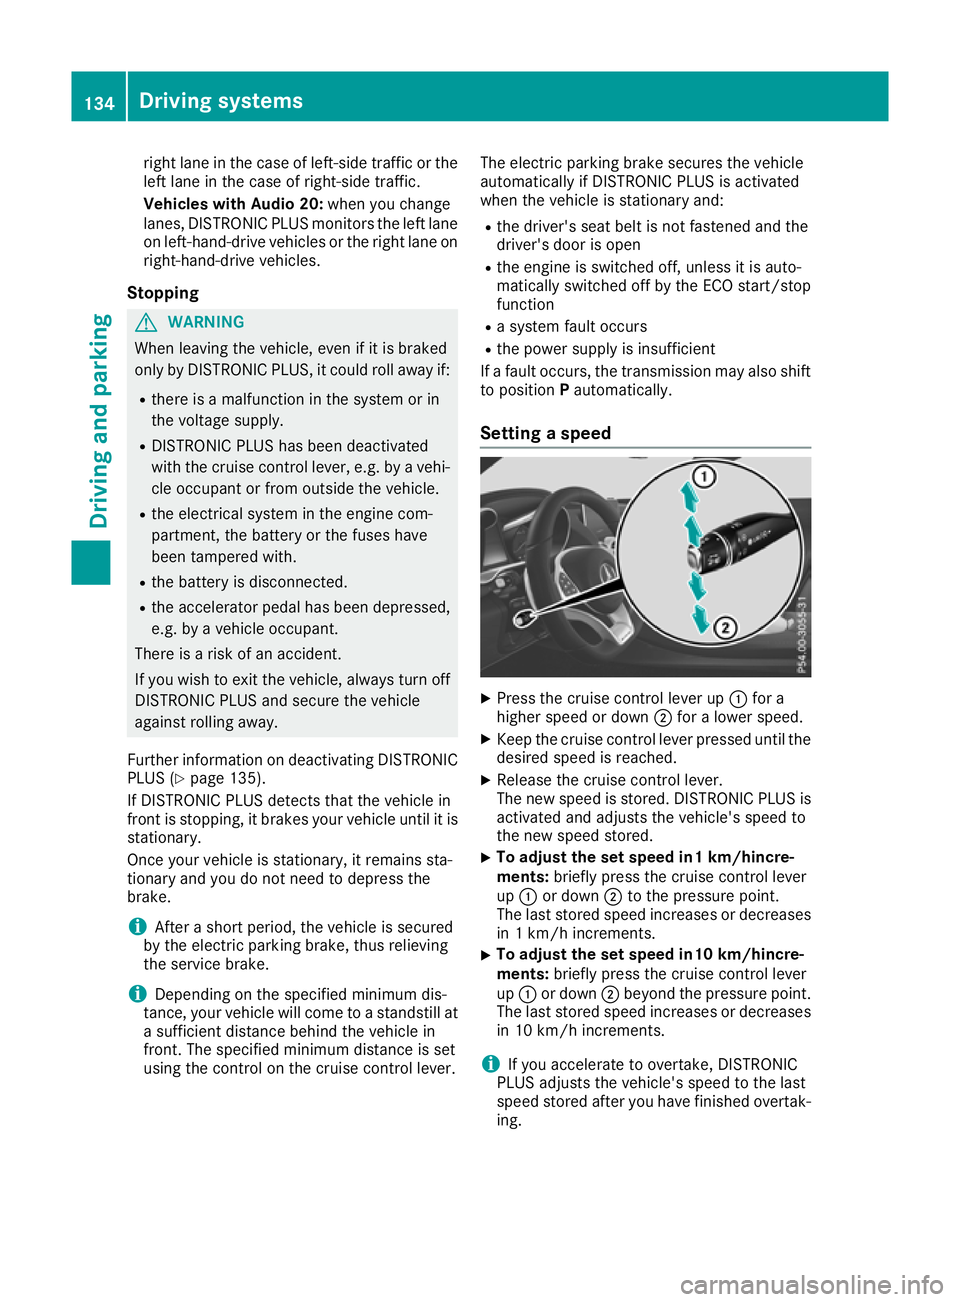
Setting a speed X
Press the cruise control lever up :for a
higher speed or down ;for a lower speed.
X Keep the cruise control lever pressed until the
desired speed is reached.
X Release the cruise control lever.
The new speed is stored. DISTRONIC PLUS is
activated and adjusts the vehicle's speed to
the new speed stored.
X To adjust the set speed in1 km/hincre-
ments:
briefly press the cruise control lever
up : or down ;to the pressure point.
The last stored speed increases or decreases in 1 km/h increments.
X To adjust the set speed in10 km/hincre-
ments: briefly press the cruise control lever
up : or down ;beyond the pressure point.
The last stored speed increases or decreases in 10 km/h increments.
i If you accelerate to overtake, DISTRONIC
PLUS adjusts the vehicle's speed to the last
speed stored after you have finished overtak-
ing. 134
Driving systemsDriving and parking
Page 141 of 289
DISTRONIC PLUS at traffic lights with crossing
traffic, for example, could cause your vehicle to pull away unintentionally. HOLD
General notes The HOLD function can assist the driver in the
following situations:
R when pulling away, especially on steep slopes
R when manoeuvring on steep slopes
R when waiting in traffic
The vehicle is kept stationary without the driver having to depress the brake pedal.
The braking effect is cancelled and the HOLD
function deactivated when you depress the
accelerator pedal to pull away.
Important safety notes G
WARNING
When leaving the vehicle, it can still roll away despite being braked by the HOLD function if:
R there is a malfunction in the system or in
the voltage supply
R the HOLD function is deactivated by the
accelerator pedal being depressed, e.g. by
a vehicle occupant
R the electrical system in the engine com-
partment, the battery or the fuses are tam-
pered with
R the battery is disconnected
There is a risk of an accident.
Before leaving the vehicle, always deactivate
the HOLD function and secure the vehicle
from rolling away.
! When DISTRONIC PLUS or the HOLD func-
tion is activated, the vehicle brakes automat- ically in certain situations.
To avoid damage to the vehicle, deactivate
DISTRONIC PLUS and the HOLD function in
the following or similar situations:
R when towing away
R in a car wash
Deactivating the HOLD function (Y page 138).Activation conditions You can activate the HOLD function if:
R the vehicle is stationary
R the engine is running or if it has been auto-
matically switched off by the ECO start/stop
function
R the driver's door is closed or if your seat belt
is fastened
R the electric parking brake is released
R the transmission is in position D,Ror N
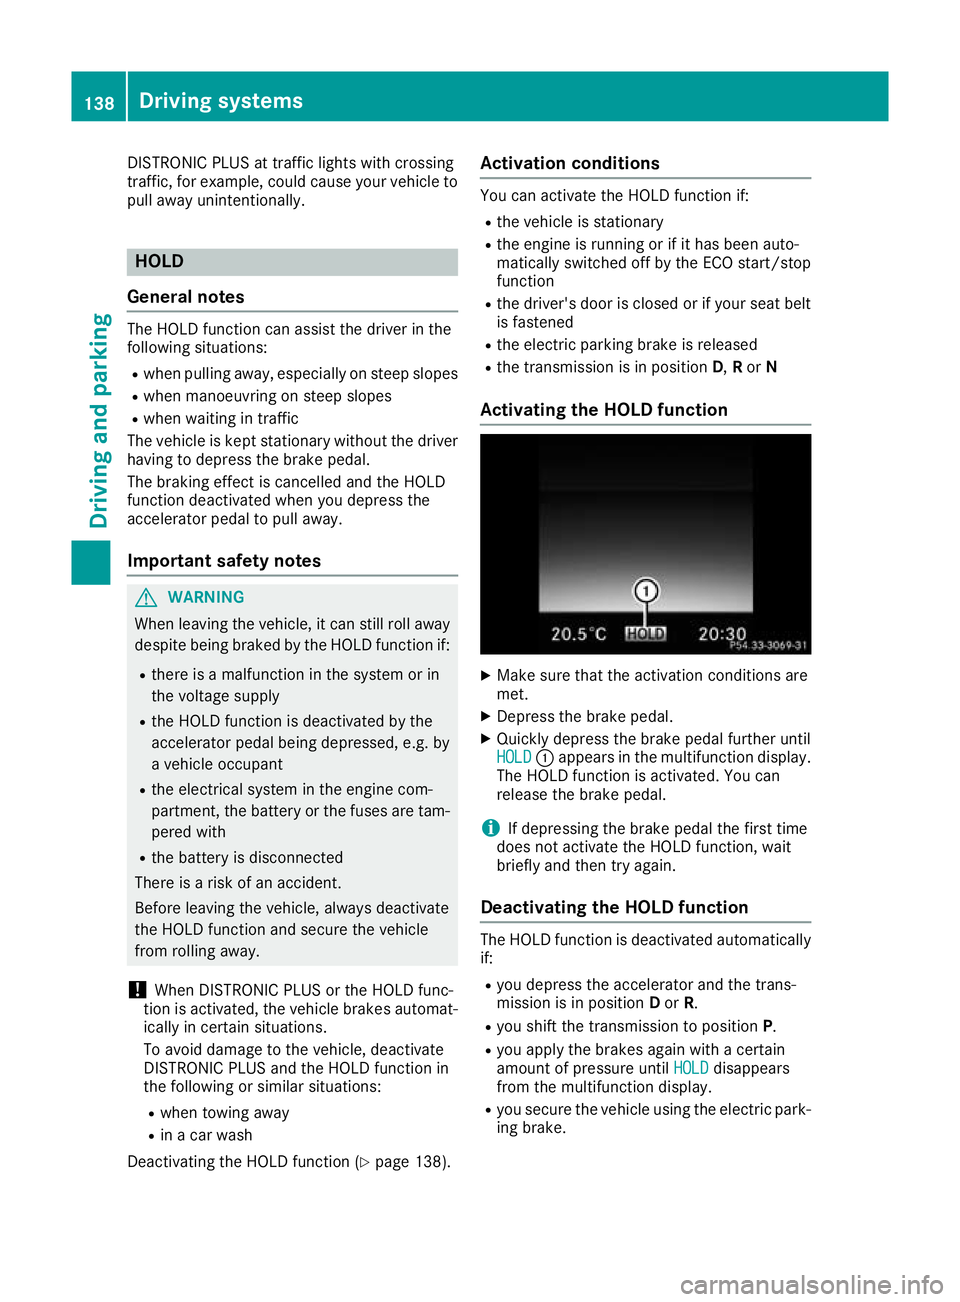
Activating the HOLD function X
Make sure that the activation conditions are
met.
X Depress the brake pedal.
X Quickly depress the brake pedal further until
HOLD HOLD :appears in the multifunction display.
The HOLD function is activated. You can
release the brake pedal.
i If depressing the brake pedal the first time
does not activate the HOLD function, wait
briefly and then try again.
Deactivating the HOLD function The HOLD function is deactivated automatically
if:
R you depress the accelerator and the trans-
mission is in position Dor R.
R you shift the transmission to position P.
R you apply the brakes again with a certain
amount of pressure until HOLD HOLDdisappears
from the multifunction display.
R you secure the vehicle using the electric park-
ing brake. 138
Driving systemsDriving an
d parking
Page 212 of 289
Important climate control functions can be set
in the climate control bar:
R Temperature
R Airflow
R Air distribution
The climate control bar is visible in most dis-
plays.
You can find all available climate control func-
tions in the climate control menu. You can use
the climate control bar to switch to the climate
control menu.
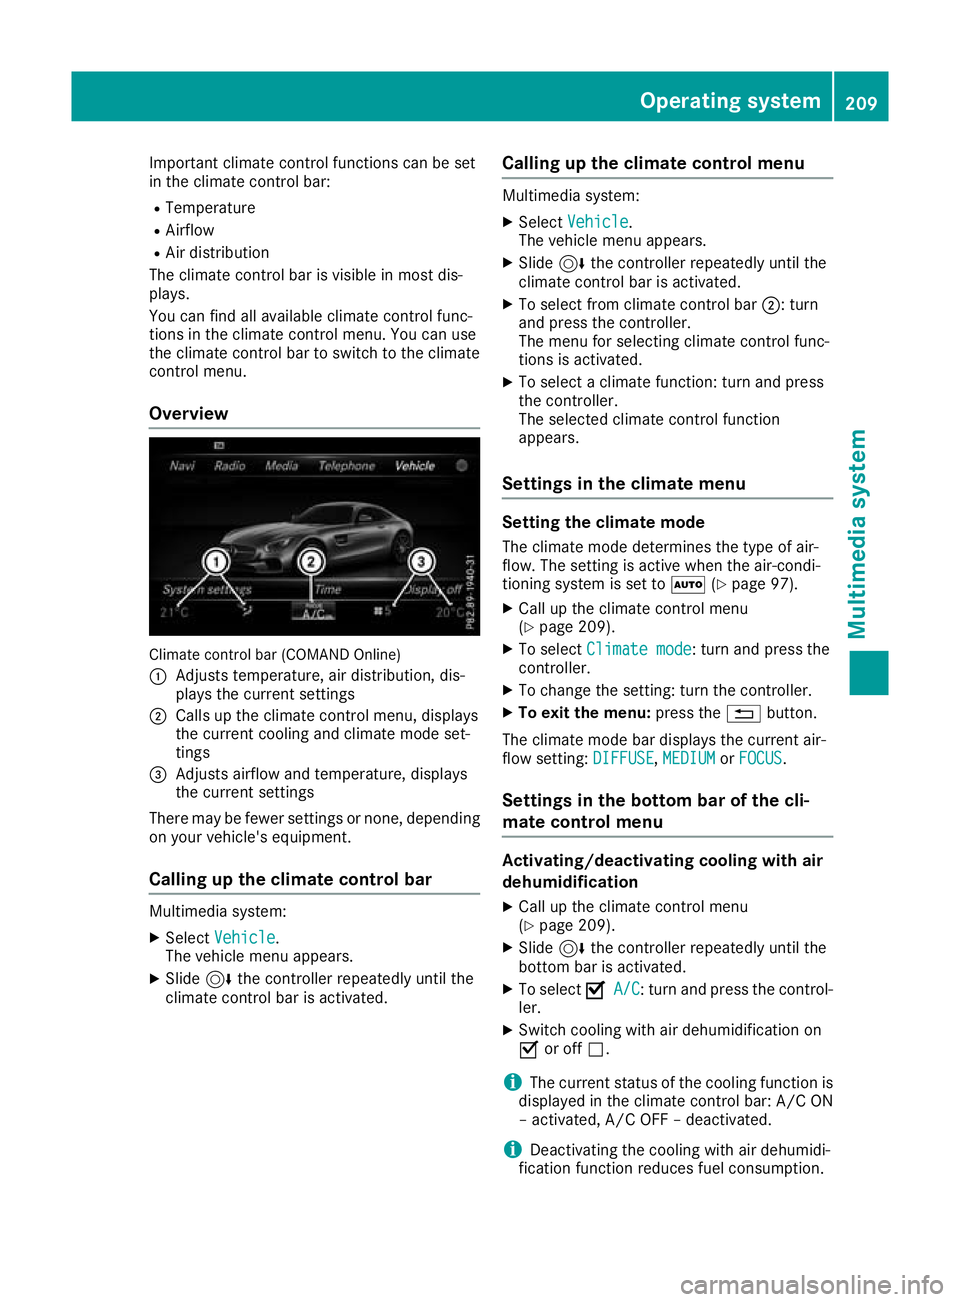
Overview Climate control bar (COMAND Online)
: Adjusts temperature, air distribution, dis-
plays the current settings
; Calls up the climate control menu, displays
the current cooling and climate mode set-
tings
= Adjusts airflow and temperature, displays
the current settings
There may be fewer settings or none, depending
on your vehicle's equipment.
Calling up the climate control bar Multimedia system:
X Select Vehicle Vehicle.
The vehicle menu appears.
X Slide 6the controller repeatedly until the
climate control bar is activated. Calling up the climate control menu Multimedia system:
X Select Vehicle
Vehicle.
The vehicle menu appears.
X Slide 6the controller repeatedly until the
climate control bar is activated.
X To select from climate control bar ;: turn
and press the controller.
The menu for selecting climate control func-
tions is activated.
X To select a climate function: turn and press
the controller.
The selected climate control function
appears.
Settings in the climate menu Setting the climate mode
The climate mode determines the type of air-
flow. The setting is active when the air-condi-
tioning system is set to Ã(Ypage 97).
X Call up the climate control menu
(Y page 209).
X To select Climate mode Climate mode: turn and press the
controller.
X To change the setting: turn the controller.
X To exit the menu: press the%button.
The climate mode bar displays the current air-
flow setting: DIFFUSE
DIFFUSE, MEDIUM MEDIUMorFOCUS
FOCUS.
Settings in the bottom bar of the cli-
mate control menu Activating/deactivating cooling with air
dehumidification
X Call up the climate control menu
(Y page 209).
X Slide 6the controller repeatedly until the
bottom bar is activated.
X To select O OA/C
A/C: turn and press the control-
ler.
X Switch cooling with air dehumidification on
O or off ª.
i The current status of the cooling function is
displayed in the climate control bar: A/C ON
– activated, A/C OFF – deactivated.
i Deactivating the cooling with air dehumidi-
fication function reduces fuel consumption. Operating system
209Multimedia system Z
Page 262 of 289
Tow-starting (emergency engine
starting)
! Do not tow-start vehicles with automatic
transmission. You could otherwise damage
the automatic transmission.
i You can find information on "Jump-starting"
under (Y page 253). Fuses
Important safety notes
G
WARNING
If you manipulate, bridge or replace a faulty
fuse with a fuse of a higher amperage, the
electric cables could be overloaded. This may result in a fire. There is a risk of an accident
and injury.
Always replace faulty fuses with specified new fuses of the correct amperage.
Blown fuses must be replaced with fuses of the same rating, which you can recognise by the
colour and fuse rating. The fuse ratings are listed
in the fuse allocation chart.
The fuse allocation chart is on the fuse box in the luggage compartment (Y page 260).
If the newly inserted fuse also blows, have the
cause traced and rectified at a qualified special-
ist workshop, e.g. a Mercedes-Benz Service
Centre.
! Only use fuses that have been approved for
Mercedes-Benz vehicles and which have the
correct fuse rating for the system concerned.
Otherwise, components or systems could be
damaged.
! Make sure that no moisture can enter the
fuse box when the cover is open.
! When closing the cover, make sure that it is
lying correctly on the fuse box. Moisture seep-
ing in or dirt could otherwise impair the oper- ation of the fuses.
The fuses in your vehicle disconnect faulty cir-
cuits. If a fuse blows, all the components on the circuit and their functions will fail. Before replacing a fuse
X Switch off the engine.
X Switch off all electrical consumers.
X Open the driver's door.
The on-board electronics now have status 0.
This is the same as the key having been
removed.
or, if the key is inserted in the ignition lock: X Remove the key from the ignition lock.
X Safeguard the vehicle against rolling away
(Y page 119).
All indicator lamps in the instrument cluster
must be off. Fuse box in the front-passenger foot-
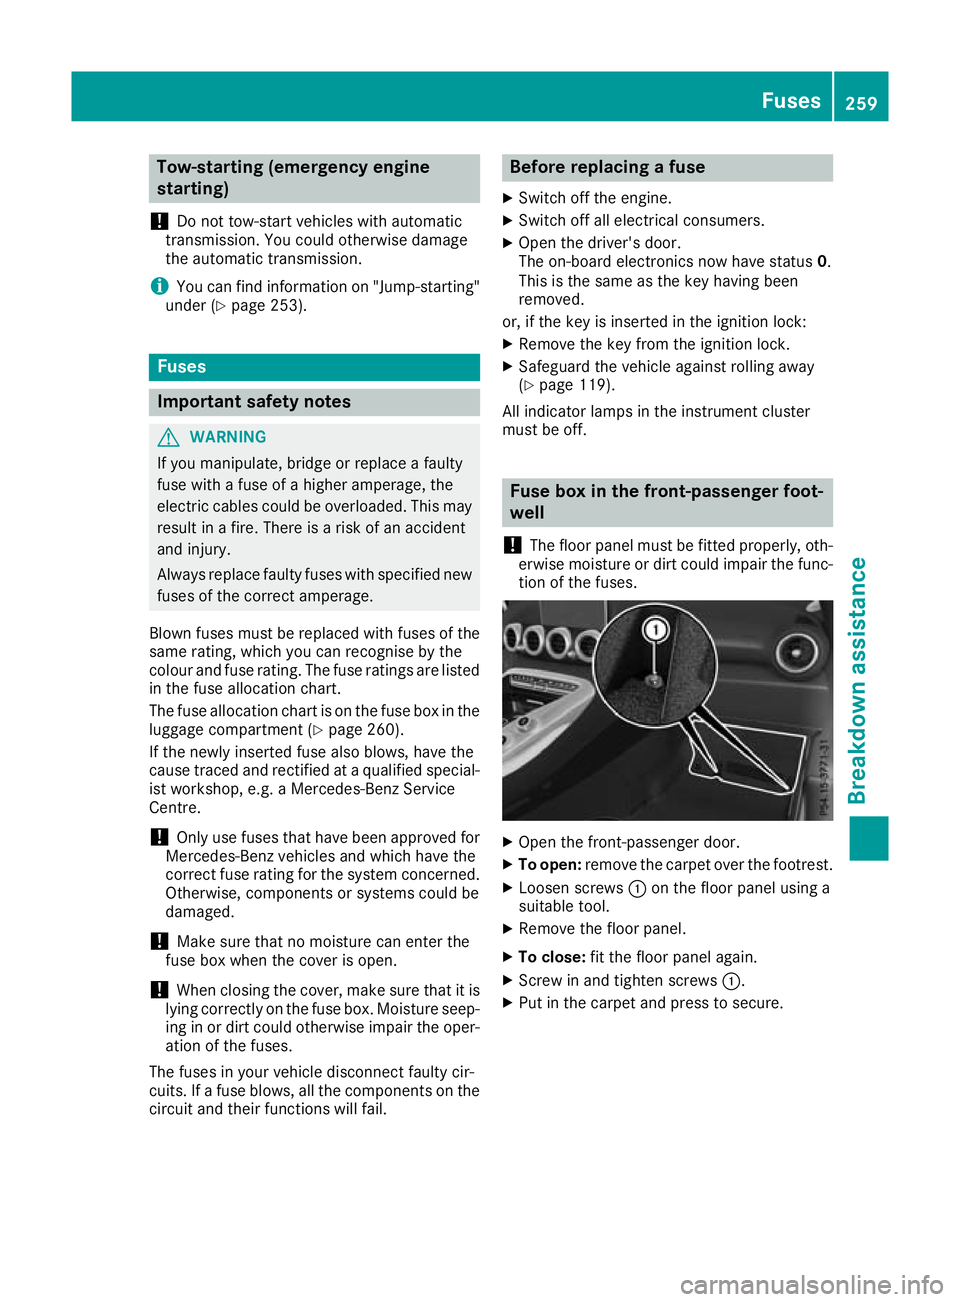
well
! The floor panel must be fitted properly, oth-
erwise moisture or dirt could impair the func- tion of the fuses. X
Open the front-passenger door.
X To open: remove the carpet over the footrest.
X Loosen screws :on the floor panel using a
suitable tool.
X Remove the floor panel.
X To close: fit the floor panel again.
X Screw in and tighten screws :.
X Put in the carpet and press to secure. Fuses
259Breakdown assistance Z
Page 263 of 289
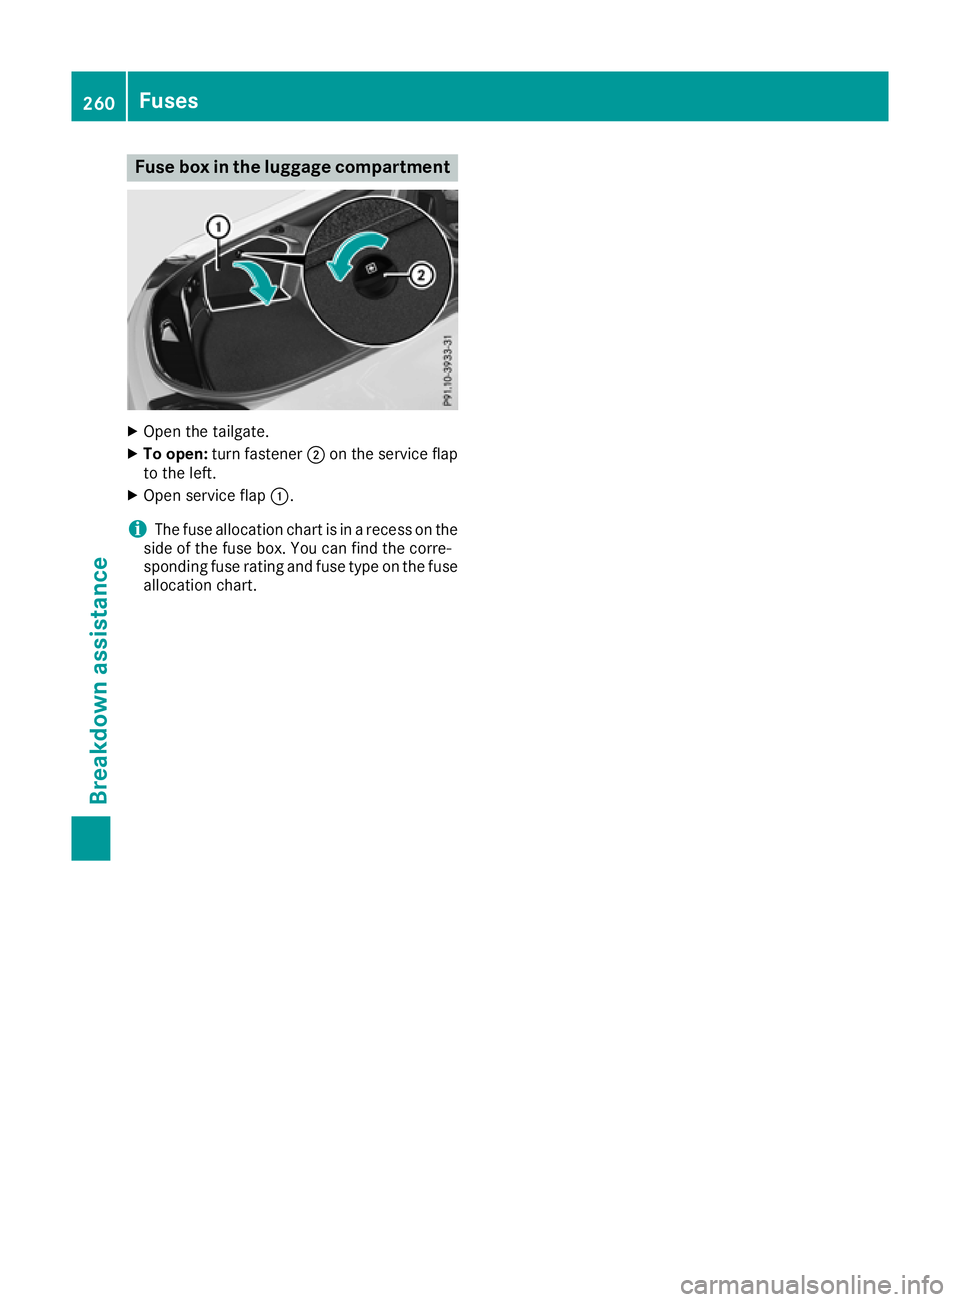
Fuse box in the luggage compartment
X
Open the tailgate.
X To open: turn fastener ;on the service flap
to the left.
X Open service flap :.
i The fuse allocation chart is in a recess on the
side of the fuse box. You can find the corre-
sponding fuse rating and fuse type on the fuse
allocation chart. 260
FusesBreakdown assistance