trailer MERCEDES-BENZ AMG GT ROADSTER 2016 Owners Manual
[x] Cancel search | Manufacturer: MERCEDES-BENZ, Model Year: 2016, Model line: AMG GT ROADSTER, Model: MERCEDES-BENZ AMG GT ROADSTER 2016Pages: 289, PDF Size: 5.97 MB
Page 21 of 289
Connecting a Mobile phone (gen-
eral information) ............................ 211
Display message ............................ 193
Introduction ..................................
.162
Menu (on-board computer) ............ 162
Number from the phone book ....... .163
Redialling ....................................... 163
Rejecting/ending a call ................. 163
See also Digital Owner's Manual ... 205
Switching between mobile
phones .......................................... .212
Telephone compartment ................ 218
Telephone module with Bluetooth ®
(SAP profile) Activating and connecting the
module .......................................... .213
Charging a mobile phone .............. .215
Connecting the mobile phone ....... .214
Connecting the module via a USB
cable .............................................. 213
Data modem mode ........................ 214
Installing the module ..................... 213
Introduction ................................... 212
Saving/deleting the PIN for the
SIM card ........................................ 214
Settings ......................................... 214
SIM card mode .............................. 213
Text messages ............................... 215
Transferring the phone book .......... 214
Temperature
Coolant (display in the instrument
cluster) .......................................... 155
Engine oil (on-board computer) ...... 167
Outside temperature ..................... .155
Setting (climate control) .................. 97
Transmission oil (on-board com-
puter) ............................................. 167
TEMPOMAT
Function/notes ............................ .126
Text messages
Telephone module with Blue-
tooth ®
(SAP profile) ....................... 215
Timing (RACETIMER) ......................... 168
TIREFIT kit .......................................... 247
Important safety notes .................. 247
Storage location ............................ 246
Tyre pressure not reached ............. 249 Tyre pressure reached ................... 249
Total distance recorder .................... 157
Touchpad
Changing the station/music
track .............................................. 208
Character suggestions ................... 207
Deleting characters ....................... 207
Entering a space ............................ 207
Entering characters ....................... 207
Gesture control .............................. 206
Handwriting recognition ................ 207
Operating the touchpad ................. 206
Overview ........................................ 206
Quick access for audio .................. 208
Switching ....................................... 206
Switching input line ....................... 207
Tow-away protection
Activating ......................................... 61
Deactivating ..................................... 61
Function .......................................... .61
Tow-starting
Emergency engine starting ............ 259
Towing
Important safety notes .................. 256
Transporting the vehicle ................ 258
Towing away
Fitting the towing eye .................... 257
Removing the towing eye ............... 258
With both axles on the ground ....... 258
Towing eye ......................................... 246
Traffic Sign Assist
Activating/deactivating the warn-ing function .................................... 164
Display message ............................ 186
Function/note s............................. 148
Important safety notes .................. 149
Instrument cluster display ............. 149
Trailer towing
Lights display message .................. 182
Transmission
Driving tips .................................... 112
Selector lever ................................ 109
see Automatic transmission
Transmission position display ......... 111
Transmission positions .................... 111
Transporting the vehicle .................. 25818
Index
Page 144 of 289
Sport + mode
The very firm setting of the suspension setting in
Sport + mode ensures the best possible contact
with the road. Select this mode only when driv-
ing on race circuits.
If indicator lamps ;and =are off:
X Press button :twice.
Indicator lamps ;and =light up. You have
selected Sport + mode.
The AMG Ride Control SPORT +
AMG Ride Control SPORT + message
appears in the multifunction display.
If indicator lamp =lights up:
X Press button :once.
Second indicator lamp ;lights up. You have
selected Sport + mode.
The AMG Ride Control SPORT +
AMG Ride Control SPORT + message
appears in the multifunction display.
Comfort mode In Comfort mode, the driving characteristics of
your vehicle are more comfortable. Select this
mode if you prefer a more comfortable driving
style, but also when driving fast on straight
roads, e.g. motorways.
X Press button :repeatedly until indicator
lamps ;and =go out.
You have selected Comfort mode.
The AMG Ride Control COMFORT
AMG Ride Control COMFORT message
appears in the multifunction display. PARKTRONIC
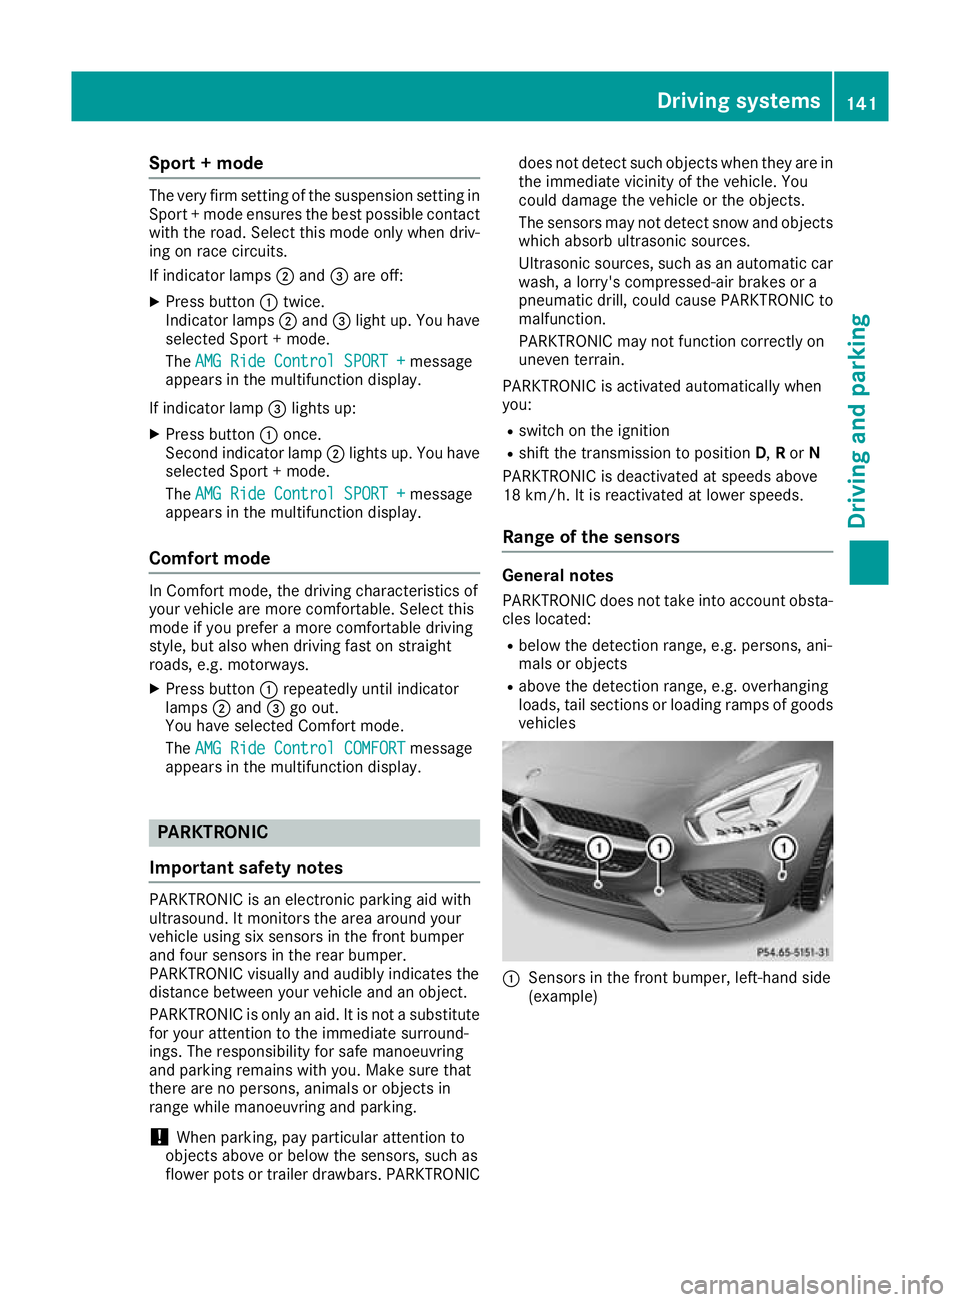
Important safety notes PARKTRONIC is an electronic parking aid with
ultrasound. It monitors the area around your
vehicle using six sensors in the front bumper
and four sensors in the rear bumper.
PARKTRONIC visually and audibly indicates the
distance between your vehicle and an object.
PARKTRONIC is only an aid. It is not a substitute
for your attention to the immediate surround-
ings. The responsibility for safe manoeuvring
and parking remains with you. Make sure that
there are no persons, animals or objects in
range while manoeuvring and parking.
! When parking, pay particular attention to
objects above or below the sensors, such as
flower pots or trailer drawbars. PARKTRONIC does not detect such objects when they are in
the immediate vicinity of the vehicle. You
could damage the vehicle or the objects.
The sensors may not detect snow and objects which absorb ultrasonic sources.
Ultrasonic sources, such as an automatic car
wash, a lorry's compressed-air brakes or a
pneumatic drill, could cause PARKTRONIC to
malfunction.
PARKTRONIC may not function correctly on
uneven terrain.
PARKTRONIC is activated automatically when
you: R switch on the ignition
R shift the transmission to position D,Ror N
PARKTRONIC is deactivated at speeds above
18 km/h. It is reactivated at lower speeds.
Range of the sensors General notes
PARKTRONIC does not take into account obsta-
cles located:
R below the detection range, e.g. persons, ani-
mals or objects
R above the detection range, e.g. overhanging
loads, tail sections or loading ramps of goods
vehicles :
Sensors in the front bumper, left-hand side
(example) Driving systems
141Driving and parking Z
Page 147 of 289
Reversing camera
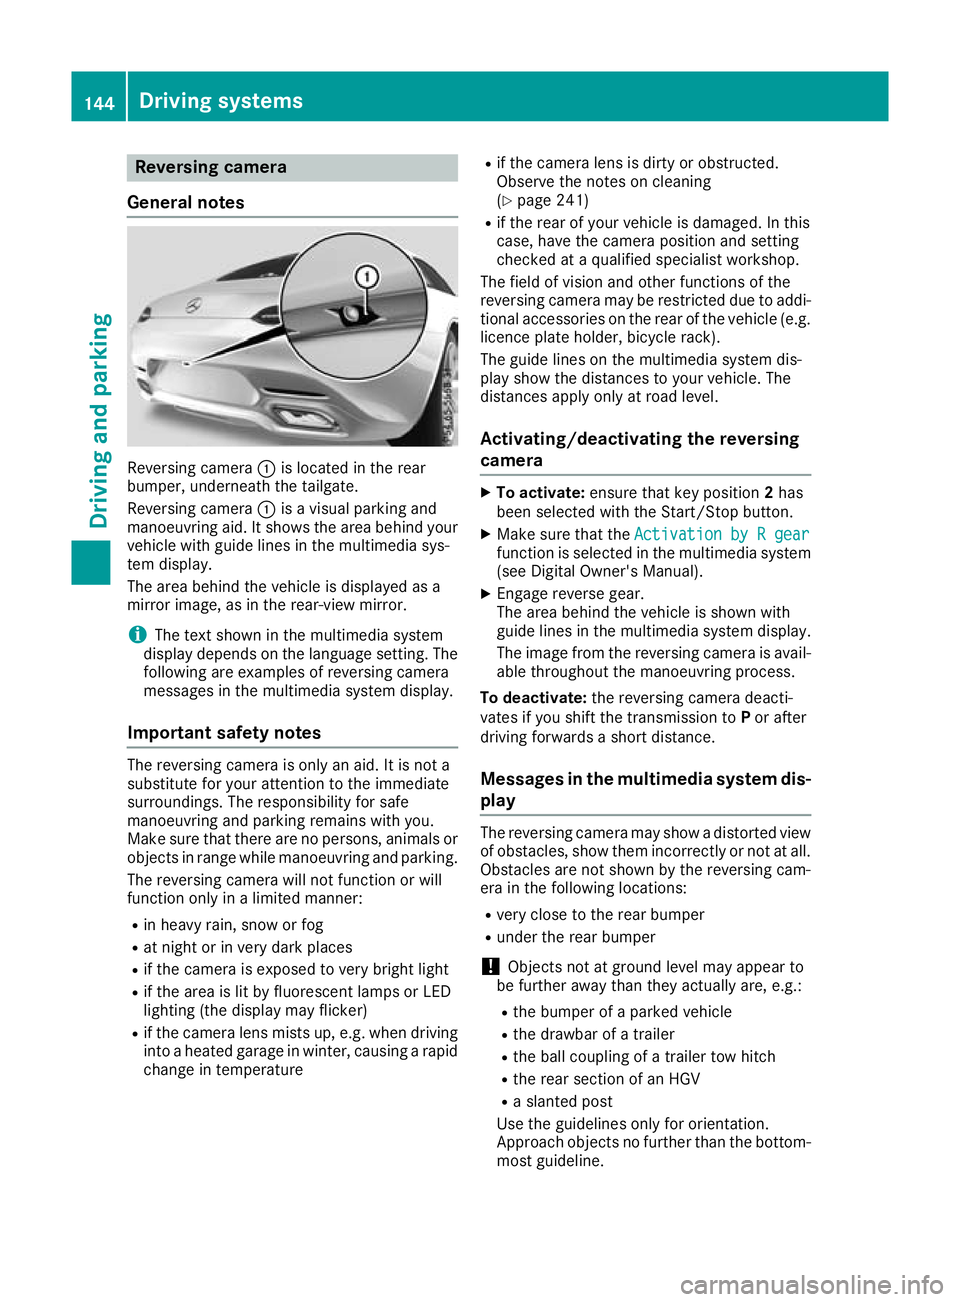
General notes Reversing camera
:is located in the rear
bumper, underneath the tailgate.
Reversing camera :is a visual parking and
manoeuvring aid. It shows the area behind your vehicle with guide lines in the multimedia sys-
tem display.
The area behind the vehicle is displayed as a
mirror image, as in the rear-view mirror.
i The text shown in the multimedia system
display depends on the language setting. The following are examples of reversing camera
messages in the multimedia system display.
Important safety notes The reversing camera is only an aid. It is not a
substitute for your attention to the immediate
surroundings. The responsibility for safe
manoeuvring and parking remains with you.
Make sure that there are no persons, animals or
objects in range while manoeuvring and parking.
The reversing camera will not function or will
function only in a limited manner:
R in heavy rain, snow or fog
R at night or in very dark places
R if the camera is exposed to very bright light
R if the area is lit by fluorescent lamps or LED
lighting (the display may flicker)
R if the camera lens mists up, e.g. when driving
into a heated garage in winter, causing a rapid
change in temperature R
if the camera lens is dirty or obstructed.
Observe the notes on cleaning
(Y page 241)
R if the rear of your vehicle is damaged. In this
case, have the camera position and setting
checked at a qualified specialist workshop.
The field of vision and other functions of the
reversing camera may be restricted due to addi-
tional accessories on the rear of the vehicle (e.g. licence plate holder, bicycle rack).
The guide lines on the multimedia system dis-
play show the distances to your vehicle. The
distances apply only at road level.
Activating/deactivating the reversing
camera X
To activate: ensure that key position 2has
been selected with the Start/Stop button.
X Make sure that the Activation by R gear Activation by R gear
function is selected in the multimedia system (see Digital Owner's Manual).
X Engage reverse gear.
The area behind the vehicle is shown with
guide lines in the multimedia system display.
The image from the reversing camera is avail-
able throughout the manoeuvring process.
To deactivate: the reversing camera deacti-
vates if you shift the transmission to Por after
driving forwards a short distance.
Messages in the multimedia system dis-
play The reversing camera may show a distorted view
of obstacles, show them incorrectly or not at all. Obstacles are not shown by the reversing cam-
era in the following locations:
R very close to the rear bumper
R under the rear bumper
! Objects not at ground level may appear to
be further away than they actually are, e.g.:
R the bumper of a parked vehicle
R the drawbar of a trailer
R the ball coupling of a trailer tow hitch
R the rear section of an HGV
R a slanted post
Use the guidelines only for orientation.
Approach objects no further than the bottom- most guideline. 144
Driving systemsDriving and parking
Page 259 of 289
Vehicles with carbon engine cover:
X Replace the jump-starting connection point cover. Make sure all mountings for the fasteners are
positioned precisely behind the corresponding recesses in the cover.
X Press the fasteners into the mountings. Turn the fasteners by Õof a turn to engage.
All vehicles:
X Have the battery checked at a qualified specialist workshop.
Jump-starting is not considered to be a normal operating condition.
i Jump-starting cables and further information regarding jump starting can be obtained at any
qualified specialist workshop. Towing away and tow-starting
Important safety notes
G
WARNING
The rear axle locks when:
R the engine is not running
R the engine stalls while the vehicle is being
towed
R there is a malfunction in the voltage supply
or the vehicle's electrical system
There is a risk of an accident.
In the event of a breakdown, you should
always have the vehicle transported. G
WARNING
If the brake system or power steering is mal-
functioning and your vehicle is then towed
away, significantly more effort may be
required to steer and brake than is normally
required. There is a risk of an accident.
In such cases use a rigid towing bar. Before
towing away, make sure steering moves
freely. G
WARNING
When towing or tow-starting another vehicle
and its weight is greater than the permissible gross weight of your vehicle, the:
R towing eye may be torn off
R car/trailer combination may swerve or
even overturn
There is a risk of an accident. When towing or tow-starting another vehicle,
its weight should not be greater than the per- missible gross weight of your vehicle.
Details on the permissible gross vehicle weight
of your vehicle can be found on the vehicle iden-
tification plate (Y page 276).
! Use the key instead of the Start/Stop but-
ton when towing the vehicle.
Start the engine and keep it running. Turn the key to position 2in the ignition. Set the trans-
mission to Nusing the E-SELECT lever. Make
sure that you then leave the key in position 2.
Check the transmission position in the instru-
ment cluster.
! Make sure that the electric parking brake is
released. If the electric parking brake is faulty,
visit a qualified specialist workshop.
! Secure the tow rope or tow bar to the towing
eye only. The vehicle may otherwise be dam-
aged.
! When Active Brake Assist, Distance Pilot
DISTRONIC or the HOLD function is activated, the vehicle brakes automatically in certain
situations.
To avoid damage to the vehicle, deactivate
these systems in the following or similar sit-
uations:
R when towing away
R in a car wash
! Observe the following points when towing
with a tow rope:
R secure the tow rope on the same side on
both vehicles.
R make sure that the tow rope is not longer
than legally permitted. Mark the tow rope in 256
Towing away and tow-startingBreakdown assistance
Page 260 of 289
the middle, e.g. with a white cloth
(30 x 30 cm). This makes other road users
aware that a vehicle is being towed.
R only secure the tow rope to the towing eye.
R observe the brake lamps of the towing vehi-
cle while driving. Always maintain a dis-
tance so that the tow rope does not sag.
R do not use steel cables or chains to tow
your vehicle. You could otherwise damage
the vehicle.
! Do not use the towing eyes for recovery pur-
poses as this could damage the vehicle. If in
doubt, recover the vehicle with a crane.
! When towing, pull away slowly and
smoothly. If the tractive power is too high, the
vehicles could be damaged.
! Shift the automatic transmission to
Nand
do not open the driver's or front passenger's
door during towing. The automatic transmis-
sion may otherwise shift to position P, which
could damage both vehicles.
! You may tow the vehicle for a maximum of
50km. A towing speed of 50 km/h must not
be exceeded.
For towing distances over 50 km, the entire
vehicle must be lifted up and transported.
! Observe the transmission fluid temperature
(AMG menu) in the on-board computer when
towing. The transmission fluid temperature
must not exceed 120 †. If this occurs, you
must stop towing immediately.
! Tow-starting the vehicle is not permitted.
The transmission may otherwise be damaged.
Also observe the following notes: R Observe the legal requirements in each indi-
vidual country when towing.
R If the engine does not start, try jump-starting
it (Y page 253). Tow-starting the vehicle is not
permitted.
R If it is not possible to jump-start the vehicle,
have it transported to the nearest qualified
specialist workshop, e.g. a Mercedes-Benz
Service Centre.
If the vehicle can no longer be driven because of an accident or breakdown, you have the follow-
ing options:
R transporting the vehicle As a rule, you should have the vehicle trans-
ported.
R towing the vehicle with a tow rope or tow bar
Only tow the vehicle in exceptional cases. The
engine must be running if you tow the vehicle with a tow rope or tow bar.
If the vehicle has suffered transmission damage, have it transported on a transporter or trailer.
Observe the display messages in the instrument
cluster.
The battery must be connected and charged.
Otherwise, you:
R will not be able to switch on the ignition with
the Start/Stop button
R cannot start the engine
R cannot release the electric parking brake
R cannot shift the automatic transmission to
position N
Deactivate the automatic locking feature before
towing the vehicle (Y page 70). You could oth-
erwise be locked out when pushing or towing
the vehicle.
Deactivate tow-away protection before the vehi-
cle is towed away (Y page 61). Fitting/removing the towing eye
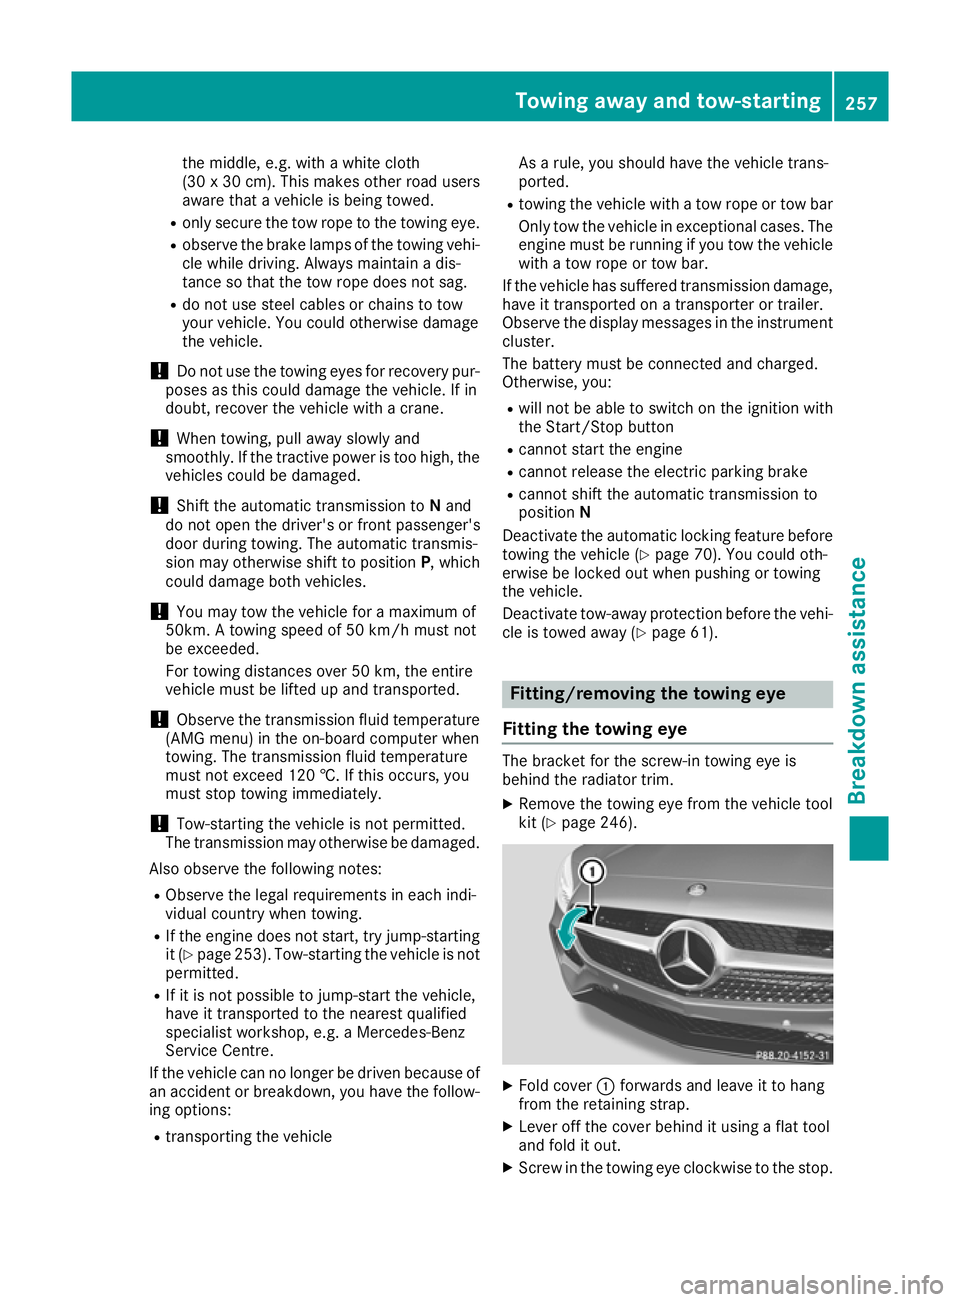
Fitting the towing eye The bracket for the screw-in towing eye is
behind the radiator trim.
X Remove the towing eye from the vehicle tool
kit (Y page 246). X
Fold cover :forwards and leave it to hang
from the retaining strap.
X Lever off the cover behind it using a flat tool
and fold it out.
X Screw in the towing eye clockwise to the stop. Towing away and tow-starting
257Breakdown assistance Z
Page 261 of 289
Removing the towing eye
X
Loosen the towing eye and unscrew it.
X Fold down the inner cover until it engages.
X Attach cover at the bottom and press it in at
the top until it engages.
X Put the towing eye back into the vehicle tool
kit. Towing the vehicle with all wheels on
the ground
It is important that you observe the safety
instructions when towing away your vehicle
(Y page 256).
The automatic transmission automatically shifts to position Pwhen you open the driver's or front-
passenger door or when you remove the key
from the ignition lock. In order to ensure that the automatic transmission stays in position N
when towing away the vehicle, you must
observe the following points:
X Insert the key into the ignition lock. You must
use the key instead of the Start/Stop button
(Y page 103).
X Start the engine and leave it running during
the entire towing procedure.
X Depress the brake pedal and keep it
depressed.
X Move the transmission to position Nwith the
E-SELECT lever.
X Check the transmission position using the
indicator in the multifunction display
(Y page 111).
X Release the brake pedal.
X Release the electric parking brake.
X Switch on the hazard warning lamps
(Y page 90).
In order to signal a change of direction when
towing the vehicle with the hazard warning
lamps switched on, use the combination switch as usual. In this case, only the turn signals for
the desired direction flash. When you reset the
combination switch, the hazard warning lamps
start flashing again. Transporting the vehicle
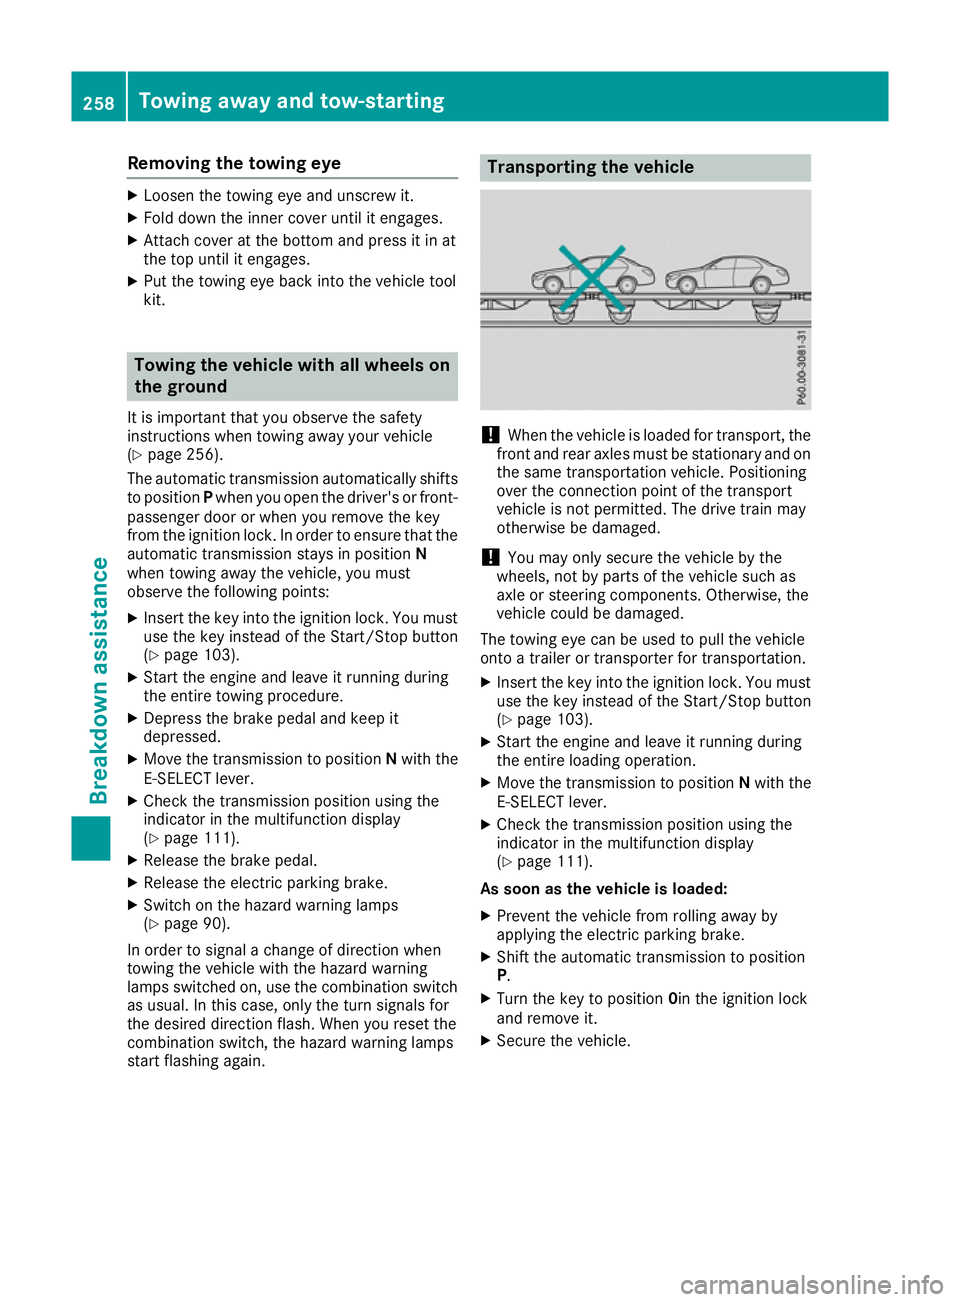
!
When the vehicle is loaded for transport, the
front and rear axles must be stationary and on the same transportation vehicle. Positioning
over the connection point of the transport
vehicle is not permitted. The drive train may
otherwise be damaged.
! You may only secure the vehicle by the
wheels, not by parts of the vehicle such as
axle or steering components. Otherwise, the
vehicle could be damaged.
The towing eye can be used to pull the vehicle
onto a trailer or transporter for transportation.
X Insert the key into the ignition lock. You must
use the key instead of the Start/Stop button
(Y page 103).
X Start the engine and leave it running during
the entire loading operation.
X Move the transmission to position Nwith the
E-SELECT lever.
X Check the transmission position using the
indicator in the multifunction display
(Y page 111).
As soon as the vehicle is loaded:
X Prevent the vehicle from rolling away by
applying the electric parking brake.
X Shift the automatic transmission to position
P.
X Turn the key to position 0in the ignition lock
and remove it.
X Secure the vehicle. 258
Towing away and tow-startingBreakdown assistance