MERCEDES-BENZ AMG GT ROADSTER 2018 Owners Manual
Manufacturer: MERCEDES-BENZ, Model Year: 2018, Model line: AMG GT ROADSTER, Model: MERCEDES-BENZ AMG GT ROADSTER 2018Pages: 409, PDF Size: 7.66 MB
Page 281 of 409
only guaranteed with an
AGM battery or lith‐
ium-ion batter y.Fo r saf etyre asons,
Mercedes-Benz recommends that you on ly
use bat teries which ha vebeen tested and
appr ovedfo ryo ur vehicle byMercedes-Benz.
R Carryove r de tach able parts, such as vent
hoses, elbow fittings or term inal co vers from
th e battery being replaced.
R Make sure that theve nt hose is al ways con‐
nected tothe original opening on the side of
th e batter y.
Fit any existing or supplied cell caps.
Otherwise, gases or battery acid could
escape. R
Make sure that de tach able parts are recon‐
nected in the same way. To
w- starting or towing away Pe
rm itted towing me thods Mercedes-Benz
recommends transporting your
ve hicle in the case of a breakdown, rath er than
to wing it away.
Fo rto wing, use a tow rope or tow bar with bo th
axles on the ground. Do not use tow bar sys‐
te ms. &
WARNING Risk of accident when towing
with steering wheel lock
Yo u will no lon ger be able tosteer theve hicle
if th esteering wheel lock is engaged. #
Alw ays switch on the ignition when tow‐
ing theve hicle with a tow cable or a tow
bar. *
NO
TEDama getotheve hicle due to tow‐
ing away incor rectly #
Obser vethe instructions and no tes on
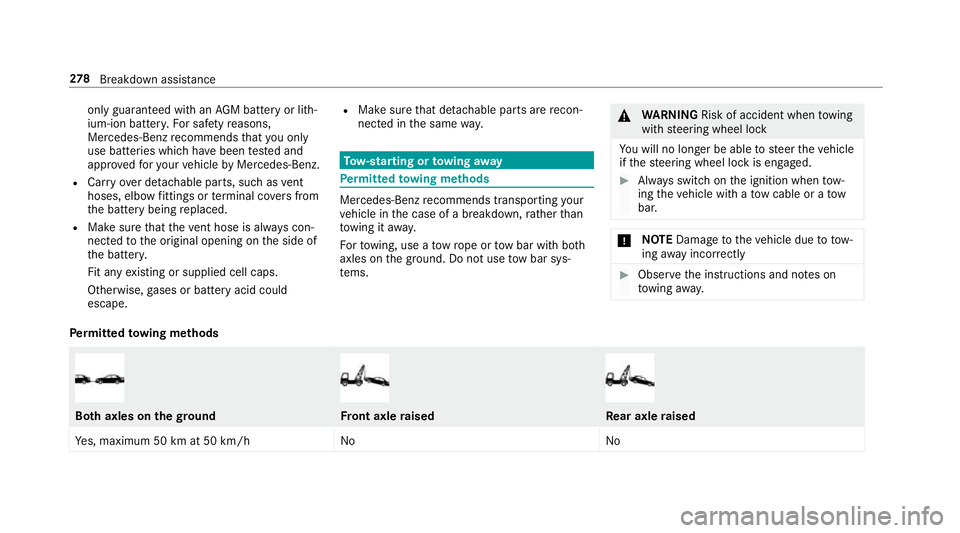
to wing away. Pe
rm itted towing me thods Bo
th axles on thegr ound Fr
ont axle raised Re
ar axle raised
Ye s, maximum 50 km at 50 km/h No No278
Breakdown assis tance
Page 282 of 409
To
wing theve hicle with bo thaxles on the
gr ound #
Obser vethe no tes on the permitted towing
me thods (/ page278). #
Make sure that the battery is connected and
ch arge d.
Obser vethefo llowing points when the battery is
dischar ged:
R the engine cann otbe star ted
R the electric parking brake cann otbe released
or applied
R vehicles with automatic transmission: the
automatic transmission cannot be shif tedto
position iorj.
% Vehicles with automatic transmission: if
th e automatic transmission cann otbe shif‐
te dto position i, orthe multifunction dis‐
play in the instrument clus ter does not show
anything, ha vetheve hicle transpor tedaw ay
( / page 280). A towing vehicle with lifting
equipment is requiredforve hicle transpor ta‐
tion. *
NO
TEDama gedue to to wing away at
exc essively high speeds or over long dis‐
ta nces The driv
etra in could be damaged when tow‐
ing at excessively high speeds or over long
dis tances. #
Atowing speed of 50 km/h must not
be exc eeded. #
Atowing dis tance of 50 km mu stnot be
exc eeded. &
WARNING Risk of accident when towing
a ve hicle which is too heavy
If th eve hicle being tow- star ted or towed
aw ay is heavier than the permissible gross
mass, thefo llowing situations can occur:
R theto wing eye may become de tach ed.
R the car/t railer combination may swer ve
or eve nove rturn. #
If ano ther vehicle is tow- star ted or
to we daw ay, its weight must not exceed th
e permissible gross mass of your own
ve hicle. If a
vehicle must be tow star ted or towe daw ay,
its permissible gross mass must not exceed the
permissible gross mass of theto wing vehicle. #
Information on the permissible gross mass of
th eve hicle can be found on theve hicle iden‐
tification plate (/ page 306). #
Vehicles with automatic transmission: do
not open the driver's door or front passenger
door, otherwise the automatic transmission
automatically shifts toposition j. #
Fittheto wing eye (/ page 282). #
Fasten theto w bar.
* NO
TEDama gedue toincor rect connec‐
tion #
Only connect theto w rope or tow bar to
th eto wing eyes. #
Deactivate the automatic locking mechanism
(/ page 63). Breakdown assis
tance 279
Page 283 of 409
#
Do not acti vate the HOLD function. #
Deactivate tow- aw ay protection
(/ page 78). #
Deactivate Active Brake Assi st
( / page 142). #
Vehicles with automatic transmission:
shift the automatic transmission toposition
i. #
Release the electric parking brake. &
WARNING Risk of accident due tolimi‐
te d saf ety-re lated functions during the
to wing process
Saf ety-re lated functions are limited or no lon‐
ge rav ailable in thefo llowing situations:
R the ignition is switched off.
R the brake sy stem or po werst eering sys‐
te m is malfunctioning.
R the energy supply or the on-board electri‐
cal sy stem is malfunctioning. When
your vehicle is then towe daw ay, signif‐
icantly more ef fort may be requ ired tosteer
and brake than is no rmally requ ired. #
Use a tow bar. #
Make sure that thesteering wheel can
mo vefreely, before towing theve hicle
aw ay. *
NO
TEDama gedue toexcessive tracti ve
po wer If
yo u pull away sharpl y,the tractive po wer
may be too high and theve hicles could be
damaged. #
Pull away slowly and smoo thly. Loading the
vehicle for transport #
Obser vethe no tes on towing away
( / page 279). #
Con nect theto w bar totheto wing eye in
order toload theve hicle. #
Shift the automatic transmission toposition
i.
% The automatic transmission may be loc ked
in position jintheeve nt of dama getothe
electrics. Toshift toi , pr ovide the on-
board electrical sy stem with po wer
( / page 276). #
Load theve hicle onto the transpor ter. #
Shift the automatic transmission toposition
j. #
Use the electric parking brake tosecure the
ve hicle against rolling away. #
Only secure theve hicle bythe wheels.
Ve hicles with ADS PLUS (Adaptive Damping
Sy stem PLUS) &
WARNING Risk of an accident when
transporting vehicles with Adaptive
Damping Sy stem PLUS
The reduced damping forc es on theve hicle
being transpor ted can cause theve hicle/
trailer combination tostart toswing. 280
Breakdown assis tance
Page 284 of 409
As a
result, when transporting vehicles with
th eAd aptive Damping Sy stem PLUS, the
ve hicle/trailer combination may start toskid.
Consequentl y,yo u could lose cont rol of your
ve hicle. #
When transporting, ensure that:
R theve hicle has been loaded onto
th e transpor ter cor rectly
R theve hicle is secured at all four
wheels with suitable tensioning
st ra ps
R the maximum permissible speed of
60 km/h is not exceeded when
transporting *
NO
TEDama getotheve hicle from secur‐
ing it incor rectly #
After loading, theve hicle must be
secured on all four wheels. Otherwise,
th eve hicle could be damaged. #
A minimum dis tance of 20 cm up wards
and 10cm down wards must be kept to
th e transport platform. #
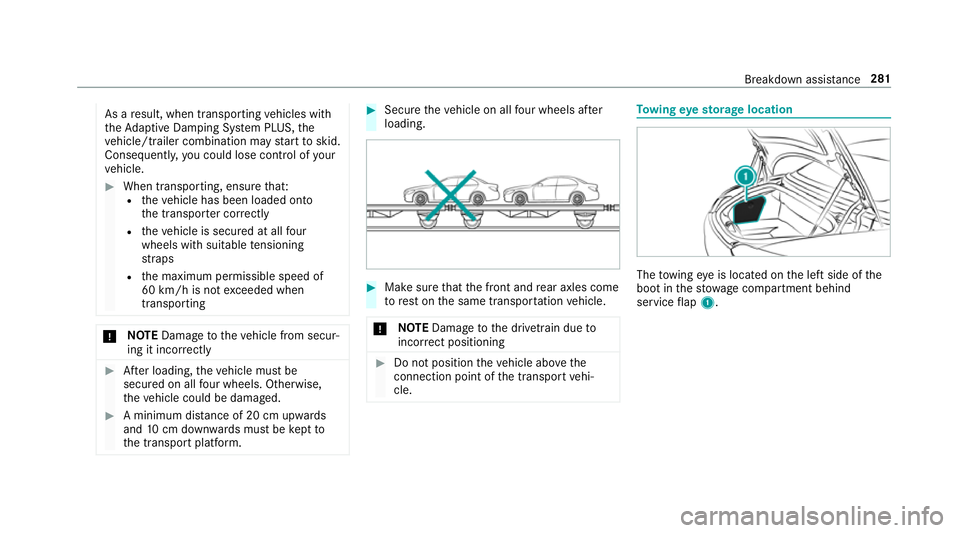
Secure theve hicle on all four wheels af ter
loading. #
Make sure that the front and rear axles come
to rest on the same transpor tation vehicle.
* NO
TEDama getothe driv etra in due to
incor rect positioning #
Do not position theve hicle abo vethe
connection point of the transport vehi‐
cle. To
wing eyesto rage location The
towing eye is located on the left side of the
boot in thestow age compartment behind
service flap 1. Breakdown assis
tance 281
Page 285 of 409
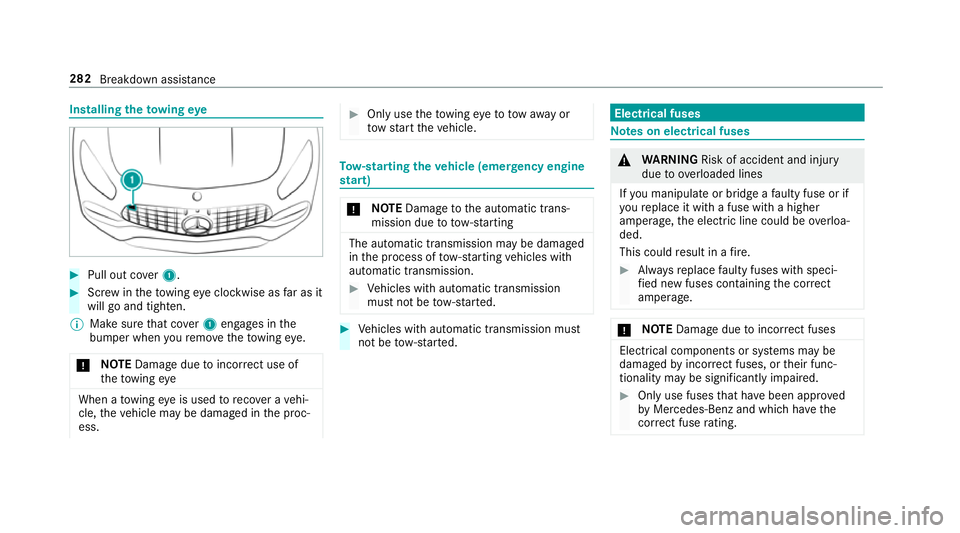
Installing
theto wing eye #
Pull out co ver1. #
Screw intheto wing eyeclockwise as far as it
will go and tighten.
% Make sure that co ver1 engages in the
bumper when youre mo vetheto wing eye.
* NO
TEDama gedue toincor rect use of
th eto wing eye When a
towing eye is used toreco ver a vehi‐
cle, theve hicle may be damaged in the proc‐
ess. #
Only use theto wing eyeto to waw ay or
to w start theve hicle. To
w- starting theve hicle (eme rgency engine
st art) *
NO
TEDama getothe automatic trans‐
mission due to tow-starting The automatic transmission may be damaged
in the process of tow- starting vehicles with
automatic transmission. #
Vehicles with automatic transmission
must not be tow- star ted. #
Vehicles with automatic transmission must
not be tow- star ted. Electrical fuses
Note
s on electrical fuses &
WARNING Risk of accident and inju ry
due to ov erloaded lines
If yo u manipulate or bridge a faulty fuse or if
yo ure place it with a fuse with a higher
amperage, the electric line could be overloa‐
ded.
This could result in a fire. #
Alw aysre place faulty fuses with speci‐
fi ed new fuses conta iningthe cor rect
amperage. *
NO
TEDama gedue toincor rect fuses Electrical components or sy
stems may be
damaged byincor rect fuses, or their func‐
tionality may be significant lyimpaired. #
Only use fuses that ha vebeen appr oved
by Mercedes-Benz and which ha vethe
cor rect fuse rating. 282
Breakdown assi stance
Page 286 of 409
Blown fuses must be
replaced with fuses of the
same rating, which you can recognise bythe col‐
our and fuse rating. The fuse ratings and fu rther
information tobe obser ved are lis ted in the fuse
assignment diagram.
Fu se assignment diag ram: onthe fuse box in
th e boot (/ page 284).
* NO
TEDama geor malfunctions caused
by moisture Moisture may cause dama
getothe electrical
sy stem or cause it tomalfunction. #
When the fuse box is open, make sure
th at no moisture can enter the fuse
box. #
When closing the fuse box, make sure
th at the seal of the lid is positioned cor‐
re ctly on the fuse box. If
th e newly inser ted fuse also blo ws, ha vethe
cause traced and rectified at a qualified special‐
ist workshop, e.g. a Mercedes-Benz Service
Centre. Ensure
thefo llowing before replacing a fuse:
R The vehicle is secured against rolling away.
R All electrical consumers are switched off.
R The ignition is switched off.
The electrical fuses are located in various fuse
bo xes:
R Fuse box in the front passenger foot we ll
(/ page 283)
R Fuse box in the boot on the left-hand side of
th eve hicle, when vie wed in the direction of
tr av el (/ page 284) Opening and closing
the fuse box in the front
passenger foot we ll Obser
vethe no tes on electrical fuses
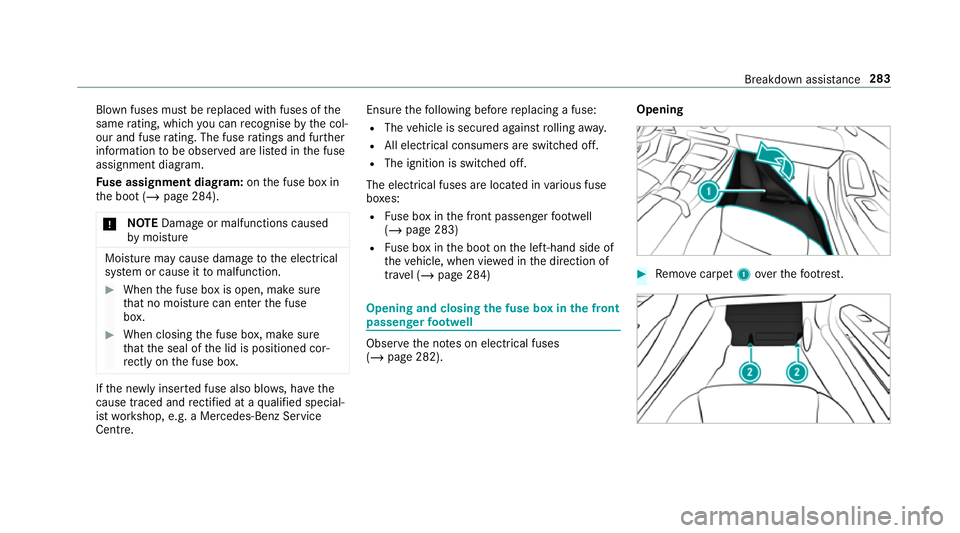
(/ page 282). Opening #
Remo vecarpet 1over thefo ot re st. Breakdown assis
tance 283
Page 287 of 409
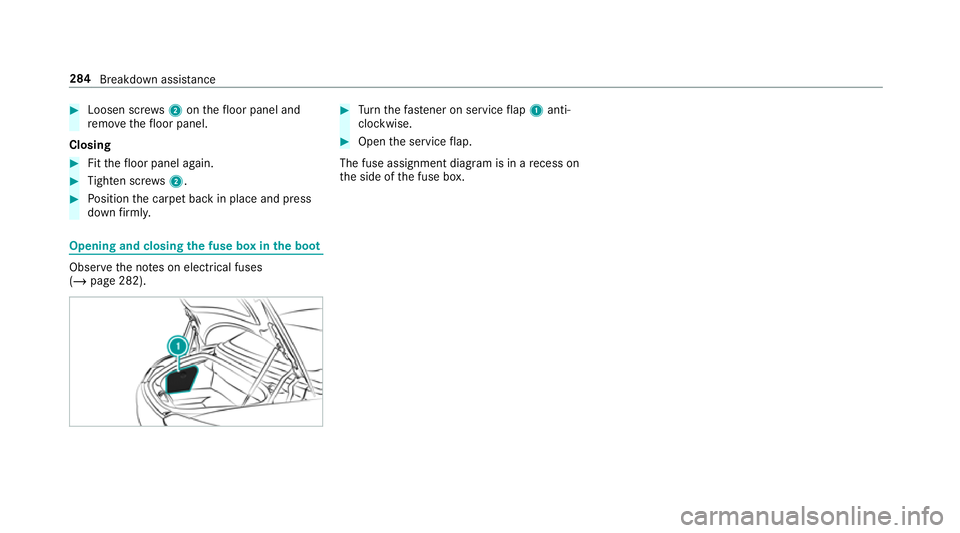
#
Loosen scr ews2 onthefloor panel and
re mo vethefloor panel.
Closing #
Fitthefloor panel again. #
Tighten scr ews2. #
Position the carpet back in place and press
down firm ly. Opening and closing
the fuse box in the boot Obser
vethe no tes on electrical fuses
(/ page 282). #
Turn thefast ener on service flap 1 anti-
clo ckwise. #
Open the service flap.
The fuse assignment diagram is in a recess on
th e side of the fuse box. 284
Breakdown assis tance
Page 288 of 409
Note
s on noise or unusual handling charac‐
te rist ics
While driving, pay attention tovibrations, noises
and unusual handling characteristics, e.g. pulling
to one side. This may indicate that the wheels or
tyres are damaged. If you suspect that a tyre is
defective, reduce your speed immediatel y.Stop
th eve hicle as soon as possible tocheck the
wheels and tyres for dama ge. Hidden tyre dam‐
age could also be causing the unusual handling
ch aracteristics. If youfind no signs of damage,
ha ve the tyres and wheels checked at a qualified
specialist workshop. Note
s onregular lyinspecting wheels and
tyres &
WARNING Risk of accident from dam‐
aged tyres
Dama ged tyres can cause tyre pressure loss.
As a result, you could lose cont rol of your
ve hicle. #
Check the tyres regularly for signs of
dama geand replace any damaged tyres
immediatel y. Car
ryout thefo llowing checks on all wheels reg‐
ularly, at least once a month or as requ ired, e.g.
prior toa long journey or driving off- road:
R Check the tyre pressure (/ page 286).
R Visually inspect tyres and wheels for dam‐
age.
R Check theva lve caps.
The valves must be pr otected against mois‐
ture and dirt bytheva lve caps appr oved
especially foryo ur vehicle byMercedes-Benz.
R Visual check of the tyre tread dep thand the
tyre contact su rface across the entire width.
The minimum tread dep thfor summer tyres
is 3 mm and for winter tyres 4 mm. Note
s on snow chains &
WARNING Risk of accident due toincor‐
re ct snow chain fitting
If yo u ha vefitted snow chains tothe front
wheels, the snow chains may drag against
th eve hicle body or chassis components.
This could cause damage totheve hicle or
th e tyres. #
Neverfit snow chains on the front
wheels. #
Only fit snow chains on there ar wheels
in pairs. *
NO
TEDama getothe wheel trim from fit‐
te d snow chains If sn
ow ch ains are fitted tosteel wheels, the
wheel trims can be damaged. #
Remo vethe wheel trims of steel wheels
before fitting snow chains. Wheels and tyres
285
Page 289 of 409
Obser
vethefo llowing no tes when using snow
ch ains:
R Snow ch ains are on ly permissible for cer tain
wheel/tyre combinations. You can obtain
information about this from a Mercedes-Benz
Service Cent re.
R For saf etyre asons, on lyuse sn ow chainsthat
ha ve been specifically appr ovedfo ryo ur
ve hicle byMercedes-Benz, or snow chains
with the same quality standard.
R If sn ow ch ains are fitted, the maximum per‐
missible speed is 50 km/h.
R Vehicles with le vel control: if snowchains
are fitted, only drive at raised vehicle le vel.
% You can permanently limit the maximum
ve hicle speed for driving with winter tyres
(/ page 146).
% You can deactivate ESP ®
to pull away . This
allo ws th e wheels tospin, achieving an
increased driving forc e. Ty
re pressure Note
s on tyre pressure &
WARNING Risk of accident due toinsuf‐
fi cient or excessive tyre pressure
Underinfla ted or overinfla ted tyres pose the
fo llowing risks:
R The tyres may bur st, especially as the
load and vehicle speed increase.
R The tyres may wearexc essively and/or
une venly, which may greatlyimpair tyre
traction.
R The driving characteristics, as well as
st eering and braking, may be greatly
impaired. #
Comply with there commended tyre
pressure and check the tyre pressure of
all tyres including the spare wheel regu‐
larly:
R at least once a month
R when the load changes R
before embarking on a lon ger journey
R if operating conditions change, e.g. off-
ro ad driving #
Adjust the tyre pressure as necessar y. Ty
re pressure which is too high or too low can:
R Shor tenth e service life of the tyres.
R Cause increased tyre damage.
R Adversely af fect driving characteristics and
th us driving saf ety, e.g. due toaquaplaning. &
WARNING Risk of accident from repea‐
te d tyre pressure drop
If th e tyre pressure drops repeatedly, the
wheel, valve or tyre may be damaged.
Insuf ficient tyre pressure can cause the tyres
to bur st. #
Inspect the tyre for signs of fore ign
objects. #
Check whe ther the wheel or valve has a
leak. 286
Wheels and tyres
Page 290 of 409
#
Ifyo u are unable torectify the damage,
conta ct aqualified specialist workshop. Information on
there commended tyre pressure
fo rth eve hicle's factor y-fitted tyres can be found
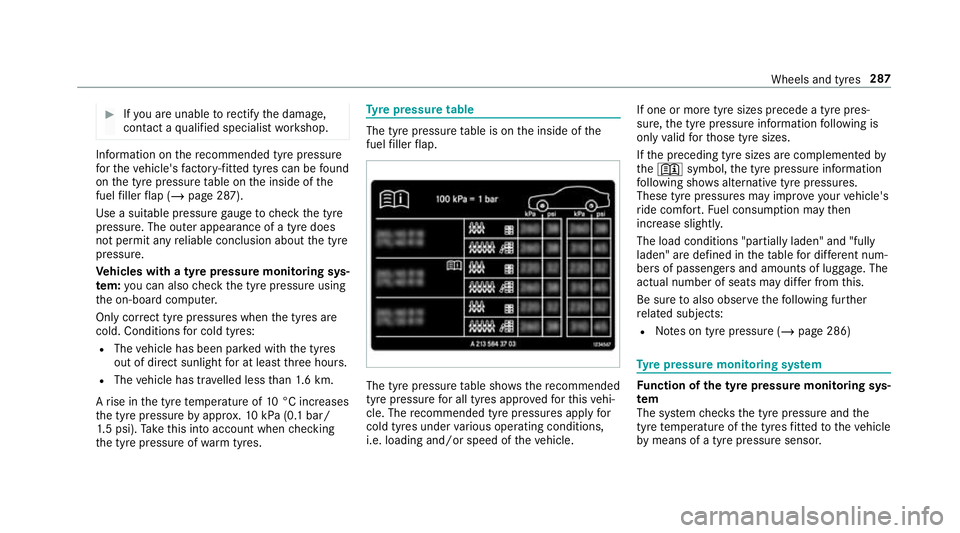
on the tyre pressure table on the inside of the
fuel filler flap (/ page 287).
Use a suitable pressure gauge tocheck the tyre
pressure. The outer appearance of a tyre does
not permit any reliable conclusion about the tyre
pressure.
Ve hicles with a tyre pressure monitoring sys‐
te m: you can also check the tyre pressure using
th e on-board computer.
Only cor rect tyre pressures when the tyres are
cold. Conditions for cold tyres:
R The vehicle has been par ked with the tyres
out of direct sunlight for at least thre e hours.
R The vehicle has tr avelled less than 1.6 km.
A rise in the tyre temp erature of 10°C increases
th e tyre pressure byappr ox.10 kPa (0.1 bar/
1. 5 psi). Take this into account when checking
th e tyre pressure of warm tyres. Ty
re pressure table The tyre pressure
table is on the inside of the
fuel filler flap. The tyre pressure
table sho ws there commended
tyre pressure for all tyres appro vedfo rth is vehi‐
cle. The recommended tyre pressures apply for
cold tyres under various operating conditions,
i.e. loading and/or speed of theve hicle. If one or more tyre sizes precede a tyre pres‐
sure,
the tyre pressure information following is
only valid forth ose tyre sizes.
If th e preceding tyre sizes are complemented by
th e+ symbol, the tyre pressure information
fo llowing sho wsalternative tyre pressures.
These tyre pressures may impr oveyour vehicle's
ri de comfort. Fuel consum ption may then
increase slightl y.
The load conditions "partially laden" and "fully
laden" are defined in theta ble for dif fere nt num‐
be rs of passengers and amounts of luggage. The
actual number of seats may dif fer from this.
Be sure toalso obse rveth efo llowing fur ther
re lated subjects:
R Notes on tyre pressure (/ page 286) Ty
re pressure moni toring sy stem Fu
nction of the ty repressure moni toring sys‐
tem
The sy stem checks the tyre pressure and the
tyre temp erature of the tyres fitted totheve hicle
by means of a tyre pressu resensor. Wheels and tyres
287