change wheel MERCEDES-BENZ B-CLASS HATCHBACK 2015 User Guide
[x] Cancel search | Manufacturer: MERCEDES-BENZ, Model Year: 2015, Model line: B-CLASS HATCHBACK, Model: MERCEDES-BENZ B-CLASS HATCHBACK 2015Pages: 293, PDF Size: 10.83 MB
Page 163 of 293
Always apply the brakes yourself when park-
ing and manoeuvring.
X Stop the vehicle when the parking symbol
shows the desired parking space in the instru- ment cluster.
X Shift the transmission to position R.
The Start
Start Park
ParkAssist?
Assist? Yes:
Yes:OK
OKNo:
No: %
message appears in the multifunction display.
X To cancel the procedure: press the%
button on the multifunction steering wheel or pull away.
or
X To park using Active Parking Assist: press
the a button on the multifunction steering
wheel.
The Park Assist active Accelerate
Park Assist active Accelerate
and brake and brake Observe surroundings
Observe surroundings mes-
sage appears in the multifunction display.
X Release the multifunction steering wheel.
X Reverse the vehicle, being ready to brake at
all times. When reversing, drive at a speed
below 10 km/h. Otherwise, Active Parking
Assist will be cancelled.
Manoeuvring may be required in tight parking
spaces.
X Stop as soon as PARKTRONIC sounds the
continuous warning tone, if not before.
Manoeuvring may be required in tight parking
spaces.
The Park
Park Assist Assist active
activeSelect D
Select D Observe
Observe
surroundings
surroundings message appears in the multi-
function display.
X Shift the transmission to position Dwhile the
vehicle is stationary.
Active Parking Assist immediately steers in
the other direction.
The Park Assist active Accelerate Park Assist active Accelerate
and brake and brake Observe surroundings
Observe surroundings mes-
sage appears in the multifunction display.
i You will achieve the best results by waiting
for the steering procedure to complete before
pulling away.
X Drive forwards and be ready to brake at all
times.
Manoeuvring may be required in tight parking
spaces.
X Stop as soon as PARKTRONIC sounds the
continuous warning tone, if not before. The
Park
Park Assist Assist active
activeSelect R
Select R Observe
Observe
surroundings
surroundings message appears in the multi-
function display.
As soon as the parking procedure is complete,
the Park Assist switched off Park Assist switched off message
appears and a warning tone sounds. The vehicle
is now parked.
Active Parking Assist no longer supports you
with steering interventions and brake applica-
tions. When Active Parking Assist is finished,
you must steer and brake again yourself.
PARKTRONIC is still available.
Parking tips:
R The way your vehicle is positioned in the park-
ing space after parking is dependent on vari-
ous factors. These include the position and
shape of the vehicles parked in front and
behind it and the conditions of the location. It
may be the case that Active Parking Assist
guides you too far into a parking space, or not
far enough into it. In some cases, it may also
lead you across or onto the kerb. If necessary, you should cancel the parking procedure withActive Parking Assist.
R You can also preselect transmission position
D. The vehicle redirects and does not drive as
far into the parking space. Should the trans-
mission change take place too early, the park-
ing procedure will be cancelled. A sensible
parking position can no longer be achieved
from this position.
Exiting a parking space In order that Active Parking Assist can support
you when exiting the parking space:
R you need to have parked using Active Parking
Assist.
R the border of the parking space must be high
enough at the front and the rear. A kerb stone is too small, for example.
R the border of the parking space must not be
too wide, as the position of the vehicle must
not exceed an angle of 45° to the starting
position as it is manoeuvred into the parking
space.
R a manoeuvring distance of at least 1.0 mmust
be available.
Active Parking Assist can only assist you with
exiting a parking space if you have parked the
vehicle parallel to the direction of travel using
Active Parking Assist. 160
Driving systemsDriving and pa
rking
Page 168 of 293
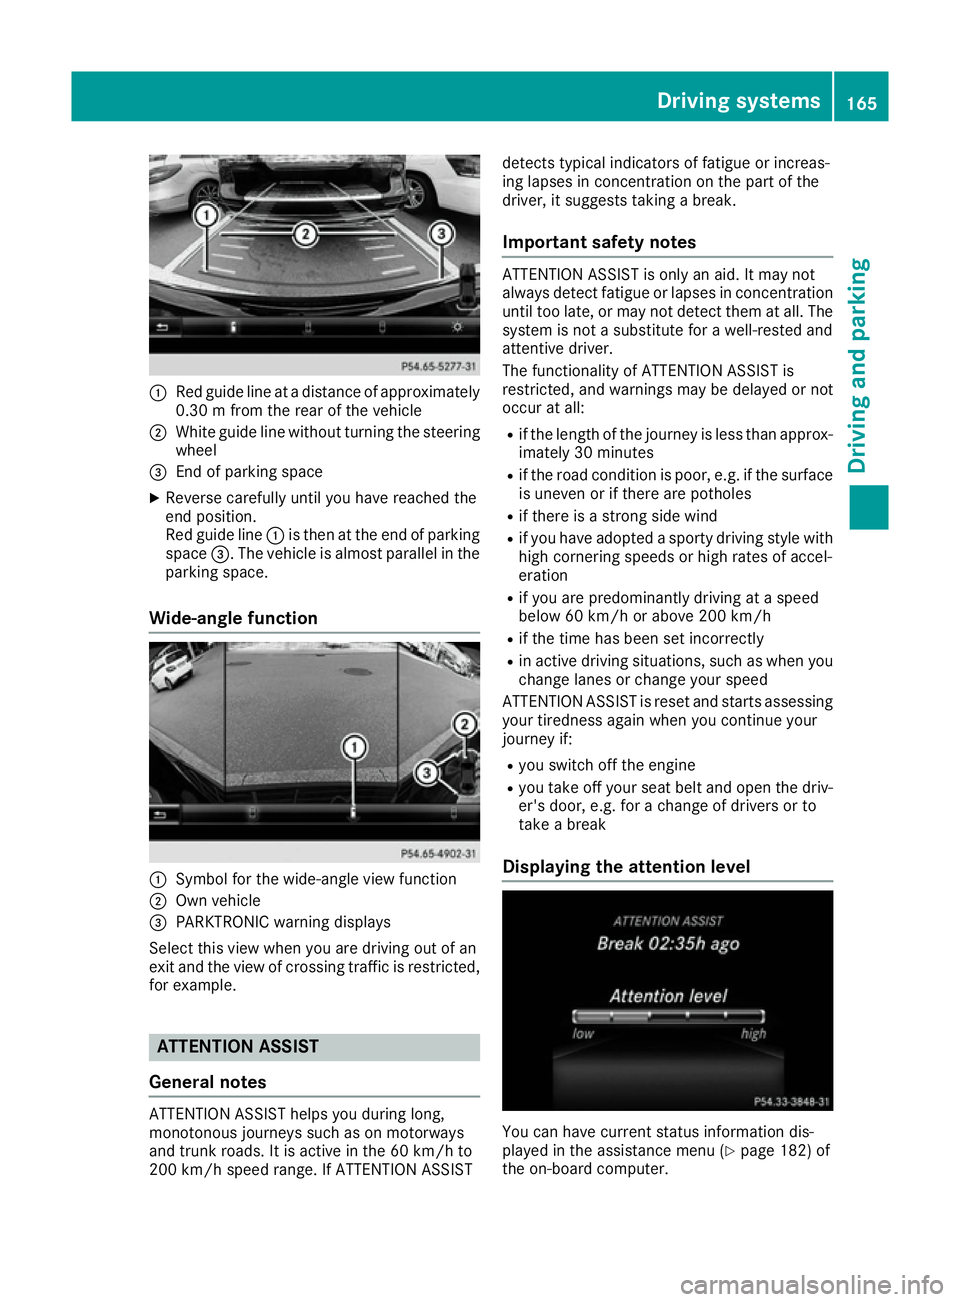
:
Red guide line at a distance of approximately
0.30 m from the rear of the vehicle
; White guide line without turning the steering
wheel
= End of parking space
X Reverse carefully until you have reached the
end position.
Red guide line :is then at the end of parking
space =. The vehicle is almost parallel in the
parking space.
Wide-angle function :
Symbol for the wide-angle view function
; Own vehicle
= PARKTRONIC warning displays
Select this view when you are driving out of an
exit and the view of crossing traffic is restricted, for example. ATTENTION ASSIST
General notes ATTENTION ASSIST helps you during long,
monotonous journeys such as on motorways
and trunk roads. It is active in the 60 km/h to
200 km/h speed range. If ATTENTION ASSIST detects typical indicators of fatigue or increas-
ing lapses in concentration on the part of the
driver, it suggests taking a break.
Important safety notes ATTENTION ASSIST is only an aid. It may not
always detect fatigue or lapses in concentration
until too late, or may not detect them at all. The system is not a substitute for a well-rested and
attentive driver.
The functionality of ATTENTION ASSIST is
restricted, and warnings may be delayed or not
occur at all:
R if the length of the journey is less than approx-
imately 30 minutes
R if the road condition is poor, e.g. if the surface
is uneven or if there are potholes
R if there is a strong side wind
R if you have adopted a sporty driving style with
high cornering speeds or high rates of accel-
eration
R if you are predominantly driving at a speed
below 60 km/h or above 200 km/h
R if the time has been set incorrectly
R in active driving situations, such as when you
change lanes or change your speed
ATTENTION ASSIST is reset and starts assessing
your tiredness again when you continue your
journey if:
R you switch off the engine
R you take off your seat belt and open the driv-
er's door, e.g. for a change of drivers or to
take a break
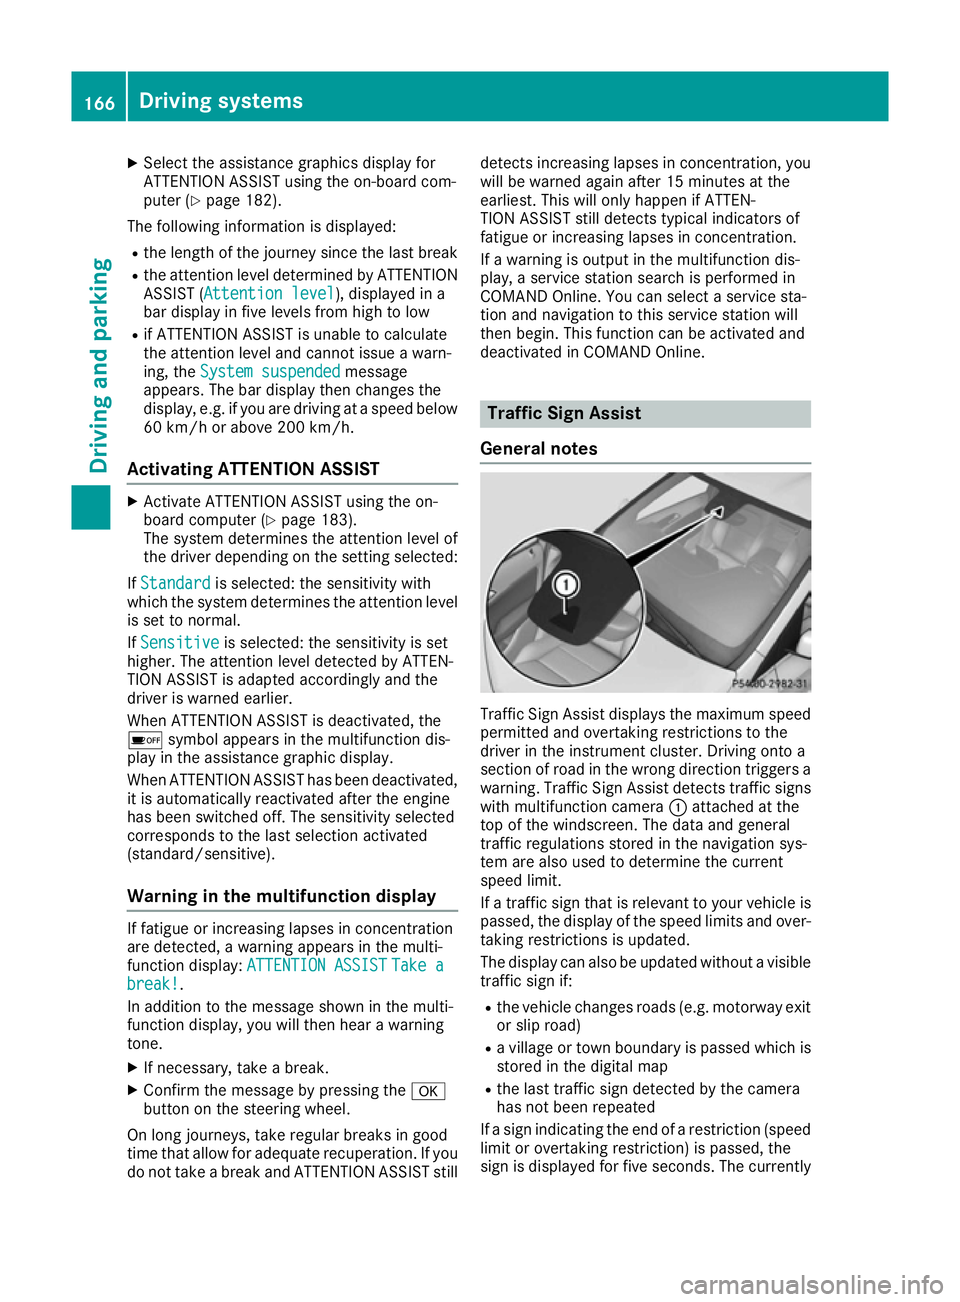
Displaying the attention level You can have current status information dis-
played in the assistance menu (Y
page 182) of
the on-board computer. Driving systems
165Driving and parking Z
Page 169 of 293
X
Select the assistance graphics display for
ATTENTION ASSIST using the on-board com-
puter (Y page 182).
The following information is displayed:
R the length of the journey since the last break
R the attention level determined by ATTENTION
ASSIST ( Attention level
Attention level), displayed in a
bar display in five levels from high to low
R if ATTENTION ASSIST is unable to calculate
the attention level and cannot issue a warn-
ing, the System suspended
System suspended message
appears. The bar display then changes the
display, e.g. if you are driving at a speed below 60 km/h or above 200 km/h.
Activating ATTENTION ASSIST X
Activate ATTENTION ASSIST using the on-
board computer (Y page 183).
The system determines the attention level of
the driver depending on the setting selected:
If Standard
Standard is selected: the sensitivity with
which the system determines the attention level
is set to normal.
If Sensitive Sensitive is selected: the sensitivity is set
higher. The attention level detected by ATTEN-
TION ASSIST is adapted accordingly and the
driver is warned earlier.
When ATTENTION ASSIST is deactivated, the
é symbol appears in the multifunction dis-
play in the assistance graphic display.
When ATTENTION ASSIST has been deactivated, it is automatically reactivated after the engine
has been switched off. The sensitivity selected
corresponds to the last selection activated
(standard/sensitive).
Warning in the multifunction display If fatigue or increasing lapses in concentration
are detected, a warning appears in the multi-
function display:
ATTENTION ASSIST ATTENTION ASSIST Take a
Take a
break!
break!.
In addition to the message shown in the multi-
function display, you will then hear a warning
tone.
X If necessary, take a break.
X Confirm the message by pressing the a
button on the steering wheel.
On long journeys, take regular breaks in good
time that allow for adequate recuperation. If you do not take a break and ATTENTION ASSIST still detects increasing lapses in concentration, you
will be warned again after 15 minutes at the
earliest. This will only happen if ATTEN-
TION ASSIST still detects typical indicators of
fatigue or increasing lapses in concentration.
If a warning is output in the multifunction dis-
play, a service station search is performed in
COMAND Online. You can select a service sta-
tion and navigation to this service station will
then begin. This function can be activated and
deactivated in COMAND Online. Traffic Sign Assist
General notes Traffic Sign Assist displays the maximum speed
permitted and overtaking restrictions to the
driver in the instrument cluster. Driving onto a
section of road in the wrong direction triggers a
warning. Traffic Sign Assist detects traffic signs with multifunction camera :attached at the
top of the windscreen. The data and general
traffic regulations stored in the navigation sys-
tem are also used to determine the current
speed limit.
If a traffic sign that is relevant to your vehicle is passed, the display of the speed limits and over-
taking restrictions is updated.
The display can also be updated without a visible traffic sign if:
R the vehicle changes roads (e.g. motorway exit
or slip road)
R a village or town boundary is passed which is
stored in the digital map
R the last traffic sign detected by the camera
has not been repeated
If a sign indicating the end of a restriction (speed limit or overtaking restriction) is passed, the
sign is displayed for five seconds. The currently 166
Driving systemsDriving and parking
Page 187 of 293
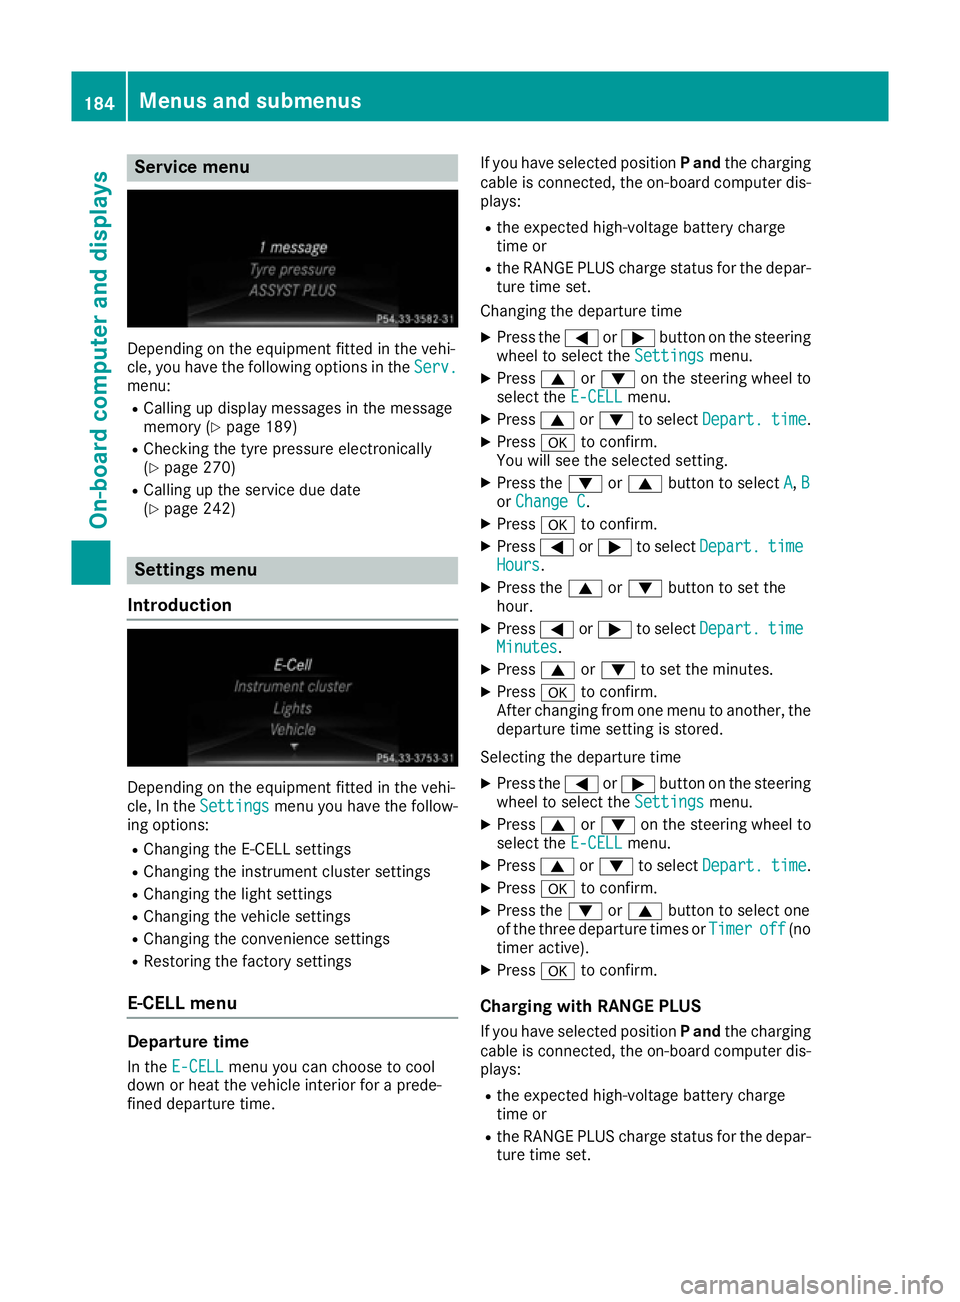
Service menu
Depending on the equipment fitted in the vehi-
cle, you have the following options in the Serv.
Serv.
menu:
R Calling up display messages in the message
memory (Y page 189)
R Checking the tyre pressure electronically
(Y page 270)
R Calling up the service due date
(Y page 242) Settings menu
Introduction Depending on the equipment fitted in the vehi-
cle, In the Settings Settings menu you have the follow-
ing options:
R Changing the E-CELL settings
R Changing the instrument cluster settings
R Changing the light settings
R Changing the vehicle settings
R Changing the convenience settings
R Restoring the factory settings
E‑CELL menu Departure time
In the E-CELL
E-CELL menu you can choose to cool
down or heat the vehicle interior for a prede-
fined departure time. If you have selected position
Pand the charging
cable is connected, the on-board computer dis- plays:
R the expected high-voltage battery charge
time or
R the RANGE PLUS charge status for the depar-
ture time set.
Changing the departure time
X Press the =or; button on the steering
wheel to select the Settings Settingsmenu.
X Press 9or: on the steering wheel to
select the E‑CELL E‑CELLmenu.
X Press 9or: to select Depart.
Depart. time
time.
X Press ato confirm.
You will see the selected setting.
X Press the :or9 button to select A
A, B
B
or Change C
Change C.
X Press ato confirm.
X Press =or; to select Depart.
Depart. time
time
Hours
Hours.
X Press the 9or: button to set the
hour.
X Press =or; to select Depart.
Depart. time
time
Minutes
Minutes.
X Press 9or: to set the minutes.
X Press ato confirm.
After changing from one menu to another, the departure time setting is stored.
Selecting the departure time
X Press the =or; button on the steering
wheel to select the Settings
Settings menu.
X Press 9or: on the steering wheel to
select the E‑CELL
E‑CELLmenu.
X Press 9or: to select Depart.
Depart. time
time.
X Press ato confirm.
X Press the :or9 button to select one
of the three departure times or Timer
Timeroff
off (no
timer active).
X Press ato confirm.
Charging with RANGE PLUS If you have selected position Pand the charging
cable is connected, the on-board computer dis- plays:
R the expected high-voltage battery charge
time or
R the RANGE PLUS charge status for the depar-
ture time set. 184
Menus and submenusOn-board computer and displays
Page 190 of 293
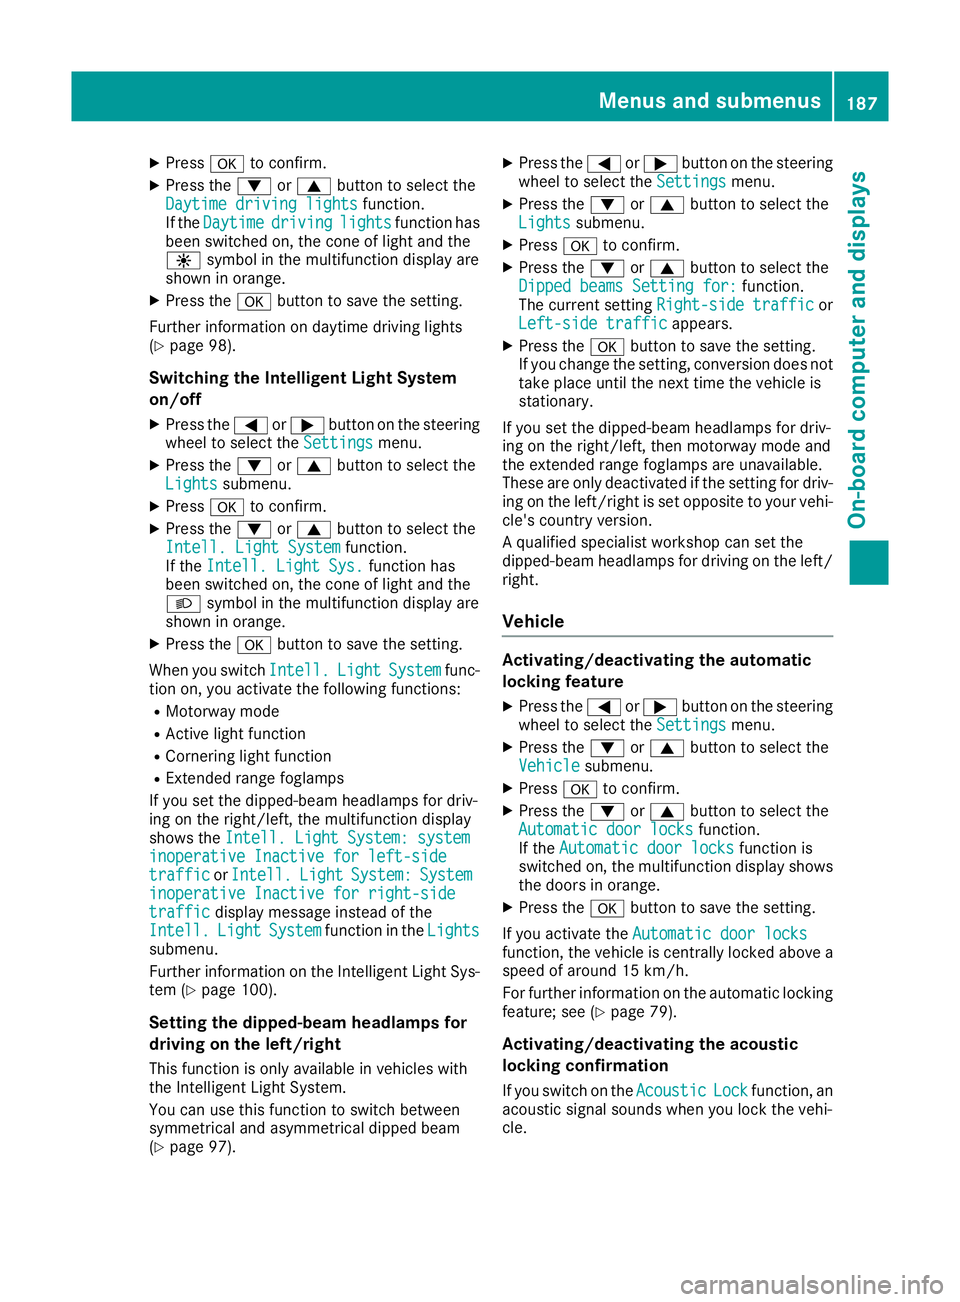
X
Press ato confirm.
X Press the :or9 button to select the
Daytime driving lights
Daytime driving lights function.
If the Daytime
Daytime driving
drivinglights
lightsfunction has
been switched on, the cone of light and the
W symbol in the multifunction display are
shown in orange.
X Press the abutton to save the setting.
Further information on daytime driving lights
(Y page 98).
Switching the Intelligent Light System
on/off
X Press the =or; button on the steering
wheel to select the Settings
Settings menu.
X Press the :or9 button to select the
Lights
Lights submenu.
X Press ato confirm.
X Press the :or9 button to select the
Intell. Light System
Intell. Light System function.
If the Intell. Light Sys. Intell. Light Sys. function has
been switched on, the cone of light and the
L symbol in the multifunction display are
shown in orange.
X Press the abutton to save the setting.
When you switch Intell.
Intell.Light
LightSystem
System func-
tion on, you activate the following functions:
R Motorway mode
R Active light function
R Cornering light function
R Extended range foglamps
If you set the dipped-beam headlamps for driv-
ing on the right/left, the multifunction display
shows the Intell. Light System: system
Intell. Light System: system
inoperative Inactive for left-side
inoperative Inactive for left-side
traffic traffic orIntell.
Intell. Light
LightSystem:
System: System
System
inoperative Inactive for right-side
inoperative Inactive for right-side
traffic traffic display message instead of the
Intell.
Intell. Light
LightSystem
System function in the Lights
Lights
submenu.
Further information on the Intelligent Light Sys-
tem (Y page 100).
Setting the dipped-beam headlamps for
driving on the left/right
This function is only available in vehicles with
the Intelligent Light System.
You can use this function to switch between
symmetrical and asymmetrical dipped beam
(Y page 97). X
Press the =or; button on the steering
wheel to select the Settings
Settings menu.
X Press the :or9 button to select the
Lights Lights submenu.
X Press ato confirm.
X Press the :or9 button to select the
Dipped beams Setting for:
Dipped beams Setting for: function.
The current setting Right-side traffic
Right-side traffic or
Left-side traffic
Left-side traffic appears.
X Press the abutton to save the setting.
If you change the setting, conversion does not take place until the next time the vehicle is
stationary.
If you set the dipped-beam headlamps for driv-
ing on the right/left, then motorway mode and
the extended range foglamps are unavailable.
These are only deactivated if the setting for driv-
ing on the left/right is set opposite to your vehi-
cle's country version.
A qualified specialist workshop can set the
dipped-beam headlamps for driving on the left/ right.
Vehicle Activating/deactivating the automatic
locking feature
X Press the =or; button on the steering
wheel to select the Settings Settingsmenu.
X Press the :or9 button to select the
Vehicle
Vehicle submenu.
X Press ato confirm.
X Press the :or9 button to select the
Automatic door locks
Automatic door locks function.
If the Automatic door locks
Automatic door locks function is
switched on, the multifunction display shows
the doors in orange.
X Press the abutton to save the setting.
If you activate the Automatic door locks
Automatic door locks
function, the vehicle is centrally locked above a
speed of around 15 km/h.
For further information on the automatic locking feature; see (Y page 79).
Activating/deactivating the acoustic
locking confirmation
If you switch on the Acoustic AcousticLock
Lockfunction, an
acoustic signal sounds when you lock the vehi-
cle. Menus and submenus
187On-board computer and displays Z
Page 252 of 293
Check the expiry date on the first-aid kit at least
once a year. Replace the contents if necessary,and replace any missing items. Fire extinguisher
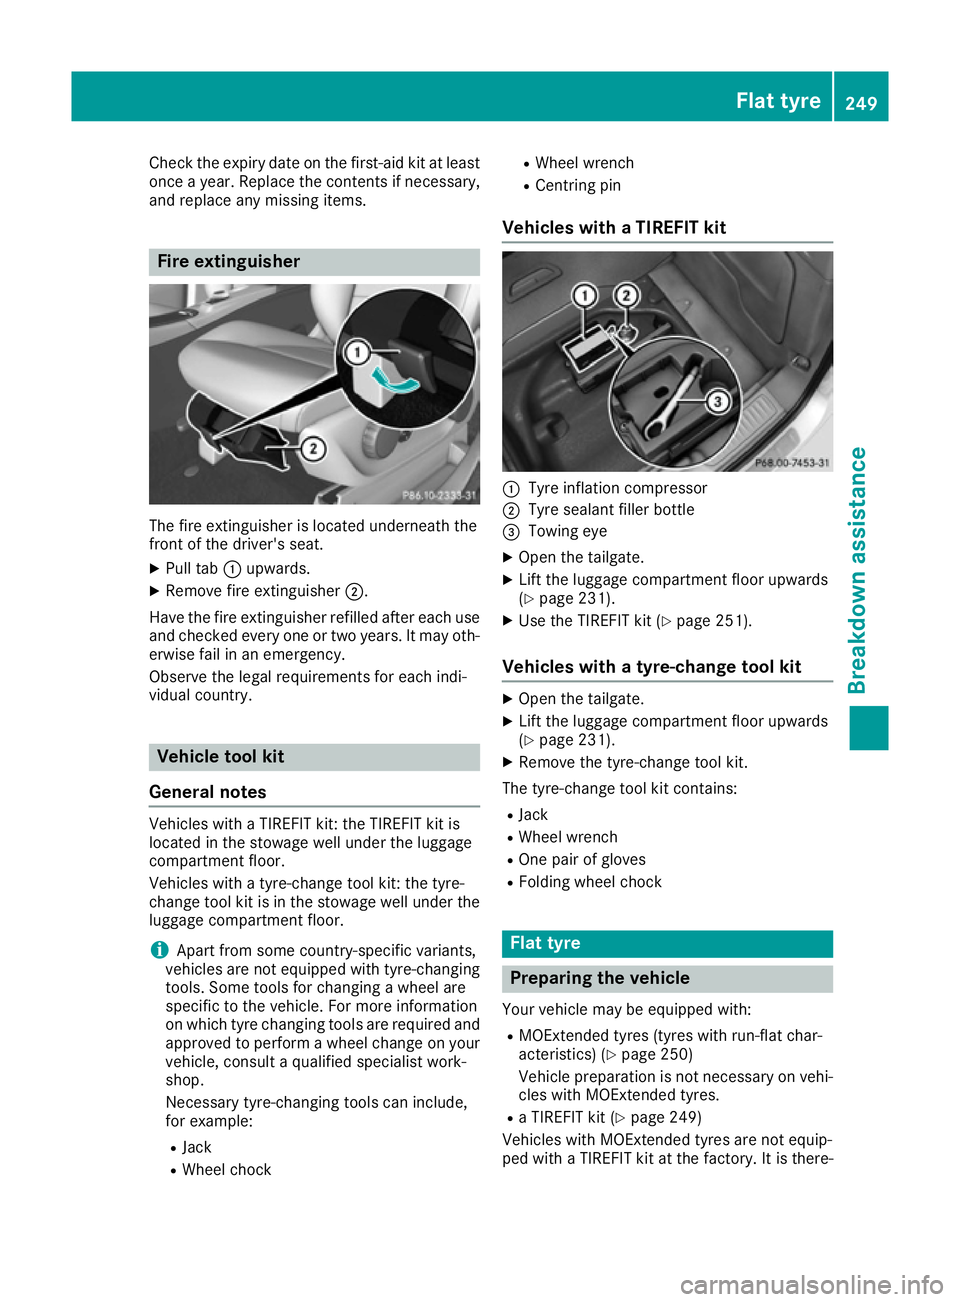
The fire extinguisher is located underneath the
front of the driver's seat.
X Pull tab :upwards.
X Remove fire extinguisher ;.
Have the fire extinguisher refilled after each use and checked every one or two years. It may oth-
erwise fail in an emergency.
Observe the legal requirements for each indi-
vidual country. Vehicle tool kit
General notes Vehicles with a TIREFIT kit: the TIREFIT kit is
located in the stowage well under the luggage
compartment floor.
Vehicles with a tyre-change tool kit: the tyre-
change tool kit is in the stowage well under the
luggage compartment floor.
i Apart from some country-specific variants,
vehicles are not equipped with tyre-changing
tools. Some tools for changing a wheel are
specific to the vehicle. For more information
on which tyre changing tools are required and approved to perform a wheel change on yourvehicle, consult a qualified specialist work-
shop.
Necessary tyre-changing tools can include,
for example:
R Jack
R Wheel chock R
Wheel wrench
R Centring pin
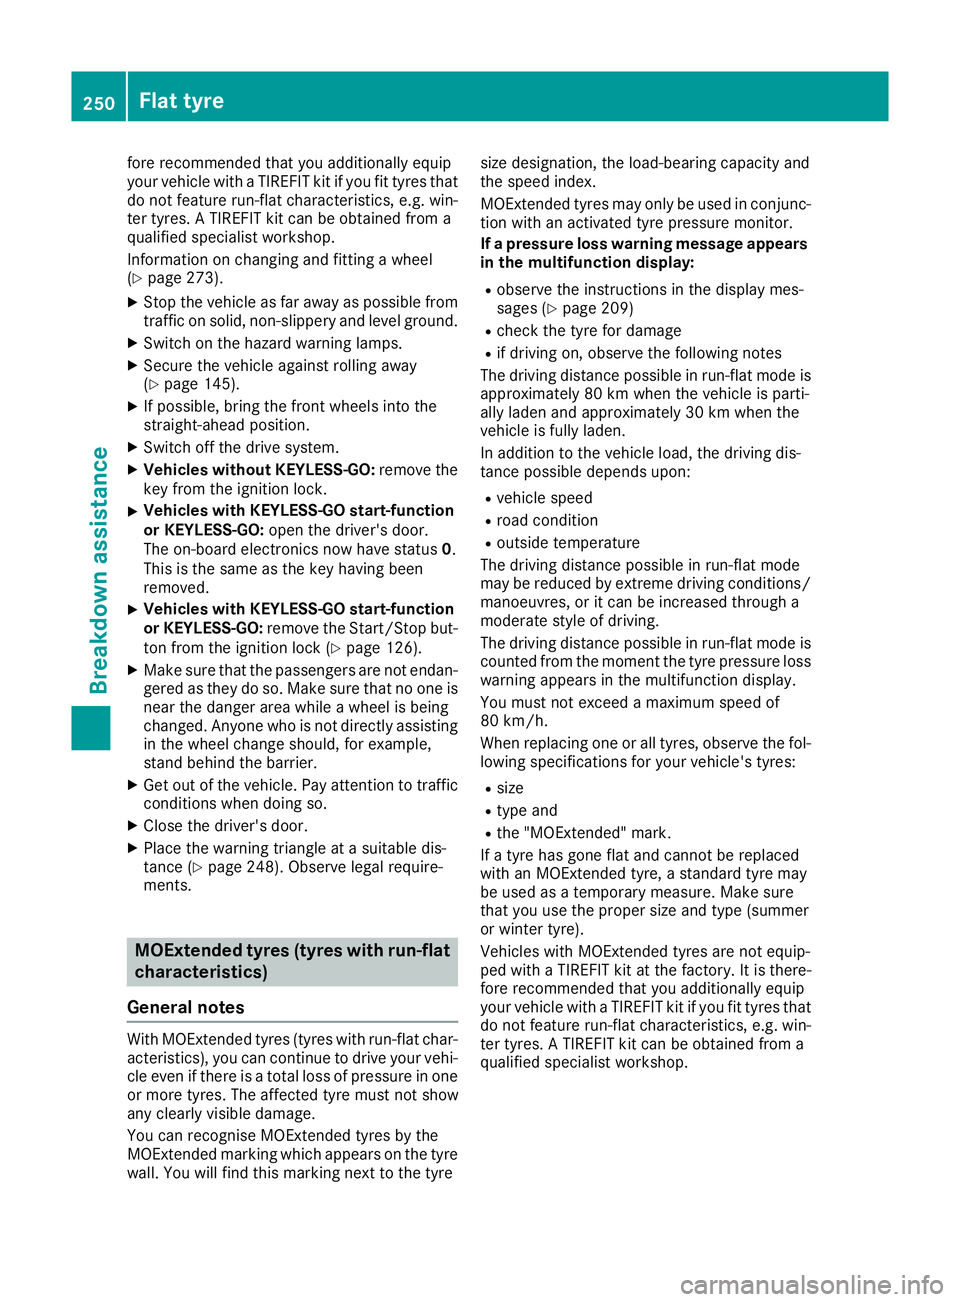
Vehicles with a TIREFIT kit :
Tyre inflation compressor
; Tyre sealant filler bottle
= Towing eye
X Open the tailgate.
X Lift the luggage compartment floor upwards
(Y page 231).
X Use the TIREFIT kit (Y page 251).
Vehicles with a tyre-change tool kit X
Open the tailgate.
X Lift the luggage compartment floor upwards
(Y page 231).
X Remove the tyre-change tool kit.
The tyre-change tool kit contains:
R Jack
R Wheel wrench
R One pair of gloves
R Folding wheel chock Flat tyre
Preparing the vehicle
Your vehicle may be equipped with: R MOExtended tyres (tyres with run-flat char-
acteristics) (Y page 250)
Vehicle preparation is not necessary on vehi- cles with MOExtended tyres.
R a TIREFIT kit (Y page 249)
Vehicles with MOExtended tyres are not equip-
ped with a TIREFIT kit at the factory. It is there- Flat tyre
249Breakdown assistance
Page 253 of 293
fore recommended that you additionally equip
your vehicle with a TIREFIT kit if you fit tyres that do not feature run-flat characteristics, e.g. win-
ter tyres. A TIREFIT kit can be obtained from a
qualified specialist workshop.
Information on changing and fitting a wheel
(Y page 273).
X Stop the vehicle as far away as possible from
traffic on solid, non-slippery and level ground.
X Switch on the hazard warning lamps.
X Secure the vehicle against rolling away
(Y page 145).
X If possible, bring the front wheels into the
straight-ahead position.
X Switch off the drive system.
X Vehicles without KEYLESS-GO: remove the
key from the ignition lock.
X Vehicles with KEYLESS-GO start-function
or KEYLESS-GO: open the driver's door.
The on-board electronics now have status 0.
This is the same as the key having been
removed.
X Vehicles with KEYLESS-GO start-function
or KEYLESS-GO: remove the Start/Stop but-
ton from the ignition lock (Y page 126).
X Make sure that the passengers are not endan-
gered as they do so. Make sure that no one is
near the danger area while a wheel is being
changed. Anyone who is not directly assisting
in the wheel change should, for example,
stand behind the barrier.
X Get out of the vehicle. Pay attention to traffic
conditions when doing so.
X Close the driver's door.
X Place the warning triangle at a suitable dis-
tance (Y page 248). Observe legal require-
ments. MOExtended tyres (tyres with run-flat
characteristics)
General notes With MOExtended tyres (tyres with run-flat char-
acteristics), you can continue to drive your vehi- cle even if there is a total loss of pressure in one
or more tyres. The affected tyre must not show
any clearly visible damage.
You can recognise MOExtended tyres by the
MOExtended marking which appears on the tyre wall. You will find this marking next to the tyre size designation, the load-bearing capacity and
the speed index.
MOExtended tyres may only be used in conjunc-
tion with an activated tyre pressure monitor.
If a pressure loss warning message appears
in the multifunction display:
R observe the instructions in the display mes-
sages (Y page 209)
R check the tyre for damage
R if driving on, observe the following notes
The driving distance possible in run-flat mode is approximately 80 km when the vehicle is parti-
ally laden and approximately 30 km when the
vehicle is fully laden.
In addition to the vehicle load, the driving dis-
tance possible depends upon:
R vehicle speed
R road condition
R outside temperature
The driving distance possible in run-flat mode
may be reduced by extreme driving conditions/ manoeuvres, or it can be increased through a
moderate style of driving.
The driving distance possible in run-flat mode is
counted from the moment the tyre pressure loss warning appears in the multifunction display.
You must not exceed a maximum speed of
80 km/h.
When replacing one or all tyres, observe the fol-
lowing specifications for your vehicle's tyres:
R size
R type and
R the "MOExtended" mark.
If a tyre has gone flat and cannot be replaced
with an MOExtended tyre, a standard tyre may
be used as a temporary measure. Make sure
that you use the proper size and type (summer
or winter tyre).
Vehicles with MOExtended tyres are not equip-
ped with a TIREFIT kit at the factory. It is there-
fore recommended that you additionally equip
your vehicle with a TIREFIT kit if you fit tyres that do not feature run-flat characteristics, e.g. win-
ter tyres. A TIREFIT kit can be obtained from a
qualified specialist workshop. 250
Flat tyreBreakdown assistance
Page 254 of 293
Important safety notes
G
WARNING
When driving in emergency mode, the driving characteristics deteriorate, e.g. when corner-
ing, accelerating quickly and when braking.
There is a risk of accident.
Do not exceed the stated maximum speed.
Avoid abrupt steering and driving manoeu-
vres, and driving over obstacles (kerbs, pot-
holes, off-road). This applies in particular to a laden vehicle.
Stop driving in emergency mode if:
R you hear banging noises.
R the vehicle starts to shake.
R you see smoke and smell rubber.
R ESP ®
is intervening constantly.
R there are tears in the sidewalls of the tyre.
After driving in emergency mode, have the
wheel rims checked at a qualified specialist
workshop with regard to their further use. The
faulty tyre must be replaced. TIREFIT kit
Important safety notes TIREFIT is a tyre sealant.
You can use TIREFIT to seal punctures of up to
4 mm, particularly those in the tyre tread. You
can use TIREFIT at outside temperatures down
to
Ò20 †. G
WARNING
In the following situations, the tyre sealant is
unable to provide sufficient breakdown assis- tance, as it is unable to seal the tyre properly:
R there are cuts or punctures in the tyre
larger than those mentioned above.
R the wheel rim is damaged.
R you have driven at very low tyre pressures
or on a flat tyre.
There is a risk of an accident.
Do not drive any further. Contact a qualified
specialist workshop. G
WARNING
The tyre sealant is harmful and causes irrita-
tion. It must not come into contact with your
skin, eyes or clothing or be swallowed. Do not inhale TIREFIT fumes. Keep tyre sealant away
from children. There is a risk of injury.
If you come into contact with the tyre sealant,
observe the following:
R Rinse off the tyre sealant from your skin
immediately with water.
R If the tyre sealant comes into contact with
your eyes, immediately rinse them thor-
oughly with clean water.
R If tyre sealant is swallowed, immediately
rinse your mouth out thoroughly and drink
plenty of water. Do not induce vomiting,
and seek medical attention immediately.
R Immediately change out of clothing which
has come into contact with tyre sealant.
R If an allergic reaction occurs, seek medical
attention immediately.
Comply with the manufacturer’s safety instruc-
tions on the sticker on the tyre inflation com-
pressor.
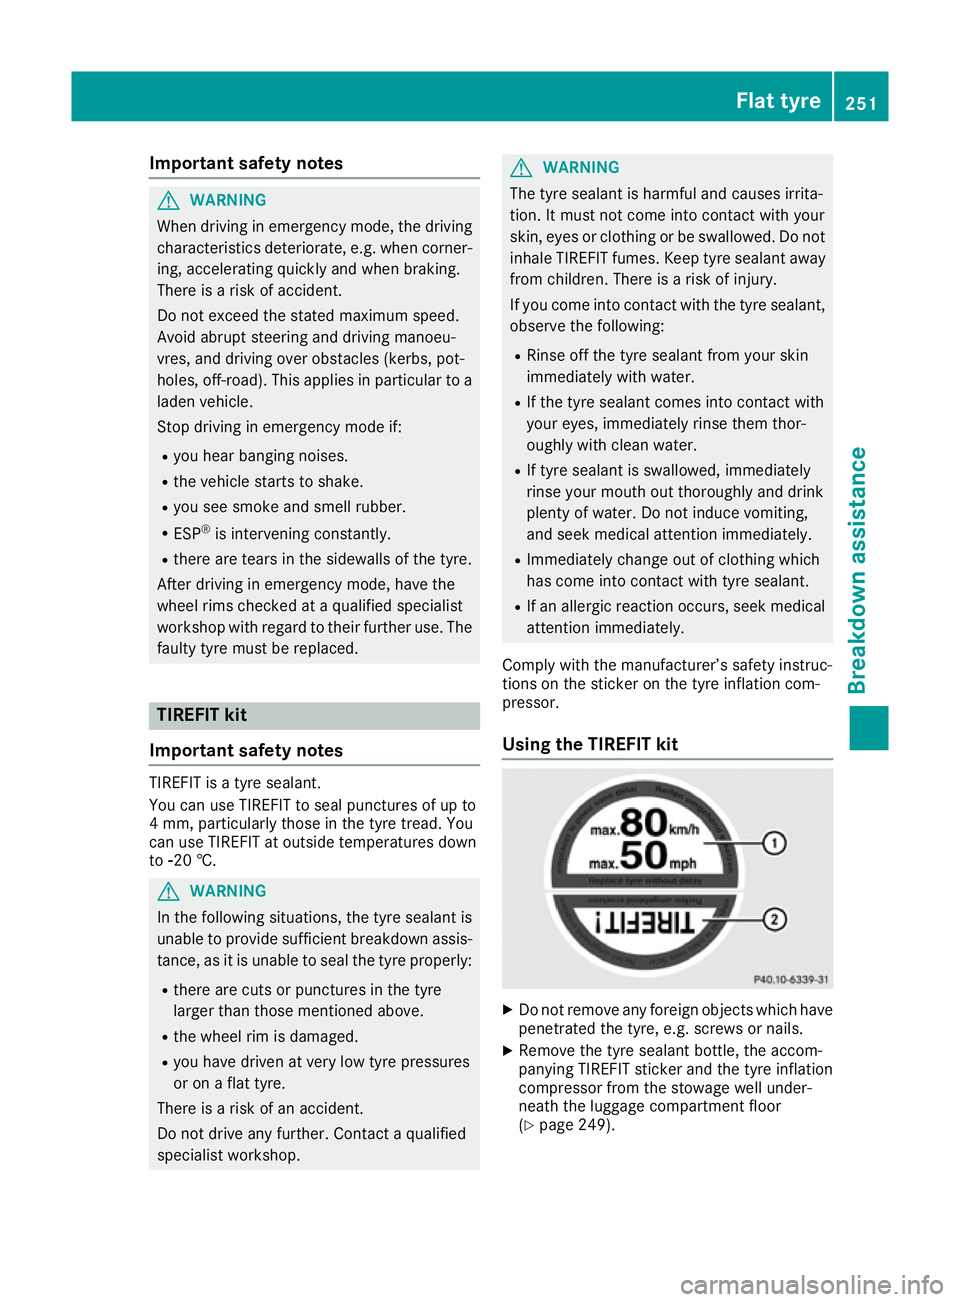
Using the TIREFIT kit X
Do not remove any foreign objects which have
penetrated the tyre, e.g. screws or nails.
X Remove the tyre sealant bottle, the accom-
panying TIREFIT sticker and the tyre inflation
compressor from the stowage well under-
neath the luggage compartment floor
(Y page 249). Flat tyre
251Breakdown assistance Z
Page 271 of 293
R
Run in new tyres at moderate speeds for the
first 100 km. They only reach their full per-
formance after this distance.
R Do not drive with tyres which have too little
tread depth. This otherwise significantly
reduces the traction on wet roads (aquaplan-
ing).
R Replace the tyres after six years at the latest,
regardless of wear. MOExtended tyres (tyres with run-flat
characteristics)
With MOExtended tyres (tyres with run-flat char- acteristics), you can continue to drive your vehi-
cle even if there is a total loss of pressure in one or more tyres.
MOExtended tyres may only be used in conjunc-tion with an activated tyre pressure monitor and
only on wheels specifically tested by Mercedes- Benz.
Notes on driving with MOExtended tyres with a
flat tyre (Y page 250).
Vehicles with MOExtended tyres are not equip-
ped with a TIREFIT kit at the factory. It is there-
fore recommended that you additionally equip
your vehicle with a TIREFIT kit if you fit tyres that do not feature run-flat characteristics, e.g. win-
ter tyres. A TIREFIT kit can be obtained from a
qualified specialist workshop. Winter operation
General notes
Have your vehicle winterproofed at a qualified
specialist workshop at the onset of winter.
Observe the notes in the "Changing a wheel"
section (Y page 273). Driving with summer tyres
At temperatures below +7 †, summer tyres lose elasticity and therefore traction and braking
power. Change the tyres on your vehicle to
M+S tyres. Using summer tyres at very cold
temperatures could cause tears to form,
thereby damaging the tyres permanently.
Mercedes-Benz cannot accept responsibility for
this type of damage. G
WARNING
Damaged tyres can cause tyre inflation pres-
sure loss. As a result, you could lose control of your vehicle. There is a risk of accident.
Check the tyres regularly for signs of damageand replace any damaged tyres immediately. M+S tyres
G
WARNING
M+S tyres with a tyre tread depth of less than 4 mm are not suitable for use in winter as they
do not provide sufficient traction. There is a
risk of accident.
M+S tyres with a tread depth of less than
4 mm must be replaced.
At temperatures below +7 †, use winter tyres or all-season tyres. Both types of tyre are identified
by the M+S marking.
Only winter tyres bearing the isnowflake
symbol in addition to the M+S marking provide
the best possible grip in wintry road conditions. Only these tyres will allow driving safety sys-
tems such as ABS and ESP ®
to function opti-
mally in winter. These tyres have been devel-
oped specifically for driving in snow.
Use M+S tyres of the same make and tread on all
wheels to maintain safe handling characteris-
tics.
Always observe the maximum permissible
speed specified for the M+S tyres you have fit-
ted.
If you fit M+S tyres that have a lower maximum
permissible speed than that of the vehicle, affix
an appropriate warning sign in the driver's field of vision. This can be obtained at a qualified
specialist workshop.
When you have fitted the M+S tyres:
X Check the tyre pressures (Y page 269).
X Restart the tyre pressure monitor
(Y page 272). 268
Winter operationWheels and ty
res
Page 272 of 293
Snow chains
G
WARNING
If snow chains are fitted to the rear wheels,
they may scrape against the vehicle body or
chassis components. This could cause dam-
age to the vehicle or the tyres. There is a risk of an accident.
To avoid hazardous situations:
R never fit snow chains on the rear wheels
R always fit snow chains in pairs to the front
wheels.
For safety reasons, Mercedes-Benz recom-
mends that you only use snow chains that have been specifically approved for your vehicle by
Mercedes-Benz, or that are of a corresponding
standard of quality. For more information,
please contact a qualified specialist workshop.
If you intend to fit snow chains, please bear the
following points in mind:
R snow chains cannot be fitted to all wheel-tyre
combinations. Permissible wheel-tyre combi-
nations (Y page 277).
R only use snow chains if the road surface is
completely snow-covered. Remove the snow
chains as soon as possible when you come to a road that is not snow-covered.
R local regulations may restrict the use of snow
chains. Observe the appropriate regulations if you wish to fit snow chains.
R do not exceed the maximum permissible
speed of 50 km/h.
R when snow chains are fitted, never use Active
Parking Assist (Y page 158).
You may wish to deactivate ESP ®
(Y page 65)
when pulling away with snow chains fitted. This way you can allow the wheels to spin in a con-
trolled manner, achieving increased driving
force (cutting action). Tyre pressure
Tyre pressure specifications
G
WARNING
Underinflated or overinflated tyres pose the
following risks:
R the tyres may burst, especially as the load
and vehicle speed increase.
R the tyres may wear excessively and/or
unevenly, which may greatly impair tyre
traction.
R the driving characteristics, as well as steer-
ing and braking, may be greatly impaired.
There is a risk of an accident.
Observe the recommended tyre pressure and check the tyre pressure of all the tyres includ-
ing the spare wheel:
R at least every two weeks
R when the load changes
R before embarking on a longer journey
R for changed operating conditions, e.g. off-
road driving
If necessary, correct the tyre pressure. G
WARNING
If you fit unsuitable accessories onto tyre
valves, the tyre valves may be overloaded and malfunction, which can cause tyre pressure
loss. Due to their design, retrofitted tyre pres-
sure monitors keep the tyre valve open. This
can also result in tyre pressure loss. There is a risk of accident.
Only screw standard valve caps or valve caps
specifically provided by Mercedes-Benz for
your vehicle onto the tyre valve. G
WARNING
If the tyre pressure drops repeatedly, the
wheel, valve or tyre may be damaged. Tyre
pressure that is too low may result in a tyre
blow-out. There is a risk of accident. R Check the tyre for foreign objects.
R Check whether the wheel is losing air or the
valve is leaking. Tyre pressure
269Wheels and tyres
Z