fuel pressure MERCEDES-BENZ B-CLASS SPORTS 2013 Owners Manual
[x] Cancel search | Manufacturer: MERCEDES-BENZ, Model Year: 2013, Model line: B-CLASS SPORTS, Model: MERCEDES-BENZ B-CLASS SPORTS 2013Pages: 336, PDF Size: 30 MB
Page 19 of 336
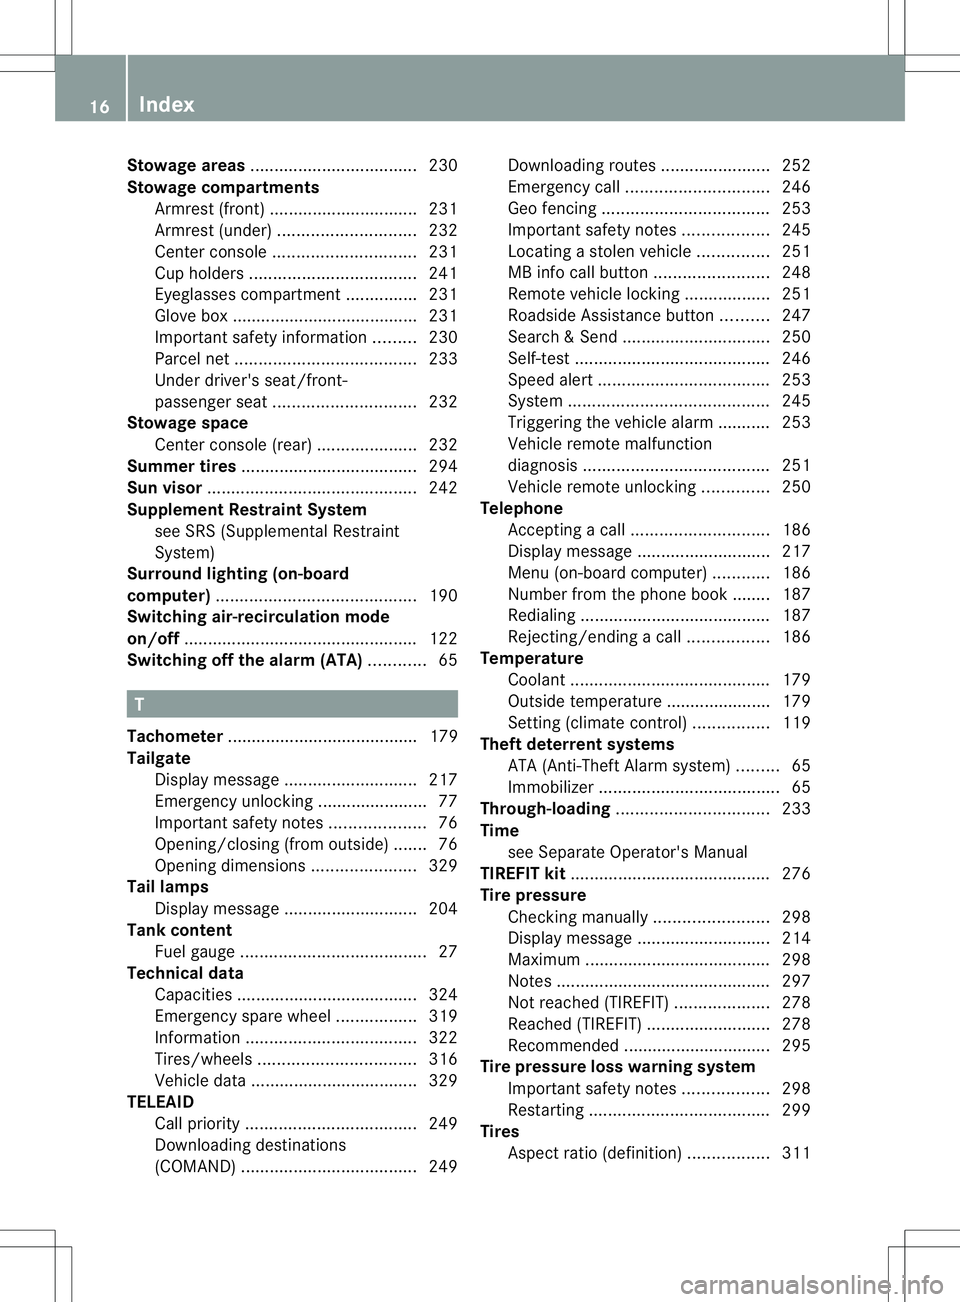
Stowage areas
................................... 230
Stowage compartments Armrest (front) ............................... 231
Armrest (under) ............................. 232
Center console .............................. 231
Cuph olders ................................... 241
Eyeglasses compartment ...............231
Glove box ...................................... .231
Important safety information .........230
Parce lnet ...................................... 233
Under driver's seat/front-
passenger seat. ............................. 232
Stowage space
Center console (rear) .....................232
Summer tires ..................................... 294
Sun visor ............................................ 242
Supplement Restraint System see SRS (Supplemental Restraint
System)
Surround lighting (on-board
computer) .......................................... 190
Switching air-recirculation mode
on/off ................................................. 122
Switching off the alarm (ATA) ............65 T
Tachometer ........................................ 179
Tailgate Display message ............................ 217
Emergency unlocking .......................77
Important safety notes ....................76
Opening/closing (from outside) .......76
Opening dimensions ......................329
Tail lamps
Display message ............................ 204
Tank content
Fuel gauge ....................................... 27
Technical data
Capacities ...................................... 324
Emergency spare wheel .................319
Information .................................... 322
Tires/wheels ................................. 316
Vehicle data ................................... 329
TELEAID
Call priority .................................... 249
Downloading destinations
(COMAND) ..................................... 249Downloading route
s....................... 252
Emergency call .............................. 246
Geo fencing ................................... 253
Important safety notes ..................245
Locating astolen vehicl e............... 251
MB info call button ........................248
Remote vehicle locking ..................251
Roadside Assistance button ..........247
Search &Send ............................... 250
Self-test ......................................... 246
Speed alert .................................... 253
System .......................................... 245
Triggering the vehicle alarm ........... 253
Vehicle remote malfunction
diagnosi s....................................... 251
Vehicle remote unlocking ..............250
Telephone
Accepting acall............................. 186
Display message ............................ 217
Menu (on-board computer) ............186
Number from the phone book ....... .187
Redialing ........................................ 187
Rejecting/ending acall................. 186
Temperature
Coolant .......................................... 179
Outside temperature ..................... .179
Setting (climate control) ................119
Theft deterrent systems
ATA (Anti-Theft Alarm system) .........65
Immobilize r...................................... 65
Through-loading ................................ 233
Time see Separate Operator's Manual
TIREFIT kit .......................................... 276
Tire pressure Checking manually ........................298
Display message ............................ 214
Maximum ....................................... 298
Notes ............................................. 297
Not reached (TIREFIT) ....................278
Reached (TIREFIT) ..........................278
Recommended ............................... 295
Tire pressure loss warning system
Important safety notes ..................298
Restarting ...................................... 299
Tires
Aspect ratio (definition) .................31116
Index
Page 23 of 336
Protection of the environment
General notes
H
Environmental note
Daimler's declared policy is one of integrated
environmental protection.
The objectives are for the natural resources
that form the basis of our existence on this
planet to be used sparingly and in a manner
that takes the requirements of both nature
and humanity into account.
You too can help to protect the environment
by operating your vehicle in an
environmentally responsible manner.
Fuel consumption and the rate of engine,
transmission, brake and tire wear depend on
the following factors:
R operating conditions of your vehicle
R your personal driving style
You can influence both factors. You should
bear the following in mind:
Operating conditions:
R avoid short trips as these increase fuel
consumption.
R always make sure that the tire pressures
are correct.
R do not carry any unnecessary weight.
R keep an eye on the vehicle's fuel
consumption.
R remove roof racks once you no longer need
them.
R a regularly serviced vehicle will contribute
to environmental protection. You should
therefore adhere to the service intervals.
R always have service work carried out at a
qualified specialist workshop.
Personal driving style:
R do not depress the accelerator pedal when
starting the engine.
R do not warm up the engine when the vehicle
is stationary.
R drive carefully and maintain a safe distance
from the vehicle in front. R
avoid frequent, sudden acceleration.
R change gear in good time and use each gear
only up to Ôof its maximum engine speed.
R switch off the engine in stationary traffic. Environmental concerns and
recommendations
Wherever the operating instructions require
you to dispose of materials, first try to
regenerate or re-use them. Observe the
relevant environmental rules and regulations
when disposing of materials. In this way you
will help to protect the environment. Product information
Mercedes-Benz recommends that you use
genuine Mercedes-Benz parts, conversion
parts and accessories that have been
approved for your vehicle.
Mercedes-Benz tests genuine parts as well as
conversion parts and accessories that have
been specifically approved for your vehicle for
their reliability, safety and suitability. Despite
ongoing market research, Mercedes-Benz is
unable to assess other parts. Therefore,
Mercedes-Benz accepts no responsibility for
the use of such parts in Mercedes-Benz
vehicles. This is also the case, even if they
have been independently or officially
approved. The use of non-approved parts
could affect your vehicle's operating safety.
Genuine Mercedes-Benz parts, approved
conversion parts and accessories are
available from any authorized Mercedes-Benz
Center. Here, you will receive advice about
permissible technical modifications, and the
parts will be professionally installed. 20
Introduction
Page 143 of 336
!
Overfilling the fuel tank could damage the
fuel system.
! Take care not to spill any fuel on painted
surfaces. You could otherwise damage the
paintwork.
! Use a filter when refueling from a fuel can.
Otherwise, the fuel lines and/or injection
system could be blocked by particles from
the fuel can.
If you overfill the fuel tank, fuel could spray
out when the fuel pump nozzle is removed.
Further information on fuel and on fuel grades
can be found in the "Fuel" section
(Y page 324). Refueling
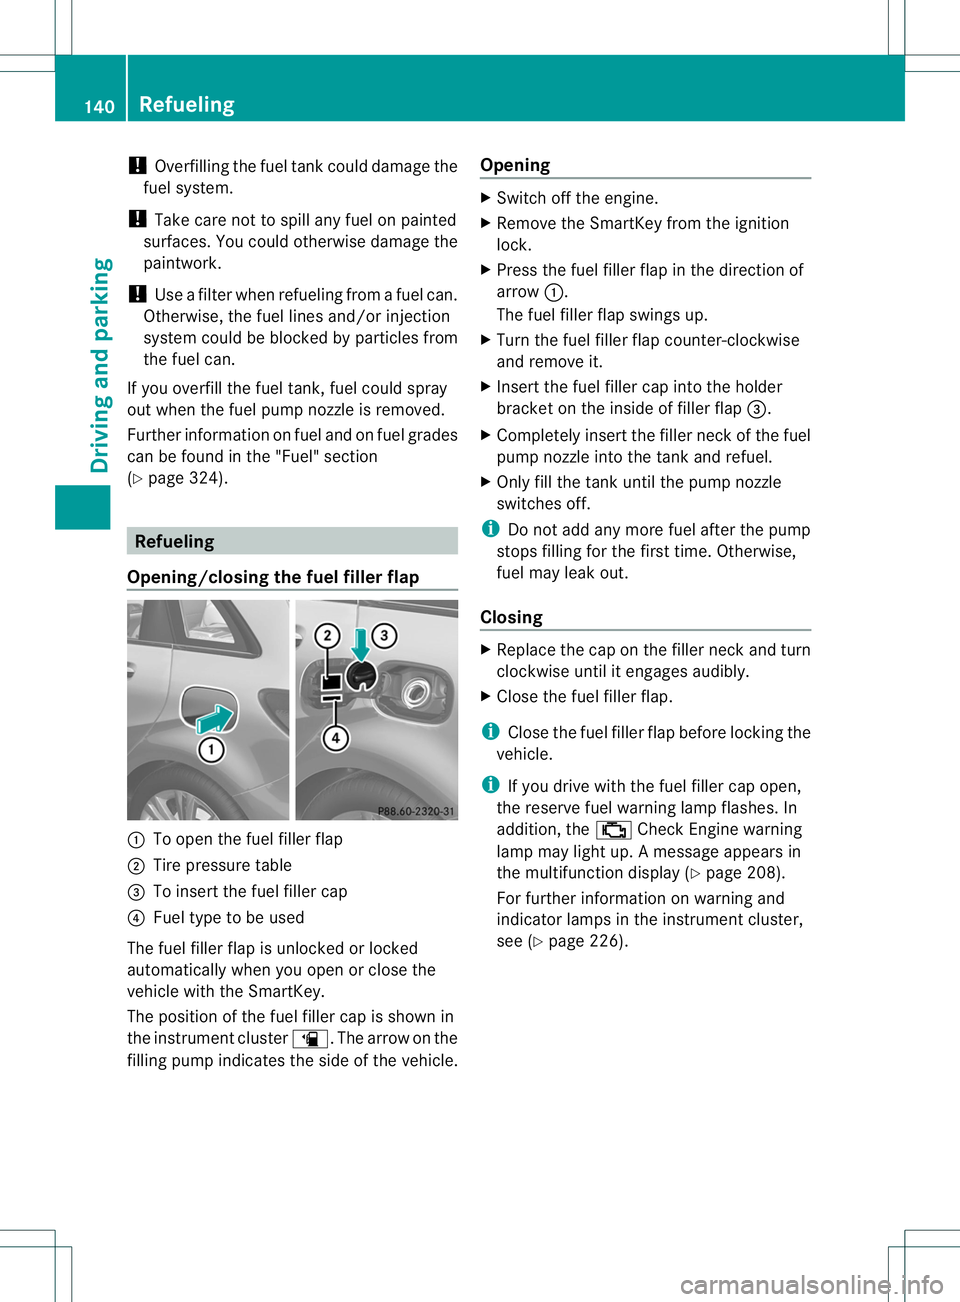
Opening/closing the fuel filler flap :
To open the fuel filler flap
; Tire pressure table
= To insert the fuel filler cap
? Fuel type to be used
The fuel filler flap is unlocked or locked
automatically when you open or close the
vehicle with the SmartKey.
The position of the fuel filler cap is shown in
the instrument cluster æ.The arrow on the
filling pump indicates the side of the vehicle. Opening X
Switch off the engine.
X Remove the SmartKey from the ignition
lock.
X Press the fuel filler flap in the direction of
arrow :.
The fuel filler flap swings up.
X Turn the fuel filler flap counter-clockwise
and remove it.
X Insert the fuel filler cap into the holder
bracket on the inside of filler flap =.
X Completely insert the filler neck of the fuel
pump nozzle into the tank and refuel.
X Only fill the tank until the pump nozzle
switches off.
i Do not add any more fuel after the pump
stops filling for the first time. Otherwise,
fuel may leak out.
Closing X
Replace the cap on the filler neck and turn
clockwise until it engages audibly.
X Close the fuel filler flap.
i Close the fuel filler flap before locking the
vehicle.
i If you drive with the fuel filler cap open,
the reserve fuel warning lamp flashes. In
addition, the ;Check Engine warning
lamp may light up. Amessage appears in
the multifunction display (Y page 208).
For further information on warning and
indicator lamps in the instrument cluster,
see (Y page 226). 140
RefuelingDriving and parking
Page 147 of 336
When the vehicle has been braked to a
standstill, the electric parking brake is
engaged.
Parking the vehicle for
along period
If you leave the vehicle parked for longer than
four weeks, the battery may be damaged by
exhaustive discharging.
If you leave the vehicle parked for longer than
six weeks, the vehicle may suffer damage as
a result of lack of use.
X Visit a qualified specialist workshop and
seek advice.
i You can obtain information about trickle
chargers from a qualified specialist
workshop. Driving tips
General notes
Important safety notes G
WARNING
Always remembe rthat you must concentrate
primarily on driving the vehicle. The driver's
concentration must always be directed
primarily at road traffic. For your own safety
and that of others, we recommend that you
stop the vehicle at a safe place and in
accordance with the traffic conditions before
making or accepting a phone call.
Comply with all legal requirements if you use
the telephone while driving. Use the hands-
free system and only use the telephone when
road, weather and traffic conditions permit. In
some jurisdictions, it is forbidden for drivers
to use mobile phones while driving.
Only operate the audio system or COMAND
(Cockpit Management and Data System) in
compliance with all legal requirements and
when the road, weather and traffic conditions
permit. You may otherwise not be able to observe the traffic conditions, endangering
yourself and others.
Remember that your vehicle covers a distance
of 44 ft (approximately 14
m)a second when
it is traveling at only 30 mph (approximately
50 km/h). G
WARNING
If you switch off the ignition while driving,
safety-relevan tfunctions are only available
with limitations, or no tatall. This could affect,
for example, the power steering and the brake
boosting effect .You will require considerably
more effort to steer and brake. There is a risk
of an accident.
Do not switch off the ignition while driving.
Drive sensibly –save fuel Observe the following tips to save fuel:
R
The tires should always be inflated to the
recommended tire pressure.
R Remove unnecessary loads.
R Remove roof racks whe nthey are not
needed.
R Warm up the engine at low engine speeds.
R Avoid frequent acceleration or braking.
R Have all maintenance work carried out as
indicated by the service intervals in the
Maintenance Booklet or by the service
interval display.
Fuel consumption also increases when
driving in cold weather, in stop-and-go traffic
and in mountainous terrain.
Drinking and driving G
WARNING
Drinking and driving and/or taking drugs and
driving are very dangerous combinations.
Even a small amount of alcohol or drugs can
affect your reflexes, perceptions and
judgment. 144
Driving tipsDriving and parking
Page 148 of 336
The possibility of a serious or even fatal
accident are greatly increased when you drink
or take drugs and drive.
Do not drink or take drugs and drive or allow
anyone to drive who has been drinking or
taking drugs.
Exhaust check G
WARNING
Combustion engines emit poisonous exhaust
gases such as carbon monoxide. Inhaling
these exhaust gases leads to poisoning. There
is a risk of fatal injury. Therefore never leave
the engine running in enclosed spaces
without sufficient ventilation.
Certain engine systems are designed to keep
the level of poisonous components in exhaust
fumes within legal limits.
These systems only work at peak efficiency if
they are serviced exactly in accordance with
the manufacturer's specifications. For this
reason, only have work on the engine carried
out by qualified and authorized Mercedes-
Benz technicians.
The engine settings must not be changed
under any circumstances. Furthermore, all
specific service work must be carried out at
regular intervals and in accordance with the
Mercedes-Benz service requirements. Details
can be found in the Maintenance Booklet. ECO display
The ECO display provides feedback on how
economical your driving characteristics are.
The ECO display assists you in achieving the
most economical driving style for the
selected settings and existin gconditions.
Consumption can be significantly influenced
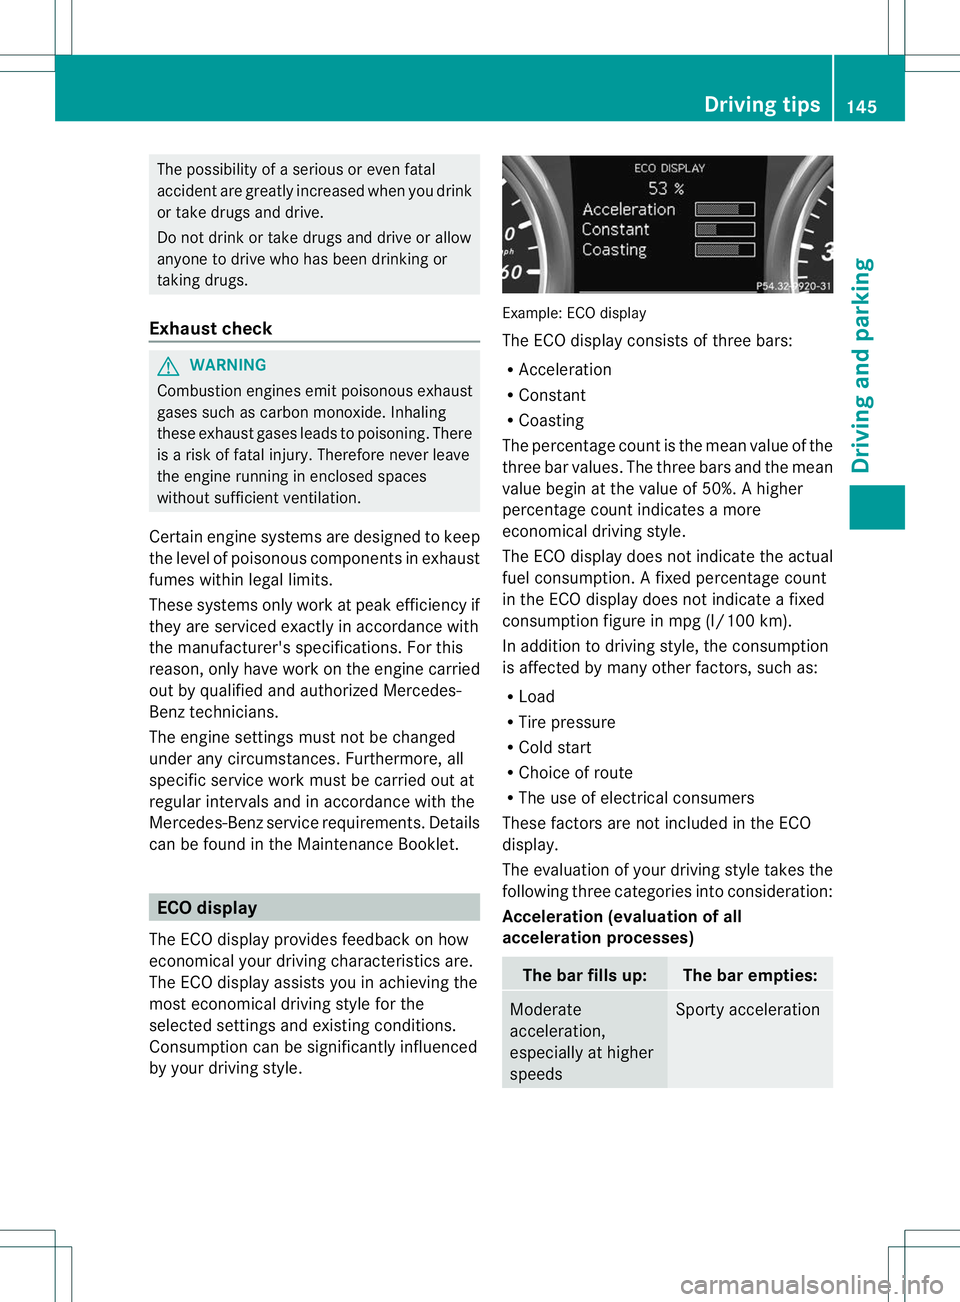
by your driving style. Example: ECO display
The ECO display consists of three bars:
R
Acceleration
R Constant
R Coasting
The percentage count is the mean value of the
three bar values. The three bars and the mean
value begin at the value of 50%. Ahigher
percentage coun tindicates a more
economical driving style.
The ECO display does not indicate the actual
fuel consumption. A fixed percentage count
in the ECO display does not indicate a fixed
consumption figure in mpg (l/100 km).
In additio nto driving style, the consumption
is affected by many other factors, such as:
R Load
R Tire pressure
R Cold start
R Choice of route
R The use of electrical consumers
These factors are not included in the ECO
display.
The evaluation of your driving style takes the
following three categories into consideration:
Acceleration (evaluation of all
acceleration processes) The bar fills up: The bar empties:
Moderate
acceleration,
especially at higher
speeds Sporty acceleration Driving tips
145Driving and parking Z
Page 212 of 336
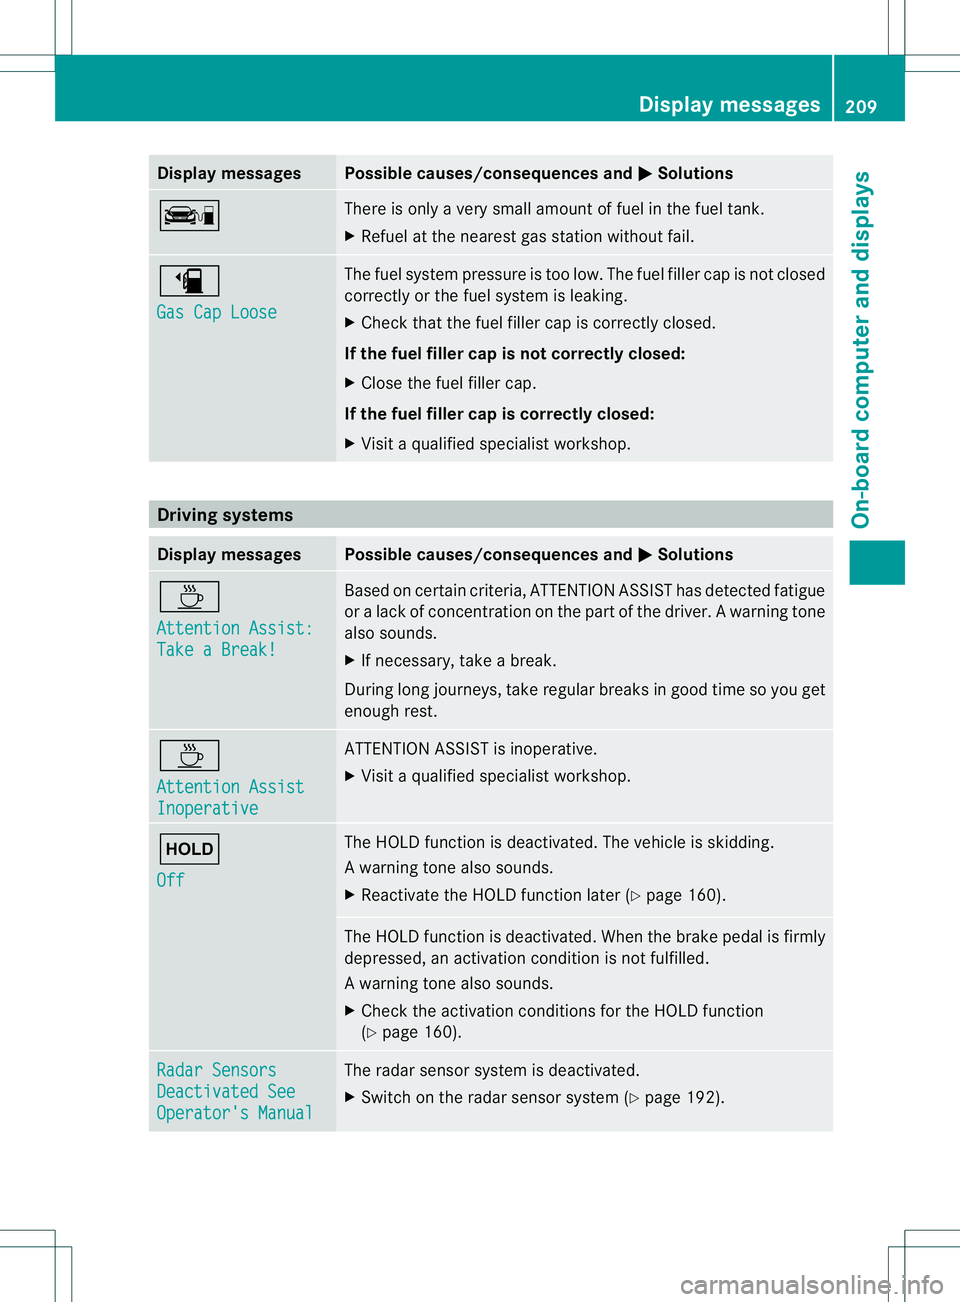
Display messages Possible causes/consequences and
M Solutions
ç There is only a very small amount of fuel in th
efuel tank.
X Refuel at the neares tgas statio nwithout fail. æ
Gas Cap Loose The fuel system pressure is too low. The fuel filler cap is not closed
correctly or the fuel system is leaking.
X
Check that the fuel filler cap is correctly closed.
If the fuel filler cap is not correctly closed:
X Close the fuel filler cap.
If the fuel filler cap is correctly closed:
X Visit a qualified specialist workshop. Driving systems
Displa
ymessages Possible causes/consequences and
M Solutions
À
Attention Assist:
Take a Break! Based on certain criteria, ATTENTION ASSIST has detected fatigue
or
alack of concentration on thep art of thedriver. A warning tone
also sounds.
X If necessary, take a break.
During long journeys, take regular breaks in good time so you get
enough rest. À
Attention Assist
Inoperative ATTENTION ASSIST is inoperative.
X
Visi taqualified specialist workshop. ë
Off The HOLD function is deactivated. The vehicle is skidding.
Aw
arning tone also sounds.
X Reactivate the HOLD function later (Y page 160). The HOLD function is deactivated. When the brak
epedal is firmly
depressed, an activation condition is not fulfilled.
Aw arning tone also sounds.
X Check the activation conditions for the HOLD function
(Y page 160). Radar Sensors
Deactivated See
Operator's Manual The radar sensor system is deactivated.
X
Switch on the radar sensor system (Y page 192). Display messages
209On-board computer and displays Z
Page 229 of 336
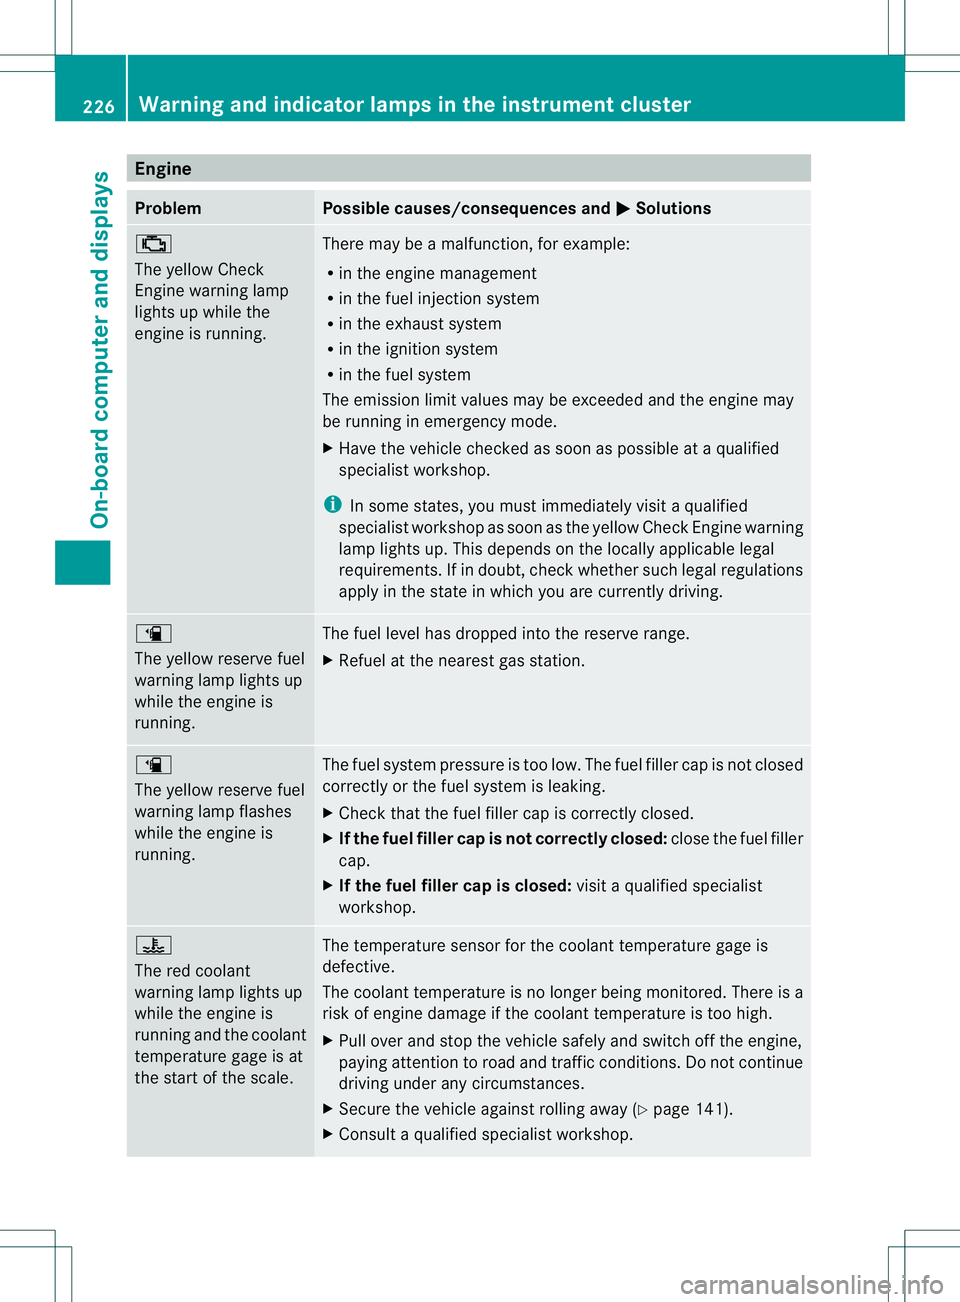
Engine
Problem Possible causes/consequences and
M Solutions
;
The yellow Check
Engine warning lamp
lights up while the
engine is running.
There may be a malfunction, for example:
R
in the engine management
R in the fuel injection system
R in the exhaust system
R in the ignition system
R in the fuel system
The emission limit values may be exceeded and the engin emay
be running in emergency mode.
X Have the vehicle checked as soon as possible at a qualified
specialist workshop.
i In some states, you must immediately visit a qualified
specialist workshop as soon as the yellow Chec kEngine warning
lamp lights up.T his depends on the locally applicable legal
requirements. If in doubt, check whether such legal regulations
apply in the state in which you are currently driving. æ
The yellow reserve fuel
warning lamp lights up
while the engine is
running.
The fuel level has dropped into the reserve range.
X
Refuel at the nearest gas station. æ
The yellow reserve fuel
warning lamp flashes
while the engine is
running.
The fuel system pressure is too low. The fuel filler cap is not closed
correctly or the fuel system is leaking.
X
Check that the fuel filler cap is correctly closed.
X If the fuel filler cap is not correctly closed: close the fuel filler
cap.
X If the fuel filler cap is closed: visit a qualified specialist
workshop. ?
The red coolant
warning lamp lights up
while the engine is
running and the coolant
temperature gage is at
the start of the scale.
The temperature sensor for the coolant temperature gage is
defective.
The coolant temperature is no longer being monitored. There is a
risk of engine damage if the coolant temperature is too high.
X
Pull over and stop the vehicle safely and switch off the engine,
paying attention to road and traffic conditions. Do not continue
driving under any circumstances.
X Secure the vehicle against rolling away (Y page 141).
X Consult a qualified specialist workshop. 226
Warning and indicator lamps in the instrument clusterOn-board computer and displays
Page 281 of 336
i
If tire sealant leaks out, allow it to dry. It
can then be removed like a layer of film.
If yourc lothes are soiled with tire sealant,
have the mcleaned with perchloroethylene
at a dry cleaner as soon as possible.
Tire pressure not reached If
ap ressure of 200 kPa (2.0 bar/ 29 psi) has
not been achieved after ten minutes:
X Switch off the tire inflation compressor.
X Unscrew the filler hose from the valve of
the faulty tire.
X Very slowly drive forwards or reverse
approximately 30 ft (10 m).
X Pump up the tire again.
After a maximum of ten minutes, the tire
pressure must be at least 200 kPa (2.0 bar/
29 psi). G
WARNING
If the required tire pressure is not reached
after the specified time, the tire is too badly
damaged. The tire sealant cannot repair the
tire in this instance. Damaged tires and a tire
pressure that is too low can significantly
impair the vehicle's braking and driving
characteristics. There is a risk of accident.
Do not continue driving. Contact a qualified
specialist workshop.
Tire pressure reached G
WARNING
At ire temporarily sealed with tire sealant
impairs the driving characteristics and is not
suitable for higher speeds. There is a risk of
accident.
You should therefore adapt your driving style
accordingly and drive carefully. Do not exceed
the specified maximum speed with a tire that
has been repaired using tire sealant.
! After use, excess tire sealant may run out
of the filler hose. This could cause stains. Therefore, place the filler hose in the plastic
bag that contained the TIREFIT kit. H
Environmental note
Have the used tire sealant bottle disposed of
professionally, e.g. at aqualified specialist
workshop.
If ap ressure of 200 kPa (2.0 bar/ 29 psi) has
been attained after a maximum of ten
minutes:
X Switch off the tire inflation compressor.
X Unscrew the filler hose from the valve of
the faulty tire.
X Stow the tire sealant bottle and the tire
inflation compressor.
X Pull away immediately.
The maximu mspeed for atire treated with tire
sealant is 50 mph (80k m/h). The upper part
of the TIREFIT sticker must be affixed to the
instrument cluster in the driver's field of
vision.
X Stop after driving for approximately ten
minutes and check the tire pressure with
the tire inflation compressor.
The tire pressure must now be at least
130 kPa (1.3 bar/19 psi). G
WARNING
If the required tire pressure is not reached
after driving for a short period, the tire is too
badly damaged. The tire sealant cannot repair
the tire in this instance. Damaged tires and a
tire pressure that is too low can significantly
impair the vehicle's braking and driving
characteristics. There is a risk of accident.
Do not continue driving. Contact a qualified
specialist workshop.
X Correct the tire pressure if it is still at least
130 kPa (1.3 bar/19 psi) (for the values,
see the Tire and Loading Information
placard on the driver's side B-pillar or tire
pressure table on the fuel filler flap).
X To increase the tire pressure: switch on
the tire inflation compressor. 278
Flat tireBreakdown assistance
Page 295 of 336
Useful information
i This Operator's Manual describes all
models and all standard and optional
equipment of your vehicle available at the
time of publication of the Operator's
Manual. Country-specific differences are
possible. Please note that your vehicle may
not be equipped with all features
described. This also applies to safety-
related systems and functions.
i Please read the information on qualified
specialist workshops (Y page 23).Important safety notes
G
WARNING
If wheels and tires of the wrong size are used,
the wheel brakes or suspension components
may be damaged. There is arisk of accident.
Always replace wheels and tires with those
that fulfill the specifications of the original
part (designation, manufacturer, model). G
WARNING
Af lat tire severely impairs the driving,
steering and braking characteristics of the
vehicle. There is a risk of accident.
Tires without run-flat characteristics:
R do not drive with aflat tire.
R immediately replace the flat tire with your
emergency spare wheel or spare wheel, or
consult a qualified specialist workshop.
Tires with run-flat characteristics:
R pay attention to the information and
warning notices on MOExtended tires (tires
with run-flat characteristics).
Accessories that are not approved for your
vehicle by Mercedes-Ben zorare not being
used correctly can impair the operating
safety. Before purchasing and using non-approved
accessories, visit a qualified specialist
workshop and inquire about:
R
suitability
R legal stipulations
R factory recommendations
For information on dimensions and types of
wheels and tires for yourv ehicle, see
(Y page 316).
Information on air pressure for the tires on
your vehicle can be found:
R on the vehicle's Tire and Loading
Information placard on the B-pillar
R on the tire pressure label on the fuel filler
flap
R under "tire pressure"
i Further information on wheels and tires
can be obtained at any qualified specialist
workshop. Operation
Information on driving
R If the vehicle is heavily laden, chec kthe tire
pressures and correct them if necessary.
R While driving, pay attention to vibrations,
noises and unusual handling
characteristics, e.g. pulling to one side.
This may indicate that the wheels or tires
are damaged. If you suspect that a tire is
defective, reduce your speed immediately.
Stop the vehicle as soon as possible to
check the wheels and tires for damage.
Hidden tire damage could also be causing
the unusual handling characteristics. If you
find no signs of damage, have the wheels
and tires checked at a qualified specialist
workshop.
R When parking your vehicle, make sure that
the tires do not get deformed by the curb
or other obstacles. If it is necessary to drive
over curbs, speed humps or similar
elevations, try to do so slowly and at an
obtuse angle. Otherwise, the tires, 292
OperationWheels and tires
Page 299 of 336
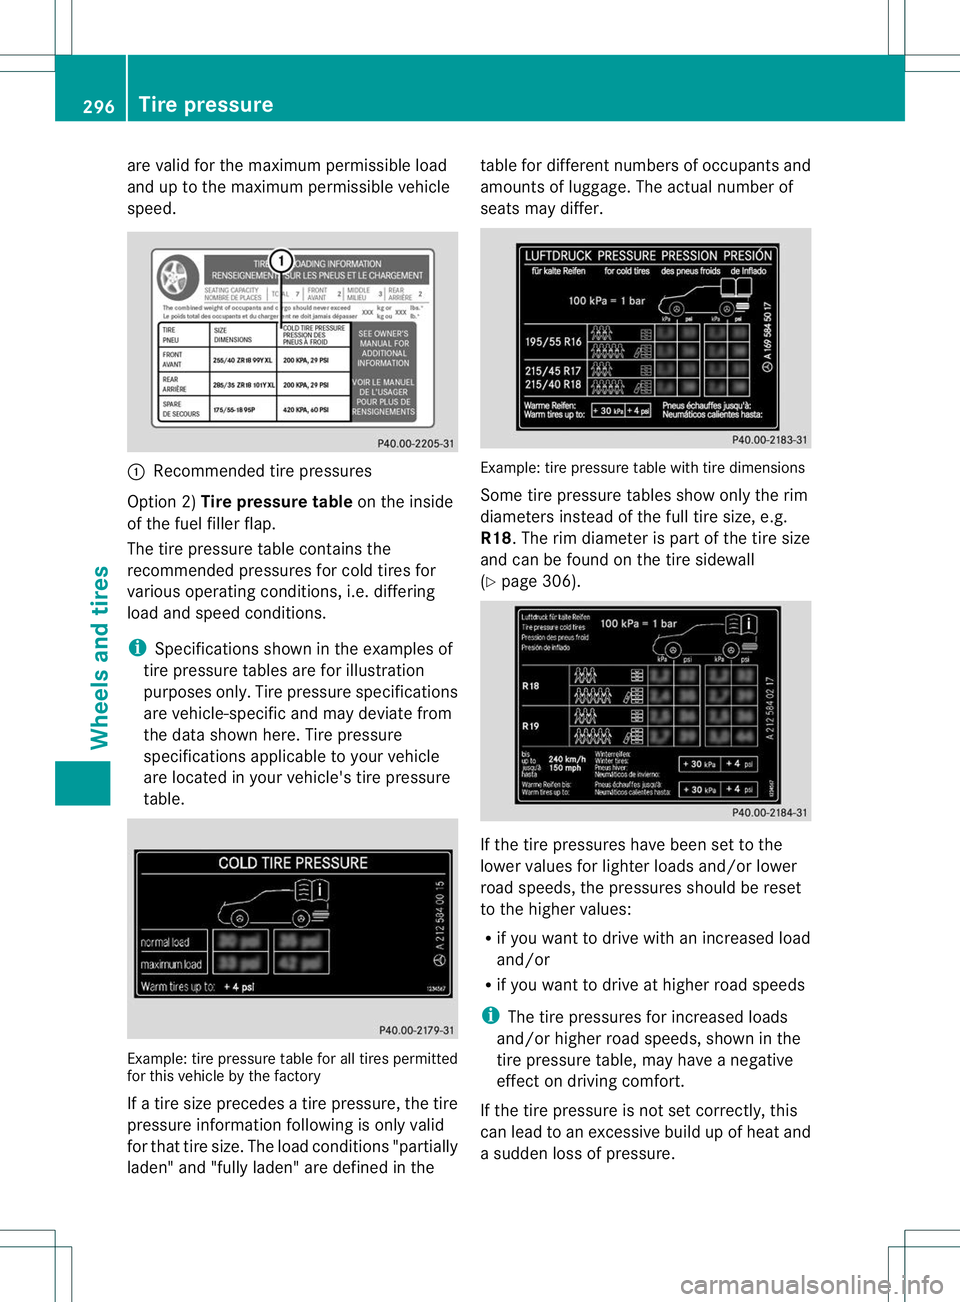
are valid for the maximum permissible load
and up to the maximum permissible vehicle
speed.
:
Recommended tire pressures
Option 2) Tire pressure table on the inside
of the fuel fille rflap.
The tire pressure table contains the
recommended pressures for cold tires for
various operating conditions, i.e. differing
load and speed conditions.
i Specifications shown in the examples of
tire pressure tables are for illustration
purposes only. Tire pressure specifications
are vehicle-specific and may deviate from
the data shown here. Tire pressure
specifications applicable to your vehicle
are located in your vehicle's tire pressure
table. Example: tire pressure table for all tires permitted
for this vehicle by the factory
If a tire size precedes a tire pressure, the tire
pressure information followin
gis only valid
for that tire size. The load conditions "partially
laden" and "fully laden" are defined in the table for different numbers of occupants and
amounts of luggage. The actual number of
seats may differ.
Example: tire pressure table with tire dimensions
Some tire pressure tables show only the rim
diameters instead of the full tire size, e.g.
R18. The rim diameter is part of the tire size
and can be found on the tire sidewall
(Y
page 306). If the tire pressures have been set to the
lower values for lighter loads and/or lower
road speeds, the pressures should be reset
to the higher values:
R
if you want to drive with an increased load
and/or
R if you want to drive at higher road speeds
i The tire pressures for increased loads
and/or higher road speeds, shown in the
tire pressure table, may have a negative
effect on driving comfort.
If the tire pressure is not set correctly, this
can lead to an excessive build up of heat and
a sudden loss of pressure. 296
Tire pressureWheels and tires