reset MERCEDES-BENZ B-CLASS SPORTS 2015 User Guide
[x] Cancel search | Manufacturer: MERCEDES-BENZ, Model Year: 2015, Model line: B-CLASS SPORTS, Model: MERCEDES-BENZ B-CLASS SPORTS 2015Pages: 346, PDF Size: 45.04 MB
Page 101 of 346
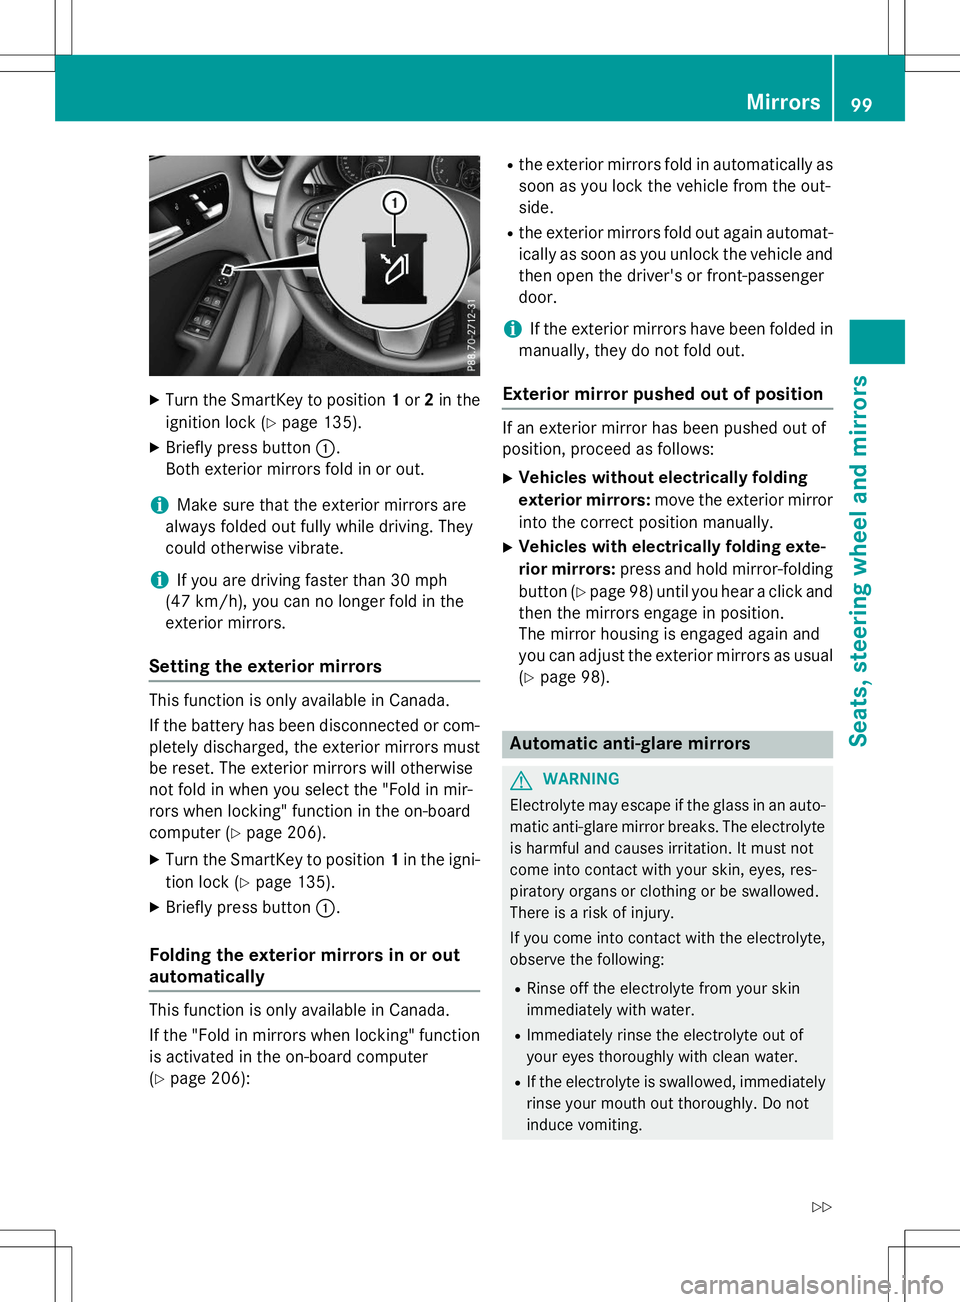
XTurn the SmartKey to position 1or 2in the
ignition lock ( Ypage 135).
X Briefly press button :.
Both exterior mirrors fold in or out.
iMake sure that the exterior mirrors are
always folded out fully while driving. They
could otherwise vibrate.
iIf you are driving faster than 30 mph
(47 km/ h), you can no longer fold in the
exterior mirrors.
Setting the exterior mirrors
This function is only available in Canada.
If the battery has been disconnected or com- pletely discharged, the exterior mirrors must
be reset. The exterior mirrors will otherwise
not fold in when you select the "Fold in mir-
rors when locking" function in the on-board
computer ( Ypage 206).
X Turn the SmartKey to position 1in the igni-
tion lock ( Ypage 135).
X Briefly press button :.
Folding the exterior mirrors in or out
automatically
This function is only available in Canada.
If the "Fold in mirrors when locking" function
is activated in the on-board computer ( Y page 206): R
the exterior mirrors fold in automatically as
soon as you lock the vehicle from the out-side.
R the exterior mirrors fold out again automat-
ically as soon as you unlock the vehicle and
then open the driver's or front-passengerdoor.
iIf the exterior mirrors have been folded in
manually, they do not fold out.
Exterior mirror pushed out of position
If an exterior mirror has been pushed out of
position, proceed as follows:
X Vehicles without electrically folding
exterior mirrors: move the exterior mirror
into the correct position manually.
X Vehicles with electrically folding exte-
rior mirrors: press and hold mirror-folding
button ( Ypage 98) until you hear a click and
then the mirrors engage in position.
The mirror housing is engaged again and
you can adjust the exterior mirrors as usual
( Y page 98).
Automatic anti-glare mirrors
GWARNING
Electrolyte may escape if the glass in an auto-
matic anti-glare mirror breaks. The electrolyte
is harmful and causes irritation. It must not
come into contact with your skin, eyes, res-
piratory organs or clothing or be swallowed.
There is a risk of injury.
If you come into contact with the electrolyte,
observe the following:
R Rinse off the electrolyte from your skin
immediately with water.
R Immediately rinse the electrolyte out of
your eyes thoroughly with clean water.
R If the electrolyte is swallowed, immediately
rinse your mouth out thoroughly. Do not
induce vomiting.
Mirrors99
Seats, steering wheel and mirrors
Z
Page 102 of 346
RIf electrolyte comes into contact with your
skin or hair or is swallowed, seek medical
attention immediately.
R Immediately change out of clothing which
has come into contact with electrolyte.
R If an allergic reaction occurs, seek medical
attention immediately.
The "Automatic anti-glare mirrors" function is
only available if the vehicle is equipped with
the "Mirrors package".
The rear-view mirror and the exterior mirror
on the driver's side automatically go into anti- glare mode if:
R the ignition is switched on and
R incident light from headlamps strikes the
sensor in the rear-view mirror
The mirrors do not go into anti-glare mode if
reverse gear is engaged or the interior lighting is switched on.
Parking position for the exterior mir-
ror on the front-passenger side
General notes
The "Parking position of the exterior mirror on
the front-passenger side" function is only
available if the vehicle is equipped with the
"Mirrors package".
Setting and storing the parking position
Using reverse gear
You can position the front-passenger side
exterior mirror in such a way that you can see the rear wheel on that side as soon as you
engage reverse gear. You can store this posi-
tion.
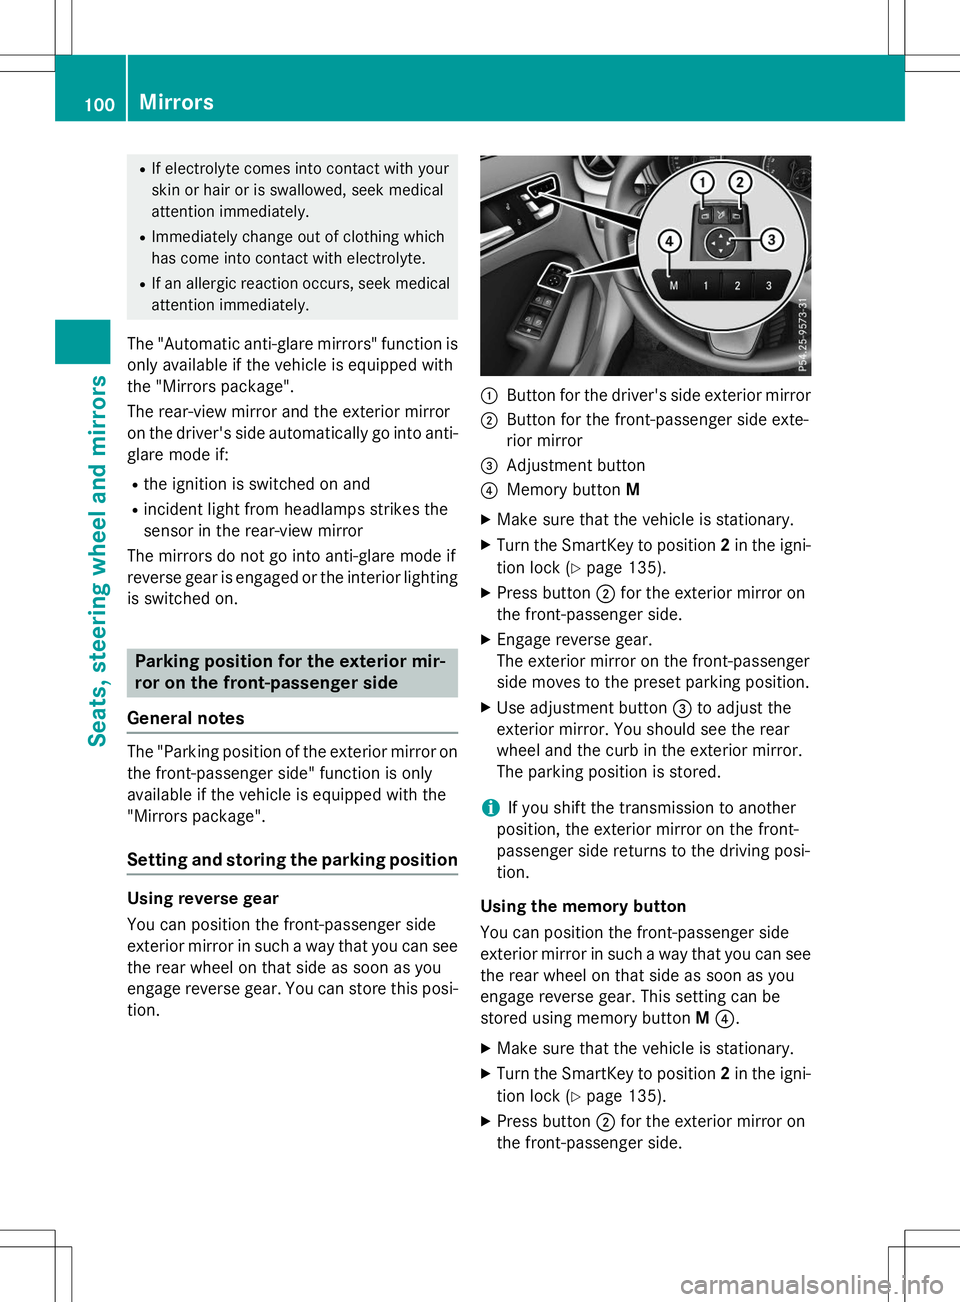
:Button for the driver's side exterior mirror
;Button for the front-passenger side exte-
rior mirror
=Adjustment button
?Memory button M
X Make sure that the vehicle is stationary.
X Turn the SmartKey to position 2in the igni-
tion lock ( Ypage 135).
X Press button ;for the exterior mirror on
the front-passenger side.
X Engage reverse gear.
The exterior mirror on the front-passenger
side moves to the preset parking position.
X Use adjustment button =to adjust the
exterior mirror. You should see the rear
wheel and the curb in the exterior mirror.
The parking position is stored.
iIf you shift the transmission to another
position, the exterior mirror on the front-
passenger side returns to the driving posi-tion.
Using the memory button
You can position the front-passenger side
exterior mirror in such a way that you can see
the rear wheel on that side as soon as you
engage reverse gear. This setting can be
stored using memory button M? .
X Make sure that the vehicle is stationary.
X Turn the SmartKey to position 2in the igni-
tion lock ( Ypage 135).
X Press button ;for the exterior mirror on
the front-passenger side.
100Mirrors
Seats, steering wheel and mirrors
Page 103 of 346
XUse adjustment button =to adjust the
exterior mirror. You should see the rear
wheel and the curb in the exterior mirror.
X Press memory button M? and one of the
arrows on adjustment button =within
three seconds.
The parking position is stored if the exterior mirror does not move.
X If the mirror moves out of position, repeat
the steps.
Calling up a stored parking position set-
ting
X Turn the SmartKey to position 2in the igni-
tion lock ( Ypage 135).
X Adjust the exterior mirror on the front-
passenger side with the corresponding but-
ton ( Ypage 98).
X Engage reverse gear.
The exterior mirror on the front-passenger
side moves to the stored parking position.
The exterior mirror on the front-passenger
side moves back to its original position:
R as soon as you exceed a speed of 9 mph
(15 km/h)
R about ten seconds after you have disen-
gaged reverse gear
R if you press button :for the exterior mir-
ror on the driver's side
Memory function
Important safety notes
GWARNING
If you use the memory function on the driver's side while driving, you could lose control of
the vehicle as a result of the adjustments
being made. There is a risk of an accident.
Only use the memory function on the driver's
side when the vehicle is stationary.
GWARNING
When the memory function adjusts the seat,
you and other vehicle occupants – particularly children – could become trapped. There is a
risk of injury.
While the memory function is making adjust-
ments, make sure that no one has any body
parts in the sweep of the seat. If somebody
becomes trapped, immediately release the
memory function position button. The adjust-ment process is stopped.
GWARNING
Children could become trapped if they acti-
vate the memory function, particularly when
unattended. There is a risk of injury.
When leaving the vehicle, always take the
SmartKey with you and lock the vehicle. Never leave children unsupervised in the vehicle.
The memory function can be used at any time,
e.g. even when the SmartKey isn't in the igni-
tion lock.
Storing settings
With the memory function, you can store up
to three different settings, e.g. for three dif-
ferent people.
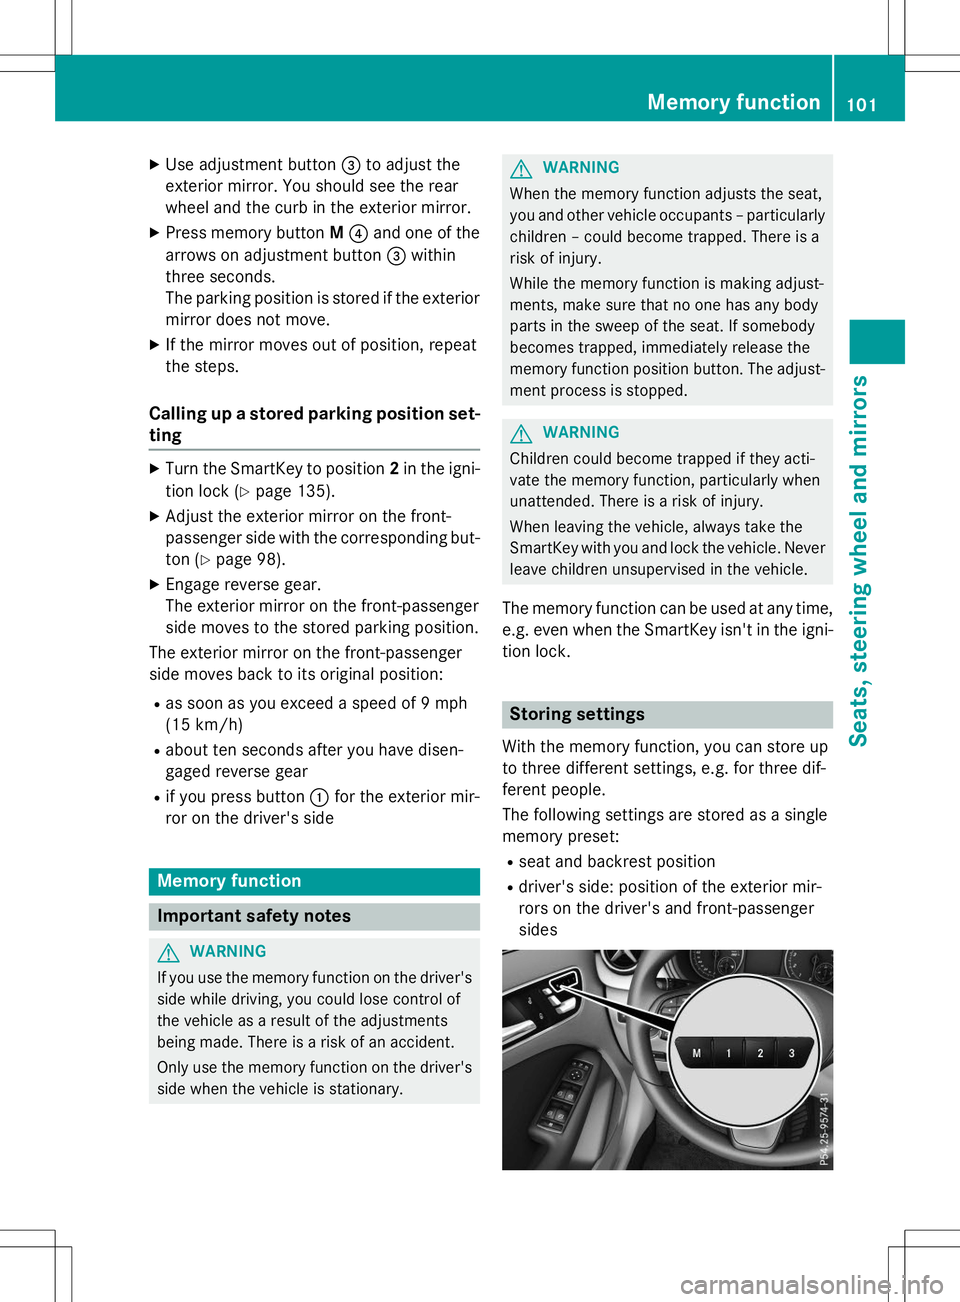
The following settings are stored as a single
memory preset:
R seat and backrest position
R driver's side: position of the exterior mir-
rors on the driver's and front-passengersides
Memory function101
Seats, steering wheel and mirrors
Z
Page 104 of 346
XAdjust the seat ( Ypage 94).
X Adjust the exterior mirror on the driver's
side ( Ypage 98).
X Briefly press the Mmemory button and
then press storage position button 1,2 or 3
within three seconds.
The settings are stored in the selected pre- set position. A tone sounds when the set-
tings have been completed.
Calling up a stored setting
X Press and hold the relevant preset position
button 1,2 or 3until the seat and exterior
mirrors are in the stored position.
iThe setting procedure is interrupted as
soon as you release the storage position
button.
102Memory function
Seats, steering wheel and mirrors
Page 159 of 346
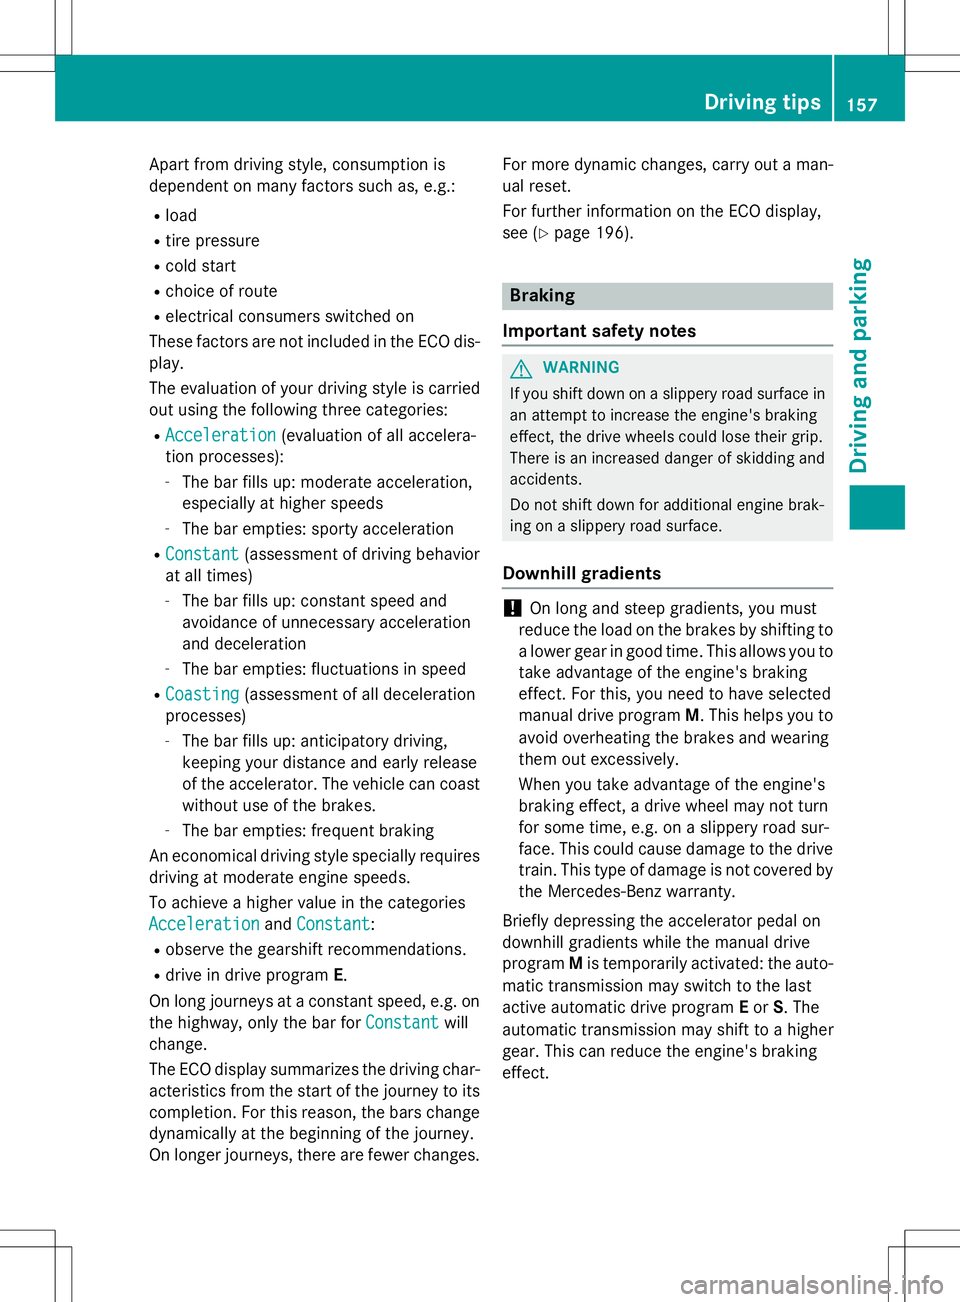
Apart from driving style, consumption is
dependent on many factors such as, e.g.: Rload
R tire pressure
R cold start
R choice of route
R electrical consumers switched on
These factors are not included in the ECO dis-
play.
The evaluation of your driving style is carried
out using the following three categories:
R
Acceleration(evaluation of all accelera-
tion processes):
- The bar fills up: moderate acceleration,
especially at higher speeds
- The bar empties: sporty acceleration
R
Constant(assessment of driving behavior
at all times)
- The bar fills up: constant speed and
avoidance of unnecessary acceleration
and deceleration
- The bar empties: fluctuations in speed
R
Coasting(assessment of all deceleration
processes) - The bar fills up: anticipatory driving,
keeping your distance and early release
of the accelerator. The vehicle can coast
without use of the brakes.
- The bar empties: frequent braking
An economical driving style specially requires
driving at moderate engine speeds.
To achieve a higher value in the categories
AccelerationandConstant:
R observe the gearshift recommendations.
R drive in drive program E.
On long journeys at a constant speed, e.g. on
the highway, only the bar for
Constantwill
change.
The ECO display summarizes the driving char- acteristics from the start of the journey to its completion. For this reason, the bars change
dynamically at the beginning of the journey.
On longer journeys, there are fewer changes. For more dynamic changes, carry out a man-
ual reset.
For further information on the ECO display,
see ( Ypage 196).
Braking
Important safety notes
GWARNING
If you shift down on a slippery road surface in an attempt to increase the engine's braking
effect, the drive wheels could lose their grip.
There is an increased danger of skidding and
accidents.
Do not shift down for additional engine brak-
ing on a slippery road surface.
Downhill gradients
!On long and steep gradients, you must
reduce the load on the brakes by shifting to
a lower gear in good time. This allows you to
take advantage of the engine's braking
effect. For this, you need to have selected
manual drive program M. This helps you to
avoid overheating the brakes and wearing
them out excessively.
When you take advantage of the engine's
braking effect, a drive wheel may not turn
for some time, e.g. on a slippery road sur-
face. This could cause damage to the drive train. This type of damage is not covered bythe Mercedes-Benz warranty.
Briefly depressing the accelerator pedal on
downhill gradients while the manual drive
program Mis temporarily activated: the auto-
matic transmission may switch to the last
active automatic drive program Eor S. The
automatic transmission may shift to a higher
gear. This can reduce the engine's braking
effect.
Driving tips157
Driving an d parking
Z
Page 186 of 346
The functionality of ATTENTION ASSIST is
restricted and warnings may be delayed or
not occur at all:
R if the length of the journey is less than
approximately 30 minutes
R if the road condition is poor, e.g. if the sur-
face is uneven or if there are potholes
R if there is a strong side wind
R if you have adopted a sporty driving style
with high cornering speeds or high rates of
acceleration
R if you are predominantly driving slower
than 37 mph (60 km/h) or faster than
125 mph (200 km/h)
R if the time has been set incorrectly
R in active driving situations, such as when
you change lanes or change your speed
ATTENTION ASSIST is reset when you con-
tinue your journey and starts assessing your
tiredness again if:
R you switch off the engine
R you take off your seat belt and open the
driver's door, e.g. for a change of drivers or
to take a break
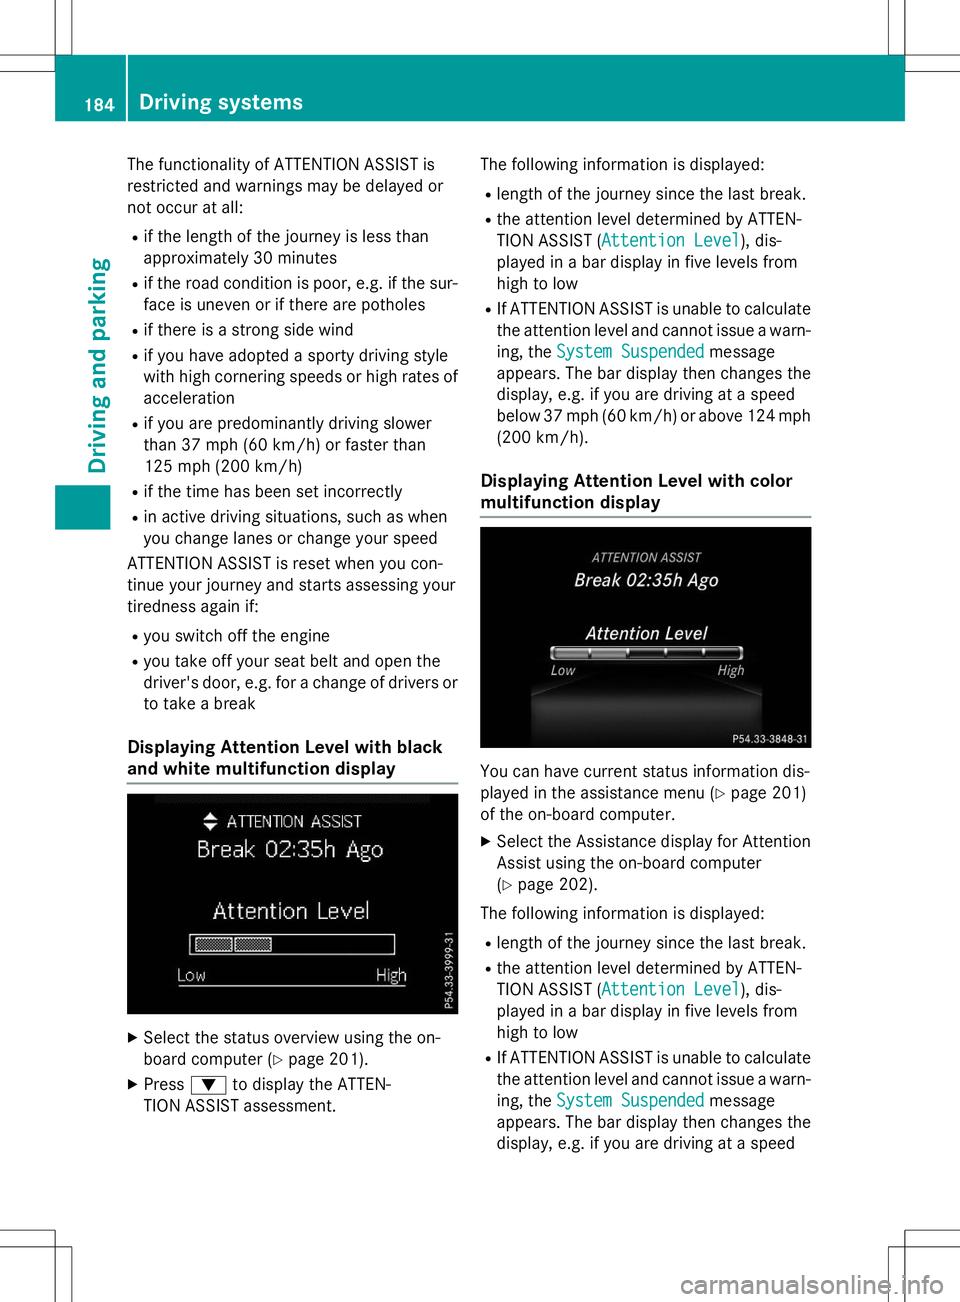
Displaying Attention Level with black
and white multifunction display
X Select the status overview using the on-
board computer ( Ypage 201).
X Press :to display the ATTEN-
TION ASSIST assessment. The following information is displayed:
R length of the journey since the last break.
R the attention level determined by ATTEN-
TION ASSIST (
Attention Level), dis-
played in a bar display in five levels from
high to low
R If ATTENTION ASSIST is unable to calculate
the attention level and cannot issue a warn-
ing, the
System Suspendedmessage
appears. The bar display then changes the
display, e.g. if you are driving at a speed
below 37 mph (60 km/h) or above 124 mph
(200 km/h).
Displaying Attention Level with color
multifunction display
You can have current status information dis-
played in the assistance menu ( Ypage 201)
of the on-board computer.
X Select the Assistance display for Attention
Assist using the on-board computer( Y page 202).
The following information is displayed: R length of the journey since the last break.
R the attention level determined by ATTEN-
TION ASSIST (
Attention Level), dis-
played in a bar display in five levels from
high to low
R If ATTENTION ASSIST is unable to calculate
the attention level and cannot issue a warn-
ing, the
System Suspendedmessage
appears. The bar display then changes the
display, e.g. if you are driving at a speed
184Driving systems
Driving and parking
Page 196 of 346
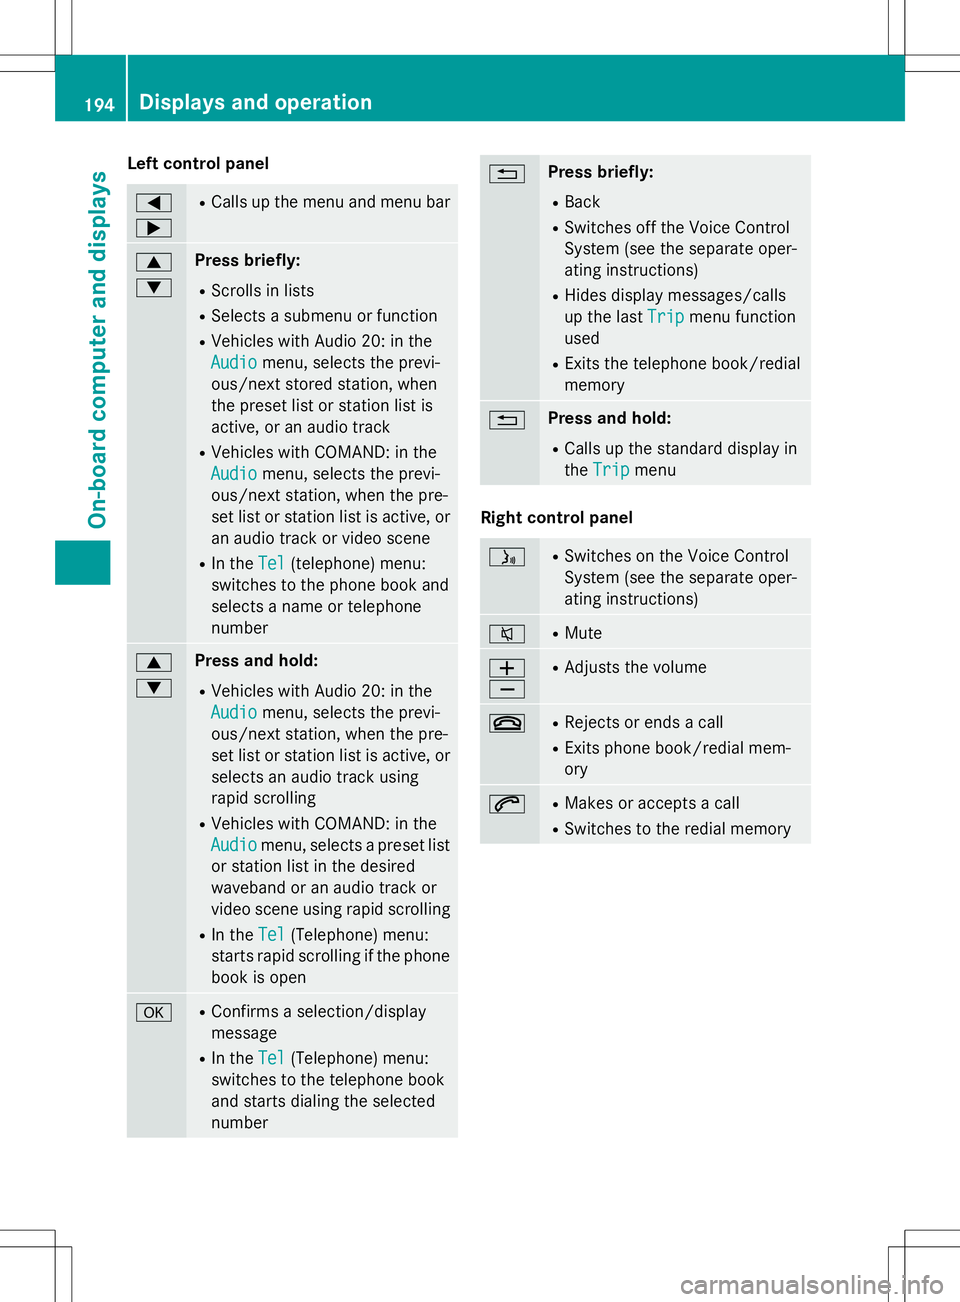
Left control panel
= ;RCalls up the menu and menu bar
9 :Press briefly:
R Scrolls in lists
R Selects a submenu or function
R Vehicles with Audio 20: in the
Audiomenu, selects the previ-
ous/next stored station, when
the preset list or station list is
active, or an audio track
R Vehicles with COMAND: in the
Audiomenu, selects the previ-
ous/next station, when the pre-
set list or station list is active, or
an audio track or video scene
R In the
Tel(telephone) menu:
switches to the phone book and
selects a name or telephone
number
9 :Press and hold:
R Vehicles with Audio 20: in the
Audiomenu, selects the previ-
ous/next station, when the pre-
set list or station list is active, or
selects an audio track using
rapid scrolling
R Vehicles with COMAND: in the
Audiomenu, selects a preset list
or station list in the desired
waveband or an audio track or
video scene using rapid scrolling
R In the
Tel(Telephone) menu:
starts rapid scrolling if the phone
book is open
aR Confirms a selection/display
message
R In the
Tel(Telephone) menu:
switches to the telephone book
and starts dialing the selected
number
%Press briefly:
R Back
R Switches off the Voice Control
System (see the separate oper-
ating instructions)
R Hides display messages/calls
up the last
Tripmenu function
used
R Exits the telephone book/redial
memory
%Press and hold:
R Calls up the standard display in
the
Tripmenu
Right control panel
óR
Switches on the Voice Control
System (see the separate oper-
ating instructions)
8RMute
W XR
Adjusts the volume
~RRejects or ends a call
R Exits phone book/redial mem- ory
6RMakes or accepts a call
R Switches to the redial memory
194Displays and operation
On-board computer and displays
Page 198 of 346
RDriveAssistDriveAssistmenu (assistance)
( Y page 201)
R
Serv.Serv.menu ( Ypage 204)
R
Sett.Sett.menu (settings) ( Ypage 204)
The
AudioAudio,NaviNaviandTelTelmenus differ slightly
in vehicles with Audio 20 and in vehicles with COMAND. The examples given in this Opera-
tor's Manual apply to vehicles equipped withCOMAND.
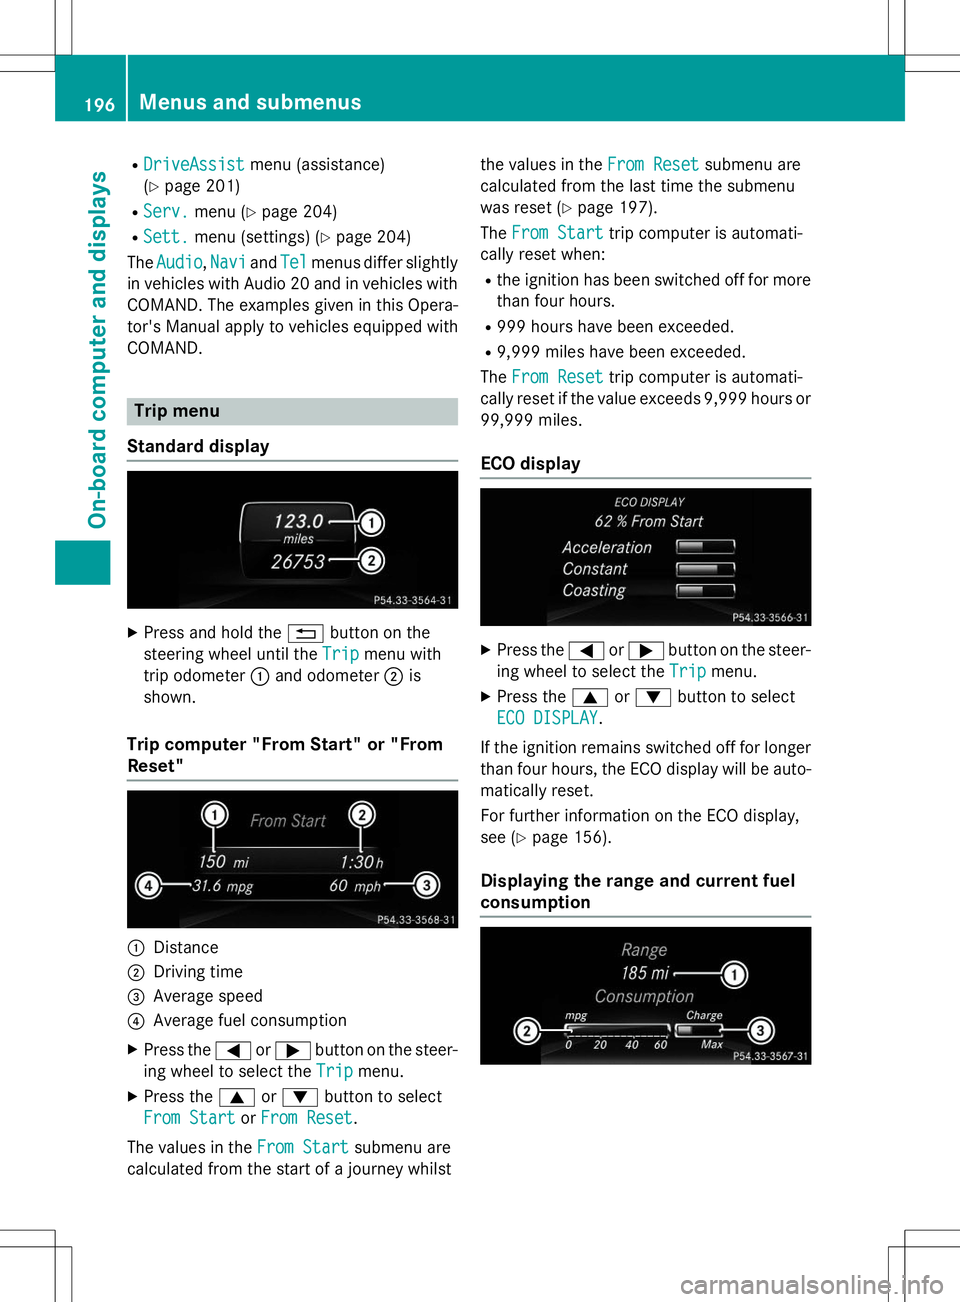
Trip menu
Standard display
X Press and hold the %button on the
steering wheel until the
TripTripmenu with
trip odometer :and odometer ;is
shown.
Trip computer "From Start" or "From Reset"
:Distance
;Driving time
=Average speed
?Average fuel consumption
X Press the =or; button on the steer-
ing wheel to select the
TripTripmenu.
X Press the 9or: button to select
From StartFrom StartorFrom ResetFrom Reset.
The values in the
From StartFrom Startsubmenu are
calculated from the start of a journey whilst the values in the
From ResetFrom Resetsubmenu are
calculated from the last time the submenu
was reset ( Ypage 197).
The
From StartFrom Starttrip computer is automati-
cally reset when:
R the ignition has been switched off for more
than four hours.
R 999 hours have been exceeded.
R 9,999 miles have been exceeded.
The
From ResetFrom Resettrip computer is automati-
cally reset if the value exceeds 9,999 hours or 99,999 miles.
ECO display
X Press the =or; button on the steer-
ing wheel to select the
TripTripmenu.
X Press the 9or: button to select
ECO DISPLAYECO DISPLAY.
If the ignition remains switched off for longer than four hours, the ECO display will be auto-
matically reset.
For further information on the ECO display,
see ( Ypage 156).
Displaying the range and current fuel
consumption
196Menus and submenus
On-board computer and displays
Page 199 of 346
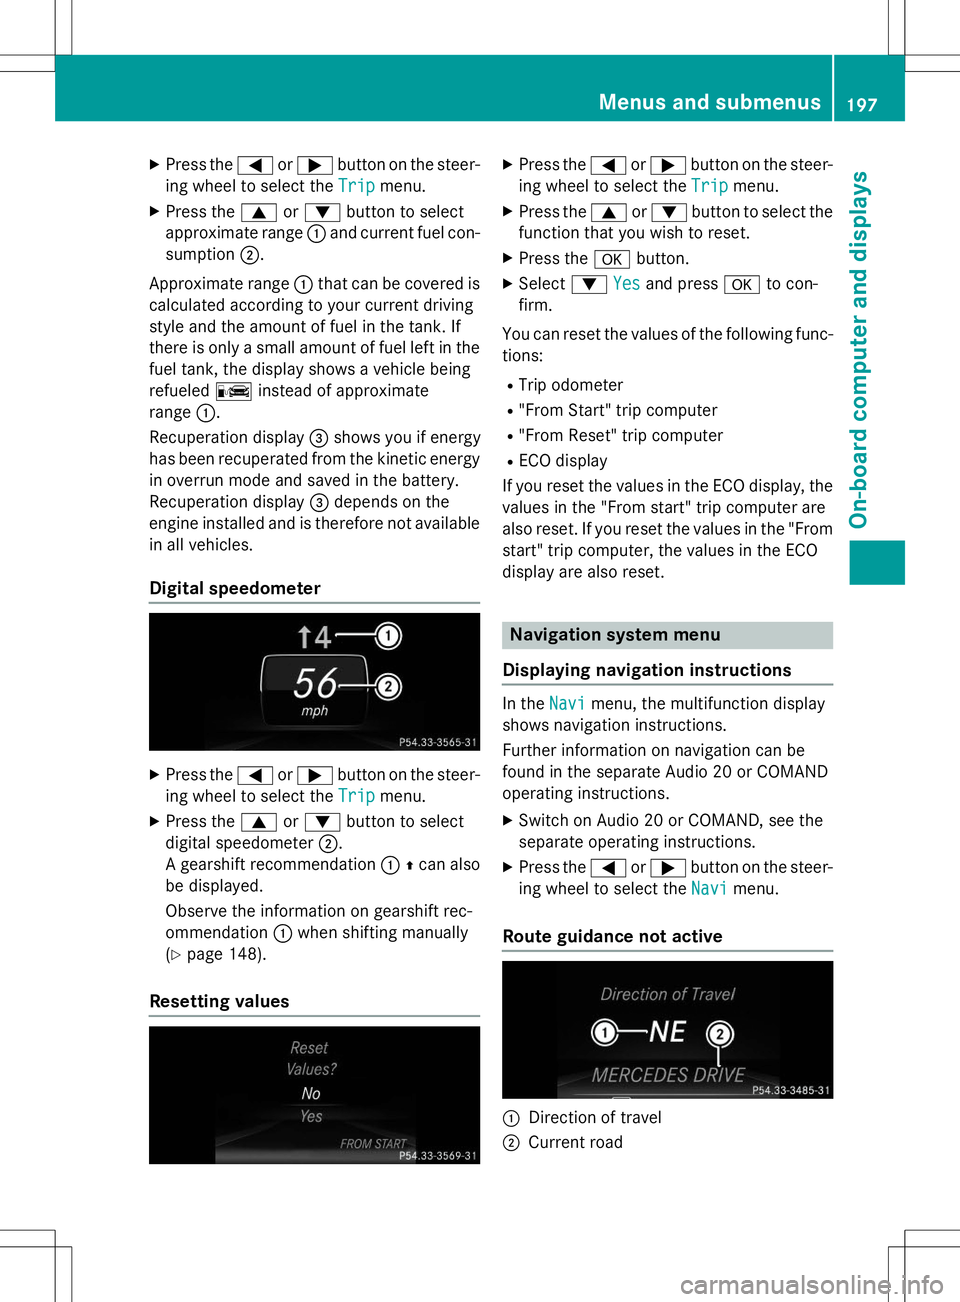
XPress the =or; button on the steer-
ing wheel to select the
Tripmenu.
X Press the 9or: button to select
approximate range :and current fuel con-
sumption ;.
Approximate range :that can be covered is
calculated according to your current driving
style and the amount of fuel in the tank. If
there is only a small amount of fuel left in the fuel tank, the display shows a vehicle beingrefueled Cinstead of approximate
range :.
Recuperation display =shows you if energy
has been recuperated from the kinetic energy
in overrun mode and saved in the battery.
Recuperation display =depends on the
engine installed and is therefore not available
in all vehicles.
Digital speedometer
X Press the =or; button on the steer-
ing wheel to select the
Tripmenu.
X Press the 9or: button to select
digital speedometer ;.
A gearshift recommendation :Zcan also
be displayed.
Observe the information on gearshift rec-
ommendation :when shifting manually
( Y page 148).
Resetting values
X
Press the =or; button on the steer-
ing wheel to select the
Tripmenu.
X Press the 9or: button to select the
function that you wish to reset.
X Press the abutton.
X Select :
Yesand press ato con-
firm.
You can reset the values of the following func-
tions:
R Trip odometer
R "From Start" trip computer
R "From Reset" trip computer
R ECO display
If you reset the values in the ECO display, the
values in the "From start" trip computer are
also reset. If you reset the values in the "From start" trip computer, the values in the ECO
display are also reset.
Navigation system menu
Displaying navigation instructions
In theNavimenu, the multifunction display
shows navigation instructions.
Further information on navigation can be
found in the separate Audio 20 or COMAND
operating instructions.
X Switch on Audio 20 or COMAND, see the
separate operating instructions.
X Press the =or; button on the steer-
ing wheel to select the
Navimenu.
Route guidance not active
:Direction of travel
;Current road
Menus and submenus197
On-board computer and displays
Z
Page 201 of 346

A new route is calculated.
R
Off Mapped Road
The vehicle position is inside the area of the digital map but the road is not recognized,
e.g. newly built streets, car parks or private
land.
R
No Route
No route could be calculated to the selec-
ted destination.
R O
You have reached the destination or an
intermediate destination.
Audio menu
Selecting a radio station
:Active station list
;Station frequency with memory position
Station ;is displayed with the station fre-
quency or station name. The memory position is only displayed along with station ;if this
has been stored.
X Switch on Audio 20 or COMAND and select
Radio; see the separate operating instruc-
tions.
X Press the =or; button on the steer-
ing wheel to select the
Audiomenu.
Vehicles with Audio 20
X To select a station in the preset list:
briefly press the 9or: button.
X To select a station in the station list:
press and hold the 9or: button.
Vehicles with COMAND
X To select a preset list or station list:
press and hold the 9or: button until the preset list or station list is shown in
the desired frequency range.
X To select a station: press9or:
briefly.
iSIRIUS XM satellite radio functions like a
normal radio.
You can find further information on opera-
tion in the "Satellite radio" section of the
separate Audio 20 or COMAND operating
instructions.
Operating an audio player or audio
media
:Current title
Audio data from various audio devices or
media can be played, depending on the equip- ment installed in the vehicle.
X Switch on Audio 20 or COMAND and select
audio CD or MP3 mode; see the separate
operating instructions.
X Press the =or; button on the steer-
ing wheel to select the
Audiomenu.
X To select the next/previous track:
briefly press the 9or: button.
X To select a track from the track list
(rapid scrolling): press and hold the 9
or : button until the desired track has
been reached.
If you press and hold 9or: , the
rapid scrolling speed is increased. Not all
audio drives or data carriers support this
function.
If track information is stored on the audio
device or medium, the multifunction display
will show the number and title of the track.
Menus and submenus199
On-board computer and displays
Z