Button MERCEDES-BENZ C-Class 2000 W202 Owner's Manual
[x] Cancel search | Manufacturer: MERCEDES-BENZ, Model Year: 2000, Model line: C-Class, Model: MERCEDES-BENZ C-Class 2000 W202Pages: 130, PDF Size: 2.43 MB
Page 4 of 130
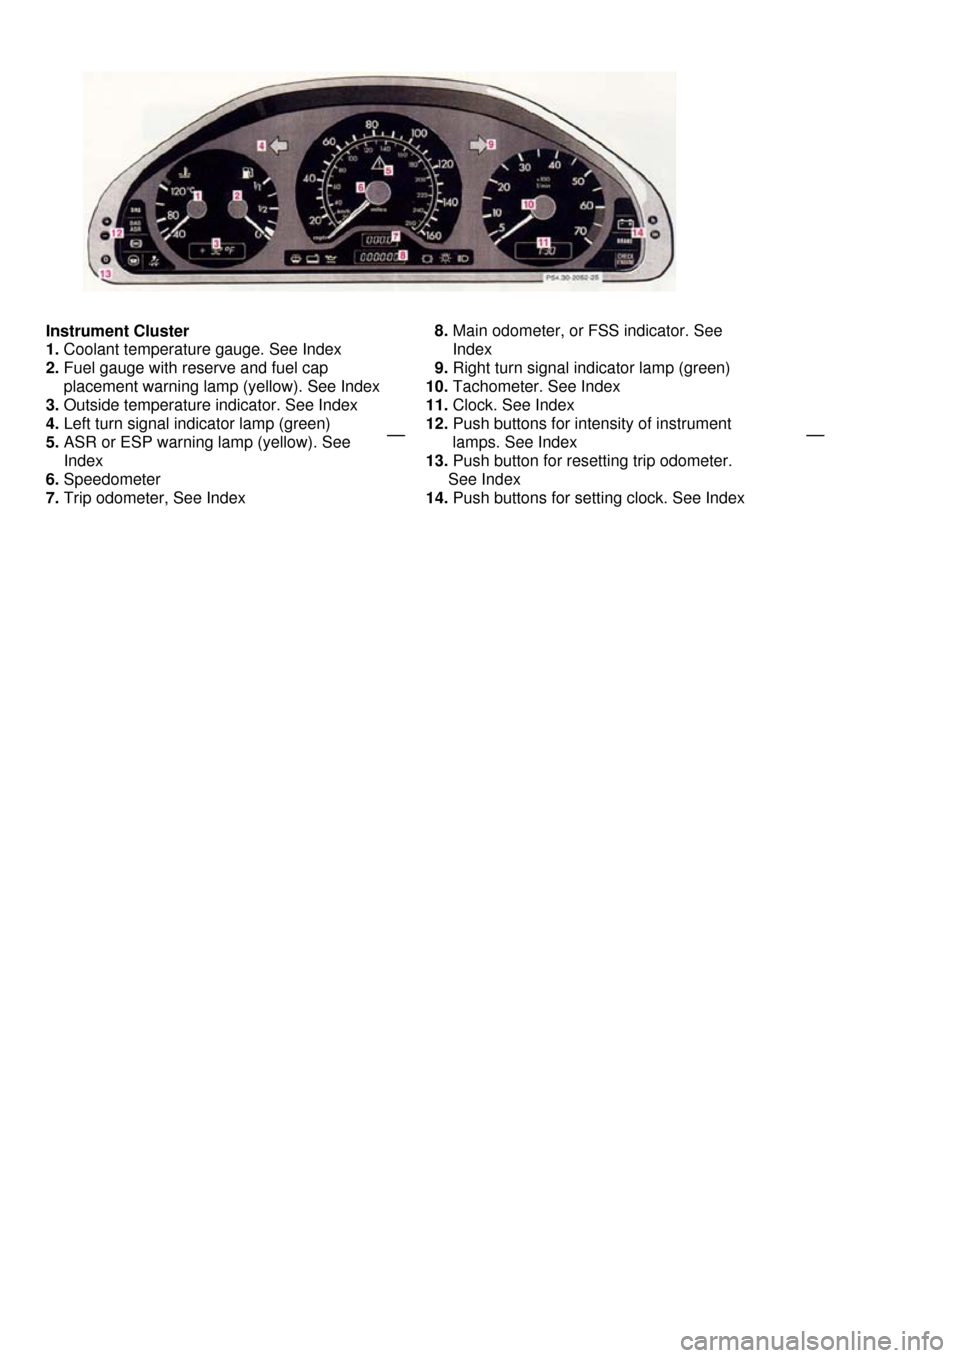
Instrument Cluster
1. Coolant temperature gauge. See Index
2. Fuel gauge with reserve and fuel cap
placement warning lamp (yellow). See Index
3. Outside temperature indicator. See Index
4. Left turn signal indicator lamp (green)
5. ASR or ESP warning lamp (yellow). See
Index
6. Speedometer
7. Trip odometer, See Index
8. Main odometer, or FSS indicator. See
Index
9. Right turn signal indicator lamp (green)
10. Tachometer. See Index
11. Clock. See Index
12. Push buttons for intensity of instrument
lamps. See Index
13. Push button for resetting trip odometer.
See Index
14. Push buttons for setting clock. See Index
Page 13 of 130
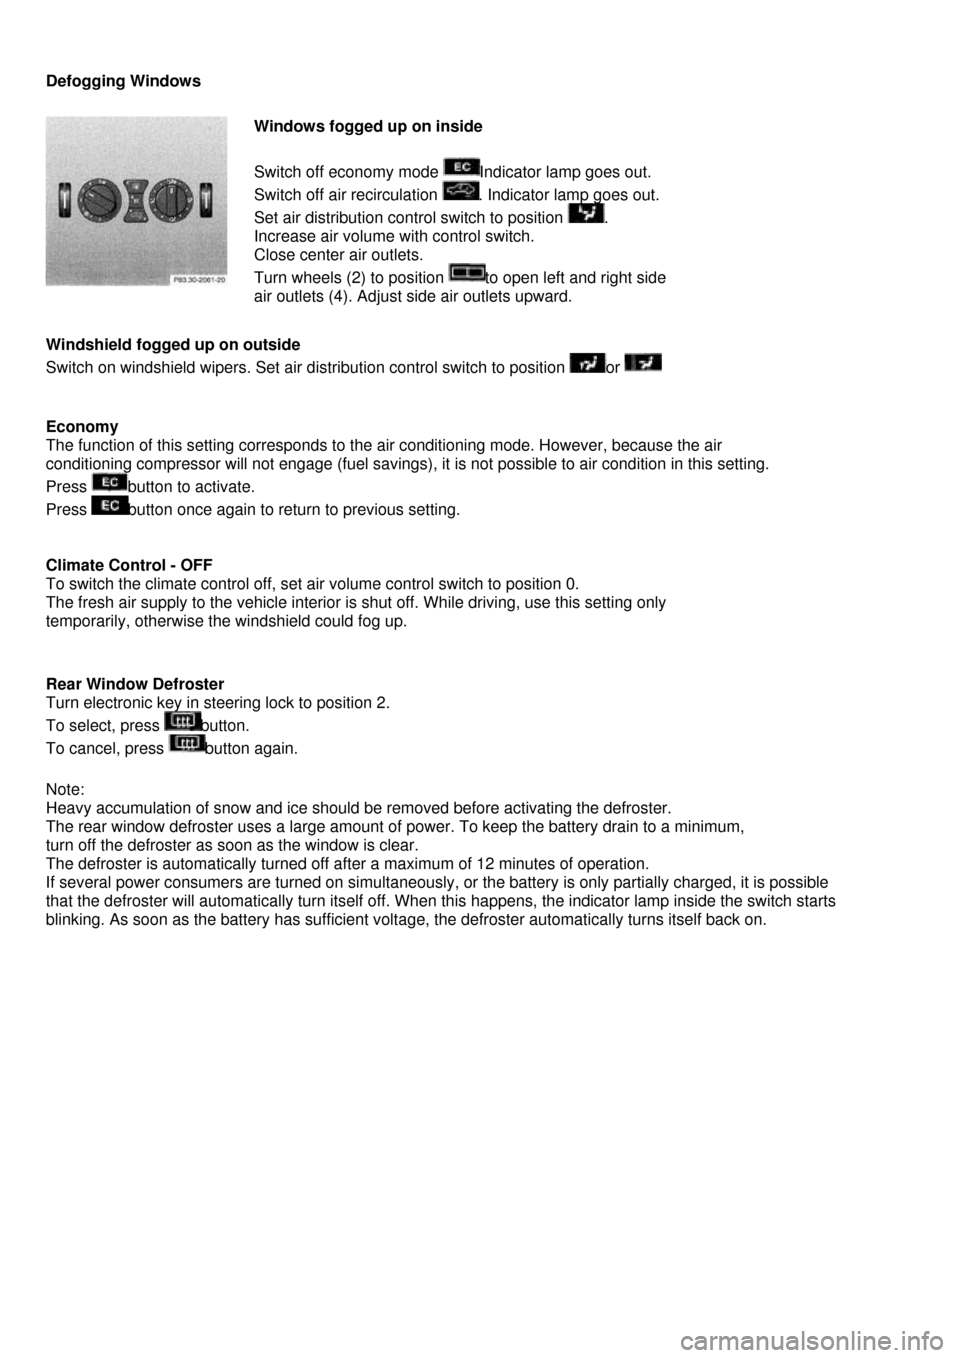
Defogging Windows
Windows fogged up on inside
Switch off economy mode Indicator lamp goes out.
Switch off air recirculation . Indicator lamp goes out.
Set air distribution control switch to position .
Increase air volume with control switch.
Close center air outlets.
Turn wheels (2) to position to open left and right side
air outlets (4). Adjust side air outlets upward.
Windshield fogged up on outside
Switch on windshield wipers. Set air distribution control switch to position or
Economy
The function of this setting corresponds to the air conditioning mode. However, because the air
conditioning compressor will not engage (fuel savings), it is not possible to air condition in this setting.
Press button to activate.
Press button once again to return to previous setting.
Climate Control - OFF
To switch the climate control off, set air volume control switch to position 0.
The fresh air supply to the vehicle interior is shut off. While driving, use this setting only
temporarily, otherwise the windshield could fog up.
Rear Window Defroster
Turn electronic key in steering lock to position 2.
To select, press button.
To cancel, press button again.
Note:
Heavy accumulation of snow and ice should be removed before activating the defroster.
The rear window defroster uses a large amount of power. To keep the battery drain to a minimum,
turn off the defroster as soon as the window is clear.
The defroster is automatically turned off after a maximum of 12 minutes of operation.
If several power consumers are turned on simultaneously, or the battery is only partially charged, it is possible
that the defroster will automatically turn itself off. When this happens, the indicator lamp inside the switch starts
blinking. As soon as the battery has sufficient voltage, the defroster automatically turns itself back on.
Page 14 of 130

Air Recirculation
This mode can be selected to temporarily reduce the entry of annoying odours or dust from vehicle's interior.
Outside air is not supplied to the car's interior.
To select, press button.
To cancel, press button again.
The system will automatically switch from recirculated air to fresh air
• after approx. 5 minutes at outside temperatures below approx. 40°F (5°C),
• after approx. 30 minutes, at outside temperatures above approx. 40°F (5°C),
• after approx. 5 minutes, if button is pressed.
At hight ouside temperatures, the system automatically engages the recirculated air mode for approx.
30 minutes, thereby increasing the cooling capacity performance. Press button again to extend the recirculated
air mode.
Residual Engine Heat Utilization
With the engine switched off, it is possible to continue heating the interior for a short while.
Air volume is controlled automatically
To select:
Turn electronic key in steering lock to position 1 or 0 or remove . Close air outlet in rear passenger compartment.
Press button. Indicator lamp in the button lights up.
This function selection will not activate if the battery charge level is insufficient.
To cancel:
Press button. Indicator lamp in the button goes out
The system will automatically shut off
• if you turn key in steering lock to position 2,
• after approx. 30 minutes,
• if the battery voltage drops.
Dust Filter
Nearly all dust particles and pollen are filtered out before outside air enters the passenger compartment through the
air distribution system.
Note:
Keep the air intake grille in front of windshield free of snow and debris.
Important !
This vehicle is equipped with an air conditioner system that uses R-134a (HFC: hydrofluorocarbon)
as a refrigerant. Repairs should always be performed by a qualified technician, and refrigerant
should be collected in a recovery system for recycling.
Page 16 of 130
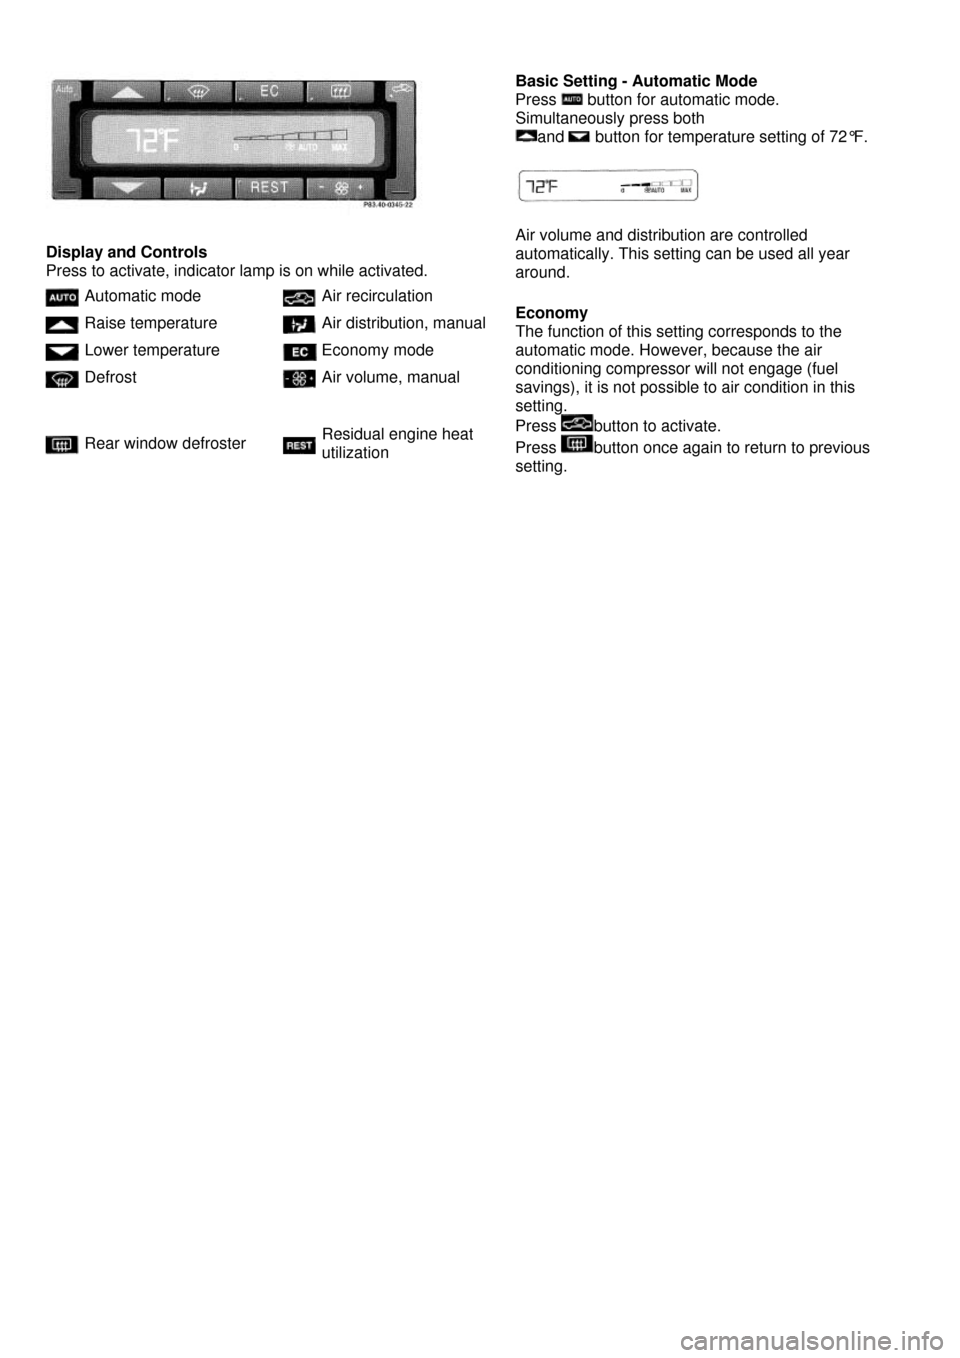
Display and Controls
Press to activate, indicator lamp is on while activated.
Automatic mode Air recirculation
Raise temperature Air distribution, manual
Lower temperature Economy mode
Defrost Air volume, manual
Rear window defroster Residual engine heat
utilization
Basic Setting - Automatic Mode
Press button for automatic mode.
Simultaneously press both
and button for temperature setting of 72°F.
Air volume and distribution are controlled
automatically. This setting can be used all year
around.
Economy
The function of this setting corresponds to the
automatic mode. However, because the air
conditioning compressor will not engage (fuel
savings), it is not possible to air condition in this
setting.
Press button to activate.
Press button once again to return to previous
setting.
Page 17 of 130
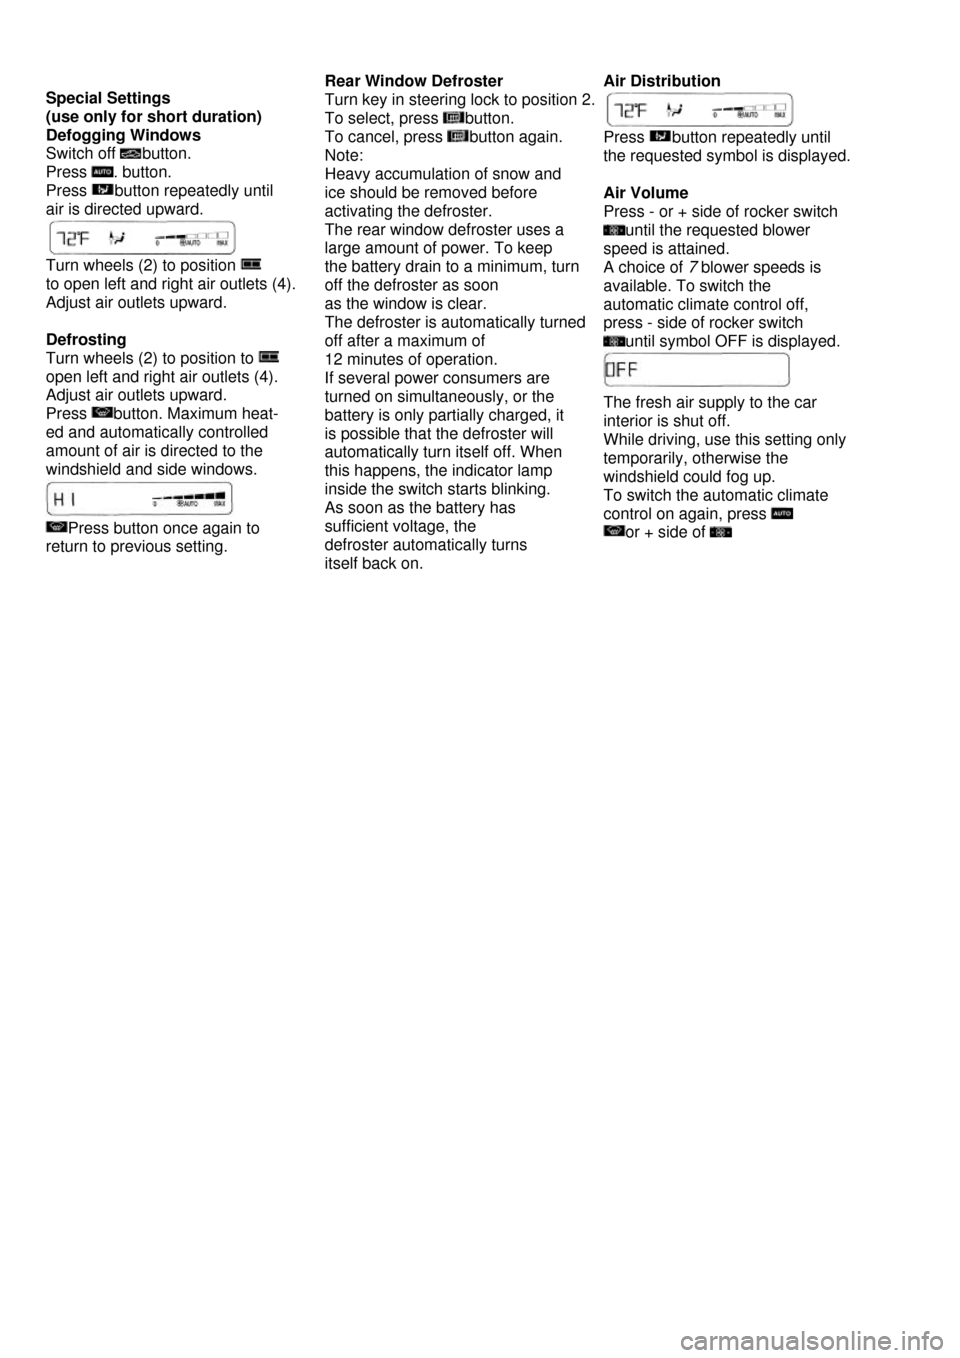
Special Settings
(use only for short duration)
Defogging Windows
Switch off button.
Press . button.
Press button repeatedly until
air is directed upward.
Turn wheels (2) to position
to open left and right air outlets (4).
Adjust air outlets upward.
Defrosting
Turn wheels (2) to position to
open left and right air outlets (4).
Adjust air outlets upward.
Press button. Maximum heat-
ed and automatically controlled
amount of air is directed to the
windshield and side windows.
Press button once again to
return to previous setting.
Rear Window Defroster
Turn key in steering lock to position 2.
To select, press button.
To cancel, press button again.
Note:
Heavy accumulation of snow and
ice should be removed before
activating the defroster.
The rear window defroster uses a
large amount of power. To keep
the battery drain to a minimum, turn
off the defroster as soon
as the window is clear.
The defroster is automatically turned
off after a maximum of
12 minutes of operation.
If several power consumers are
turned on simultaneously, or the
battery is only partially charged, it
is possible that the defroster will
automatically turn itself off. When
this happens, the indicator lamp
inside the switch starts blinking.
As soon as the battery has
sufficient voltage, the
defroster automatically turns
itself back on.
Air Distribution
Press button repeatedly until
the requested symbol is displayed.
Air Volume
Press - or + side of rocker switch
until the requested blower
speed is attained.
A choice of 7 blower speeds is
available. To switch the
automatic climate control off,
press - side of rocker switch
until symbol OFF is displayed.
The fresh air supply to the car
interior is shut off.
While driving, use this setting only
temporarily, otherwise the
windshield could fog up.
To switch the automatic climate
control on again, press
or + side of
Page 18 of 130
Air Recirculation
This mode can be selected to prevent annoying odours or dust from entering the car's interior.
Outside air is not supplied to the car's interior.
To select, press button.
To cancel, press button again.
The system will automatically switch from recirculated air to fresh air
• after approx. 5 minutes at outside temperatures below approx. 40°F (5°C),
• after approx. 30 minutes, at outside temperatures above approx. 40°F (5°C),
• after approx. 5 minutes, if button is pressed.
Notes:
If the windows should fog up from the inside, switch from recirculated air back to fresh air.
At high outside temperatures, the system automatically engages the recirculated air mode thereby
increasing the cooling capacity performance, switching to partially fresh air within 20 minutes.
Dust Filter
Nearly all dust particles and pollen are filtered out before outside air enters the
passenger compartment through the air distribution system.
Notes:
Do not obstruct the air flow by placing objects on the air flowthrough exhaust slots below the rear
window.
Also keep the air intake grille in front of windshield free of snow and debris.
Residual Engine Heat Utilization
With the engine switched off, it is possible to continue heating the interior for a short while.
Air volume and distribution are controlled automatically
To select:
Turn electronic key in steering lock to position 1 or 0 or remove electronic key.
Press button.
This function selection will not activate if the battery charge level is insufficient.
To cancel:
Press button.
The system will automatically shut off
• if you turn electronic key in steering lock to position 2,
• after approx. 30 minutes,
• if the battery voltage drops.
Page 21 of 130
Central Locking System
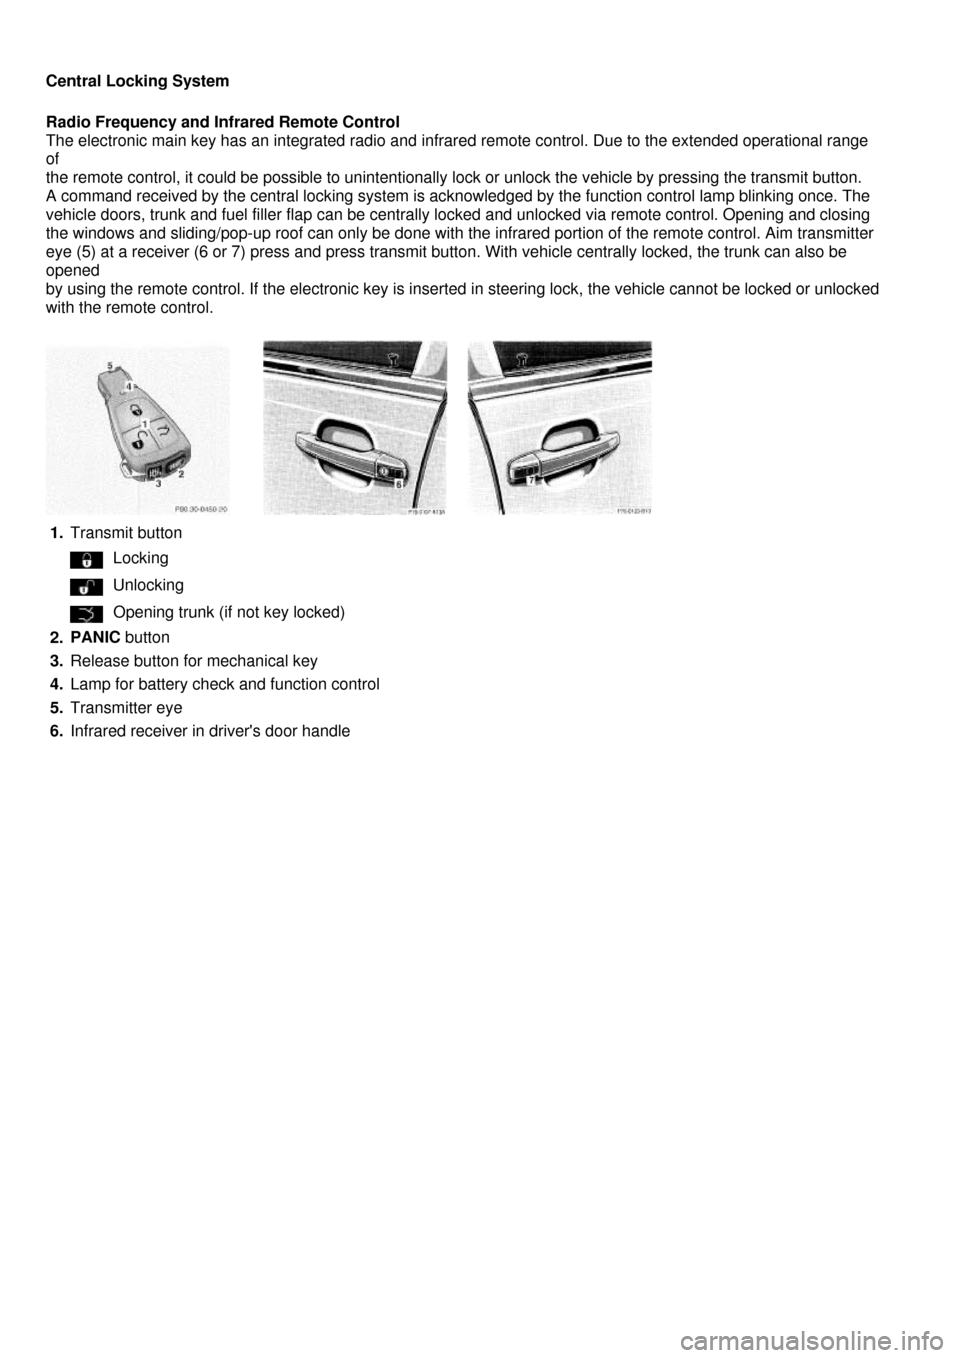
Radio Frequency and Infrared Remote Control
The electronic main key has an integrated radio and infrared remote control. Due to the extended operational range
of
the remote control, it could be possible to unintentionally lock or unlock the vehicle by pressing the transmit button.
A command received by the central locking system is acknowledged by the function control lamp blinking once. The
vehicle doors, trunk and fuel filler flap can be centrally locked and unlocked via remote control. Opening and closing
the windows and sliding/pop-up roof can only be done with the infrared portion of the remote control. Aim transmitter
eye (5) at a receiver (6 or 7) press and press transmit button. With vehicle centrally locked, the trunk can also be
opened
by using the remote control. If the electronic key is inserted in steering lock, the vehicle cannot be locked or unlocked
with the remote control.
1. Transmit button
Locking
Unlocking
Opening trunk (if not key locked)
2. PANIC button
3. Release button for mechanical key
4. Lamp for battery check and function control
5. Transmitter eye
6. Infrared receiver in driver's door handle
Page 22 of 130
Locking and Unlocking
Unlocking:
Press transmit button . All turn signal lamps blink once to indicate that the vehicle is unlocked.
The remote control can be programmed for two kinds of unlocking methods (see below):
Selective unlocking mode:
Press transmit button once to unlock driver's door and fuel filler flap.
Press transmit button twice to unlock doors, fuel filler flap, and trunk.
Global unlocking mode:
Press transmit button once to unlock doors, fuel filler flap, and trunk.
Notes:
If the trunk was previously locked separately, it will remain locked (see Index). The presently active
unlocking mode (selective or global) can only be determined by unlocking the vehicle with the
remote control (see below for changing mode). The vehicle is automatically locked again, if within 40
seconds of unlocking with the remote control, neither door or trunk is opened, the electronic key is
not inserted in the steering lock, or the central locking switch is not activated.
Locking:
Press transmit buttononce. All turn signal lamps blink three times to indicate that the vehicle is
locked
Note:
If the vehicle cannot be locked or unlocked by pressing the transmit button, then it may be necessary
to change the batteries in the transmitter (if ok, battery check lamp in transmitter will light briefly
when
transmitting) or to synchronize the system, see Remote Control in Index.
Choosing Global or Selective Mode on Remote Control
Press and hold transmit buttons and simultaneously for five seconds to reprogram the
remote control. Battery check lamp will blink two times indicating the completed mode change.
Page 23 of 130
Opening the Trunk
A minimum height clearance of 5.9 ft ( 1.8 m) is required to open the trunk lid.
Press transmit button until trunk lid is open.
Important !
Do not place remote control in trunk since trunk is locked again when closing the lid.
Note:
If the trunk was previously locked separately, it will remain locked (see Index).
Opening and Closing Windows and Sliding/Pop-Up Roof from Outside
Aim transmitter eye (5) of remote control at door receivers (6 or 7).
To open:
Continue to press transmit button after unlocking car
The windows and sliding/pop-up roof begin to open after approx. 1 second. To interrupt opening
procedure, release button.
To close:
Continue to press transmit button after locking car
The windows and sliding/pop-up roof begin to close after approx. 1 second. To interrupt closing
procedure, release button.
Warning !
Never operate the windows or sliding/pop-up roof if there is the possibility of anyone being
harmed by the opening or closing procedure.
In case the procedure causes potential danger, the procedure can be immediately halted by
releasing the remote control button. To reverse direction of movement press for opening
or for closing.
Note:
If the windows and sliding/ pop-up roof cannot be operated automatically by pressing the transmit
button of the remote control then it may be necessary to change the batteries in the transmitter
(if ok, battery check lamp in transmitter will light briefly when transmitting), or to synchronize the
electronic main key, see Synchronizing remote Control in Index.
Page 24 of 130
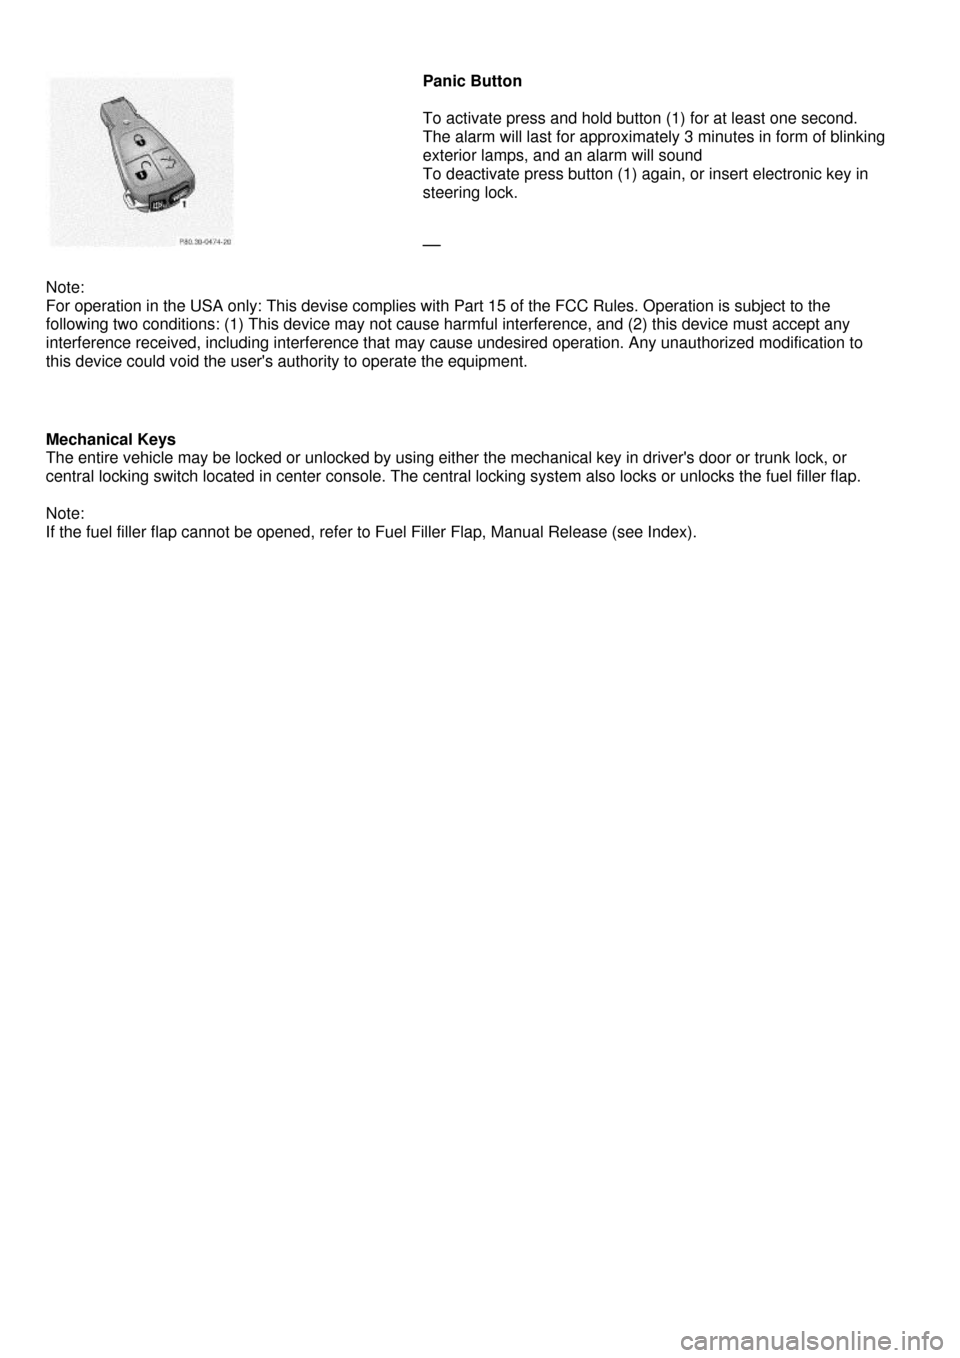
Panic Button
To activate press and hold button (1) for at least one second.
The alarm will last for approximately 3 minutes in form of blinking
exterior lamps, and an alarm will sound
To deactivate press button (1) again, or insert electronic key in
steering lock.
Note:
For operation in the USA only: This devise complies with Part 15 of the FCC Rules. Operation is subject to the
following two conditions: (1) This device may not cause harmful interference, and (2) this device must accept any
interference received, including interference that may cause undesired operation. Any unauthorized modification to
this device could void the user's authority to operate the equipment.
Mechanical Keys
The entire vehicle may be locked or unlocked by using either the mechanical key in driver's door or trunk lock, or
central locking switch located in center console. The central locking system also locks or unlocks the fuel filler flap.
Note:
If the fuel filler flap cannot be opened, refer to Fuel Filler Flap, Manual Release (see Index).