navigation MERCEDES-BENZ C-Class 2015 W205 Comand Manual
[x] Cancel search | Manufacturer: MERCEDES-BENZ, Model Year: 2015, Model line: C-Class, Model: MERCEDES-BENZ C-Class 2015 W205Pages: 214, PDF Size: 5.16 MB
Page 23 of 214
0081
0082 R
Adjusts the volume 0063 R
Mute 00E3
Switches on the Voice Control Sys-
tem (see the separate operating
instructions)
Touchpad
Touchpad overview
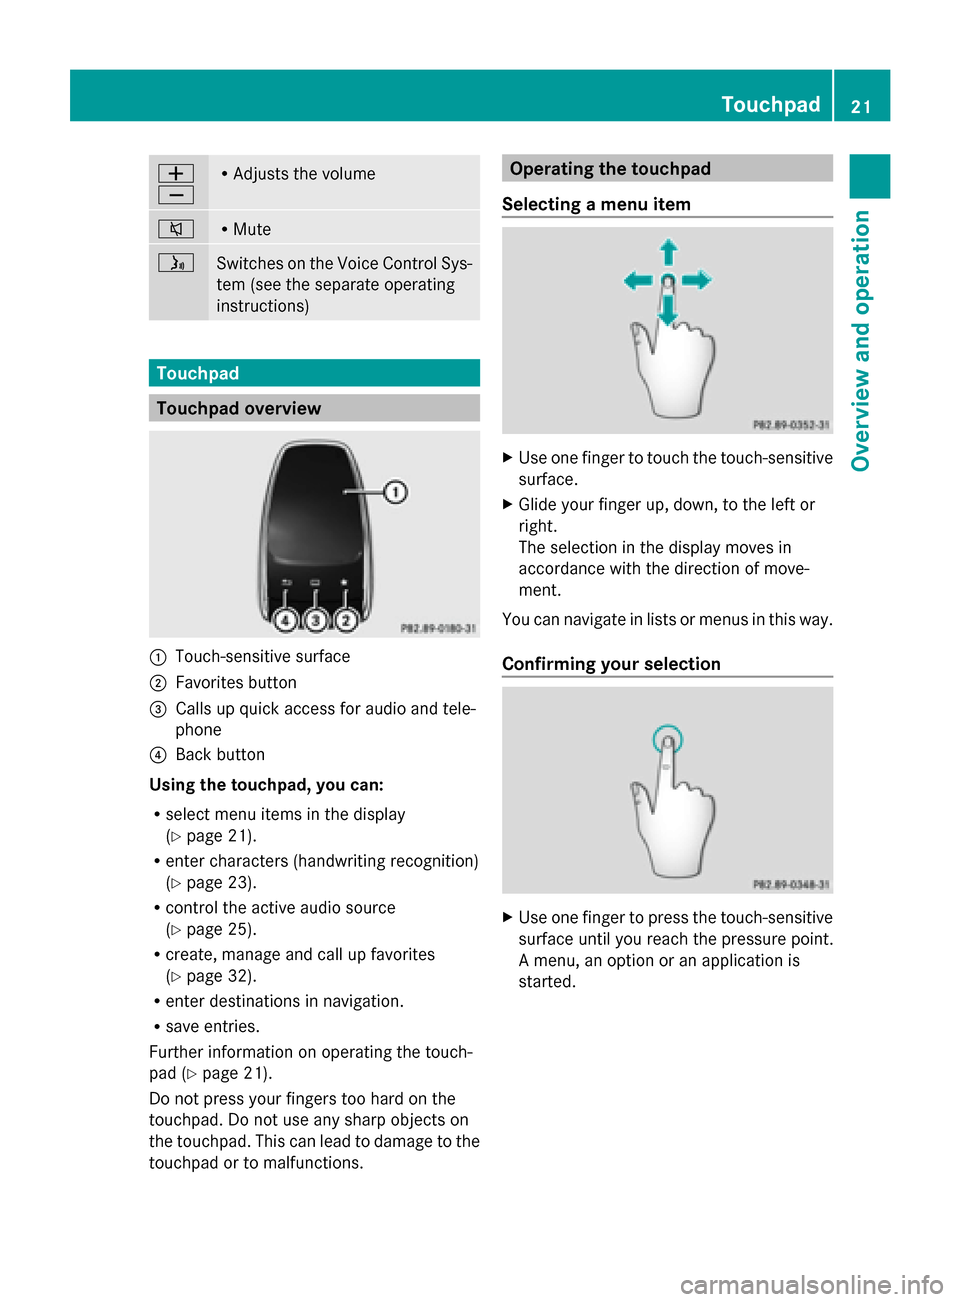
0043
Touch-sensitive surface
0044 Favorites button
0087 Calls up quick access for audio and tele-
phone
0085 Back button
Using the touchpad, you can:
R select menu items in the display
(Y page 21).
R enter characters (handwriting recognition)
(Y page 23).
R control the active audio source
(Y page 25).
R create, manage and call up favorites
(Y page 32).
R enter destinations in navigation.
R save entries.
Further information on operating the touch-
pad (Y page 21).
Do not press your fingers too hard on the
touchpad. Do not use any sharp objects on
the touchpad. This can lead to damage to the
touchpad or to malfunctions. Operating the touchpad
Selecting a menu item X
Use one finger to touch the touch-sensitive
surface.
X Glide your finger up, down, to the left or
right.
The selection in the display moves in
accordance with the direction of move-
ment.
You can navigate in lists or menus in this way.
Confirming your selection X
Use one finger to press the touch-sensitive
surface until you reach the pressure point.
A menu, an option or an application is
started. Touchpad
21Overview and operation
Page 28 of 214
X
Call up quick access (Y page 22).
The current audio source is displayed.
X To display the available audio sources:
glide down with one finger.
X To select an audio source: glide your finger
to the left or right and press.
The selected audio source is played.
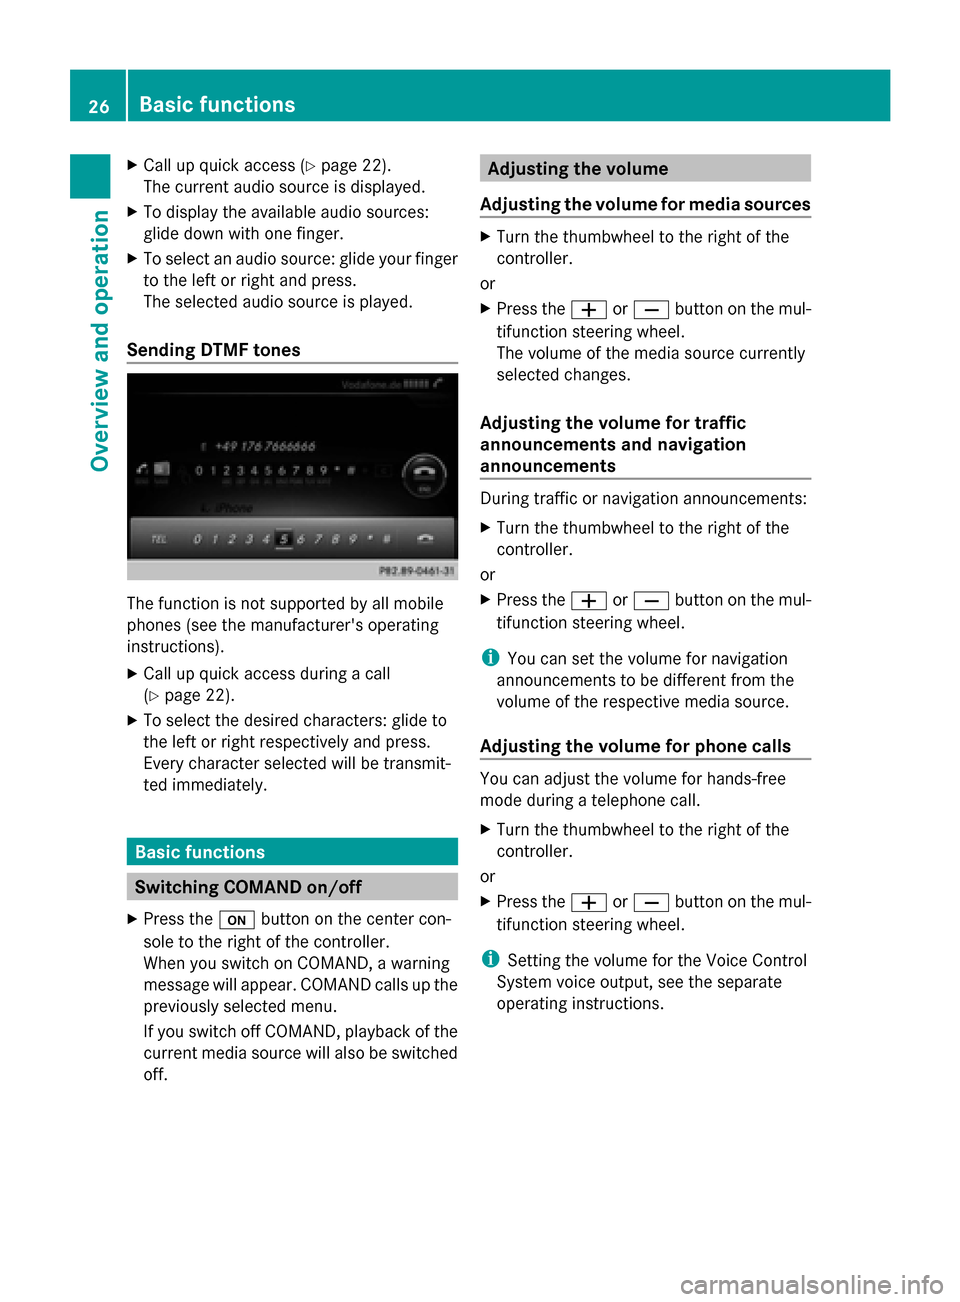
Sending DTMF tones The function is not supported by all mobile
phones (see the manufacturer's operating
instructions).
X Call up quick access during a call
(Y page 22).
X To select the desired characters: glide to
the left or right respectively and press.
Every character selected will be transmit-
ted immediately. Basic functions
Switching COMAND on/off
X Press the 008Bbutton on the center con-
sole to the right of the controller.
When you switch on COMAND, a warning
message will appear. COMAND calls up the
previously selected menu.
If you switch off COMAND, playback of the
current media source will also be switched
off. Adjusting the volume
Adjusting the volume for media sources X
Turn the thumbwheel to the right of the
controller.
or
X Press the 0081or0082 button on the mul-
tifunction steering wheel.
The volume of the media source currently
selected changes.
Adjusting the volume for traffic
announcements and navigation
announcements During traffic or navigation announcements:
X
Turn the thumbwheel to the right of the
controller.
or
X Press the 0081or0082 button on the mul-
tifunction steering wheel.
i You can set the volume for navigation
announcements to be different from the
volume of the respective media source.
Adjusting the volume for phone calls You can adjust the volume for hands-free
mode during a telephone call.
X
Turn the thumbwheel to the right of the
controller.
or
X Press the 0081or0082 button on the mul-
tifunction steering wheel.
i Setting the volume for the Voice Control
System voice output, see the separate
operating instructions. 26
Basic functionsOverview and operation
Page 29 of 214
Switching the sound on or off
Media source sound X
Press the thumbwheel beside the control-
ler.
or
X Press the 0063button on the multifunction
steering wheel.
i When the sound is switched off, you will
see the 006Bsymbol in the status bar. If you
change the media source or change the
volume, the sound is automatically
switched on.
i Even if the sound is switched off, you will
still hear navigation system announce-
ments.
Switching navigation announcements
off and on again X
To switch off navigation announce-
ments: press the thumbwheel beside the
controller during the announcement.
The Spoken
Spoken driving driving recommendations
recommendations
have been deactivated.
have been deactivated. message
appears.
X To switch navigation announcements
back on: switch COMAND off and then on
again (Y page 26).
or
X Start a new route calculation
(Y page 69).
or
X Select 006A: while route guidance is active,
show the menu and press the controller
(Y page 82). Function menu
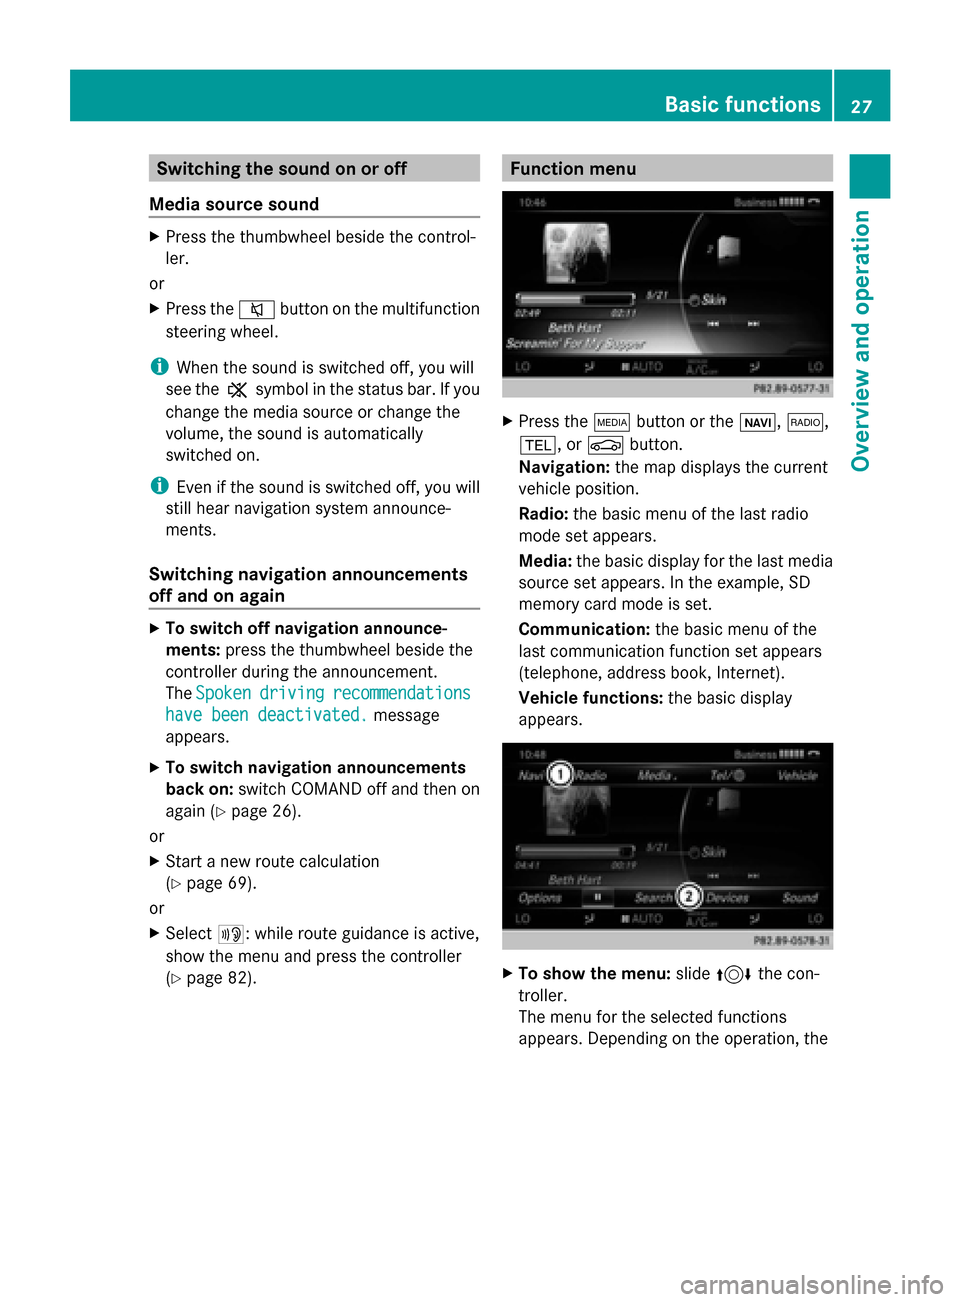
X
Press the 00FDbutton or the 00CB,002A,
002B, or 00D4button.
Navigation: the map displays the current
vehicle position.
Radio: the basic menu of the last radio
mode set appears.
Media: the basic display for the last media
source set appears. In the example, SD
memory card mode is set.
Communication: the basic menu of the
last communication function set appears
(telephone, address book, Internet).
Vehicle functions: the basic display
appears. X
To show the menu: slide4 the con-
troller.
The menu for the selected functions
appears. Depending on the operation, the Basic functions
27Overview and operation
Page 31 of 214
X
Slide 00970052the controller repeatedly until the
character bar disappears.
X To select an input line for the text of the
text message: slide 00520064and press the con-
troller.
The input line for the text of the text mes-
sage is selected. The character bar has
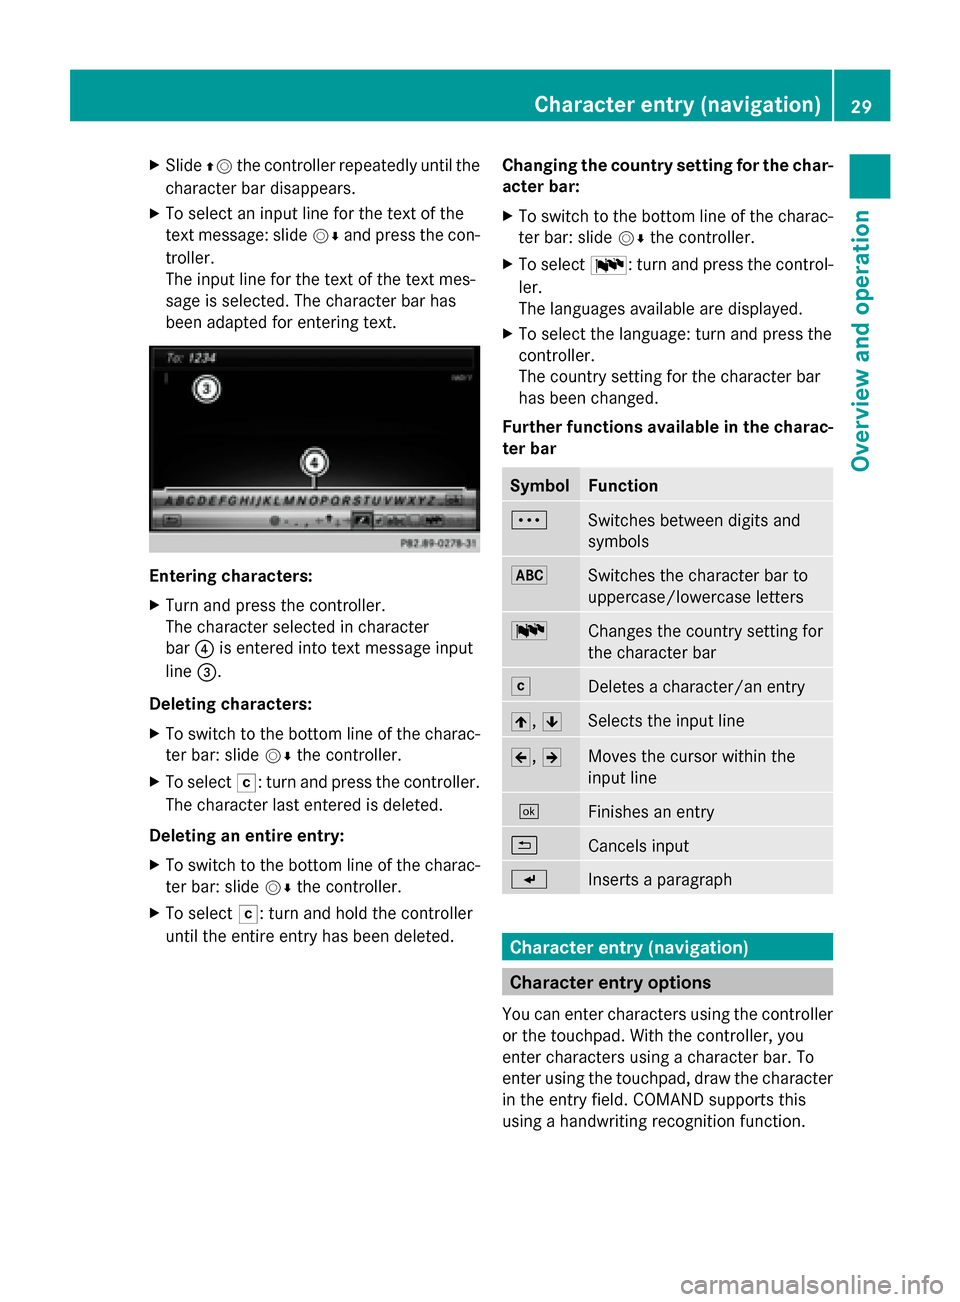
been adapted for entering text. Entering characters:
X
Turn and press the controller.
The character selected in character
bar 0085is entered into text message input
line 0087.
Deleting characters:
X To switch to the bottom line of the charac-
ter bar: slide 00520064the controller.
X To select 0042: turn and press the controller.
The character last entered is deleted.
Deleting an entire entry:
X To switch to the bottom line of the charac-
ter bar: slide 00520064the controller.
X To select 0042: turn and hold the controller
until the entire entry has been deleted. Changing the country setting for the char-
acter bar:
X
To switch to the bottom line of the charac-
ter bar: slide 00520064the controller.
X To select 0054: turn and press the control-
ler.
The languages available are displayed.
X To select the language: turn and press the
controller.
The country setting for the character bar
has been changed.
Further functions available in the charac-
ter bar Symbol Function
0062
Switches between digits and
symbols
0069
Switches the character bar to
uppercase/lowercase letters
0054
Changes the country setting for
the character bar
0042
Deletes a character/an entry
005F,
0060 Selects the input line
005D,
005E Moves the cursor within the
input line
0054
Finishes an entry
0039
Cancels input
007D
Inserts a paragraph
Character entry (navigation)
Character entry options
You can enter characters using the controller
or the touchpad. With the controller, you
enter characters using a character bar. To
enter using the touchpad, draw the character
in the entry field. COMAND supports this
using a handwriting recognition function. Character entry (navigation)
29Overview and operation
Page 32 of 214
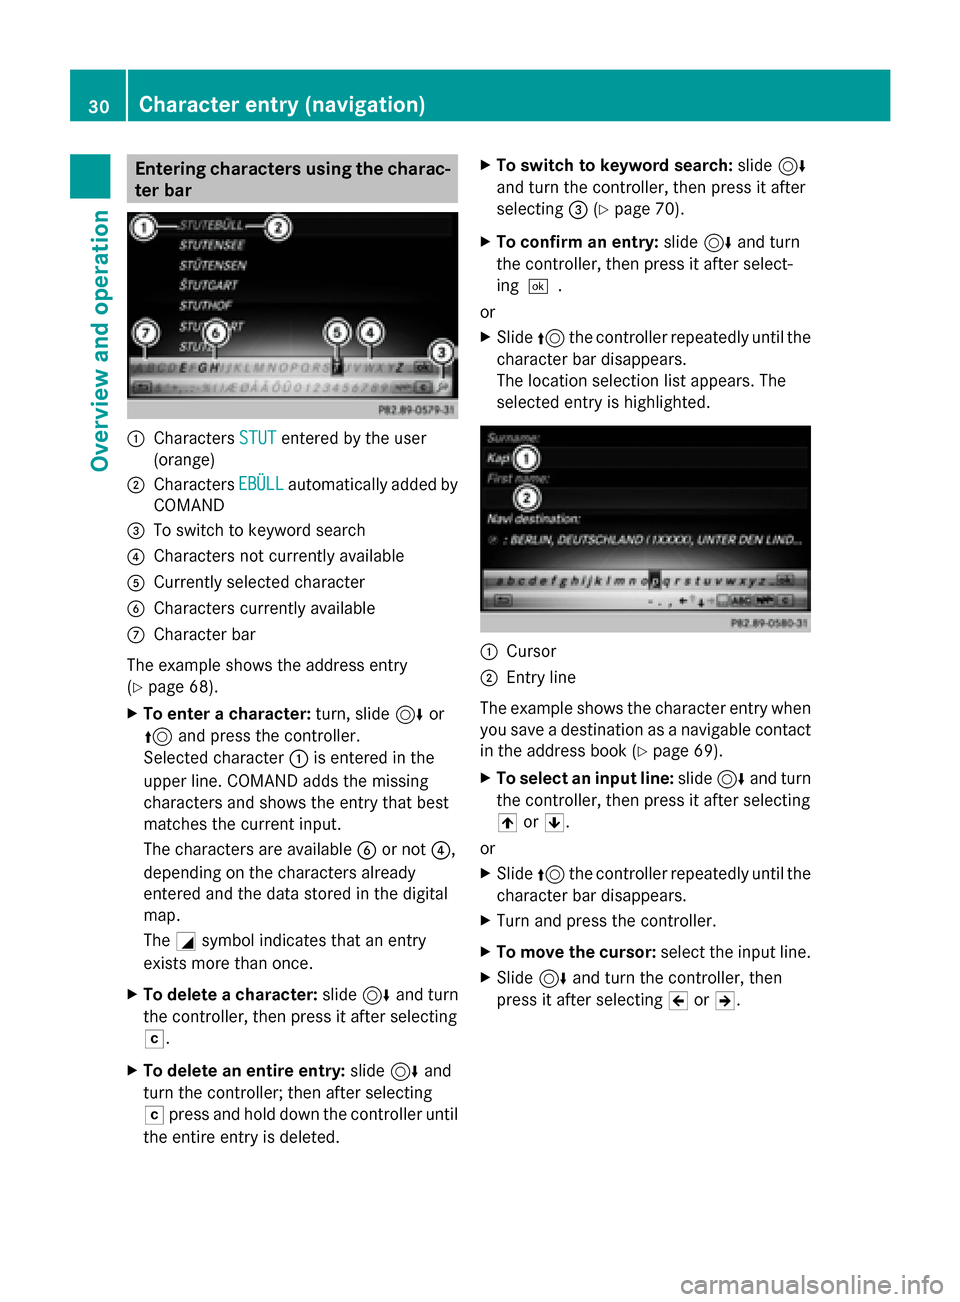
Entering characters using the charac-
ter bar 0043
Characters STUT
STUTentered by the user
(orange)
0044 Characters EBÜLL
EBÜLLautomatically added by
COMAND
0087 To switch to keyword search
0085 Characters not currently available
0083 Currently selected character
0084 Characters currently available
006B Character bar
The example shows the address entry
(Y page 68).
X To enter a character: turn, slide6or
5 and press the controller.
Selected character 0043is entered in the
upper line. COMAND adds the missing
characters and shows the entry that best
matches the current input.
The characters are available 0084or not 0085,
depending on the characters already
entered and the data stored in the digital
map.
The 0043symbol indicates that an entry
exists more than once.
X To delete a character: slide6and turn
the controller, then press it after selecting
0042.
X To delete an entire entry: slide6and
turn the controller; then after selecting
0042 press and hold down the controller until
the entire entry is deleted. X
To switch to keyword search: slide6
and turn the controller, then press it after
selecting 0087(Ypage 70).
X To confirm an entry: slide6and turn
the controller, then press it after select-
ing 0054.
or
X Slide 5the controller repeatedly until the
character bar disappears.
The location selection list appears. The
selected entry is highlighted. 0043
Cursor
0044 Entry line
The example shows the character entry when
you save a destination as a navigable contact
in the address book (Y page 69).
X To select an input line: slide6and turn
the controller, then press it after selecting
005F or0060.
or
X Slide 5the controller repeatedly until the
character bar disappears.
X Turn and press the controller.
X To move the cursor: select the input line.
X Slide 6and turn the controller, then
press it after selecting 005Dor005E. 30
Character entry (navigation)Overview and operation
Page 33 of 214
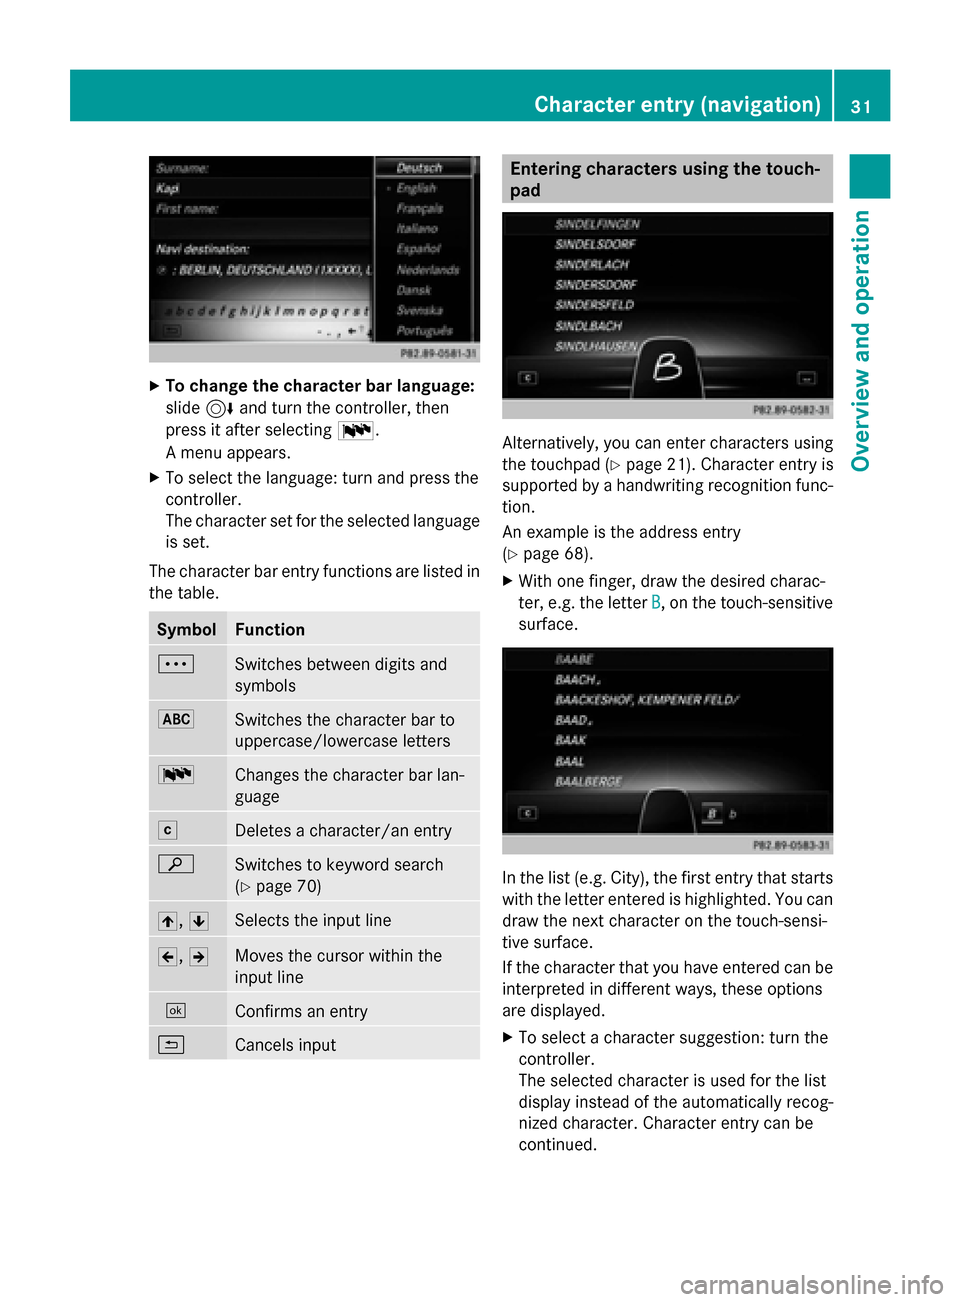
X
To change the character bar language:
slide 6and turn the controller, then
press it after selecting 0054.
A menu appears.
X To select the language: turn and press the
controller.
The character set for the selected language
is set.
The character bar entry functions are listed in
the table. Symbol Function
0062
Switches between digits and
symbols
0069
Switches the character bar to
uppercase/lowercase letters
0054
Changes the character bar lan-
guage
0042
Deletes a character/an entry
00D3
Switches to keyword search
(Y
page 70) 005F,
0060 Selects the input line
005D,
005E Moves the cursor within the
input line
0054
Confirms an entry
0039
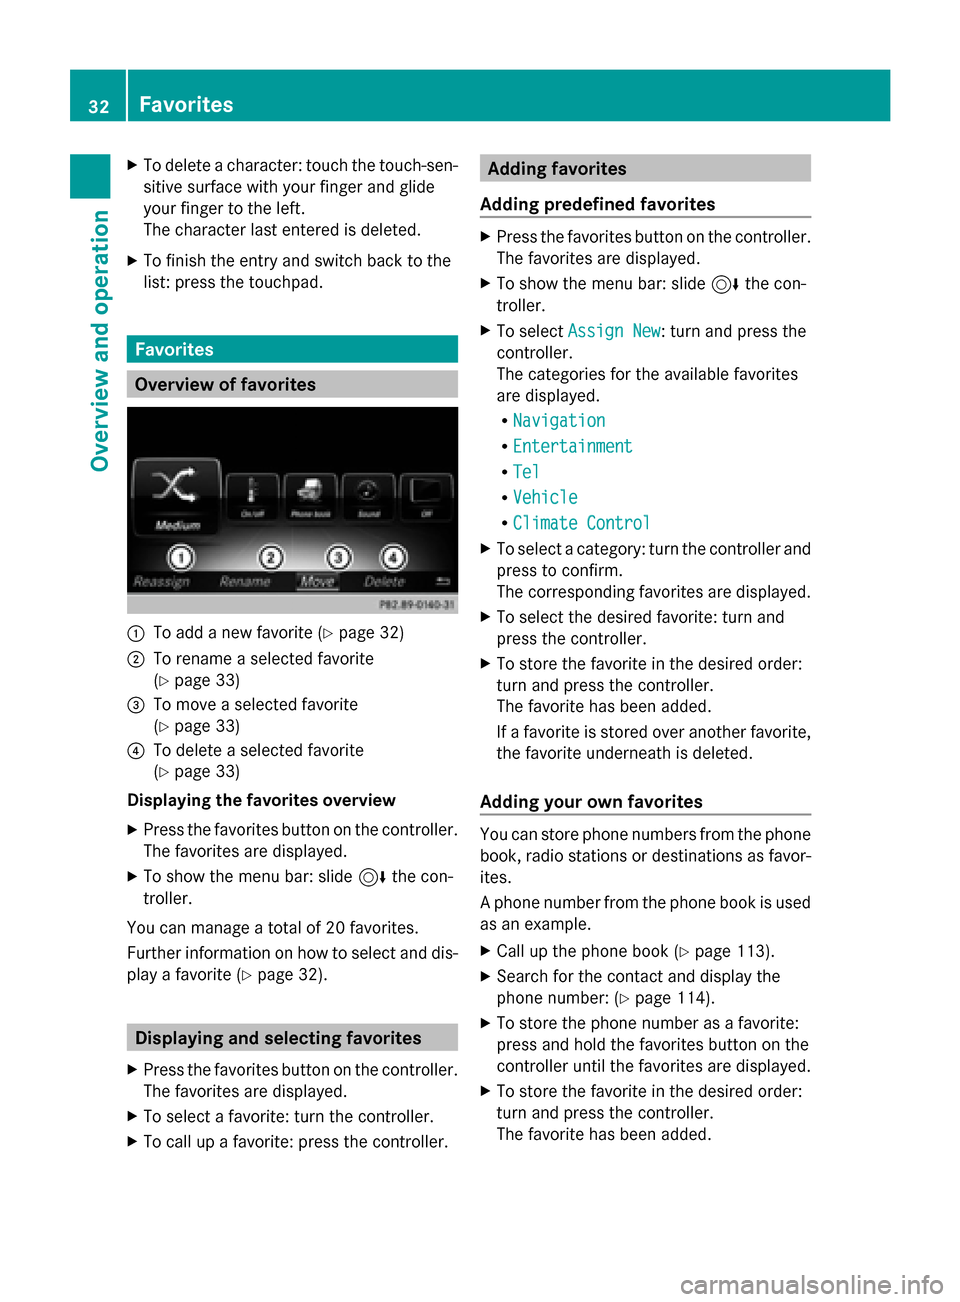
Cancels input Entering characters using the touch-
pad
Alternatively, you can enter characters using
the touchpad (Y
page 21). Character entry is
supported by a handwriting recognition func-
tion.
An example is the address entry
(Y page 68).
X With one finger, draw the desired charac-
ter, e.g. the letter B
B, on the touch-sensitive
surface. In the list (e.g. City), the first entry that starts
with the letter entered is highlighted. You can
draw the next character on the touch-sensi-
tive surface.
If the character that you have entered can be
interpreted in different ways, these options
are displayed.
X
To select a character suggestion: turn the
controller.
The selected character is used for the list
display instead of the automatically recog-
nized character. Character entry can be
continued. Character entry (navigation)
31Overview and operation
Page 34 of 214
X
To delete a character: touch the touch-sen-
sitive surface with your finger and glide
your finger to the left.
The character last entered is deleted.
X To finish the entry and switch back to the
list: press the touchpad. Favorites
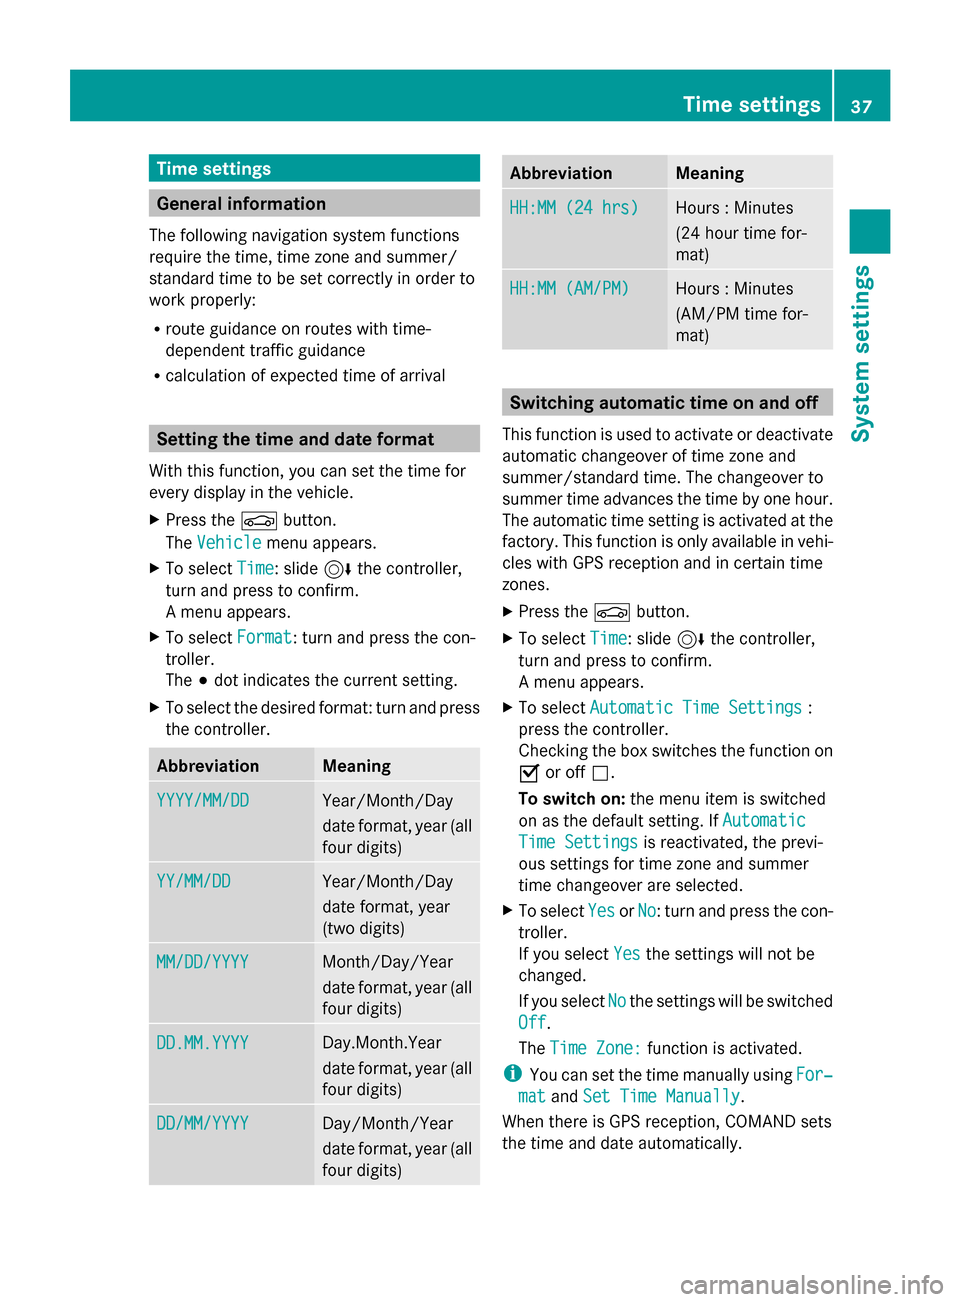
Overview of favorites
0043
To add a new favorite (Y page 32)
0044 To rename a selected favorite
(Ypage 33)
0087 To move a selected favorite
(Ypage 33)
0085 To delete a selected favorite
(Ypage 33)
Displaying the favorites overview
X Press the favorites button on the controller.
The favorites are displayed.
X To show the menu bar: slide 6the con-
troller.
You can manage a total of 20 favorites.
Further information on how to select and dis-
play a favorite (Y page 32). Displaying and selecting favorites
X Press the favorites button on the controller.
The favorites are displayed.
X To select a favorite: turn the controller.
X To call up a favorite: press the controller. Adding favorites
Adding predefined favorites X
Press the favorites button on the controller.
The favorites are displayed.
X To show the menu bar: slide 6the con-
troller.
X To select Assign New Assign New: turn and press the
controller.
The categories for the available favorites
are displayed.
R Navigation Navigation
R Entertainment
Entertainment
R Tel
Tel
R Vehicle
Vehicle
R Climate Control
Climate Control
X To select a category: turn the controller and
press to confirm.
The corresponding favorites are displayed.
X To select the desired favorite: turn and
press the controller.
X To store the favorite in the desired order:
turn and press the controller.
The favorite has been added.
If a favorite is stored over another favorite,
the favorite underneath is deleted.
Adding your own favorites You can store phone numbers from the phone
book, radio stations or destinations as favor-
ites.
A phone number from the phone book is used
as an example.
X Call up the phone book (Y page 113).
X Search for the contact and display the
phone number: (Y page 114).
X To store the phone number as a favorite:
press and hold the favorites button on the
controller until the favorites are displayed.
X To store the favorite in the desired order:
turn and press the controller.
The favorite has been added. 32
FavoritesOverview and operation
Page 39 of 214
Time settings
General information
The following navigation system functions
require the time, time zone and summer/
standard time to be set correctly in order to
work properly:
R route guidance on routes with time-
dependent traffic guidance
R calculation of expected time of arrival Setting the time and date format
With this function, you can set the time for
every display in the vehicle.
X Press the 00D4button.
The Vehicle
Vehicle menu appears.
X To select Time Time: slide 6the controller,
turn and press to confirm.
A menu appears.
X To select Format
Format : turn and press the con-
troller.
The 003Bdot indicates the current setting.
X To select the desired format: turn and press
the controller. Abbreviation Meaning
YYYY/MM/DD YYYY/MM/DD Year/Month/Day
date format, year (all
four digits)
YY/MM/DD YY/MM/DD Year/Month/Day
date format, year
(two digits)
MM/DD/YYYY MM/DD/YYYY Month/Day/Year
date format, year (all
four digits)
DD.MM.YYYY DD.MM.YYYY Day.Month.Year
date format, year (all
four digits)
DD/MM/YYYY DD/MM/YYYY Day/Month/Year
date format, year (all
four digits) Abbreviation Meaning
HH:MM (24 hrs) HH:MM (24 hrs) Hours : Minutes
(24 hour time for-
mat)
HH:MM (AM/PM) HH:MM (AM/PM) Hours : Minutes
(AM/PM time for-
mat)
Switching automatic time on and off
This function is used to activate or deactivate
automatic changeover of time zone and
summer/standard time. The changeover to
summer time advances the time by one hour.
The automatic time setting is activated at the
factory. This function is only available in vehi-
cles with GPS reception and in certain time
zones.
X Press the 00D4button.
X To select Time Time: slide 6the controller,
turn and press to confirm.
A menu appears.
X To select Automatic Time Settings Automatic Time Settings :
press the controller.
Checking the box switches the function on
0073 or off 0053.
To switch on: the menu item is switched
on as the default setting. If Automatic
Automatic
Time Settings Time Settings is reactivated, the previ-
ous settings for time zone and summer
time changeover are selected.
X To select Yes YesorNo
No: turn and press the con-
troller.
If you select Yes Yesthe settings will not be
changed.
If you select No
No the settings will be switched
Off
Off .
The Time Zone: Time Zone: function is activated.
i You can set the time manually using For‐ For‐
mat mat andSet Time Manually
Set Time Manually.
When there is GPS reception, COMAND sets
the time and date automatically. Time settings
37System settings
Page 40 of 214
Setting the time zone
To set the time zone, the Automatic Time
Automatic Time
Settings
Settings function must be activated.
X Press the 00D4button.
The Vehicle
Vehicle menu appears.
X To select Time
Time: slide 6the controller,
turn and press to confirm.
A menu appears.
X To select Time Zone:
Time Zone:: turn and press the
controller.
A list of countries or time zones appears.
The 003Bdot indicates the current setting.
X Select a country or a time zone.
A time zone list may also be displayed,
depending on the country selected.
X To select the desired time zone: turn and
press the controller.
The entry for the Automatic Time Set‐
Automatic Time Set‐
tings
tings is accepted.
Subsequent operation depends on whether
the navigation system has GPS reception and
whether the changeover function to summer
time is available.
X In the window for summer time settings,
select Automatic
Automatic.
The entry for the Automatic Time Set‐ Automatic Time Set‐
tings
tings is accepted. The Daylight Sav‐
Daylight Sav‐
ings Time (Summer)
ings Time (Summer) function is acti-
vated.
Manually switching to summer time:
X To select On
On orOff
Off turn the controller and
press to confirm.
The 003Bdot indicates the current setting.
The Automatic Time Settings Automatic Time Settings function
is deactivated 0053. Setting the time manually
X
Press the 00D4button.
The Vehicle
Vehicle menu appears.
X To select Time
Time: slide 6the controller,
turn and press to confirm.
A menu appears.
X To select Set Time Manually Set Time Manually: turn and
press the controller.
X To set the hour: turn the controller.
X To set the minutes: slide 9, turn and
press the controller.
X The time is accepted.
If Auto
Auto is set for the summer time change-
over, a prompt will appear asking whether this
should be maintained. Text reader settings
X Press the 00D4button.
The Vehicle Vehicle menu appears.
X To select System Settings
System Settings : slide6the
controller, turn and press to confirm.
A menu appears.
X To select Text Reader Speed Text Reader Speed: turn and
press the controller.
A list appears.
X Select Fast Fast,MediumMedium orSlow
Slow.
The 003Bdot indicates the current setting. 38
Text reader settingsSystem settings
Page 44 of 214
Bluetooth
®
technology is a standard for
short-range wireless data transmissions up to
approximately 10 meters. You can use Blue-
tooth ®
to connect your mobile phone to
COMAND to, for example:
R use the hands-free system
R establish an Internet connection
R listen to music using Bluetooth ®
Audio
R exchange vCards
Bluetooth ®
is a registered trademark of Blue-
tooth Special Interest Group (SIG) Inc. Activating/deactivating Bluetooth
®
X Press the 00D4button in the center con-
sole.
The Vehicle
Vehicle menu appears.
X To select System Settings System Settings : slide6the
controller, turn and press to confirm.
A menu appears.
X To select Activate Bluetooth
Activate Bluetooth: turn and
press the controller.
This switches Bluetooth ®
on 0073 or off 0053. Setting the system language
This function allows you to determine the lan-
guage for the menu displays and the naviga-
tion messages. The selected language affects
the characters available for entry.
i The navigation announcements are not
available in all languages. If a language is
not available, the navigation announce-
ments will be in English.
i When you set the system language, the
language of the Voice Control System will
change accordingly. If it is not supported
by the Voice Control System, English will be
selected. X
Press the 00D4button.
The Vehicle Vehicle menu appears.
X To select System Settings
System Settings : slide6the
controller, turn and press to confirm.
A menu appears.
X To select Language Language : turn and press the
controller.
The list of languages appears. The 003Bdot
indicates the current setting.
X Select the desired language.
COMAND loads the selected language and
sets it. Calling up and editing the Favorites
function
The Favorites function can be called up via the
system menu or via the 007Dbutton on the
controller or the touchpad.
To call up the Favorites function via the
system menu:
X Press the 00D4button.
The system menu appears.
X To select System SystemSettings
Settings: slide 6and
press the controller.
A menu appears.
X To select Favorite Favorite Functions
Functions : press the
controller.
A menu appears.
X To select the desired function, e.g. Radio
Radio:
turn and press the controller.
A menu appears.
To call up the Favorites function via the
controller or touchpad:
X Press the 007Dbutton.
Call up the Favorite Functions Favorite Functions menu.
The Favorites function can be exited at any
time. To exit the Favorites function:
R Press the 007Dbutton again
R Press the 0038button on the controller
R Press the 0038button in the display. 42
Calling up and editing the Favorites functionSystem settings