tire type MERCEDES-BENZ C CLASS 2018 Owners Manual
[x] Cancel search | Manufacturer: MERCEDES-BENZ, Model Year: 2018, Model line: C CLASS, Model: MERCEDES-BENZ C CLASS 2018Pages: 370, PDF Size: 6.25 MB
Page 17 of 370
M
M+S tires............................................ 335
Malfunction message
see Display messages
Matte finish (cleaning instruc-
tions) .................................................. 311
mbrace
Call priority ....................................2 96
Display message ............................ 236
Downloading destinations
(COMAND) ..................................... 296
Downloading routes ....................... 299
Emergency call .............................. 294
General notes ................................ 293
Geo fencing ................................... 299
Info call button .............................. 295
Locating a stolen vehicle ...............2 98
Remote fault diagnosis .................. 298
Remote vehicle locking .................. 297
Roadside assistance button ........... 295
Search & Send ............................... 297
Self-test ......................................... 293
Speed alert ....................................2 99
System .......................................... 293
Triggering the vehicle alarm ........... 299
Vehicle remote unlocking .............. 297
Mechanical key
Function/notes ................................ 80
General notes .................................. 80
Inserting .......................................... 80
Locking vehicle ................................ 85
Removing ......................................... 80
Unlocking the driver's door .............. 85
Media Interface
see Digital Operator's Manual
Memory card (audio) ......................... 219
Memory function
Seats, steering wheel, exterior
mirrors ...........................................1 11
Mercedes-Benz Intelligent Drive
360°camera .................................. 194
Active Blind Spot Assist ................. 204
Active Lane Keeping Assist ............ 207
ATTENTION ASSIST ........................ 198
Blind Spot Assist ............................ 200
Distance Pilot DISTRONIC ............. 171 Distance Pilot DISTRONIC with
Steering Pilot ................................. 177
General notes ................................ 169
Lane Keeping Assist ...................... 202
Parking Assist PAR
KTRONIC .......... 188
P
arking Pilot .................................. 184
PRE-SAFE
®(anticipatory occu-
pant protection) ............................... 58
PRE-SAFE
®PLUS (anticipatory
occupant protection PLUS) .............. 59
Rear view camera .......................... 191
Traffic Sign Assist .......................... 200
Message memory (on-board com-
puter) .................................................. 230
Messages
see Display messages
see Warning and indicator lamps
Mirror turn signal
Cleaning ......................................... 312
Mirrors
see Exterior mirrors
see Rear-view mirror
see Vanity mirror (in the sun visor)
Mobile phone
Connecting (Bluetooth
®inter-
face) .............................................. 277
Connecting another mobile
phone ............................................ 278
Frequencies ................................... 359
Installation ..................................... 359
Menu (on-board computer) ............ 220
Transmission output (maximum) .... 359
Model type
see Vehicle identification plate
Modifying the programming
(SmartKey) ........................................... 80
MOExtended tires .............................. 318
Mounting wheels
Lowering the vehicle ...................... 357
Mounting a new wheel ................... 356
Preparing the vehicle ..................... 353
Raising the vehicle ......................... 354
Removing a wheel .......................... 356
Securing the vehicle against roll-
ing away ........................................ 353
MP3
Operation ....................................... 219
Index15
Page 24 of 370
Suspension tuningSETUP (on-board computer,
Mercedes-AMG vehicles) ............... 227
Switching air-recirculation mode
on/off .................................................1 30
Switching on media mode
Via the device list .......................... 279
T
Tachometer ........................................ 211
Tail lamps
Display message ............................ 242
Tank
see Fuel tank
Tank content
Fuel gauge ....................................... 37
Technical data
Capacities ...................................... 361
Information .................................... 359
Vehicle data ................................... 367
Telephone
Accepting a call (multifunction
steering wheel) .............................. 220
Authorizing a mobile phone (con-
necting) ......................................... 278
Connecting a mobile phone (gen-
eral information) ............................ 277
Display message ............................ 257
Introduction ................................... 220
Menu (on-board computer) ............ 220
Number from the phone book ........ 220
Redialing ........................................ 221
Rejecting/ending a call ................. 220
see also Digital Operator's Man-
ual .................................................. 270
Switching between mobile
phones ........................................... 278
see Mobile phone
Temperature
Coolant (display in the instrument
cluster) .......................................... 211
Engine oil (on-board computer,
Mercedes-AMG vehicles) ............... 226
Outside temperature ...................... 211
Setting (climate control) ................ 128
Transmission oil (on-board com-
puter, Mercedes-AMG vehicles) ..... 226 Through-loading feature
................... 283
Timing (RACETIMER) ......................... 228
Tire pressure
Calling up (on-board computer) ..... 340
Checking manually ........................ 339
Display message ............................ 252
Maximum ....................................... 339
Not reached (TIREFIT) .................... 321
Notes ............................................. 337
Reached (TIREFIT) .......................... 321
Recommended ............................... 336
Using the TIREFIT kit ...................... 320
Tire pressure loss warning system
General notes ................................ 339
Important safety notes .................. 339
Restarting ...................................... 340
Tire pressure monitor
Checking the tire pressure elec-
tronically ........................................ 342
Function/notes ............................. 340
Genera l note
s ................................ 340
Important safety notes .................. 340
Radio type approval for the tire
pressure monitor ........................... 343
Restarting ...................................... 342
Warning lamp ................................. 268
Warning message .......................... 342
Tire pressure sensors
Display message ............................ 253
Tire-change tool kit ........................... 317
TIREFIT kit
Important safety notes .................. 319
Storage location ............................ 317
Tire pressure not reached .............. 321
Tire pressure reached .................... 321
Using ............................................. 320
Tires
Aspect ratio (definition) ................. 352
Average weight of the vehicle
occupants (definition) .................... 350
Bar (definition) ............................... 350
Changing a wheel .......................... 352
Characteristics .............................. 350
Checking ........................................ 334
Curb weight (definition) ................. 351
Definition of terms ......................... 350
Direction of rotation ...................... 353
Display message ............................ 252
22Index
Page 27 of 370
Vehicle data ................................... 367
Vehicle battery
see Battery (vehicle)
Vehicle data
Roof load (maximum) .....................3 67
Vehicle dimensions ........................... 367
Vehicle emergency locking ................ 85
Vehicle identification number
see VIN
Vehicle identification plate .............. 360
Vehicle level
AIRMATIC ...................................... 182
Display message ............................ 247
Video
Operating the DVD ......................... 219
see also Digital Operator's Man-
ual ..................................................2 70
VIN
Seat ............................................... 361
Type plate ...................................... 360
W
Warning and indicator lampsABS ................................................ 261
Active Brake Assist ........................ 267
Airbag ............................................ 264
Brakes ...........................................2 60
Coolant .......................................... 265
Distance warning ........................... 267
Engine diagnostics ......................... 265
ESP
®.............................................. 261
ESP®OFF ....................................... 263
Fuel tank ........................................ 265
General notes ................................ 258
Overview .......................................... 37
Parking brake ................................ 264
PASSENGER AIR BAG ......................4 5
Reserv efuel .................................. .265
Restraint system ............................ 264
Seat belt ........................................ 259
SPORT handling mode ................... 263
Steering ......................................... 269
Tire pressure monitor .................... 268
Warranty .............................................. 29
Washer fluid
Display message ............................ 257 Weather display (COMAND)
see also Digital Operator's Man-
ual .................................................. 270
Wheel and tire combinations
Tires ............................................... 357
Wheel bolt tightening torque ........... 357
Wheel chock ...................................... 353
Wheels
Changing a wheel .......................... 352
Checking ........................................ 334
Cleaning ......................................... 311
Important safety notes .................. 333
Information on driving .................... 333
Interchanging/changing ................ 352
Mounting a new wheel ................... 356
Mounting a wheel .......................... 353
Removing a wheel .......................... 356
Snow chains .................................. 336
Storing ........................................... 353
Tightening torque ........................... 357
Wheel size/tire size ....................... 357
Window curtain air bag
Display message ............................ 239
Operation ......................................... 51
Windows
see Side windows
Windshield
Defrosting ...................................... 129
Win dshie
ld washer fluid
see Windshield washer system
Windshield washer system
Adding washer fluid ....................... 307
Important safety notes .................. 366
Windshield wipers
Problem (malfunction) ................... 123
Replacing the wiper blades ............ 121
Switching on/off ........................... 120
Winter driving
Important safety notes .................. 335
Slippery road surfaces ................... 169
Snow chains .................................. 336
Winter operation
Radiator cover ............................... 304
Summer tires ................................. 335
Winter tires
M+S tires ....................................... 335
Wiper arm
Moving to a vertical position .......... 121
Index25
Page 158 of 370
clean water. Seek medical assistance with-
out delay.
RIf fuel is swallowed, seek medical assis-
tance without delay. Do not induce vomit-
ing.
RImmediately change out of clothing which
has come into contact with fuel.
GWARNING
Electrostatic buildup can create sparks and
ignite fuel vapors. There is a risk of fire and
explosion.
Always touch the vehicle body before opening
the fuel filler flap or touching the fuel pump
nozzle. Any existing electrostatic buildup is
thereby discharged.
Do not get into the vehicle again during the refu-
eling process. otherwise electrostatic charge
could build up again.
GWARNING
Vehicles with a diesel engine:
If you mix diesel fuel with gasoline, the flash
point is lower than that of pure diesel fuel.
When the engine is running, exhaust system
components could overheat without being
noticed. There is a risk of fire.
Never refuel with gasoline. Never mix gasoline with diesel fuel.
!Do not use diesel to refuel vehicles with a
gasoline engine. Do not switch on the ignition
if you accidentally refuel with the wrong fuel. Otherwise, the fuel will enter the fuel system.
Even small amounts of the wrong fuel could
result in damage to the fuel system and the
engine. Notify a qualified specialist workshop
and have the fuel tank and fuel lines drained
completely.
!Do not use gasoline to refuel vehicles with a
diesel engine. Do not switch on the ignition if
you accidentally refuel with the wrong fuel.
Otherwise, the fuel will enter the fuel system.
Even small amounts of the wrong fuel could
result in damage to the fuel system and the
engine. The repair costs are high. Notify a
qualified specialist workshop and have the
fuel tank and fuel lines drained completely.
!Overfilling the fuel tank could damage the
fuel system.
!Take care not to spill any fuel on painted
surfaces. You could otherwise damage the
paintwork.
!Use a filter when adding fuel from a fuel can.
The fuel lines and/or the fuel injection system
could otherwise be blocked by particles from
the fuel can.
If you overfill the fuel tank, fuel could spray out
when the fuel pump nozzle is removed.
For further information on fuel and fuel quality
(
Ypage 361).
Refueling
General information
Pay attention to the important safety notes
(Ypage 155).
All vehicles except PLUG-IN HYBRID vehi-
cles: if you unlock or lock the vehicle from the
outside, the fuel filler flap also unlocks or locks.
PLUG-IN HYBRID vehicles: the pressure in the
fuel tank must be released before refueling (see
Digital Operator's Manual).
The position of the 8fuel filler cap is dis-
played on the instrument cluster. The arrow next
to the filling pump indicates the side of the vehi-
cle.
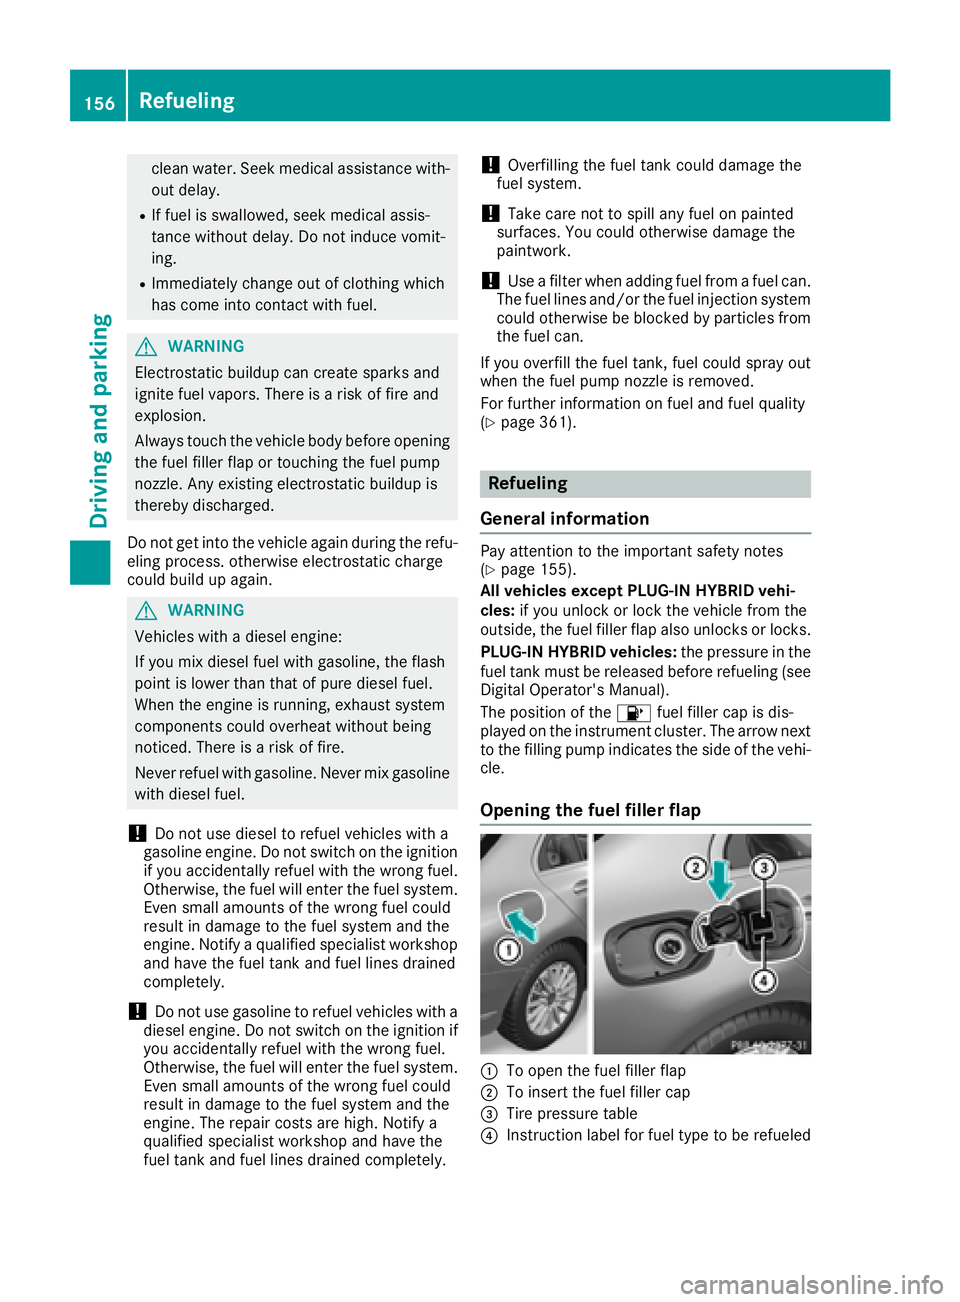
Opening the fuel filler flap
:To open the fuel filler flap
;To insert the fuel filler cap
=Tire pressure table
?Instruction label for fuel type to be refueled
156Refueling
Driving and parking
Page 170 of 370
For safety reasons, Mercedes-Benz recom-
mends only installing the following brake disks
and brake pads/linings:
Rbrake disks that have been approved by
Mercedes-Benz
Rbrake pads/linings that have been approved
by Mercedes-Benz or that are of an equivalent
standard of quality
Other brake disks or brake pads/linings can
compromise the safety of your vehicle.
Always replace all brake disks and brake pads/
linings on an axle at the same time. Always
install new brake pads/linings when replacing
brake disks.
The vehicle is equipped with lightweight brake
disks to which the wheel assembly with rim and
threaded connection is matched.
The use of brake disks other than those
approved by Mercedes-Benz can change the
track width and is subject to approval, if appli-
cable.
Shock-type loads when handling the brake
discs, such as when changing wheels, can lead
to a reduction in comfort when driving with light-
weight brake discs. Avoid shock-type loads on
the lightweight brake disks, particularly on the
brake plate.
Mercedes-Benz recommends that you only use
brake fluid that has been specially approved for
your vehicle by Mercedes-Benz, or which corre-
sponds to an equivalent quality standard. Brake
fluid which has not been approved for
Mercedes-Benz vehicles or which is not of an
equivalent quality could affect your vehicle's
operating safety.
High-performance and ceramic brakes
(Mercedes-AMG vehicles)
The AMG brake systems are designed for heavy
loads. This may lead to noise when braking. This
will depend on:
RSpeed
RBraking force
REnvironmental conditions, such as tempera-
ture and humidity
The wear of individual components of the brake
system, such as the brake pads/linings or brake
discs, depends on the individual driving style
and operating conditions.
For this reason, it is impossible to state a mile-
age that will be valid under all circumstances. An aggressive driving style will lead to high wear.
You can obtain more information on this from a
qualified specialist workshop.
New and replaced brake pads and discs only
reach their optimum braking effect after several
hundred kilometers of driving. Compensate for
this by applying greater force to the brake pedal.
Keep this in mind, and adapt your driving and
braking accordingly during this break-in period.
Excessive heavy braking results in correspond-
ingly high brake wear. If the brake pads/linings
have reached their wear limit, the multifunction
display shows a corresponding message. Espe-
cially for high performance driving, it is impor-
tant to maintain and have the brake system
checked regularly.
Driving on wet roads
Hydroplaning
If water has accumulated to a certain depth on
the road surface, there is a danger of hydro-
planing occurring, even if:
Ryou drive at low speeds
Rthe tires have adequate tread depth
For this reason, in the event of heavy rain or in
conditions in which hydroplaning may occur,
you must drive in the following manner:
Rlower your speed
Ravoid ruts
Ravoid sudden steering movements
Rbrake carefully
Driving on flooded roads
!Bear in mind that vehicles traveling in front
or in the opposite direction create waves. This
may cause the maximum permissible water
depth to be exceeded.
Failure to observe these notes may result in
damage to the engine, electrical systems and
transmission.
If you have to drive on stretches of road on which
water has collected, please bear in mind that:
Rin the case of standing water, the water level may be no higher than the lower edge of the
vehicle body
Ryou should drive no faster than walking pace
168Driving tips
Driving and parking
Page 270 of 370
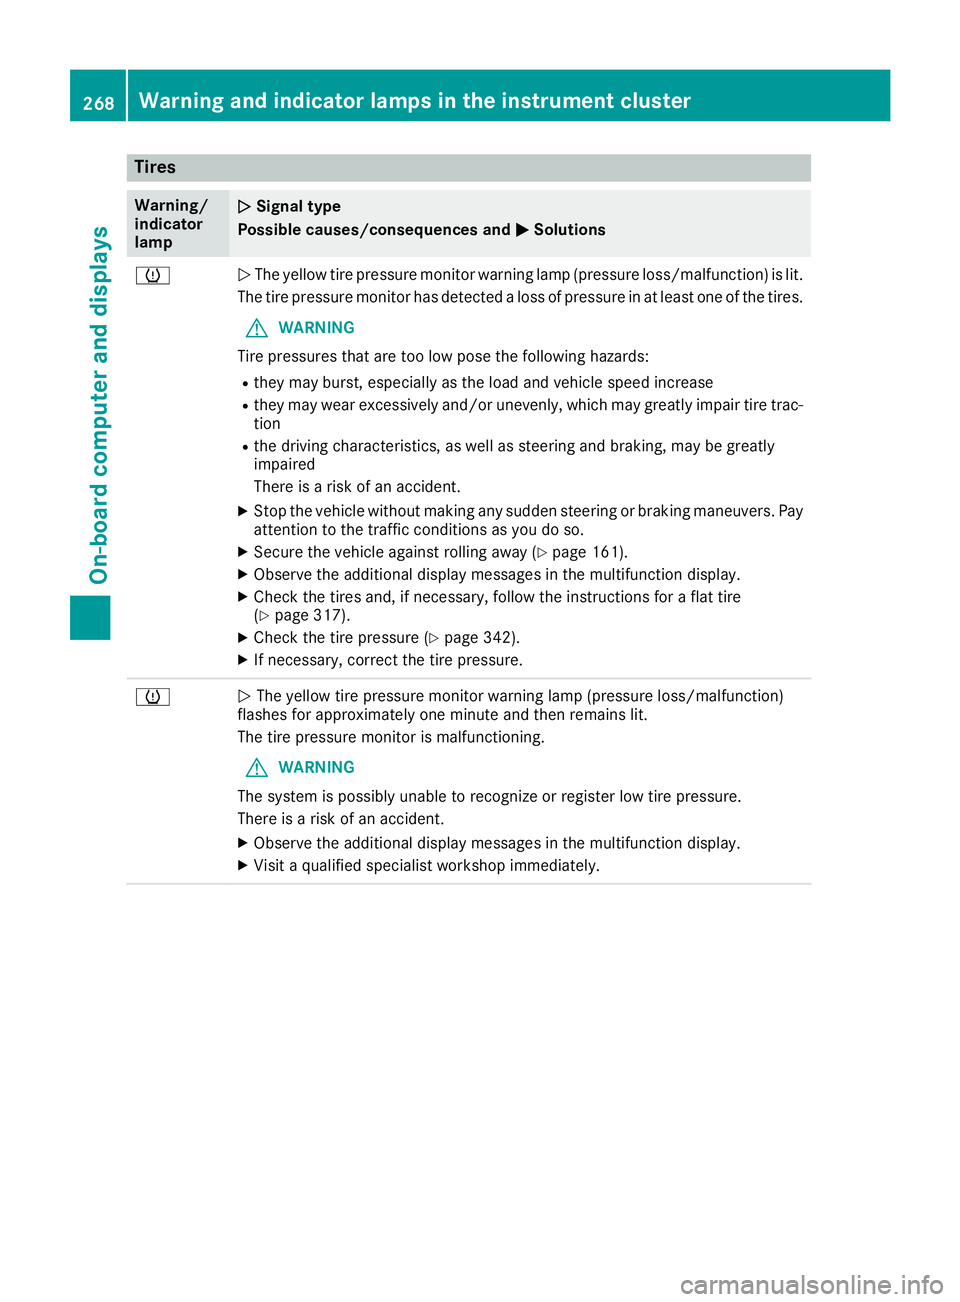
Tires
Warning/
indicator
lampNSignal type
Possible causes/consequences and M
Solutions
hNThe yellow tire pressure monitor warning lamp (pressure loss/malfunction) is lit.
The tire pressure monitor has detected a loss of pressure in at least one of the tires.
GWARNING
Tire pressures that are too low pose the following hazards:
Rthey may burst, especially as the load and vehicle speed increase
Rthey may wear excessively and/or unevenly, which may greatly impair tire trac-
tion
Rthe driving characteristics, as well as steering and braking, may be greatly
impaired
There is a risk of an accident.
XStop the vehicle without making any sudden steering or braking maneuvers. Pay
attention to the traffic conditions as you do so.
XSecure the vehicle against rolling away (Ypage 161).
XObserve the additional display messages in the multifunction display.
XCheck the tires and, if necessary, follow the instructions for a flat tire
(Ypage 317).
XCheck the tire pressure (Ypage 342).
XIf necessary, correct the tire pressure.
hN The yellow tire pressure monitor warning lamp (pressure loss/malfunction)
flashes for approximately one minute and then remains lit.
The tire pressure monitor is malfunctioning.
GWARNING
The system is possibly unable to recognize or register low tire pressure.
There is a risk of an accident.
XObserve the additional display messages in the multifunction display.
XVisit a qualified specialist workshop immediately.
268Warning and indicator lamps in the instrument cluster
On-board computer and displays
Page 317 of 370
Benz. You can obtain these from a qualified
specialist workshop.
Leather is a natural product.
It exhibits natural surface characteristics, for
example:
Rdifferences in the texture
Rmarks caused by growth and injury
Rslight nuances of color
These are characteristics of leather and not
material defects.
Seat covers of other materials
!Observe the following when cleaning:
Rclean artificial leather covers with a cloth
moistened with a solution containing 1%
detergent (e.g. dish washing liquid).
Rclean cloth covers with a microfiber cloth
moistened with a solution containing 1%
detergent (e.g. dish washing liquid). Rub
carefully and always wipe entire seat sec-
tions to avoid leaving visible lines. Leave
the seat to dry afterwards. Cleaning results
depend on the type of dirt and how long it
has been there.
Rclean DINAMICA covers with a damp cloth.
Make sure that you wipe entire seat sec-
tions to avoid leaving visible lines.
Cleaning the seat belts
GWARNING
Seat belts can become severely weakened if
bleached or dyed. This could cause the seat
belts to tear or fail, for instance, in the event of an accident. This poses an increased risk of
injury or fatal injury.
Never bleach or dye the seat belts.
!Do not clean the seat belts using chemical
cleaning agents. Do not dry the seat belts by
heating at temperatures above 176 ‡(80 †)
or in direct sunlight.
XUse clean, lukewarm water and soap solution.
Cleaning the headliner and carpets
XHeadliner: if it is very dirty, use a soft brush or
dry shampoo.
XCarpets: use the carpet and textile cleaning
agents recommended and approved by
Mercedes-Benz.
Care315
Maintenance and care
Z
Page 320 of 370
Vehicle preparation is not necessary on vehi-
cles with MOExtended tires
Ra TIREFIT kit (Ypage 317)
Vehicles equipped with MOExtended tires are
not equipped with a TIREFIT kit at the factory. It
is therefore recommended that you additionally
equip your vehicle with a TIREFIT kit if you mount tires that do not feature run-flat properties, e.g.
winter tires. A TIREFIT kit may be obtained from a qualified specialist workshop.
Vehicles with an mbrace system (USA only) that
are not equipped with a TIREFIT kit: in the event
of a flat tire, contact the Customer Assistance
Center of the mbrace emergency call system
(
Ypage 294).
Information on changing and mounting wheels
(
Ypage 353).
XStop the vehicle on solid, non-slippery and
level ground, as far away as possible from
traffic.
XSwitch on the hazard warning lamps.
XSecure the vehicle against rolling away
(Ypage 161).
XIf possible, bring the front wheels into the
straight-ahead position.
XSwitch off the engine.
XRemove the SmartKey from the ignition lock.
or, in vehicles with KEYLESS-GO start-function
or KEYLESS‑GO
XOpen the driver's door.
The vehicle electronics are now in position
u. which is the same as the SmartKey having
been removed.
XRemove the Start/Stop button from the igni-
tion lock (Ypage 137).
XMake sure that the engine cannot be started
via your smartphone (Ypage 139).
XMake sure that the passengers are not endan-
gered as they do so. Make sure that no one is
near the danger area while a wheel is being
changed. Anyone who is not directly assisting
in the wheel change should, for example,
stand behind the barrier.
XGet out of the vehicle. Pay attention to traffic
conditions when doing so.
XClose the driver's door.
Vehicles with MOExtended tires (tires
with run-flat characteristics)
General notes
With MOExtended tires (tires with run flat char-
acteristics), you can continue to drive your vehi-
cle even if there is a total loss of pressure in one
or more tires. The affected tire must not show
any clearly visible damage.
You can recognize a MOExtended tire by the
MOExtended marking which appears on the
sidewall of the tire. You will find this marking
next to the tire size designation, the load-bear-
ing capacity and the speed index (
Ypage 347).
MOExtended tires may only be used in conjunc-
tion with an active tire pressure loss warning
system or with an active tire pressure monitor.
If a pressure loss warning message appears
in the multifunction display:
Robserve the instructions in the display mes-
sages (Ypage 252)
Rcheck the tire for damage
Rif driving on, observe the following notes
The driving distance possible in run-flat mode is
approximately 50 miles (80 km) when the vehi-
cle is partially laden. When the vehicle is fully
laden it is approximately 19 miles (30 km).
In addition to the vehicle load, the driving dis-
tance possible depends upon:
Rvehicle speed
Rroad condition
Routside temperature
The driving distance possible in run-flat mode
may be reduced by extreme driving conditions
or maneuvers, or it can be increased through a
moderate style of driving.
The driving distance possible in run-flat mode is
counted from the moment the tire pressure loss
warning appears in the multifunction display.
You must not exceed a maximum permissible
speed of 50 mph (80 km/h).
When replacing one or all tires, please observe
the following specifications for your vehicle's
tires:
Rsize
Rthe type and
Rthe "MOExtended" marking
If a tire has gone flat and cannot be replaced
with a MOExtended tire, a standard tire may be
used as a temporary measure. Make sure that
318Flat tire
Breakdown assistance
Page 330 of 370
If your vehicle is being towed, much more
force may be necessary to steer or brake.
There is a risk of an accident.
In such cases, use a tow bar. Before towing,
make sure that the steering moves freely.
GWARNING
You can no longer steer the vehicle if the
steering wheel lock has been engaged. There
is a risk of an accident.
Always switch off the ignition when towing the
vehicle with a tow cable or a tow bar.
GWARNING
When towing or tow-starting another vehicle
and its weight is greater than the permissible
gross weight of your vehicle, the:
Rthe towing eye could detach itself
Rthe vehicle/trailer combination could roll-
over.
There is a risk of an accident.
When towing or tow-starting another vehicle,
its weight should not be greater than the per- missible gross weight of your vehicle.
Details on the permissible gross vehicle weight
of your vehicle can be found on the vehicle iden-
tification plate (
Ypage 360).
!When Active Brake Assist, Distance Pilot
DISTRONIC or the HOLD function is activated,
the vehicle brakes automatically in certain
situations.
To avoid damage to the vehicle, deactivate
these systems in the following or similar sit-
uations:
Rwhen towing the vehicle
Rin the car wash
!Make sure that the electric parking brake is
released. If the electric parking brake is faulty,
visit a qualified specialist workshop.
!Secure the tow rope or tow bar to the towing
eye only. Otherwise, the vehicle could
become damaged.
!Do not use the towing eye for recovery. This
could damage the vehicle. If in doubt, have
the vehicle recovered using a crane.
!When towing, pull away slowly and
smoothly. If the tractive power is too high, the
vehicles could be damaged.
!Shift the automatic transmission to position
i and do not open the driver's or front pas-
senger's door during towing. The automatic
transmission may otherwise shift to position
j, which could damage the transmission.
!Do not tow with sling-type equipment. This
could damage the vehicle.
!The vehicle can be towed a maximum of
30 miles (50km). The towing speed of 30 mph (50 km/h) must not be exceeded.
If the vehicle has to be towed more than
30 miles (50km), the entire vehicle must be
raised and transported.
It is better to have the vehicle transported than
to have it towed away.
If the vehicle has suffered transmission damage,
have it transported on a transporter or trailer.
The automatic transmission must be in position
i w
hen the vehicle is being towed. If the auto-
matic transmission cannot be shifted to position
i, have the vehicle transported on a trans-
porter or trailer.
The battery must be connected and charged.
Otherwise, you:
Rcannot turn the SmartKey to position 2in
the ignition lock
Rcannot release the electric parking brake
Rcannot shift the automatic transmission to
position i
Disarm the automatic locking feature before the vehicle is towed (
Ypage 85). You could other-
wise be locked out when pushing or towing the
vehicle.
Installing/removing the towing eye
Installing the towing eye
GWARNING
The exhaust tail pipe may be very hot. There is
a risk of burns when removing the rear cover.
Do not touch the exhaust pipe. Take particular
care when removing the rear cover.
328Towing and tow-starting
Breakdown assistance
Page 336 of 370
Activate ESP®and adapt your driving style. At
outside temperatures below 50 ‡(10 †), use
M+S tires.
iDifferent driving styles may lead to high tire
wear and the tires may reach the minimum
tire tread depth after only a short time.
Regular checking of wheels and tires
GWARNING
Damaged tires can cause tire inflation pres-
sure loss. As a result, you could lose control of
your vehicle. There is a risk of accident.
Check the tires regularly for signs of damage
and replace any damaged tires immediately.
Check wheels and tires for damage at least once
a month. Check wheels and tires after driving
off-road or on rough roads. Damaged wheels
can cause a loss of tire pressure.
Pay particular attention to damage such as:
RCuts in the tires
RPunctures in the tires
RTears in the tires
RBulges on tires
RDeformation or severe corrosion on wheels
Regularly check the tire tread depth and the
condition of the tread across the whole width of
the tire (
Ypage 334). If necessary, turn the
front wheels to full lock in order to inspect the
inner side of the tire surface.
All wheels must have a valve cap to protect the
valve against dirt and moisture. Do not mount
anything onto the valve other than the standard
valve cap or other valve caps approved by
Mercedes-Benz for your vehicle. Do not use any
other valve caps or systems, e.g. tire pressure
monitoring systems.
Regularly check the pressure of all the tires par-
ticularly prior to long trips. Adjust the tire pres-
sure as necessary (
Ypage 336).
The service life of tires depends, among other
things, on the following factors:
RDriving style
RTire pressure
RDistance covered
Notes on tire tread
GWARNING
Insufficient tire tread will reduce tire traction.
The tire is no longer able to dissipate water.
This means that on wet road surfaces, the risk
of hydroplaning increases, in particular where speed is not adapted to suit the driving con-
ditions. There is a risk of accident.
If the tire pressure is too high or too low, tires
may exhibit different levels of wear at differ-
ent locations on the tire tread. Thus, you
should regularly check the tread depth and
the condition of the tread across the entire
width of all tires.
Minimum tire tread depth for:
RSummer tires: âin (3 mm)
RM+S tires: ãin (4 mm)
For safety reasons, replace the tires before
the legally prescribed limit for the minimum
tire tread depth is reached.
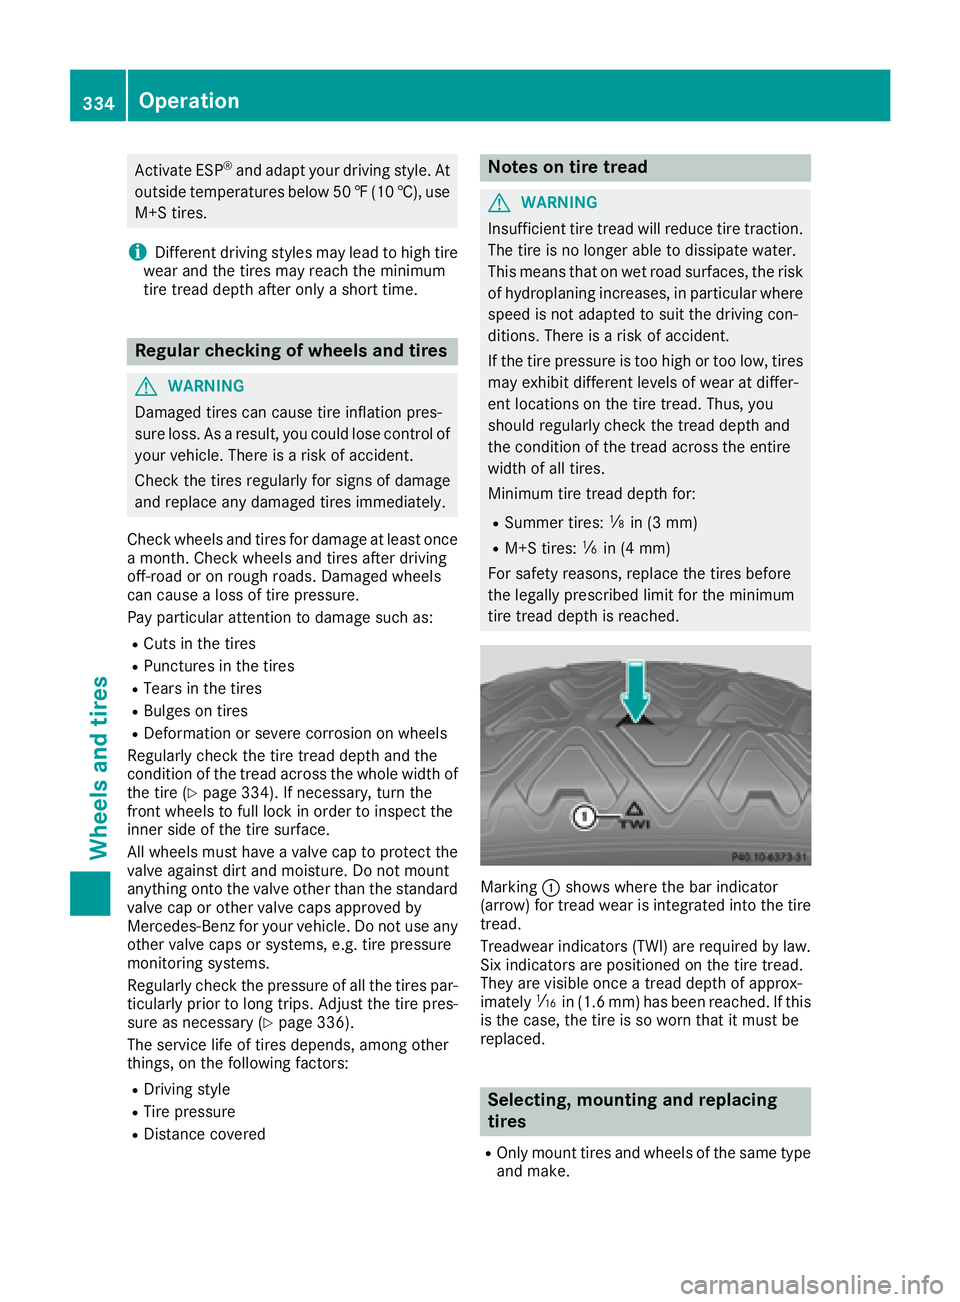
Marking :shows where the bar indicator
(arrow) for tread wear is integrated into the tire
tread.
Treadwear indicators (TWI) are required by law. Six indicators are positioned on the tire tread.
They are visible once a tread depth of approx-
imately áin (1.6 mm) has been reached. If this
is the case, the tire is so worn that it must be
replaced.
Selecting, mounting and replacing
tires
ROnly mount tires and wheels of the same type
and make.
334Operation
Wheels and tires