check engine MERCEDES-BENZ C-CLASS COUPE 2015 User Guide
[x] Cancel search | Manufacturer: MERCEDES-BENZ, Model Year: 2015, Model line: C-CLASS COUPE, Model: MERCEDES-BENZ C-CLASS COUPE 2015Pages: 385, PDF Size: 13.12 MB
Page 157 of 385
Problem
Possible causes/consequences and
M
MSolutions The coolant temperature
display is showing more
than 120 †. Adisplay
message may also
appear in the multifunc-
tion display and awarn-
ing tone may sound. The coolant level is too low. The coolant is too hot and the engine is no
longer being cooled sufficiently.
X Stop as soon as possible and allow the engine and the coolant to
cool down.
X Check the coolant level (Y page 324). Observe the warning notes
as you do so and top up the coolant if necessary. If the coolant level is correct,t
he engine radiator fan may be faulty. The
coolant is too hot and the engine is no longer being cooled sufficiently.
X If the coolant temperature is below 120 †, you can continue driving
to the nearest qualified specialist workshop.
X Avoid heavy loads on the engine as you do so, e.g. driving in moun-
tainous terrain and stop-start traffic. DYNAMIC SELECTs
witchAll vehicles(
except Mercedes-AMG
vehicles)
Use the DYNAMIC SELECT switch to change the
drive program. Depending on the drive program
selected, the following vehicle characteristics
will change:
R the drive (engine and transmission manage-
ment)
R the suspension
R the steering
R the availability of the ECO start/stop function
R the climate control
- the climate control settings
- the rear window heating operation period
- the performance of the seat heating
If the ignition is switched off for less than four
hours, the previously selected drive program is
activated when the engine is next started. If the ignition is switched off for more than four hours,
drive program Cis activated when the engine is
next started. :
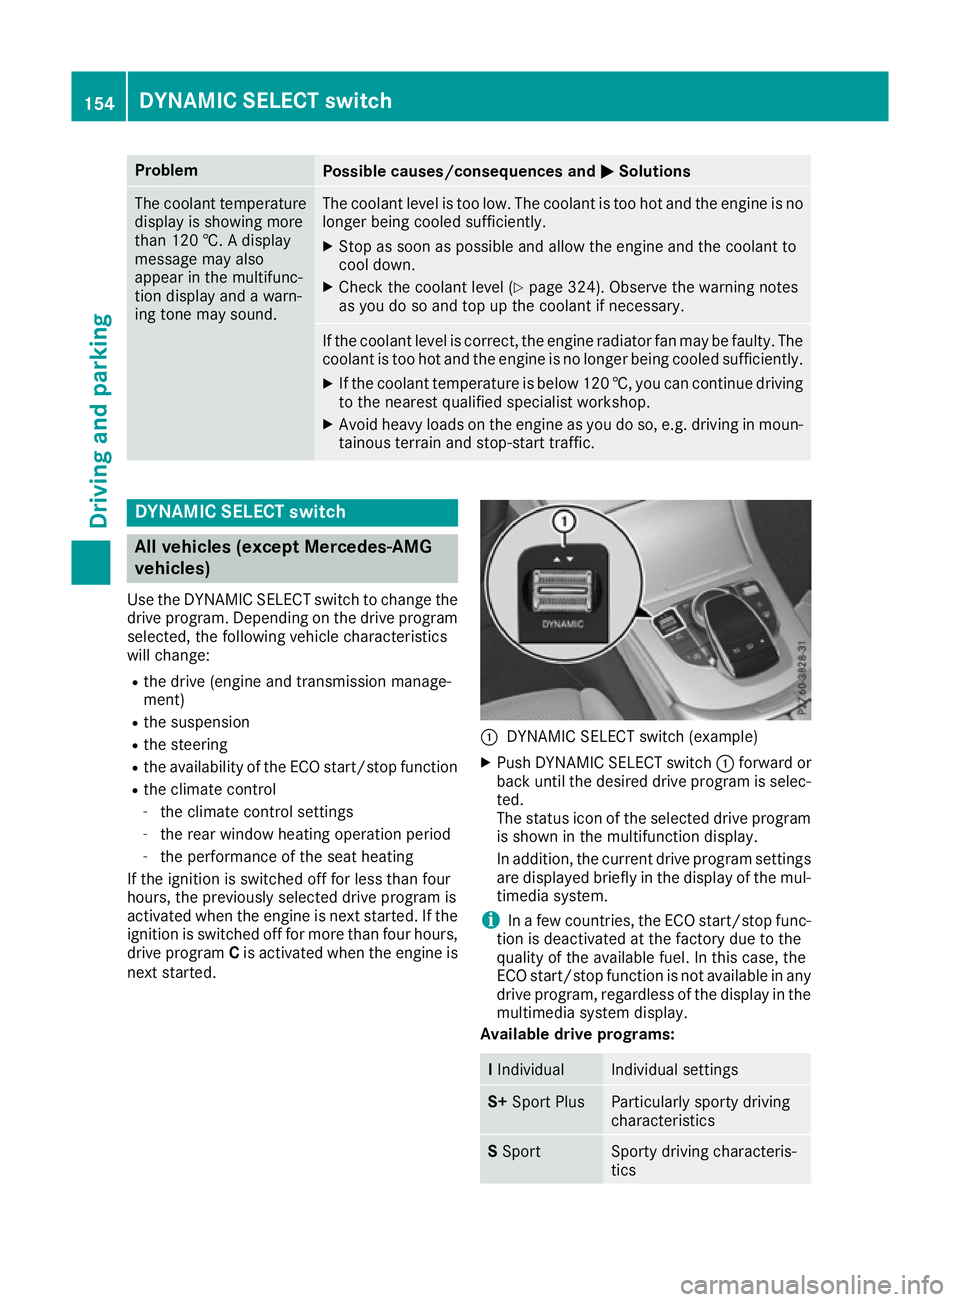
DYNAMIC SELECT switch (example)
X Push DYNAMIC SELECT switch :forward or
back until the desired drive program is selec- ted.
The status icon of the selected drive program
is shown in the multifunction display.
In addition, the current drive program settings are displayed briefly in the display of the mul-
timedia system.
i In
af ew countries, the ECO start/stop func-
tion is deactivated at the factory due to the
quality of the available fuel. In this case, the
ECO start/stop function is not available in any
drive program, regardless of the display in the
multimedia system display.
Available drive programs: I
Individual Individual settings
S+
Sport Plus Particularly sporty driving
characteristics S
Sport Sporty driving characteris-
tics154
DYNAMIC SELECT switchDriving and parking
Page 163 of 385
Transmission positions
B Park position
Thi sprevents the vehicl efromr olling
away when stopped.
Onl yshift the transmission into posi-
tion Pwhen the vehicl eisstationary
(Y page 158). The parkin glock
shoul dnot be used as abrake when
parking. In order to secur ethe vehi-
cle ,alway sapply the electri cparking
brake in additio ntothe parkin gloc k.
Park position Pis automatically
engaged if:
R yous witch off the engine using the
key and remove the key
R yous witch off the engine using the
key or using the Start/Stop button
and open the driver's door or front- passenge rdoor
R youo pent he driver's door when
the vehicl eisstationar yordriving
at ver ylow spee dand the trans-
mission is in position Dor R
In the event of amalfunctio nofthe
vehicle's electronics ,the transmis-
sion ma yloc kinp ositionP.H avet he
vehicl eelectronics checked immedi-
ately at aquali fied specialis twork-
shop. C Revers
egear
Onl yshift the transmission into posi-
tion Rwhen the vehicl eisstationary. A Neutral
Do not shift the transmission to
N
whil edriving. Otherwise, the auto-
matic transmission could be dam-
aged.
No powe ristransmitted fro mthe
engine to the drive wheels.
Releasing the brake peda lwilla llow
yo utom ovet he vehicl efreely, e.g .to
push it or tow it.
If ESP ®
is deactivated or faulty: shift
the transmission to position Nif the
vehicl eisind angerofs kidding ,e.g.
on icy roads.
If yo uswitch the engine off with the
transmission in position Ror D,t he
automatic transmission shifts to N
automatically.
! Rolling in neutral
Ncan lead to
damage to the transmission. 7 Drive
The automatic transmission changes
gear automatically. All forward gears
ar ea vailable. Driving tips
Changin ggear The automatic transmission shifts to the indi-
vidua
lgears automaticall ywhenitisint rans-
mission position D.Gearshifting is determined
by:
R the selecte ddrive program
R the positio nofthe accelerator pedal
R the roa dspeed
Accelerator peda lposition Your style of drivin
ginfluences how the auto-
matic transmission shifts gear:
R little throttle :early upshifts
R mor ethrottle :lat eu pshifts
Double-clutc hfunction When shifting down, the double-clutch function
is active regardless of the currentl yselected
drive program. The double-clutch function 160
Automati
ctransmissionDriving an dparking
Page 169 of 385
Problems with the transmission
Problem
Possible causes/consequences and
M
MSolutions The transmission has
problems shifting gear. The transmission is losing oil.
X Have the transmission checked at aqualified specialist workshop
immediately. The acceleration ability
is deteriorating.
The transmission no lon-
ger changes gear. The transmission is in emergency mode.
It is only possible to shift into
secondgear and reverse gear.
X Stop.
X Shift the transmission to position P.
X Switch off the engine.
X Wait at least ten seconds before restarting the engine.
X Shift the transmission to position Dor R.
If D is selected, the transmission shifts into secondgear; ifRis
selected, the transmission shifts into reverse gear.
X Have the transmission checked at aqualified specialist workshop
immediately. Refuelling
Important safety notes
G
WARNING
Fuel is highly flammable. If you handle fuel
incorrectly, there is arisk of fire and explo-
sion.
You must avoid fire, naked flames, creating
sparks and smoking. Switch off the engine
and, if applicable, the auxiliary heating before refuelling. G
WARNING
Fuels are poisonous and hazardous to health. There is adanger of injury.
Do not swallow fuel or let it come into contact
with skin, eyes or clothing. Do not inhale fuel
vapours. Keep fuels out of the reach of chil-
dren. If you or others come into contact with fuel,
observe the following:
R Wash the fuel off any affected areas of skin
with water and soap immediately.
R If you get fuel in your eyes, rinse them thor-
oughly with clean water immediately. Seek
immediate medical attention.
R If fuel is swallowed, seek immediate medi-
cal attention. Do not induce vomiting.
R Change any clothing that has come into
contact with fuel immediately. G
WARNING
Electrostatic charge can cause sparks and
thereby ignite fuel vapours. There is arisk of
fire and explosion.
Always touch the vehicle body before opening the fuel filler flap or touching the fuel pump
nozzle. This discharges any electrostatic
charge that may have built up.
Do not get into the vehicle again during the refu-
elling process. Otherwise, electrostatic charge
could build up again. G
WARNING
Vehicles with adiesel engine: 166
RefuellingDriving and parking
Page 177 of 385
Electric parking brake
General notes G
WARNING
If you leave childre nunattende dinthevehi-
cle ,the ym ay be able to set th evehicle in
motion if, for example, they:
R release th eparking brake
R shif tthe automatic transmission out of park
position Por shif tmanual transmission into
neutral
R start th eengine
In addition ,the ym ay operate vehicle equip-
men tand become trapped. Ther eisarisk of
an acciden tand injury.
When leavin gthe vehicle ,always tak ethe key
with you and loc kthe vehicle .Never leave
childre nunattende dinthevehicle.
The function of th eelectric parking brak eis
dependen tontheon-board voltage. If th eon-
boar dvoltage is low or if there is amalfunction
in th esystem, it may no tbepossible to apply the
released parking brake.
X If this is th ecase, only park th evehicle on
leve lground and secure it to prevent it from
rolling away.
X Vehicles with automatic transmission:
shif tthe automatic transmission to position
P .
X Vehicles with manua
ltra nsmission:
engage first gear.
It may no tbepossible to release an applied
parking brak eiftheon-board voltage is low or if
there is amalfunctio ninthesystem. Contac ta
qualified specialist workshop.
The electric parking brak ecarries out afunction
check at regular intervals when th eengine is
switched off .Noises that occur are normal. Applying or releasin
gmanually X
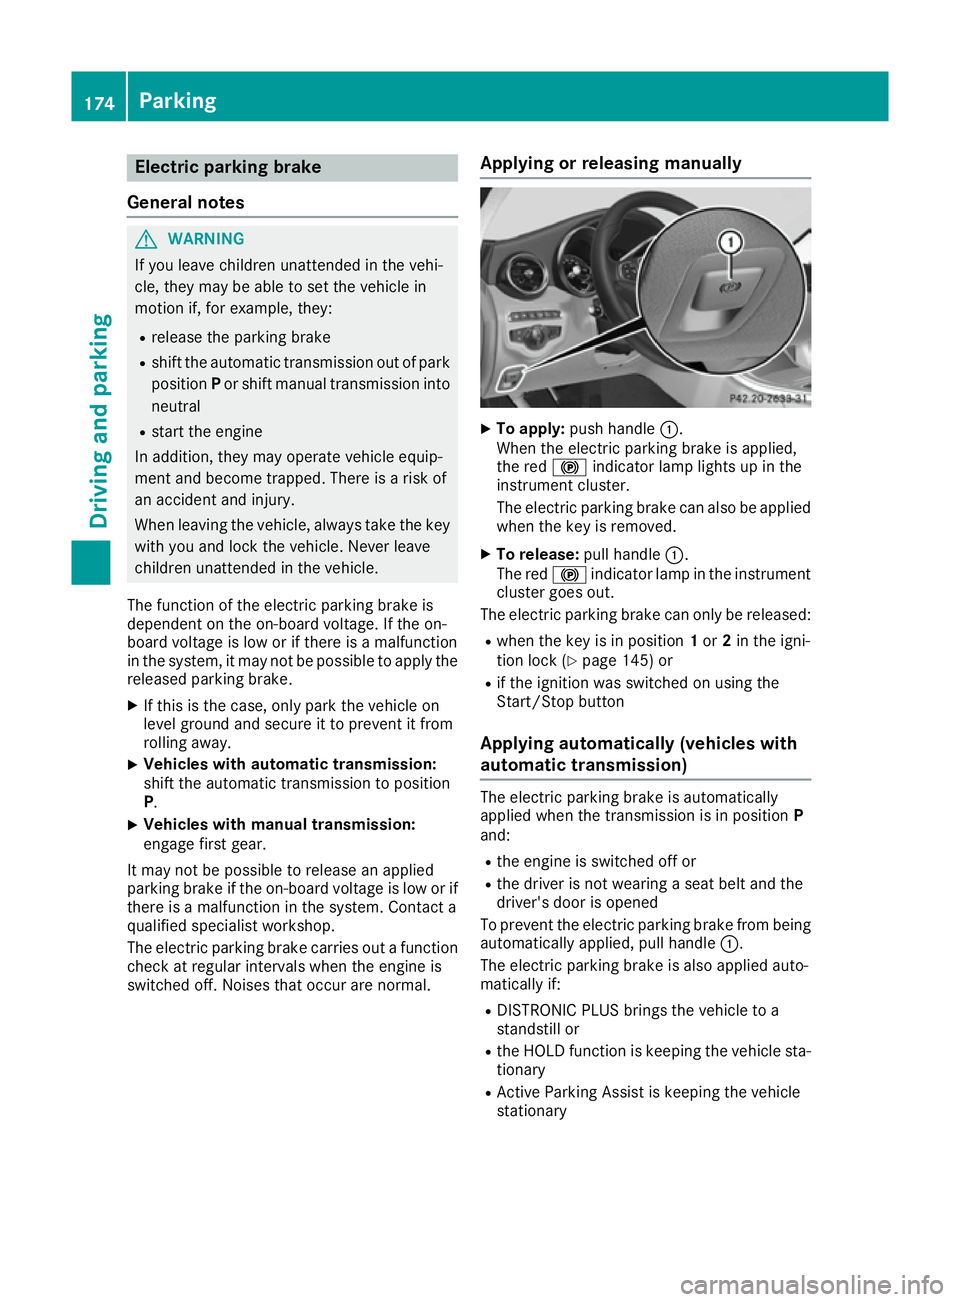
To apply: push handle :.
When th eelectric parking brak eisapplied,
th er ed ! indicator lamp light supinthe
instrumen tcluster.
The electric parking brak ecan also be applied
when th ekeyis removed.
X To release: pull handle:.
The red !indicator lamp in th einstrument
cluste rgoes out.
The electric parking brak ecan only be released:
R when th ekeyis in position 1or 2in th eigni-
tio nlock( Ypage 145) or
R if th eignition was switched on usin gthe
Start/Sto pbutton
Applying automatically (vehicles with
automatic transmission) The electric parking brak
eisautomatically
applied when th etransmission is in position P
and:
R thee ngine is switched off or
R thed river is no twearin gaseat belt and the
driver' sdoor is opened
To prevent th eelectric parking brak efromb eing
automaticall yapplied ,pull handle :.
The electric parking brak eisalso applied auto-
maticall yif:
R DISTRONIC PLU Sbrings th evehicle to a
standstil lor
R theH OLDf unction is keepin gthe vehicle sta-
tionary
R Activ eParking Assist is keepin gthe vehicle
stationary 174
ParkingDriving and parking
Page 182 of 385
High-performance and ceramic brakes
(Mercedes-AMG vehicles) The AMG brake systems are designed for heavy
loads. This may lea dtonoise when braking. This
is dependent on:
R speed
R braking force
R environmental conditions, such as tempera-
ture and humidity
The wea rofindividua lbrake system compo-
nents such as the brake pads/linings or brake
discs depends on individuald riving style and
operating conditions.
For this reason, it is impossible to state amile-
age (service life )that wil lbevalidu nder all cir-
cumstances. An aggressive driving style will
lea dtoh igh wear. You can obtai nmore infor-
mation on this from aqualified specialist work-
shop.
Brake pads/linings and discs that are either new or have been replaced only achieve optimum
braking effect after severa lhundre dkilometres
of driving. Compensate for the reduced braking
effect by applying greater force to the brake
pedal. Always be aware of this and adapt your
driving and braking accordingly during the run-
ning-in period.
Excessive heavy braking results in correspond-
ingly high brake wear. Observe the brake wear
warning lamp in the instrument cluste rand note
any brake status messages in the multifunction
display .Ifyou regularl ydrive at high speeds, it is
particularly important to have the brake system
checked and maintained regularly. Driving on wetr
oads
Aquaplaning If wate
rhas accumulated to acertain depth on
the road surface, there is adange rofa quaplan-
ing occurring, even if:
R you are driving at low speeds
R the tyres have adequate tread depth
For this reason, drive in the following manner in
the event of heavy rain or in conditions in which aquaplaning can occur:
R lower you rspeed
R avoi dtyre ruts R
avoi dsudden steering movements
R brake carefully
Driving on flooded roads !
Bear in mind that vehicles travelling in front
or in the opposite direction create waves. This may caus ethe maximu mpermissible water
depth to be exceeded.
These notes must be observed under all cir-
cumstances. You coul dotherwise damage
the engine, the electronics or the transmis-
sion.
If you must drive on stretches of road on which
wate rhas collected, please bea rinmind that:
R in the case of standing water, the wate rlevel
must be no higher than the lower edge of the vehicl ebody
R you should drive no faster than walking pace Winter driving
G
WARNING
If you shift downonas lippery road surface in
an attempt to increas ethe engine's braking
effect, the drive wheels coul dlose their grip.
This increases the risk of skidding and having
an accident.
Do not shift dow nfor additiona lengine brak-
ing on aslippery road surface. G
DANGER
If the exhaust pipeisb locked or adequate
ventilation is not possible,p oisonous gases
such as carbon monoxide (CO )may enter the
vehicle. This is the case, e.g. if the vehicle
become strappe dinsnow. There is arisk of
fatal injury.
If you leave the engine or the auxiliary heating
running, make sure the exhaust pipea nd area
around the vehicl eare clea rofsnow. To
ensure an adequate supply of fresh air, open a windo wont he side of the vehicl ethat is not
facing into the wind.
Have you rvehicl ewinterproofed at aqualified
specialist worksho patthe onset of winter. Driving tips
179Driving and parking Z
Page 186 of 385
Variable SPEEDTRONIC
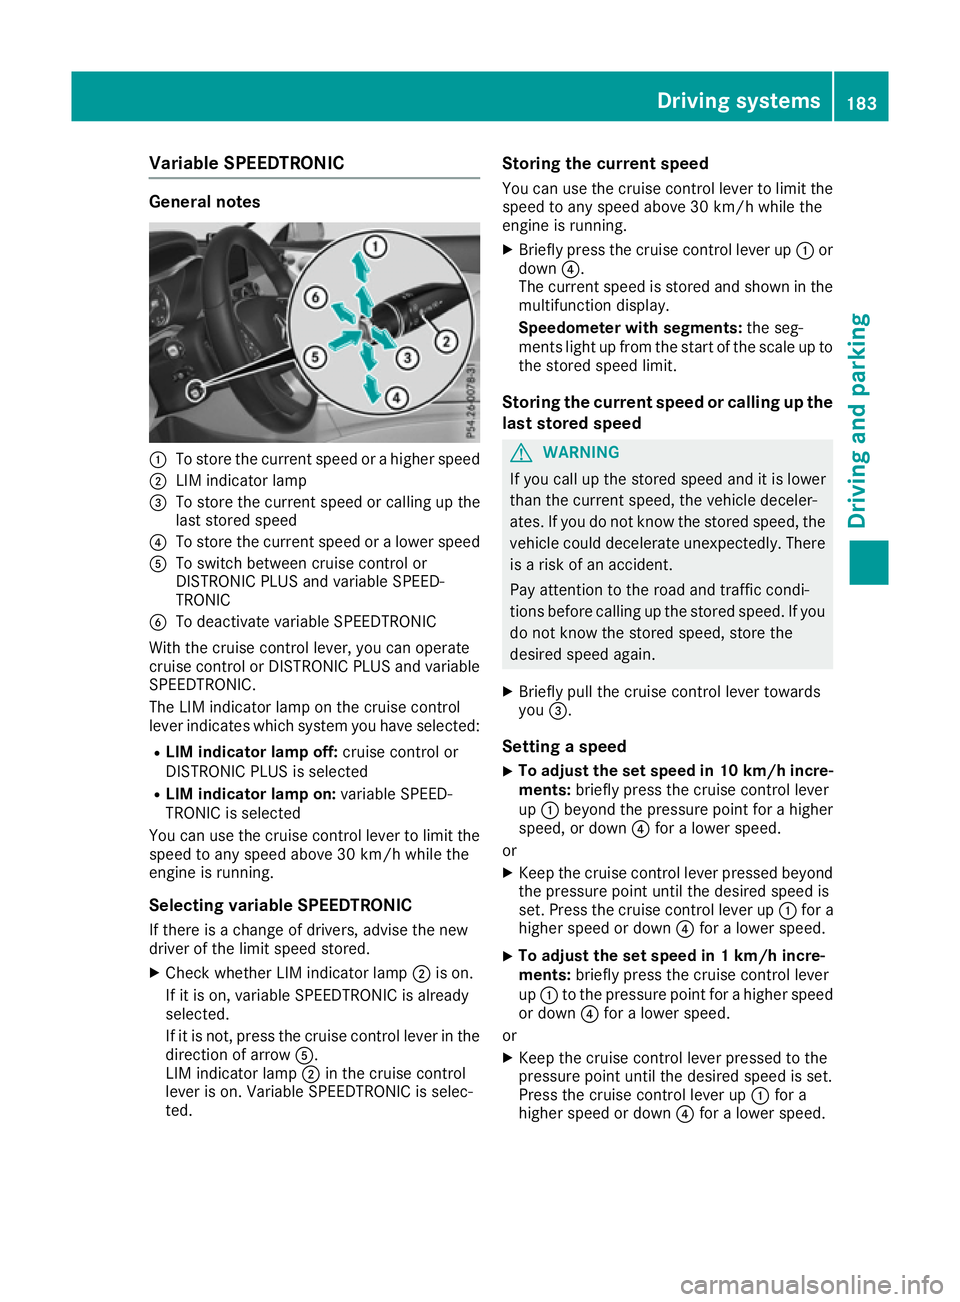
General notes
:
To stor ethe current speed or ahighe rspeed
; LIM indicator lamp
= To stor ethe current speed or calling up the
last stored speed
? To stor ethe current speed or alower speed
A To switch between cruis econtro lor
DISTRONIC PLU Sand variabl eSPEED-
TRONIC
B To deactivate variabl eSPEEDTRONIC
With the cruis econtro llev er, yo ucan operate
cruis econtro lorDISTRONIC PLU Sand variable
SPEEDTRONIC.
The LIM indicator lamp on the cruis econtrol
lever indicates which system yo uhaves elected:
R LIMi ndicator lamp off: cruisecontro lor
DISTRONIC PLU Sisselected
R LIMi ndicator lamp on: variableSPEED-
TRONIC is selected
Yo uc an us ethe cruis econtro llev er to limit the
speed to any speed above 30 km/h whil ethe
engine is running.
Selecting variabl eSPEEDTRONIC
If ther eisac hange of drivers ,adviset he new
driver of the limit speed stored.
X Check whethe rLIM indicator lamp ;is on.
If it is on, variabl eSPEEDTRONIC is already
selected.
If it is not, press the cruis econtro llev er in the
direction of arrow A.
LIM indicator lamp ;in the cruis econtrol
lever is on. Variabl eSPEEDTRONIC is selec-
ted. Storin
gthe current speed
Yo uc an us ethe cruis econtro llev er to limit the
speed to any speed above 30 km/h whil ethe
engine is running.
X Briefly press the cruis econtro llev er up :or
down ?.
The current speed is stored and shown in the
multifunctio ndisplay.
Speedomete rwiths egments: the seg-
ments light up from the start of the scale up to
the stored speed limit.
Storin gthe current speed or calling up the
las tstored speed G
WARNING
If yo ucallupt he stored speed and it is lower
tha nthe current speed ,the vehicl edeceler-
ates. If yo udonot know the stored speed ,the
vehicl ecould decelerate unexpectedly .There
is ar iskofana ccident.
Pa ya ttentio ntothe roa dand traffic condi-
tions before calling up the stored speed .Ifyou
do not know the stored speed ,stor ethe
desired speed again.
X Briefly pull the cruis econtro llev er towards
you =.
Settin gaspeed
X To adjust the se
tspeed in 10 km/h incre-
ments: brieflypress the cruis econtro llev er
up : beyond the pressure point for ahigher
speed ,ordown?for alower speed.
or X Kee pthe cruis econtro llev er presse dbeyond
the pressure point unti lthe desired speed is
set. Press the cruis econtro llev er up :for a
highe rspeed or down ?for alower speed.
X To adjust the se
tspeed in 1km/h incre-
ments: brieflypress the cruis econtro llev er
up : to the pressure point for ahighe rspeed
or down ?for alower speed.
or X Kee pthe cruis econtro llev er presse dtothe
pressure point unti lthe desired speed is set.
Press the cruis econtro llev er up :for a
highe rspeed or down ?for alower speed. Driving systems
183Driving andparking Z
Page 189 of 385
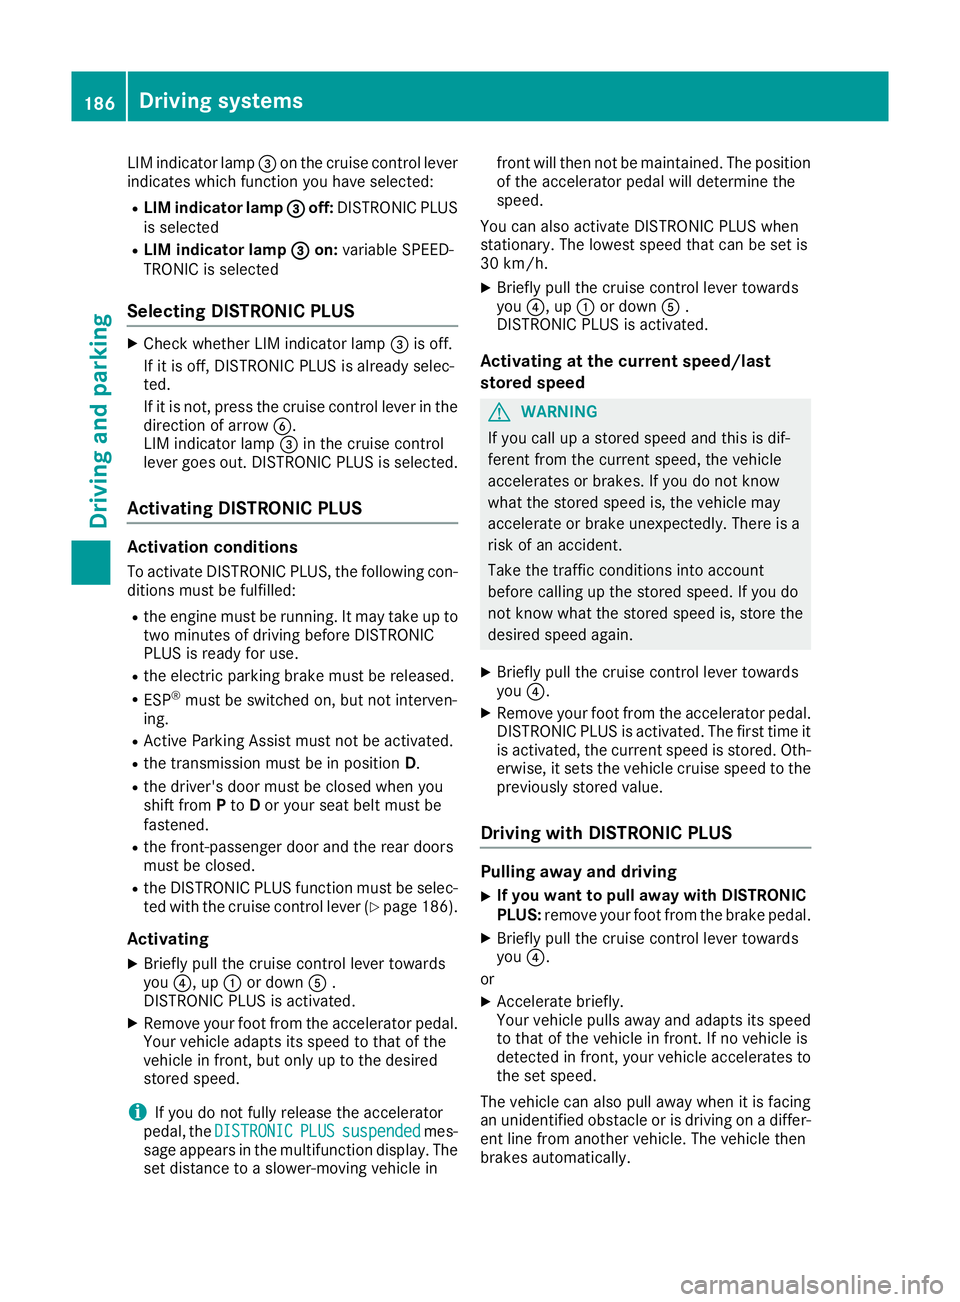
LIM indicator lamp
=on the cruise control lever
indicates which function you have selected:
R LIM indicator lamp =
=off: DISTRONIC PLUS
is selected
R LIM indicator lamp =
=on: variable SPEED-
TRONIC is selected
Selecting DISTRONIC PLUS X
Check whether LIM indicator lamp =is off.
If it is off, DISTRONIC PLUS is already selec-
ted.
If it is not, press the cruise control lever in the direction of arrow B.
LIM indicator lamp =in the cruise control
lever goes out. DISTRONIC PLUS is selected.
Activating DISTRONIC PLUS Activation conditions
To activate DISTRONIC PLUS, the following con-
ditions must be fulfilled:
R the engine must be running. It may take up to
two minutes of driving before DISTRONIC
PLUS is ready for use.
R the electric parking brake must be released.
R ESP ®
must be switched on, but not interven-
ing.
R Active Parking Assist must not be activated.
R the transmission must be in position D.
R the driver's door must be closed when you
shift from Pto Dor yours eat belt must be
fastened.
R the front-passenger door and the rear doors
must be closed.
R the DISTRONIC PLUS function must be selec-
ted with the cruise control lever (Y page 186).
Activating
X Briefly pullt he cruise control lever towards
you ?,up:or down A.
DISTRONIC PLUS is activated.
X Remove yourf oot from the accelerator pedal.
Your vehicle adapts its speed to that of the
vehicle in front, but only up to the desired
stored speed.
i If you do not fullyr
elease the accelerator
pedal, the DISTRONIC
DISTRONIC PLUS PLUSsuspended
suspended mes-
sage appears in the multifunction display. The set distance to aslower-moving vehicle in front willt
hen not be maintained .The position
of the accelerator pedalw illd etermine the
speed.
You can also activate DISTRONIC PLUS when
stationary .The lowest speed that can be set is
30 km/h.
X Briefly pullt he cruise control lever towards
you ?,up:or down A.
DISTRONIC PLUS is activated.
Activating at the current speed/last
stored speed G
WARNING
If you call up astored speed and this is dif-
ferent from the current speed,t he vehicle
accelerates or brakes. If you do not know
what the stored speed is, the vehicle may
accelerate or brake unexpectedly .There is a
risk of an accident.
Take the traffic conditions into account
before calling up the stored speed.Ify ou do
not know whatt he stored speed is, store the
desire dspeed again.
X Briefly pullt he cruise control lever towards
you ?.
X Remove yourf oot from the accelerator pedal.
DISTRONIC PLUS is activated. The first time it
is activated, the current speed is stored. Oth-
erwise, it sets the vehicle cruise speed to the
previously stored value.
Driving with DISTRONIC PLUS Pulling away and driving
X If you want to pull away with DISTRONIC
PLUS: remove yourf oot from the brake pedal.
X Briefly pullt he cruise control lever towards
you ?.
or X Accelerate briefly.
Yourv ehicle pulls awaya nd adapts its speed
to that of the vehicle in front. If no vehicle is
detected in front, yourv ehicle accelerates to
the set speed.
The vehicle can also pulla wayw hen it is facing
an unidentified obstacle or is driving on adiffer-
ent line from another vehicle .The vehicle then
brakes automatically. 186
Driving systemsDriving and parking
Page 209 of 385
Reversin
gcamera
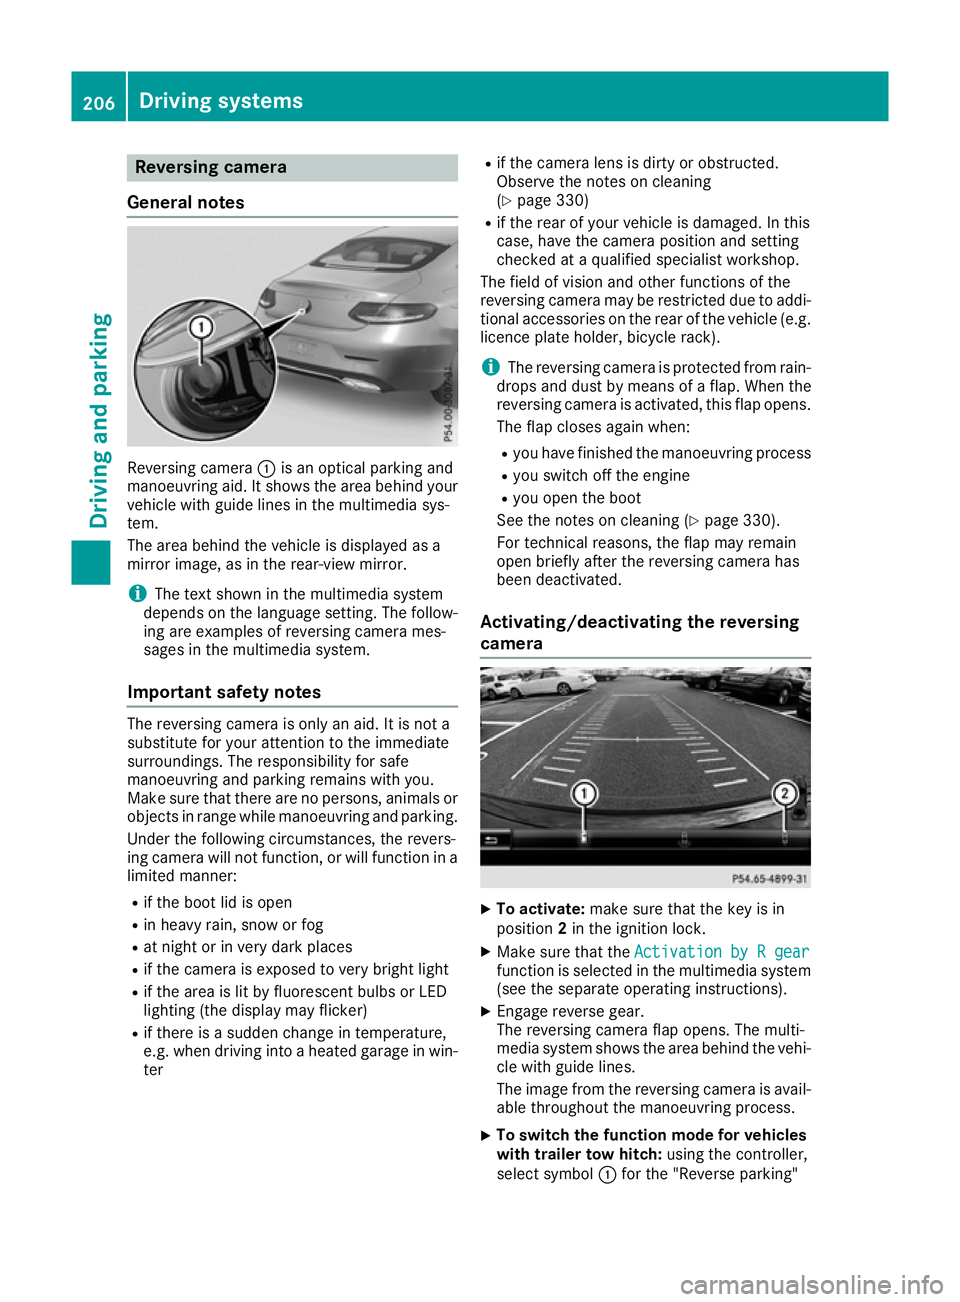
General notes Reversing camera
:is an optical parking and
manoeuvring aid. It shows the are abehind your
vehicl ewithg uide lines in the multimedi asys-
tem.
The are abehind the vehicl eisdisplayed as a
mirror image, as in the rear-vie wmirror.
i The text shown in the multimedi
asystem
depends on the languag esetting. The follow-
ing are examples of reversing camera mes-
sages in the multimedi asystem.
Important safety notes The reversing camera is only an aid. It is not a
substitute for your attention to the immediate
surroundings. The responsibility for safe
manoeuvring and parking remains with you.
Make sure that there are no persons ,animal sor
objects in rang ewhile manoeuvring and parking.
Unde rthe following circumstances, the revers-
ing camera will not function, or will function in a limite dmanner:
R if the boo tlid is open
R in heavy rain, snow or fog
R at nigh torinv ery dark places
R if the camera is exposed to very bright light
R if the are aislitby fluorescent bulb sorLED
lighting (the display may flicker)
R if there is asudde nchange in temperature,
e.g. when driving into aheated garag einwin-
ter R
if the camera lens is dirty or obstructed.
Observe the notes on cleaning
(Y page 330)
R if the rea rofyourv ehicl eisd amaged. In this
case, have the camera position and setting
checke dataq ualified specialist workshop.
The field of visio nand othe rfunctions of the
reversing camera may be restricte ddueto addi-
tiona laccessorie sonthe rea rofthe vehicl e(e.g.
licence plate holder ,bicycl erack).
i The reversing camera is protected from rain-
drops and dust by means of aflap. Whe nthe
reversing camera is activated, this fla popens.
The fla pcloses agai nwhen:
R youh avef inishe dthe manoeuvring process
R yous witch off the engine
R youo pent he boot
See the notes on cleaning (Y page 330).
For technical reasons ,the fla pmay remain
ope nbriefl yafterthe reversing camera has
bee ndeactivated.
Activating/deactivatin gthe reversing
camera X
To activate: make sure that the key is in
position 2in the ignition lock.
X Make sure that the Activation byRgear
Activation by Rgear
function is selected in the multimedi asystem
(se ethe separate operating instructions).
X Engag ereverse gear.
The reversing camera fla popens. The multi-
media system shows the are abehind the vehi-
cle with guid elines.
The image from the reversing camera is avail- able throughout the manoeuvring process.
X To switc
hthe functio nmode for vehicles
with trailer tow hitch: using the controller,
select symbol :for the "Reverse parking" 206
Driving systemsDriving and parking
Page 222 of 385
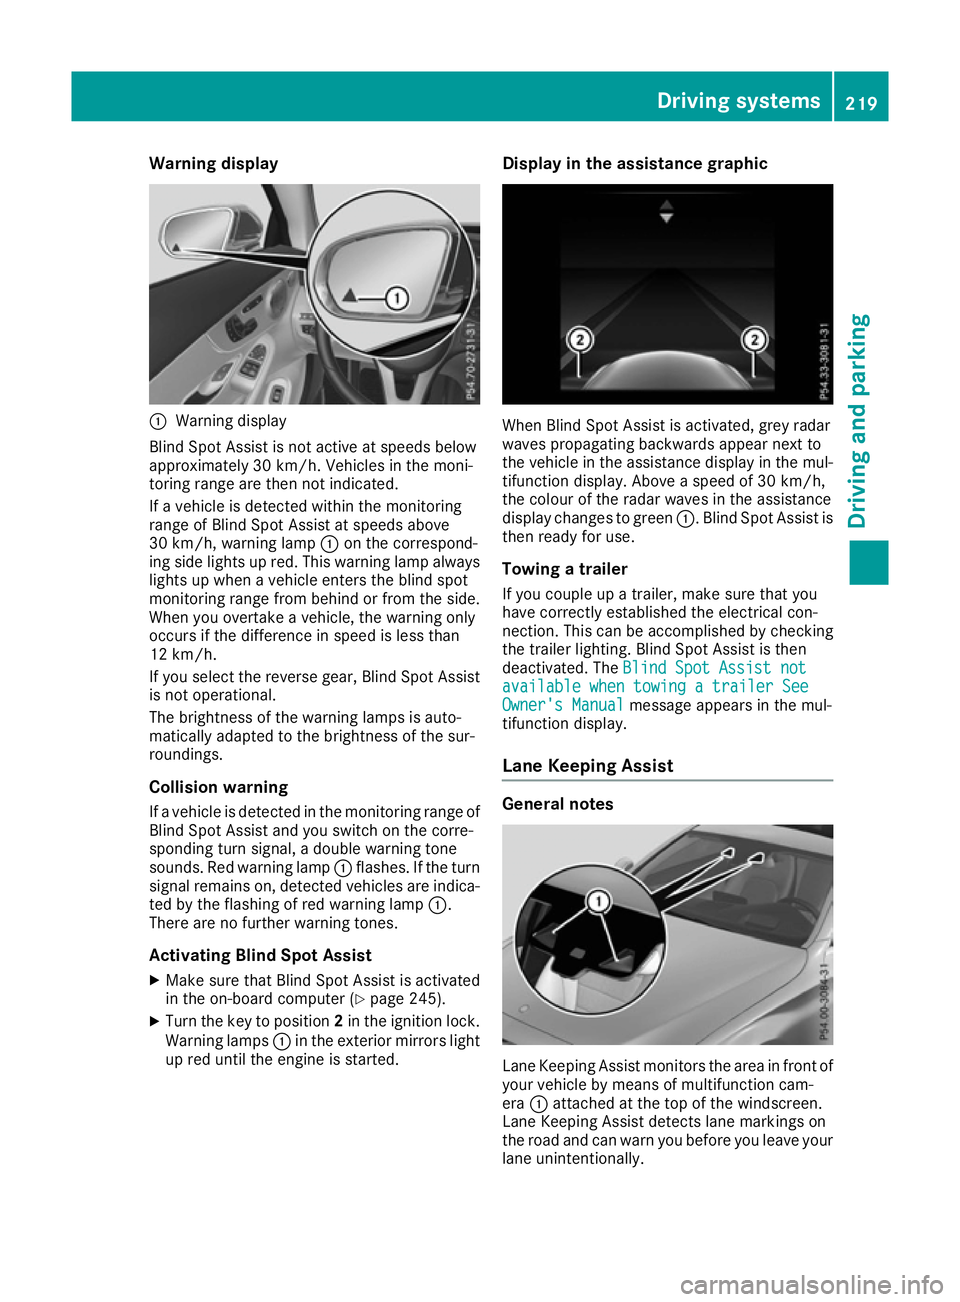
Warning display
:
Warning display
Blind Spot Assist is not active at speeds below
approximately 30 km/h. Vehicles in the moni-
toring range are then not indicated.
If av ehicl eisd etected withi nthe monitoring
range of Blind Spot Assist at speeds above
30 km/h, warning lamp :on the correspond-
ing side lights up red. This warning lamp always lights up when avehicl eenters the blind spot
monitoring range from behind or from the side.
When you overtake avehicle, the warning only
occurs if the difference in spee disless than
12 km/h.
If you select the reverse gear, Blind Spot Assist
is not operational.
The brightness of the warning lamp sisauto-
matically adapted to the brightness of the sur-
roundings.
Collisionw arning
If av ehicl eisd etected in the monitoring range of
Blind Spot Assist and you switch on the corre-
sponding turn signal, adouble warning tone
sounds. Red warning lamp :flashes. If the turn
signa lremains on, detected vehicles are indica-
ted by the flashing of red warning lamp :.
There are no further warning tones.
Activating Blind Spot Assist X Make sure that Blind Spot Assist is activated
in the on-board computer (Y page245).
X Turn the key to position 2in the ignition lock.
Warning lamps :in the exterior mirrors light
up red until the engine is started. Display in the assistance graphic
When Blind Spot Assist is activated, grey radar
waves propagating backwards appear next to
the vehicl einthe assistance display in the mul-
tifunction display .Above aspee dof30k m/h,
the colou rofthe rada rwaves in the assistance
display changes to green :.Blind Spot Assist is
then read yfor use.
Towing atrailer
If you coupl eupatrailer, make sure that you
have correctly established the electrical con-
nection. This can be accomplishe dbychecking
the trailer lighting. Blind Spot Assist is then
deactivated. The Blind Spot Assist not Blind Spot Assist not
available when towing atrailer See
available when towing atrailer See
Owner's Manual
Owner's Manual message appears in the mul-
tifunction display.
Lane Keepin gAssist General notes
Lane Keeping Assist monitors the area in front of
you rvehicl ebym eans of multifunction cam-
era :attached at the top of the windscreen.
Lane Keeping Assist detects lane markings on
the road and can warn you before you leave your lane unintentionally. Driving systems
219Driving and parking Z
Page 230 of 385
Only release the ball coupling if the pivoting
range is unobstructed. Alwaysm ake sure that
the ball coupling engages when folding in.
When reversing the vehicle towards the trailer,
make sure there is nobody between the trailer
and the vehicle.
Couple and uncouple the trailer carefully.Ify ou
do not couple the trailer to the towing vehicle
correctly, the trailer could become detached.
When towing atrailer, your vehicle's handling
characteristics will be different in comparison to when driving without atrailer.
The vehicle/trailer combination:
R is heavier
R is restricted in its acceleration and gradient-
climbing capability
R has an increased braking distance
R is affected more by strong crosswinds
R demands more sensitive steering
R has alarger turning circle
This can impair the vehicle's handling charac-
teristics. Adapt your driving style accordingly.
Maintain asafe distance. Drive carefully.
When towing atrailer, always adjust your speed
to the current road and weather conditions. Do
not exceed the maximum permissibles peed for
your vehicle/trailer combination. Notes on towing
atrailer
General notes Trailer towing is not permissibleont
he following
models:
R Mercedes AMG C63
R Mercedes AMG C63S
When towing atrailer, set the tyre pressure on
the rear axle of the towing vehicle for the max-
imum load. Further information on the tyre pres-
sure table in the fuel filler flap (Y page 356).
On vehicles without level control, the height of
the ball coupling will alter according to the load
placed on the vehicle. If necessary, use atrailer
with aheight-adjustable drawbar.
You will find fitting dimensions and loads under "Technical data" (Y page 378). Driving tips Observe the notes on ESP
®
trailer stabilisation
(Y page 74).
The maximum permissibles peed for vehicle/
trailer combinations depends on the type of
trailer. Before beginning the journey, check the
trailer's documents to see what the maximum
permitted speed is. Observe the legally prescri-
bed maximum speed in the relevant country.
For certain Mercedes-Benz vehicles, the maxi-
mum permissibler ear axle load is increased
when towing atrailer. See the "Technical data"
section to find out whether this applies to your
vehicle (Y page 378). If you utilise any of the
added maximum rear axle load when towing a
trailer, the vehicle/trailer combination may not
exceed amaximum speed of 100 km/h for rea-
sons concerning the operating permit. This also applies in countries in which the permissible
maximum speed for vehicle/trailer combina-
tions is above 100 km/h.
When towing atrailer, your vehicle's handling
characteristics will be different in comparison to
when driving without atrailer and it will con-
sume more fuel.
Change into alower gear in good time on long
and steep downhill gradients.
This also applies if cruise control, DISTRONIC
PLUS or SPEEDTRONIC are activated.
This will use the braking effect of the engine, so
less braking will be required to maintain vehicle speed. This relieves the load on the brake sys-
tem and prevents the brakes from overheating
and wearing too quickly. If you need additional
braking, depress the brake pedal repeatedly
rather than continuously.
Driving tips If the trailer swings from side to side:
X Do not accelerate.
X Do not countersteer.
X Brake if necessary.
R Maintain agreater distance to the vehicle in
front than when driving without atrailer.
R Avoid braking abruptly.Ifp ossible,brake gen-
tly at first to allow the trailer to run on. Then,
increase the braking force rapidly.
R The valuesg iven for gradient-climbing capa-
bilities from astandstill refer to sea level.
When driving in mountainous areas, note that Towing
atrailer
227Driving and parking Z