service indicator MERCEDES-BENZ C-Class SEDAN 2013 W204 Owner's Manual
[x] Cancel search | Manufacturer: MERCEDES-BENZ, Model Year: 2013, Model line: C-Class SEDAN, Model: MERCEDES-BENZ C-Class SEDAN 2013 W204Pages: 358, PDF Size: 4.85 MB
Page 6 of 358
1, 2, 3 ...
115 Vsocket ...................................... 265
12 Vsocket
see Sockets
4ETS
see ETS/4ETS (Electronic
Tractio nSystem)
4MATIC (permanent four-wheel
drive) .................................................. 179A
ABS (Anti-lock Braking System) Display message ............................ 217
Function/notes ................................ 64
Important safety notes ....................64
Warning lamp ................................. 244
Activating/deactivating cooling
with air dehumidification .................131
Active Blin dSpot Assist
Activating/deactivating (on-
board computer) ............................ 208
Display message ............................ 232
Function/informatio n.................... 190
Active Driving Assistance package .190
Active Lane Keeping Assist Activating/deactivating (on-
board computer) ............................ 208
Display message ............................ 231
Function/informatio n.................... 193
Active light function .........................113
ADAPTIVE BRAKE ................................. 69
Adaptive Highbeam Assist Display message ............................ 227
Function/notes ............................. 114
Switching on/off (on-board
computer) ...................................... 210
Additives (engine oil) ........................352
Airb ags
Display message ............................ 223
Front air bag (driver, front
passenger )....................................... 44
Important safety notes ....................42
Knee bag .......................................... 44
PASSENGER AIR BAG OFF
indicator lamp .................................. 47
Pelvis airb ag................................... 45Safety guidelines
............................. 41
Side impact airb ag.......................... 45
Windo wcurtain air bag .................... 46
Air-conditioning system
see Climate control
AIRF LOW ........................................... 132
Airv ents
Glove box ....................................... 137
Important safet ynotes .................. 137
Rea r............................................... 138
Setting ........................................... 137
Setting the center air vents ...........137
Setting the side air vents ...............137
see Climate control
Alarm system
see ATA (Anti-Theft Alarm system)
AMG menu (on-board computer) .....212
Anti-loc kbraking system
see ABS (Anti-lock Braking System)
Anti-theft alarm system
see ATA (Anti-Theft Alarm system)
Ashtray ............................................... 263
Assistance menu (on-board
computer) .......................................... 206
ASSYST PLUS Displaying a service message ........282
Hiding a service message ..............282
Notes ............................................. 282
Resetting the service interval
displa y........................................... 282
Service message ............................ 282
Special service requirements ......... 283
ATA (Anti-Theft Alarm system)
Activating/deactivating ...................71
Function .......................................... .71
Switching off the alarm ....................71
ATTENTIO NASSIST
Activating/deactivating .................207
Display message ............................ 230
Function/notes ............................. 185
Audio menu (on-board
computer) .......................................... 204
Audio system see separate operating instructions
Authorized Centers
see Qualified specialist workshop 4
Index
Page 74 of 358
i
If the alarm stays on for more than
30 seconds, the mbrace emergency call
system (USA only) or the Tele Aid system
(Canada only) initiates a call to the
Customer Assistance Center
automatically. The Tele Aid system will
initiate the call provided that:
R you have subscribed to the Tele Aid
service.
R the Tele Aid service has been activated
properly.
R the required mobile phone, powers upply
and GPS are available. X
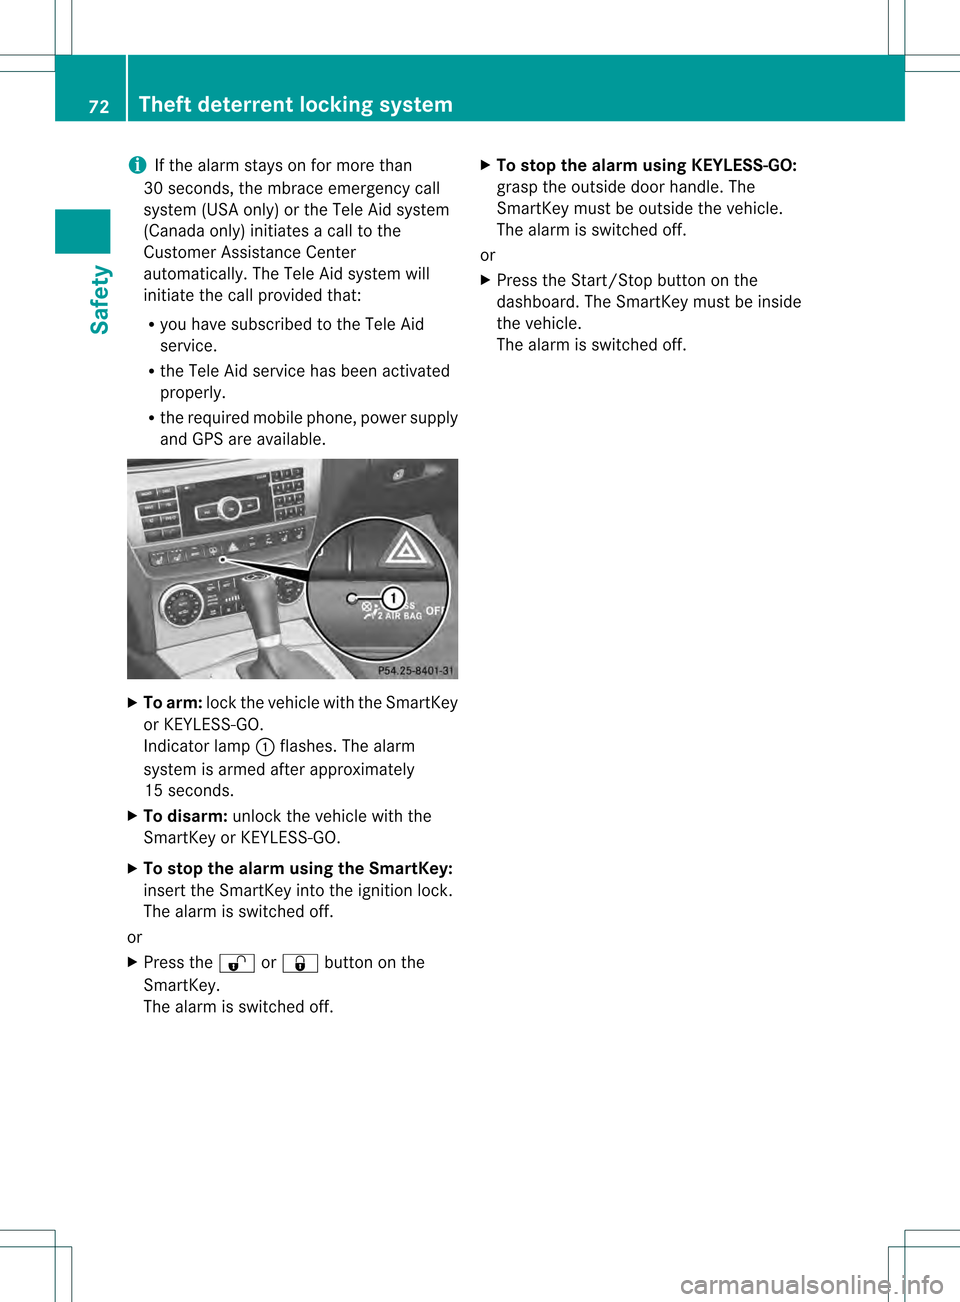
To arm: lockthe vehicle with the SmartKey
or KEYLESS-GO.
Indicator lamp 0002flashes. The alarm
system is armed after approximately
15 seconds.
X To disarm: unlock the vehicle with the
SmartKey or KEYLESS-GO.
X To stop the alarm using the SmartKey:
insert the SmartKey into the ignition lock.
The alarm is switched off.
or
X Press the 000Bor000A button on the
SmartKey.
The alarm is switched off. X
To stop the alarm using KEYLESS-GO:
grasp the outside door handle. The
SmartKey must be outside the vehicle.
The alarm is switched off.
or
X Press the Start/Stop button on the
dashboard. The SmartKey must be inside
the vehicle.
The alarm is switched off. 72
Theft deterrent locking systemSafety
Page 161 of 358
!
Always secure the vehicle correctly
against rolling away. Otherwise, the vehicle
or its drivetrain could be damaged.
To ensure that the vehicle is secured against
rolling away unintentionally:
R the parking brake must be applied.
R the transmission must be in position Pand
the SmartKey must be removed from the
ignition lock.
R on uphill or downhill gradients, the front
wheels must be turned towards the curb. Switching off the engine
Important safety notes G
WARNING
The automatic transmission switches to
neutral position Nwhen you switch off the
engine. The vehicle may roll away. There is a
risk of an accident.
After switching off the engine, always switch
to parking position P. Prevent the parked
vehicle from rolling away by applying the
parking brake.
Vehicles with automatic transmission X
Apply the parking brake firmly.
X Shift the transmission to position P.
Using the SmartKey
X Turn the SmartKey to position 0in the
ignition lock and remove it.
The immobilizer is activated.
i The SmartKey can only be removed if the
transmission is in position P.
Using KEYLESS-GO
X Press the Start/Stop button (Y page 142).
The engine stops and all the indicator
lamps in the instrument cluster go out.
i When the driver's door is closed, this
corresponds to key position 1. When thedriver's door is open, this corresponds to
key position
0:"key removed".
If you try to switch off the engine when the
transmission is not in position P, a message
appears in the multifunctio ndisplay. Asignal
sounds. Parking brake
G
WARNING
If you must brake the vehicle with the parking
brake, the braking distanc eis considerably
longer and the wheels could lock. There is an
increased danger of skidding and accidents.
Only use the parking brake to brake the
vehicle when the service brake is faulty. Do
not apply the parking brake too firmly. If the
wheels lock, release the parking brake until
the wheels begin turning again. G
WARNING
If you leave children unsupervised in the
vehicle, they could set it in motion by, for
example:
R releasing the parking brake
R shifting the automatic transmission out of
the parking position P
R starting the engine.
They could also operate the vehicle's
equipment. There is a risk of an accident and
injury.
When leaving the vehicle, always take the
SmartKey with you and lock the vehicle. Never
leave children unsupervised in the vehicle.
If you brake the vehicle with the parking
brake, the brake lamps will not light up. Parking
159Driving and parking Z
Page 269 of 358
Problems with the 115
Vpower socket Problem Possible causes/consequences and
0001 Solutions
The warning lamp on
the 11
5Vpower socket
is not lit. The on-board voltage is too low because the battery is too weak.
X
Start the engine.
or
X Charge the battery (Y page 300).
If the indicator lamp still does not light up:
X Visit a qualified specialist workshop. The temperature of the DC/AC converter is temporarily too high.
X Remove the electronic device connector from the 115 V socket.
X Let the DC/AC converter cool down.
If the indicator lamp still does not light up after cooling down the
converter:
X Visit a qualified specialist workshop. You have connected a small electronic device that has a constant
nominal power of less than 150 W, but a very high switch-on
current. This device will not work. If you connect such a device,
the 115
Vpower socket will not supply it with power.
X Connect a suitable device. mbrace
Important safety notes !
You must have a license agreement to
activate the mbrace service. Make sure
that your system is activated and ready for
use. To register, press the 0009MB Info call
button. If any of the steps mentioned are
not carried out, the system may not be
activated.
If you have questions about the activation,
contact one of the following telephone
hotlines:
R USA: Mercedes-Benz Customer
Assistance Center at
1-800-FOR-MERCedes
(1-800-367-6372) or 1-866-990-9007
R Canada: Customer Service at
1-888-923-8367 Shortly after successfully registering with the
mbrace service (Canada: TELEAID), a user ID
and password will be sent to you by post. USA
only: you can use this password to log onto
the mbrace area under "Owners Online" at
http://www.mbusa.com.
The mbrace system is available if:
R
it has been activated and is operational
R the corresponding mobile phone network
is available for transmitting data to the
Customer Center
R a service subscription is available
R the starter battery is sufficiently charged
i Determining the location of the vehicle on
a map is only possible if:
R GPS reception is available.
R the vehicle position can be forwarded to
the Customer Assistance Center. Features
267Stowage and features Z
Page 270 of 358
The mbrace system
To adjus
tthe volume during an mbrace call,
proceed as follows:
X Press the 0009or000A button on the
multifunction steering wheel.
or
X Use the volume controller of the audio
system/COMAND.
The mbrace system provides various
services, e.g.:
R automatic and manual emergency call
R Roadside Assistance call
R MB Info call
USA only: you can find information and a
description of all available features under
"Owners Online" at http://www.mbusa.com.
System self-test After you have switched on the ignition, the
system carries out a self-diagnosis.
Am
alfunction in the system has been
detected if one of the following occurs:
R The indicator lamp in the SO Sbutton does
not come on during the system self-test.
R The indicator lamp in the 0007Roadside
Assistance butto ndoes not light up during
self-diagnosis of the system.
R The indicator lamp in the 0009MB Info call
button does not light up during self-
diagnosis of the system.
R The indicator lamp in one or more of the
following buttons continues to light up red
after the system self-diagnosis:
- SOS button
- the 0007 Roadside Assistance call
button
- the 0009 MB Info call button
R The mbrace Inoperative or
mbrace Service Not Activated message
appears in the multifunction display after
the system self-diagnosis. If a malfunction is indicated as outlined
above, the system may not operate as
expected. In the event of an emergency, help
will have to be summoned by other means.
Have the system checked at the nearest
authorized Mercedes-Benz Center or contact
the following service hotlines:
R
USA: Mercedes-Benz Customer Assistance
Center at
1-800-FOR-MERCedes (1-800-367-6372)
or 1-866-990-9007
R Canada: Customer Service at
1-888-923-8367
Emergency call Important safety notes
!
You must have a license agreement to
activate the mbrace service. Make sure
that your system is activated and ready for
use. To register, press the 0009MB Info call
button. If any of the steps mentioned are
not carried out, the system may not be
activated.
If you have questions about the activation,
contact one of the following telephone
hotlines:
R USA: Mercedes-Benz Customer
Assistance Center at
1-800-FOR-MERCedes
(1-800-367-6372) or 1-866-990-9007
R Canada: Customer Service at
1-888-923-8367
General notes
An emergency call is dialed automatically if
an air bag or Emergency Tensioning Device is
triggered.
i You cannot end an automatically
triggered emergency call yourself.
An emergency call can also be initiated
manually.
As soon as the emergenc ycall has been
initiated, the indicator lamp in the SO Sbutton 268
FeaturesStowage and featu
res
Page 272 of 358
immediately after pressing the SOS button,
you do not know if mbrace has successfully
made the emergency call. In this situation,
seek additional assistance by other means.
Roadside Assistance button X
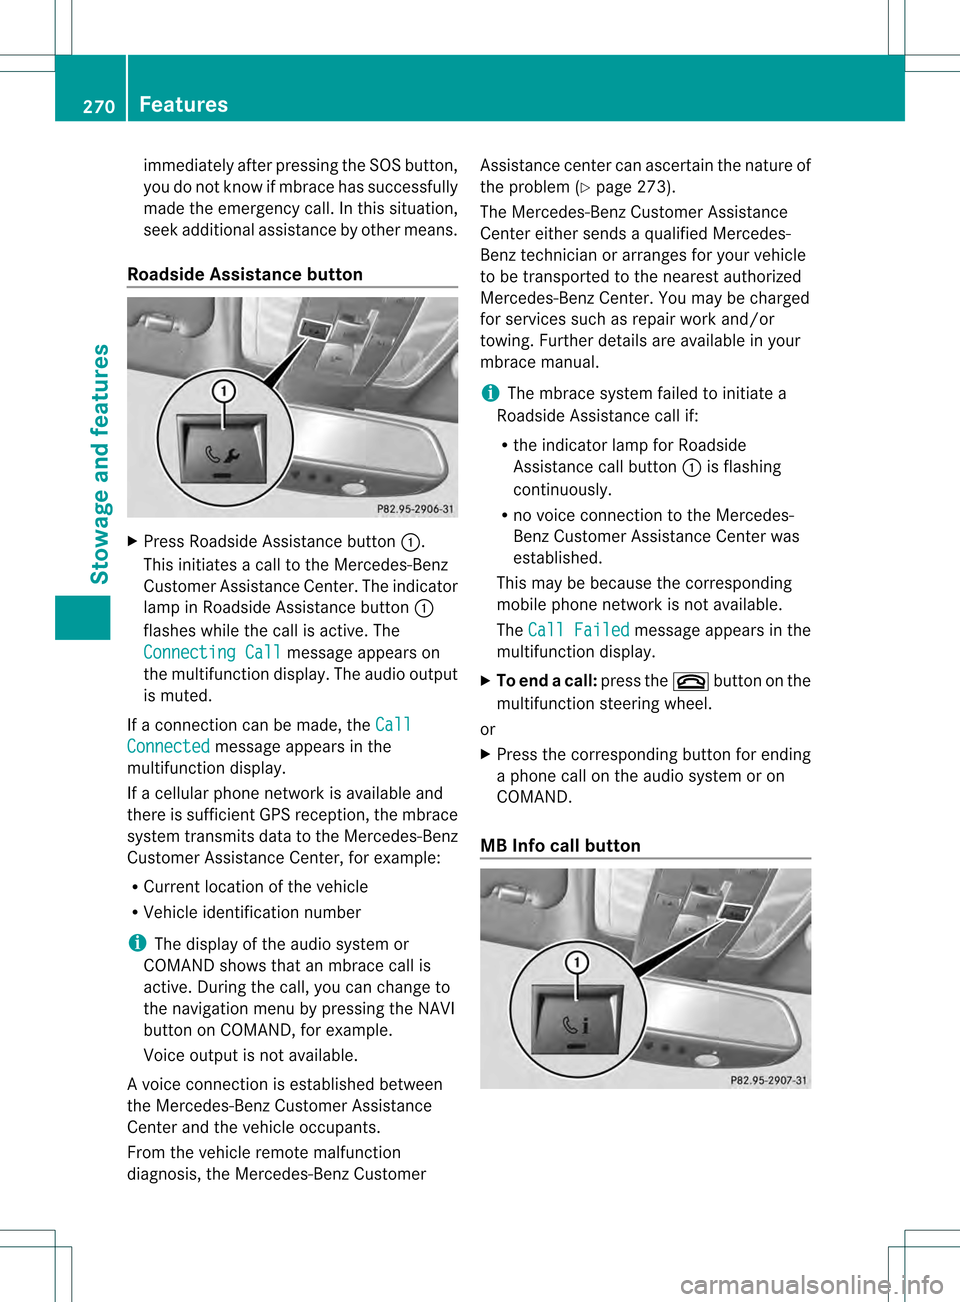
Press Roadside Assistance button 0002.
This initiates a call to the Mercedes-Benz
Customer Assistance Center. The indicator
lamp in Roadside Assistance button 0002
flashes while the call is active. The
Connecting Call message appears on
the multifunction display. The audio output
is muted.
If a connection can be made, the CallConnected message appears in the
multifunction display.
If a cellular phone network is available and
there is sufficien tGPS reception, the mbrace
system transmits data to the Mercedes-Benz
Customer Assistance Center, for example:
R Current location of the vehicle
R Vehicle identification number
i The display of the audio system or
COMAND shows that an mbrace call is
active. During the call, you can change to
the navigation menu by pressing the NAVI
button on COMAND, for example.
Voice output is not available.
Av oice connection is established between
the Mercedes-Benz Customer Assistance
Center and the vehicle occupants.
From the vehicle remote malfunction
diagnosis, the Mercedes-Benz Customer Assistance center can ascertain the nature of
the problem (Y
page 273).
The Mercedes-Benz Customer Assistance
Center either sends a qualified Mercedes-
Benz technician or arranges for your vehicle
to be transported to the nearest authorized
Mercedes-Benz Center. You may be charged
for services such as repair work and/or
towing. Further details are available in your
mbrace manual.
i The mbrace system failed to initiate a
Roadside Assistance call if:
R the indicator lamp for Roadside
Assistance call button 0002is flashing
continuously.
R no voice connection to the Mercedes-
Benz Customer Assistance Center was
established.
This may be because the corresponding
mobile phone network is not available.
The Call Failed message appears in the
multifunction display.
X To end acall: press the 0009button on the
multifunctio nsteering wheel.
or
X Press the corresponding button for ending
a phone call on the audio syste moron
COMAND.
MB Info call button 270
FeaturesStowage and featu
res
Page 273 of 358
X
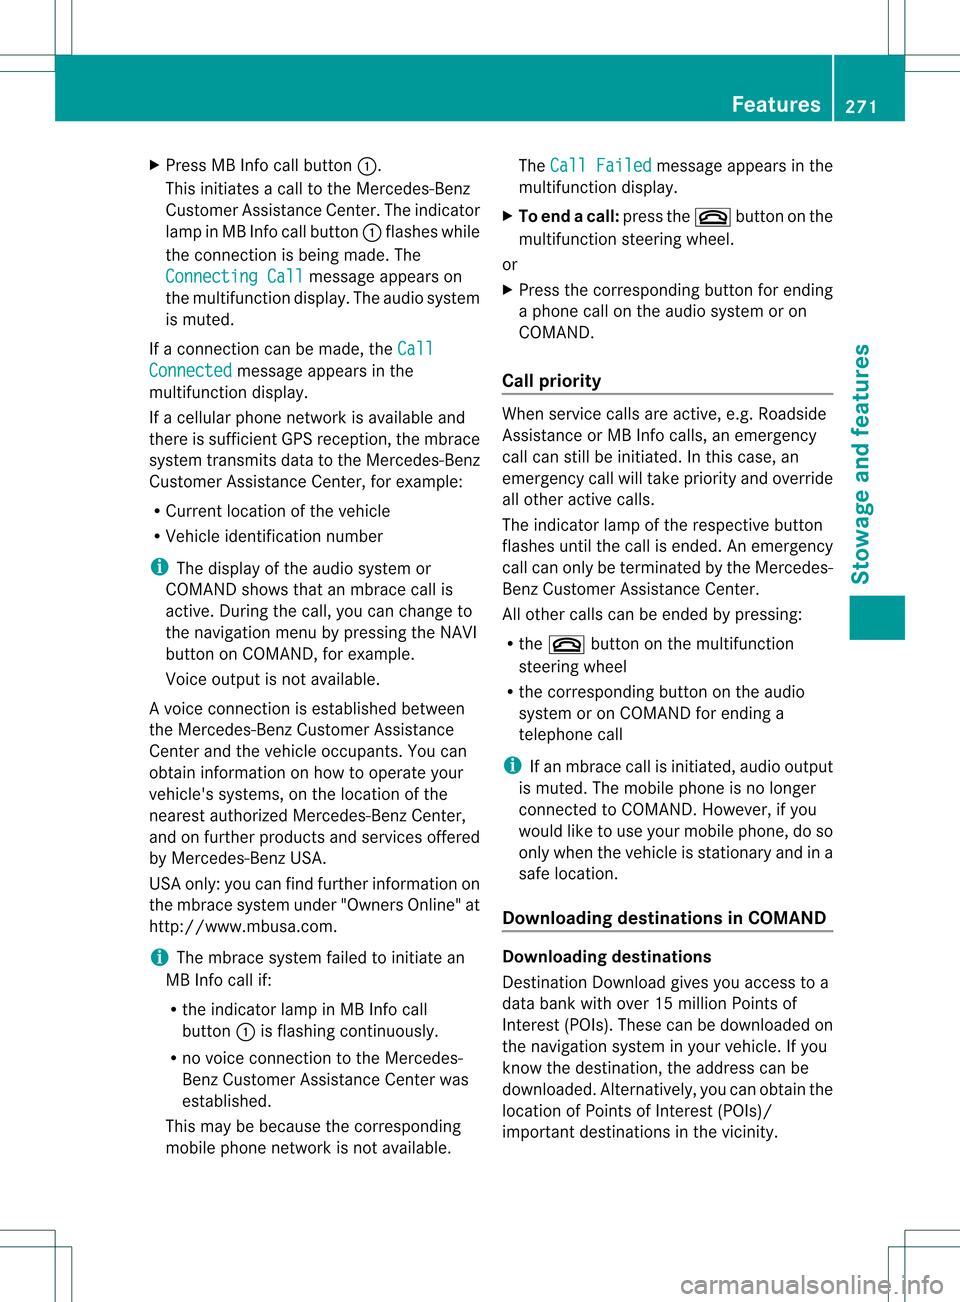
Press MB Info call button 0002.
This initiates a call to the Mercedes-Benz
Customer Assistance Center. The indicator
lamp in MB Info call button 0002flashes while
the connection is being made. The
Connecting Call message appears on
the multifunction display. The audio system
is muted.
If a connection can be made, the CallConnected message appears in the
multifunction display.
If a cellular phone network is available and
there is sufficient GPS reception, the mbrace
system transmits data to the Mercedes-Benz
Customer Assistance Center, for example:
R Current location of the vehicle
R Vehicle identification number
i The display of the audio system or
COMAND shows that an mbrace call is
active. During the call, you can change to
the navigation menu by pressing the NAVI
button on COMAND, for example.
Voice output is not available.
Av oice connection is established between
the Mercedes-Benz Customer Assistance
Center and the vehicle occupants. You can
obtain information on how to operate your
vehicle's systems, on the location of the
nearest authorized Mercedes-Benz Center,
and on further products and services offered
by Mercedes-Benz USA.
USA only: you can find further information on
the mbrace system under "Owners Online" at
http://www.mbusa.com.
i The mbrace system failed to initiate an
MB Info call if:
R the indicator lamp in MB Info call
button 0002is flashing continuously.
R no voice connection to the Mercedes-
Benz Customer Assistance Center was
established.
This may be because the corresponding
mobile phone network is not available. The
Call Failed message appears in the
multifunction display.
X To end acall: press the 0009button on the
multifunctio nsteering wheel.
or
X Press the corresponding button for ending
a phone call on the audio syste moron
COMAND.
Call priority When service calls are active, e.g. Roadside
Assistance or MB Info calls, an emergency
call can still be initiated. In this case, an
emergency call will take priority and override
all other active calls.
The indicator lamp of the respective button
flashes until the call is ended. An emergency
call can only be terminated by the Mercedes-
Benz Customer Assistance Center.
All other calls can be ended by pressing:
R the 0009 button on the multifunction
steering wheel
R the corresponding butto nonthe audio
system or on COMAND for ending a
telephone call
i If an mbrace call is initiated, audio output
is muted. The mobile phone is no longer
connected to COMAND. However, if you
would like to use your mobile phone, do so
only when the vehicle is stationary and in a
safe location.
Downloading destinations in COMAND Downloading destinations
Destination Download gives you access to a
data bank with over 15 million Points of
Interest (POIs). These can be downloaded on
the navigation system in your vehicle. If you
know the destination, the address can be
downloaded.A
lternatively, you can obtain the
location of Points of Interest (POIs)/
importan tdestinations in the vicinity. Features
271Stowage and features Z
Page 301 of 358
Always make sure tha
tneither you nor the
battery is electrostatically charged. Abuild-
up of electrostati ccharge can be caused, for
example:
R by wearing clothing made from synthetic
fibers
R due to friction between clothing and seats
R if you push or pull the battery across the
carpet or other synthetic materials
R if you wipe the battery with a cloth G
WARNING
Battery acid is caustic. There is a risk of injury.
Avoid contact with the skin, eyes or clothing.
Do not inhale any battery gases. Do not lean
over the battery. Keep children away from
batteries. Wash battery acid immediately with
water and seek medical attention. G
WARNING
During the charging process, a battery
produces hydrogen gas. If a short circuit
occurs or sparks are created, the hydrogen
gas can ignite. There is a risk of an explosion.
R Make sure that the positive terminal of a
connected battery does not come into
contact with vehicle parts.
R Never place metal objects or tools on a
battery.
R It is important that you observe the
described order of the battery terminals
when connecting and disconnecting a
battery.
R When jump-starting, make sure that the
battery poles with identical polarity are
connected.
R It is particularly important to observe the
described order when connecting and
disconnecting the jumper cables.
R Never connect or disconnect the battery
terminals while the engine is running. G
WARNING
During charging and jump-starting, explosive
gases can escape from the battery. There is a
risk of an explosion.
Particularly avoid fire, open flames, creating
sparks and smoking. Ensure there is sufficient
ventilation while charging and jump-starting.
Do not lean over a battery. H
Environmental note Batteries contain dangerous
substances. It is against the
law to dispose of them with
the household rubbish. They
must be collected separately
and recycled to protect the
environment.
Dispose of batteries in an
environmentally friendly
manner. Take discharged
batteries to a qualified
specialist workshop or a
special collection point for
used batteries.
! Have the battery checked regularly at a
qualified specialist workshop.
Observe the service intervals in the
Maintenance Booklet or contact a qualified
specialist workshop for more information.
! You should have all work involving the
battery carried out at aqualified specialist
workshop. In the exceptional case that it is
necessary for you to disconnect the battery
yourself, make sure that:
R you switch off the engine and remove the
SmartKey. On vehicles with KEYLESS-
GO, ensure that the ignition is switched
off .C heck that all the indicator lamps in
the instrumentc luster are off.Otherwise,
electroni ccomponents, such as the
alternator, may be damaged.
R you first remove the negative terminal
clamp and then the positive terminal
clamp. Never swap the terminal clamps. Battery (vehicle)
299Breakdown assistance Z
Page 319 of 358
Checking the tire pressures
Important safety notes Observe the "tire pressure information"
sectio n(Ypage 313).
Information on air pressure for the tires on
your vehicle can be found:
R on the vehicle's Tire and Loading
Information placard on the B-pillar
R on the tire pressure label on the fuel filler
flap
R in the "Tire pressure information" section
Checking tire pressures manually To determine and set the correct tire
pressure, proceed as follows:
X Remove the valve cap of the tire that is to
be checked.
X Press the tire pressure gauge securely onto
the valve.
X Read the tire pressure and compare it with
the recommended value on the Tire and
Loading Information placard on the
B-pillar on the driver's side of your vehicle.
X If necessary, increase the tire pressure to
the recommended value (Y page 313).
X If the tire pressure is too high, release air
by pressing down the metal pin in the valve
using the tip of a pen, for example. Then,
chec kthe tire pressure again using the tire
pressure gauge.
X Screw the valve cap onto the valve.
X Repeatt hese steps for the other tires. Tire pressure loss warning system
(Canada only)
General notes While the vehicle is in motion, the tire
pressure loss warning system monitors the
set tire pressure using the rotational speed of
the wheels. This enables the system to detect
significant pressure loss in a tire. If the speed of rotation of a wheel changes as a result of
a loss of pressure, a corresponding warning
message will appearint
he multifunction
display.
You can recognize the tire pressure loss
warning by the Run Flat Indicator Active Press 'OK' to Restart message
which appears in the Service menu of the
multifunction display. Further information on
the message display can be found under
"Restarting the tire pressure loss warning
system" section (Y page 318).
Important safety notes The tire pressure warning system does not
warn you of an incorrectly set tire pressure.
Observe the notes on the recommended tire
pressure (Y
page 313).
The tire pressure loss warning system does
not replace the need to regularly check your
vehicle's tire pressures, since an even loss of
pressure on several tires at the same time
cannot be detected by the tire pressure loss
warning system.
The tire pressure monitor is not able to warn
you of a sudden loss of pressure, e.g. if the
tire is penetrated by a foreign object. In the
event of a sudden loss of pressure, bring the
vehicle to a halt by braking carefully. Avoid
abrupt steering maneuvers.
The function of the tire pressure loss warning
system is limited or delayed if:
R snow chains are mounted on your vehicle's
tires.
R road conditions are wintry.
R you are driving on sand or gravel.
R you adopt a very sporty driving style
(cornering at high speeds or driving with
high rates of acceleration).
R you are driving with a heavy load (in the
vehicle or on the roof). Tire pressure
317Wheels and tires Z
Page 320 of 358
Restarting the tire pressure loss
warning system Restar
tthe tire pressure loss warning system
if you have:
R changed the tire pressure
R changed the wheels or tires
R mounted new wheels or tires
X Before restarting, consult the Tire and
Loading Information placard on the
B-pillar on the driver's side or the tire
pressure table on the inside of the fuel filler
flap to ensure the tire pressure in all four
tires is set correctly for the current
operating conditions.
The tire pressure loss warning system can
only give reliable warnings if you have set
the correct tire pressure. If an incorrectt ire
pressure is set, these incorrect values will
be monitored.
X Observe the notes in the section on tire
pressures (Y page 313).
X Make sure that the SmartKey is in position
2(Y page 141) in the ignition lock .
X Press the 0002or0005 button to selec tthe
Service menu.
X Press the 0003or0004 button to select
Tire Pressure .
X Press the 000Bbutton.
The Run Flat Indicator Active Press 'OK' to Restart message
appears in the multifunction display.
If you wish to confirm the restart:
X Press the 000Bbutton.
The Tire Pressure Now OK? message
appears in the multifunction display.
X Press the 0003or0004 button to select
Yes .
X Press the 000Bbutton.
The Run Flat Indicator Restarted message appears in the multifunction
display. After a teach-in period, the tire pressure
loss warning system will monitor the set
tire pressures of all four tires.
If you wish to cancel the restart:
X Press the 0006button.
or
X If the Tire Pressure Now OK? message
appears, use the 0003or0004 button to
select Cancel .
X Press the 000Bbutton.
The tire pressure values stored at the last
restart will continue to be monitored. Tire pressure monitor
General notes If a tire pressure monitor is installed, the
vehicle's wheels have sensors that monitor
the tire pressures in all four tires. The tire
pressure monitor warns you if the pressure
drops in one or more of the tires. The tire
pressure monitor only functions if the correct
sensors are installed to all wheels.
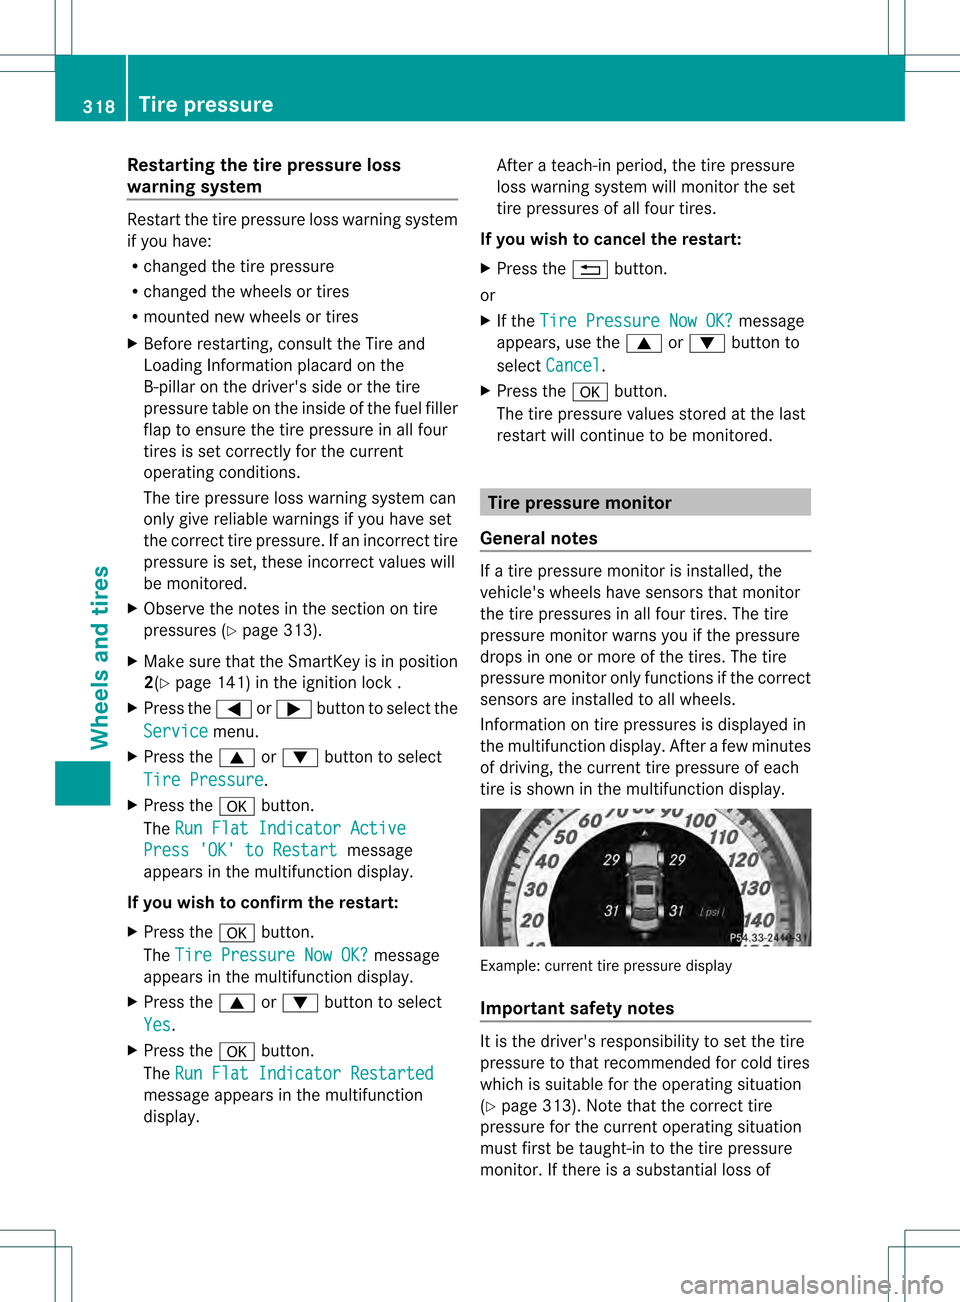
Information on tire pressures is displayed in
the multifunction display. After a few minutes
of driving, the current tire pressure of each
tire is shown in the multifunction display. Example: current tire pressure display
Important safety notes
It is the driver's responsibility to set the tire
pressure to that recommended for cold tires
which is suitable for the operating situation
(Y page 313). Note that the correct tire
pressure for the current operating situation
must first be taught-in to the tire pressure
monitor. If there is a substantial loss of 318
Tire pressureWheels and tires