turn signal MERCEDES-BENZ CL-Class 2014 C217 Owner's Manual
[x] Cancel search | Manufacturer: MERCEDES-BENZ, Model Year: 2014, Model line: CL-Class, Model: MERCEDES-BENZ CL-Class 2014 C217Pages: 494, PDF Size: 13.55 MB
Page 9 of 494
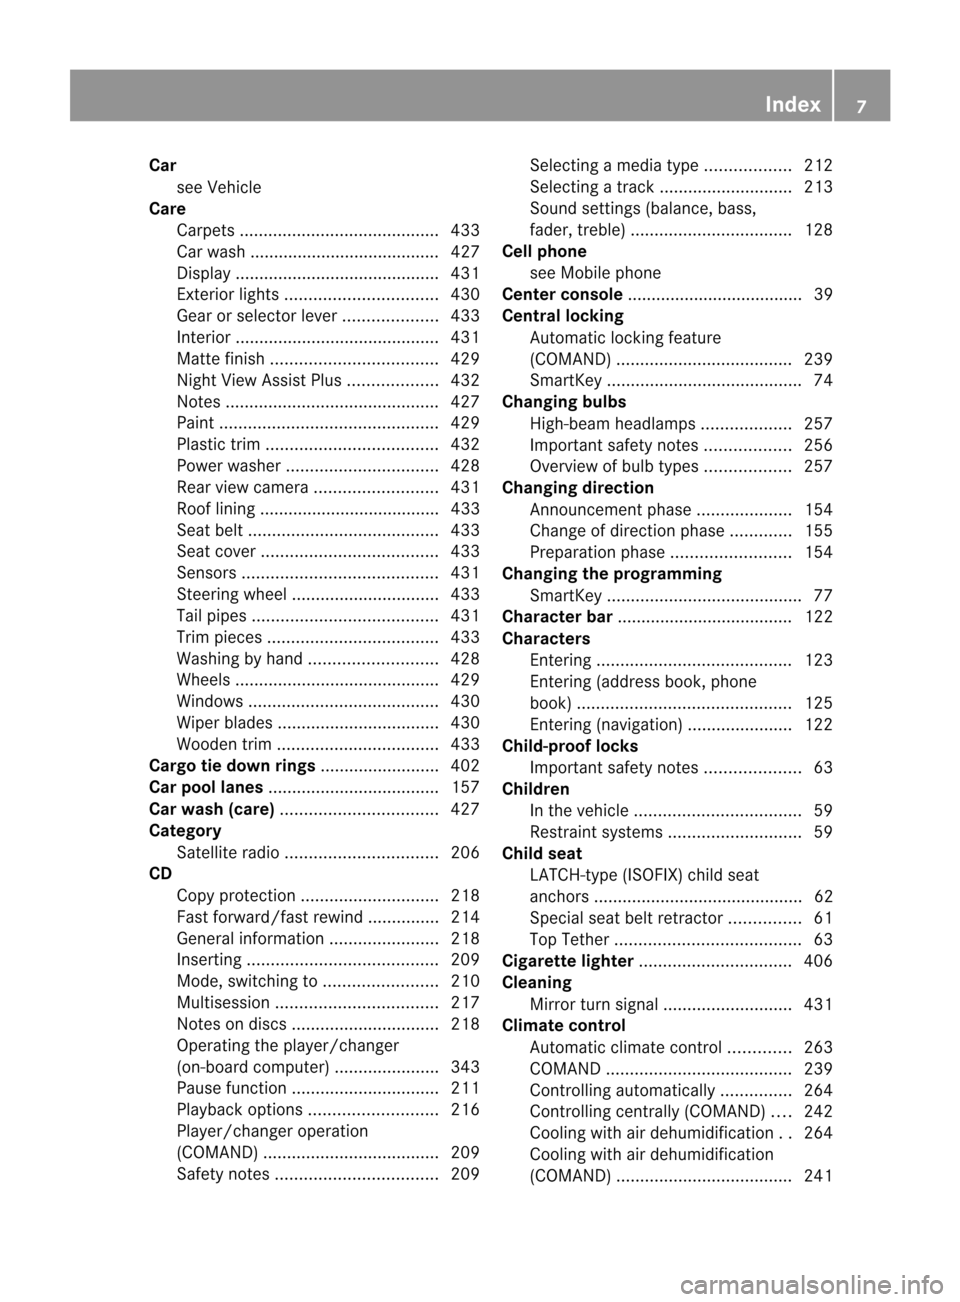
Car
see Vehicle
Care
Carpet s.......................................... 433
Car wash ........................................ 427
Display ........................................... 431
Exterior lights ................................ 430
Gea rors electo rlever .................... 433
Interior ........................................... 431
Matte finish ................................... 429
Nigh tView Assist Plus ...................432
Notes ............................................. 427
Paint .............................................. 429
Plastic trim .................................... 432
Power washer ................................ 428
Rea rview camera .......................... 431
Roof lining ...................................... 433
Seat bel t........................................ 433
Seat cover ..................................... 433
Sensors ......................................... 431
Steering wheel ............................... 433
Tai lpipes ....................................... 431
Trim pieces .................................... 433
Washing by hand ........................... 428
Wheels ........................................... 429
Windows ........................................ 430
Wiper blades .................................. 430
Wooden trim .................................. 433
Cargo tie down rings .........................402
Car pool lanes .................................... 157
Car wash (care) ................................. 427
Category Satellite radio ................................ 206
CD
Cop yprotection ............................. 218
Fast forward/fast rewind ...............214
General information .......................218
Inserting ........................................ 209
Mode ,switchin gto........................ 210
Multisession .................................. 217
Notes on discs ............................... 218
Operating the player/changer
(on-board computer) ......................343
Pause function ............................... 211
Playback options ........................... 216
Player/change roperation
(COMAND )..................................... 209
Safety notes .................................. 209Selecting
amedia type .................. 212
Selecting atrack ............................ 213
Sound settings (balance, bass,
fader, treble ).................................. 128
Cell phone
see Mobile phone
Center console ..................................... 39
Central locking Automatic locking feature
(COMAND) ..................................... 239
SmartKey ......................................... 74
Changing bulbs
High-beam headlamps ...................257
Important safety notes ..................256
Overview of bul btypes .................. 257
Changing direction
Announcement phase ....................154
Change of direction phase .............155
Preparation phase .........................154
Changing the programming
SmartKey ......................................... 77
Character bar ..................................... 122
Characters Entering ......................................... 123
Entering (address book, phone
book) ............................................. 125
Entering (navigation) ......................122
Child-proof locks
Important safety notes ....................63
Children
In the vehicle ................................... 59
Restraint systems ............................ 59
Child seat
LATCH-type (ISOFIX) child seat
anchors ............................................ 62
Specia lseat belt retractor ...............61
Top Tether ....................................... 63
Cigarette lighter ................................ 406
Cleaning Mirro rturn signal ........................... 431
Climate control
Automatic climate control .............263
COMAND ....................................... 239
Controlling automatically ...............264
Controlling centrally (COMAND) ....242
Cooling with aird ehumidification..264
Cooling with aird ehumidification
(COMAND )..................................... 241 Index
7
Page 15 of 494
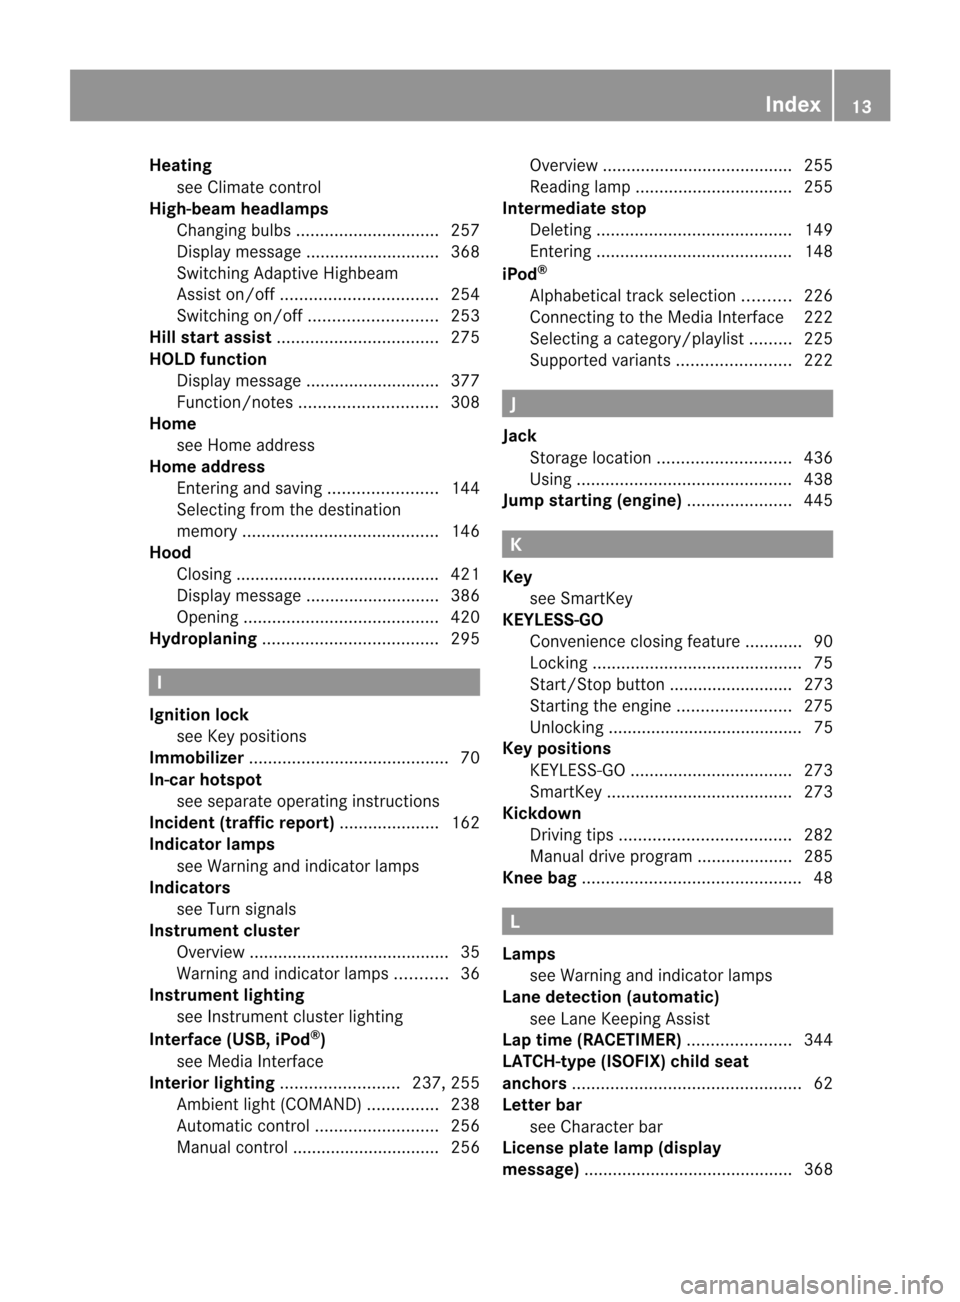
Heating
see Climate control
High-beam headlamps
Changing bulbs .............................. 257
Display message ............................ 368
Switching Adaptive Highbeam
Assist on/off ................................. 254
Switching on/off ........................... 253
Hill start assist .................................. 275
HOLD function Display message ............................ 377
Function/notes ............................. 308
Home
see Home address
Home address
Entering and saving .......................144
Selecting from the destination
memory ......................................... 146
Hood
Closing .......................................... .421
Display message ............................ 386
Opening ......................................... 420
Hydroplaning ..................................... 295I
Ignition lock see Key positions
Immobilizer .......................................... 70
In-car hotspot see separate operating instructions
Incident (traffic report) .....................162
Indicator lamps see Warning and indicator lamps
Indicators
see Turn signals
Instrument cluster
Overview .......................................... 35
Warning and indicator lamps ...........36
Instrument lighting
see Instrument cluster lighting
Interface (USB, iPod ®
)
see Medi aInterface
Interior lighting ......................... 237, 255
Ambient light (COMAND) ...............238
Automatic control ..........................256
Manual control ............................... 256 Overview
........................................ 255
Reading lamp ................................. 255
Intermediate stop
Deleting ......................................... 149
Entering ......................................... 148
iPod ®
Alphabetical track selection ..........226
Connecting to the Media Interface 222
Selecting a category/playlis t......... 225
Supported variants ........................222 J
Jack Storage location ............................ 436
Using ............................................. 438
Jump starting (engine) ......................445 K
Key see SmartKey
KEYLESS-GO
Convenience closing feature ............90
Locking ............................................ 75
Start/Stop button .......................... 273
Starting the engine ........................275
Unlocking ......................................... 75
Keyp ositions
KEYLESS-GO .................................. 273
SmartKey ....................................... 273
Kickdown
Driving tips .................................... 282
Manual drive program ....................285
Knee bag .............................................. 48 L
Lamps see Warning and indicator lamps
Lane detection (automatic)
see Lane Keeping Assist
Lap time (RACETIMER) ......................344
LATCH-type (ISOFIX) child seat
anchors ................................................ 62
Letter bar see Character bar
License plate lamp (display
message) ............................................ 368 Index
13
Page 16 of 494
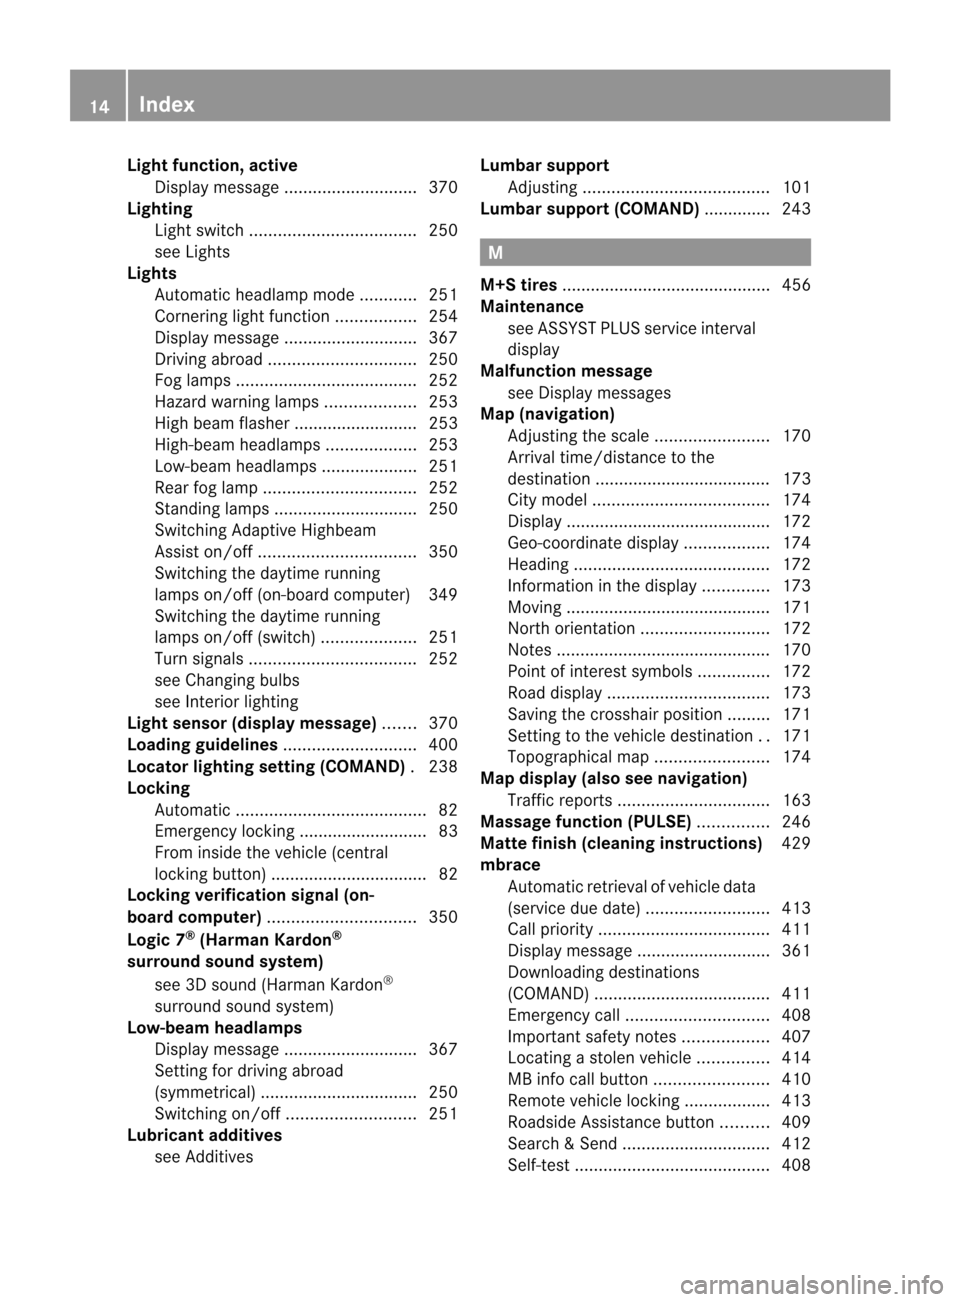
Light function, active
Display message ............................ 370
Lighting
Ligh tswitc h................................... 250
see Lights
Lights
Automatic headlamp mode ............251
Cornering light function .................254
Display message ............................ 367
Driving abroad ............................... 250
Fog lamps ...................................... 252
Hazard warning lamps ...................253
High beam flasher .......................... 253
High-beam headlamps ...................253
Low-beam headlamps ....................251
Rea rfog lamp ................................ 252
Standing lamps .............................. 250
Switching Adaptive Highbeam
Assist on/off ................................. 350
Switching the daytime running
lamps on/off (on-board computer) 349
Switching the daytime running
lamps on/off (switch) ....................251
Turn signals ................................... 252
see Changing bulbs
see Interior lighting
Light sensor (display message) .......370
Loading guidelines ............................400
Locator lighting setting (COMAND) .238
Locking Automatic ........................................ 82
Emergency locking ........................... 83
From inside the vehicle (central
locking button) ................................. 82
Locking verification signal (on-
board computer) ............................... 350
Logic 7 ®
(Harman Kardon ®
surround sound system) see 3D sound (Harman Kardon ®
surround sound system)
Low-beam headlamps
Display message ............................ 367
Setting for driving abroad
(symmetrical) ................................. 250
Switching on/off ........................... 251
Lubricant additives
see Additives Lumbar support
Adjusting ....................................... 101
Lumbar support (COMAND) .............. 243 M
M+S tires ............................................ 456
Maintenance see ASSYST PLUS service interval
display
Malfunction message
see Display messages
Map (navigation)
Adjusting the scal e........................ 170
Arrival time/distance to the
destination ..................................... 173
City mode l..................................... 174
Display ........................................... 172
Geo-coordinate displa y.................. 174
Heading ......................................... 172
Information in the displa y.............. 173
Moving ........................................... 171
North orientation ........................... 172
Notes ............................................. 170
Point of interest symbols ...............172
Roa ddisplay .................................. 173
Saving the crosshair position .........171
Setting to the vehicle destination ..171
Topographica lmap........................ 174
Map display (also see navigation)
Traffi creports ................................ 163
Massage function (PULSE) ...............246
Matte finish (cleaning instructions) 429
mbrace Automatic retrieval of vehicle data
(service due date ).......................... 413
Call priority .................................... 411
Display message ............................ 361
Downloading destinations
(COMAND) ..................................... 411
Emergency call .............................. 408
Important safety notes ..................407
Locating astolen vehicl e............... 414
MB info call button ........................410
Remote vehicle locking ..................413
Roadside Assistance button ..........409
Search &Send ............................... 412
Self-test ......................................... 40814
Index
Page 26 of 494
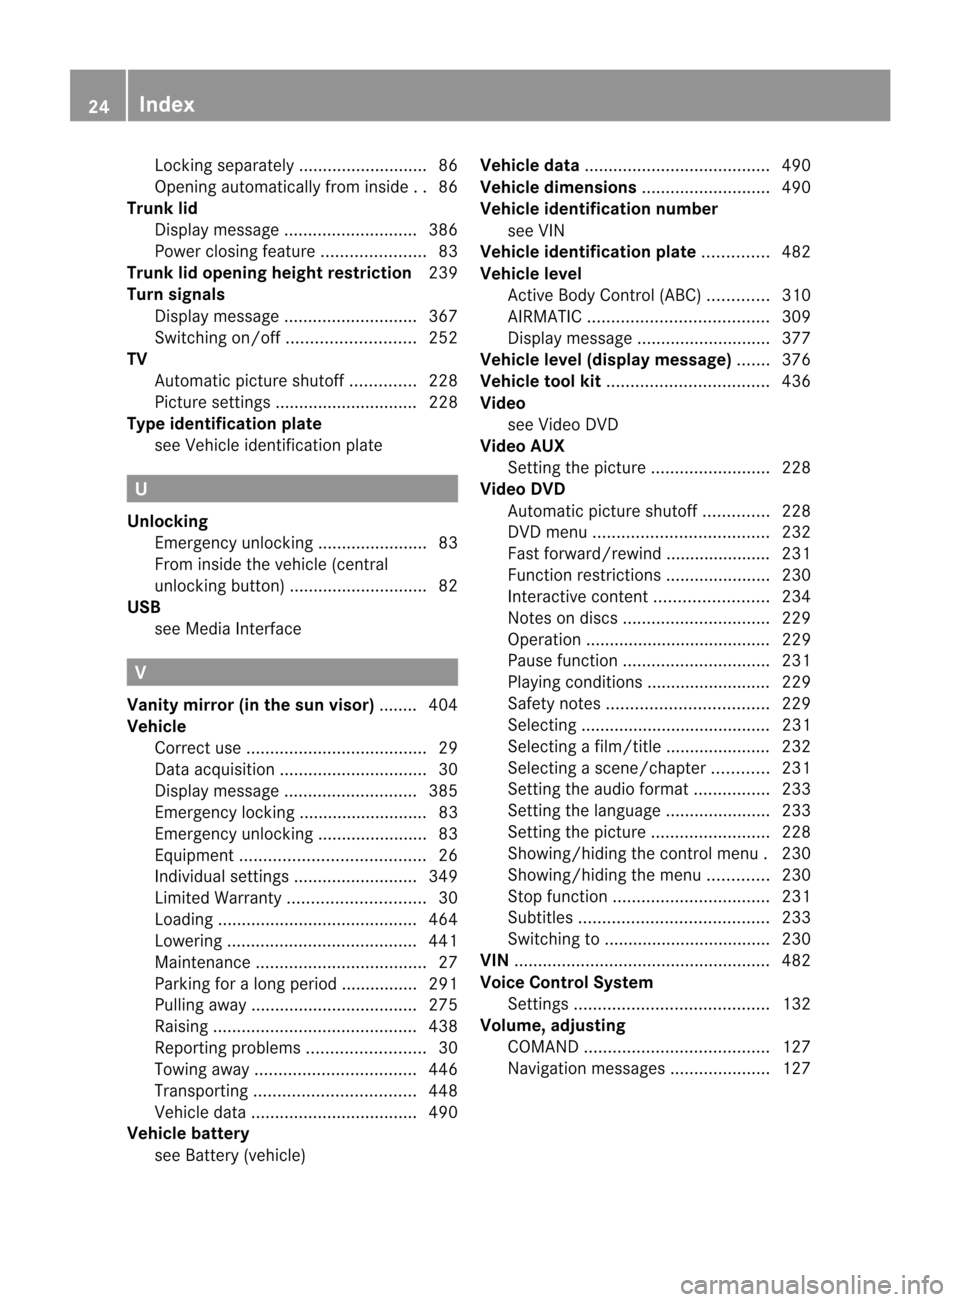
Locking separately
...........................86
Opening automatically from insid e..86
Trunk lid
Display message ............................ 386
Power closing feature ......................83
Trunk lid opening height restriction 239
Turn signals Display message ............................ 367
Switching on/off ........................... 252
TV
Automatic picture shutoff ..............228
Picture settings .............................. 228
Type identification plate
see Vehicle identification plate U
Unlocking Emergency unlocking .......................83
From inside the vehicle (central
unlocking button) ............................. 82
USB
see Medi aInterface V
Vanity mirror (in the sun visor) ........ 404
Vehicle Correct us e...................................... 29
Data acquisition ............................... 30
Display message ............................ 385
Emergency locking ........................... 83
Emergency unlocking .......................83
Equipment ....................................... 26
Individua lsettings .......................... 349
Limited Warranty ............................. 30
Loading .......................................... 464
Lowering ........................................ 441
Maintenance .................................... 27
Parking for a long period ................ 291
Pulling away ................................... 275
Raising ........................................... 438
Reporting problems .........................30
Towing away .................................. 446
Transporting .................................. 448
Vehicle data ................................... 490
Vehicle battery
see Battery (vehicle) Vehicle data
....................................... 490
Vehicle dimensions ...........................490
Vehicle identification number see VIN
Vehicle identification plate ..............482
Vehicle level Active Body Control (ABC) .............310
AIRMATIC ...................................... 309
Display message ............................ 377
Vehicle level (display message) .......376
Vehicle tool kit .................................. 436
Video see Video DVD
Video AUX
Setting the picture .........................228
Video DVD
Automatic picture shutoff ..............228
DVD menu ..................................... 232
Fast forward/rewind ..................... .231
Function restrictions ......................230
Interactive content ........................234
Notes on discs ............................... 229
Operation ....................................... 229
Pause function ............................... 231
Playing conditions .......................... 229
Safety notes .................................. 229
Selecting ........................................ 231
Selecting a film/title ..................... .232
Selecting a scene/chapter ............231
Setting the audio forma t................ 233
Setting the language ......................233
Setting the picture .........................228
Showing/hiding the control menu .230
Showing/hiding the menu .............230
Stop function ................................. 231
Subtitles ........................................ 233
Switching to ................................... 230
VIN ...................................................... 482
Voice Control System Settings ......................................... 132
Volume, adjusting
COMAND ....................................... 127
Navigation messages .....................12724
Index
Page 38 of 494
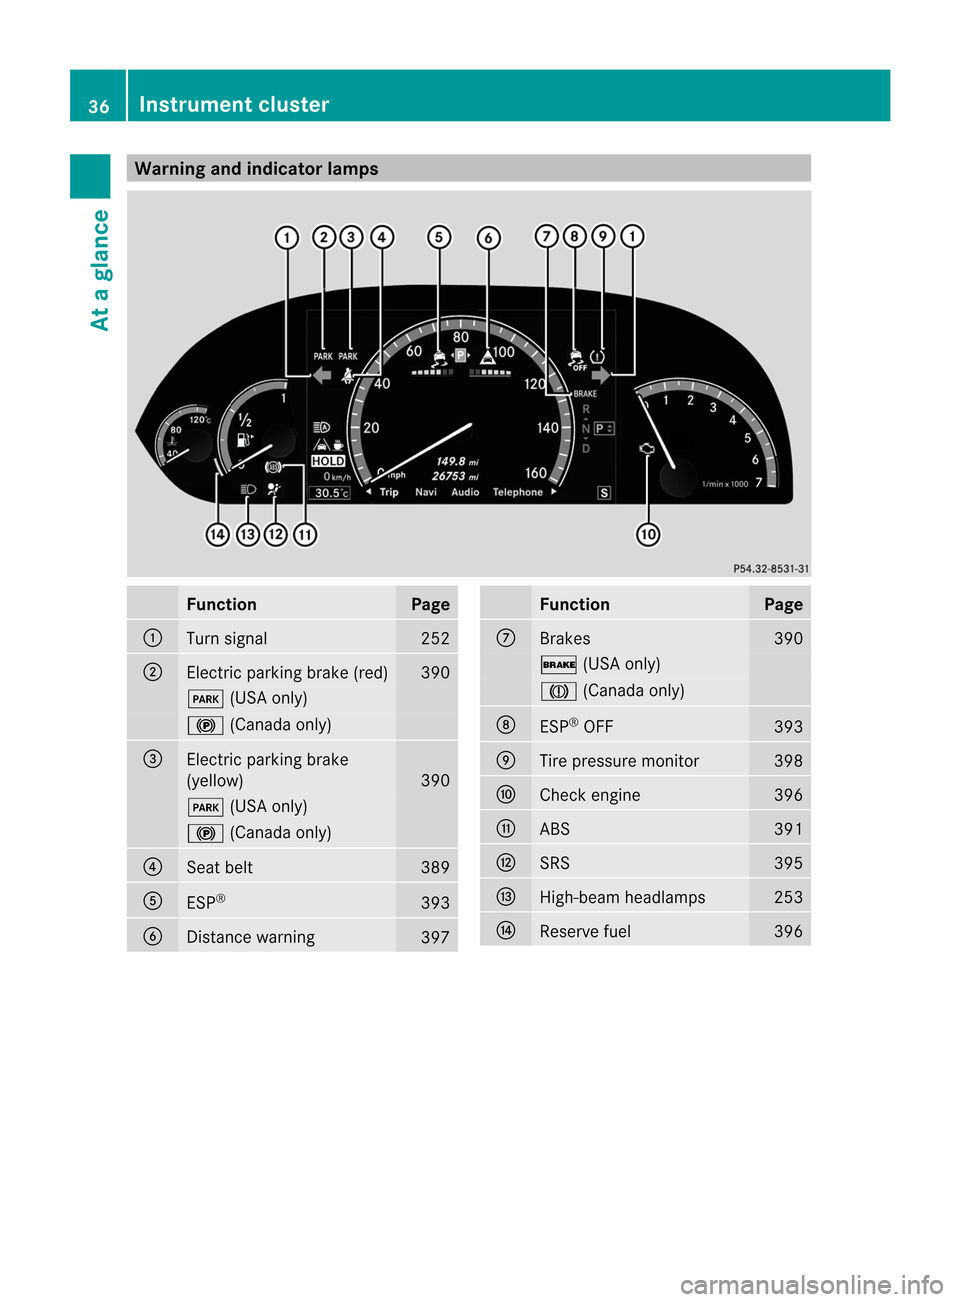
Warning and indicator lamps
Function Page
:
Turn signal 252
;
Electric parking brake (red) 390
F
(USA only) !
(Canada only) =
Electric parking brake
(yellow)
390
F
(USA only) !
(Canada only) ?
Seat belt 389
A
ESP
® 393
B
Distance warning
397 Function Page
C
Brakes 390
$
(USA only) J
(Canada only) D
ESP
®
OFF 393
E
Tire pressure monitor 398
F
Check engine 396
G
ABS 391
H
SRS 395
I
High-beam headlamps 253
J
Reserve fuel 39636
Instrument clusterAt a glance
Page 77 of 494
Unapproved modifications to this device
may lead to withdrawal of permission to
operate it.
The product label with FCC ID and IC
certification number can be found in the
battery case of the SmartKey.
i Only for Canada:
This device complies with Industry
Canada's RSS210 rules. Operation is
subject to the following conditions:
1. This device must not cause any
interference, and
2. This device must be able to
accommodate interferencet hat is
received, including interference which
could cause unwanted functions.
Unapproved modifications to this device
may lead to withdrawal of permission to
operate it.
The product label with FCC ID and IC
certification number can be found in the
battery case of the SmartKey.
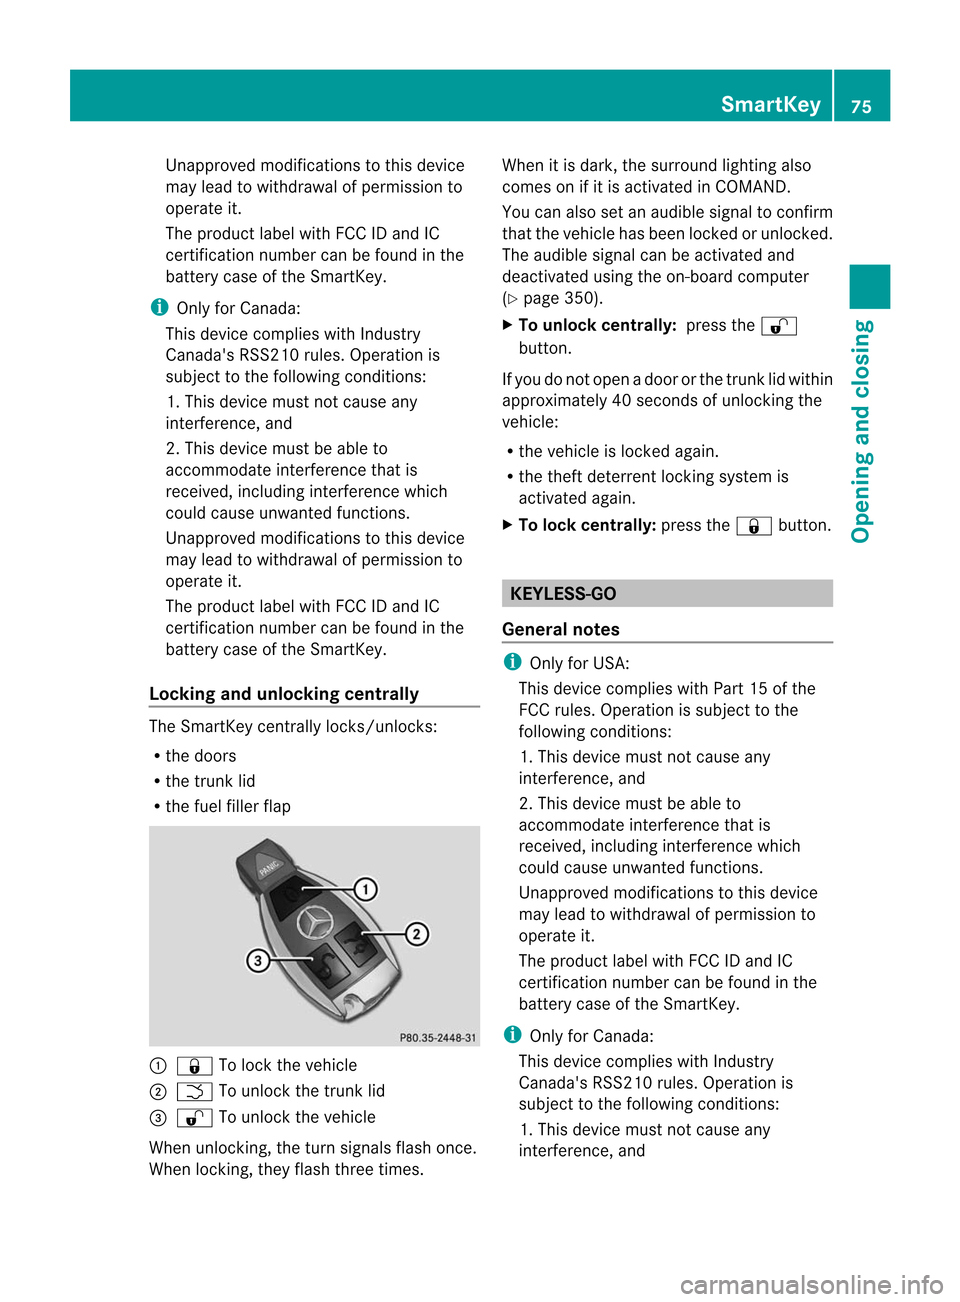
Locking and unlocking centrally The SmartKey centrally locks/unlocks:
R the doors
R the trunk lid
R the fuel filler flap :
& To lock the vehicle
; F To unlock the trunk lid
= % To unlock the vehicle
When unlocking, the turn signals flash once.
When locking, they flash three times. When it is dark, the surround lighting also
comes on if it is activated in COMAND.
You can also set an audible signal to confirm
that the vehicle has been locked or unlocked.
The audible signal can be activated and
deactivated using the on-board computer
(Y
page 350).
X To unlock centrally: press the%
button.
If you do not open a door or the trunk lid within
approximately 40 seconds of unlocking the
vehicle:
R the vehicle is locked again.
R the theft deterrent locking system is
activated again.
X To lock centrally: press the&button. KEYLESS-GO
General notes i
Only for USA:
This device complies with Part 15 of the
FCC rules. Operation is subject to the
following conditions:
1. This device must not cause any
interference, and
2. This device must be able to
accommodate interference that is
received, including interference which
could cause unwanted functions.
Unapproved modifications to this device
may lead to withdrawal of permission to
operate it.
The product label with FCC ID and IC
certification number can be found in the
battery case of the SmartKey.
i Only for Canada:
This device complies with Industry
Canada's RSS210 rules. Operation is
subject to the following conditions:
1. This device must not cause any
interference, and SmartKey
75Opening and closing Z
Page 119 of 494
For example, the "Navi" function can be used
from the driver's side while the "Video"
function is used on the front-passenger side.
Use the remote control to operate COMAND
from the front-passenger side with
SPLITVIEW.
Please bear the following in mind
R You rvehicle may be equipped with
SPLITVIEW, depending on its date of
production. The use of SPLITVIEW is
currently not permitted in the following
states: AL, AZ, CO, IL, LA, MA, MD, NH, PA,
VA, VT, WA, WI, and WV or in the Canadian
provinces of Manitoba, Newfoundland,
New Brunswick, and Prince Edward Island.
It is the driver's responsibility to observe
ALL regional legally prescribed regulations.
If your vehicle is registered in a state or
province in which SPLITVIEW is not
approved, this function must be
deactivated. Please contact an authorized
specialist dealer to chec kwhether
SPLITVIEW is approved in your state or
province.
R Volume adjustment for the cordless
headphones can be carried out on the
headphones. Before putting on the
headphones, make sure that the volume
has not been set too high.
R The remote control can be used for the
volume adjustment of corded headphones.
R You can only use media from the driver's
and front-passenger sides separately if the
media are from different sources. Example:
on the driver's side, an audio CD is being
played by the DVD changer. This means
that on the front-passenger side, the DVD
changer cannot be used to play a different
disc type, for instance a video DVD.
However, other media can be used at the
same time on the front-passenger side,
including radio, memory card, MUSIC
REGISTER, Media Interface, USB or AUX.
R If you use the same medium on both sides,
settings for this medium can be carried out
from either side. R
There must be intervisibility between the
headphones and the display so that
COMAND can optimally transmit music and
speech via the infrared signal on the front-
passenger's headphones. For this reason,
please also observe that the headphones
have left and right sides, and use them
correctly.
R Only entertainment functions, i.e. audio
and video, can be used separately via
SPLITVIEW.
R The multifunction steering wheel can only
be used for functions which relate to the
driver's side.
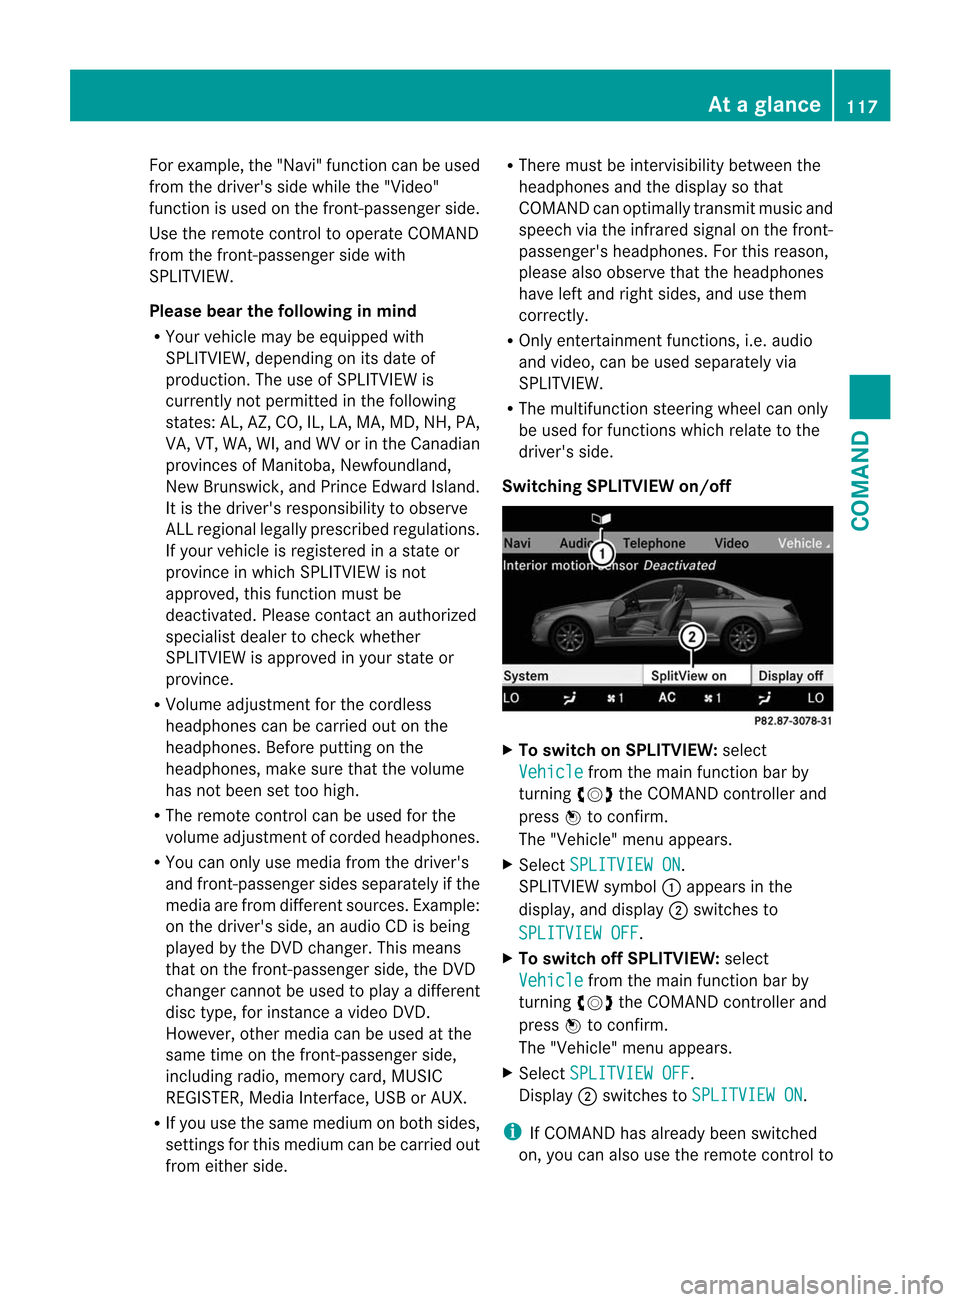
Switching SPLITVIEW on/off X
To switch on SPLITVIEW: select
Vehicle from the main function bar by
turning cVdthe COMAND controller and
press Wto confirm.
The "Vehicle" menu appears.
X Select SPLITVIEW ON .
SPLITVIEW symbol :appears in the
display, and display ;switches to
SPLITVIEW OFF .
X To switch off SPLITVIEW: select
Vehicle from the main function bar by
turning cVdthe COMAND controller and
press Wto confirm.
The "Vehicle" menu appears.
X Select SPLITVIEW OFF .
Display ;switches to SPLITVIEW ON .
i If COMAND has already been switched
on, you can also use the remote control to At
ag lance
117COMAND Z
Page 132 of 494
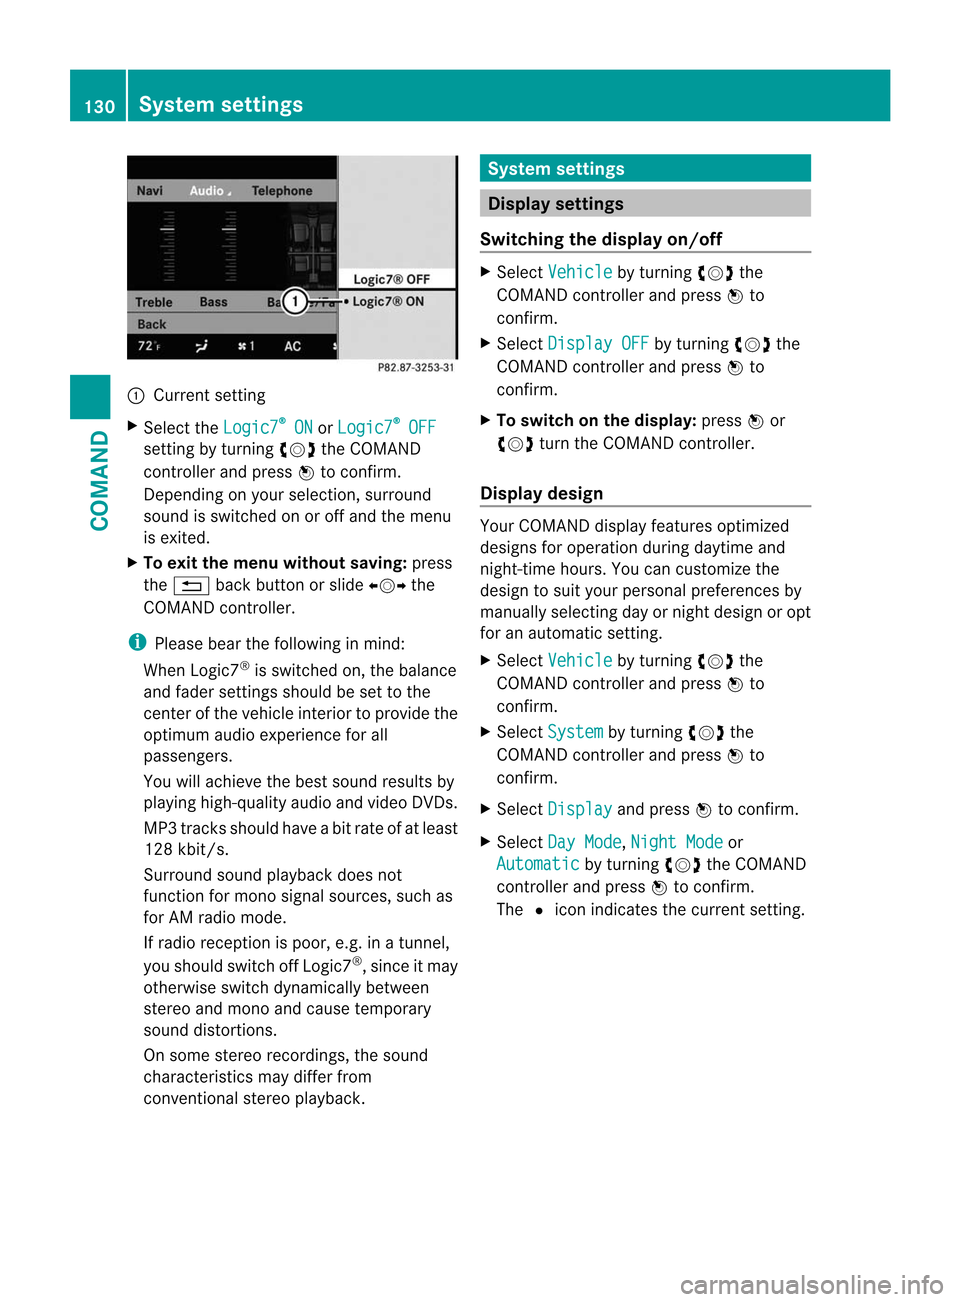
:
Current setting
X Selec tthe Logic7 ®
ON or
Logic7 ®
OFF
setting by turning
cVdthe COMAND
controller and press Wto confirm.
Depending on your selection, surround
sound is switched on or off and the menu
is exited.
X To exit the menu without saving: press
the % back button or slide XVYthe
COMAND controller.
i Please bear the following in mind:
When Logic7 ®
is switched on, the balance
and fader settings should be set to the
center of the vehicle interior to provide the
optimum audio experience for all
passengers.
You will achieve the best sound results by
playing high-quality audio and video DVDs.
MP3 tracks should have abit rate of at least
128 kbit/s.
Surround sound playback does not
function for mono signal sources, such as
for AM radio mode.
If radio receptio nis poor, e.g. in a tunnel,
you should switch off Logic7 ®
, since it may
otherwise switch dynamically between
stereo and mono and cause temporary
sound distortions.
On some stereo recordings, the sound
characteristics may differ from
conventional stereo playback. System settings
Display settings
Switching the display on/off X
Select Vehicle by turning
cVdthe
COMAND controller and press Wto
confirm.
X Select Display OFF by turning
cVdthe
COMAND controller and press Wto
confirm.
X To switch on the display: pressWor
cVd turn the COMAND controller.
Display design Your COMAND display features optimized
designs for operation during daytime and
night-time hours. You can customize the
design to suit your personal preferences by
manually selecting day or night design or opt
for an automatic setting.
X
Select Vehicle by turning
cVdthe
COMAND controller and press Wto
confirm.
X Select System by turning
cVdthe
COMAND controller and press Wto
confirm.
X Select Display and press
Wto confirm.
X Select Day Mode ,
Night Mode or
Automatic by turning
cVdthe COMAND
controller and press Wto confirm.
The #icon indicates the current setting. 130
System settingsCOMAND
Page 150 of 494
switched on and the GPS signal is strong
enough.
Moving the map and selecting the
destination
X
To scroll the map: slideXVY, ZVÆor
aVb the COMAND controller.
X To set the map scale: as soon as you turn
cVd the COMAND controller, the scale bar
appears.
X Turn cVd until the desired scale is set.
Turning clockwise zooms out from the map;
turning counter-clockwise zooms in.
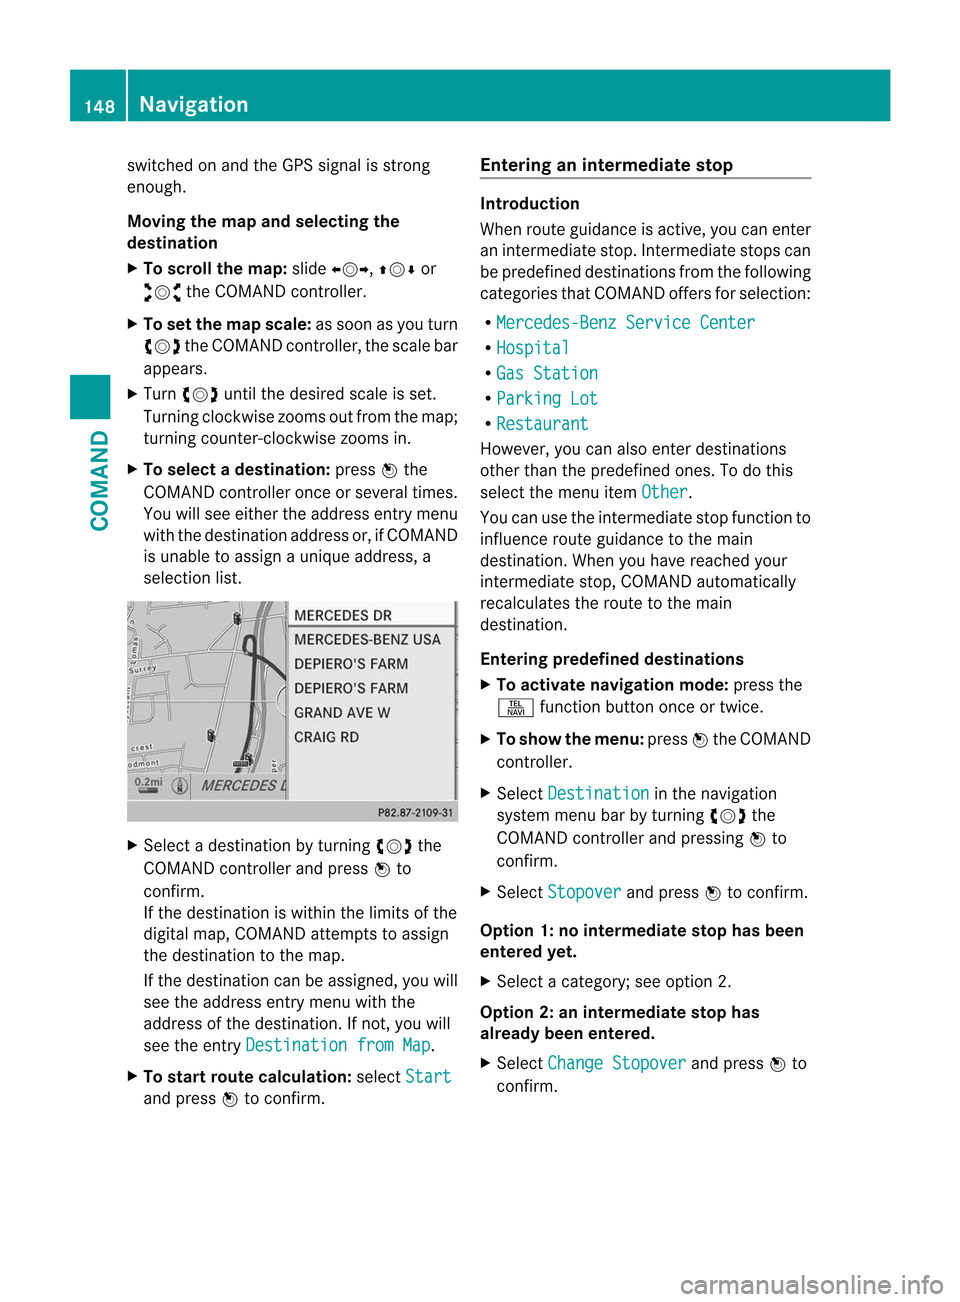
X To selectad estination:pressWthe
COMAND controller once or several times.
You will see either the address entry menu
with the destination address or, if COMAND
is unable to assign a unique address, a
selectio nlist. X
Selec tadestination by turning cVdthe
COMAND controller and press Wto
confirm.
If the destination is within the limits of the
digital map, COMAND attempts to assign
the destination to the map.
If the destination can be assigned, you will
see the address entry menu with the
address of the destination. If not, you will
see the entry Destination from Map .
X To start route calculation: selectStart and press
Wto confirm. Entering an intermediate stop Introduction
When route guidance is active, you can enter
an intermediate stop. Intermediate stops can
be predefined destinations from the following
categories that COMAND offers for selection:
R Mercedes-Benz Service Center R
Hospital R
Gas Station R
Parking Lot R
Restaurant However, you can also enter destinations
other than the predefined ones. To do this
select the menu item
Other .
You can use the intermediate stop function to
influence route guidance to the main
destination. When you have reached your
intermediate stop, COMAND automatically
recalculates the route to the main
destination.
Entering predefined destinations
X To activate navigation mode: press the
S function button once or twice.
X To show the menu: pressWthe COMAND
controller.
X Select Destination in the navigation
system menu bar by turning cVdthe
COMAND controller and pressing Wto
confirm.
X Select Stopover and press
Wto confirm.
Option 1: no intermediate stop has been
entered yet.
X Select a category; see option 2.
Option 2: an intermediate stop has
already been entered.
X Select Change Stopover and press
Wto
confirm. 148
NavigationCOMAND
Page 176 of 494
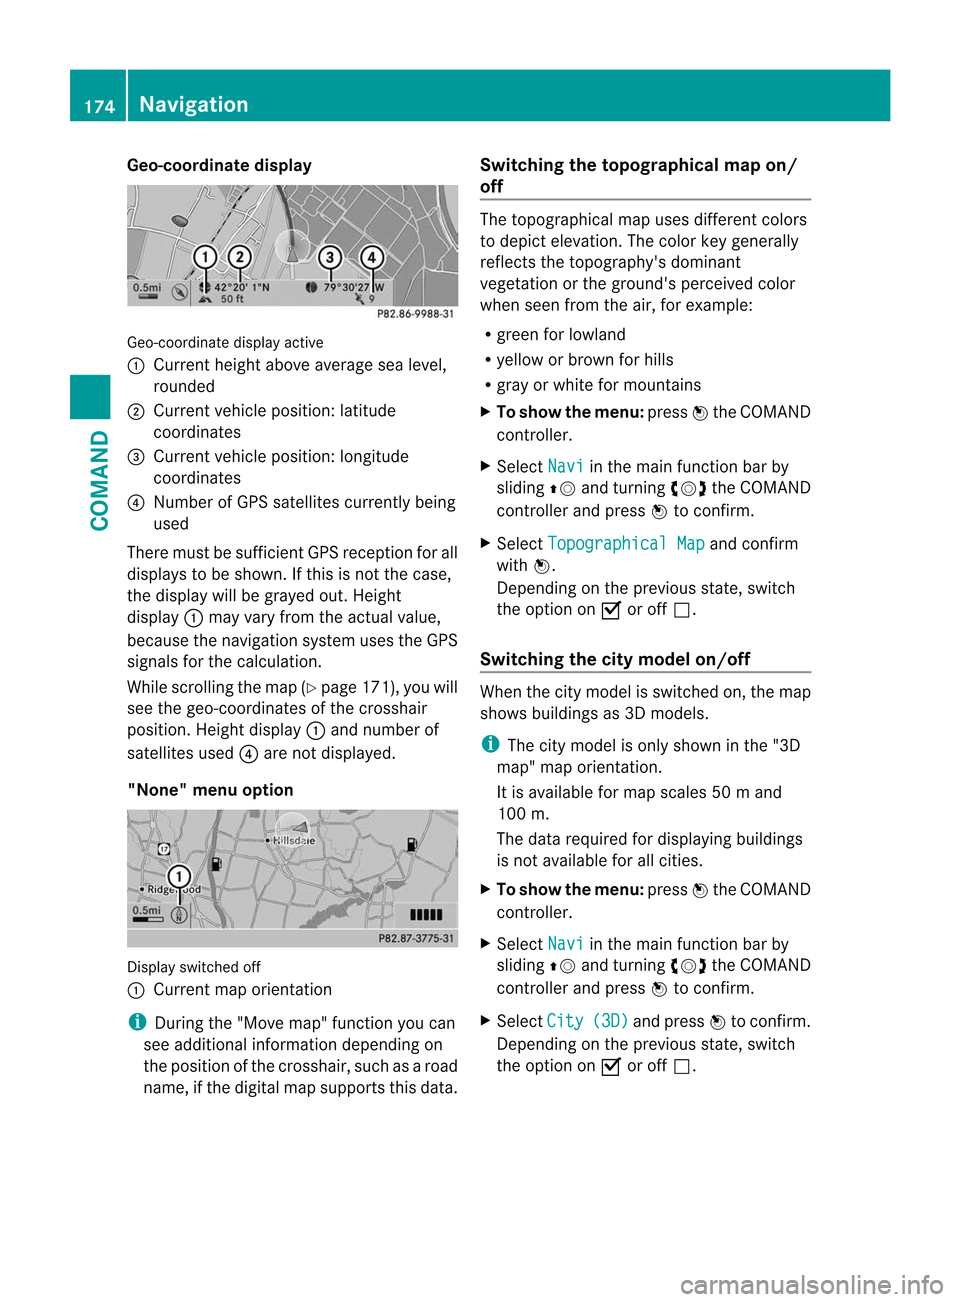
Geo-coordinate display
Geo-coordinate display active
:
Current heigh tabove average sea level,
rounded
; Current vehicle position :latitude
coordinates
= Curren tvehicle position :longitude
coordinates
? Number of GPS satellites currently being
used
There must be sufficient GPS reception for all
displays to be shown. If this is not the case,
the display will be grayed out. Height
display :may vary from the actual value,
because the navigation system uses the GPS
signals for the calculation.
While scrolling the map (Y page 171), you will
see the geo-coordinates of the crosshair
position. Height display :and number of
satellites used ?are not displayed.
"None" menu option Display switched off
:
Current map orientation
i During the "Move map" function you can
see additional information depending on
the position of the crosshair, such as a road
name, if the digital map supports this data. Switching the topographical map on/
off The topographical map uses different colors
to depict elevation. The color key generally
reflects the topography's dominant
vegetation or the ground's perceived color
when seen from the air, for example:
R green for lowland
R yellow or brown for hills
R gray or white for mountains
X To show the menu: pressWthe COMAND
controller.
X Select Navi in the main function bar by
sliding ZVand turning cVdthe COMAND
controller and press Wto confirm.
X Select Topographical Map and confirm
with W.
Depending on the previous state, switch
the option on Oor off ª.
Switching the city model on/off When the city model is switched on, the map
shows buildings as 3D models.
i
The city model is only shown in the "3D
map" map orientation.
It is available for map scales 50 mand
100 m.
The data required for displaying buildings
is not available for all cities.
X To show the menu: pressWthe COMAND
controller.
X Select Navi in the main function bar by
sliding ZVand turning cVdthe COMAND
controller and press Wto confirm.
X Select City (3D) and press
Wto confirm.
Depending on the previous state, switch
the optio nonOor offª. 174
NavigationCOMAND