MERCEDES-BENZ CL500 2002 C215 Owner's Manual
CL500 2002 C215
MERCEDES-BENZ
MERCEDES-BENZ
https://www.carmanualsonline.info/img/4/3381/w960_3381-0.png
MERCEDES-BENZ CL500 2002 C215 Owner's Manual
Trending: tow bar, remote start, oil reset, dashboard warning lights, water pump, fuel reserve, wheel torque
Page 371 of 430
368 Exterior lamps
Te ch n i c a l
data Instruments
and controlsOperation DrivingInstrument
cluster displayPractical hintsCar care Index
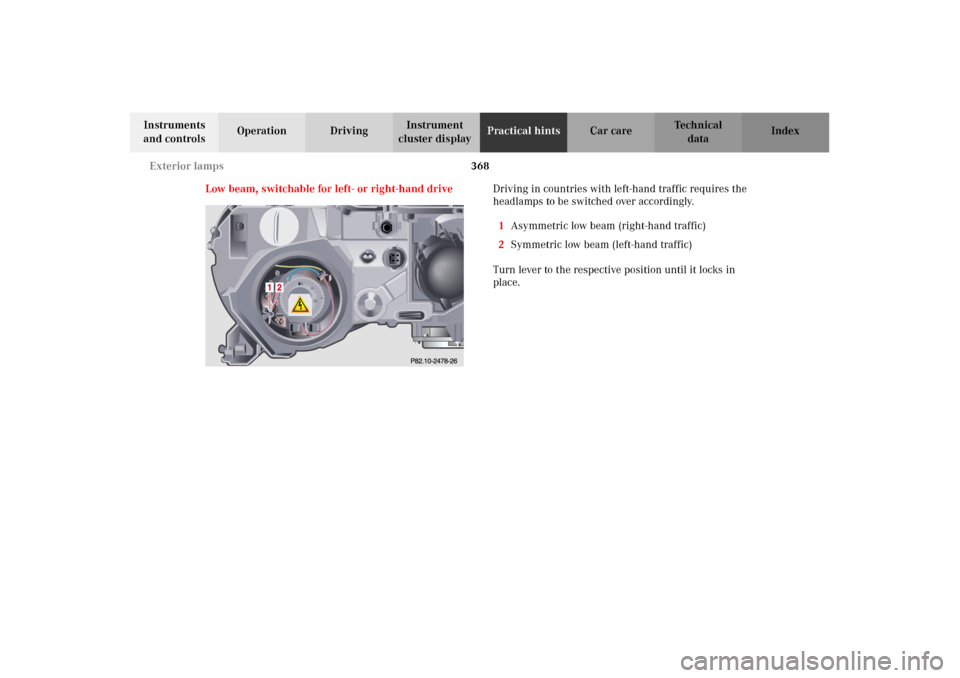
Low beam, switchable for left- or right-hand driveDriving in countries with left-hand traffic requires the
headlamps to be switched over accordingly.
1Asymmetric low beam (right-hand traffic)
2Symmetric low beam (left-hand traffic)
Turn lever to the respective position until it locks in
place.
J_OM_215.book Seite 368 Mittwoch, 30. Mai 2001 2:01 14
Page 372 of 430
369 Electronic key
Te ch n i c a l
data Instruments
and controlsOperation DrivingInstrument
cluster displayPractical hintsCar care Index Changing batteries in the electronic key
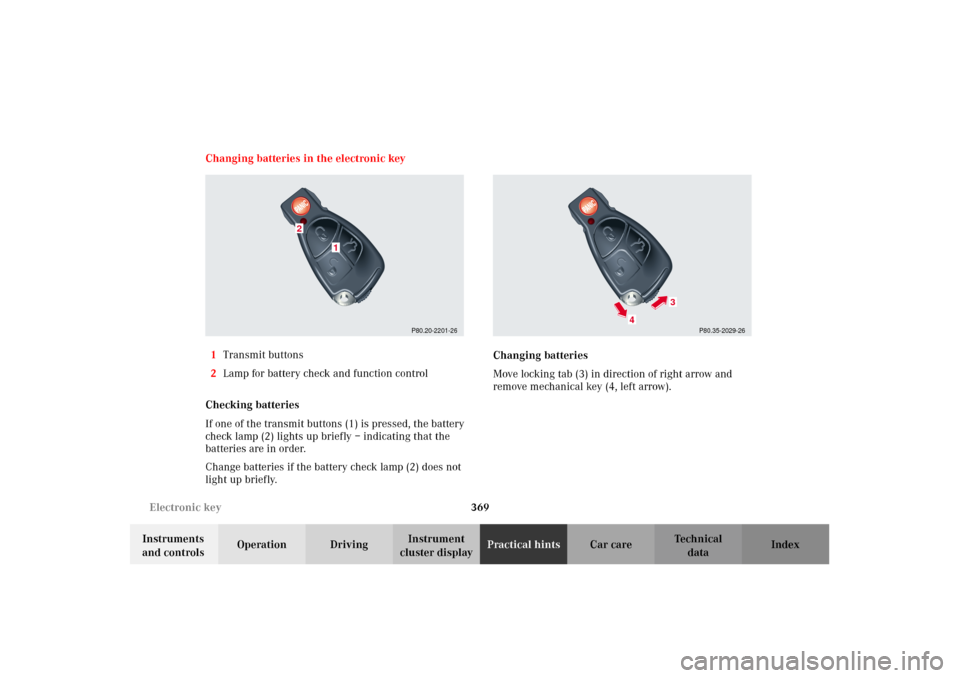
1Transmit buttons
2Lamp for battery check and function control
Checking batteries
If one of the transmit buttons (1) is pressed, the battery
check lamp (2) lights up briefly – indicating that the
batteries are in order.
Change batteries if the battery check lamp (2) does not
light up briefly.Changing batteries
Move locking tab (3) in direction of right arrow and
remove mechanical key (4, left arrow).
P80.20-2201-26
1
2
P80.35-2029-26
4
3
J_OM_215.book Seite 369 Mittwoch, 30. Mai 2001 2:01 14
Page 373 of 430
370 Electronic key
Te ch n i c a l
data Instruments
and controlsOperation DrivingInstrument
cluster displayPractical hintsCar care Index
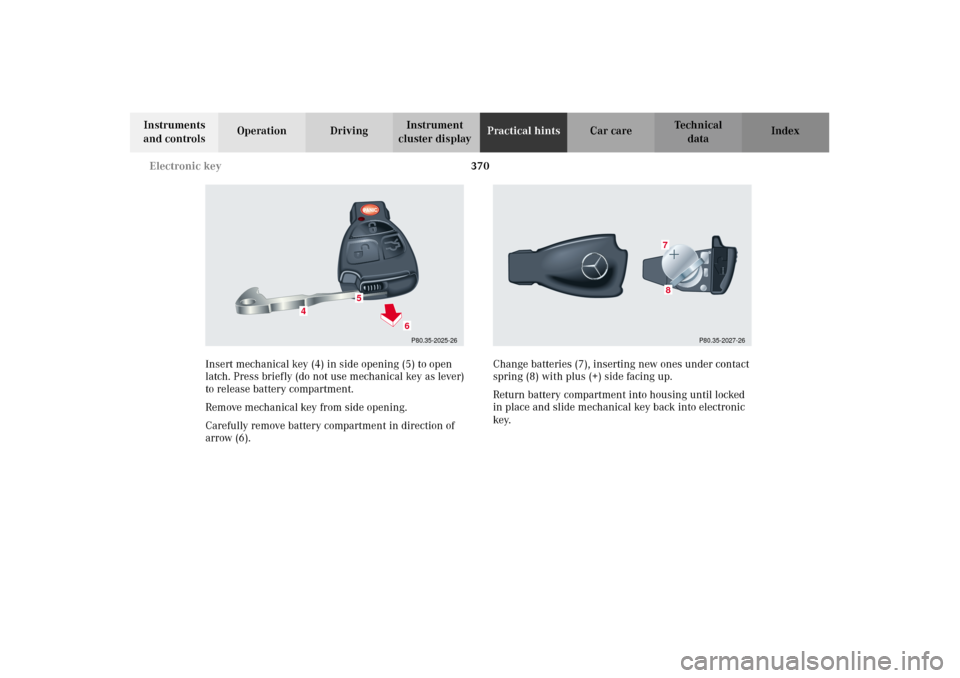
Insert mechanical key (4) in side opening (5) to open
latch. Press briefly (do not use mechanical key as lever)
to release battery compartment.
Remove mechanical key from side opening.
Carefully remove battery compartment in direction of
arrow (6).Change batteries (7), inserting new ones under contact
spring (8) with plus (+) side facing up.
Return battery compartment into housing until locked
in place and slide mechanical key back into electronic
key.
P80.35-2025-26
5
4
6
P80.35-2027-26
78
J_OM_215.book Seite 370 Mittwoch, 30. Mai 2001 2:01 14
Page 374 of 430
371 Electronic key
Te ch n i c a l
data Instruments
and controlsOperation DrivingInstrument
cluster displayPractical hintsCar care Index Important!
Batteries contain materials that can harm the
environment if disposed of improperly. Recycling of
batteries is the preferred method of disposal. For
disposal, please follow manufacturer’s recommendation
on battery package.
Replacement Battery:
Lithium, type CR 2025 or equivalent.Synchronizing remote control
The remote control may have to be resynchronized, if
the vehicle cannot be locked or unlocked.
To synchronize insert electronic key in starter switch.
The remote control should once again be operational.
J_OM_215.book Seite 371 Mittwoch, 30. Mai 2001 2:01 14
Page 375 of 430
372 KEYLESS-GO-card
Te ch n i c a l
data Instruments
and controlsOperation DrivingInstrument
cluster displayPractical hintsCar care Index
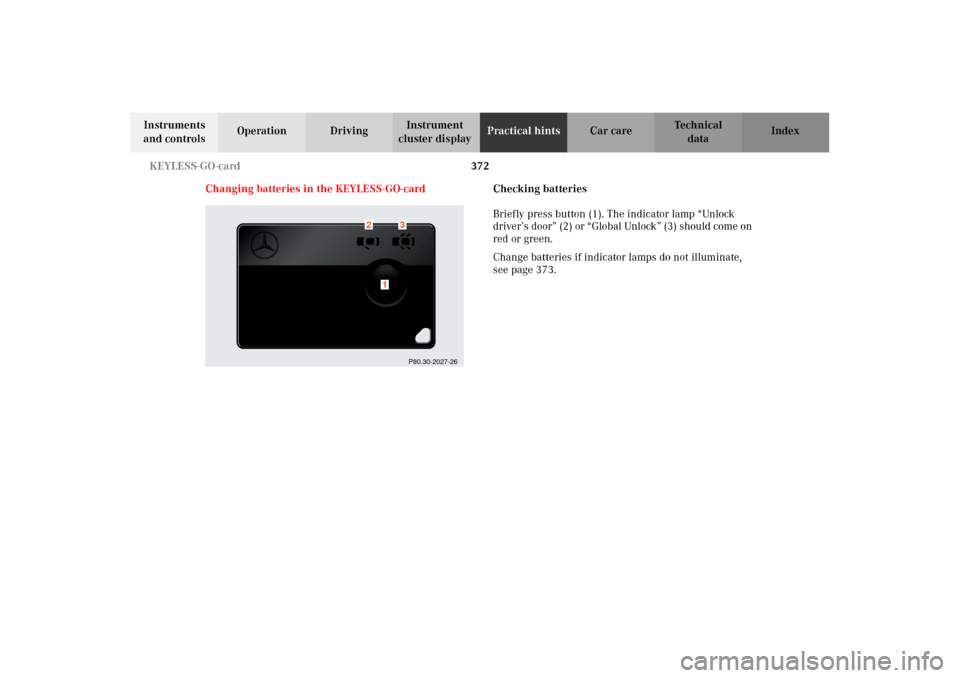
Changing batteries in the KEYLESS-GO-cardChecking batteries
Briefly press button (1). The indicator lamp “Unlock
driver’s door” (2) or “Global Unlock” (3) should come on
red or green.
Change batteries if indicator lamps do not illuminate,
see page 373.
P80.30-2027-26
1
2
3
J_OM_215.book Seite 372 Mittwoch, 30. Mai 2001 2:01 14
Page 376 of 430
373 KEYLESS-GO-card
Te ch n i c a l
data Instruments
and controlsOperation DrivingInstrument
cluster displayPractical hintsCar care Index Changing batteries
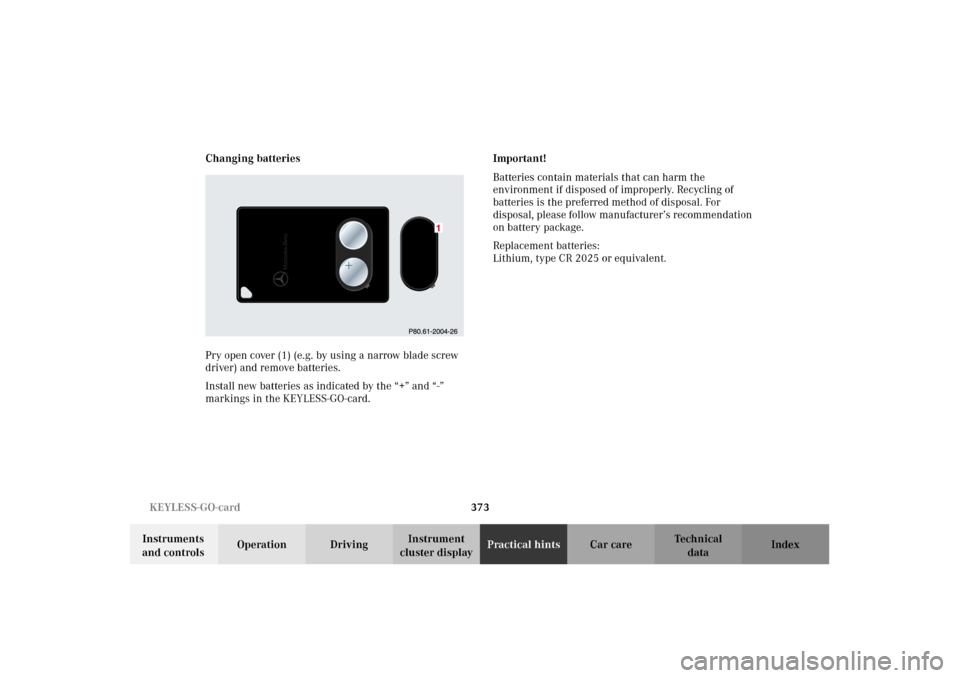
Pry open cover (1) (e.g. by using a narrow blade screw
driver) and remove batteries.
Install new batteries as indicated by the “+” and “-”
markings in the KEYLESS-GO-card.Important!
Batteries contain materials that can harm the
environment if disposed of improperly. Recycling of
batteries is the preferred method of disposal. For
disposal, please follow manufacturer’s recommendation
on battery package.
Replacement batteries:
Lithium, type CR 2025 or equivalent.
J_OM_215.book Seite 373 Mittwoch, 30. Mai 2001 2:01 14
Page 377 of 430
374 Emergency engine shut-down
Te ch n i c a l
data Instruments
and controlsOperation DrivingInstrument
cluster displayPractical hintsCar care Index
Emergency engine shut-down
If the engine can no longer be stopped using the
electronic key or the start-/stop button (vehicles with
KEYLESS-GO), the engine can be turned off by
withdrawing two fuses.
For easy removal of fuses use the fuse extractor
(supplied with vehicle tool kit) to pull out the fuses
marked on the fuse chart as “ENGINE EMERGENCY
OFF”.
The fuse chart is also located in the vehicle tool kit,
seepage341.
For fuses see page 331.Fuel filler flap, manual release
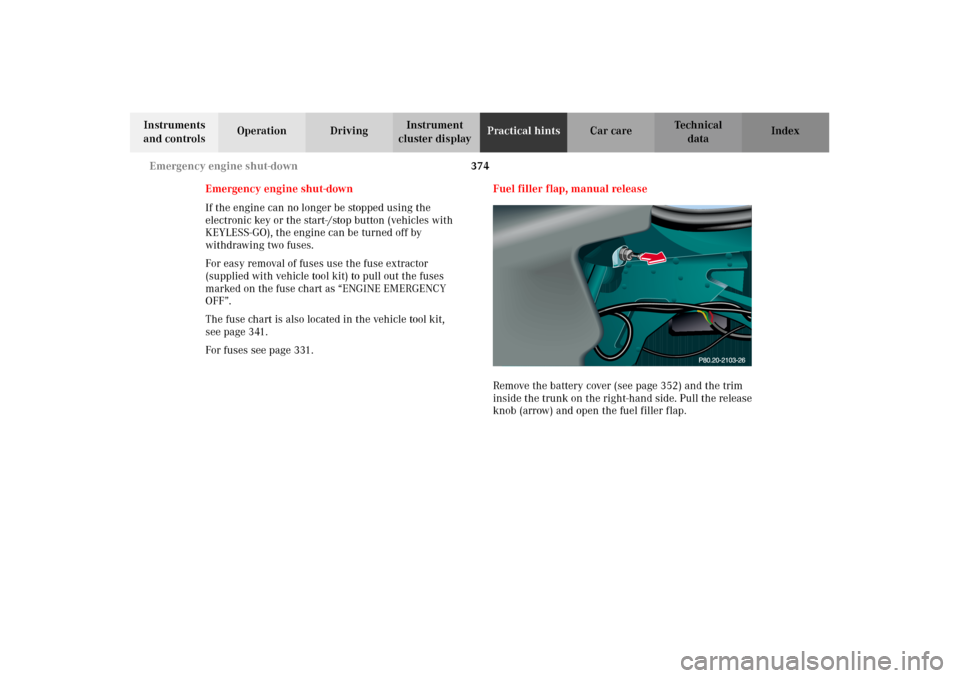
Remove the battery cover (see page 352) and the trim
inside the trunk on the right-hand side. Pull the release
knob (arrow) and open the fuel filler flap.
J_OM_215.book Seite 374 Mittwoch, 30. Mai 2001 2:01 14
Page 378 of 430
375 Emergency operation of sliding/pop-up roof
Te ch n i c a l
data Instruments
and controlsOperation DrivingInstrument
cluster displayPractical hintsCar care Index Emergency operation of sliding/pop-up roof
The sliding /pop-up roof can be opened or closed
manually should an electrical malfunction occur.
The sliding /pop-up roof drive is located behind the lens
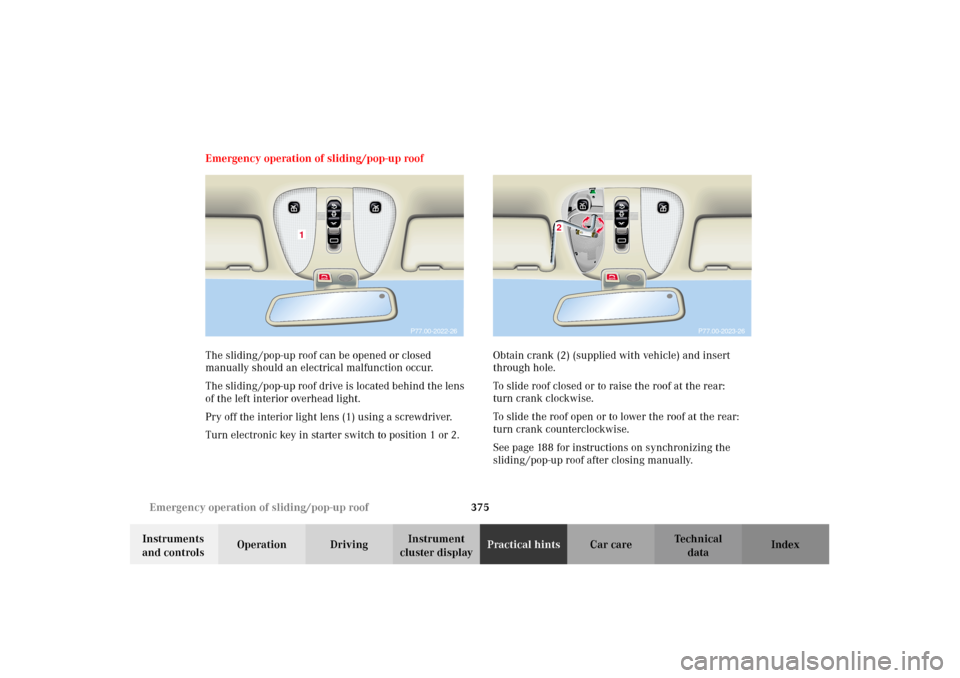
of the left interior overhead light.
Pry off the interior light lens (1) using a screwdriver.
Turn electronic key in starter switch to position 1 or 2.Obtain crank (2) (supplied with vehicle) and insert
through hole.
To slide roof closed or to raise the roof at the rear:
turn crank clockwise.
To slide the roof open or to lower the roof at the rear:
turn crank counterclockwise.
See page 188 for instructions on synchronizing the
sliding /pop-up roof after closing manually.
P77.00-2022-26
1
P77.00-2023-26
2
J_OM_215.book Seite 375 Mittwoch, 30. Mai 2001 2:01 14
Page 379 of 430
376 Replacing wiper blades
Te ch n i c a l
data Instruments
and controlsOperation DrivingInstrument
cluster displayPractical hintsCar care Index
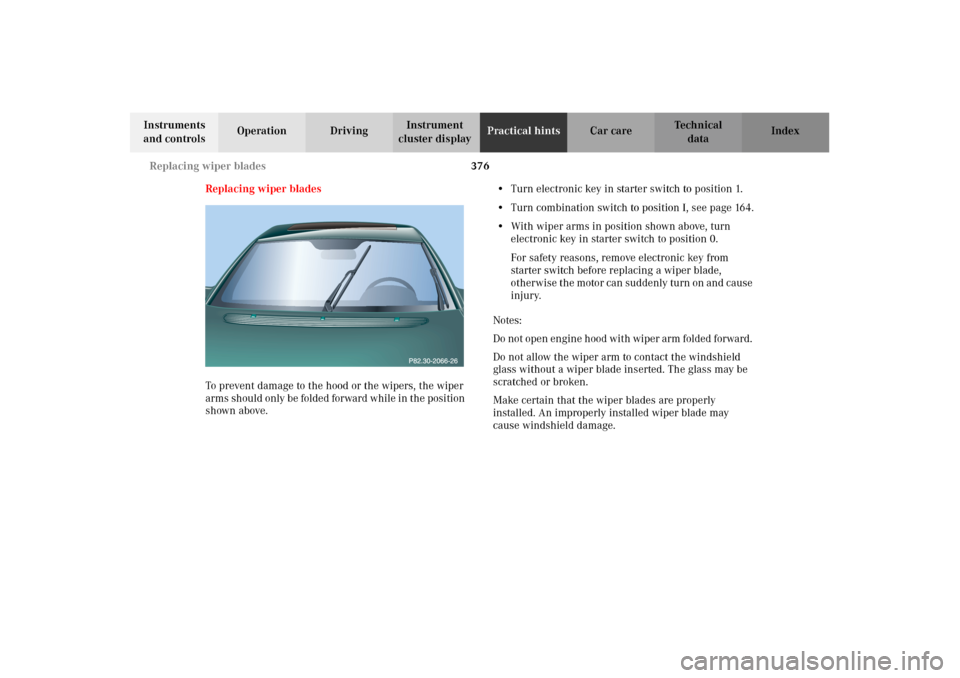
Replacing wiper blades
To prevent damage to the hood or the wipers, the wiper
arms should only be folde d forward while i n t he posi ti on
shown above.•Turn electronic key in starter switch to position 1.
•Turn combination switch to position I, see page 164.
•With wiper arms in position shown above, turn
electronic key in starter switch to position 0.
For safety reasons, remove electronic key from
starter switch before replacing a wiper blade,
otherwise the motor can suddenly turn on and cause
injury.
Notes:
Do not ope n en gin e hood wit h wip er arm folded forward .
Do not allow the wiper arm to contact the windshield
glass without a wiper blade inserted. The glass may be
scratched or broken.
Make certain that the wiper blades are properly
installed. An improperly installed wiper blade may
cause windshield damage.
J_OM_215.book Seite 376 Mittwoch, 30. Mai 2001 2:01 14
Page 380 of 430
377 Replacing wiper blades
Te ch n i c a l
data Instruments
and controlsOperation DrivingInstrument
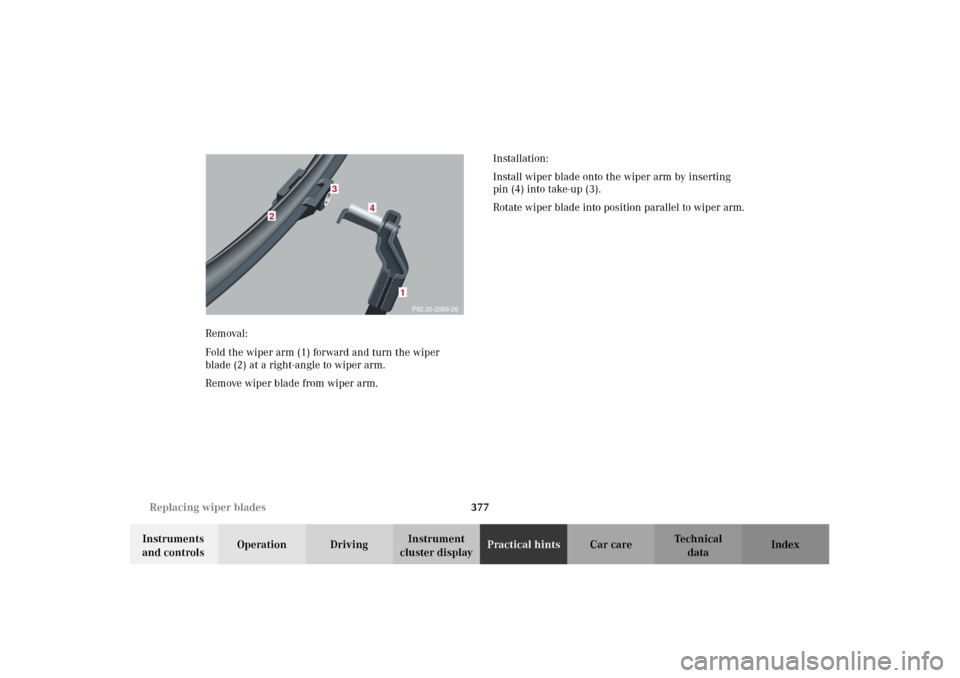
cluster displayPractical hintsCar care Index Removal:
Fold the wiper arm (1) forward and turn the wiper
blade (2) at a right-angle to wiper arm.
Remove wiper blade from wiper arm.Installation:
Install wiper blade onto the wiper arm by inserting
pin (4) into take-up (3).
Rotate wiper blade into position parallel to wiper arm.
P82.30-2089-26
4
1
2
3
J_OM_215.book Seite 377 Mittwoch, 30. Mai 2001 2:01 14
Trending: wheel bolt torque, oil level, ground clearance, warning light, oil additives, engine overheat, fuse
