wheel size MERCEDES-BENZ CLA 2019 Owners Manual
[x] Cancel search | Manufacturer: MERCEDES-BENZ, Model Year: 2019, Model line: CLA, Model: MERCEDES-BENZ CLA 2019Pages: 330, PDF Size: 23.57 MB
Page 22 of 330
Optional equipment weight (defi-
nition) ............................................ 310
PSI (pounds per square inch) (def-
inition) ...........................................310
Replacing ....................................... 310
Service life ..................................... 291
Sidewall (definition) ....................... 310
Speed rating (definition) ................ 309
Storing ...........................................311
Structure and characteristics
(definition) ..................................... 308
Summer tires ................................. 292
Temperature .................................. 305
TIN (Tire Identification Number)
(definition) ..................................... 310
Tire bead (definition) ......................310
Tire pressure (definition) ................ 310
Tire pressures (recommended) ...... 309
Tire size (data) ............................... 315
Tire size designation, load-bearing
capacity, speed rating .................... 305
Tire tread ....................................... 291
Tire tread (definition) ..................... 310
Total load limit (definition) ............. 310
Traction ......................................... 304
Traction (definition) ....................... 310
Tread wear..................................... 304
Uniform Tire Quality Grading
Standards ...................................... 304
Uniform Tire Quality Grading
Standards (definition) .................... 309
Wear indicator (definition) ............. 310
Wheel rim (definition) .................... 309
see Flat tire
Top Tether............................................ 57
Tow-starting
Emergency engine starting ............ 287
Important safety notes .................. 284
Installing the towing eye ................ 285
Removing the towing eye ............... 286
Towing
Permitted towing methods ............ 287
Towing a trailer
ESP®(Electronic Stability Pro-
gram) ............................................... 67
Towing away
Important safety guidelines ........... 284
Installing the towing eye ................ 285
Notes for 4MATIC vehicles ............ 287
Removing the towing eye ............... 286
Transporting the vehicle ................ 287
With both axles on the ground ....... 286
With the front axle raised ............... 286
Towing eye......................................... 274
Traffic reports
see also Digital Operator's Man-
ual .................................................. 231
Transmission
see Automatic transmission
Transmission position display
(DIRECT SELECT lever)...................... 131
Transporting the vehicle.................. 287
Trim pieces (cleaning instruc-
tions).................................................. 271
Trip computer (on-board com-
puter).................................................. 182
Trip odometer
Calling up ....................................... 182
Resetting (on-board computer) ...... 183
Trunk
Emergency release .......................... 82
Emergency release button ............... 82
Important safety notes .................... 78
Opening (automatically from out-
side) ................................................. 79
Opening (from outside the vehi-
cle, HANDS-FREE ACCESS) .............. 80
Opening automatically from
inside ............................................... 81
Opening/closing (manually from
outside) ............................................ 79
Trunk lid
Display message ............................ 217
see Tailgate
Turn signals
Display message ............................ 204
Replacing bulbs (front) ................... 107
Switching on/off........................... 102
Two-way radio
Frequencies ................................... 317
Installation ..................................... 317
Transmission output (maximum) .... 317
Type identification plate
see Vehicle identification plate
20Index
Page 23 of 330
U
Unlocking
Emergency unlocking .......................77
From inside the vehicle (central
unlocking button) ............................. 76
Upshift indicator (on-board com-
puter, Mercedes-AMG vehicles)....... 190
USB devices
Connecting to the Media Inter-
face ............................................... 238
V
Vanity mirror (in the sun visor)........ 246
Vehicle
Correct use ...................................... 28
Data acquisition ............................... 29
Display message............................ 215
Equipment ....................................... 25
Individual settings .......................... 188
Limited Warranty ............................. 29
Loading .......................................... 301
Locking (in an emergency) ............... 77
Locking (SmartKey).......................... 70
Lowering ........................................ 314
Maintenance .................................... 26
Parking for a long period ................ 145
Pulling away ................................... 126
Raising ........................................... 312
Reporting problems ......................... 28
Securing from rolling away ............ 312
Transporting .................................. 287
Unlocking (in an emergency) ........... 77
Unlocking (SmartKey)...................... 70
Vehicle data ................................... 325
Vehicle data
Roof load (maximum) ..................... 325
Vehicle dimensions........................... 325
Vehicle emergency locking................ 77
Vehicle identification number
see VIN
Vehicle identification plate.............. 318
Vehicle tool kit.................................. 274
Ventilation
Setting the vents ........................... 121
Video
Operating the DVD ......................... 185
see also Digital Operator's Man-
ual .................................................. 231
VIN
Seat ............................................... 319
Type plate ...................................... 318
W
Warning and indicator lamps
ABS ................................................ 222
Active Brake Assist ........................ 229
Brakes ........................................... 221
Check Engine ................................. 226
Coolant .......................................... 227
Distance warning ........................... 229
ESP®.............................................. 223
ESP®OFF ....................................... 224
Fuel tank ........................................ 226
Overview .......................................... 33
PASSENGER AIR BAG ...................... 41
Reserve fuel ................................... 226
Restraint system ............................ 226
Seat belt ........................................ 220
SPORT handling mode ................... 224
Tire pressure monitor .................... 230
Warranty.............................................. 25
Washer fluid
Display message ............................ 218
Weather display (COMAND)
see also Digital Operator's Man-
ual .................................................. 231
Wheel and tire combinations
Tires ............................................... 315
Wheel bolt tightening torque........... 314
Wheel chock...................................... 312
Wheels
Changing a wheel.......................... 310
Checking ........................................ 290
Cleaning ......................................... 268
Emergency spare wheel ................. 315
Important safety notes .................. 290
Information on driving .................... 290
Interchanging/changing ................ 310
Mounting a new wheel ................... 313
Removing a wheel.......................... 313
Storing ........................................... 311
Tightening torque ........................... 314
Wheel size/tire size ....................... 315
Index21
Page 277 of 330
XMake sure that the engine cannot be startedvia your smartphone (Ypage 124).
XMake sure that the passengers are not endan-gered as they do so. Make sure that no one isnear the danger area while a wheel is beingchanged. Anyone who is not directly assistingin the wheel change should, for example,stand behind the barrier.
XGet out of the vehicle. Pay attention to trafficconditions when doing so.
XClose the driver's door.
MOExtended tires (tires with run-flat
properties)
General notes
With MOExtended tires (tires with run flat char-acteristics), you can continue to drive your vehi-cle even if there is a total loss of pressure in oneor more tires. The affected tire must not showany clearly visible damage.
You can recognize a MOExtended tire by theMOExtended marking which appears on thesidewall of the tire. You will find this markingnext to the tire size designation, the load-bear-ing capacity and the speed index (Ypage 305).
MOExtended tires may be used only in conjunc-tion with an activated tire pressure loss warningsystem (Canada only) or tire pressure monitor(USA only).
If a pressure loss warning message appearsin the multifunction display:
Robserve the instructions in the display mes-sages (Ypage 213).
Rcheck the tire for damage
Rif driving on, observe the following notes
The driving distance possible in run-flat mode isapproximately 50 miles (80 km) when the vehi-cle is partially laden. When the vehicle is fullyladen it is approximately 19 miles (30 km).
In addition to the vehicle load, the driving dis-tance possible depends upon:
Rvehicle speed
Rroad condition
Routside temperature
The driving distance possible in run-flat modemay be reduced by extreme driving conditionsor maneuvers, or it can be increased through amoderate style of driving.
The driving distance possible in run-flat mode iscounted from the moment the tire pressure losswarning appears in the multifunction display.
You must not exceed a maximum speed of50 mph (80 km/h).
When replacing one or all tires, please observethe following specifications for your vehicle'stires:
Rsize
Rtype and
Rthe "MOExtended" marking
If a tire has gone flat and cannot be replacedwith a MOExtended tire, a standard tire may beused as a temporary measure. Make sure thatyou use the proper size and type (summer orwinter tire).
Vehicles equipped with MOExtended tires arenot equipped with a TIREFIT kit at the factory. Itis therefore recommended that you additionallyequip your vehicle with a TIREFIT kit if you mounttires that do not feature run-flat properties, e.g.winter tires. A TIREFIT kit may be obtained froma qualified specialist workshop.
Important safety notes
GWARNING
When driving in emergency mode, the driving
characteristics deteriorate, e.g. when corner-
ing, accelerating quickly and when braking.
There is a risk of an accident.
Do not exceed the stated maximum speed.
Avoid abrupt steering and driving maneuvers,
and driving over obstacles (curbs, potholes,
off-road). This applies in particular to a laden
vehicle.
Stop driving in emergency mode if:
Ryou hear banging noises.
Rthe vehicle starts to shake.
Ryou see smoke and smell rubber.
RESP®is intervening constantly.
Rthere are tears in the sidewalls of the tire.
After driving in emergency mode, have the
wheel rims checked at a qualified specialist
workshop with regard to their further use. The
defective tire must be replaced in every case.
Flat tire275
Breakdown assistance
Z
Page 292 of 330
Important safety notes
GWARNING
If wheels and tires of the wrong size are used,
the wheel brakes or suspension components
may be damaged. There is a risk of an acci-
dent.
Always replace wheels and tires with those
that fulfill the specifications of the original
part.
When replacing wheels, make sure to use the
correct:
Rdesignation
Rmodel
When replacing tires, make sure to use the
correct:
Rdesignation
Rmanufacturer
Rmodel
GWARNING
A flat tire severely impairs the driving, steer-
ing and braking characteristics of the vehicle.
There is a risk of accident.
Tires without run-flat characteristics:
Rdo not drive with a flat tire.
Rimmediately replace the flat tire with your
emergency spare wheel or spare wheel, or
consult a qualified specialist workshop.
Tires with run-flat characteristics:
Rpay attention to the information and warn-
ing notices on MOExtended tires (tires with
run-flat characteristics).
Accessories that are not approved for your vehi-cle by Mercedes-Benz or are not being used cor-rectly can impair the operating safety.
Before purchasing and using non-approvedaccessories, visit a qualified specialist work-shop and inquire about:
Rsuitability
Rlegal stipulations
Rfactory recommendations
Further information regarding wheels and tirescan be found under "Wheel/tire combinations"(Ypage 315).
You can ask for information regarding permittedwheel/tire combinations at an authorizedMercedes-Benz Center.
Information on tire pressure can be found:
Ron the Tire and Loading Information placardon the B-pillar on the driver's side(Ypage 301)
Rin the tire pressure table in the fuel filler flap(Ypage 141)
Runder "Tire pressure" (Ypage 293)
Operation
Information on driving
Check the tire pressure when the vehicle isheavily laden and adjust prior to a trip.
While driving, pay attention to vibrations, noisesand unusual handling characteristics, e.g. pull-ing to one side. This may indicate that thewheels or tires are damaged. If you suspect thata tire is defective, reduce your speed immedi-ately. Stop the vehicle as soon as possible tocheck the wheels and tires for damage. Hiddentire damage could also be causing the unusualhandling characteristics. If you find no signs ofdamage, have the tires and wheels checked at aqualified specialist workshop.
When parking your vehicle, make sure that thetires do not get deformed by the curb or otherobstacles. If they cannot be avoided, drive overobstacles such as curbs slowly and at an obtuseangle. Otherwise, you may damage the wheelsor tires.
Regular checking of wheels and tires
GWARNING
Damaged tires can cause tire inflation pres-
sure loss. As a result, you could lose control of
your vehicle. There is a risk of accident.
Check the tires regularly for signs of damage
and replace any damaged tires immediately.
290Operation
Wheels and ti res
Page 294 of 330
with run-flat characteristics)" section(Ypage 275).
ROnly mount tires of the correct size onto thewheels.
RBreak in new tires at moderate speeds for thefirst 60 miles(100 km). The new tires onlyreach their full performance after this dis-tance.
RDo not drive with tires which have too littletread depth, as this significantly reduces thetraction on wet roads (hydroplaning).
RReplace the tires after six years at the latest,regardless of wear.
Observe the notes on the emergency sparewheel (Ypage 315).
MOExtended tires (tires with run-flat
properties)
With MOExtended tires (tires with run flat char-acteristics), you can continue to drive your vehi-cle even if there is a total loss of pressure in oneor more tires.
MOExtended tires may only be used in conjunc-tion with an activated tire pressure loss warningsystem (Canada only) or tire pressure monitor(USA only) and only on wheels specifically tes-ted by Mercedes-Benz.
Notes on driving with MOExtended tires with aflat tire (Ypage 275).
Vehicles equipped with MOExtended tires arenot equipped with a TIREFIT kit at the factory. Itis therefore recommended that you additionallyequip your vehicle with a TIREFIT kit if you mounttires that do not feature run-flat properties, e.g.winter tires. A TIREFIT kit may be obtained froma qualified specialist workshop.
Winter operation
General notes
Have your vehicle winter-proofed at a qualifiedspecialist workshop at the onset of winter.
Observe the notes in the "Changing a wheel"section (Ypage 310).
Driving with summer tires
At temperatures below 45 ‡(+7 †), summertires lose elasticity and therefore traction andbraking power. Change the tires on your vehicleto M+S tires. Using summer tires at very coldtemperatures could cause cracks to form,thereby damaging the tires permanently.Mercedes-Benz cannot accept responsibility forthis type of damage.
GWARNING
Damaged tires can cause tire inflation pres-
sure loss. As a result, you could lose control of
your vehicle. There is a risk of accident.
Check the tires regularly for signs of damage
and replace any damaged tires immediately.
M+S tires
GWARNING
M+S tires with a tire tread depth of less than
�
Page 295 of 330
When you have mounted the M+S tires:
XCheck the tire pressures (Ypage 293).
XRestart the tire pressure monitor (USA only)(Ypage 300).
XRestart the tire pressure loss warning system(Canada) (Ypage 297)
Snow chains
GWARNING
If snow chains are mounted on the rear
wheels, the snow chains could cause abrasion
to the vehicle body or to chassis components.
This could cause damage to the vehicle or the
tires. There is a risk of an accident.
To avoid hazardous situations:
Rnever mount snow chains on the rear
wheels
Ronly mount snow chains in pairs on the
front wheels.
!On some tire sizes there is not enough spacefor snow chains. To avoid damage to the vehi-cle or tires, observe the "Wheel and tire com-binations" section under "Tires and wheels".
For safety reasons, Mercedes-Benz recom-mends that you only use snow chains that havebeen specially approved for your vehicle byMercedes-Benz, or are of a correspondingstandard of quality. For more information,please contact a qualified specialist workshop.
If you intend to mount snow chains, please bearthe following points in mind:
RSnow chains may not be mounted on allwheel/tire combinations. Permissible wheel-tire combinations (Ypage 315).
ROnly use snow chains when driving on roadscompletely covered by snow. Remove thesnow chains as soon as possible when youcome to a road that is not snow-covered.
RLocal regulations may restrict the use of snowchains. Observe the appropriate regulations ifyou wish to mount snow chains.
RDo not exceed the maximum permissiblespeed of 30mph (50 km/h).
RIf snow chains are installed, you cannot useActive Parking Assist (Ypage 167).
You may wish to deactivate ESP®when pullingaway with snow chains installed . This allows thewheels to spin in a controlled manner, achievingincreased propulsive force (cutting action).
RDeactivate ESP®(all vehicles exceptMercedes-AMG vehicles) (Ypage 65)
RDeactivate ESP®(Mercedes-AMG vehicles)(Ypage 66)
Information about driving with an emergencyspare wheel (Ypage 315).
Tire pressure
Tire pressure specifications
Important safety notes
GWARNING
Underinflated or overinflated tires pose the
following risks:
Rthe tires may burst, especially as the load
and vehicle speed increase.
Rthe tires may wear excessively and/or
unevenly, which may greatly impair tire
traction.
Rthe driving characteristics, as well as steer-
ing and braking, may be greatly impaired.
There is a risk of an accident.
Follow recommended tire inflation pressures
and check the pressure of all the tires includ-
ing the spare wheel:
Rmonthly, at least
Rif the load changes
Rbefore beginning a long journey
Runder different operating conditions, e.g.
off-road driving
If necessary, correct the tire pressure.
iThe data on the Tire and Loading Informa-tion placard and tire pressure table shownhere are examples. Tire pressure specifica-tions are vehicle-specific and may deviatefrom the data shown here. The tire pressurespecifications that are valid for your vehiclecan be found on the Tire and Loading Infor-mation placard and tire pressure table on thevehicle.
Tire pressure293
Wheels and tires
Z
Page 296 of 330
General notes
The recommended tire pressures for the tiresmounted at the factory can be found on thelabels described here.
Operation with an emergency spare wheel:information on operation with an emergencyspare wheel can be found in the general notes inthe "Emergency spare wheel" section(Ypage 315).
Further information on tire pressures can beobtained at a qualified specialist workshop.
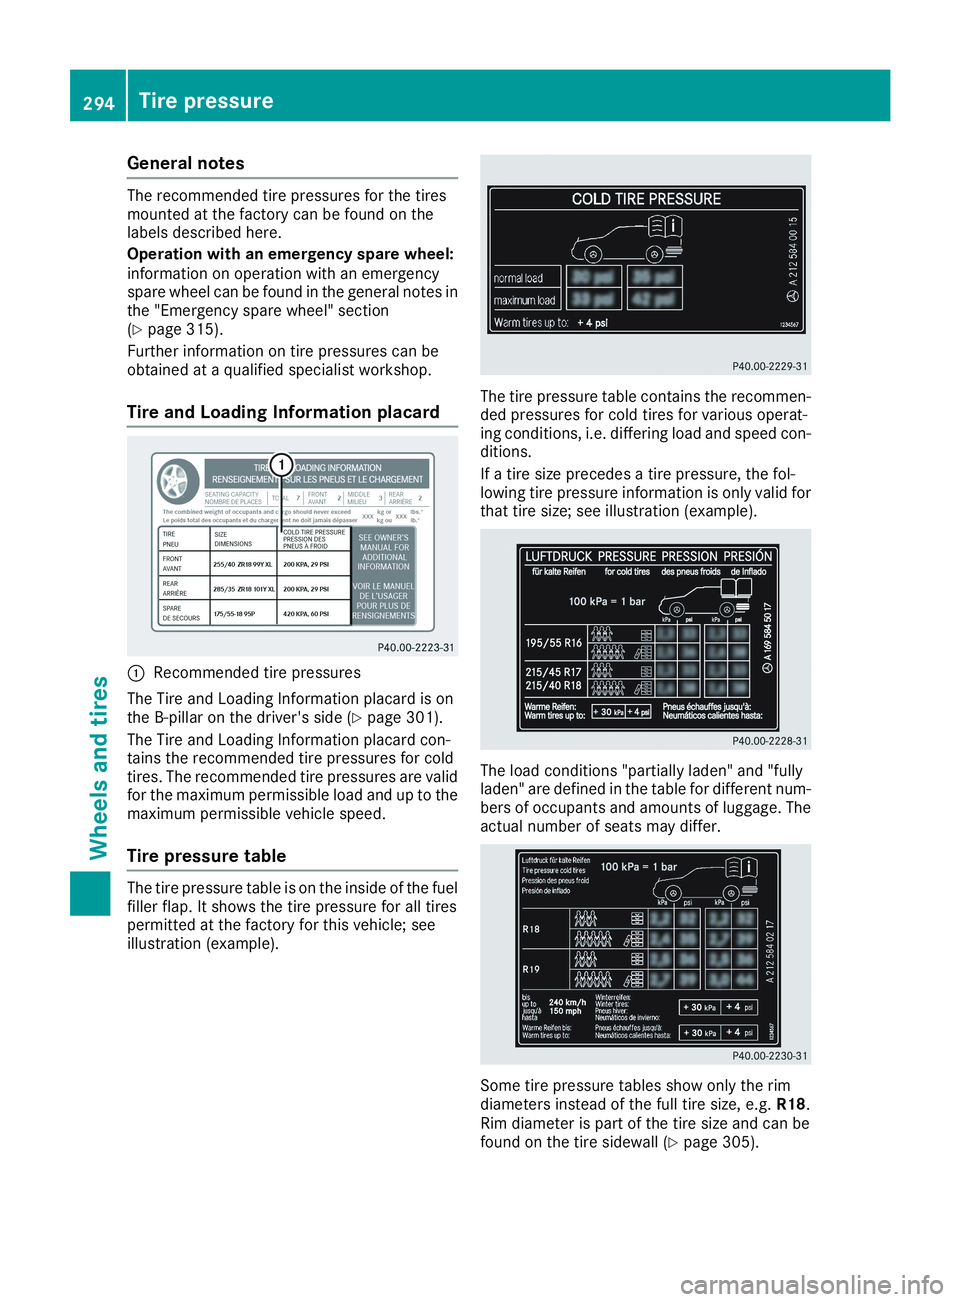
Tire and Loading Information placard
�CRecommended tire pressures
The Tire and Loading Information placard is onthe B-pillar on the driver's side (Ypage 301).
The Tire and Loading Information placard con-tains the recommended tire pressures for coldtires. The recommended tire pressures are validfor the maximum permissible load and up to themaximum permissible vehicle speed.
Tire pressure table
The tire pressure table is on the inside of the fuelfiller flap. It shows the tire pressure for all tirespermitted at the factory for this vehicle; seeillustration (example).
The tire pressure table contains the recommen-ded pressures for cold tires for various operat-ing conditions, i.e. differing load and speed con-ditions.
If a tire size precedes a tire pressure, the fol-lowing tire pressure information is only valid forthat tire size; see illustration (example).
The load conditions "partially laden" and "fullyladen" are defined in the table for different num-bers of occupants and amounts of luggage. Theactual number of seats may differ.
Some tire pressure tables show only the rimdiameters instead of the full tire size, e.g.R18.Rim diameter is part of the tire size and can befound on the tire sidewall (Ypage 305).
294Tire pressure
Wheels and tires
Page 300 of 330
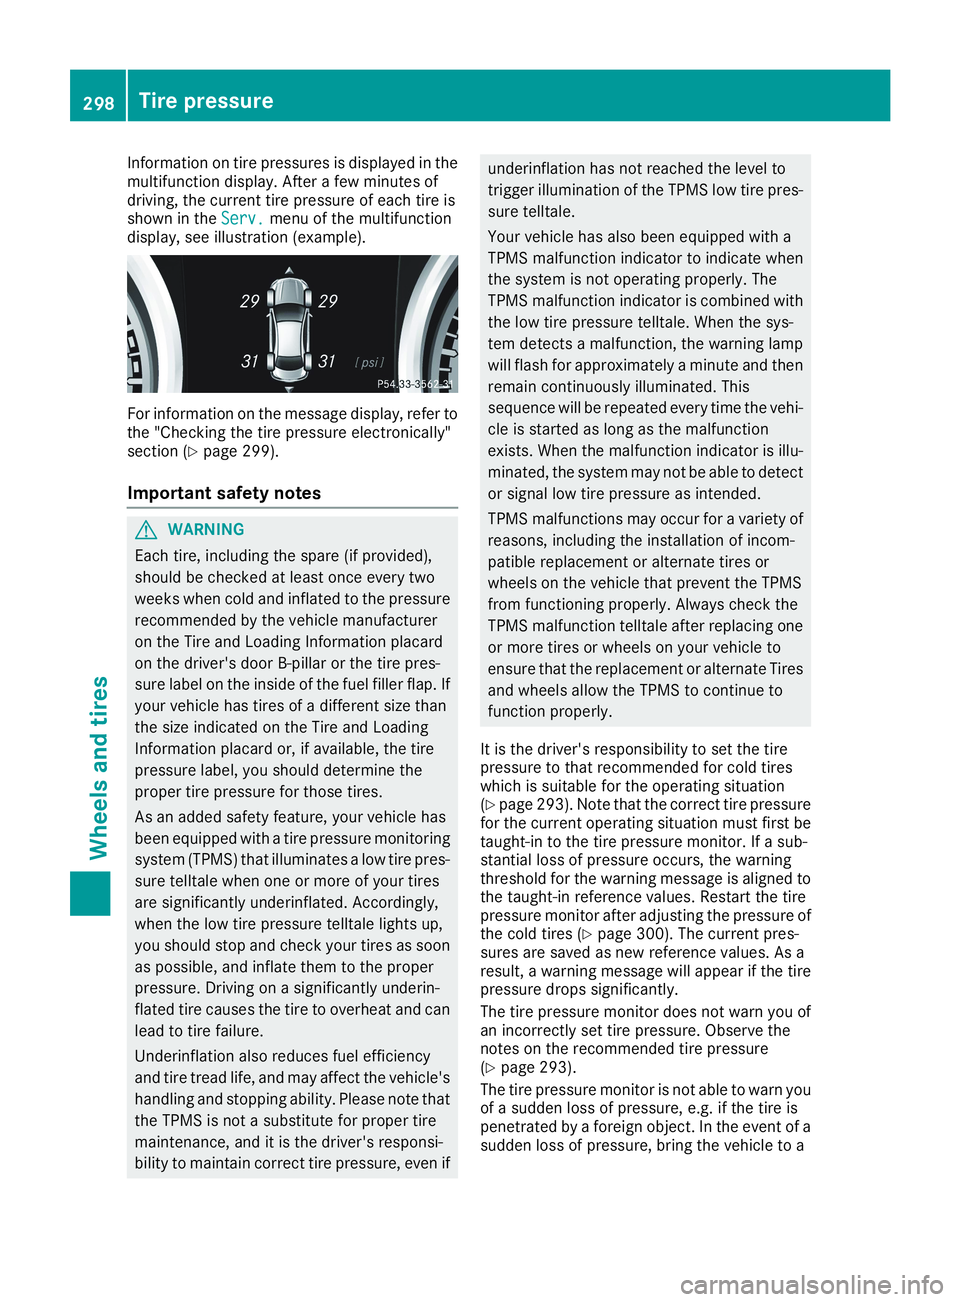
Information on tire pressures is displayed in themultifunction display. After a few minutes ofdriving, the current tire pressure of each tire isshown in theServ.Serv.menu of the multifunctiondisplay, see illustration (example).
For information on the message display, refer tothe "Checking the tire pressure electronically"section (Ypage 299).
Important safety notes
GWARNING
Each tire, including the spare (if provided),
should be checked at least once every two
weeks when cold and inflated to the pressure
recommended by the vehicle manufacturer
on the Tire and Loading Information placard
on the driver's door B-pillar or the tire pres-
sure label on the inside of the fuel filler flap. If
your vehicle has tires of a different size than
the size indicated on the Tire and Loading
Information placard or, if available, the tire
pressure label, you should determine the
proper tire pressure for those tires.
As an added safety feature, your vehicle has
been equipped with a tire pressure monitoring
system (TPMS) that illuminates a low tire pres-
sure telltale when one or more of your tires
are significantly underinflated. Accordingly,
when the low tire pressure telltale lights up,
you should stop and check your tires as soon
as possible, and inflate them to the proper
pressure. Driving on a significantly underin-
flated tire causes the tire to overheat and can
lead to tire failure.
Underinflation also reduces fuel efficiency
and tire tread life, and may affect the vehicle's
handling and stopping ability. Please note that
the TPMS is not a substitute for proper tire
maintenance, and it is the driver's responsi-
bility to maintain correct tire pressure, even if
underinflation has not reached the level to
trigger illumination of the TPMS low tire pres-
sure telltale.
Your vehicle has also been equipped with a
TPMS malfunction indicator to indicate when
the system is not operating properly. The
TPMS malfunction indicator is combined with
the low tire pressure telltale. When the sys-
tem detects a malfunction, the warning lamp
will flash for approximately a minute and then
remain continuously illuminated. This
sequence will be repeated every time the vehi-
cle is started as long as the malfunction
exists. When the malfunction indicator is illu-
minated, the system may not be able to detect
or signal low tire pressure as intended.
TPMS malfunctions may occur for a variety of
reasons, including the installation of incom-
patible replacement or alternate tires or
wheels on the vehicle that prevent the TPMS
from functioning properly. Always check the
TPMS malfunction telltale after replacing one
or more tires or wheels on your vehicle to
ensure that the replacement or alternate Tires
and wheels allow the TPMS to continue to
function properly.
It is the driver's responsibility to set the tirepressure to that recommended for cold tireswhich is suitable for the operating situation(Ypage 293). Note that the correct tire pressurefor the current operating situation must first betaught-in to the tire pressure monitor. If a sub-stantial loss of pressure occurs, the warningthreshold for the warning message is aligned tothe taught-in reference values. Restart the tirepressure monitor after adjusting the pressure ofthe cold tires (Ypage 300). The current pres-sures are saved as new reference values. As aresult, a warning message will appear if the tirepressure drops significantly.
The tire pressure monitor does not warn you ofan incorrectly set tire pressure. Observe thenotes on the recommended tire pressure(Ypage 293).
The tire pressure monitor is not able to warn youof a sudden loss of pressure, e.g. if the tire ispenetrated by a foreign object. In the event of asudden loss of pressure, bring the vehicle to a
298Tire pressure
Wheels and tires
Page 303 of 330
CountryRadio type approval number
ne doit pas produire de brouil-lage, et (2) L'autisatuer de l'ap-pareil doit accepter tout brouil-lage radioelectrique subi, memesi le brouillage est susceptibled'en compromettre le fonc-tionnement. WARNING: Changesor modifications not expressivelyapproved by the party responsi-ble for compliance could void theusers authority to operate theequipment. The term "IC:" beforethe radio certification numberonly signifies Canada technicalspecifications were met.
CanadaIC: 2546A-MW2433A
IC:2546A-GG4 This device com-plies with part 15 of the FCCrules and with license exemptRSS standards of Industry Can-ada. Operation is subject to thefollowing conditions. (1) Thisdevice may not cause harmfulinterference, and (2) This devicemust accept any interferencereceived, including interferencethat may cause undesired oper-ation. Le present appareil estconforme d'industrie Canadaapplicables aux appareils radioexempts de license. L'exploita-tion est authorisee aux deux con-ditions suivantes. (1). L'appareilne doit pas produire de brouil-lage, et (2) L'autisateur de l'ap-pareil doit accepter tout brouil-lage radioelectrique subi, memesi le brouillage est susceptibled'en compromettre le fonc-tionnement. WARNING: Changesor modifications not expressivelyapproved by the party responsi-ble for compliance could void theusers authority to operate theequipment. The term "IC:" beforethe radio certification numberonly signifies Canada technicalspecifications were met.
IC: 2546A-MC34MA4
Loading the vehicle
Instruction labels for tires and loads
GWARNING
Overloaded tires can overheat, causing a
blowout. Overloaded tires can also impair the
steering and driving characteristics and lead
to brake failure. There is a risk of accident.
Observe the load rating of the tires. The load
rating must be at least half of the GAWR of
your vehicle. Never overload the tires by
exceeding the maximum load.
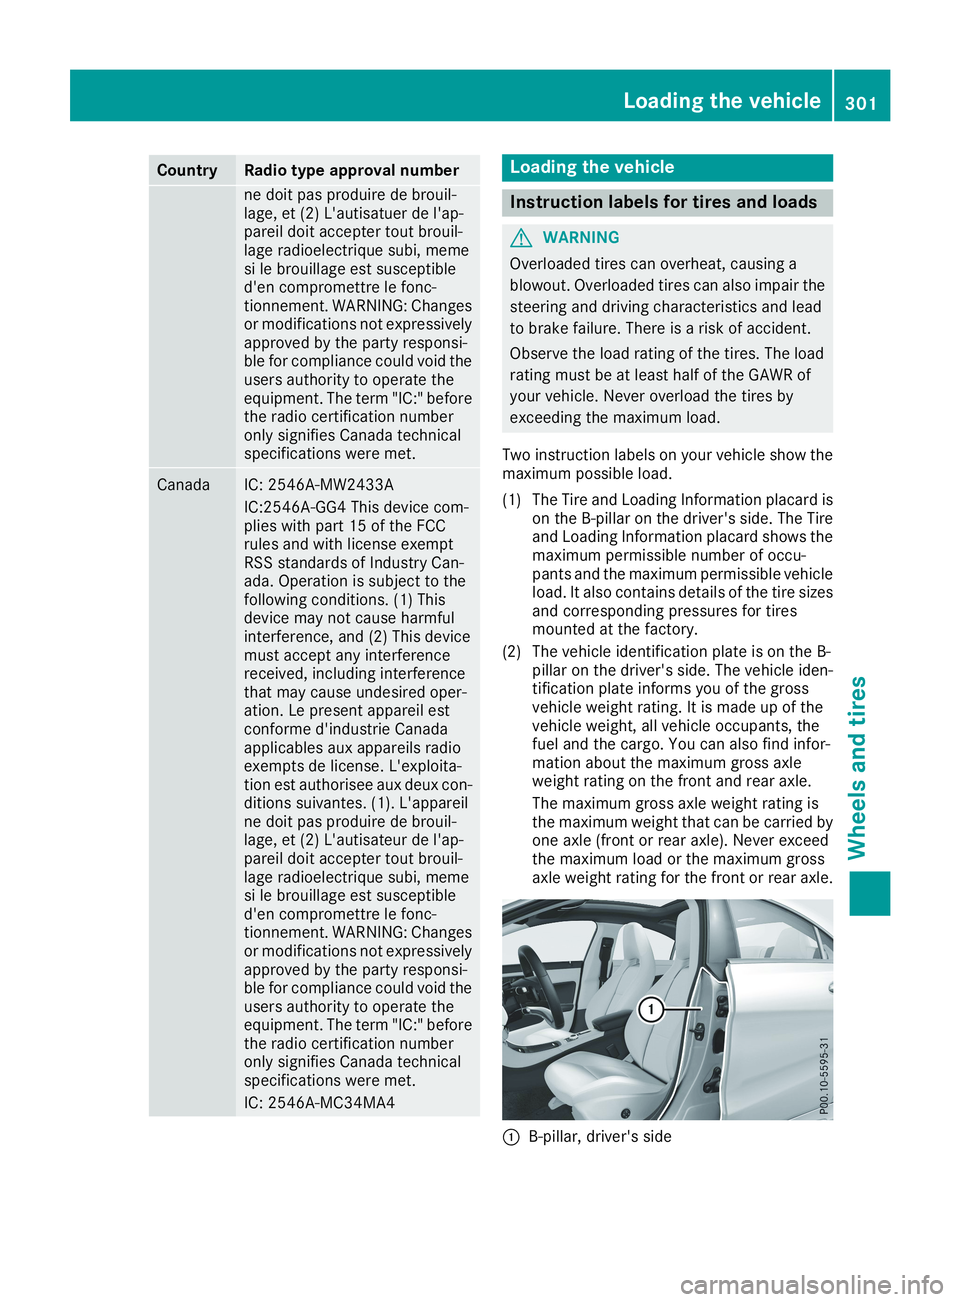
Two instruction labels on your vehicle show themaximum possible load.
(1) The Tire and Loading Information placard ison the B-pillar on the driver's side. The Tireand Loading Information placard shows themaximum permissible number of occu-pants and the maximum permissible vehicleload. It also contains details of the tire sizesand corresponding pressures for tiresmounted at the factory.
(2) The vehicle identification plate is on the B-pillar on the driver's side. The vehicle iden-tification plate informs you of the grossvehicle weight rating. It is made up of thevehicle weight, all vehicle occupants, thefuel and the cargo. You can also find infor-mation about the maximum gross axleweight rating on the front and rear axle.
The maximum gross axle weight rating isthe maximum weight that can be carried byone axle (front or rear axle). Never exceedthe maximum load or the maximum grossaxle weight rating for the front or rear axle.
�CB-pillar, driver's side
Loading the vehicle301
Wheels and tires
Z
Page 304 of 330
Maximum permissible gross vehicle
weight rating
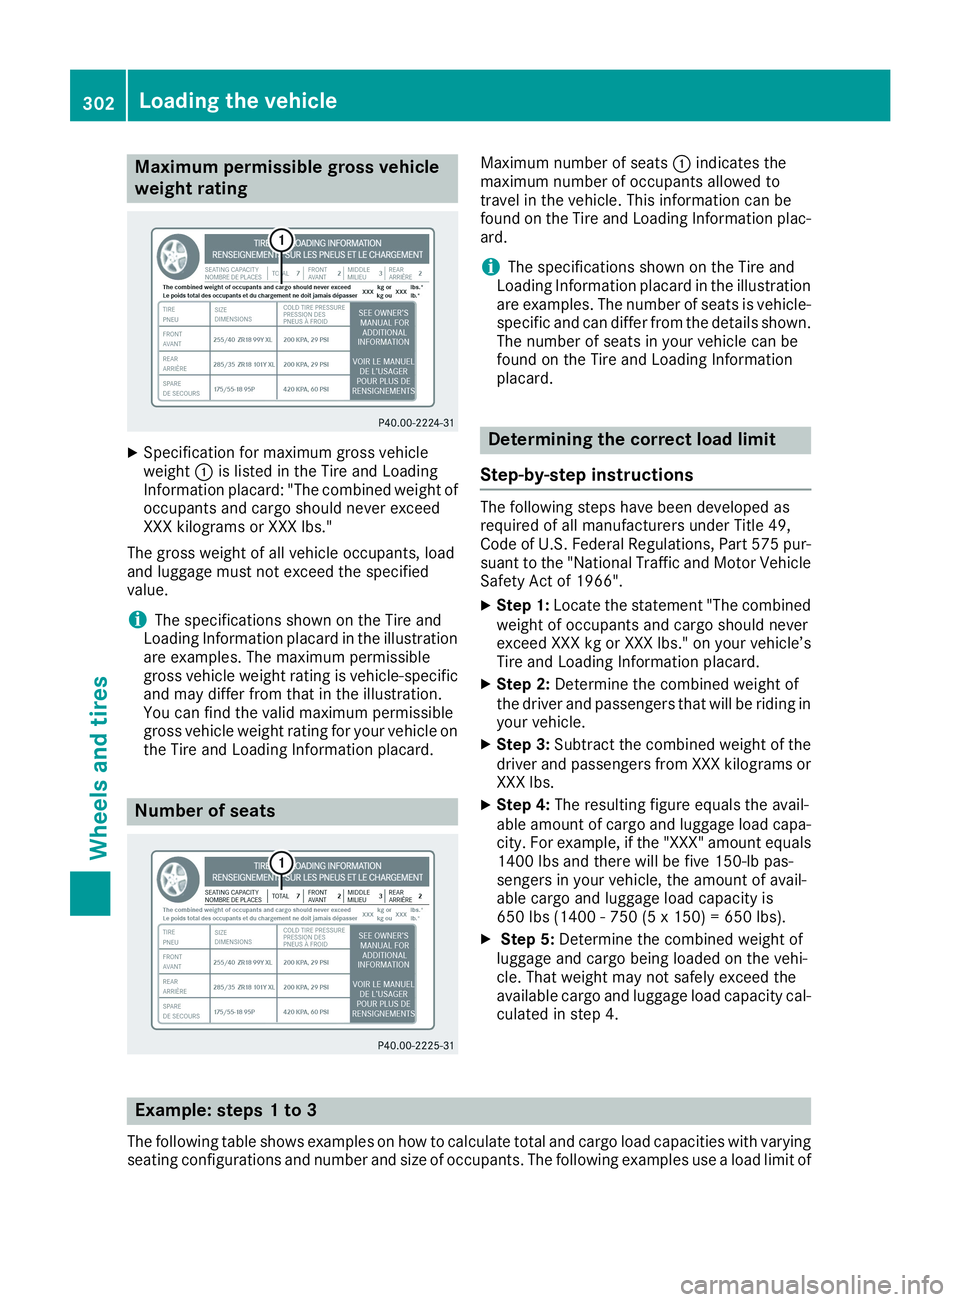
XSpecification for maximum gross vehicleweight�Cis listed in the Tire and LoadingInformation placard: "The combined weight ofoccupants and cargo should never exceedXXX kilograms or XXX lbs."
The gross weight of all vehicle occupants, loadand luggage must not exceed the specifiedvalue.
iThe specifications shown on the Tire andLoading Information placard in the illustrationare examples. The maximum permissiblegross vehicle weight rating is vehicle-specificand may differ from that in the illustration.You can find the valid maximum permissiblegross vehicle weight rating for your vehicle onthe Tire and Loading Information placard.
Number of seats
Maximum number of seats�Cindicates themaximum number of occupants allowed totravel in the vehicle. This information can befound on the Tire and Loading Information plac-ard.
iThe specifications shown on the Tire andLoading Information placard in the illustrationare examples. The number of seats is vehicle-specific and can differ from the details shown.The number of seats in your vehicle can befound on the Tire and Loading Informationplacard.
Determining the correct load limit
Step-by-step instructions
The following steps have been developed asrequired of all manufacturers under Title 49,Code of U.S. Federal Regulations, Part 575 pur-suant to the "National Traffic and Motor VehicleSafety Act of 1966".
XStep 1:Locate the statement "The combinedweight of occupants and cargo should neverexceed XXX kg or XXX lbs." on your vehicle’sTire and Loading Information placard.
XStep 2:Determine the combined weight ofthe driver and passengers that will be riding inyour vehicle.
XStep 3:Subtract the combined weight of thedriver and passengers from XXX kilograms orXXX lbs.
XStep 4:The resulting figure equals the avail-able amount of cargo and luggage load capa-city. For example, if the "XXX" amount equals1400 lbs and there will be five 150-lb pas-sengers in your vehicle, the amount of avail-able cargo and luggage load capacity is650 lbs (1400 - 750 (5 x 150) = 650 lbs).
XStep 5:Determine the combined weight ofluggage and cargo being loaded on the vehi-cle. That weight may not safely exceed theavailable cargo and luggage load capacity cal-culated in step 4.
Example: steps 1 to 3
The following table shows examples on how to calculate total and cargo load capacities with varyingseating configurations and number and size of occupants. The following examples use a load limit of
302Loading the vehicle
Wheels and tires