instrument cluster MERCEDES-BENZ CLA-Class 2016 C117 Service Manual
[x] Cancel search | Manufacturer: MERCEDES-BENZ, Model Year: 2016, Model line: CLA-Class, Model: MERCEDES-BENZ CLA-Class 2016 C117Pages: 374, PDF Size: 8.19 MB
Page 267 of 374
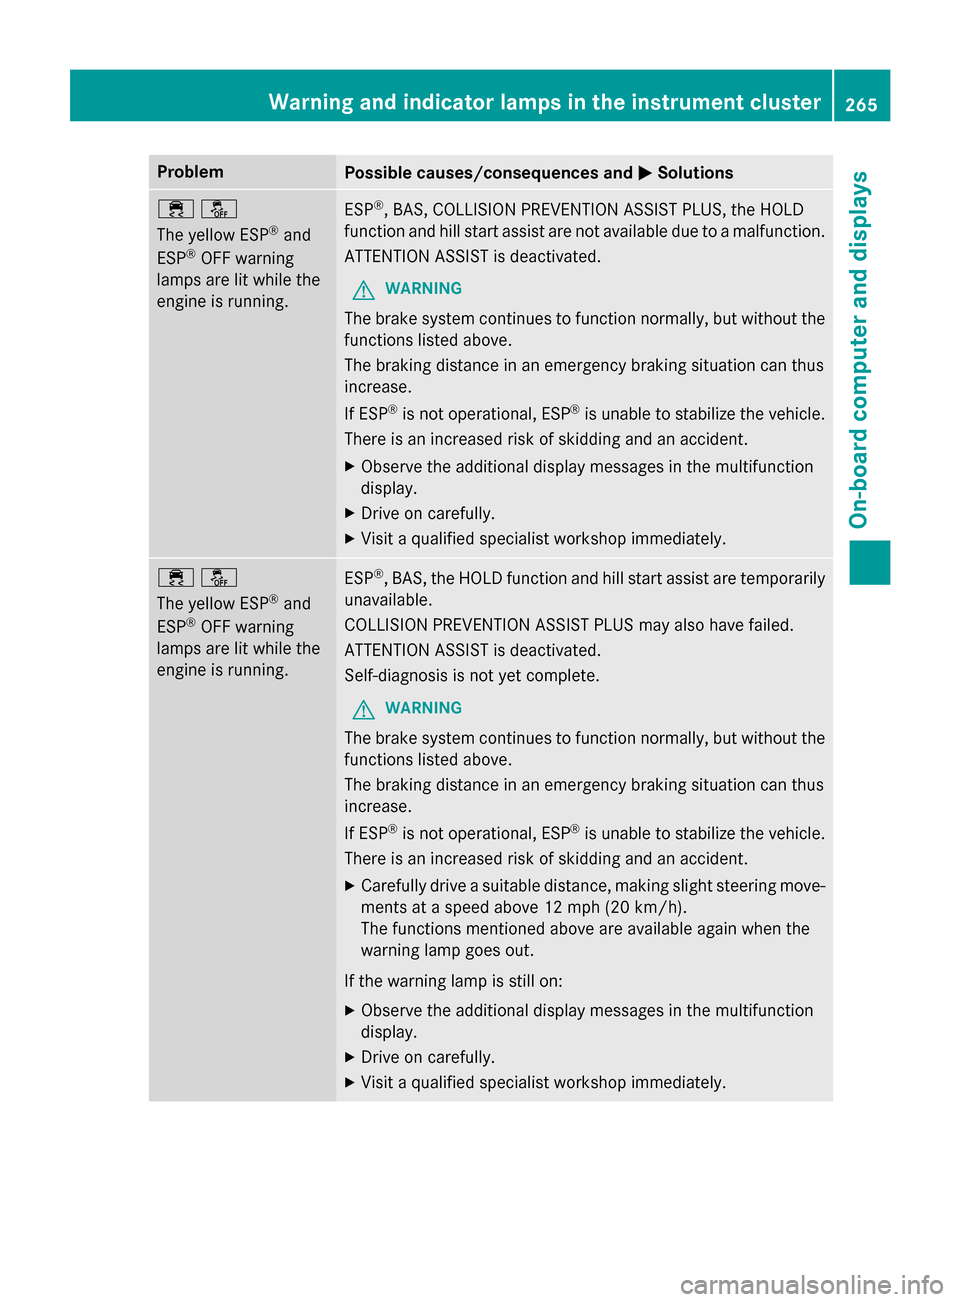
ProblemPossible causes/consequences andMSolutions
֌
The yellow ESP
®and
ESP®OFF warning
lamps are lit while the
engine is running.
ESP®, BAS, COLLISION PREVENTION ASSIST PLUS, the HOLD
function and hill start assist are not available due to a malfunction.
ATTENTION ASSIST is deactivated.
GWARNING
The brake system continues to function normally, but without the
functions listed above.
The braking distance in an emergency braking situation can thus
increase.
If ESP
®is not operational, ESP®is unable to stabilize the vehicle.
There is an increased risk of skidding and an accident.
XObserve the additional display messages in the multifunction
display.
XDrive on carefully.
XVisit a qualified specialist workshop immediately.
֌
The yellow ESP
®and
ESP®OFF warning
lamps are lit while the
engine is running.
ESP®, BAS, the HOLD function and hill start assist are temporarily
unavailable.
COLLISION PREVENTION ASSIST PLUS may also have failed.
ATTENTION ASSIST is deactivated.
Self-diagnosis is not yet complete.
GWARNING
The brake system continues to function normally, but without the
functions listed above.
The braking distance in an emergency braking situation can thus
increase.
If ESP
®is not operational, ESP®is unable to stabilize the vehicle.
There is an increased risk of skidding and an accident.
XCarefully drive a suitable distance, making slight steering move-
ments at a speed above 12 mph (20 km/h).
The functions mentioned above are available again when the
warning lamp goes out.
If the warning lamp is still on:
XObserve the additional display messages in the multifunction
display.
XDrive on carefully.
XVisit a qualified specialist workshop immediately.
Warning and indicator lamps in the instrument cluster265
On-board computer and displays
Z
Page 268 of 374
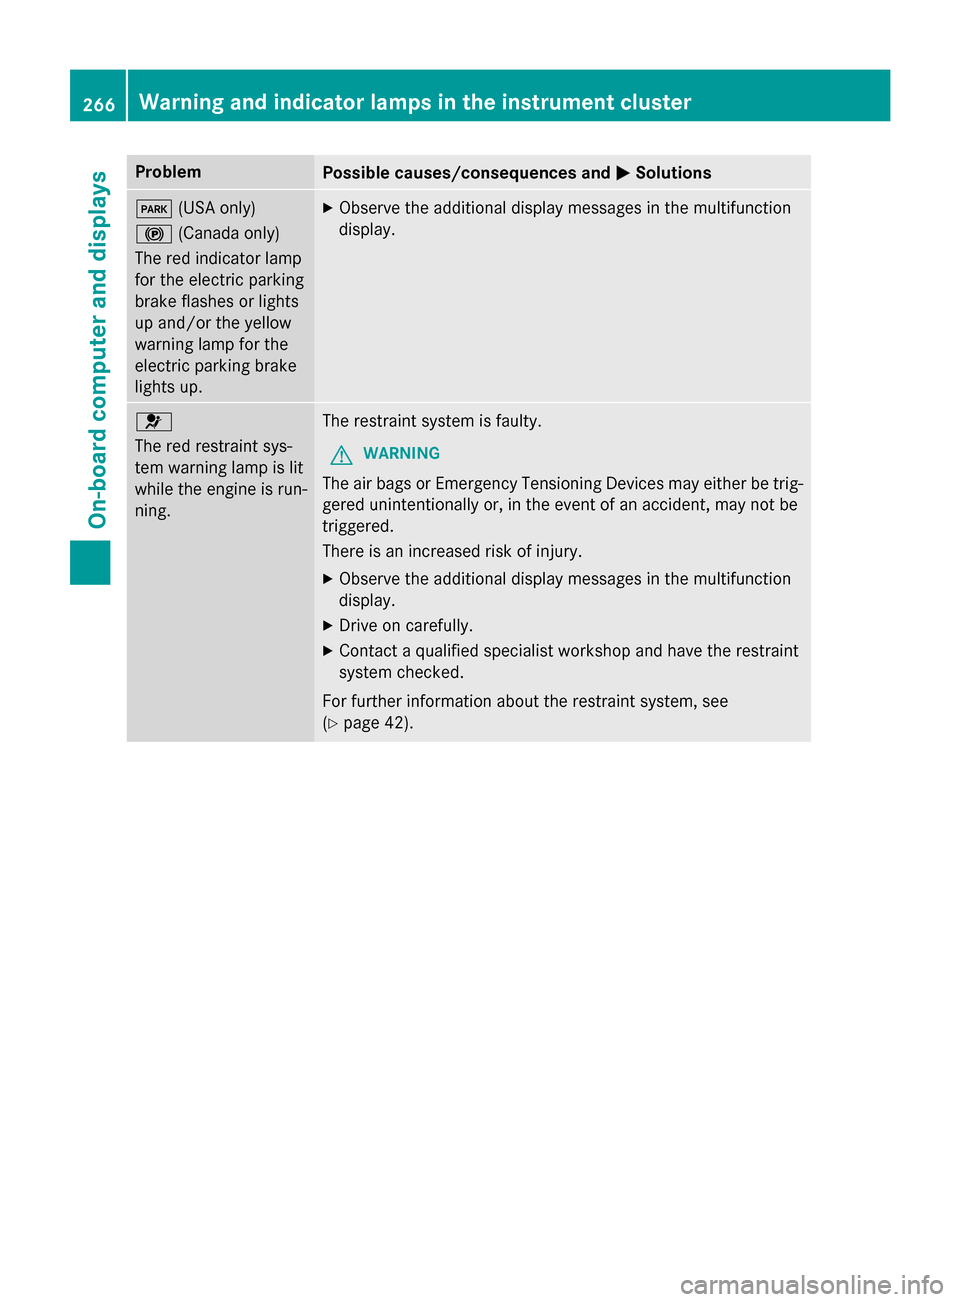
ProblemPossible causes/consequences andMSolutions
F(USA only)
! (Canada only)
The red indicator lamp
for the electric parking
brake flashes or lights
up and/or the yellow
warning lamp for the
electric parking brake
lights up.XObserve the additional display messages in the multifunction
display.
6
The red restraint sys-
tem warning lamp is lit
while the engine is run-
ning.The restraint system is faulty.
GWARNING
The air bags or Emergency Tensioning Devices may either be trig-
gered unintentionally or, in the event of an accident, may not be
triggered.
There is an increased risk of injury.
XObserve the additional display messages in the multifunction
display.
XDrive on carefully.
XContact a qualified specialist workshop and have the restraint
system checked.
For further information about the restraint system, see
(
Ypage 42).
266Warning and indicator lamps in the instrument cluster
On-board computer and displays
Page 269 of 374
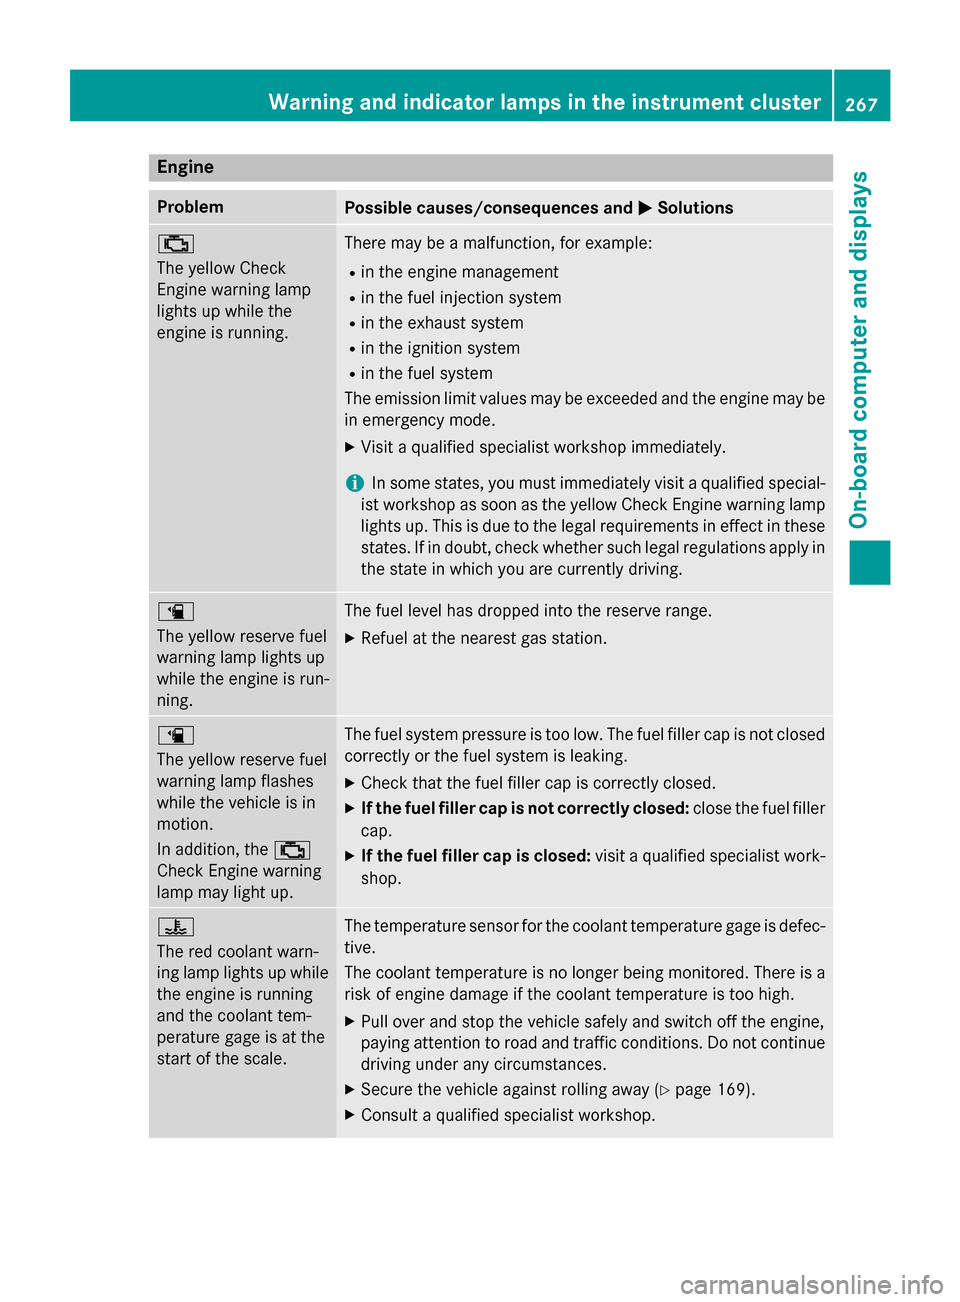
Engine
ProblemPossible causes/consequences andMSolutions
;
The yellow Check
Engine warning lamp
lights up while the
engine is running.There may be a malfunction, for example:
Rin the engine management
Rin the fuel injection system
Rin the exhaust system
Rin the ignition system
Rin the fuel system
The emission limit values may be exceeded and the engine may be
in emergency mode.
XVisit a qualified specialist workshop immediately.
iIn some states, you must immediately visit a qualified special-
ist workshop as soon as the yellow Check Engine warning lamp
lights up. This is due to the legal requirements in effect in these
states. If in doubt, check whether such legal regulations apply in the state in which you are currently driving.
æ
The yellow reserve fuel
warning lamp lights up
while the engine is run-
ning.The fuel level has dropped into the reserve range.
XRefuel at the nearest gas station.
æ
The yellow reserve fuel
warning lamp flashes
while the vehicle is in
motion.
In addition, the ;
Check Engine warning
lamp may light up.The fuel system pressure is too low. The fuel filler cap is not closed
correctly or the fuel system is leaking.
XCheck that the fuel filler cap is correctly closed.
XIf the fuel filler cap is not correctly closed: close the fuel filler
cap.
XIf the fuel filler cap is closed: visit a qualified specialist work-
shop.
?
The red coolant warn-
ing lamp lights up while
the engine is running
and the coolant tem-
perature gage is at the
start of the scale.The temperature sensor for the coolant temperature gage is defec-
tive.
The coolant temperature is no longer being monitored. There is a
risk of engine damage if the coolant temperature is too high.
XPull over and stop the vehicle safely and switch off the engine,
paying attention to road and traffic conditions. Do not continue
driving under any circumstances.
XSecure the vehicle against rolling away (Ypage 169).
XConsult a qualified specialist workshop.
Warning and indicator lamps in the instrument cluster267
On-board computer and displays
Z
Page 270 of 374
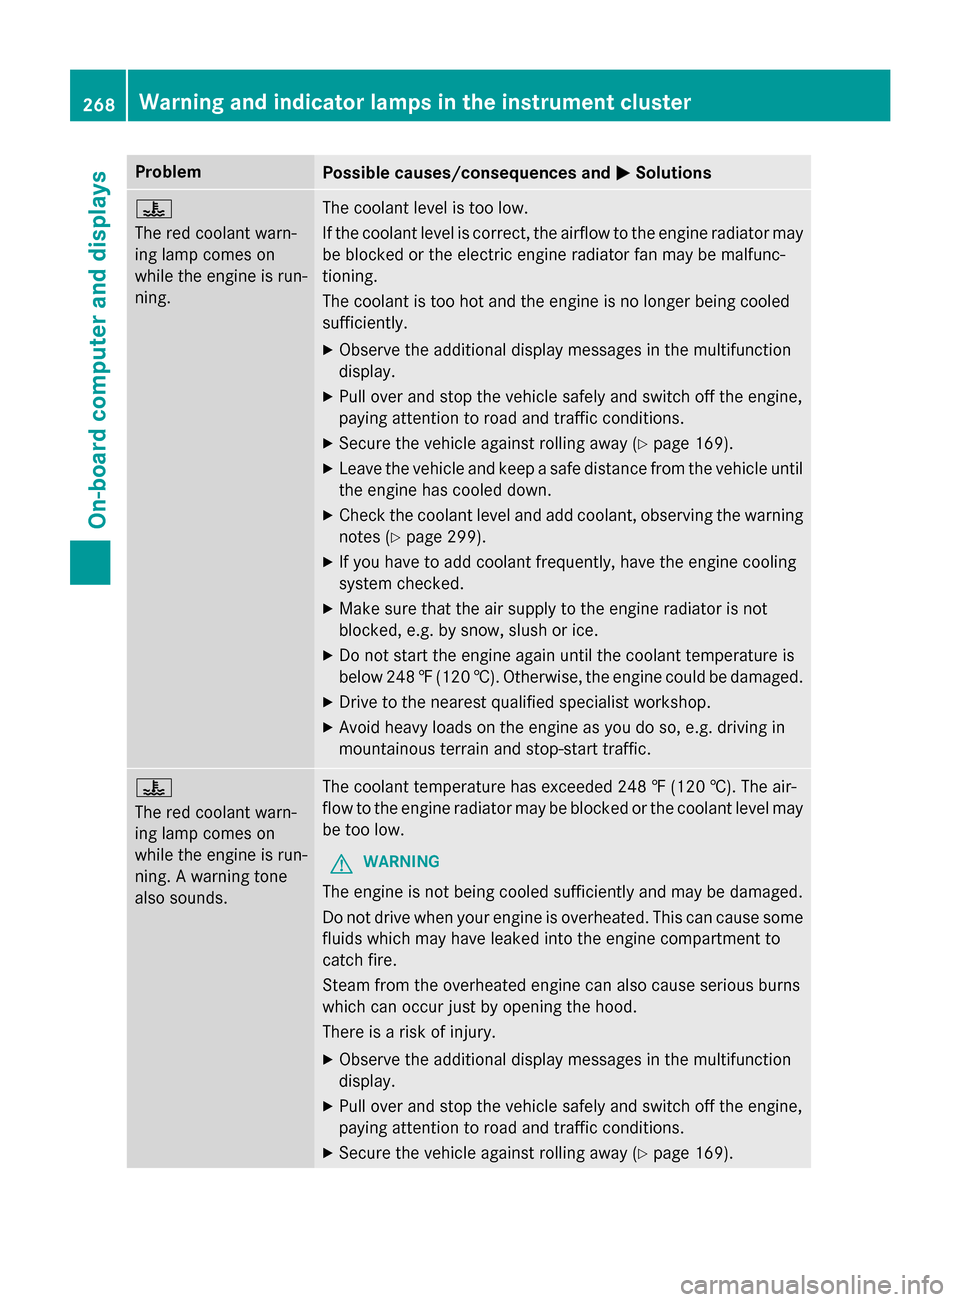
ProblemPossible causes/consequences andMSolutions
?
The red coolant warn-
ing lamp comes on
while the engine is run-
ning.The coolant level is too low.
If the coolant level is correct, the airflow to the engine radiator may
be blocked or the electric engine radiator fan may be malfunc-
tioning.
The coolant is too hot and the engine is no longer being cooled
sufficiently.
XObserve the additional display messages in the multifunction
display.
XPull over and stop the vehicle safely and switch off the engine,
paying attention to road and traffic conditions.
XSecure the vehicle against rolling away (Ypage 169).
XLeave the vehicle and keep a safe distance from the vehicle until
the engine has cooled down.
XCheck the coolant level and add coolant, observing the warning
notes (
Ypage 299).
XIf you have to add coolant frequently, have the engine cooling
system checked.
XMake sure that the air supply to the engine radiator is not
blocked, e.g. by snow, slush or ice.
XDo not start the engine again until the coolant temperature is
below 248‡(120 †). Otherwise, the engine could be damaged.
XDrive to the nearest qualified specialist workshop.
XAvoid heavy loads on the engine as you do so, e.g. driving in
mountainous terrain and stop-start traffic.
?
The red coolant warn-
ing lamp comes on
while the engine is run-
ning. A warning tone
also sounds.The coolant temperature has exceeded 248 ‡ (120 †). The air-
flow to the engine radiator may be blocked or the coolant level may
be too low.
GWARNING
The engine is not being cooled sufficiently and may be damaged.
Do not drive when your engine is overheated. This can cause some
fluids which may have leaked into the engine compartment to
catch fire.
Steam from the overheated engine can also cause serious burns
which can occur just by opening the hood.
There is a risk of injury.
XObserve the additional display messages in the multifunction
display.
XPull over and stop the vehicle safely and switch off the engine,
paying attention to road and traffic conditions.
XSecure the vehicle against rolling away (Ypage 169).
268Warning and indicator lamps in the instrument cluster
On-board computer and displays
Page 271 of 374
ProblemPossible causes/consequences andMSolutions
XLeave the vehicle and keep a safe distance from the vehicle until
the engine has cooled down.
XCheck the coolant level and add coolant, observing the warning
notes (
Ypage 299).
XIf you have to add coolant frequently, have the engine cooling
system checked.
XMake sure that the air supply to the engine radiator is not
blocked, e.g. by snow, slush or ice.
XAt coolant temperatures below 248 ‡ (120 †), drive to the
nearest qualified specialist workshop.
XAvoid heavy loads on the engine as you do so, e.g. driving in
mountainous terrain and stop-start traffic.
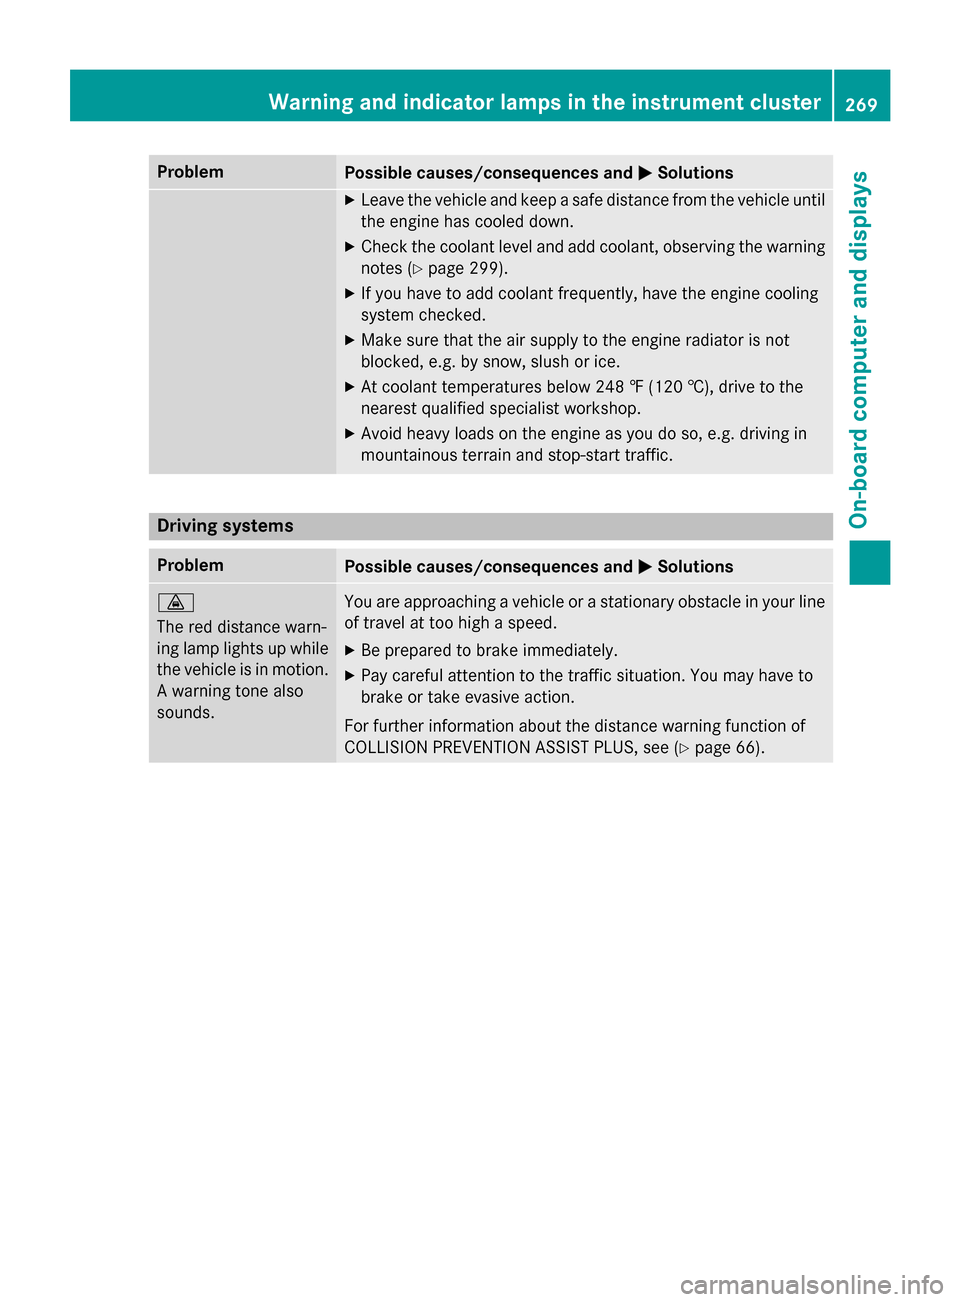
Driving systems
ProblemPossible causes/consequences and MSolutions
·
The red distance warn-
ing lamp lights up while
the vehicle is in motion.
A warning tone also
sounds.You are approaching a vehicle or a stationary obstacle in your line
of travel at too high a speed.
XBe prepared to brake immediately.
XPay careful attention to the traffic situation. You may have to
brake or take evasive action.
For further information about the distance warning function of
COLLISION PREVENTION ASSIST PLUS, see (
Ypage 66).
Warning and indicator lamps in the instrument cluster269
On-board computer and displays
Z
Page 272 of 374
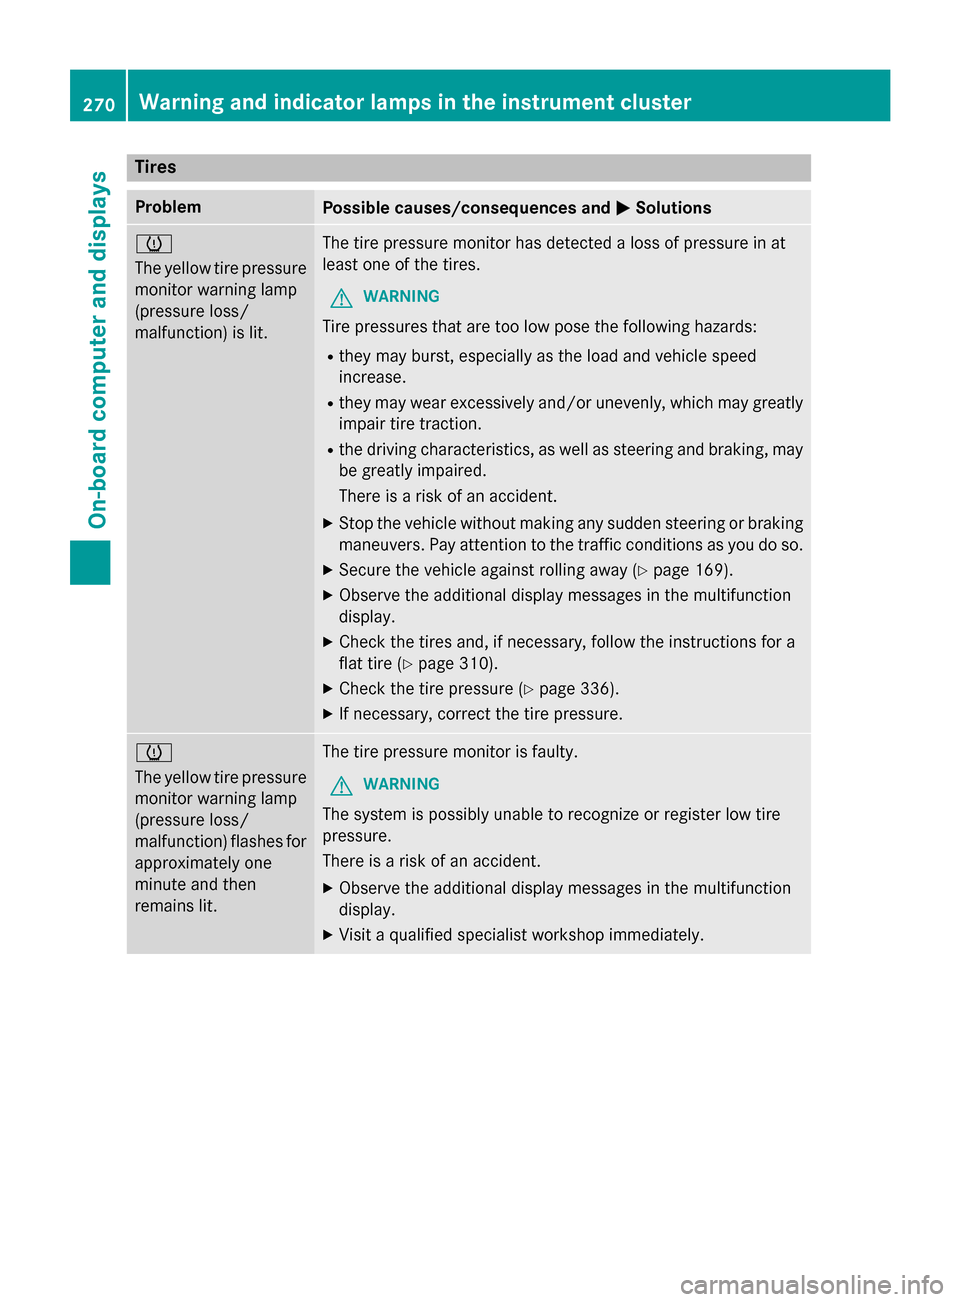
Tires
ProblemPossible causes/consequences andMSolutions
h
The yellow tire pressure
monitor warning lamp
(pressure loss/
malfunction) is lit.The tire pressure monitor has detected a loss of pressure in at
least one of the tires.
GWARNING
Tire pressures that are too low pose the following hazards:
Rthey may burst, especially as the load and vehicle speed
increase.
Rthey may wear excessively and/or unevenly, which may greatly
impair tire traction.
Rthe driving characteristics, as well as steering and braking, may
be greatly impaired.
There is a risk of an accident.
XStop the vehicle without making any sudden steering or braking
maneuvers. Pay attention to the traffic conditions as you do so.
XSecure the vehicle against rolling away (Ypage 169).
XObserve the additional display messages in the multifunction
display.
XCheck the tires and, if necessary, follow the instructions for a
flat tire (
Ypage 310).
XCheck the tire pressure (Ypage 336).
XIf necessary, correct the tire pressure.
h
The yellow tire pressure
monitor warning lamp
(pressure loss/
malfunction) flashes for
approximately one
minute and then
remains lit.The tire pressure monitor is faulty.
GWARNING
The system is possibly unable to recognize or register low tire
pressure.
There is a risk of an accident.
XObserve the additional display messages in the multifunction
display.
XVisit a qualified specialist workshop immediately.
270Warning and indicator lamps in the instrument cluster
On-board computer and displays
Page 301 of 374
Example: engine oil cap
XTurn cap:counter-clockwise and remove
it.
XAdd engine oil.
If the oil level is at or below the MIN mark on
the oil dipstick, add 1.1 US qt (1.0 l)of
engine oil.
XReplace cap :on the filler neck and turn
clockwise.
Ensure that the cap locks into place
securely.
XCheck the oil level again with the oil dip-
stick (
Ypage 298).
Further information on engine oil
(
Ypage 368).
Checking and adding other service
products
Checking coolant level
GWARNING
The cooling system is pressurized, particularly
when the motor is warm. If you open the cap,
you could be scalded if hot coolant sprays out.
There is a risk of injury.
Let the engine cool down before you open the
cap. Wear gloves and eye protection. Slowly
open the cap to relieve pressure.
!The coolant may only be checked and cor-
rected when the engine is cool (coolant
temperature below 104 ‡ (40 †). Check-
ing the coolant when the coolant tempera-
ture is above 104 ‡ (40 †) may result in
damage to the engine or to the engine cool-
ing system.
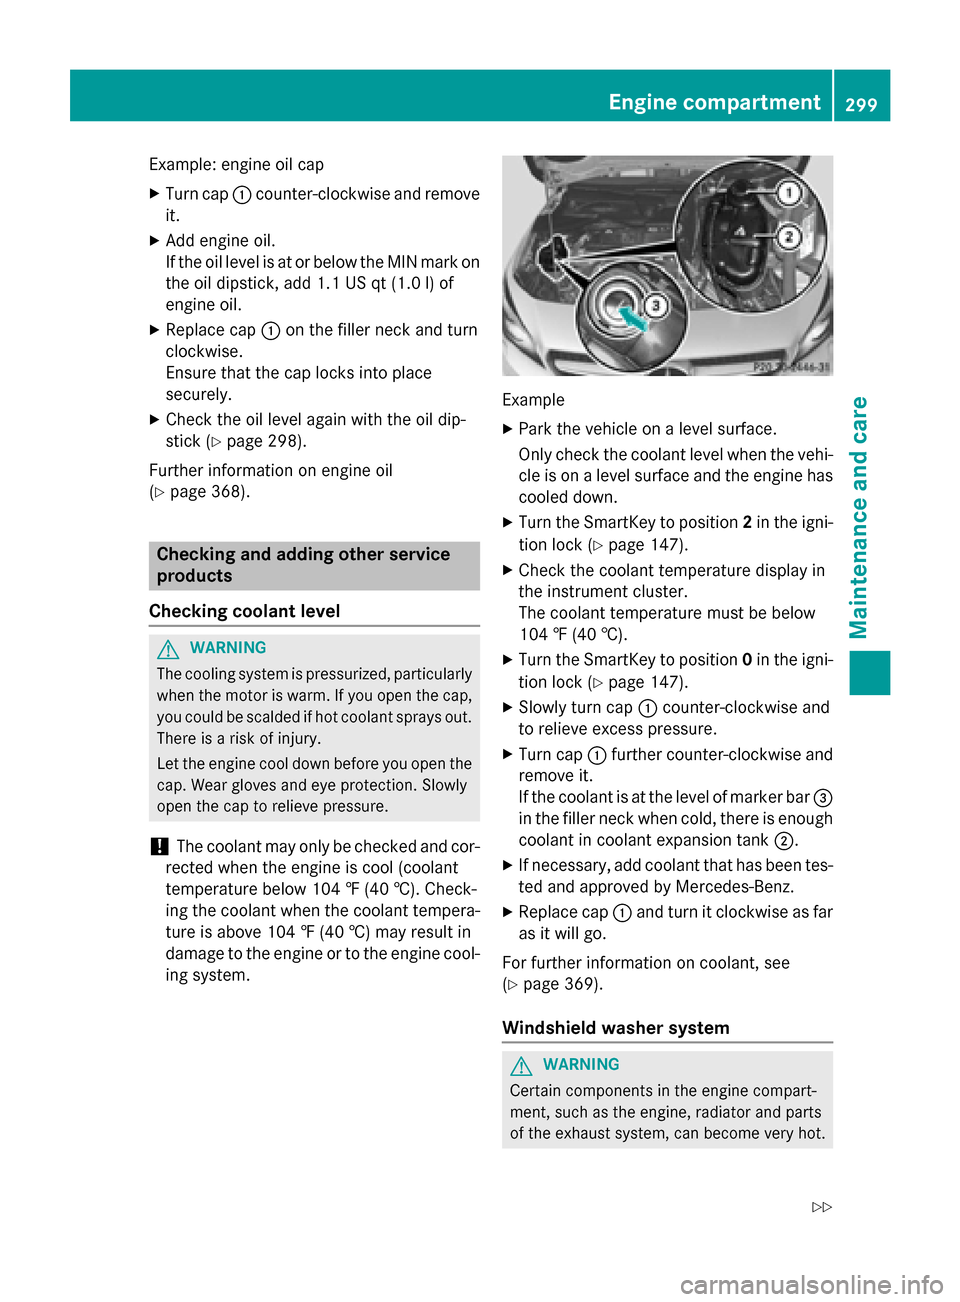
Example
XPark the vehicle on a level surface.
Only check the coolant level when the vehi-
cle is on a level surface and the engine has cooled down.
XTurn the SmartKey to position 2in the igni-
tion lock (
Ypage 147).
XCheck the coolant temperature display in
the instrument cluster.
The coolant temperature must be below
104 ‡ (40 †).
XTurn the SmartKey to position 0in the igni-
tion lock (
Ypage 147).
XSlowly turn cap :counter-clockwise and
to relieve excess pressure.
XTurn cap :further counter-clockwise and
remove it.
If the coolant is at the level of marker bar =
in the filler neck when cold, there is enough
coolant in coolant expansion tank ;.
XIf necessary, add coolant that has been tes-
ted and approved by Mercedes-Benz.
XReplace cap:and turn it clockwise as far
as it will go.
For further information on coolant, see
(
Ypage 369).
Windshield washer system
GWARNING
Certain components in the engine compart-
ment, such as the engine, radiator and parts
of the exhaust system, can become very hot.
Engine compartment299
Maintenance and care
Z
Page 315 of 374
!Do not operate the tire inflation compres-
sor for longer than ten minutes at a time
without a break. It may otherwise overheat.
The tire inflation compressor can be oper-
ated again once it has cooled down.
Comply with the manufacturer’s safety
instructions on the sticker on the tire inflation
compressor.
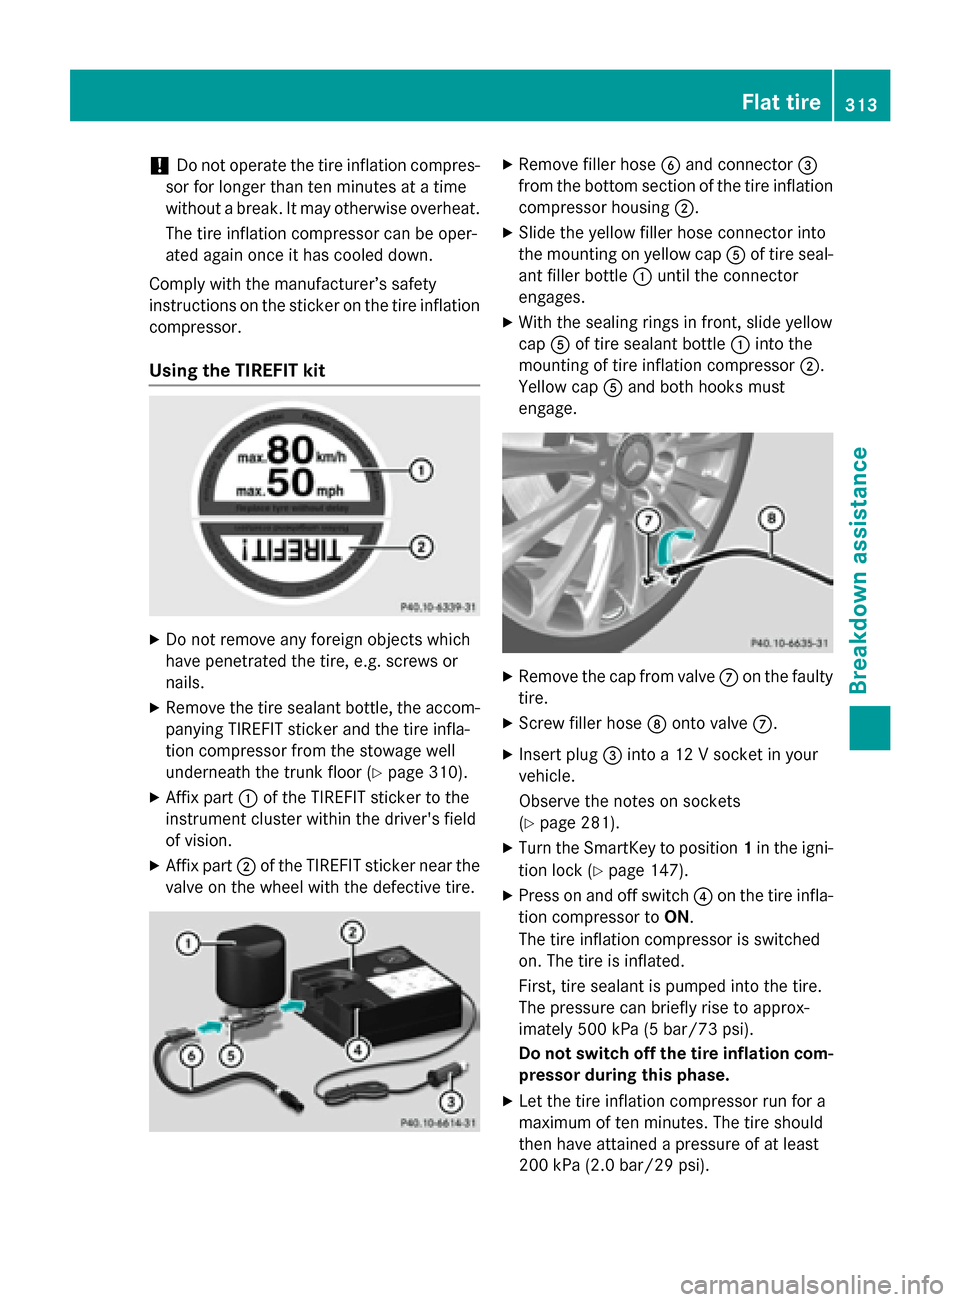
Using the TIREFIT kit
XDo not remove any foreign objects which
have penetrated the tire, e.g. screws or
nails.
XRemove the tire sealant bottle, the accom-
panying TIREFIT sticker and the tire infla-
tion compressor from the stowage well
underneath the trunk floor (
Ypage 310).
XAffix part :of the TIREFIT sticker to the
instrument cluster within the driver's field
of vision.
XAffix part ;of the TIREFIT sticker near the
valve on the wheel with the defective tire.
XRemove filler hose Band connector =
from the bottom section of the tire inflation
compressor housing ;.
XSlide the yellow filler hose connector into
the mounting on yellow cap Aof tire seal-
ant filler bottle :until the connector
engages.
XWith the sealing rings in front, slide yellow
cap Aof tire sealant bottle :into the
mounting of tire inflation compressor ;.
Yellow cap Aand both hooks must
engage.
XRemove the cap from valve Con the faulty
tire.
XScrew filler hose Donto valve C.
XInsert plug =into a 12 V socket in your
vehicle.
Observe the notes on sockets
(
Ypage 281).
XTurn the SmartKey to position 1in the igni-
tion lock (
Ypage 147).
XPress on and off switch ?on the tire infla-
tion compressor to ON.
The tire inflation compressor is switched
on. The tire is inflated.
First, tire sealant is pumped into the tire.
The pressure can briefly rise to approx-
imately 500 kPa (5 bar/73 psi).
Do not switch off the tire inflation com-
pressor during this phase.
XLet the tire inflation compressor run for a
maximum of ten minutes. The tire should
then have attained a pressure of at least
200 kPa (2.0 bar/29 psi).
Flat tire313
Breakdown assistance
Z
Page 316 of 374

If a pressure of 200 kPa (2.0 bar/29 psi) has
been attained after five minutes, see "Tire
pressure reached" (
Ypage 314).
If a tire pressure of 200 kPa (2.0 bar/29 psi)
has not been attained after five minutes, see
"Tire pressure not reached" (
Ypage 314).
If tire sealant has escaped, clean it off affec-
ted areas as quickly as possible. Use plain
water if possible.
If your clothes are soiled with tire sealant,
have them cleaned with perchloroethylene at
a dry cleaner as soon as possible.
Tire pressure not reached
If a tire pressure of 200 kPa (2.0 bar/29 psi)
has not been attained after ten minutes:
XSwitch off the tire inflation compressor.
XUnscrew the filler hose from the valve of
the faulty tire.
Note that tire sealant may escape when you unscrew the filler hose.
XVery slowly drive forwards or reverse
approximately 30 ft (10 m).
XPump up the tire again.
After a maximum of ten minutes, the tire
pressure must be at least 200 kPa (2.0 bar/29 psi).
GWARNING
If the required tire pressure is not reached
after the specified time, the tire is too badly
damaged. The tire sealant cannot repair the
tire in this instance. Damaged tires and a tire
pressure that is too low can significantly
impair the vehicle's braking and driving char-
acteristics. There is a risk of accident.
Do not continue driving. Contact a qualified
specialist workshop.
Tire pressure reached
GWARNING
A tire temporarily sealed with tire sealant
impairs the driving characteristics and is not
suitable for higher speeds. There is a risk of
accident.
You should therefore adapt your driving style
accordingly and drive carefully. Do not exceed the specified maximum speed with a tire that
has been repaired using tire sealant.
The maximum permissible speed for a tire
sealed with tire sealant is 50 mph (80 km/h). The upper part of the TIREFIT sticker must be
affixed to the instrument cluster in the driv-
er's field of vision.
!Residue from the tire sealant may come
out of the filler hose after use. This could
cause stains.
Therefore, place the filler hose in the plastic
bag which contained the TIREFIT kit.
HEnvironmental note
Have the used tire sealant bottle disposed of
professionally, e.g. at a qualified specialist
workshop.
If a tire pressure of 200 kPa (2.0 bar/29 psi)
has been attained after ten minutes:
XSwitch off the tire inflation compressor.
XUnscrew the filler hose from the valve of
the faulty tire.
XStow the tire sealant bottle and the tire
inflation compressor.
XPull away immediately.
XStop after driving for approximately ten
minutes and check the tire pressure with
the tire inflation compressor.
The tire pressure must now be at least
130 kPa (1.3 bar/19 psi).
GWARNING
If the required tire pressure is not reached
after driving for a short period, the tire is too
badly damaged. The tire sealant cannot repair
the tire in this instance. Damaged tires and a
tire pressure that is too low can significantly
impair the vehicle's braking and driving char-
acteristics. There is a risk of accident.
314Flat tire
Breakdown assistance
Page 318 of 374
should have all work involving the battery car-ried out at a qualified specialist workshop.
For further information about ABS and ESP®,
see (
Ypage 65) and (Ypage 69).
GWARNING
Electrostatic build-up can lead to the creation of sparks, which could ignite the highly explo-
sive gases of a battery. There is a risk of an
explosion.
Before handling the battery, touch the vehicle
body to remove any existing electrostatic
build-up.
The highly flammable gas mixture forms when
charging the battery as well as when jump-
starting.
Always make sure that neither you nor the
battery is electrostatically charged. A build-
up of electrostatic charge can be caused, for
example:
Rby wearing clothing made from synthetic
fibers
Rdue to friction between clothing and seats
Rif you push or pull the battery across the
carpet or other synthetic materials
Rif you wipe the battery with a cloth
GWARNING
During the charging process, a battery produ-
ces hydrogen gas. If a short circuit occurs or
sparks are created, the hydrogen gas can
ignite. There is a risk of an explosion.
RMake sure that the positive terminal of a
connected battery does not come into con- tact with vehicle parts.
RNever place metal objects or tools on a bat-
tery.
RIt is important that you observe the descri-
bed order of the battery terminals when
connecting and disconnecting a battery.
RWhen jump-starting, make sure that the
battery poles with identical polarity are
connected.
RIt is particularly important to observe the
described order when connecting and dis-
connecting the jumper cables.
RNever connect or disconnect the battery
terminals while the engine is running.
GWARNING
Battery acid is caustic. There is a risk of injury.
Avoid contact with skin, eyes or clothing. Do
not inhale any battery gases. Do not lean over
the battery. Keep children away from batter-
ies. Wash away battery acid immediately with
plenty of clean water and seek medical atten-
tion.
HEnvironmental note
Batteries contain dangerous
substances. It is against the
law to dispose of them with
the household rubbish. They
must be collected separately and recycled to protect the
environment.
Dispose of batteries in an
environmentally friendly
manner. Take discharged
batteries to a qualified spe-
cialist workshop or a special
collection point for used bat-
teries.
!Have the battery checked regularly at a
qualified specialist workshop.
Observe the service intervals in the Main-
tenance Booklet or contact a qualified spe-
cialist workshop for more information.
!You should have all work involving the
battery carried out at a qualified specialist
workshop. In the exceptional case that it is
necessary for you to disconnect the battery
yourself, make sure that:
Ryou switch off the engine and remove the
key. On vehicles with KEYLESS-GO,
ensure that the ignition is switched off.
Check that all the indicator lamps in the
instrument cluster are off. Otherwise,
316Battery (vehicle)
Breakdown assistance