USB MERCEDES-BENZ CLA-Class 2017 C117 Comand Manual
[x] Cancel search | Manufacturer: MERCEDES-BENZ, Model Year: 2017, Model line: CLA-Class, Model: MERCEDES-BENZ CLA-Class 2017 C117Pages: 202, PDF Size: 6.35 MB
Page 14 of 202
Writing e-mails ...............................118
Writing text messages ................... 117
Telephone number
Entering ...........................................9 8
Text messages (SMS)
Calling the sender .......................... 119
Calling up the settings menu ......... 115
Configuring the text messages
displayed ....................................... 115
Deleting ......................................... 120
Displaying details ........................... 117
Downloading manually ................... 116
Editing text templates .................... 119
Inbox .............................................. 116
Reading .......................................... 116
Reading aloud ................................ 117
Settings ......................................... 115
Storing the sender as a new
address book entry ........................ 120
Using a phone number in the text .. 119
Using text templates ...................... 119
Writing ........................................... 117
Time
Setting the format ............................ 36
Setting the time manually ................ 36
Setting the time zone ....................... 35
Setting the time/date format .......... 36
Switching automatic time on/off ..... 35
Touchpad
Calling up quick access for audio
and telephone .................................. 23
Changing the audio source .............. 27
Changing the input language for
handwriting recognition ................... 26
Changing the station/music
track ................................................ 26
Character suggestions ..................... 25
Deleting characters ......................... 25
Entering a space .............................. 25
Entering characters ......................... 25
Gesture control ................................ 22
Handwriting recognition ................... 24
Operating the touchpad ................... 22
Overview .......................................... 22
Quick access for audio and tele-
phone .............................................. 26
Switching ......................................... 22
Switching input line ......................... 25 Track information
.............................. 190
Traffic jam function ............................. 76
Traffic reports
Calling up a list ................................ 78
Real-time traffic report .................... 79
U
Updating the digital map .................... 88
USB audio mode
Selecting a track ............................ 150
USB devices
Connecting to the Media Inter-
face ............................................... 149
V
VehicleData acquisition ............................... 15
Vehicle settings
Calling up ......................................... 45
Video
see Video DVD
Video DVD
Control option ................................ 161
DVD functions ............................... 164
DVD menu ..................................... 164
DVD's control menu ...................... 163
Function restrictions ...................... 162
Menu options ................................. 162
Notes on discs ............................... 161
Operation ....................................... 161
Overview ........................................ 162
Pause function ............................... 165
Picture settings .............................. 163
Playing conditions .......................... 161
Safety notes .................................. 161
Selecting a scene/chapter ............ 165
Stop function ................................. 164
Switching to ................................... 162
Video menu ................................... 163
Voice Control System
Settings ........................................... 37
Volume, adjusting
Navigation messages ....................... 27
12Index
Page 20 of 202
Overview
Components
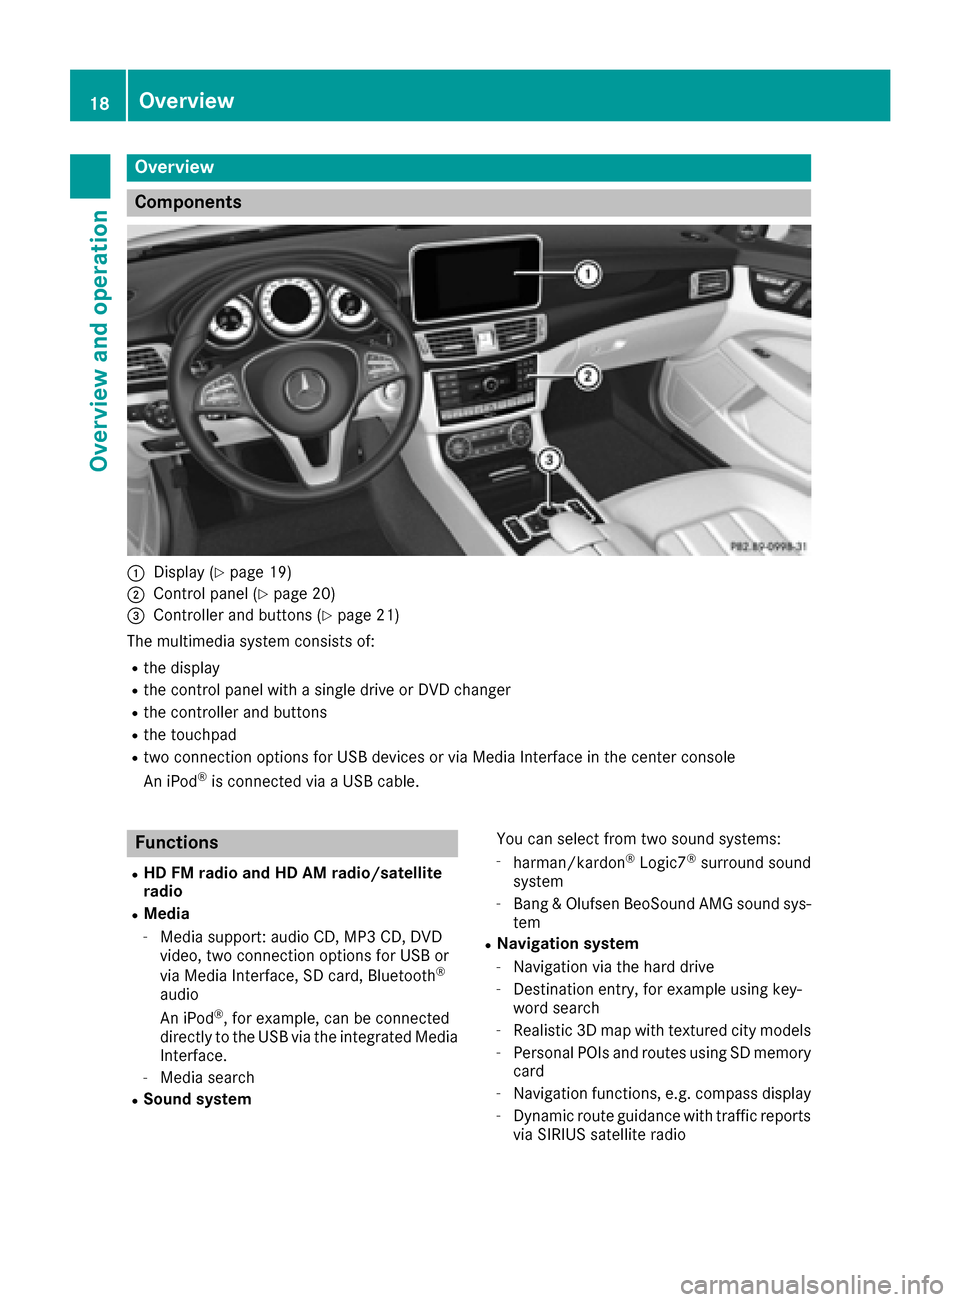
:Display (Ypage 19)
;Control panel (Ypage 20)
=Controller and buttons (Ypage 21)
The multimedia system consists of:
Rthe display
Rthe control panel with a single drive or DVD changer
Rthe controller and buttons
Rthe touchpad
Rtwo connection options for USB devices or via Media Interface in the center console
An iPod®is connected via a USB cable.
Functions
RHD FM radio and HD AM radio/satellite
radio
RMedia
-Media support: audio CD, MP3 CD, DVD
video, two connection options for USB or
via Media Interface, SD card, Bluetooth
®
audio
An iPod®, for example, can be connected
directly to the USB via the integrated Media
Interface.
-Media search
RSound system You can select from two sound systems:
-harman/kardon®Logic7®surround sound
system
-Bang & Olufsen BeoSound AMG sound sys-
tem
RNavigation system
-Navigation via the hard drive
-Destination entry, for example using key-
word search
-Realistic 3D map with textured city models
-Personal POIs and routes using SD memory
card
-Navigation functions, e.g. compass display
-Dynamic route guidance with traffic reports
via SIRIUS satellite radio
18Overview
Overview and operation
Page 40 of 202
If the multimedia system is to be used as a WiFi
hotspot:
RThe multimedia system must be connected to
an Internet-enabled mobile phone via Blue-
tooth
®or USB.
RThe Internet access data for the mobile phone
network provider must be selected or set in
the multimedia system.
RAn Internet connection must be established
on the multimedia system.
Canada: requirements for establishing a WiFi
connection between the multimedia system and
a WiFi hotspot of a WiFi-enabled device, such as
a smartphone, or another hotspot:
RWiFi must be enabled on the multimedia sys-
tem.
RSwitch on WiFi hotspot on the external device;
see the manufacturer's operating instruc-
tions.
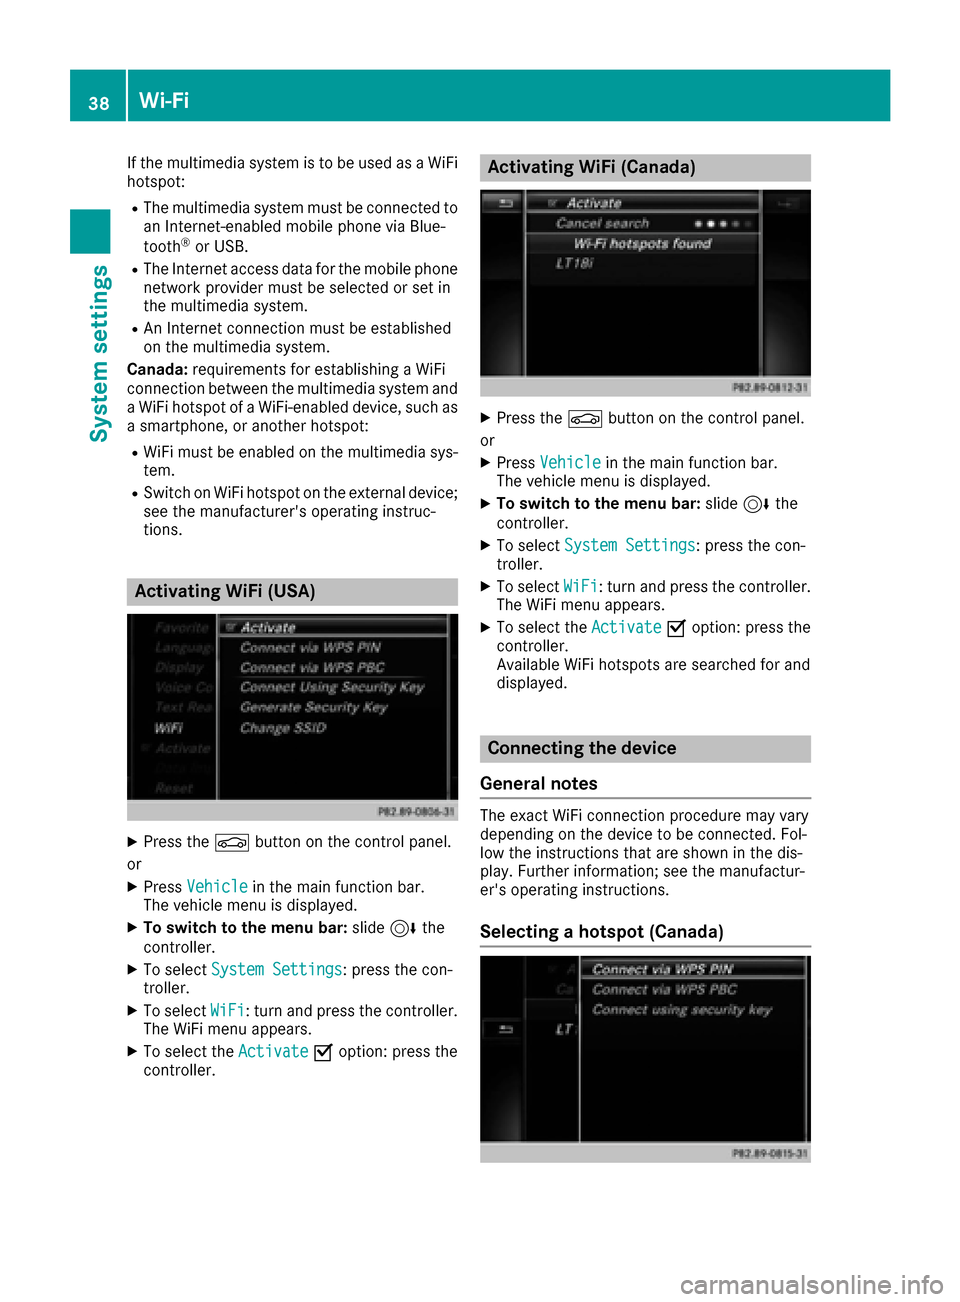
Activating WiFi (USA)
XPress the Øbutton on the control panel.
or
XPress Vehiclein the main function bar.
The vehicle menu is displayed.
XTo switch to the menu bar: slide6the
controller.
XTo select System Settings: press the con-
troller.
XTo select WiFi: turn and press the controller.
The WiFi menu appears.
XTo select the ActivateOoption: press the
controller.
Activating WiFi (Canada)
XPress the Øbutton on the control panel.
or
XPress Vehiclein the main function bar.
The vehicle menu is displayed.
XTo switch to the menu bar: slide6the
controller.
XTo select System Settings: press the con-
troller.
XTo select WiFi: turn and press the controller.
The WiFi menu appears.
XTo select the ActivateOoption: press the
controller.
Available WiFi hotspots are searched for and
displayed.
Connecting the device
General notes
The exact WiFi connection procedure may vary
depending on the device to be connected. Fol-
low the instructions that are shown in the dis-
play. Further information; see the manufactur-
er's operating instructions.
Selecting a hotspot (Canada)
38Wi-Fi
System settings
Page 44 of 202
Calling up the Favorites function via the
touchpad
XPress the favorites button on the touchpad.
The favorites are displayed.
XTo select the desired function, e.g.Phone‐book: turn and press the controller.
Exiting the Favorites function
XPress the Favorites button again.
or
XPress the %button.
Further information on the Favorites function
(
Ypage 31).
Importing/exporting data
General notes
!
Never remove the stick or card when writing
data to the USB stick or the memory card. You
may otherwise lose data.
Using this function you can do the following with
your personal data:
Rtransfer your data from one multimedia sys-
tem to another multimedia system
The transfer may be limited or not possible,
depending on the vehicle's equipment.
Rmake a backup copy of your personal data
(export data) and load it again (import data)
Rprotect your data from unwanted export by
activating a PIN prompt (presetting: deacti-
vated ª)
You can either use an SD card or a USB storage
device (e.g. a USB stick) as temporary storage.
Please remember that the NFTS file system is
not supported. The FAT32 file system is recom-
mended.
You can obtain further information on data
import and export from an authorized
Mercedes-Benz Center.
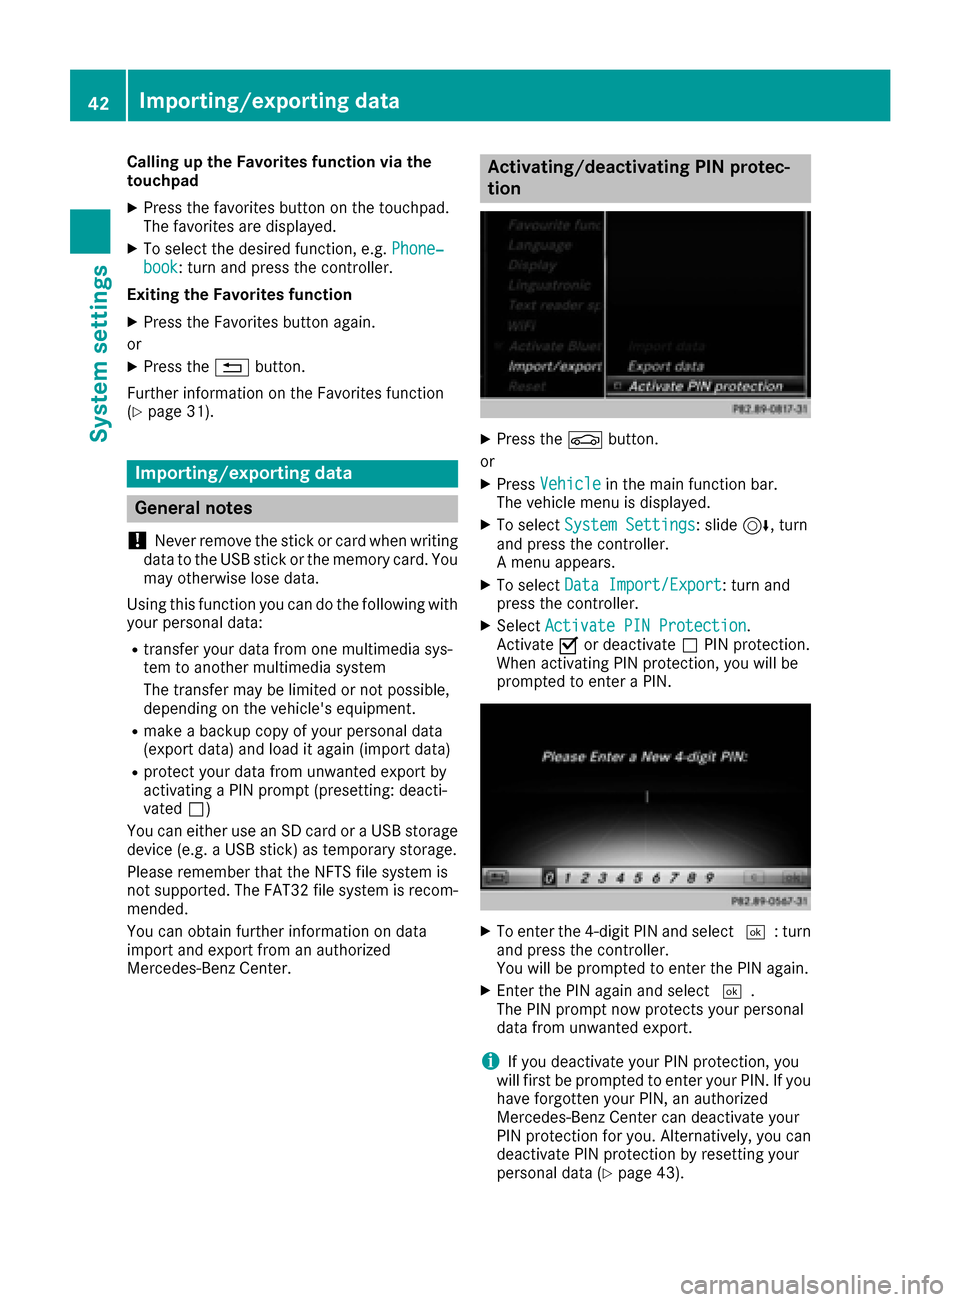
Activating/deactivating PIN protec-
tion
XPress the Øbutton.
or
XPress Vehiclein the main function bar.
The vehicle menu is displayed.
XTo select System Settings: slide6, turn
and press the controller.
A menu appears.
XTo select Data Import/Export: turn and
press the controller.
XSelect Activate PIN Protection.
Activate Oor deactivate ªPIN protection.
When activating PIN protection, you will be
prompted to enter a PIN.
XTo enter the 4-digit PIN and select ¬: turn
and press the controller.
You will be prompted to enter the PIN again.
XEnter the PIN again and select ¬.
The PIN prompt now protects your personal
data from unwanted export.
iIf you deactivate your PIN protection, you
will first be prompted to enter your PIN. If you
have forgotten your PIN, an authorized
Mercedes-Benz Center can deactivate your
PIN protection for you. Alternatively, you can
deactivate PIN protection by resetting your
personal data (
Ypage 43).
42Importing/exporting data
System settings
Page 45 of 202
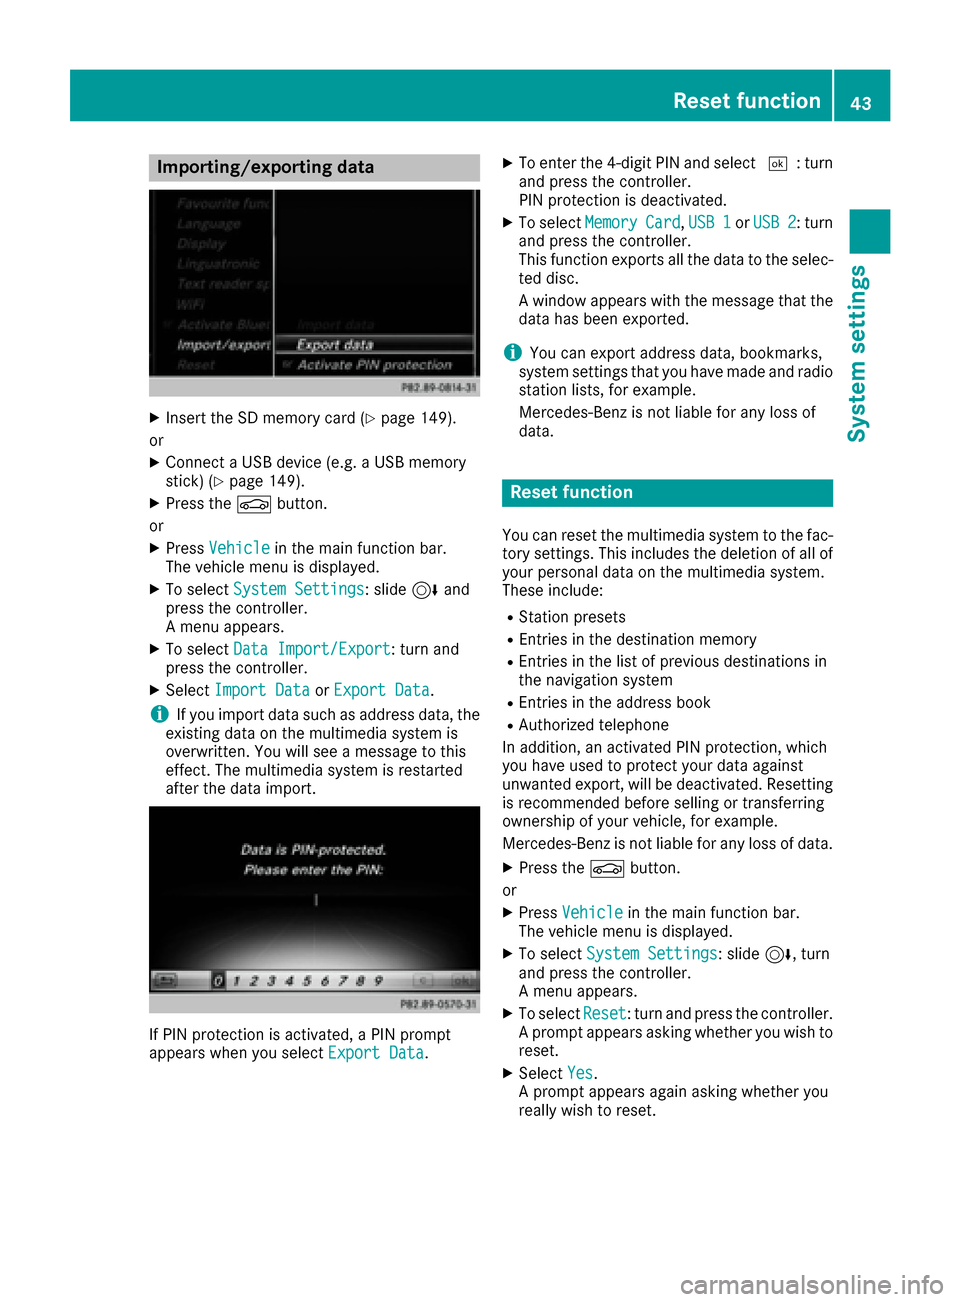
Importing/exporting data
XInsertth eSD memory car d (Ypage 149).
or
XConnect aUS Bdevice (e.g. aUS Bmemory
stick ) (Ypage 149).
XPress th eØ button.
or
XPress Vehicl ein themain function bar.
The vehicl emen uis displayed.
XTo select System Settings:slide 6and
press th econtroller.
A men uappears.
XTo select DataImport/Expor t:tur nand
press th econtroller.
XSelec tImport Dat aorExport Dat a.
iIf you import dat asuc has address data, th e
existing dat aon th emultimedia system is
overwritten. You will see amessage to this
effect. The multimedia system is restarte d
after th edat aimport .
If PIN protection is activated, aPIN prompt
appear swhen you select Export Data.
XTo enterth e4-digit PIN and select ¬:turn
and press th econtroller .
PIN protection is deactivated.
XTo select MemoryCard,USB 1orUSB 2:tur n
and press th econtroller .
This function exports all th edat ato th eselec-
te ddisc .
A window appear swit hth emessage that th e
dat ahas been exported.
iYou can expor taddress data, bookmarks ,
system setting sthat you hav emade and radi o
station lists, for example.
Mercedes-Ben zis no tliable for any loss of
data.
Reset function
You can reset th emultimedia system to th efac -
tory settings. This includes th edeletion of all of
your personal dat aon th emultimedia system.
Thes einclude:
RStation preset s
REntries in thedestination memory
REntries in th elist of previous destination sin
th enavigation system
REntries in th eaddress book
RAuthorized telephon e
In addition ,an activated PIN protection ,whic h
you hav eused to protect your dat aagainst
unwante dexport, will be deactivated. Resetting
is recommended before selling or transferrin g
ownership of your vehicle, for example.
Mercedes-Ben zis no tliable for any loss of data.
XPress th eØ button.
or
XPress Vehicl ein themain function bar.
The vehicl emen uis displayed.
XTo select System Settings:slide 6,turn
and press th econtroller .
A men uappears.
XTo select Reset:tur nand press th econtroller .
A prompt appear sasking whether you wish to
reset .
XSelec tYes.
A prompt appear sagain asking whether you
really wish to reset .
Reset function43
System settings
Z
Page 63 of 202
XTo select POI:selectPOIs in the Vicin‐
ityorAllPOIsby turning and pressing con-
troller.
A list appears. The search results are dis-
played according to the linear distance, start-
ing with those closest.
XSelect a POI.
The POI is shown.
XTo start route calculation: select Start.
XTo select online search:selectOnline
Searchby turning and pressing the control-
ler.
The search switches to the online functions.
Online search requirement (USA): mbrace
must be activated for Internet access
(
Ypage 125).
Requirement for the online map display (Can-
ada): a mobile phone is connected to the mul-
timedia system via Bluetooth
®(Ypage 93)
or USB (Ypage 159).
Selecting search options
XTo switch to navigation mode: press the
Ø button.
XTo show the menu: slide6the controller.
XTo select Destination: turn and press the
controller.
XSelect Keyword Search.
XTo select Search Options: slide5, turn
and press the controller.
XSelect Fuzzy SearchorPOI Search.
Switch the setting on Oor off ª.
The error-tolerant search is useful if parts of
the address are incomplete or the spelling is
unclear.
The POI search takes into account points of
interest in the search.
Selecting a state/province
XTo switch to navigation mode: press the
Ø button.
XTo show the menu: slide6the controller.
XTo select Destination: turn and press the
controller.
XSelect Keyword Search.
XTo select State/Province: slide5, turn
and press the controller.
States/provinces are sorted alphabetically.
XTo select a state/province: turn and press the
controller.
Using online search
Requirement (USA): mbrace must be activated
for Internet access (Ypage 125).
Requirement (Canada): a mobile phone is con-
nected to the multimedia system via Bluetooth
®
(Ypage 93) or USB (Ypage 159).
XTo switch to navigation mode: press the
Ø button.
XTo show the menu: slide6the controller.
XTo select Destination: turn and press the
controller.
XSelect Keyword Search.
XEnter the first few letters of the city and
street.
XTo select OnlineSearch: slide5, turn and
press the controller.
The search switches to the online functions.
Selecting a destination from the list of
last destinations
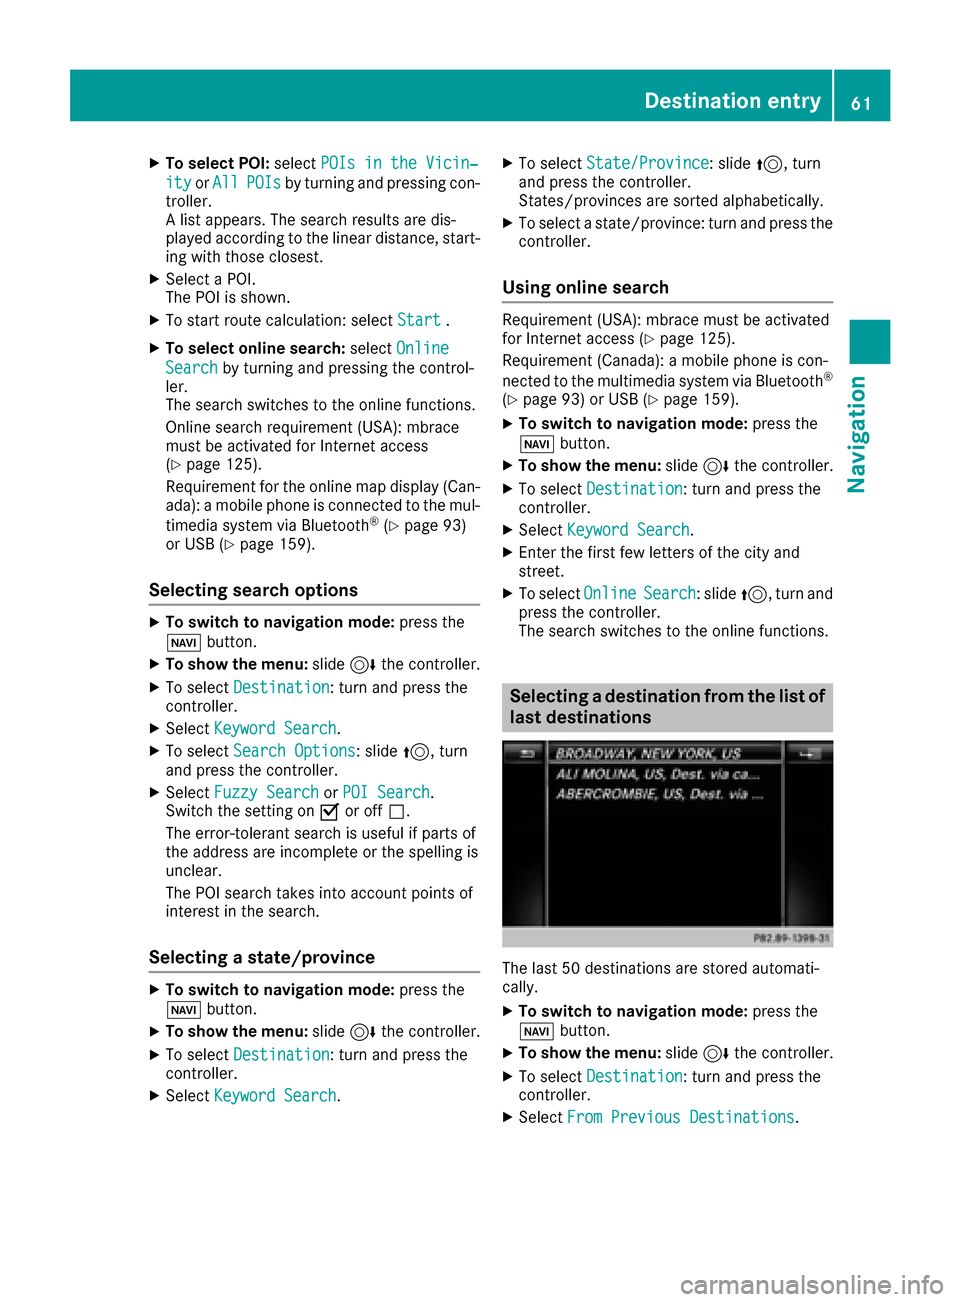
The last 50 destinations are stored automati-
cally.
XTo switch to navigation mode: press the
Ø button.
XTo show the menu: slide6the controller.
XTo select Destination: turn and press the
controller.
XSelect From Previous Destinations.
Destination entry61
Navigation
Z
Page 66 of 202
XTurn and press the controller.
TheGsymbol after an entry shows that fur-
ther categories are available.
XSelect a sub-category.
The POI search covers a 240 mi (400 km)
radius around the selected position.
Once the search is completed, the POI list is
displayed.
The search results display the following infor-
mation:
Ran arrow that shows the linear direction to
the POI (search around vehicle position)
Rthe linear distance to the POI
Rthe name of the POI
XSelect a POI.
The complete address of the POI is shown.
Selecting a POI
Requirement for "Calling up a POI": a mobile
phone must be connected to the multimedia
system (
Ypage 93).
Requirements for "Viewing the vicinity of the
destination" and "Loading data from the Inter-
net" (USA): mbrace must be activated for Inter-
net access (
Ypage 125).
Requirements for "Viewing the vicinity of the
destination" and "Loading data from the Inter-
net" (Canada): a mobile phone must be connec-
ted to the multimedia system via Bluetooth
®
(Ypage 93) or USB (Ypage 159).
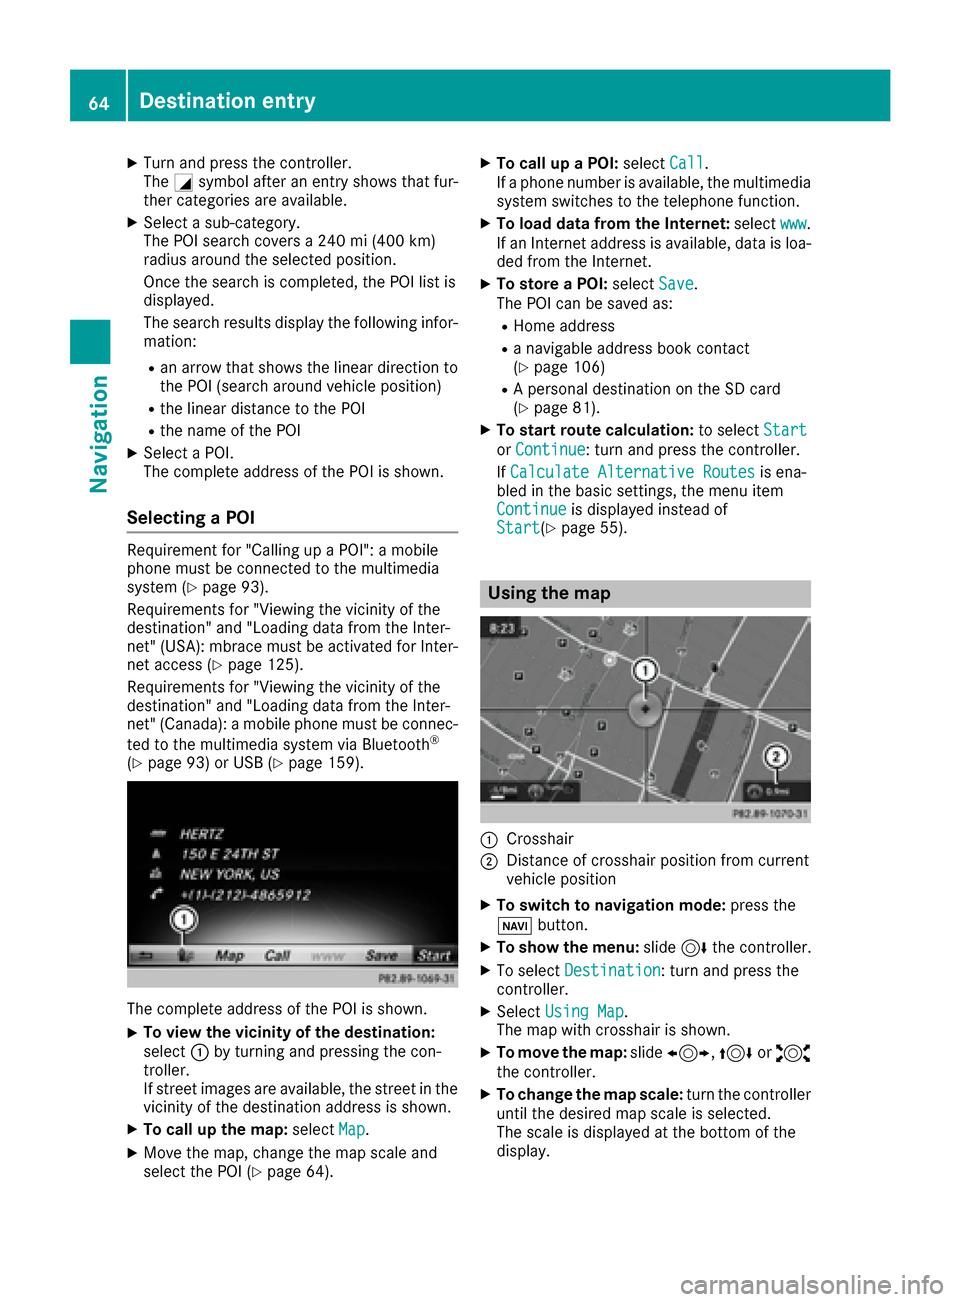
The complete address of the POI is shown.
XTo view the vicinity of the destination:
select :by turning and pressing the con-
troller.
If street images are available, the street in the
vicinity of the destination address is shown.
XTo call up the map: selectMap.
XMove the map, change the map scale and
select the POI (Ypage 64).
XTo call up a POI: selectCall.
If a phone number is available, the multimedia
system switches to the telephone function.
XTo load data from the Internet: selectwww.
If an Internet address is available, data is loa-
ded from the Internet.
XTo store a POI: selectSave.
The POI can be saved as:
RHome address
Ra navigable address book contact
(Ypage 106)
RA personal destination on the SD card
(Ypage 81).
XTo start route calculation: to selectStart
orContinue: turn and press the controller.
If Calculate Alternative Routes
is ena-
bled in the basic settings, the menu item
Continue
is displayed instead of
Start(Ypage 55).
Using the map
:Crosshair
;Distance of crosshair position from current
vehicle position
XTo switch to navigation mode: press the
ß button.
XTo show the menu: slide6the controller.
XTo select Destination: turn and press the
controller.
XSelect Using Map.
The map with crosshair is shown.
XTo move the map: slide1, 4or2
the controller.
XTo change the map scale: turn the controller
until the desired map scale is selected.
The scale is displayed at the bottom of the
display.
64Destination entry
Navigation
Page 76 of 202
phone is connected to the multimedia sys-
tem via Bluetooth®(Ypage 93) or USB
(Ypage 159)
RUSA: download data from the Internet if an
Internet address is available and mbrace is
activated for Internet access
(
Ypage 93)
RCanada: download data from the Internet if
an Internet address is available and a
mobile phone is connected to the multime-
dia system via Bluetooth
®(Ypage 93) or
USB (Ypage 159)
RSelect for route guidance and calculate a
route to it (Ypage 59)
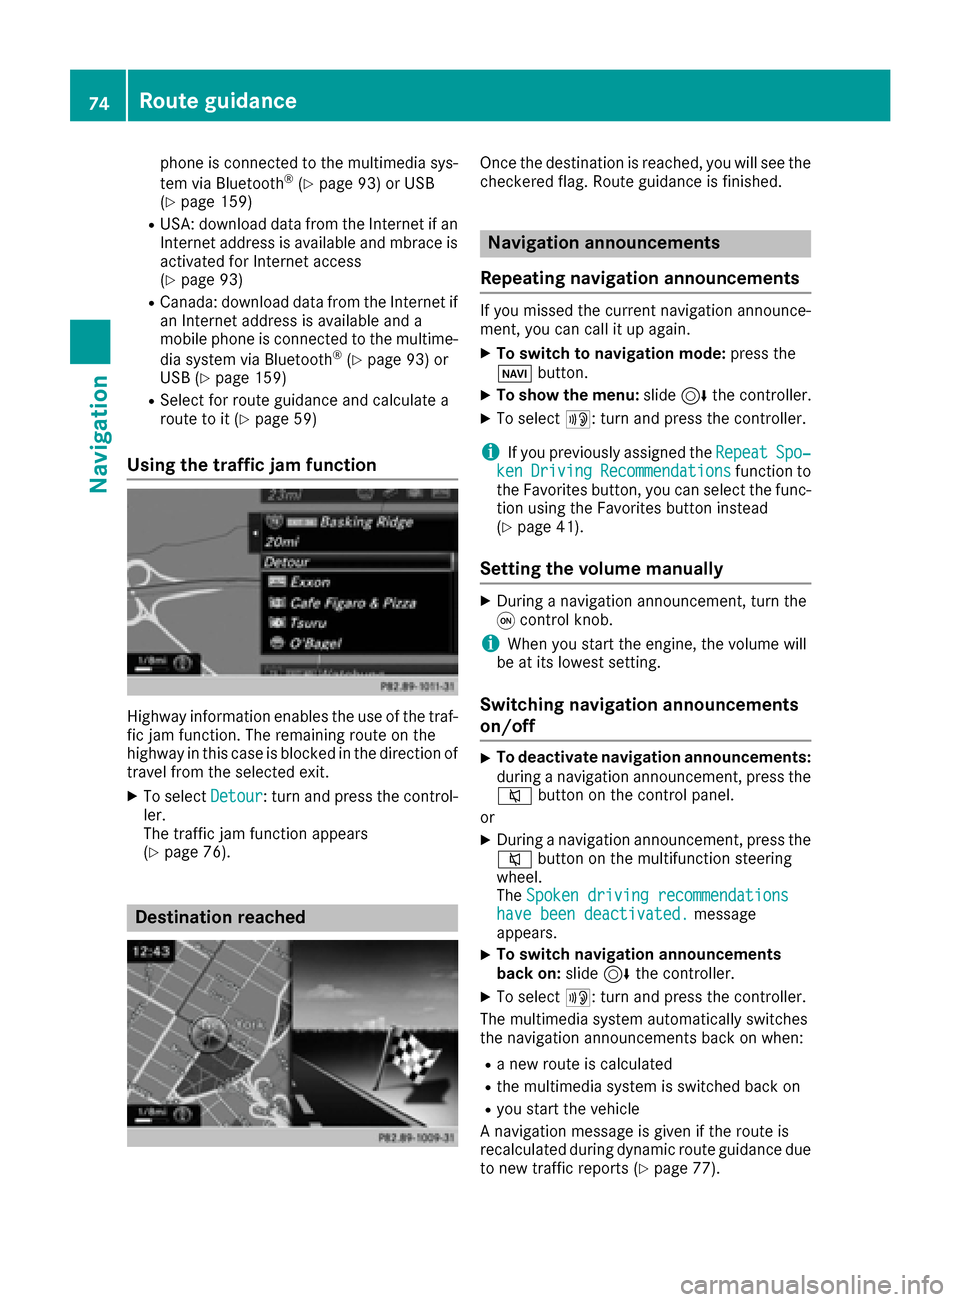
Using the traffic jam function
Highway information enables the use of the traf-
fic jam function. The remaining route on the
highway in this case is blocked in the direction of
travel from the selected exit.
XTo select Detour: turn and press the control-
ler.
The traffic jam function appears
(
Ypage 76).
Destination reached
Once the destination is reached, you will see the
checkered flag. Route guidance is finished.
Navigation announcements
Repeating navigation announcements
If you missed the current navigation announce-
ment, you can call it up again.
XTo switch to navigation mode: press the
Ø button.
XTo show the menu: slide6the controller.
XTo select +: turn and press the controller.
iIf you previously assigned the RepeatSpo‐kenDrivingRecommendationsfunction to
the Favorites button, you can select the func-
tion using the Favorites button instead
(
Ypage 41).
Setting the volume manually
XDuring a navigation announcement, turn the
q control knob.
iWhen you start the engine, the volume will
be at its lowest setting.
Switching navigation announcements
on/off
XTo deactivate navigation announcements:
during a navigation announcement, press the
8 button on the control panel.
or
XDuring a navigation announcement, press the
8 button on the multifunction steering
wheel.
The Spoken driving recommendations
have been deactivated.message
appears.
XTo switch navigation announcements
back on: slide6the controller.
XTo select +: turn and press the controller.
The multimedia system automatically switches
the navigation announcements back on when:
Ra new route is calculated
Rthe multimedia system is switched back on
Ryou start the vehicle
A navigation message is given if the route is
recalculated during dynamic route guidance due
to new traffic reports (
Ypage 77).
74Route guidance
Navigation
Page 77 of 202
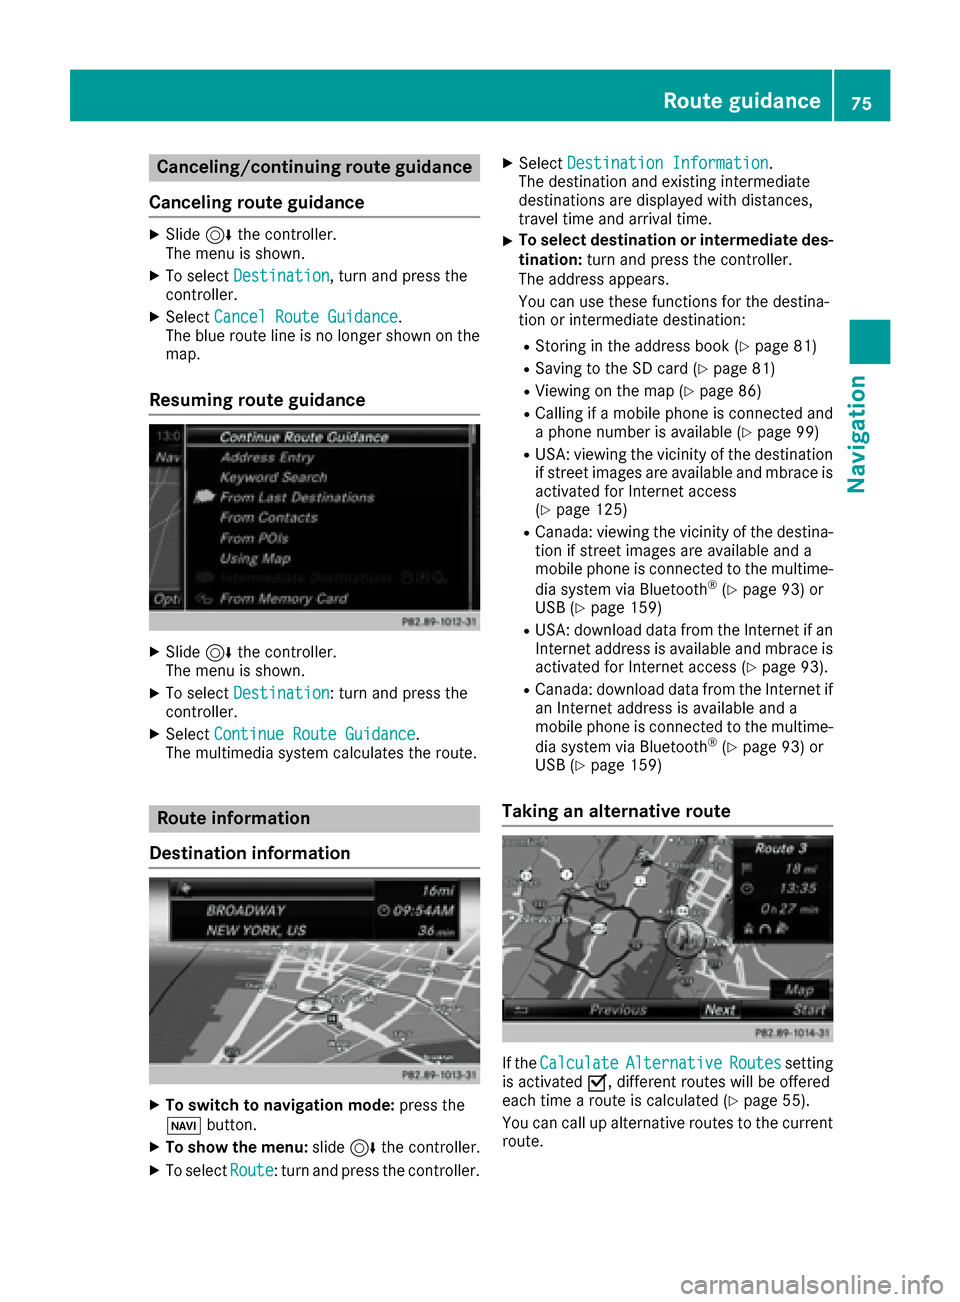
Canceling/continuing route guidance
Canceling route guidance
XSlide 6the controller.
The menu is shown.
XTo select Destination, turn and press the
controller.
XSelect Cancel Route Guidance.
The blue route line is no longer shown on the
map.
Resuming route guidance
XSlide 6the controller.
The menu is shown.
XTo select Destination: turn and press the
controller.
XSelect Continue Route Guidance.
The multimedia system calculates the route.
Route information
Destination information
XTo switch to navigation mode: press the
Ø button.
XTo show the menu: slide6the controller.
XTo select Route: turn and press the controller.
XSelectDestination Information.
The destination and existing intermediate
destinations are displayed with distances,
travel time and arrival time.
XTo select destination or intermediate des-
tination: turn and press the controller.
The address appears.
You can use these functions for the destina-
tion or intermediate destination:
RStoring in the address book (Ypage 81)
RSaving to the SD card (Ypage 81)
RViewing on the map (Ypage 86)
RCalling if a mobile phone is connected and
a phone number is available (Ypage 99)
RUSA: viewing the vicinity of the destination
if street images are available and mbrace is
activated for Internet access
(
Ypage 125)
RCanada: viewing the vicinity of the destina-
tion if street images are available and a
mobile phone is connected to the multime-
dia system via Bluetooth
®(Ypage 93) or
USB (Ypage 159)
RUSA: download data from the Internet if an
Internet address is available and mbrace is
activated for Internet access (
Ypage 93).
RCanada: download data from the Internet if
an Internet address is available and a
mobile phone is connected to the multime-
dia system via Bluetooth
®(Ypage 93) or
USB (Ypage 159)
Taking an alternative route
If the CalculateAlternativeRoutessetting
is activated O, different routes will be offered
each time a route is calculated (
Ypage 55).
You can call up alternative routes to the current
route.
Route guidance75
Navigation
Z
Page 93 of 202
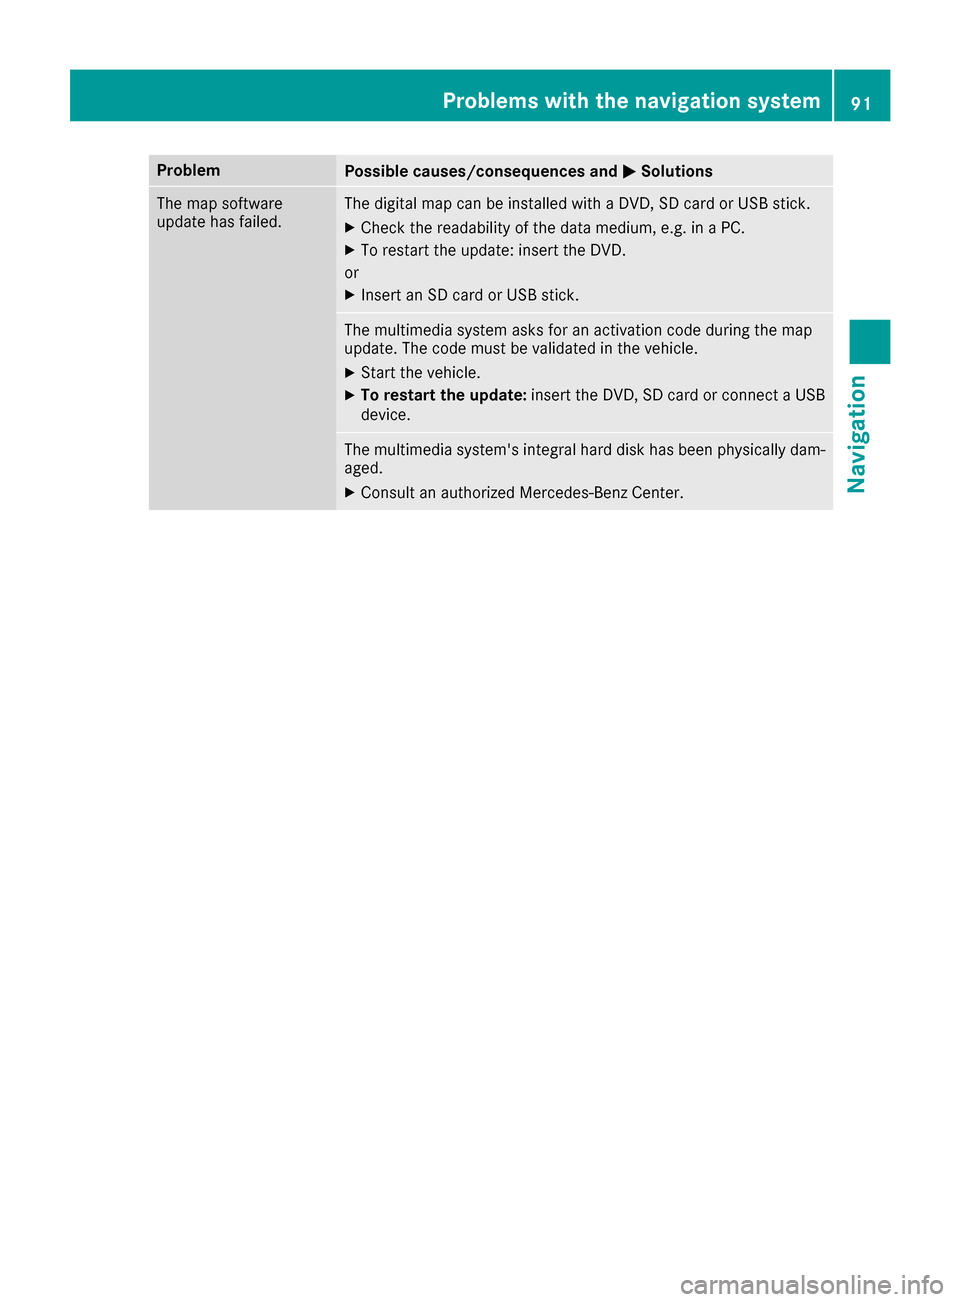
ProblemPossible causes/consequences andMSolutions
The map software
update has failed.The digital map can be installed with a DVD, SD card or USB stick.
XCheck the readability of the data medium, e.g. in a PC.
XTo restart the update: insert the DVD.
or
XInsert an SD card or USB stick.
The multimedia system asks for an activation code during the map
update. The code must be validated in the vehicle.
XStart the vehicle.
XTo restart the update: insert the DVD, SD card or connect a USB
device.
The multimedia system's integral hard disk has been physically dam-
aged.
XConsult an authorized Mercedes-Benz Center.
Problems with the navigation system91
Navigation
Z