MERCEDES-BENZ CLK CABRIOLET 2000 A208 Owner's Manual
Manufacturer: MERCEDES-BENZ, Model Year: 2000, Model line: CLK CABRIOLET, Model: MERCEDES-BENZ CLK CABRIOLET 2000 A208Pages: 323, PDF Size: 9.32 MB
Page 251 of 323
Tires, Wheels
Te ch n ica l
data Instruments
and controlsOperation DrivingInstrument
cluster displayPractical hintsCar care Index Rotating wheels
CLK 430:
Wheel rotation applies only when winter tires are
mounted on all four wheels.
The wheels can be rotated according to the degree of
tire wear while retaining the same direction of travel.
Rotating, however, should be carried out as
recommended by the tire manufacturer, before the
characteristic tire wear pattern (shoulder wear on front
wheels and tread center wear on rear wheels) becomes
visible, as otherwise the driving properties deteriorate.
Important!
Unidirectional tires must always be mounted with arrow
on tire sidewall pointing in direction of vehicle forward
movement.Notes:
Thoroughly clean the inner side of the wheels any time
you rotate the wheels or wash the vehicle underside.
The use of retread tires is not recommended. Retread
tires may adversely affect the handling characteristics
and safety of the vehicle.
Dented or bent rims can cause tire pressure loss and
dam age to t he tire bead s. For this reason, ch eck rims for
damage at regular intervals. The rim flanges must be
checked for wear before a tire is mounted. Remove
burrs, if any.
Check and ensure proper tire inflation pressure after
rotating the wheels. For tire inflation pressure see
inside of fuel filler flap and also page259.
251
Page 252 of 323
Tires, Wheels
Te ch n ica l
data Instruments
and controlsOperation DrivingInstrument
cluster displayPractical hintsCar care Index
Spare wheel
Spare wheel CLK 320
Important!
The spare wheel rim is mounted with a full size tire of
the same type as on the vehicle, and is fully functional.
However, that spare wheel rim is weight optimized and
has a limited service life of 12 000 miles (20 000 km)
use before a standard wheel rim must replace it.
In the case of a flat tire, you may temporarily use the
spare wheel.
Do not operate vehicle with more than one spare wheel
mounted.Unid irectional tires must a lways be mou nted w it h a rrow
on tire sidewall pointing in direction of vehicle forward
movement.
If the arrow on tire side wall does not point in direction
of vehicle forward movement when using the spare
wheel, observe the following restriction:
•Drive to the nearest tire repair facility as soon as
possible.
For rim and tire specifications, refer to “Technical Data”
Wa r n i n g !
The spare wheel rim is for temporary use only. Use
for over a total of 12 000 miles (20 000 km)
(aggregate of all uses) may cause wheel rim failure
leading to an accident and possible injuries.
252
Page 253 of 323
Tires, Wheels
Te ch n ica l
data Instruments
and controlsOperation DrivingInstrument
cluster displayPractical hintsCar care Index Spare wheel CLK 430
Important!
The spare wheel rim size is 7
1/2J x 17 H 2.
The spare wheel rim is mounted with a full size tire of
the same type as on the vehicle’s front axle, and is fully
functional. However, that spare wheel rim is weight
optimized and has a limited service life of 12 000 miles
(20 000 km) use before a standard wheel rim must
replace it.
If the arrow on tire side wall does not point in direction
of vehicle forward movement when using the spare
wheel, observe the following restriction:
•Drive to the nearest tire repair facility as soon as
possible.
In the case of a rear axle f lat tire, you may temporarily
use the spare wheel, when observing the following
restrictions:
•Do not exceed vehicle speed of 50 mph (80 km/h)
•Drive to the nearest tire repair facility to have the
flat tire repaired or replaced as appropriate.Do not operate vehicle with more than one spare wheel
mounted.
Unid irectional tires must a lways be mou nted w it h a rrow
on tire sidewall pointing in direction of vehicle forward
movement.
For rim and tire specifications, refer to “Technical Data”
Wa r n i n g !
The spare wheel rim is for temporary use only. Use
for over a total of 12 000 miles (20 000 km)
(aggregate of all uses) may cause wheel rim failure
leading to an accident and possible injuries.The dimensions of the spare wheel are different
from those of the road wheels for the rear axle. As a
result, the vehicle handling characteristics change
when driving with a spare wheel mounted on the
rear axle.The spare wheel should only be used temporarily,
and replaced with a regular road wheel as quick as
possible.
253
Page 254 of 323
Tires, Wheels
Te ch n ica l
data Instruments
and controlsOperation DrivingInstrument
cluster displayPractical hintsCar care Index
Changing wheelsMove vehicle to a level area which is a safe distance
from the roadway.
1. Set parking brake and turn on hazard warning
flasher.
2. Move selector lever to position “P” and turn off
engine.
3. Prevent vehicle from rolling away by blocking
wheels with wheel chocks (not supplied with
vehicle) or sizable wood block or stone. When
changing a wheel on a hill, place chocks on the
downhill side blocking both wheels of the other
axle. On a level road, place one chock in front of and
one behind the wheel that is diagonally opposite to
the wheel being changed.
Warning!
The jack is designed exclusively for jacking up the
vehicle at the jack tubes built into either side of the
vehicle. To help avoid personal injury, use the jack
only to lift the vehicle during a wheel change.
Never get beneath the vehicle while it is supported
by the jack. Keep hands and feet away from the area
under the lifted vehicle. Always firmly set parking
brake and block wheels before raising vehicle with
jack.Do not disengage parking brake while the vehicle is
raised. Be certain that the jack is always vertical
when in use, especially on hills. Always try to use
the jack on level surface. Be sure that the jack arm
is fully inserted in the jack tube. Always lower the
vehicle onto sufficient capacity jackstands before
working under the vehicle.
Wa r n i n g !
Before working on the vehicle, e.g. when changing
wheels, the roll bar should be raised with the
switch, and the electronic key be removed from the
steering lock, to prevent possible injury.
254
Page 255 of 323
Tires, Wheels
Te ch n ica l
data Instruments
and controlsOperation DrivingInstrument
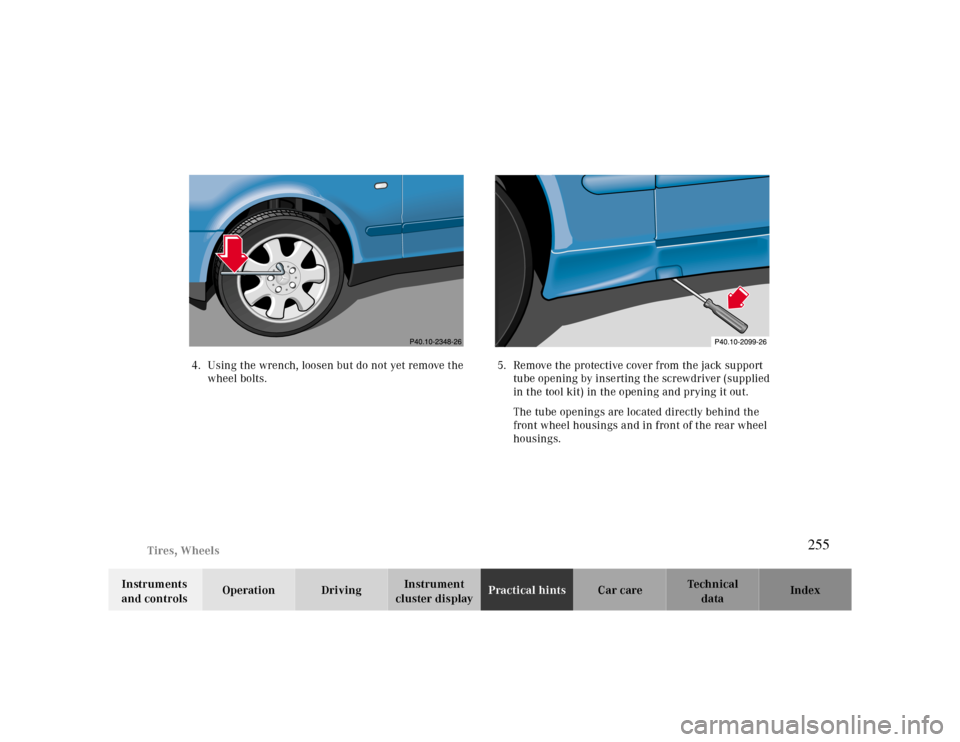
cluster displayPractical hintsCar care Index 4. Using the wrench, loosen but do not yet remove the
wheel bolts.5. Remove the protective cover from the jack support
tube opening by inserting the screwdriver (supplied
in the tool kit) in the opening and prying it out.
The tube openings are located directly behind the
front wheel housings and in front of the rear wheel
housings.
255
Page 256 of 323
Tires, Wheels
Te ch n ica l
data Instruments
and controlsOperation DrivingInstrument
cluster displayPractical hintsCar care Index
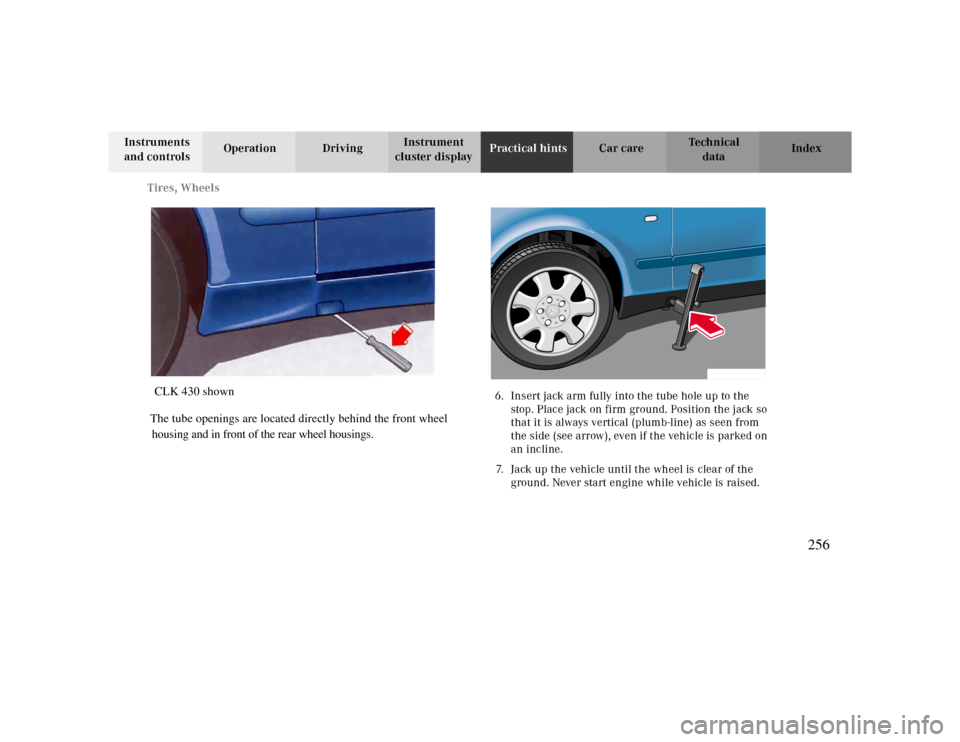
6. Insert jack arm fully into the tube hole up to the
stop. Place jack on firm ground. Position the jack so
that it is always vertical (plumb-line) as seen from
the side (see arrow), even if the vehicle is parked on
an incline. housing and in front of the rear wheel housings.
7. Jack up the vehicle until the wheel is clear of the
ground. Never start engine while vehicle is raised. The tube openings are located directly behind the front wheel CLK 430 shown
256
Page 257 of 323
Tires, Wheels
Te ch n ica l
data Instruments
and controlsOperation DrivingInstrument
cluster displayPractical hintsCar care Index
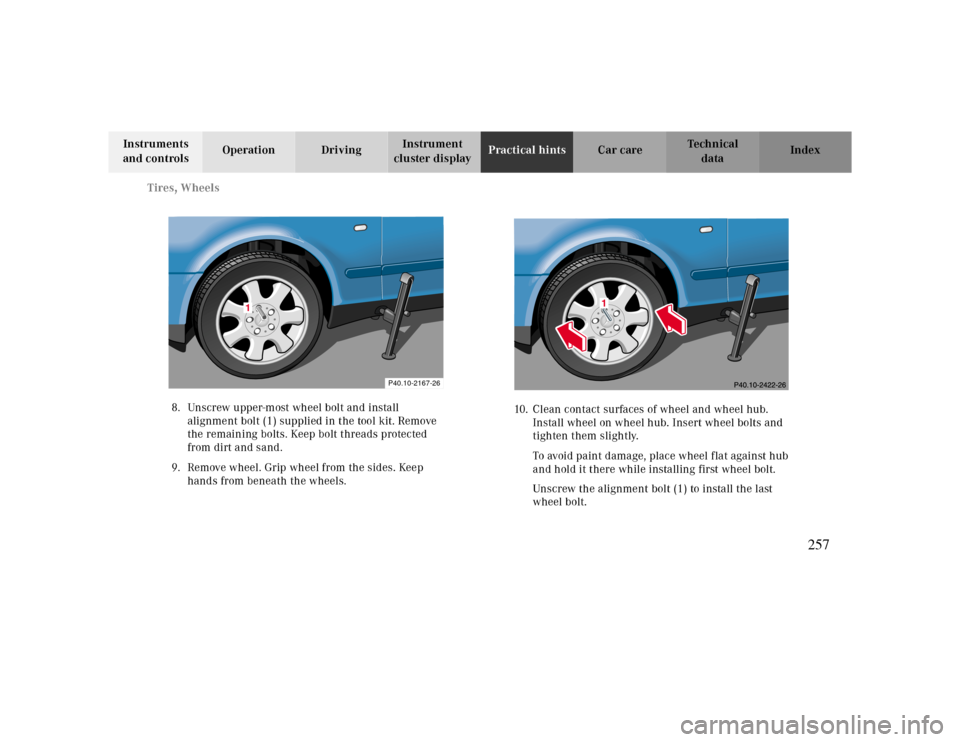
8. Unscrew upper-most wheel bolt and install
alignment bolt (1) supplied in the tool kit. Remove
the remaining bolts. Keep bolt threads protected
from dirt and sand.
9. Remove wheel. Grip wheel from the sides. Keep
hands from beneath the wheels.
P40.10-2167-26
1
10. Clean contact surfaces of wheel and wheel hub.
Install wheel on wheel hub. Insert wheel bolts and
tighten them slightly.
To avoid paint damage, place wheel flat against hub
and hold it there while installing first wheel bolt.
Unscrew the alignment bolt (1) to install the last
wheel bolt.
257
Page 258 of 323
Tires, Wheels
Te ch n ica l
data Instruments
and controlsOperation DrivingInstrument
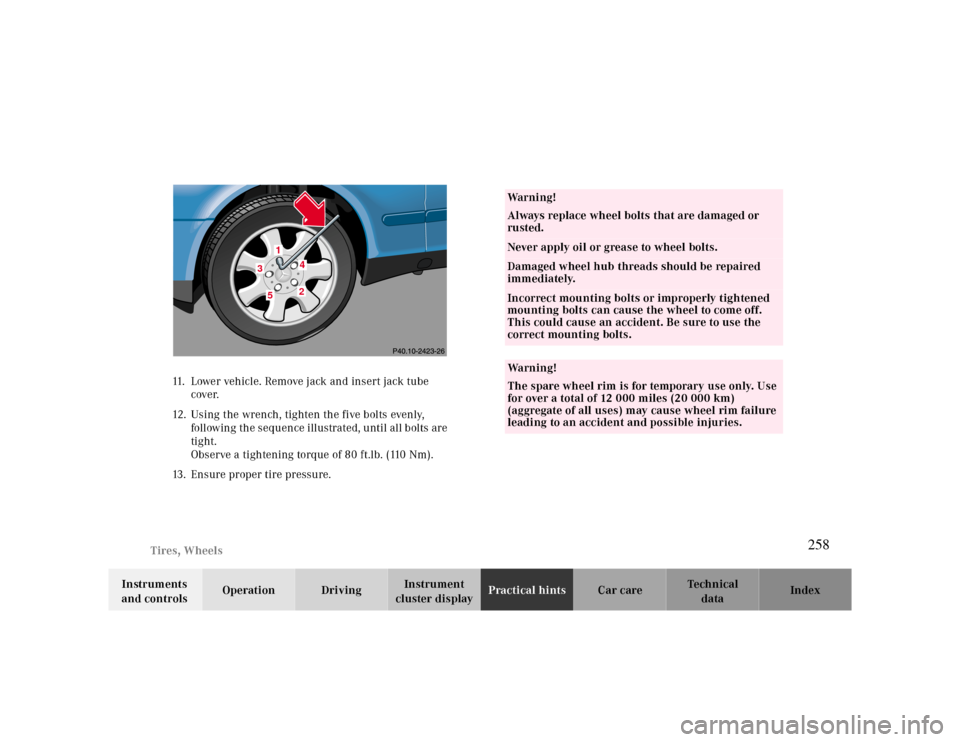
cluster displayPractical hintsCar care Index 11. Lower vehicle. Remove jack and insert jack tube
cover.
12. Using the wrench, tighten the five bolts evenly,
following the sequence illustrated, until all bolts are
tight.
Observe a tightening torque of 80 ft.lb. (110 Nm).
13. Ensure proper tire pressure.
34
2
5
Warning!
Always replace wheel bolts that are damaged or
rusted.Never apply oil or grease to wheel bolts.Damaged wheel hub threads should be repaired
immediately.Incorrect mounting bolts or improperly tightened
mounting bolts can cause the wheel to come off.
This could cause an accident. Be sure to use the
correct mounting bolts.Wa r n i n g !
The spare wheel rim is for temporary use only. Use
for over a total of 12 000 miles (20 000 km)
(aggregate of all uses) may cause wheel rim failure
leading to an accident and possible injuries.
258
Page 259 of 323
Tires, Wheels
Te ch n ica l
data Instruments
and controlsOperation DrivingInstrument
cluster displayPractical hintsCar care Index Tire inflation pressure
A table (see fuel filler f lap) lists the tire inflation
pressures specified for Mercedes-Benz recommended
tires as well as for the varying operating conditions.
Important!
Tire pressure changes by approx. 1.5 psi (0.1 bar) per
18°F (10°C) of air temperature change. Keep this in
mind when checking tire pressure inside a garage –
especially in the winter.
Example:
If garage temperature = approx. +68°F (+20°C) and
ambient temperature = approx. +32°F (0°C) then the
adjusted air pressure = specified air pressure +3 psi
(+0.2 bar).Tire pressures listed for light loads are minimum values
offering high driving comfort. Increased inflation
pressures for heavy loads produce favorable handling
characteristics with lighter loads and are perfectly
permissible. The ride of the vehicle, however, will
become somewhat harder.
Tire temperature and pressure increase with the vehicle
speed. Tire pressure should therefore only be checked
and corrected on cold tires. Correct tire pressure in
warm tires only if pressure has dropped below the
pressure listed in the table and the respective operating
conditions are taken into consideration.
An underinf lated tire due to a slow leak (e.g. due to a
nail in the tire) may cause damage such as tread
separation, bulging etc.. Regular tire pressure checks
(including the spare tire) at intervals of no more than
14 days are therefore essential.
259
Page 260 of 323
Te ch n ica l
data Instruments
and controlsOperation DrivingInstrument
cluster displayPractical hintsCar care Index
If a tire constantly loses air, it should be inspected for
damage.
The spare tire should be checked periodically for
condition and inflation. Spare tire will age and become
worn over time even if never used, and thus should be
inspected and replaced when necessary.
Warning!
Do not overinflate tires. Overinflating tires can
result in sudden deflation (blowout) because they
are more likely to become punctured or damaged
by road debris, potholes etc.. Follow recommended
inflation pressures.Do not overload the tires by exceeding the specified
vehicle capacity weight (as indicated by the label
on the driver’s door latch post). Overloading the
tires can overheat them, possibly causing a
blowout. Tires, Wheels
260