trailer MERCEDES-BENZ CLS COUPE 2011 Owners Manual
[x] Cancel search | Manufacturer: MERCEDES-BENZ, Model Year: 2011, Model line: CLS COUPE, Model: MERCEDES-BENZ CLS COUPE 2011Pages: 337, PDF Size: 7.37 MB
Page 174 of 337

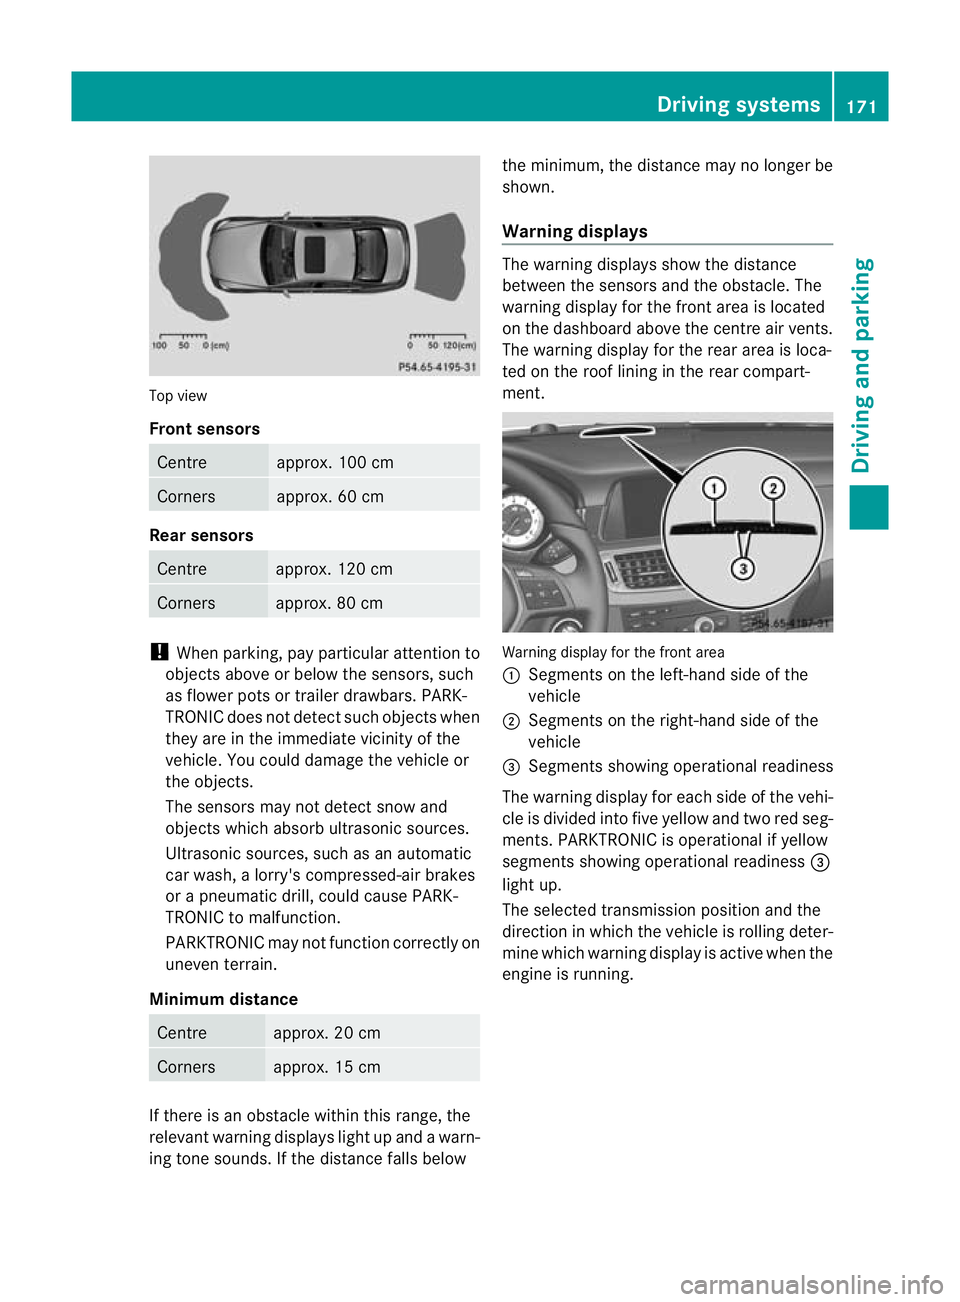
Top view
Front sensors
Centre approx. 100 cm
Corners approx. 60 cm
Rear sensors
Centre approx. 120 cm
Corners approx. 80 cm
!
When parking, pay particular attention to
objects above or below the sensors, such
as flower pots or trailer drawbars. PARK-
TRONIC does not detect such objects when
they are in the immediate vicinity of the
vehicle. You could damage the vehicle or
the objects.
The sensors may not detect snow and
objects which absorb ultrasonic sources.
Ultrasonic sources, such as an automatic
car wash, a lorry's compressed-air brakes
or a pneumatic drill, could cause PARK-
TRONIC to malfunction.
PARKTRONIC may not function correctly on
uneven terrain.
Minimum distance Centre approx. 20 cm
Corners approx. 15 cm
If there is an obstacle within this range, the
relevant warning displays light up and a warn-
ing tone sounds. If the distance falls below the minimum, the distance may no longer be
shown.
Warning displays The warning displays show the distance
between the sensors and the obstacle. The
warning display for the front area is located
on the dashboard above the centre air vents.
The warning display for the rear area is loca-
ted on the roof lining in the rear compart-
ment.
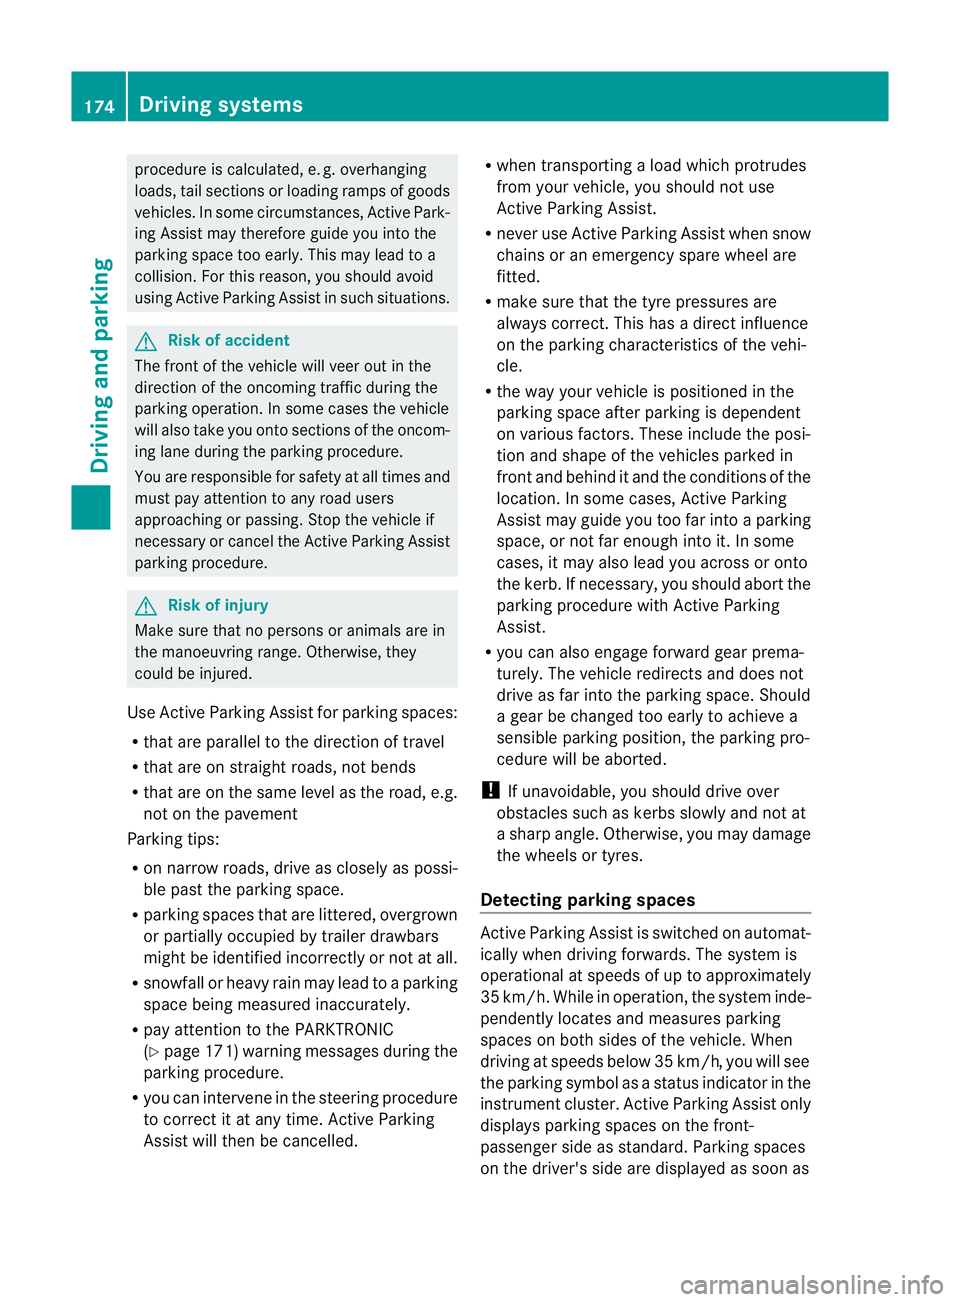
Warning display for the front area
:
Segments on the left-hand side of the
vehicle
; Segments on the right-hand side of the
vehicle
= Segments showing operational readiness
The warning display for each side of the vehi-
cle is divided into five yellow and two red seg-
ments. PARKTRONIC is operational if yellow
segments showing operational readiness =
light up.
The selected transmission position and the
direction in which the vehicle is rolling deter-
mine which warning display is active when the
engine is running. Driving systems
171Driving and parking Z
Page 177 of 337

procedure is calculated, e. g. overhanging
loads, tail sections or loading ramps of goods
vehicles. In some circumstances, Active Park-
ing Assist may therefore guide you into the
parking space too early. This may lead to a
collision. For this reason, you should avoid
using Active Parking Assist in such situations.
G
Risk of accident
The front of the vehicle will veer out in the
direction of the oncoming traffic during the
parking operation .Insome cases the vehicle
will also take you onto sections of the oncom-
ing lane during the parking procedure.
You are responsible for safety at all times and
must pay attention to any road users
approaching or passing. Stop the vehicle if
necessary or cancel the Active Parking Assist
parking procedure. G
Risk of injury
Make sure that no persons or animals are in
the manoeuvring range. Otherwise, they
could be injured.
Use Active Parking Assist for parking spaces:
R that are parallel to the direction of travel
R that are on straight roads, not bends
R that are on the same level as the road, e.g.
not on the pavement
Parking tips:
R on narrow roads, drive as closely as possi-
ble past the parking space.
R parking spaces that are littered, overgrown
or partially occupied by trailer drawbars
might be identified incorrectly or not at all.
R snowfall or heavy rain may lead to a parking
space being measured inaccurately.
R pay attention to the PARKTRONIC
(Y page 171) warning messages during the
parking procedure.
R you can intervene in the steering procedure
to correct it at any time. Active Parking
Assist will then be cancelled. R
when transporting a load which protrudes
from your vehicle, you should not use
Active Parking Assist.
R never use Active Parking Assist when snow
chains or an emergency spare wheel are
fitted.
R make sure that the tyre pressures are
always correct. This has adirec tinfluence
on the parking characteristics of the vehi-
cle.
R the way your vehicle is positioned in the
parking space after parking is dependent
on various factors .These include the posi-
tion and shape of the vehicles parked in
front and behind it and the conditions of the
location. In some cases, Active Parking
Assist may guide you too far into a parking
space, or not far enough into it. In some
cases, it may also lead you across or onto
the kerb. If necessary, you should abort the
parking procedure with Active Parking
Assist.
R you can also engage forward gear prema-
turely. The vehicle redirects and does not
drive as far into the parking space. Should
a gear be changed too early to achieve a
sensible parking position, the parking pro-
cedure will be aborted.
! If unavoidable, you should drive over
obstacles such as kerbs slowly and not at
a sharp angle. Otherwise, you may damage
the wheels or tyres.
Detecting parking spaces Active Parking Assist is switched on automat-
ically when driving forwards. The system is
operational at speeds of up to approximately
35 km/h. While in operation, the system inde-
pendently locates and measures parking
spaces on both sides of the vehicle. When
driving at speeds below 35 km/h, you will see
the parking symbol as a status indicator in the
instrumentc luster.Active Parking Assist only
displays parking spaces on the front-
passenger side as standard .Parking spaces
on the driver's side are displayed as soon as 174
Driving systemsDriving and parking
Page 301 of 337

X
Switch on the hazard warning lamps
(Y page 101).
X Leave the key in position 2in the ignition
lock.
i Whe ntowing with the hazard warning
lamps switched on, use the combination
switch as usual to signal achange of direc-
tion. In this case, only the turn signals for
the desired direction flash. When the com-
bination switch is reset, the hazard warning
lamps start flashing again. Transporting the vehicle
The towing eye can be used to pull the vehicle
onto a trailer or transporter for transporting
purposes.
X Vehicles with automatic transmission:
turn the key to position 2in the ignition
lock.
X Shift the automatic transmission to posi-
tion N.
As soon as the vehicle is loaded:
X Prevent the vehicle from rolling away by
applying the parking brake.
X Turn the key in the ignition lock to position
0and remove the key from the ignition
lock.
X Secure the vehicle.
! Only lash the vehicle down by the wheels
or wheel rims, not by parts of the vehicle
such as axle or steering components. Oth-
erwise, the vehicle could be damaged. Electrical fuses
Important safety notes
The fuses in your vehicle serve to close down
faulty circuits. If afuse blows, all the compo-
nents on the circuit and their functions will
fail. G
Risk of fire
Only use fuses that have been approved for
Mercedes-Ben zvehicles and which have the
correct fuse rating for the systems con-
cerned. Do not attempt to repair or bridge
faulty fuses. Otherwise, a circuit overload
could cause a fire. Have the cause traced and
rectified at a qualified specialist workshop,
e.g. a Mercedes-Benz Service Centre.
Blown fuses must be replaced with fuses of
the same rating, which you can recognise by
the colour and value. The fuse ratings are lis-
ted in the fuse allocation chart .AMercedes-
BenzS ervice Centre will be happy to advise
you.
If the newly inserted fuse also blows, have the
cause traced and rectified at a qualified spe-
cialist workshop, e.g. a Mercedes-Benz
Service Centre.
! Only use fuses that have been approved
for Mercedes-Benzv ehicles and which
have the correct fuse rating for the system
concerned. Otherwise, components or sys-
tems could be damaged. Before changing a fuse
X Park the vehicle and apply the parking
brake.
X Switch off all electrical consumers.
X Remove the key from the ignition lock.
The fuses are located in various fuse boxes:
R fuse box in the engine compartment on the
left-hand side of the vehicle, when viewed
in the direction of travel
R fuse box in the boot on the right when
viewed in the direction of travel
The fuse allocation chart is located in the
vehicle tool kit (Y page 279) in the stowage
compartment under the boot floor. 298
Electrical fusesBreakdown assistance
Page 308 of 337

achieving an increased driving force (cut-
ting action). Tyre pressure
Tyre pressure specifications
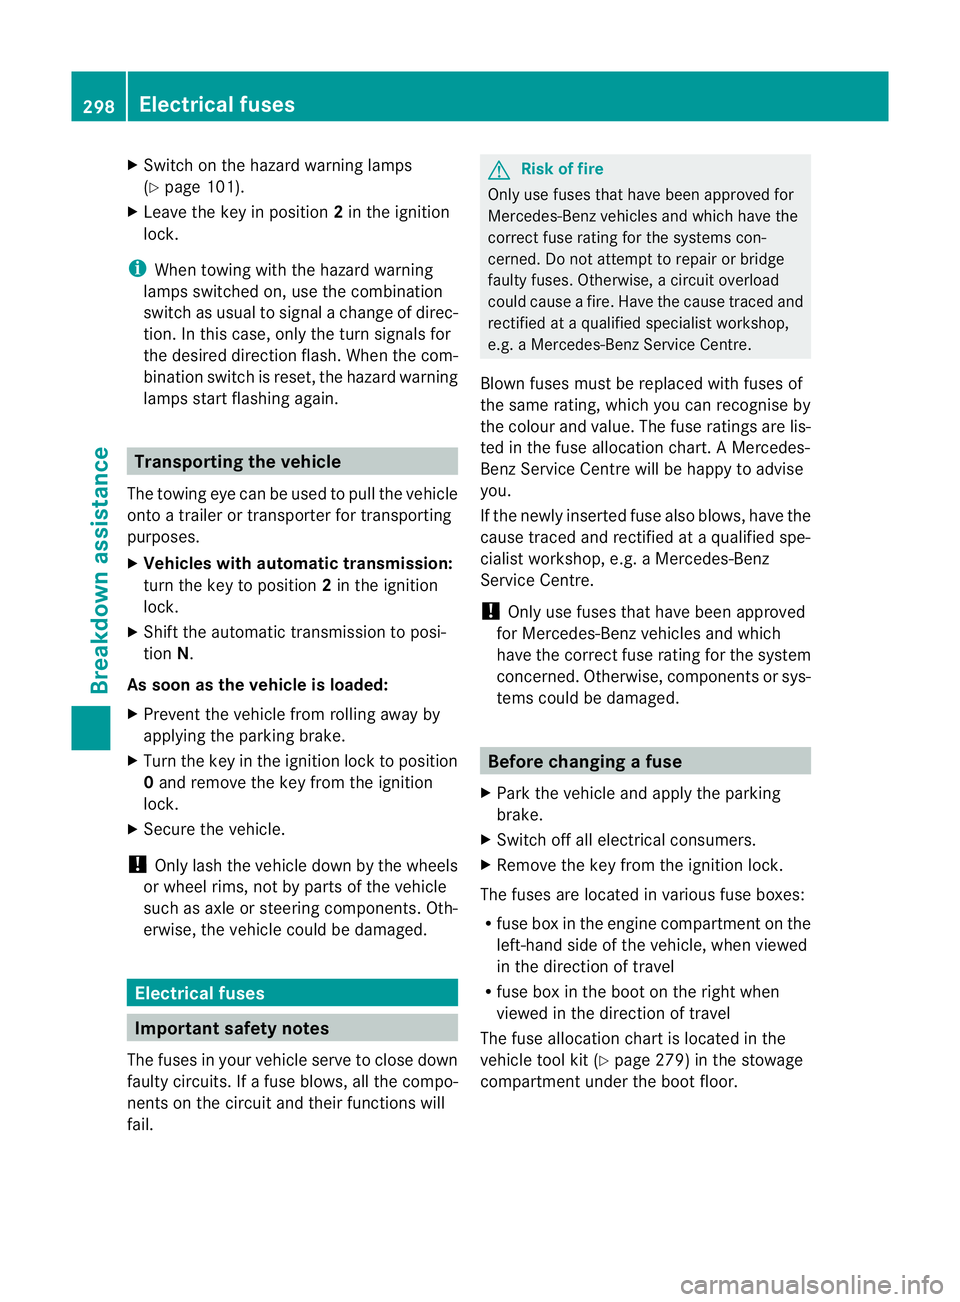
You will find a table of tyre pressures for var-
ious operating conditions on the inside of
your vehicle's fuel fille rflap.
The applicable value for the emergency spare
wheel is stated on the spare wheel and in the
technical data section.
For trailer towing, adjust the tyre pressure of
the rear tyres to the maximum tyre pressure
value stated on the table inside the fuel filler
flap.
The load conditions "partially laden" and "fully
laden" are defined in the table for different
numbers of passengers and amounts of lug-
gage. The actual number of seats may vary –
for more information please refer to the vehi-
cle's registration documents.
If no other data is stated, the tyre pressures
specified on the fuel filler flap apply for all
tyres approved for this vehicle. If a tyre size precedes a tyre pressure, the tyre
pressure information followin gis only valid
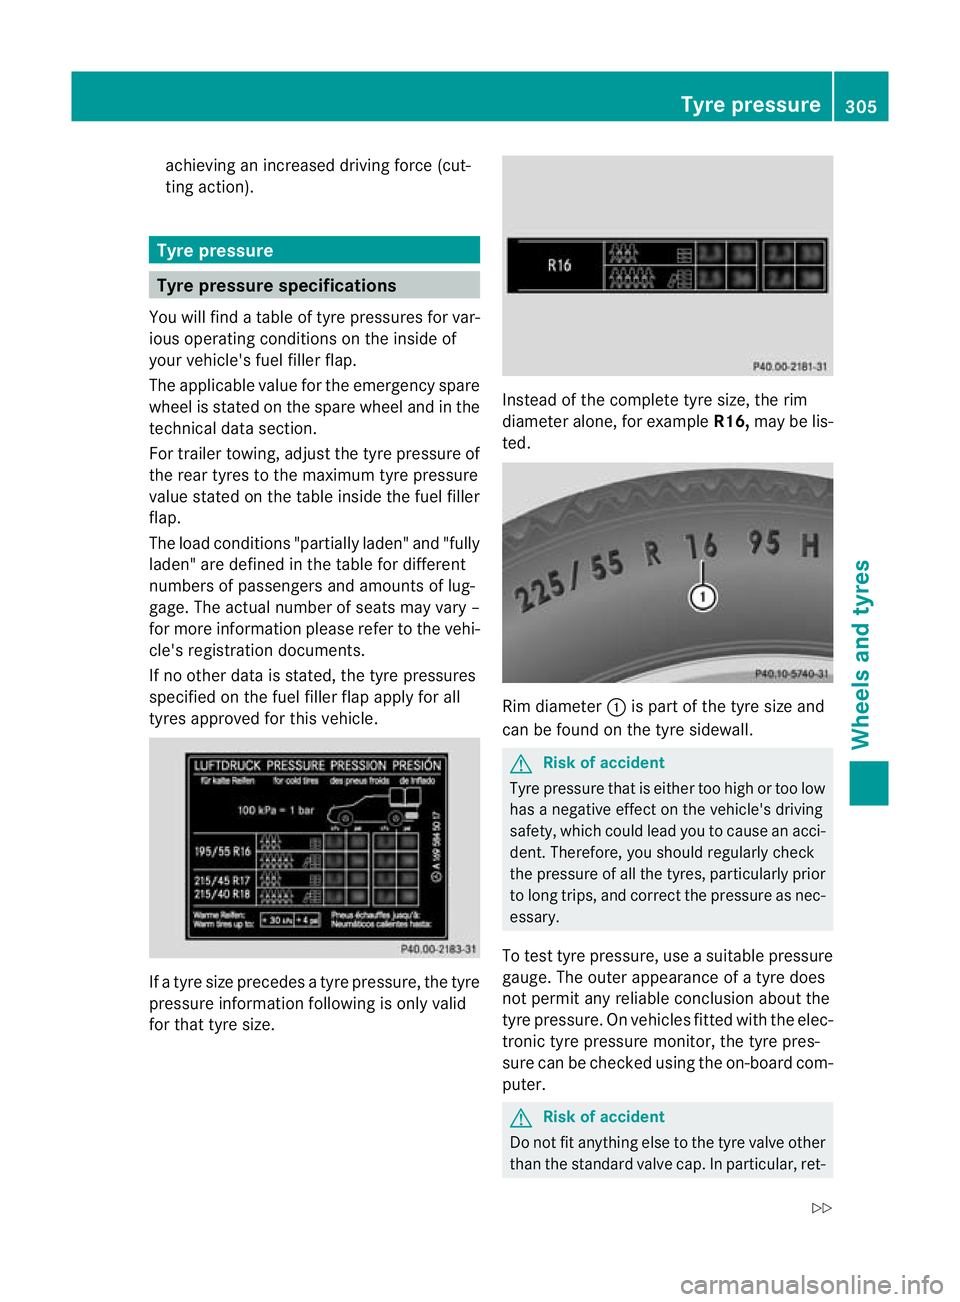
for that tyre size. Instead of the complete tyre size, the rim
diameter alone, for example
R16,may be lis-
ted. Rim diameter
:is part of the tyre size and
can be found on the tyre sidewall. G
Risk of accident
Tyre pressure that is either too high or too low
has a negative effect on the vehicle's driving
safety, which could lead you to cause an acci-
dent. Therefore, you should regularly check
the pressure of all the tyres, particularly prior
to long trips, and correct the pressure as nec-
essary.
To test tyre pressure, use a suitable pressure
gauge.T he outer appearance of a tyre does
not permit any reliable conclusion about the
tyre pressure. On vehicles fitted with the elec-
tronic tyre pressure monitor, the tyre pres-
sure can be checked using the on-board com-
puter. G
Risk of accident
Do not fit anything else to the tyre valve other
than the standard valve cap. In particular, ret- Tyre pressure
305Wheels and tyres
Z