ECO mode MERCEDES-BENZ E-CLASS CABRIOLET 2017 Owners Manual
[x] Cancel search | Manufacturer: MERCEDES-BENZ, Model Year: 2017, Model line: E-CLASS CABRIOLET, Model: MERCEDES-BENZ E-CLASS CABRIOLET 2017Pages: 521, PDF Size: 10.64 MB
Page 22 of 521
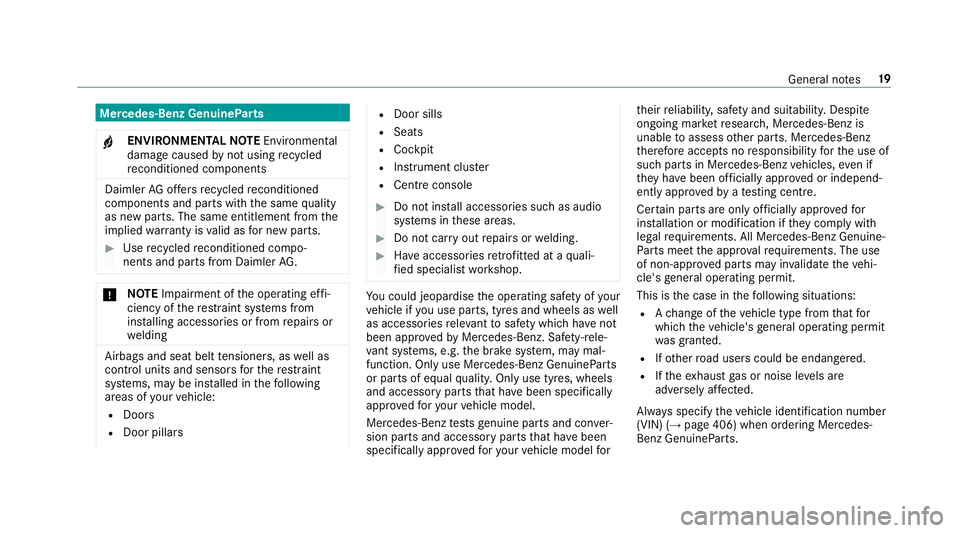
Mercedes-Benz GenuineParts
+ ENVIRONMENTAL
NOTEEnvironmental
dama gecaused bynot using recycled
re conditioned components Daimler
AGoffers recycled reconditioned
components and pa rts with the same quality
as new parts. The same entitlement from the
implied warranty is valid as for new parts. #
Use recycled reconditioned compo‐
nents and pa rts from Daimler AG. *
NO
TEImpairment of the operating ef fi‐
ciency of there stra int sy stems from
ins talling accessories or from repairs or
we lding Airbags and seat belt
tensioners, as well as
control units and sensors forth ere stra int
sy stems, may be ins talled in thefo llowing
areas of your vehicle:
R Doors
R Door pillars R
Door sills
R Seats
R Cockpit
R Instrument clus ter
R Centre console #
Do not ins tall accessories such as audio
sy stems in these areas. #
Do not car ryout repairs or welding. #
Have accesso ries retrofitted at a quali‐
fi ed specialist workshop. Yo
u could jeopardise the operating saf ety of your
ve hicle if you use parts, tyres and wheels as well
as accessories releva nt tosaf ety which ha venot
been appr ovedby Mercedes-Benz. Saf ety-re le‐
va nt sy stems, e.g. the brake sy stem, may mal‐
function. Only use Mercedes-Benz GenuineParts
or parts of equal qualit y.Only use tyres, wheels
and accessory parts that ha vebeen specifically
appr ovedfo ryo ur vehicle model.
Mercedes-Benz testsge nuine pa rts and con ver‐
sion parts and accessory parts that ha vebeen
specifically appr ovedfo ryo ur vehicle model forth
eir reliability, saf ety and suitabilit y.Despite
ongoing ma rket resear ch, Mercedes-Benz is
unable toassess other parts. Mercedes-Benz
th erefore accepts no responsibility forth e use of
such parts in Mercedes-Benz vehicles, even if
th ey have been of ficially appr oved or independ‐
ently appr oved byate sting centre.
Cer tain parts are only of ficially appr ovedfor
ins tallation or modification if they comply wi th
legal requirements. All Mercedes-Benz Genuine‐
Pa rts meet the appr oval requ irements. The use
of non-appr oved parts may in validate theve hi‐
cle's general operating pe rmit.
This is the case in thefo llowing situations:
R Ach ange of theve hicle type from that for
which theve hicle's general operating pe rmit
wa s granted.
R Ifot her road users could be endangered.
R Ifth eex haust gas or noise le vels are
adversely af fected.
Alw ays specify theve hicle identification number
(VIN) (→ page 406) when ordering Mercedes-
Benz GenuineParts. General no
tes19
Page 53 of 521
Semi-uni
versal ch ild restra int sy stems are indi‐
cated bythete xt "semi-uni versal" on the
appr oval label. They can on ly beused if theve hi‐
cle and the seat are lis ted in thech ild restra int
sy stem manufacturer's vehicle model list.
Suitability of seats for attaching belt-
secu redch ild restra int sy stems
Obser vethefo llowing information:
R When using a baby car seat of the cate‐
gory 0/0+ and a rear wa rd-facing child
re stra int sy stem on a rear seat: adjustthe
driver's and front passenger seat such that
th e seat does not touch thech ild restra int
sy stem.
R When using a forw ard-facing child
re stra int sy stem of category I: remo vethe
head restra int from there spective seat, if
possible (→ page 93). In addition, the seat
backrest of thech ild restra int sy stem must,
as far as possible, lie flat against the back‐
re st of theve hicle seat. R
When youre mo vethech ild restra int sy stem,
fi t th e head restra int immediately
(→ page 93) and adjust all the head
re stra ints again cor rectly.
R For cer tain child restra int sy stems in weight
categories II or III, there might be restrictions
in the maximum size setting, e.g. due topos‐
sible con tact wi th thero of.
R Make sure that thech ild's feet do not touch
th e front seat. If necessar y,mo vethe front
seat forw ard slightl y.
R The child restra int sy stem must not touch the
ro of or be put under stra in by the head
re stra ints. Adjust the head restra ints accord‐
ing ly.
R When opening or closing the soft top, the
ch ild restra int sy stems in weight categories II
or III must be remo ved or the head restra ints
of thech ild restra int sy stems must be mo ved
to the lo westposition. R
Obser vethe manufacturer's ins tallation
instructions forth ech ild restra int sy stem.
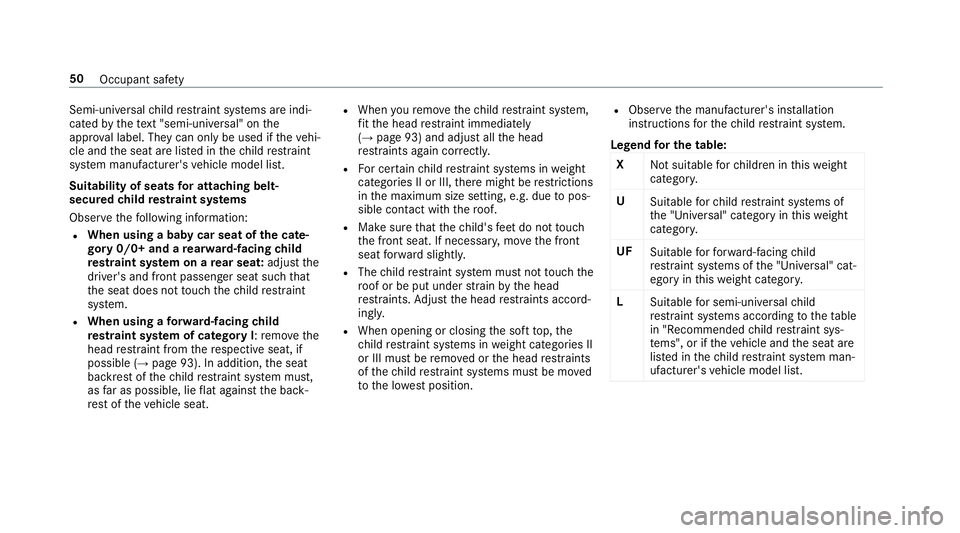
Legend for the table:
X Not suitable forch ildren in this we ight
categor y.
U Suitable forch ild restra int sy stems of
th e "Universal" category in this we ight
categor y.
UF Suitable forfo rw ard-facing child
re stra int sy stems of the "Universal" cat‐
egory in this we ight categor y.
L Suitable for semi-universal child
re stra int sy stems according totheta ble
in "Recommended child restra int sys‐
te ms", or if theve hicle and the seat are
lis ted in thech ild restra int sy stem man‐
ufacturer's vehicle model list. 50
Occupant saf ety
Page 133 of 521
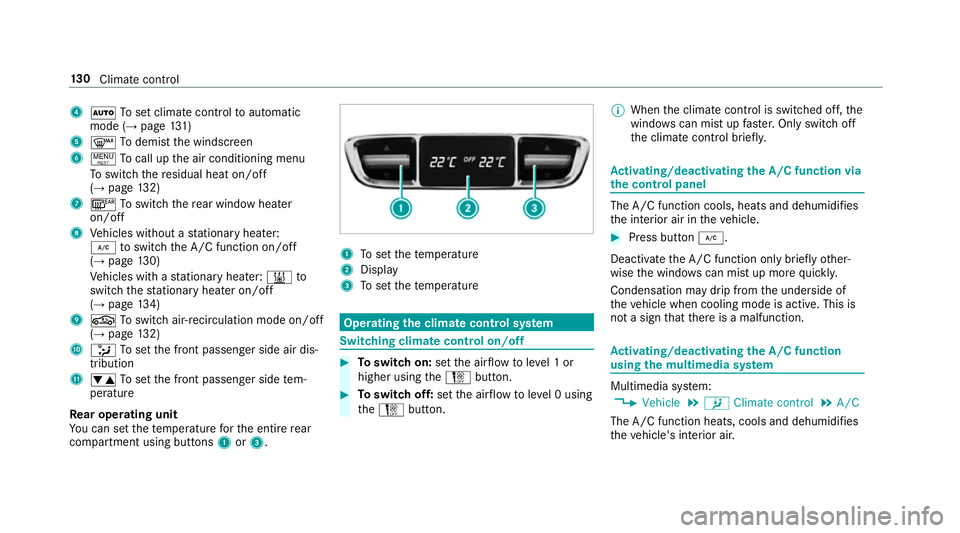
4
à Toset climate contro lto automatic
mode (→ page131)
5 ¬ Todemist the windscreen
6 ! Tocall up the air conditioning menu
To switch there sidual heat on/off
(→ page 132)
7 ¤ Toswitch there ar wind owheater
on/off
8 Vehicles without a stationary heater:
¿ toswitch the A/C function on/off
(→ page 130)
Ve hicles with a stationary heater: &to
switch thest ationary heater on/off
(→ page 134)
9 g Toswitch air-recirculation mode on/off
(→ page 132)
A _ Toset the front passenger side air dis‐
tribution
B w Toset the front passenger side tem‐
perature
Re ar operating unit
Yo u can set thete mp erature forth e entire rear
compartment using buttons 1or3. 1
Toset thete mp erature
2 Display
3 Toset thete mp erature Operating
the clima tecont rol sy stem Switching clima
tecont rol on/off #
Toswitch on: setthe air flow toleve l 1 or
higher using theH button. #
Toswitch off: setthe air flow toleve l 0 using
th eH button. %
When the climate control is switched off, the
windo wscan mist up faster. Only switch off
th e climate control brief ly. Ac
tivating/deactivating the A/C function via
the control panel The A/C function cools, heats and dehumidifies
th
e interior air in theve hicle. #
Press button ¿.
Deactivate the A/C function only briefly other‐
wise the windo wscan mist up more quickl y.
Condensation may drip from the underside of
th eve hicle when cooling mode is active. This is
not a sign that there is a malfunction. Ac
tivating/deactivating the A/C function
using the multimedia sy stem Multimedia sy
stem:
, Vehicle .
b Climate control .
A/C
The A/C function heats, cools and dehumidifies
th eve hicle's interior air. 13 0
Climate cont rol
Page 135 of 521
Ac
tivating/deactivating the climate control
syn chro nisation function using the multime‐
dia sy stem Multimedia sy
stem:
, Vehicle .
b Climate con-
trol .
SYNC
Climate control can be set cent rally using the
synchronisation function. The temp erature set‐
ting is automatically adop tedfo r all clima te
zones. #
Activate Oor deacti vate ª the function. Demisting
the windo ws Wi
ndo wsmis ted up on the inside #
Press theà button. #
Ifth e windo wscontinue tomist up: press the
¬ button.
Wi ndo wsmis ted up on the outside #
Switch on the windscreen wipers. #
Press theà button. Switching air-recirculation mode on/off
#
Press theg button.
The interior air will be recirculated.
Air-reci rculation mode is swit ched off automati‐
cally.
% If air-recirculation mode is switched on, the
windo wsmay mist up more quickl y.Switch
on ai r-re circulation mode only brie fly. Switching
there sidual heat on/off Re
quirement:
R The vehicle is par ked.
It is possible tomake use of there sidual heat
from the engine tocontinue heating or ventilat‐
ing the front compartment of theve hicle for
appr oximately 30 minutes. #
Toswitch on: pressthe! button.
Re sidual heat is switched off automaticall y. Ac
tivating and deactivating ionisation Multimedia sy
stem:
, Vehicle .
b Climate control .
Ioni-
sation
Ionisation cleans and refreshes the interior air of
th eve hicle. The ionisation of the interior air is
odourless. #
Activate Oor deacti vate ª the function. Fr
ag rance sy stem Setting
the frag rance sy stem
Re quirements:
R Automatic clima tecontrol is acti vated.
R The glove box is closed.
Multimedia sy stem:
, Vehicle .
b Climate control .
Air
freshener
The fragrance sy stem distributes a pleasant fra‐
grance thro ughout theve hicle interior from a fla‐
con located in theglove box. 13 2
Climate cont rol
Page 137 of 521
Dispose of
thege nuine Mercedes-Benz interior
pe rfume flacon when it is em pty and do not refill
it.
Re fillable flacon #
Unscr ew the cap of the em ptyflacon. #
Filltheflacon with a maximum of 15ml. #
Screw the cap back on totheflacon.
Alw aysre fill th e em ptyre fillable flacon with the
same perfume. Obser vethe separate informa‐
tion sheet attached totheflacon. St
ationary heater/ventilation Fu
nction of thest ationary heater/stationary
ve ntilation
R The air in theve hicle interior is heated or
ve ntilated tothe set temp erature.
R The air in theve hicle interior cannot be
cooled down totemp eratures below the out‐
side temp erature.
R Ifth e outside temp erature changes, ventila‐
tion mode au tomatical lyswitches toheating mode or from heating mode
toventilation
mode.
The stationary heater and theex haust gas outlet
are situated at theright-hand front wheel.
Switching thest ationary heater/stationary
ve ntilation on/off via the control panel &
DANG ER Risk of fata l injury due topoi‐
sonous exhaust gases
If th eta ilpipe is bloc ked or suf ficient ventila‐
tion is not possible, poisonous exhaust gases
such as carbon monoxide may enter theve hi‐
cle. This is the case in enclosed spaces or if
th eve hicle gets stuck in sn ow,fo rex ample. #
Alw ays switch thest ationary heater off
in enclosed spaces without an air
ex traction sy stems, e.g. in garage s. #
Keep theta ilpipe and the area around
th eve hicle free from snow when the
engine or thest ationary heater are run‐
ning. #
Open a window on the windward side of
th eve hicle toensure an adequate sup‐
ply of fresh air. &
WARNING Risk offire due tohot station‐
ary heater components
When thest ationary heater is swit ched on,
parts of theve hicle can become very hot,
e.g. theex haust sy stem.
Flammable materials such as lea ves, grass or
twigs may ignite if they come into contact
wi th:
R hot parts of theex haust sy stem
R theex haust gas itself #
When thest ationary heater is swit ched
on, make sure that:
R hot vehicle parts do not come into
contact with flammable materials
R theex haust gas can flow out of the
ta ilpipe unhindered
R theex haust gas does not come into
contact with flammable materials 134
Climate cont rol
Page 145 of 521
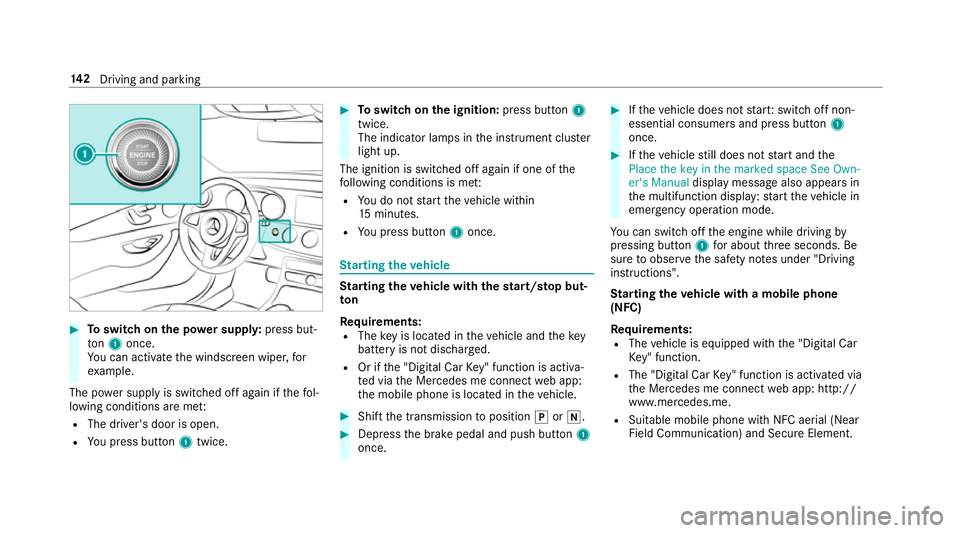
#
Toswitch on the po wer supp ly:press but‐
to n1 once.
Yo u can activate the windscreen wiper, for
ex ample.
The po wer supp lyis switched off again if thefo l‐
lowing conditions are me t:
R The driver's door is open.
R You press but ton1 twice. #
Toswitch on the ignition: press button 1
twice.
The indicator lamps in the instrument clus ter
light up.
The ignition is switched off again if one of the
fo llowing conditions is me t:
R You do not start theve hicle within
15 minutes.
R You press but ton1 once. St
arting theve hicle St
arting theve hicle with thest art/s top but‐
ton
Requ irements:
R The key is located in theve hicle and thekey
battery is not dischar ged.
R Or if the "Digital Car Key" function is activa‐
te d via the Mercedes me connect web app:
th e mobile phone is located in theve hicle. #
Shift the transmission toposition jori. #
Depress the brake pedal and push button 1
once. #
Ifth eve hicle does not star t:switch off non-
essential consumers and press button 1
once. #
Ifth eve hicle still does not start and the
Place the key in the marked space See Own-
er's Manual display message also appears in
th e multifunction display: start theve hicle in
emer gency operation mode.
Yo u can swit choff the engine while driving by
pressing button 1for about thre e seconds. Be
sure toobser vethe saf ety no tes under "Driving
instructions".
St arting theve hicle with a mobile phone
(NFC)
Re quirements:
R The vehicle is equipped with the "Digital Car
Ke y" function.
R The "Digital Car Key" function is activated via
th e Mercedes me connect web app: http://
www.mercedes.me.
R Suitable mobile phone with NFC aerial (Near
Field Communication) and Secure Element. 14 2
Driving and pa rking
Page 146 of 521
R
Suf ficient charge leve l of the mobile
phone. On some mobile phones, the function
is also available when the battery is dis‐
ch arge d.
% You can check the suitability of your mobile
phone byentering the phone number at
http://www.mercedes.me.
Information about suitable mobile phones
can be obtained from your Mercedes-Benz
service centre or at http://www.mercedes-
benz.com/connect.
% Mercedes-Benz recommends that you car ry
th e emer gency key in case of function
re strictions.
% The function is only available in combination
with Mercedes me connect and on lyin cer‐
ta in countries.
% Protective cases around the mobile phone
can impair the functionality. #
Make sure that thech arge leve l of the mobile
phone is suf ficient. If necessar y,ch arge the
mobile phone before starting the journe y. St
arting theve hicle for the firs t time af ter
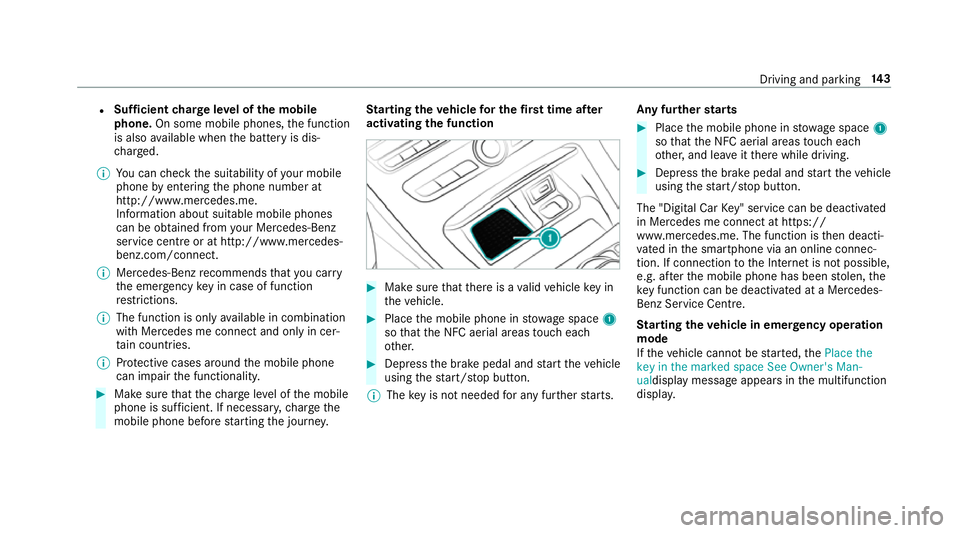
activating the function #
Make sure that there is a valid vehicle key in
th eve hicle. #
Place the mobile phone in stowage space 1
so that the NFC aerial areas touch each
ot her. #
Depress the brake pedal and start theve hicle
using thest art/ stop button.
% The key is not needed for any fur ther starts. Any fu
rther starts #
Place the mobile phone in stowage space 1
so that the NFC aerial areas touch each
ot her, and lea veitth ere while driving. #
Depress the brake pedal and start theve hicle
using thest art/ stop button.
The "Digital Car Key" service can be deacti vated
in Mercedes me connect at https://
www.me rcedes.me. The function is then deacti‐
va ted in the smartphone via an online connec‐
tion. If connection tothe Internet is not possible,
e.g. af terth e mobile phone has been stolen, the
ke y function can be deacti vated at a Mercedes-
Benz Service Centre.
St arting theve hicle in emer gency operation
mode
If th eve hicle cannot be star ted, thePlace the
key in the marked space See Owner's Man-
ualdisplay message appears in the multifunction
displa y. Driving and pa
rking 14 3
Page 150 of 521
The
è symbol appears in the multifunction
display when theve hicle is stationar y.If not all
th eve hicle conditions are met, theç symbol
appears in the multifunction displa y.
The engine is restar ted automatically if:
R Youre lease the brake pedal with the trans‐
mission in position hwhen the HOLD func‐
tion is not active.
R You shift from transmission position j.
R You en gage transmission position hork.
R You depress the accelerator pedal.
R Youch ange theve hicle le vel.
R You open or close the soft top.
R An automatic engine start is necessar y.
If th e engine was switched off bythe ECO start/
st op function and you lea vetheve hicle, a warn‐
ing tone sounds. The Vehicle is operational
Switch off the ignition before exiting display
messa gealso appears in the multifunction dis‐
pla y.Ifyo u do not swit choff the ignition, the
ignition is automatically switched off af ter one
minute. Switching
the ECO start/s top function
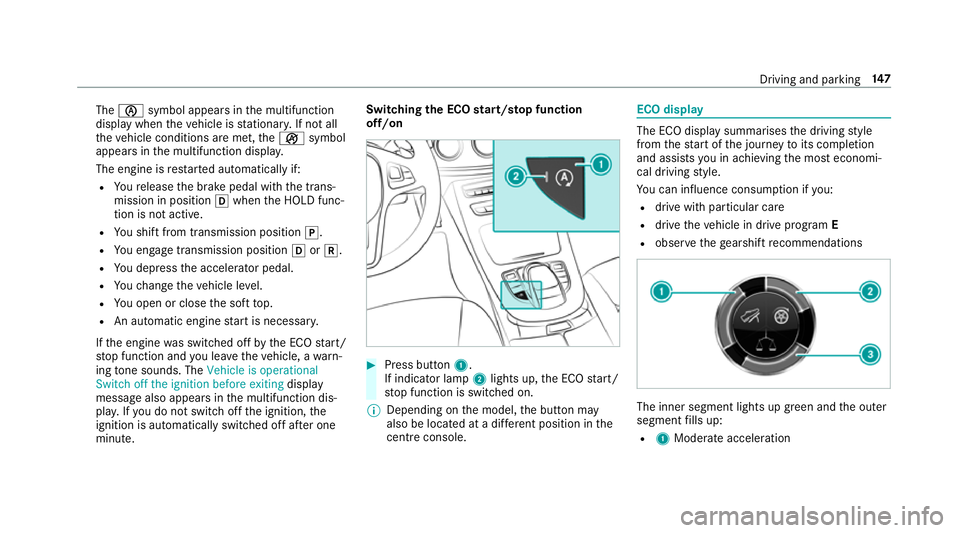
off/on #
Press button 1.
If indicator la mp2lights up, the ECO start/
st op function is switched on.
% Depending on the model, the button may
also be located at a dif fere nt position in the
centre console. ECO displ
ay The ECO display summarises
the driving style
from thest art of the journey toits completion
and assists you in achieving the most economi‐
cal driving style.
Yo u can influence consum ption if you:
R drive with particular care
R drive theve hicle in drive program E
R obser vethege arshift recommendations The inner segment lights up green and
the outer
segment fills up:
R 1 Moderate acceleration Driving and parking
147
Page 155 of 521
#
Toactivate: pullsteering wheel gearshift
paddle 1or2.
Manual gearshifting is activated for a short
time. The cur rent gear is displa yed in the
multifunction displa y.#
Toshift up: pullsteering wheel gearshift
paddle 2. #
Toshift down: pullsteering wheel gearshift
paddle 1. #
Todeactivate: pullsteering wheel gearshift
paddle 2and hold it in place.
The transmission position
h appears in the multifunction displa y.
% Ifyo u select theManual drive setting in
drive prog ram I, manual gearshifting is per‐
manent lyactivated. Gea
rshift recommendation The
gearshift recommendations assist you in
adopting an economical driving style. #
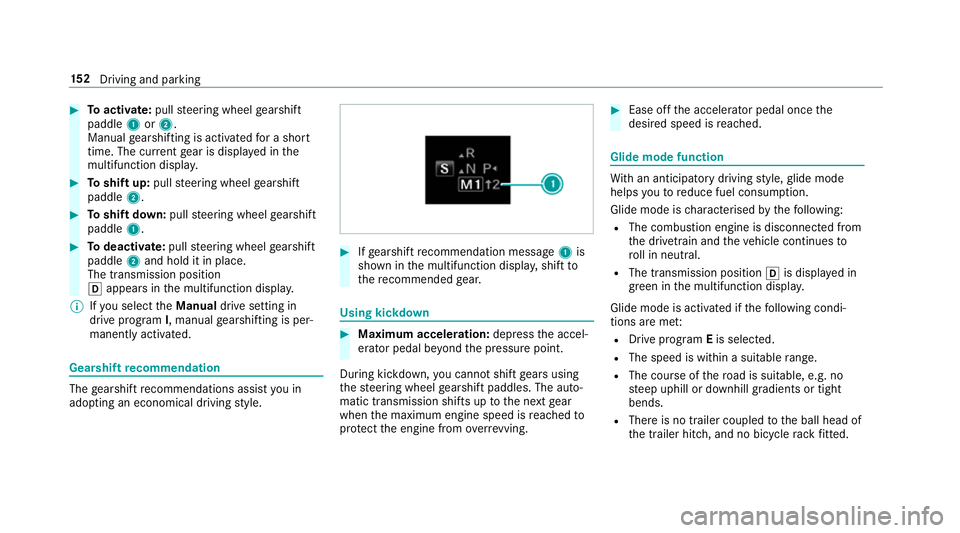
Ifge arshift recommendation message 1is
shown in the multifunction displa y,shift to
th ere commended gear. Using kickd
own #
Maximum acceleration: depressthe accel‐
erator pedal be yond the pressure point.
During kickdown, you cannot shift gears using
th esteering wheel gearshift paddles. The auto‐
matic transmission shifts up tothe next gear
when the maximum engine speed is reached to
pr otect the engine from overrev ving. #
Ease off the accelera tor pedal once the
desired speed is reached. Glide mode function
Wi
th an anticipatory driving style, glide mode
helps youto reduce fuel consum ption.
Glide mode is characterised bythefo llowing:
R The combustion engine is disconnected from
th e driv etra in and theve hicle continues to
ro ll in neut ral.
R The transmission position his displa yed in
green in the multifunction displa y.
Glide mode is activated if thefo llowing condi‐
tions are me t:
R Drive program Eis selected.
R The speed is wi thin a suitable range.
R The cou rse of thero ad is suitable, e.g. no
st eep uphill or downhill gradients or tight
bends.
R There is no trailer coupled tothe ball head of
th e trailer hitch, and no bicycle rack fitted. 15 2
Driving and pa rking
Page 156 of 521
R
You are no lon ger depressing the accelerator
or brake pedal.
% Glide mode can also be activated if you ha ve
selected the "Eco" setting forth e drive
(engine management) when in drive program
I.
Glide mode is deactivated again if one of the
conditions is no longer met.
Ve hicles with Driving Assistance Package,
Dist ance Pil otDISTRONIC or Active Brake
Assi st:Glide mode is also deacti vated depend‐
ing on the traf fic situation and theve hicle then
switches toove rrun mode. This fur ther reduces
fuel consum ption.
Glide mode can also be pr evented bythefo llow‐
ing parame ters:
R Uphill gradient
R Downhill gradient
R Temp erature
R Height
R Speed
R Obs tacle de tection R
Ope rating condition of the engine Re
fuelling Re
fuelling theve hicle &
WARNING ‑ Risk of fire or explosion
caused byfuel
Fu els are highly inflammable. #
You must avoidfire , naked flames, cre‐
ating spar ksand smoking. #
Before refuelling, switch off the engine
and auxiliary heating if your vehicle is
equipped with auxiliary heating. &
WARNING Risk of inju ryfrom fuel
Fu els are poisonous and harmful to your
health #
Do not swallow fuel or let it come into
contact with skin, eyes or clo thing. #
Do not inhale fuel vapour. #
Keep children away from fuel. If
yo u or other people come into contact with
fuel, obser vethefo llowing: #
Immediately rinse fuel off your skin with
soap and water. #
If fuel comes into contact with your
ey es, immediately rinse them thor‐
oughly with clean water.Seek medical
attention immediately. #
Ifyo u swallow fuel, seek medical atten‐
tion immediatel y.Do not induce vomit‐
ing. #
Change immediately out of clo thing that
has come into con tact wi thfuel. &
WARNING Risk offire and explosion due
to electros tatic charge
Electros tatic charge can cause spa rks and
th ereby ignite fuel vapours. #
Touch the me talve hicle body before
opening the fuel filler cap or touching
th e pump nozzle. Driving and parking
15 3