MERCEDES-BENZ E-CLASS COUPE 2009 Owners Manual
Manufacturer: MERCEDES-BENZ, Model Year: 2009, Model line: E-CLASS COUPE, Model: MERCEDES-BENZ E-CLASS COUPE 2009Pages: 313, PDF Size: 7.76 MB
Page 201 of 313
service.
Anumber or another letter may be
displayed after the letter. This figure indicates
any necessary additional maintenance work
to be performed. If you report this displayed
information to aqualified specialist work-
shop, for example aMercedes-Benz Service
Centre, they can inform you of the costs the
service will incur.
The ASSYST PLUS service interval display
does not take into account any periods of
time during which the battery is disconnec-
ted. To maintain the time-dependent service
schedule:
X Note down the service due date displayed
before disconnecting the battery.
or
X Subtract the battery disconnection periods
from the service date shown on the display
after reconnecting the battery.
Hiding aservice message X
Press 0041or0064.
Service overdue Ad
isplaym essage is shown in the multi-func-
tion display, for example:
Service Aoverdue by ... days
Service Aoverdue by .. km
i If you fail to have the service performed
by the specified date, you may be violating
applicable laws. Your warranty may be inva-
lidated and goodwills ettlementsmay be
refused.
Callingupa service due date X
Switch on the ignition.
X Press the 0040or003E button to select the
Service menu.
X Press the 003Cor003D button to select the
ASSYST PLUS submenu and confirm with
0064.
The multi-function displays hows the
service due date. Care
Care and cleaning products
Regular care of your vehicle is acondition for
retaining the quality in the long term.
Use only care products and cleaning agents
recommended and approved by Mercedes-
Benz.
! For cleaning your vehicle, do not use any
of the following:
R dry, rough or hard cloths
R abrasive cleaning agents
R solvents
R cleaning agents containing solvents
and do not scrub.
Do not touch the surfaces and protective
films with hard objects, e.g. rings or ice
scrapers. You could otherwise scratch or
damage the surfaces and protective film. H
Environmental note
Dispose of empty packaging, cleaning cloths
and polishing wads in an environmentally
responsible manner.
! Do not park the vehicle for along period
of time directly after cleaning, especially if
the wheels have just been cleaned with a
wheel cleaner. Wheel cleaners could cause
rapid corrosion of the brake discs and
brake pads/linings. After cleaning, park
the vehicle when it is at normal operating
temperature. Exterior care
Automatic car wash G
Risk of accident
The vehicle is braked when the HOLD function
or DISTRONIC PLUS* is activated. Therefore,
deactivate the Hold function or DISTRONIC
PLUS before the vehicle is washed in an auto-
matic car wash. 198
CareOperation
*o
ptional
207_AKB;2;3,e
n-GB
mkalafa, Version: 2.11.8.1 2009-07-23T10:23:49+02:00-Seite 198
Page 202 of 313
G
Risk of accident
Braking efficiency is reduce dafterw ashing
the vehicle .Thisc ould cause an accident. For
this reason, following acar wash, drive with
particula rcare unti lthe brakes are dry.
You can wash the vehicle in an automatic car
wash from the beginning.
! We recommend automatic car washes
with an adjustable 38
high-pressure pre-
cleaning program. In car washe sthat use
hig hw ater pressures, there is adanger that
as mall quantity of water may leak into the
vehicle.
! Cabriolet: do not treatthe vehicle with
hot wa xunder any circumstances.
! Cabriolet: pull the key ou tofthe ignition
lock whe nwashing the vehicle .This
ensures that the wind deflector on the
windscreen is retracted. The wind deflector
may otherwise be damaged.
If the vehicle is very dirty, pre-wash it before
cleaning it in an automatic car wash.
! Make sure that the automatic car wash is
suitabl efor the size of the vehicle .Fold in
the exterior mirrors before the vehicle is
washed. There is otherwise ariskofd am-
ag etot he exterior mirrors.
! Whe nwashing your vehicle in atow-
through car wash, make sure that the auto-
mati ctransmission* is in position N.The
vehicle could otherwise be damaged.
! Make sure that the sid ewindow sare com-
pletel yclosed, that the ventilation/heater
blower is fully turne doff and that the wind-
scree nwiper switch is set to 0.Otherwise,
the rain/light senso rmay be activated, trig-
gering unintende dwiper movements. This
could cause damag etothe vehicle.
After using an automatic car wash, wipe off
wa xa nd drying agents from the windscreen and the wiper blades. Thi
swillp revent smears
and reduce wiping noises caused by residue
on the windscreen.
High-pressure cleaners G
Risk of accident
Do not us ehigh-pressure cleaners with circu-
lar-jet nozzle s(dirt grinders )toclean your
vehicle ,inparticula rthe tyres. You could oth-
erwise damag ethe tyre sand cause an acci-
dent.
! Observe the instructions issue dbythe
equipment manufacturer concerning the
distance to be maintained between the
nozzle of the high-pressure cleane rand the
vehicle (a tleast 30 cm).
Move the high-pressure cleane rnozzle
around whe ncleaning your vehicle.
Do not ai mdirectl yata ny of the following:
R tyres
R doo rjoint
R soft top (Cabriolet)
R wind deflector net (Cabriolet)
R electrical components
R battery
R connectors
R lights
R seals
R trim elements
R ventilation slots
Damaged seals or electrical components
can lead to failures or leaks.
Care and treatmen tofmatt paint-
work* You
rvehicle ha saclear matt finish. For this
reason, yo ushoul dmake sure that you
adhere to the following instructions to avoid
38 In accordance with the specifications for Cabriole tprograms. Care
199Operation
*optional
207_AKB
;2;3,en-GB
mkalafa ,V ersion: 2.11.8.1
2009-07-23T10:23:49+02:00
-Seite 199 Z
Page 203 of 313
damage to paintwor
kdue to improper treat-
ment.
! Under no circumstances should you pol-
ish the vehicle. Polishing will make the
paintwor kshine.
! When carin gfor your paintwork, do not
use paint cleaner ,grindin gorp olishing
products, or gloss preservers such as wax.
These product sare only suitable for high-
gloss finishes. Using them on avehicle with
am att finish results in serious damage to
the surface (gleaming, spotted areas).
Always have paintwor krepairs carried out
at aq ualified specialist workshop, e.g. a
Mercedes-Benz Service Centre.
i From the range of available Mercedes-
Ben zcare products, use only the insect
remover and the car shampoo.
Cleaning the paintwork Scratches, corrosive deposits, areas affected
by corrosion and damage caused by inade-
quate care cannot always be completely
repaired. In such cases, visit
aqualified spe-
cialist workshop immediately, e.g. a
Mercedes-Benz Service Centre.
X Remove the following types of dirt immedi-
ately, whilst avoiding rubbing too hard.
Soak:
R
insec tremains with insec tremover
R bird droppings with water
and rinse off the treated surface after-
wards.
Remove:
R tree resin, oils, fuels and greases by rub-
bing gently with acloths oaked in petro-
leum ether or lighter fluid
R tar stain with tar remover
R wax with silicon eremover !
Do not affix:
R stickers
R films
R magnetic plates or similar items
to painted surfaces .Otherwise, you could
damage the paintwork.
Cleaning the Cabriolet soft top X
Light soiling: you can clean the soft top
while it is dry or rinse it with clear water.
X Normal to heavy soiling: you can clean
the soft top with abrush and clear water.
Clean stain sand other heavy soiling with a
brush and asuitable soft-top cleaning
agent .Always brush in the direction of the
fabric, from fron ttoback.
! Never use any of the following to clean the
soft top:
R petrol
R thinner
R tar or stain remover
R other organic solvents
! Remove bird droppings immediately as
they are corrosive and, therefore, can make
the soft-top fabric leak. Do not use high-
pressure cleanin gequipment to clean the
vehicle. Do not use sharp-edged equipment
to remov eice and snow.
Frequen tcleanin greduces the resistance to
dirt of the soft top.
To restore this resistance, clean your soft top
with Mercedes-Benz soft top care products.
Incorrec tcleanin gand care, as well as ageing,
can cause soft-top seams to leak. Have the
soft-top seams sealed at aqualified specialist
workshop, e.g. at aMercedes-Benz Service
Centre.
i Cover the soft top with asuitable cover if
you plan to leave the vehicle outside for a
long period of time. 200
CareOperation
207_AKB
;2;3,en-GB
mkalafa, Version:2.11.8.1
2009-07-23T10:23:49+02:0
0-Seite 200
Page 204 of 313
Cleaning AIRCAP*
Cleaning th
ewind deflector
Clean th ewind deflecto ronthewindscreen
wit hthe softtop closed.
X Apply th eparking brak efirmly.
X Vehicles with akey: turnthe keyt op osi-
tion 2(Y page 65)in th eignition lock.
X Vehicles with KEYLESS-GO*: pressthe
Start/Sto pbutto ntwice (position
2 (Y page 66)).
X Open th ecover in th elower centr econsol e.
The AIRCAP butto nislocate dunde rthe
cover ;see illustration. AIRCAP butto
ninthelower sectio nofthecentre
console
X Press button 0046.
The wind deflecto rbetween th ewind-
scree nand th esoftt op is extended. X
Clean net 0047of th ewind deflecto rwitha
sof tbrus horam oistcloth .For heavier soil-
ing ,clean it wit hthe car eand cleaning
agents recommended and approved by Mercedes-Ben
zand rinse it wit hclean
water.
! Do no tuse high-pressur ecleanin gequip-
men ttoc lean th enet.
Cleaning th eAIRCAP draught stop
Clean th eAIRCAP draught stop wit hthe soft
to po pen.
X Vehicles with akey: turnthe keyt op osi-
tion 2(Y page 65)in th eignition lock.
X Vehicles with KEYLESS-GO*: pressthe
Start/Sto pbutto ntwice (position
2 (Y page 66)).
X Open th esoftt op ( Ypage 160). Rear seat head restraint butto
nintheupper control
panel
X Press button 0046.
The rear seat head restraint and AIRCAP
draught stop ris eupwards. X
Clean net 0047of th eAIRCAP draught stop
wit ham oistcloth together wit hthe care
and cleanin gagents recommended and
approved by Mercedes-Benz. Care
201Operation
*optional
207_AKB
;2;3,en-GB
mkalafa ,V ersion: 2.11.8.1
2009-07-23T10:23:49+02:00
-Seite 201 Z
Page 205 of 313
Cleaning th
ewheels !
Do no tuse acidic wheel cleaners to
remove brak edust .This could damage
wheel bolt sand brak ecom ponents.
Cleaning th ewindows X
Clean th einside and outside of th ewin-
dows wit hadamp cloth and acleaning
product approved and recommended by
Mercedes-Benz.
! Clean th ewaterdrainage channels of the
windscree nand th erear window at regular
intervals. Under certain circumstances,
deposits suc hasleaves, petals and pollen
may preven twate rfromd raining away
leadin gtocorrosiond amage.
Cleaning th ewiper blades G
Ris
kofi njury
Before cleanin gthe windscree norwiper
blades ,tur nt he keyt op osition 0in th eigni-
tio nloc korp ressthe Start/Sto pbutton* until
all indicator lamps have gon eout in th einstru-
men tcluster. The windscree nwiper scould
otherwise mov eand caus einjury.
! Do no tclean th ewiper blades to ooften
and do no trub them to ohard ,ast hisw ill
result in damag etothegraphit ecoating.
This could caus ewiper noise.
X Fol dthe wiper arm saway from th ewind-
screen.
X Clean th ewiper blades carefully wit ha
damp cloth.
X Fol dthe wiper arm sback again before
switching on th eignition.
Cleaning th eheadlamps X
Clean th eplastic lenses of th eheadlamps
wit haw et sponge and windscree nwasher
fluid or cleanin gcloths. !
Only use washe rfluid or cleanin gcloths
suitable for plastic lenses. Unsuitable
washe rfluid or cleanin gcloth scould
scratch or damag ethe plastic lenses of the
headlamps.
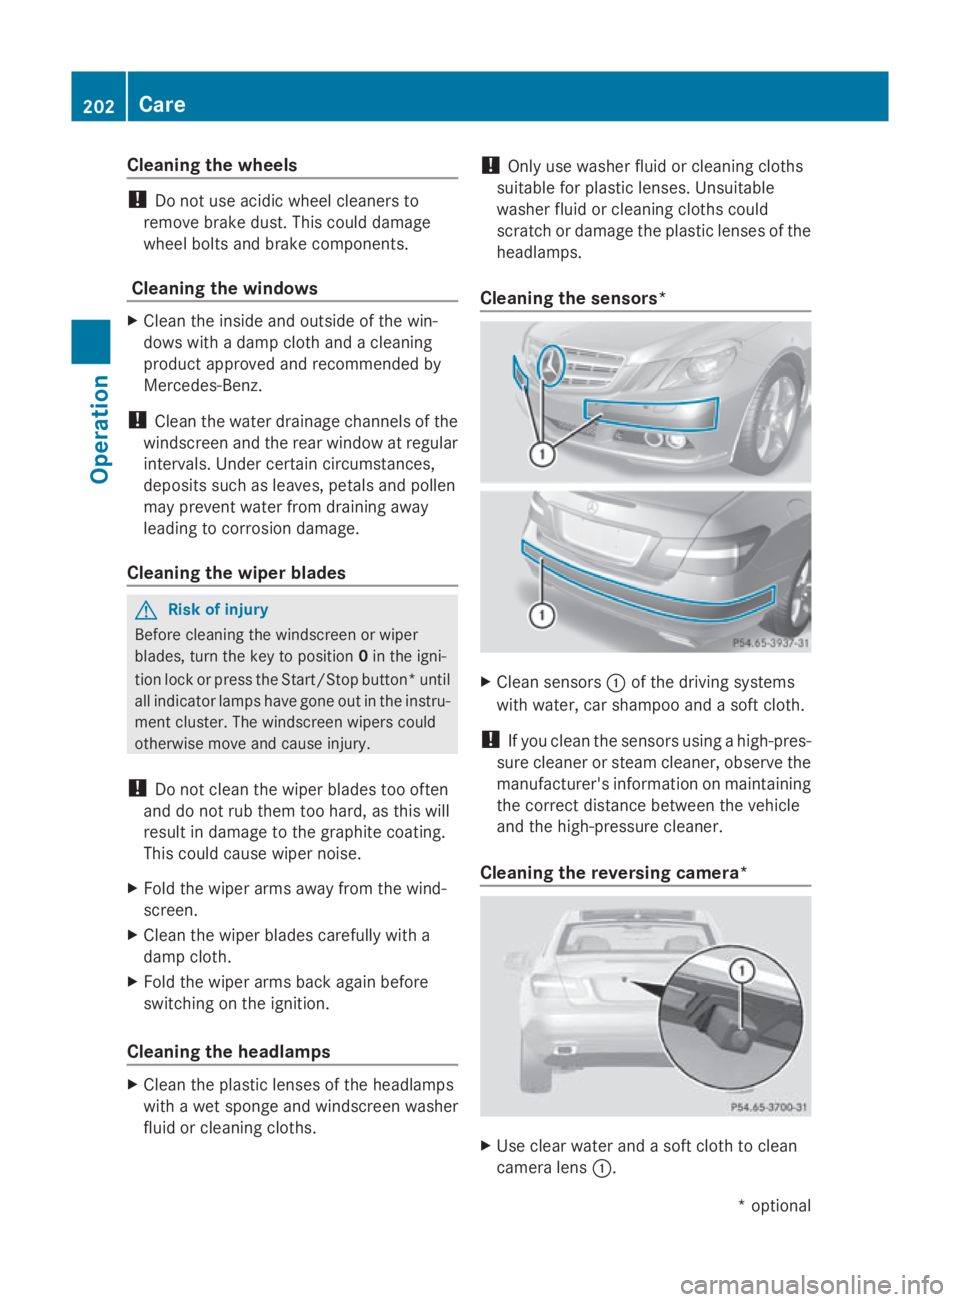
Cleaning th esensors* X
Clean sensors 0046of th edriving systems
wit hw ater, car shampoo and asoftc loth.
! If you clean th esensor susin gah igh-pres-
sure cleane rorsteam cleaner, observ ethe
manufacturer' sinformatio nonmaintaining
th ec orrec tdistanc ebetween th evehicle
and th ehigh-pressur ecleaner.
Cleaning th ereversing camera* X
Use clear wate rand asoftc loth to clean
camera lens 0046.202
CareOperation
*o
ptional
207_AKB
;2;3,en-GB
mkalafa ,V ersion: 2.11.8.1
2009-07-23T10:23:49+02:00
-Seite 202
Page 206 of 313
!
Do not clean the camera lens and the area
around the reversing camera with ahigh-
pressure cleaner.
Cleaning the exhaust tail pipes Impurities combined with the effects of road
grit and corrosive environmental factors may
cause flash rust to form on the surface. Reg-
ularc are of the exhaust tail pipes will ensure
that their original shine is restored.
! Do not clean the exhaust tail pipes with
alkaline-based cleaning agents such as
wheel cleaner.
X Cleant he exhaust tail pipes with achrome
care product approved by Mercedes-Benz.
Trailer tow hitch* The ball coupling must be cleaned if it
becomes dirty or corroded.
X Remove any rust using awire brush.
X Remove dirt with aclean, lint-free cloth or
ab rush.
! Do not clean the ball coupling with ahigh-
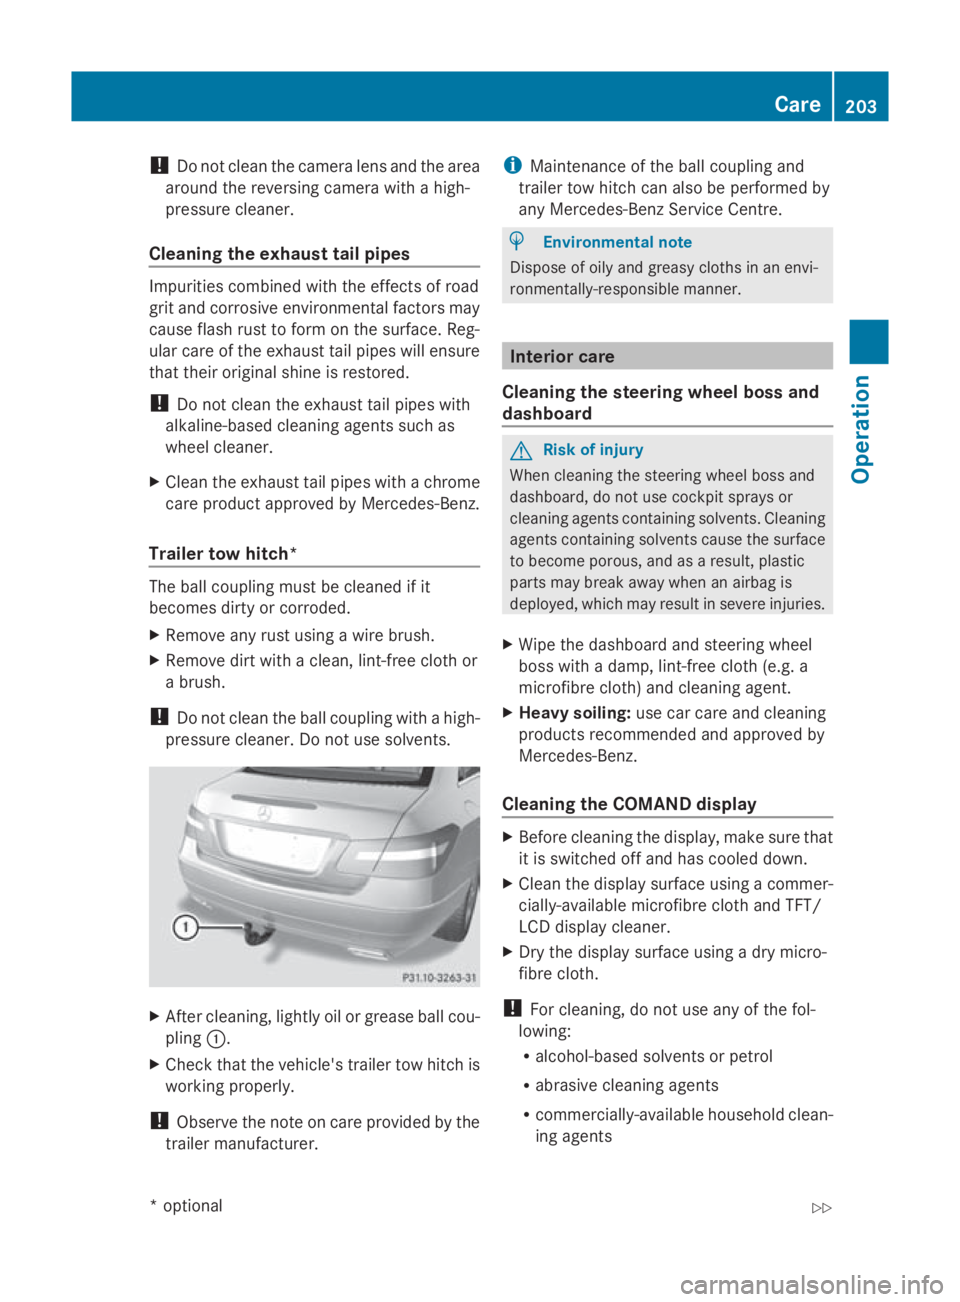
pressure cleaner. Do not use solvents. X
After cleaning, lightly oil or grease ball cou-
pling 0046.
X Check that the vehicle's trailer tow hitch is
working properly.
! Observe the note on care provided by the
trailer manufacturer. i
Maintenance of the ball coupling and
trailer tow hitch can also be performed by
any Mercedes-Benz Service Centre. H
Environmental note
Dispose of oily and greasy cloths in an envi-
ronmentally-responsible manner. Interior care
Cleaning the steering wheelb oss and
dashboard G
Risk of injury
When cleaning the steering wheel boss and
dashboard, do not use cockpit sprays or
cleaning agents containing solvents. Cleaning
agents containing solvents cause the surface
to become porous, and as aresult, plastic
parts may break awayw hen an airbagis
deployed, which may result in severe injuries.
X Wipe the dashboard and steering wheel
boss with adamp, lint-free cloth (e.g. a
microfibre cloth) and cleaning agent.
X Heavy soiling: use car care and cleaning
products recommended and approved by
Mercedes-Benz.
Cleaning the COMAND display X
Before cleaning the display, make sure that
it is switched off and has cooled down.
X Cleant he displays urface using acommer-
cially-available microfibre cloth and TFT/
LCD displayc leaner.
X Dry the displays urface usingadry micro-
fibre cloth.
! For cleaning, do not use any of the fol-
lowing:
R alcohol-based solvents or petrol
R abrasive cleaning agents
R commercially-available householdc lean-
ing agents Care
203Operation
*optional
207_AKB;2;3,e
n-GB
mkalafa, Version: 2.11.8.1 2009-07-23T10:23:49+02:00-Seite 203 Z
Page 207 of 313
These may damage the display surface. Do
not exert pressure when cleaning the dis-
play surface as this may lead to irreversible
damage.
Cleaning the seat covers !
Do not use microfibre cloths to clean gen-
uine leather, artificial leather or
Alcantara ®
covers, as these are too aggres-
sive and, if used often ,may damage the
cover.
! Clean:
R genuine leather covers with adamp
cloth, then wipe the covers down with a
dry cloth. Make sure that the leather
does not become soaked. For leather
care, use aleather care agent recom-
mended by Mercedes-Benz.Y ou can
obtain information about this from any
Mercedes-Benz Servic eCentre.
R artificial leather covers with acloth mois-
tened with asolution containing 1%
detergen t(e.g. washing-up liquid).
R cloth covers with amicrofibre cloth mois-
tened with asolution containing 1%
detergen t(e.g. washing-up liquid). Rub
carefully and alway swipe entire seat sec-
tions to avoid leaving visible lines. Leave
the seat to dry afterwards. Cleaning
results depend on the type of dirt and
how long it has been there.
R Alcantara ®
covers with adamp cloth.
Make sure you wipe entire seat sections
to avoid leaving visible lines.
i Note that regular care is essential to
ensure that the quality (both appearance
and comfort) of the covers is retained over
time. Cleaning the plastic trim !
Do not affix the following to plastic surfa-
ces:
R stickers
R films
R scented oil bottles or similar items
You can otherwise damage the plastic.
! Ensure that cosmetics, insect repellent
and suntan lotion do not come into contact
with the vehicle's trim. This will protec tthe
vehicle's high-quality trim and help retain
its overall appearance.
X Wipe the plastic trim with adamp, lint-free
cloth (e.g. amicrofibre cloth).
X Heavy soiling: use car care and cleaning
products recommended and approved by
Mercedes-Benz.
Cleaning the wooden trim* and trim
strips X
Wipe the wooden trim and trim strips with
ad amp, lint-free cloth (e.g. amicrofibre
cloth).
X Heavy soiling: use car care and cleaning
products recommended and approved by
Mercedes-Benz. 204
CareOperation
*o
ptional
207_AKB; 2; 3, en-GB
mkalafa,
Version: 2.11.8.1 2009-07-23T10:23:49+02:00-Seite 204
Page 208 of 313
Where will
Ifind...? ........................... 206
Display messages ............................. 208
Troubleshooting ................................ 230
Locking/unlocking in an emer-
gency ................................................. 249
Resetting the active bonnet
(pedestrian protection) after trig-
gering ................................................. 256
Resetting triggered NECK-PRO
head restraints .................................. 257
Manually lowering the head
restraint sinthe rear (Cabriolet) .....257
AIRCAP* -fitting/removing the
wind deflector (Cabriolet) ................258
Changing batteries (key) ..................259
Changing bulbs ................................. 260
Replacing the wiper blades ..............263
Flat tyre ............................................. 263
Battery ............................................... 273
Jump-starting .................................... 276
Towing and tow-starting ..................278
Fuses .................................................. 280 205Practical advice
207_AKB
;2;3,en-GB
mkalafa, Version:2.11.8.1
2009-07-23T10:23:49+02:0
0-Seite 205
Page 209 of 313
Where will
Ifind...? Warning triangle
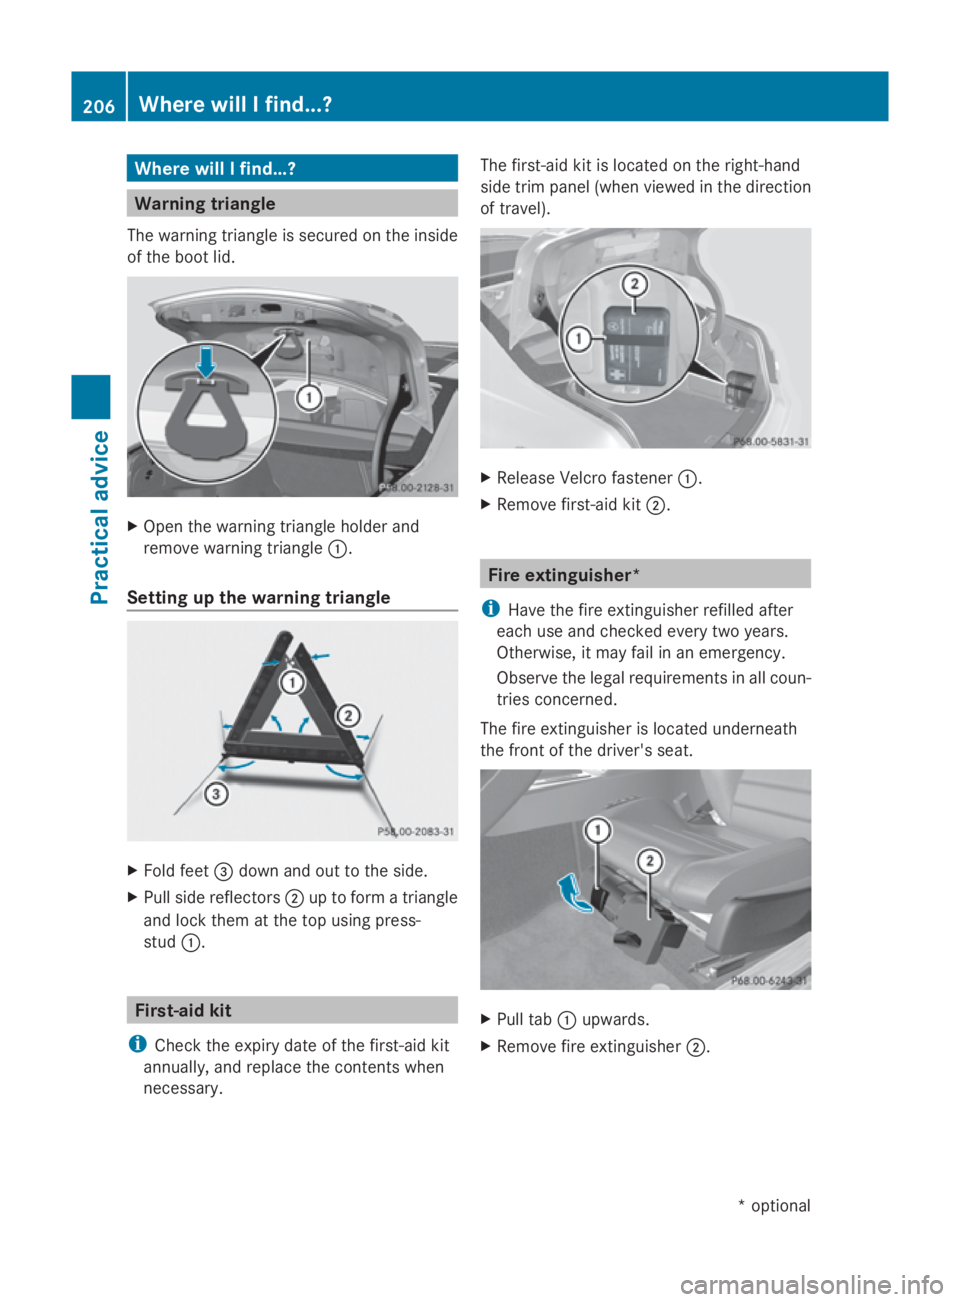
The warning triangl eissecure dont he inside
of the boot lid. X
Open the warning triangl eholder and
remove warning triangle 0046.
Setting up the warning triangle X
Fold feet 008Adow nand out to the side.
X Pul lside reflectors 0047up to form atriangle
and lock them at the top using press-
stud 0046. First-aid kit
i Check the expiry date of the first-ai dkit
annually ,and replace the contents when
necessary. The first-ai
dkit is located on the right-hand
side trim panel (when viewed in the direction
of travel). X
Releas eVelcro fastener 0046.
X Remove first-ai dkit0047. Fire extinguisher*
i Have the fire extinguisher refilled after
each use and checked every two years.
Otherwise, it may fail in an emergency.
Observe the legal requirements in allc oun-
tries concerned.
The fire extinguisher is located underneath
the front of the driver's seat. X
Pul ltab 0046 upwards.
X Remove fire extinguisher 0047.206
Where will
Ifind...?Practical advice
*o ptional
207_AKB; 2; 3, en-GB
mkalafa,
Version: 2.11.8.1 2009-07-23T10:23:49+02:00-Seite 206
Page 210 of 313
Vehicl
etoolkit and "Minispare"
emergenc yspare wheel*
The vehicl etool kit and "Minispare" emer-
genc yspare whee letc. ar eloc ate dint he
stowag ewellu nderneath the boot floor.
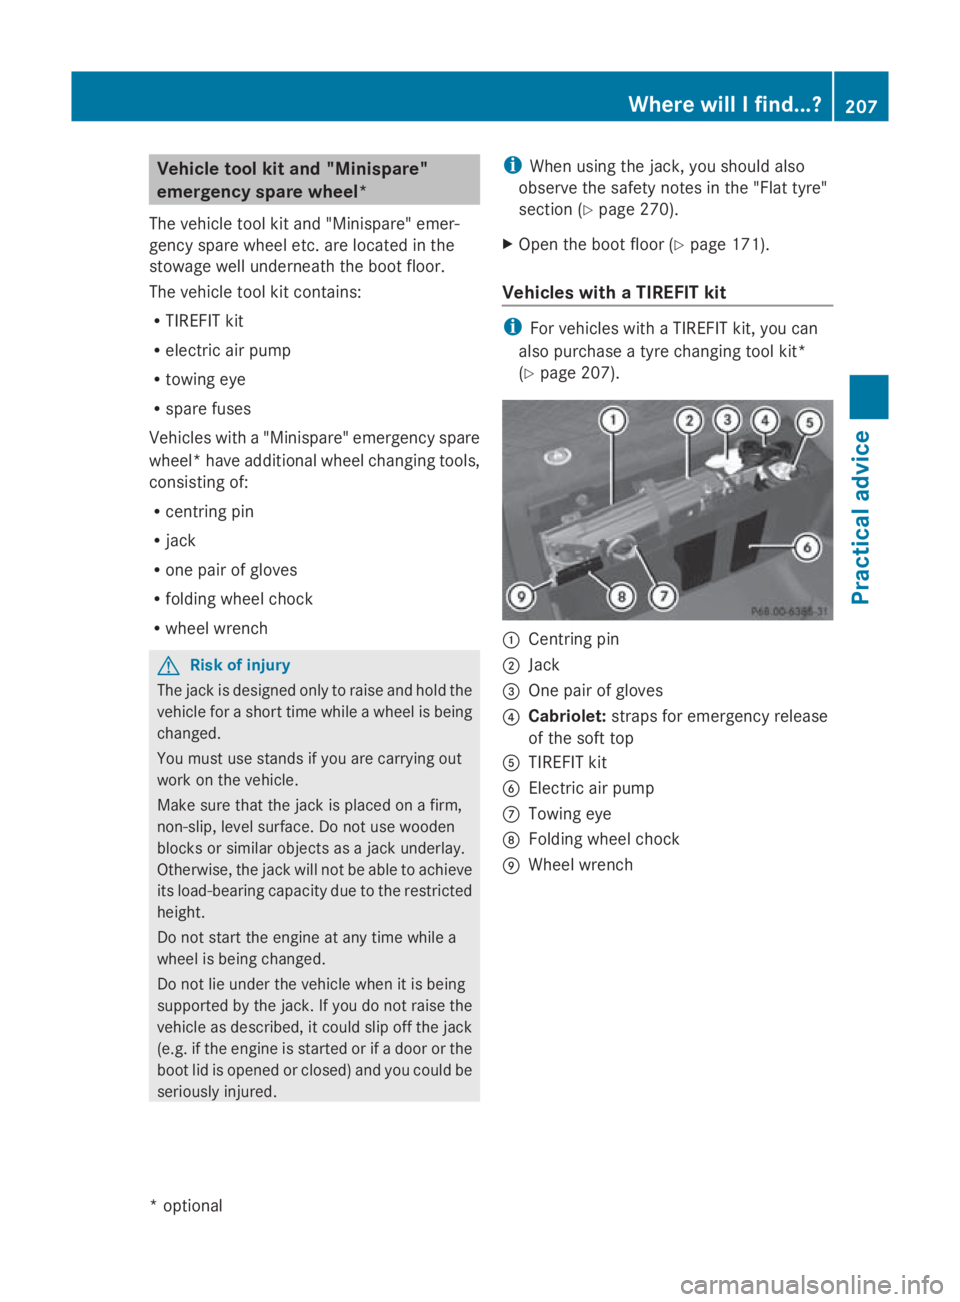
The vehicl etool kit contains:
R TIREFIT kit
R electri cairpump
R towing eye
R spare fuses
Vehicles with a"Minispare" emergency spare
wheel* have additional whee lchanging tools,
consisting of:
R centring pin
R jack
R one pair of gloves
R folding whee lchock
R whee lwrench G
Ris
kofi njury
The jack is designed onl ytoraise and hol dthe
vehicl efor as hort time whil eawheelis being
changed.
Yo um ustu se stands if yo uare carrying out
work on the vehicle.
Make sure tha tthe jack is place donafirm,
non-slip ,lev el surface. Do not us ewooden
blocks or similar objects as ajack underlay.
Otherwise, the jack will not be able to achieve
its load-bearing capacity du etothe restricted
height.
Do not start the engine at any time whil ea
whee lisbeing changed.
Do not li eunder the vehicl ewhenitisb eing
supporte dbythe jack. If yo udonot raise the
vehicl easd escribed, it could slip off the jack
(e.g. if the engine is started or if adoorort he
boot li disopenedorc losed)and yo ucould be
seriously injured. i
Whe nusing the jack, yo ushoul dalso
observe the safety notes in the "Flat tyre"
section ( Ypage 270).
X Ope nthe boot floor (Y page 171).
Vehicles with aTIREFI Tkit i
For vehicles with aTIREFIT kit, yo ucan
also purchase atyrec hanging tool kit*
(Y page 207). 0046
Centring pin
0047 Jack
008A One pair of gloves
0088 Cabriolet: straps for emergency release
of the sof ttop
0086 TIREFIT kit
0087 Electric ai rpump
006E Towing eye
006F Folding whee lchock
0070 Wheel wrench Where will
Ifind...?
207Practical advice
*optional
207_AKB; 2; 3, en-GB
mkalafa,
Version: 2.11.8.1 2009-07-23T10:23:49+02:00-Seite 207 Z