key MERCEDES-BENZ E-Class COUPE 2010 C212 Comand Manual
[x] Cancel search | Manufacturer: MERCEDES-BENZ, Model Year: 2010, Model line: E-Class COUPE, Model: MERCEDES-BENZ E-Class COUPE 2010 C212Pages: 224, PDF Size: 7.4 MB
Page 101 of 224
RKeypad on the COMAND control unit
R Multifunction steering wheel
R Voice Control
The explanations in this section assume that
the mobile phone is connected to COMAND
via the Bluetooth ®
interface. Exceptions are
explicitly described.
Functional Restrictions
Under the following circumstances, the
phone may not yet be useable:
R If it is not yet logged into a network. The
phone will try independently to log into a
network. If no network is available, you will
not be able to make “911” emergency calls.
If you try to make an outgoing call, the
message No Service appears briefly.
Activating the Mobile Phone
Mobile Phone With Bluetooth ®
Interface
Prerequisites for the Mobile Phone
For making calls using COMAND via the
Bluetooth ®
interface, you will need a
Bluetooth-enabled mobile phone.
i Not all mobile phones available on the
market are comparably suitable. Further
information on suitable mobile phones and
connecting Bluetooth-enabled mobile
phones to COMAND is available via the
Internet at www.mbusa-mobile.com. Or
call the Mercedes-Benz Customer
Assistance Center at 1-800-FOR-
MERCedes (1-800-367-6372) (US), or
Customer Relations at 1-800-387-0100
(Canada).
Activating Bluetooth ®
Before you begin activation of your mobile
phone connection via the Bluetooth ®
interface please ensure it is compatible with
Bluetooth ®
handsfree profile 1.0 or higher
( Y mobile phone operating guide):XSwitch on the mobile phone and enter the
PIN, if applicable ( Y mobile phone
operating guide).XActivate Bluetooth ®
connection on the
mobile phone ( Y mobile phone operating
guide).
i On certain mobile phones, not only do you
have to activate the Bluetooth ®
function
but the device must also be made “visible”
for other devices.
Each Bluetooth ®
device has a Bluetooth ®
device name. It is recommended to give the
device a personal name, by which you can
clearly recognize your mobile phone.
i If the Bluetooth ®
function on the
COMAND is switched off, the message
Bluetooth not activated in system
settings . appears.
XActivate Bluetooth ®
connection on
COMAND ( Y page 45).
Registering a Mobile Phone
(Authorizing)
When you use your mobile phone in
conjunction with COMAND for the first time,
you must register (authorize) it.
It is possible to register several mobile
phones. The connection is always established
to the mobile phone that was activated last.
When you authorize a new mobile phone, it is
activated automatically. You can switch
between the authorized mobile phones
( Y page 101).
Searching for a Mobile Phone
XIn the phone submenu select Phone
£ Bluetooth Phones £Update .
COMAND searches for suitable
Bluetooth ®
phones within range and enters
them in the phone list.Activating the Mobile Phone99TelephoneZ
Page 103 of 224
COMAND’s Bluetooth®
device name is “MB
Bluetooth”.XIn the phone submenu select Phone
£ Bluetooth Phones £Update
£ Options £External
Authorization .XStart the Bluetooth ®
search on the mobile
phone ( Y mobile phone operator's guide).XSelect COMAND (“MB Bluetooth”) on the
mobile phone.XWhen prompted to do so, enter the
passcode on the mobile phone and on
COMAND.
i After you have entered the passkey on
COMAND and on the mobile phone, you
have to trigger a connection to COMAND
manually on some mobile phones.
Displaying Details on a Mobile Phone
XIn the phone submenu select Phone
£ Bluetooth Phones .XSelect the mobile phone from the list.XSelect Options £Details .
The details screen for the device is
displayed.XTo close the details screen: Rotate
y m z or slide om p.
or
XPress the n or the k button.
Deregistering (De-Authorizing) a
Mobile Phone
XIn the phone submenu select Phone
£ Bluetooth Phones .XSelect the authorized mobile phone.XSelect Options £De-Authorize .
You will be asked whether the device
should really be de-authorized.XSelect Yes or No.
If you select Yes, the authorization of the
device is withdrawn.i If the authorization of a device which had
been authorized in the past has been
withdrawn, the device list no longer
includes this device.
i If you de-authorize the mobile phone on
COMAND, you should also de-authorize
“MB Bluetooth” on the mobile phone.
Otherwise a future authorization may fail.
Activating Another Mobile Phone
If you have authorized several mobile phones,
you can switch between the individual mobile
phones.
When you authorize a new mobile phone, it is
activated automatically. Only one mobile
phone is active at a time.
XSelect Phone£Bluetooth Phones .XSelect the mobile phone from the list.XPress n.
The selected mobile phone is activated if
the selected mobile is within reception
range and its Bluetooth ®
function is
switched on. Any previously activated
phone is deactivated.
Setting Transmit and Receive Volume
i These settings should normally not be
changed as the factory settings are
matched to most mobile phones.
i Changes may result in significant
impairments to the transmission quality.
These settings may not be changed during
an active phone call.
XIn the phone submenu select Phone
£ Bluetooth Phones .XSelect the authorized mobile phone.XSelect Options £Reception Volume or
Transmission Volume .
i
Reception and Transmission volume only
appear for authorized devices.
Activating the Mobile Phone101TelephoneZ
Page 108 of 224
XSelect Yes or No.
If you select Yes, a selection list will appear
containing the five existing numbers.XSelect the number to be overwritten.
The input menu with the data field for
entering the new telephone number
appears.XTo enter digits: Select the required digits
in sequence from the input speller or use
the number keypad.XTo move the cursor in the data field:
Select Y or Z.XTo delete individual digits: Select õ
and briefly press the n button.
or
XPress the 2 button next to the
COMAND controller.
The digit to the left of the cursor is deleted.XTo delete an entire entry: Select õ
and press n until the entire entry has been
deleted.
or
XPress and hold down the 2 button next
to the COMAND controller until the entire
entry is deleted.XTo save entry: Select d.
Call Lists
i COMAND supports Bluetooth ®
PBAP
(Phone Book Access Profile).
How COMAND handles call lists depends
on the type of mobile phone connected:
R Bluetooth ®
phone with PBAP support:
COMAND downloads the call lists from
the mobile phone when the phone is
connected to COMAND
R Bluetooth ®
phone without PBAP support:
COMAND creates the call lists from calls
received (including missed calls) and
made during phone mode when a mobile
phone is connected to COMAND.
The particular menu item can only be
selected if calls have already been received
or made from COMAND.
The display of missed calls in the COMAND
display is not possible with all mobile
phones.
i The menu item Call lists is not active
if no mobile phone is connected to
COMAND.
i If the mobile phone does not support
PBAP, COMAND automatically deletes the
call lists if a mobile phone other than the
last used is connected.
i The instrument cluster control system
displays a list of the last dialed calls.
i For many operating functions you can
also use the buttons on the multifunction
steering wheel, e.g. the =, ; ,
9 , : , a , 6 or ~ buttons,
for selecting a menu, scrolling through lists
or initiating or ending a call ( Y page 25).
Calling up the List
XIn the phone main menu select Call
Lists .
A menu appears.XSelect Calls Received or Calls
Dialed .
The appropriate list appears.
or
XWhen the basic telephone menu is
displayed, press the 6 button on
COMAND.
A list of the last dialed calls appears.106Call ListsTelephone
Page 111 of 224
asking whether you wish to overwrite one
of the existing numbers.XSelect Yes or No.
If you select Yes, a selection list with the
five existing numbers is displayed.XSelect the number to be overwritten.
COMAND overwrites the selected number
with the new data.
Deleting Call Lists
This function is only available if you use a
Bluetooth ®
phone without PBAB support, that
is, if the call lists have been created by
COMAND.
XSelect Call Lists £Delete Call
Lists from the basic telephone menu.
A query appears asking if all call lists are to
be deleted.XSelect Yes or No.
The call lists will either be deleted or not,
depending on your selection.
i If you use a mobile phone with PBAP
support, you have to delete the call lists on
the mobile phone. Next time you reconnect
the mobile phone, COMAND downloads the
empty call lists.
Making Calls
Incoming Call
Rejecting or Accepting Calls
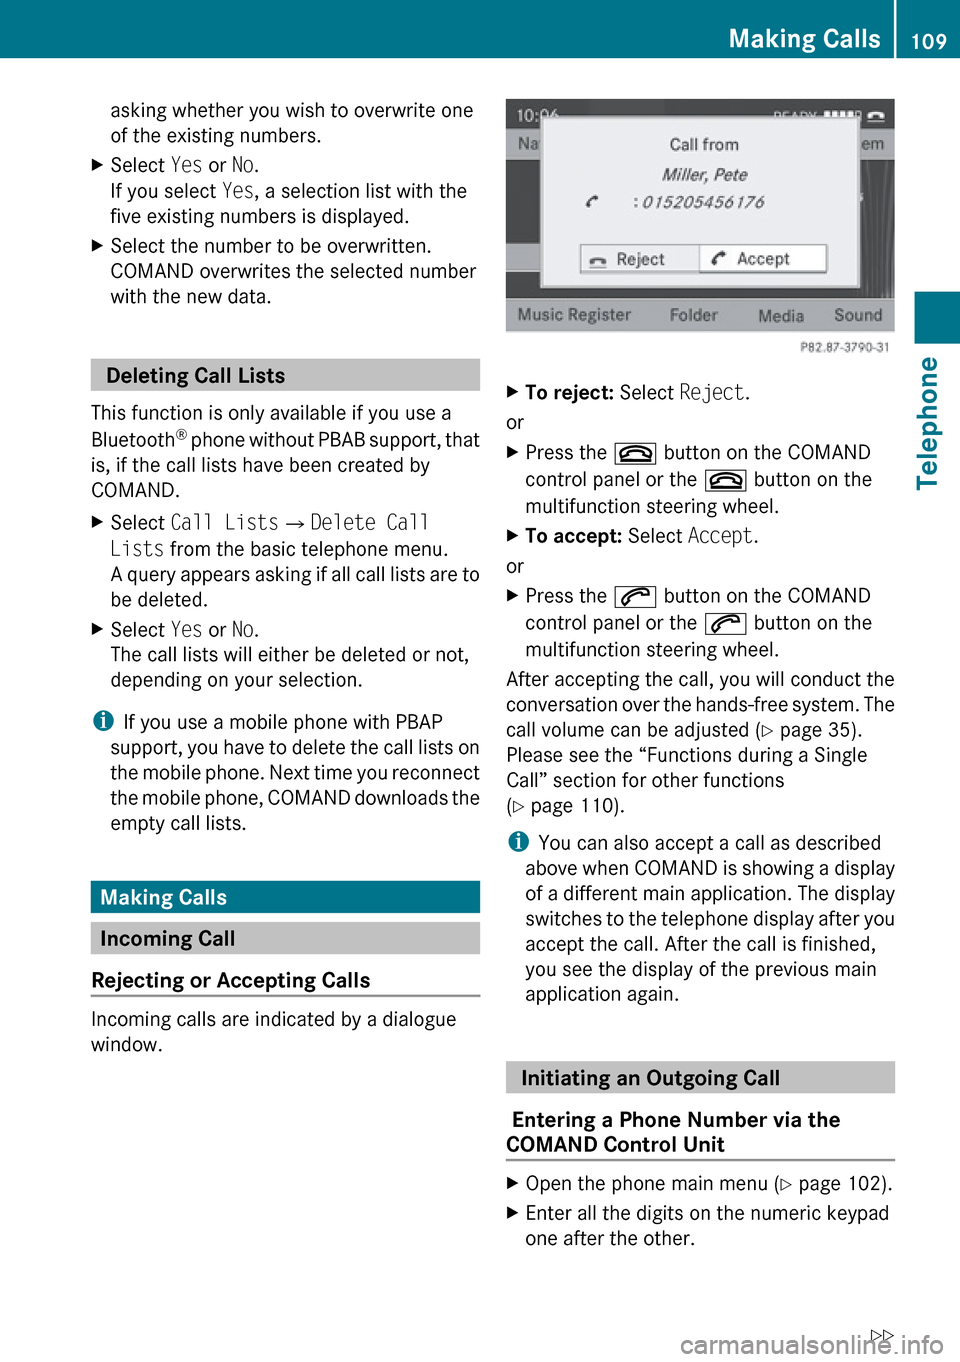
Incoming calls are indicated by a dialogue
window.
XTo reject: Select Reject.
or
XPress the ~ button on the COMAND
control panel or the ~ button on the
multifunction steering wheel.XTo accept: Select Accept.
or
XPress the 6 button on the COMAND
control panel or the 6 button on the
multifunction steering wheel.
After accepting the call, you will conduct the
conversation over the hands-free system. The
call volume can be adjusted ( Y page 35).
Please see the “Functions during a Single
Call” section for other functions
( Y page 110).
i You can also accept a call as described
above when COMAND is showing a display
of a different main application. The display
switches to the telephone display after you
accept the call. After the call is finished,
you see the display of the previous main
application again.
Initiating an Outgoing Call
Entering a Phone Number via the
COMAND Control Unit
XOpen the phone main menu ( Y page 102).XEnter all the digits on the numeric keypad
one after the other.Making Calls109TelephoneZ
Page 113 of 224
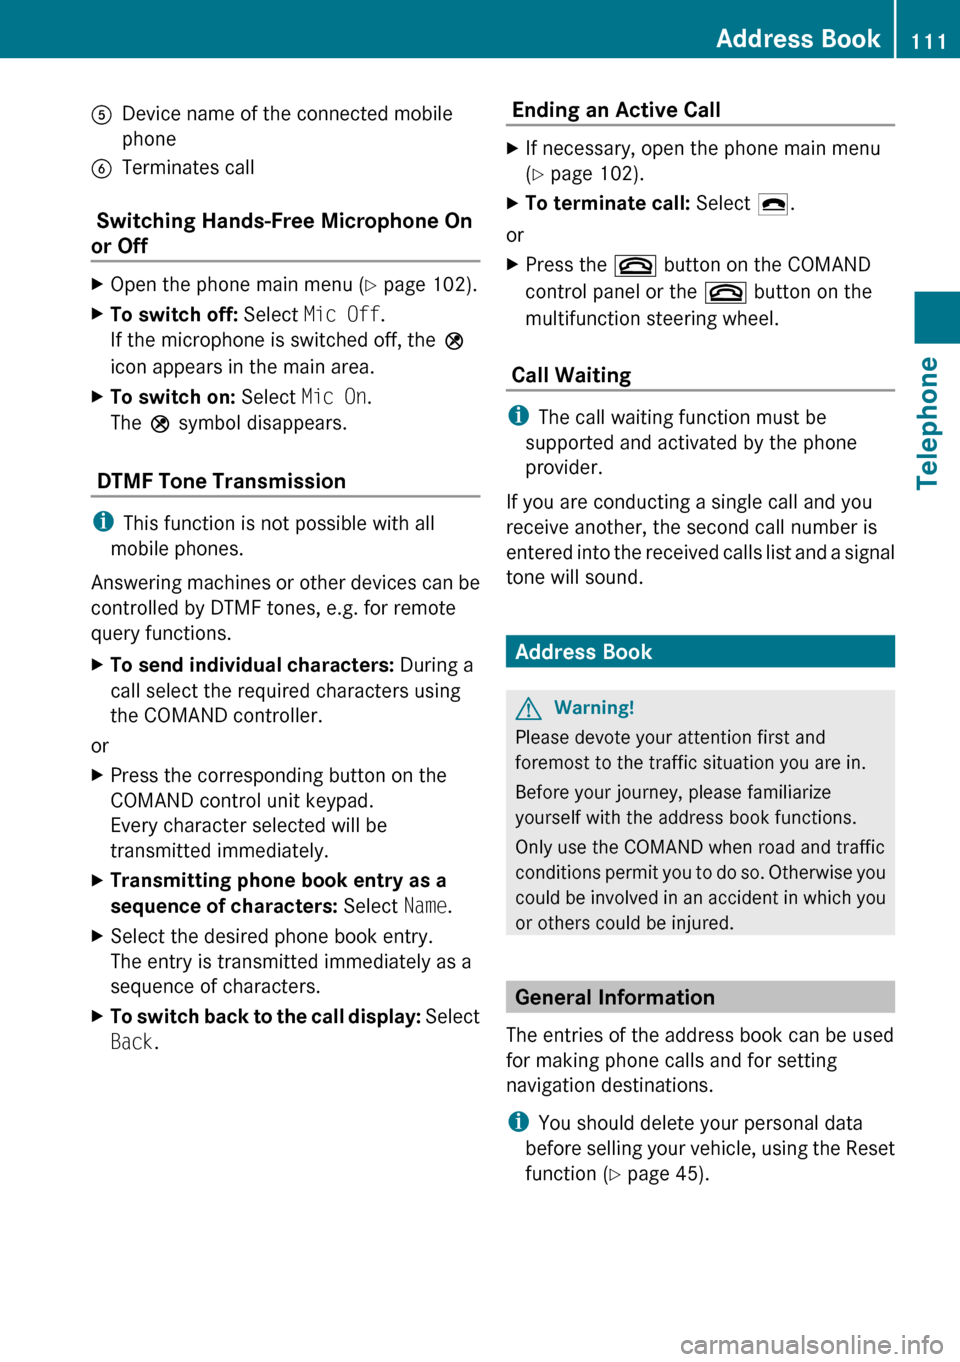
5Device name of the connected mobile
phone6Terminates call
Switching Hands-Free Microphone On
or Off
XOpen the phone main menu ( Y page 102).XTo switch off: Select Mic Off .
If the microphone is switched off, the >
icon appears in the main area.XTo switch on: Select Mic On.
The > symbol disappears.
DTMF Tone Transmission
i
This function is not possible with all
mobile phones.
Answering machines or other devices can be
controlled by DTMF tones, e.g. for remote
query functions.
XTo send individual characters: During a
call select the required characters using
the COMAND controller.
or
XPress the corresponding button on the
COMAND control unit keypad.
Every character selected will be
transmitted immediately.XTransmitting phone book entry as a
sequence of characters: Select Name.XSelect the desired phone book entry.
The entry is transmitted immediately as a
sequence of characters.XTo switch back to the call display: Select
Back . Ending an Active Call XIf necessary, open the phone main menu
( Y page 102).XTo terminate call: Select 4.
or
XPress the ~ button on the COMAND
control panel or the ~ button on the
multifunction steering wheel.
Call Waiting
i The call waiting function must be
supported and activated by the phone
provider.
If you are conducting a single call and you
receive another, the second call number is
entered into the received calls list and a signal
tone will sound.
Address Book
GWarning!
Please devote your attention first and
foremost to the traffic situation you are in.
Before your journey, please familiarize
yourself with the address book functions.
Only use the COMAND when road and traffic
conditions permit you to do so. Otherwise you
could be involved in an accident in which you
or others could be injured.
General Information
The entries of the address book can be used
for making phone calls and for setting
navigation destinations.
i You should delete your personal data
before selling your vehicle, using the Reset
function ( Y page 45).
Address Book111TelephoneZ
Page 127 of 224
Tuning to a Station
You can tune to a station via station search,
by manual frequency input or via the station
memory.
Tuning to a Station via Station SearchXRotate ym z or slide om p when the main
area is highlighted.
or
XPress E or F on the COMAND
control unit.
The search proceeds upwards or
downwards and stops at the next
receivable station.
Tuning to a Station via Manual
Frequency Input
XSelect Radio£Enter Frequency in the
radio display.
An input menu appears.
or
XPress õ on the control unit.XTo enter a frequency: Press number
buttons on the control unit.
i You can only select numbers that are
currently permissible.
COMAND will tune to the frequency entered.
i If in the FM or AM wavebands you enter a
frequency outside the frequency sub-
range, COMAND will select the next
frequency down.
Tuning to a Station via the Station
Memory
XSelect Presets in the radio display.
or
XPress n when the main area is highlighted.
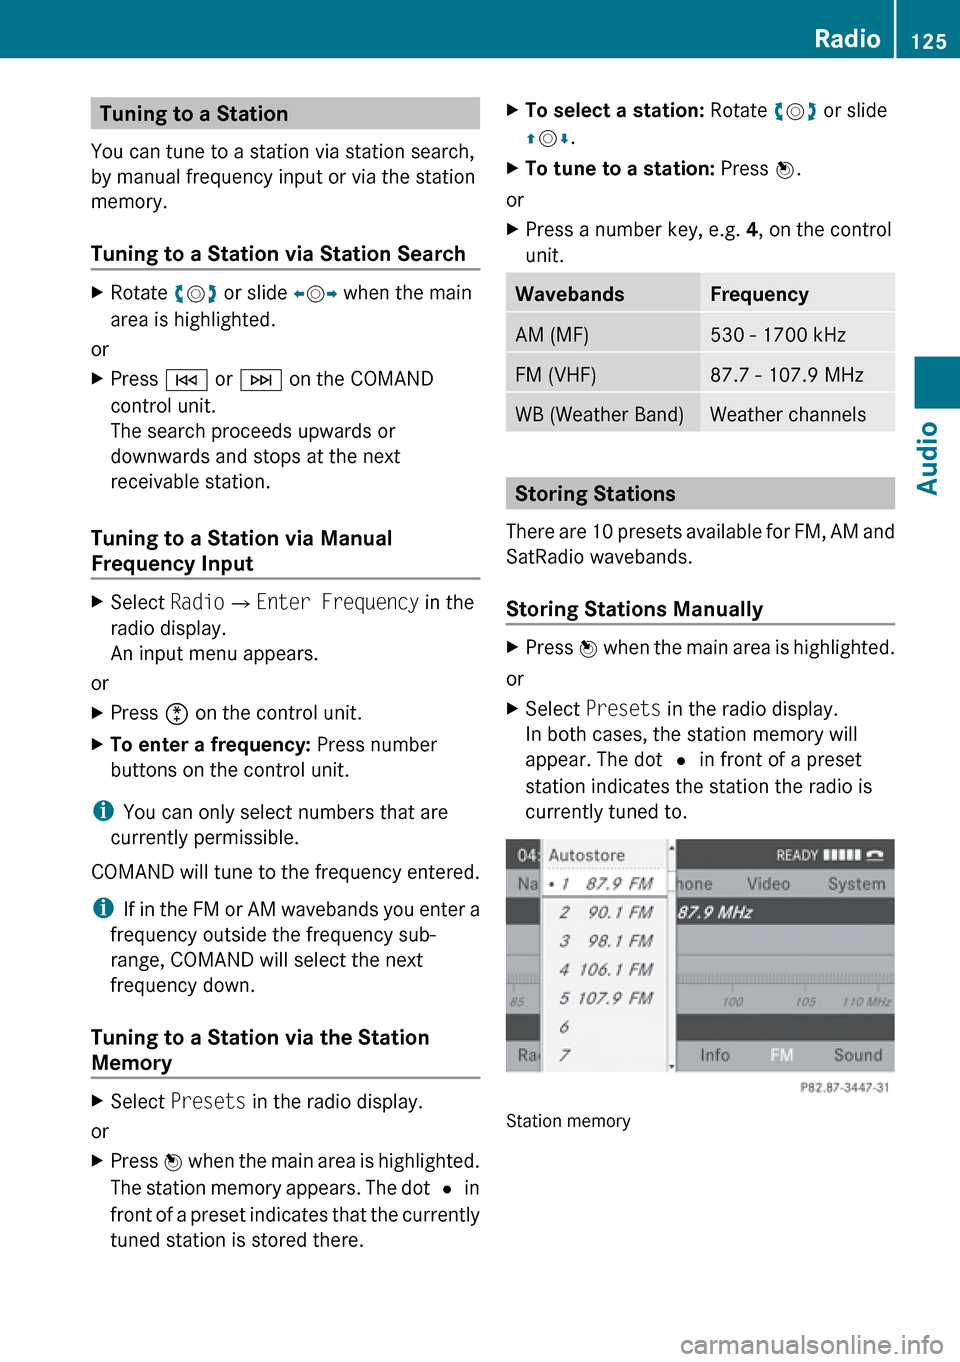
The station memory appears. The dot R in
front of a preset indicates that the currently
tuned station is stored there.XTo select a station: Rotate ym z or slide
q m r.XTo tune to a station: Press n.
or
XPress a number key, e.g. 4, on the control
unit.WavebandsFrequencyAM (MF)530 - 1700 kHzFM (VHF)87.7 - 107.9 MHzWB (Weather Band)Weather channels
Storing Stations
There are 10 presets available for FM, AM and
SatRadio wavebands.
Storing Stations Manually
XPress n when the main area is highlighted.
or
XSelect Presets in the radio display.
In both cases, the station memory will
appear. The dot R in front of a preset
station indicates the station the radio is
currently tuned to.
Station memory
Radio125AudioZ
Page 128 of 224
XTo store a station to a selected preset:
Press and hold n until a signal tone
sounds.
or
XPress and hold a number key, e.g. 4, until
a signal tone sounds.
The station is stored.
Storing via Autostore
i The function automatically assigns
receivable stations to the presets, sorted
according to reception quality. The stations
which were stored in the station memory
manually are overwritten.
XPress n when the main area is active.XSelect Autostore .
or
XSelect Presets £Autostore in the radio
display.
COMAND searches for receivable stations.
A corresponding message is displayed. The
available stations are automatically stored
under the presets.
Canceling Autostore Procedure
XSelect Cancel .
Switching to Weather Band
XPress the $ function button on the
control unit repeatedly until the weather
band is selected.
or
XSlide mr to highlight the submenu.XTo select the weather band: Rotate
y m z or slide o until the currently set
waveband is highlighted ( FM or AM).XPress 9.
Waveband submeu is opened.XSelect WB.Searching a ChannelXRotate ym z or slide om p when the main
area is highlighted.
or
XPress E or F on the control unit.
The search proceeds upwards or
downwards and stops at the next
receivable channel.
Selecting a Channel from Channel list
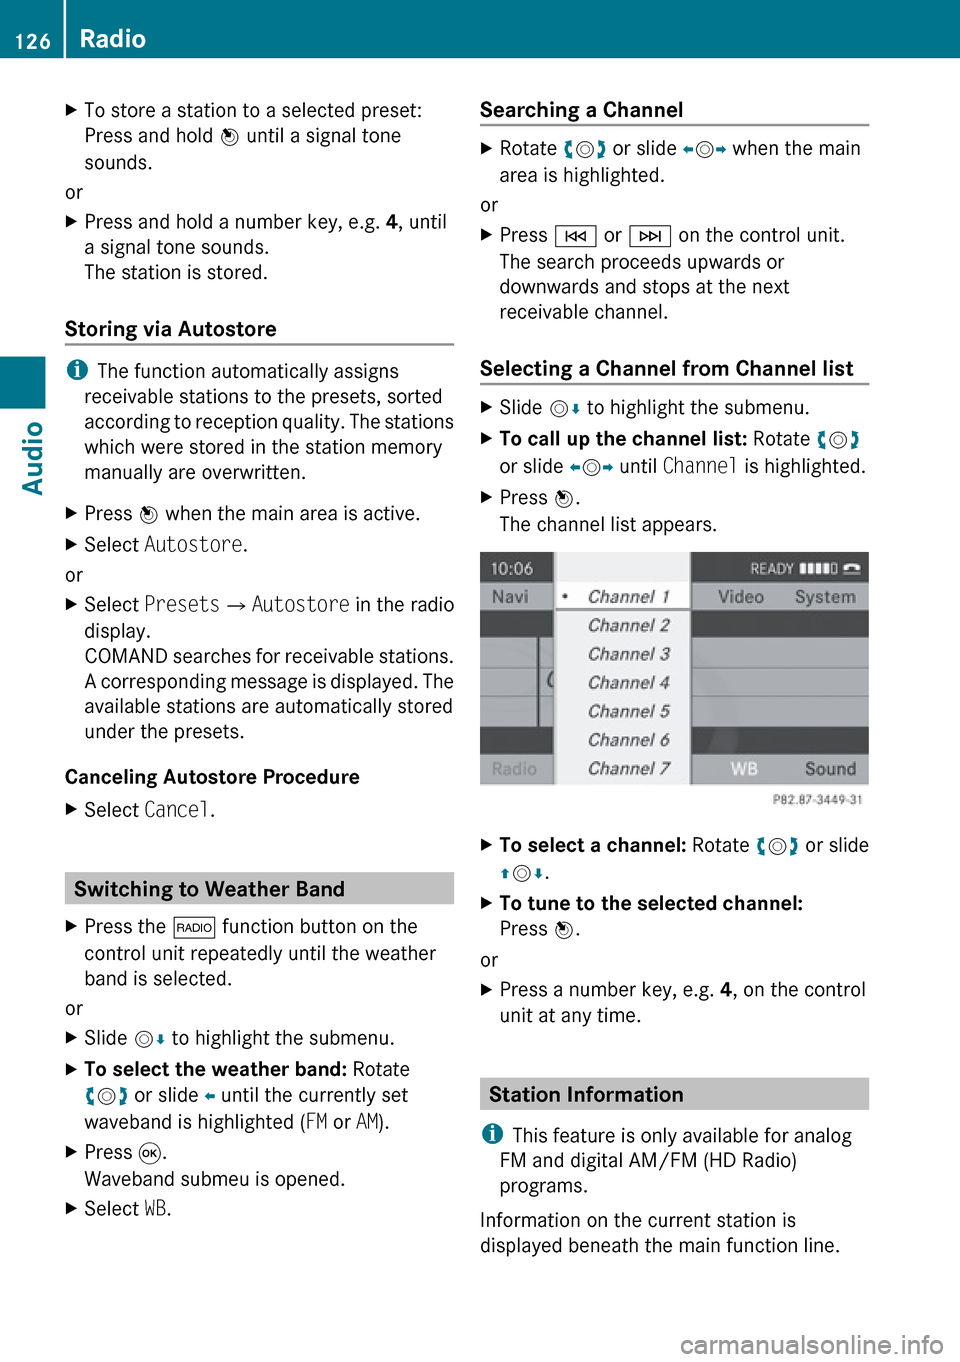
XSlide mr to highlight the submenu.XTo call up the channel list: Rotate ym z
or slide om p until Channel is highlighted.XPress n.
The channel list appears.XTo select a channel: Rotate ym z or slide
q m r.XTo tune to the selected channel:
Press n.
or
XPress a number key, e.g. 4, on the control
unit at any time.
Station Information
i This feature is only available for analog
FM and digital AM/FM (HD Radio)
programs.
Information on the current station is
displayed beneath the main function line.
126RadioAudio
Page 132 of 224
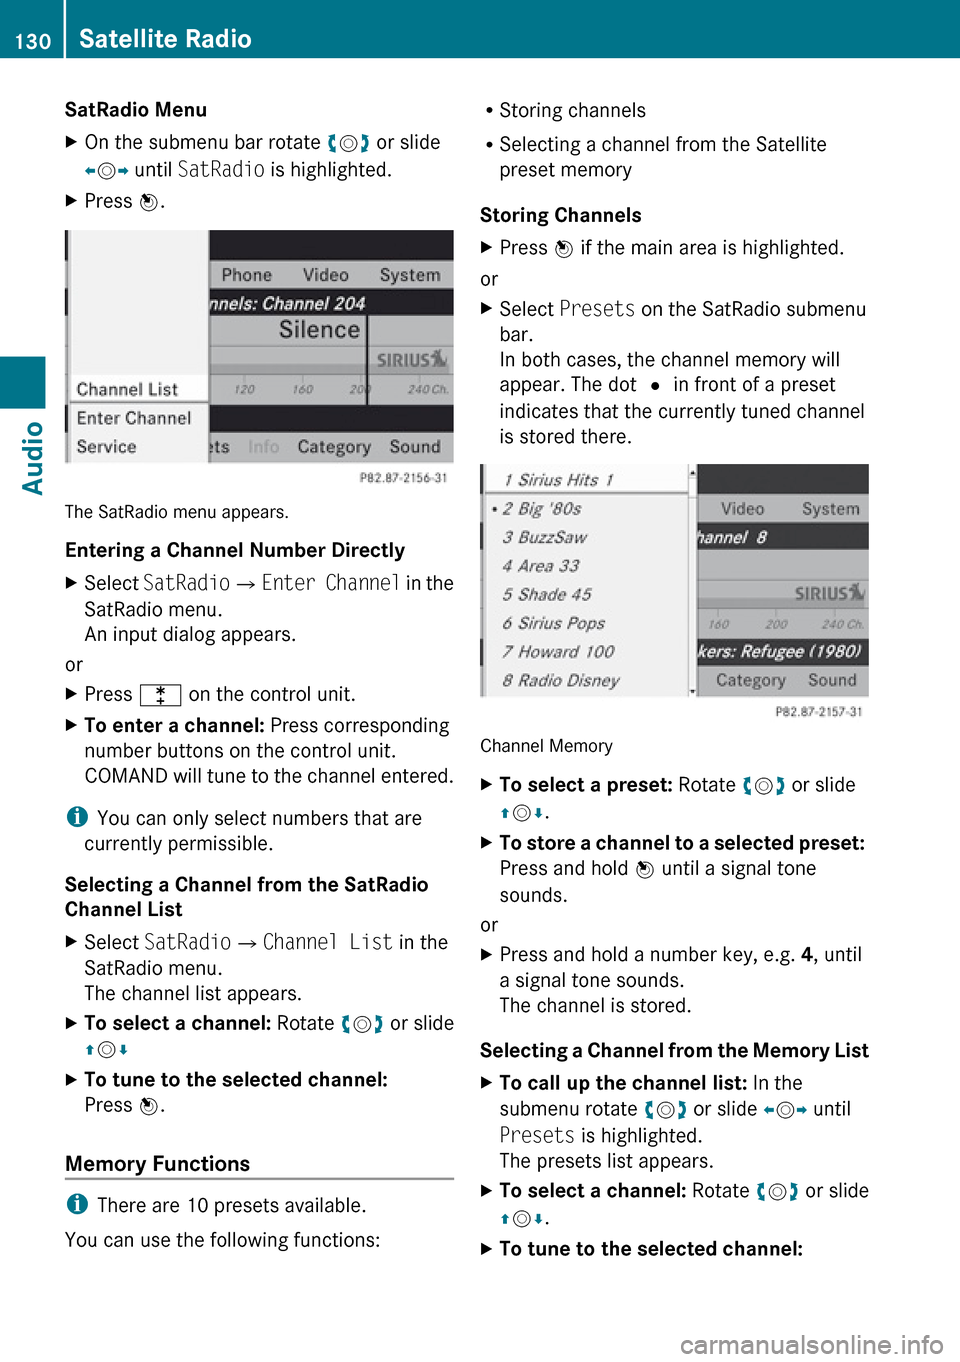
SatRadio MenuXOn the submenu bar rotate ym z or slide
o m p until SatRadio is highlighted.XPress n.
The SatRadio menu appears.
Entering a Channel Number Directly
XSelect SatRadio £Enter Channel in the
SatRadio menu.
An input dialog appears.
or
XPress l on the control unit.XTo enter a channel: Press corresponding
number buttons on the control unit.
COMAND will tune to the channel entered.
i You can only select numbers that are
currently permissible.
Selecting a Channel from the SatRadio
Channel List
XSelect SatRadio £Channel List in the
SatRadio menu.
The channel list appears.XTo select a channel: Rotate ym z or slide
q m rXTo tune to the selected channel:
Press n.
Memory Functions
i
There are 10 presets available.
You can use the following functions:
R Storing channels
R Selecting a channel from the Satellite
preset memory
Storing ChannelsXPress n if the main area is highlighted.
or
XSelect Presets on the SatRadio submenu
bar.
In both cases, the channel memory will
appear. The dot R in front of a preset
indicates that the currently tuned channel
is stored there.
Channel Memory
XTo select a preset: Rotate ym z or slide
q m r.XTo store a channel to a selected preset:
Press and hold n until a signal tone
sounds.
or
XPress and hold a number key, e.g. 4, until
a signal tone sounds.
The channel is stored.
Selecting a Channel from the Memory List
XTo call up the channel list: In the
submenu rotate ym z or slide om p until
Presets is highlighted.
The presets list appears.XTo select a channel: Rotate ym z or slide
q m r.XTo tune to the selected channel: 130Satellite RadioAudio
Page 133 of 224

Press n.
or
XPress a number key, e. g. 4 on the control
unit.
Displaying Information
XIn the submenu rotate ym z or slide om p
until Info is highlighted.XPress n.
Information about the current program
appears.1Category2Channel3Artist4Song title
You will see (if available)
R the full name
R additional information
XTo switch back to the SatRadio main
display: Slide om p.
Displaying Service Information
You can call the provider service center for
questions or releases whenever you need.
XSelect SatRadio £Service in the
SatRadio submenu.
The service information appears.1Phone number of the provider, (SIRIUS
XM) or Call Service Provider2SIRIUS XM ID of your satellite receiverXTo switch back to the SatRadio main
display: Slide om p.
Channel List Updates
While receiving a new channel list the
message Updating Channels will appear.
The channel last tuned to will be muted until
the update is completed. You cannot operate
the satellite radio.
After completion of the update, the Satellite
radio main menu will appear. The channel last
tuned to will begin to play if available in the
new channel list.
Sound Settings
Refer to chapter “At a glance” on how to
adjust sound settings.
R Volume ( Y page 35)
R Balance and fader control ( Y page 35)
R Bass and treble control ( Y page 35)
R Surround sound ( Y page 36)
CD Audio/DVD Audio/MP3
Safety Instructions
GWarning
COMAND is classified as a Class 1 laser
product. You must not open the casing. There
CD Audio/DVD Audio/MP3131AudioZ
Page 152 of 224
Selecting Music Files
i COMAND displays the data stored on the
iPod ®
, MP3 player or USB mass storage
device in the storage structure used in the
medium in question.
Selecting by Skipping to a TrackXTo skip forwards or backwards to a
track: Slide om p.
or
XPress the F or E button.
i
Skipping forwards skips to the next track.
Skipping backwards skips to the beginning
of the current track if the track has been
playing for more than 8 seconds. If the
track has been playing for less than 8
seconds, it skips to the start of the previous
track. If you have selected a playback
option other than Normal Track
Sequence , the track sequence is random.
Selecting by Manual Track Number
Entry
XTo make an entry: Press the l button.
An input menu appears. The number of
possible input places depends on the
number of tracks stored.XTo enter a track number: Press a number
key, such as s.
The number is entered in the first position
in the input line.
i If an invalid number is entered, COMAND
will ignore it and it will not be displayed.
XEnter more numbers if desired.XTo confirm your entry: Press the n
button.
The selected track is played.Fast forward/rewindXWhen the main area is highlighted, slide
and hold om p until the desired position has
been reached.
or
XPress and hold the F or E button
until the desired position has been
reached.
Selecting a Category/Playlist/Folder
iPods and MP3 Players
You can select tracks by category for iPods
and by folder for MP3 players.
Depending on the connected device, the
categories may include:
R Current track list
R Playlists (e.g. All, My top 25 or Music
videos )
R Artists
R Albums
R Podcasts
R Audiobooks
R Genres
R Composers
i Some playback categories contain the
All entry. Further entries of this type can
follow depending on the hierarchy level.
After selecting a title at the track level, the
entire content of the category selected will
be played.
USB Devices
For USB mass storage devices, you can select
folders and also playlists (if available).
COMAND can also display the album name
and artist (“metadata”) during playback, if
this information has previously been entered.
Playlists are shown in the display with a
particular icon. When you open the playlist,
150Media InterfaceAudio