tailgate MERCEDES-BENZ E-CLASS ESTATE 2012 Owners Manual
[x] Cancel search | Manufacturer: MERCEDES-BENZ, Model Year: 2012, Model line: E-CLASS ESTATE, Model: MERCEDES-BENZ E-CLASS ESTATE 2012Pages: 457, PDF Size: 11.62 MB
Page 13 of 457
E
EASY-ENTRY feature Activating/deactivating .................263
Function/notes ............................. 118
EASY-EXIT feature
Crash-responsive ........................... 118
Function/notes ............................. 118
Switching on/off ........................... 263
EASY-PACK convenience box ...........322
EASY-PACK folding floor Important safety notes ..................325
EASY-PACK folding luggage-com-
partment floor
Opening and closing ......................326
EASY-PACK loading sill protector ....326
EASY-PACK load-securing kit Components and storag e.............. 323
Inserting the brackets into the
loading rai l..................................... 323
EASY-PACK luggage compartment
management system ........................323
EBD (electronic brake force distri-
bution)
Display message ............................ 271
Function/notes ................................ 76
ECO display
Function/notes ............................. 185
On-board computer .......................250
ECO start/stop function
Deactivating/activating .................165
General information .......................165
Electrical fuses
see Fuses
Electronic Stability Program
see ESP ®
(Electroni cStability Program)
Electronic Traction System
see ETS/4ETS (Electronic Trac-
tionS ystem)
Emergency key
Unlocking the driver's door ..............90
Emergency key element
Function/notes ................................ 84
Locking vehicle ................................ 90
Emergency release
Driver's door .................................... 90
Fuel filler fla p................................. 181Emergency spare wheel
Important safety notes ..................425
Inflating the collapsible spare
wheel ............................................. 427
Points to remember .......................425
Removing ....................................... 426
Storage location ............................ 426
Stowing .......................................... 427
Technical data ............................... 429
Emergency unlocking
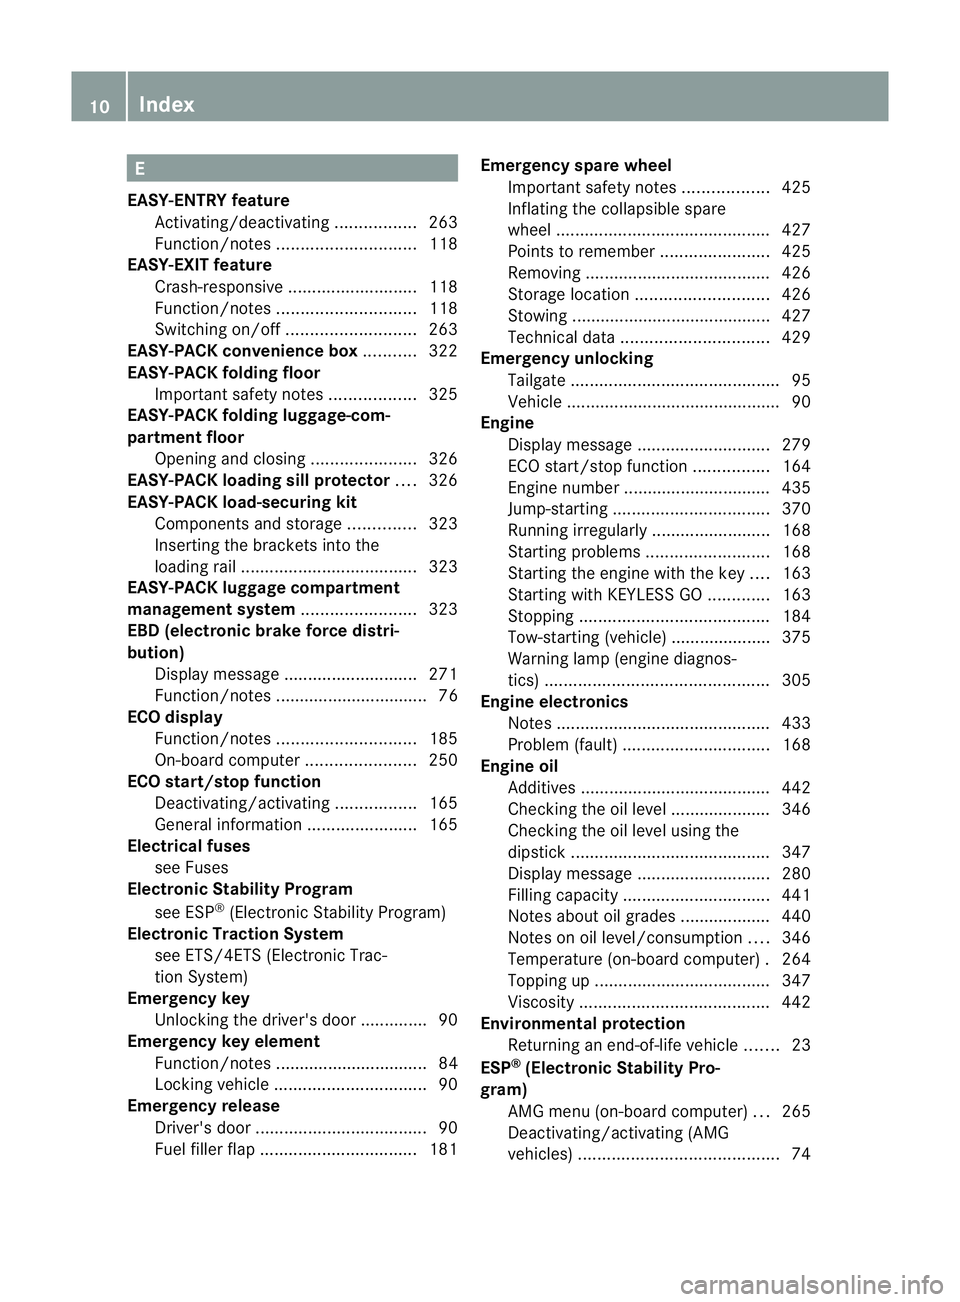
Tailgate ............................................ 95
Vehicle ............................................. 90
Engine
Display message ............................ 279
ECO start/stop function ................164
Engine number ............................... 435
Jump-starting ................................. 370
Running irregularl y......................... 168
Starting problems ..........................168
Starting the engine with the key ....163
Starting with KEYLESS GO .............163
Stopping ........................................ 184
Tow-starting (vehicle) ..................... 375
Warning lamp (engine diagnos-
tics) ............................................... 305
Engine electronics
Notes ............................................. 433
Problem (fault) ............................... 168
Engine oil
Additives ........................................ 442
Checking the oil level ..................... 346
Checking the oil level using the
dipstick .......................................... 347
Display message ............................ 280
Filling capacity ............................... 441
Notes about oil grades ................... 440
Notes on oil level/consumption ....346
Temperature (on-board computer) .264
Topping up ..................................... 347
Viscosity ........................................ 442
Environmental protection
Returning an end-of-life vehicle .......23
ESP ®
(Electronic Stability Pro-
gram) AMG menu (on-board computer) ...265
Deactivating/activating (AMG
vehicles) .......................................... 7410
Index
Page 22 of 457
SRS (Supplemental Restraint Sys-
tem)
Display message ............................ 274
Introduction ..................................... 43
Warning lamp ................................. 304
Warning lamp (function) ................... 43
Starting (engine) ................................ 162
Steering (display message) ..............296
Steering wheel Adjusting (electrically). ..................117
Adjusting (manually). .....................117
Button overview ............................... 35
Buttons (on-board computer) ......... 247
Cleaning ......................................... 356
Gearshift paddles ........................... 175
Important safety notes ..................117
Steering wheel heating ..................117
Storing settings (memory func-
tion) ............................................... 121
Steering wheel gearshift paddles ....175
Steering wheel heating Problem (malfunction) ...................118
Switching on/off ........................... 117
Stopwatch (RACETIMER) ................... 265
Stowage areas ................................... 310
Stowage compartment Spectacles compartment ...............311
Stowage compartments
Armrest (front) ............................... 312
Armrest (under) ............................. 312
Centre console .............................. 311
Cuph older..................................... 328
Glove compartment .......................311
Important safety information .........310
Rea r............................................... 313
Under driver's seat/front-
passenger sea t.............................. 312
Stowage net ....................................... 313
Stowage space Stowage net ................................... 313
Stowage well beneath the boot
floor .................................................... 325
Summer tyres .................................... 382
Sun blind Rea rside windows ......................... 330
Sun visor ............................................ 329Supplement Restraint System
see SRS (Supplemental Restraint
System)
Surround lighting (on-board com-
puter) ................................................. .260
Suspension tuning AIRMATIC ...................................... 209
AMG RIDE CONTROL sports sus-
pension .......................................... 210
SETUP (on-board computer) ..........265
Switching off the alarm (ATA) ............78 T
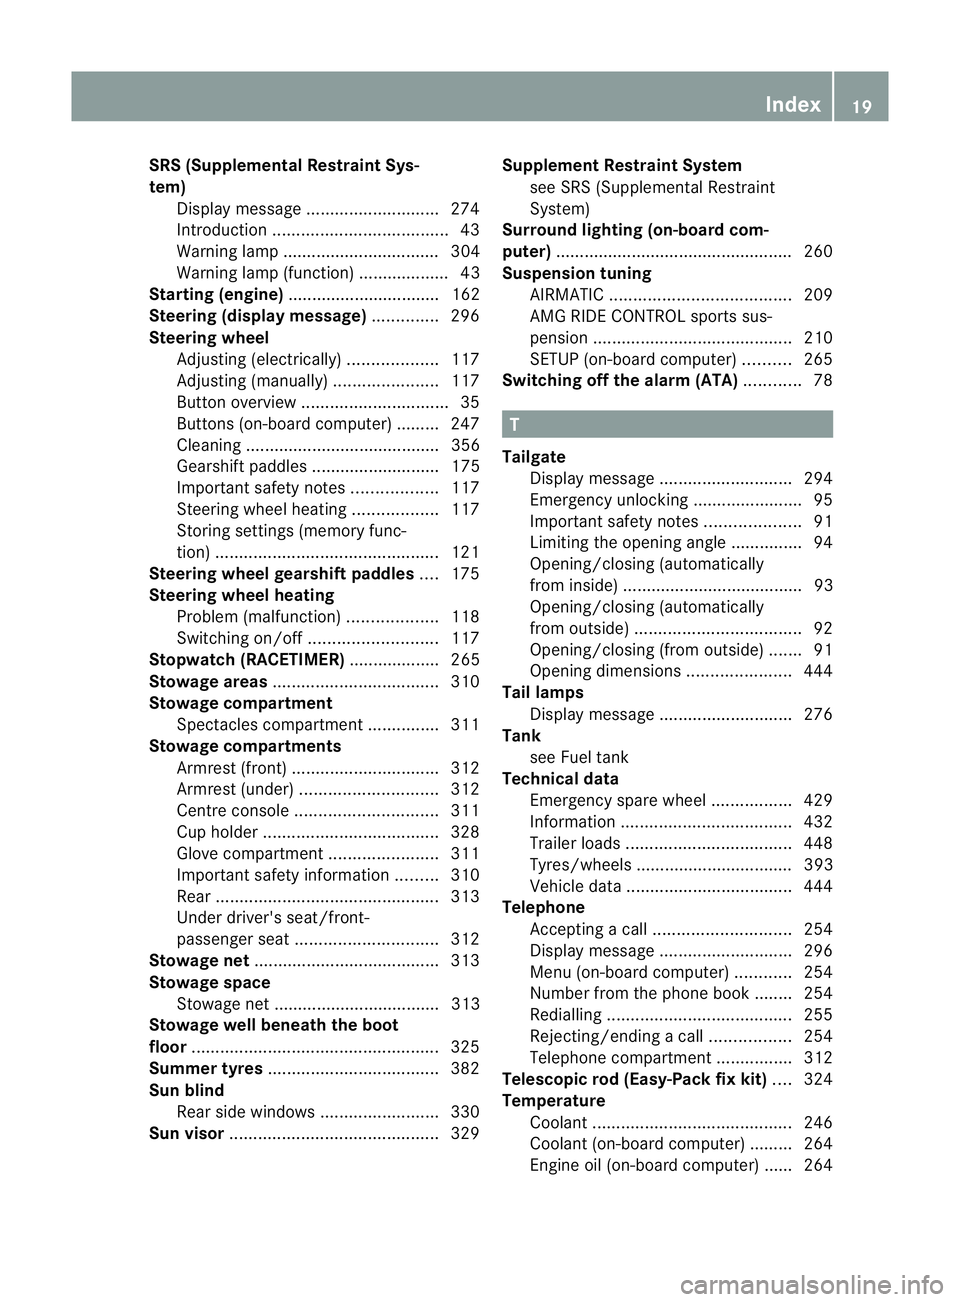
Tailgate Display message ............................ 294
Emergency unlocking .......................95
Important safety notes ....................91
Limiting the opening angle ...............94
Opening/closing (automatically
from inside) ...................................... 93
Opening/closing (automatically
from outside) ................................... 92
Opening/closing (from outside) .......91
Opening dimensions ......................444
Tail lamps
Display message ............................ 276
Tank
see Fuel tank
Technical data
Emergency spare wheel .................429
Information .................................... 432
Trailer loads ................................... 448
Tyres/wheels ................................. 393
Vehicle data ................................... 444
Telephone
Accepting acall............................. 254
Display message ............................ 296
Menu (on-board computer) ............254
Number from the phone book ....... .254
Redialling ....................................... 255
Rejecting/ending acall................. 254
Telephone compartment ................312
Telescopic rod (Easy-Pac kfix kit) ....324
Temperature Coolant .......................................... 246
Coolant (on-board computer) ......... 264
Engine oil (on-board computer) ...... 264 Index
19
Page 43 of 457
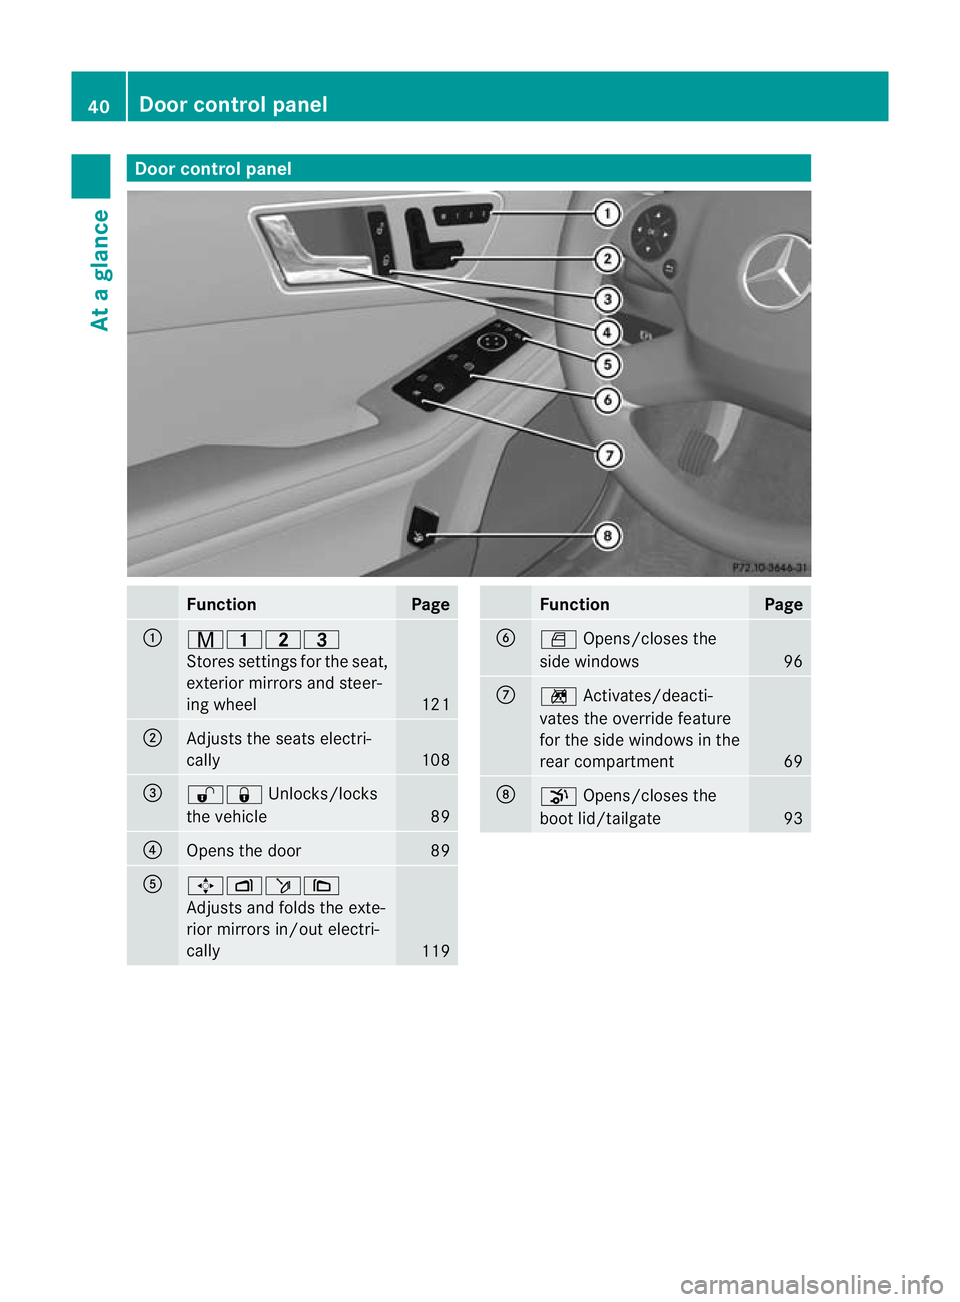
Door control panel
Function Page
:
r45=
Stores settings fo
rthe seat,
exterior mirrors and steer-
ing wheel 121
;
Adjusts the seats electri-
cally
108
=
%&
Unlocks/locks
the vehicle 89
?
Opens the door 89
A
7Zö\
Adjusts and folds the exte-
rior mirrors in/out electri-
cally
119 Function Page
B
W
Opens/closes the
side windows 96
C
n
Activates/deacti-
vates the override feature
for the side windows in the
rear compartment 69
D
p
Opens/closes the
boot lid/tailgate 9340
Doorc
ontrol panelAt a glance
Page 81 of 457
X
To activate/deactivate: activate or deac-
tivate PRE-SAFE ®
Brake in the on-board
computer (Y page 256).
When PRE-SAFE ®
Brake is activated, the
Ä symbol appears in multifunctio ndis-
play, as long as the HOL Dfunction is deac-
tivated (Y page 205). On vehicles with the
Active Parking Assist driving system, the
Ä symbol is displayed when position P
is engaged or you are driving faste rthan
35 km/h.
For PRE-SAFE ®
Brake to assist you when driv-
ing, the radar sensor system must be
switched on (Y page 262) and be opera-
tional.
The radar sensor system is switched off auto-
matically in the vicinity of radio telescope
facilities in the following vehicles:
R vehicles with COMAND Online and naviga-
tion
R vehicles with Audio 20 and Becker ®
MAP
PILOT
Becker ®
MAP PILOT must be connected;
see the separate operating instructions.
The radar sensor system must be switched off
using the on-board computer in the vicinity of
radio telescope facilities in the following vehi-
cles:
R vehicles without COMAND Online and nav-
igation
R vehicles without Audio 20 and Becker ®
MAP PILOT
R vehicles for Australia
For information on switching off the radar
sensor system using the on-board computer,
see (Y page 262).
Following damage to the front end of the vehi-
cle, have the configuration and operation of
the radar sensors checked at a qualified spe-
cialist workshop. This also applies to colli-
sions at slow speeds where there is no visible
damage to the front of the vehicle. Anti-theft systems
Immobiliser
X To activate with the key: remove the key
from the ignition lock.
X To activate with KEYLESS-GO: switch the
ignition off and open the driver's door.
X To deactivate: switch on the ignition.
The immobiliser prevents your vehicle from
being started without the correct key.
When leaving the vehicle, always take the key
with you and lock the vehicle. Anyone can
start the engine if a valid key has been left
inside the vehicle.
i The immobiliser is always deactivated
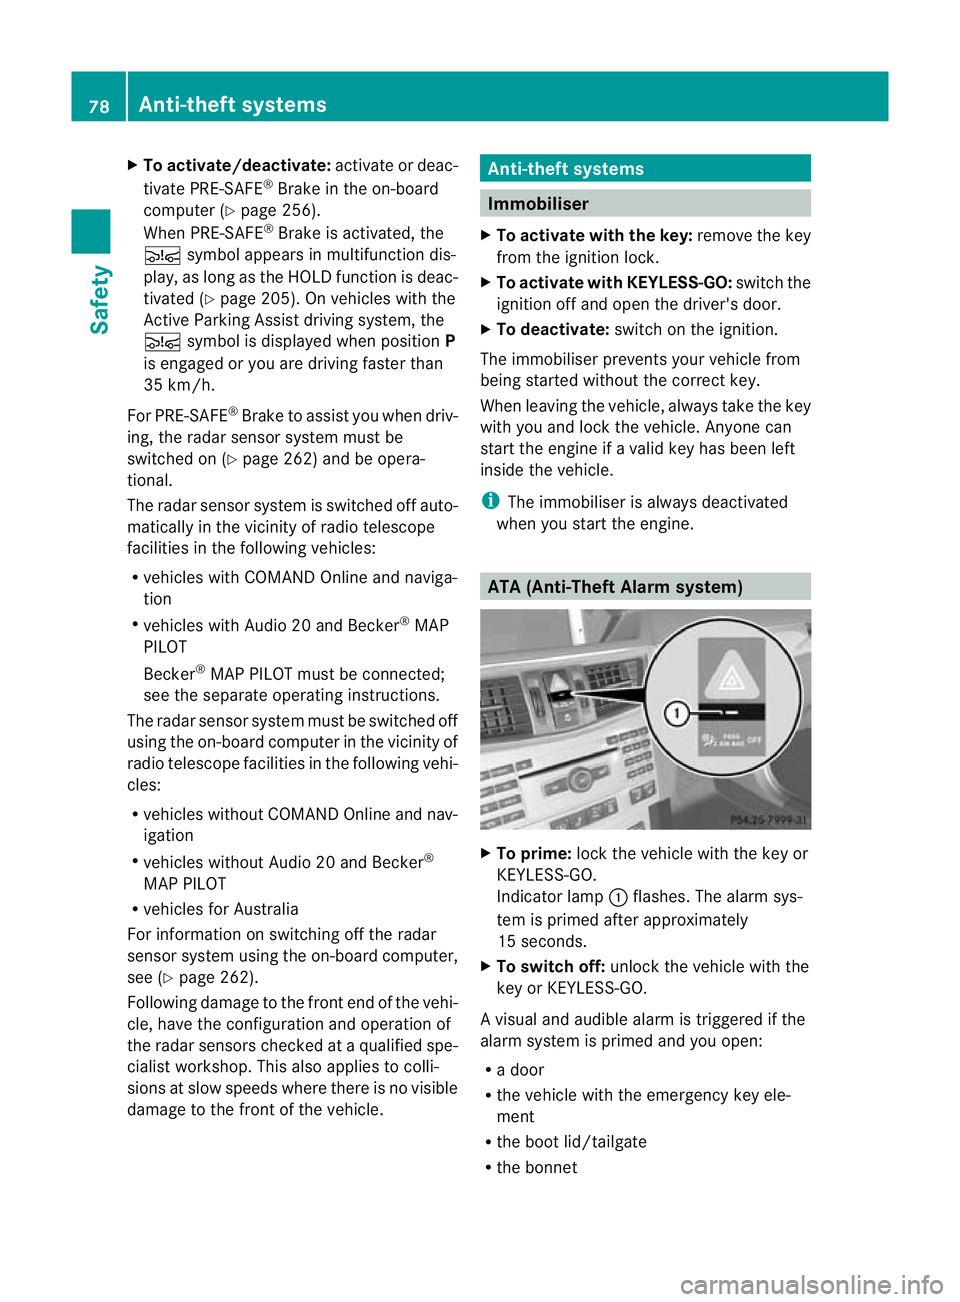
when you start the engine. ATA (Anti-Theft Alarm system)
X
To prime: lock the vehicle with the key or
KEYLESS-GO.
Indicator lamp :flashes. The alarm sys-
tem is primed after approximately
15 seconds.
X To switch off: unlock the vehicle with the
key or KEYLESS-GO.
Av isual and audible alarm is triggered if the
alarm system is primed and you open:
R a door
R the vehicle with the emergency key ele-
ment
R the boot lid/tailgate
R the bonnet 78
Anti-theft systemsSafety
Page 82 of 457
X
To turn the alarm off with the key: press
the % or& button on the key.
The alar mis switched off.
or
X Insert the key into the ignition lock.
The alarm is switched off.
X To stop the alarm using KEYLESS-GO:
grasp the outside door handle. The key
must be outside the vehicle.
The alarm is switched off.
or
X Press the Start/Stop button on the dash-
board. The key must be inside the vehicle.
The alarm is switched off.
The alarm is not switched off, even if you
close the open door that has triggered it, for
example. Tow-away protection
Function An audible and visual alarm is triggered if your
vehicle's angle of inclination is altered while
tow-away protection is primed. This can occur
if the vehicle is jacked up on one side, for
example.
Activating X
Make sure that:
R
the doors are closed.
R the boot lid/tailgate is closed.
Only then is the tow-away protection
primed.
X Lock the vehicle with the key or KEYLESS-
GO.
Tow-away protection is primed after
approximately 30 seconds.
To deactivate X
To switch off: unlock the vehicle with the
key or KEYLESS-GO.
Tow-away protection is switched off auto-
matically. Deactivating
X
Remove the key from the ignition lock.
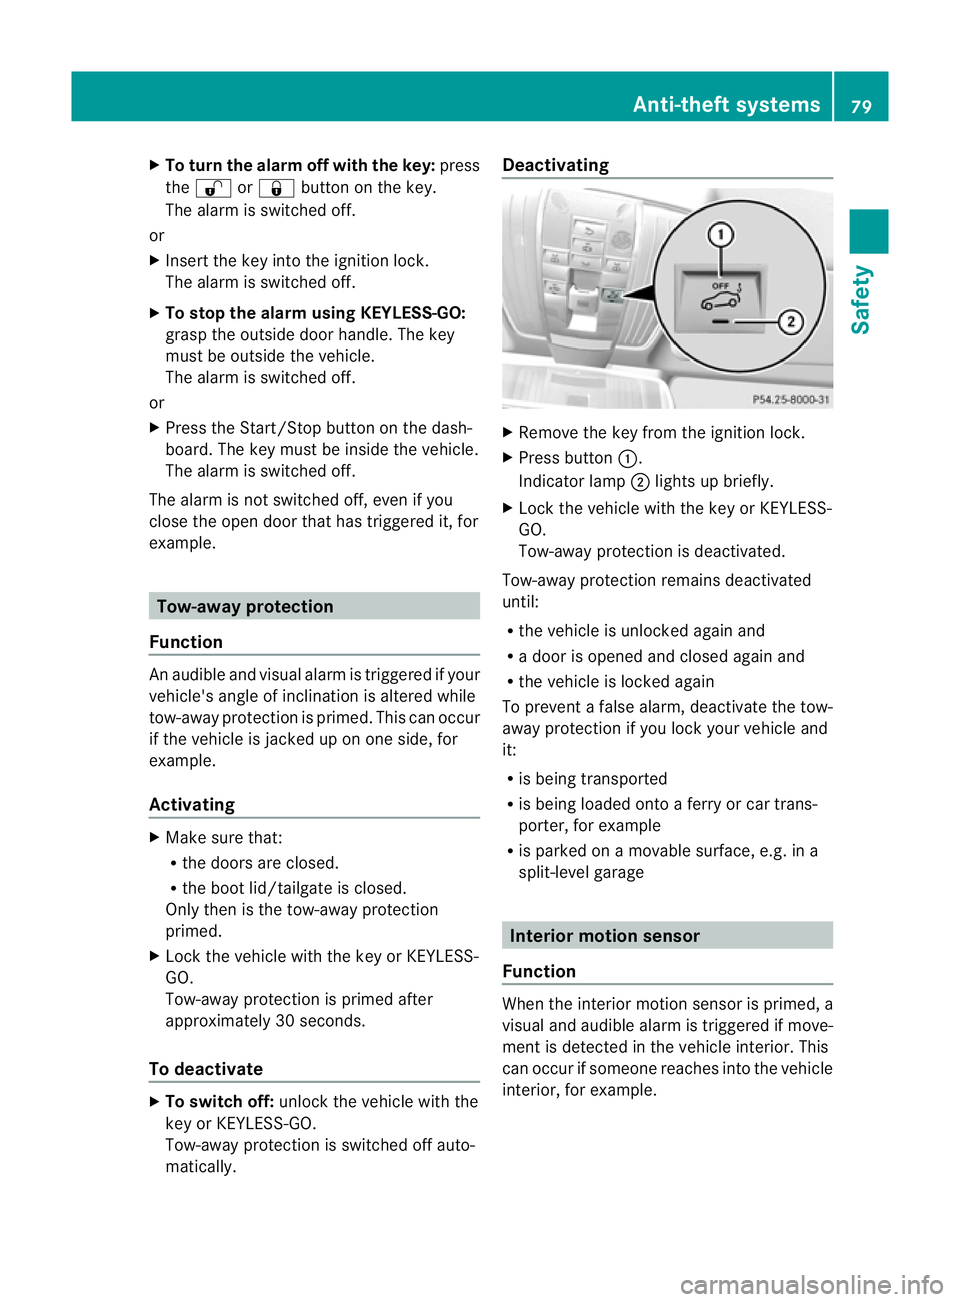
X Press button :.
Indicator lamp ;lights up briefly.
X Lock the vehicle with the key or KEYLESS-
GO.
Tow-away protection is deactivated.
Tow-away protection remains deactivated
until:
R the vehicle is unlocked againa nd
R a door is opened and closed agai nand
R the vehicle is locked again
To prevent a false alarm, deactivate the tow-
away protection if you lock your vehicle and
it:
R is being transported
R is being loaded onto a ferry or car trans-
porter, for example
R is parked on a movable surface, e.g .ina
split-level garage Interior motion sensor
Function When the interior motion sensor is primed, a
visual and audible alarm is triggered if move-
ment is detected in the vehicle interior. This
can occur if someone reaches into the vehicle
interior, for example. Anti-theft systems
79Safety Z
Page 83 of 457
Activating
X
Make sure that:
R
the side windows are closed.
R the sliding sunroof/panorama sliding
sunroo fis closed.
R there are no objects, e.g. mascots, hang-
ing on the rear-view mirror or on the grab
handles on the roof trim.
This will prevent false alarms.
X Make sure that:
R
the doors are closed.
R the sliding sunroof/panorama sliding
sunroof is closed.
R the boot lid/tailgate is closed.
Only then is the interior motion sensor
primed.
X Lock the vehicle with the key or KEYLESS-
GO.
The interior motion sensor is primed after
approximately 30 seconds.
To deactivate X
Unlock the vehicle with the key or KEY-
LESS-GO.
The interior motion sensor is switched off
automatically.
Deactivating X
Remove the key from the ignition lock.
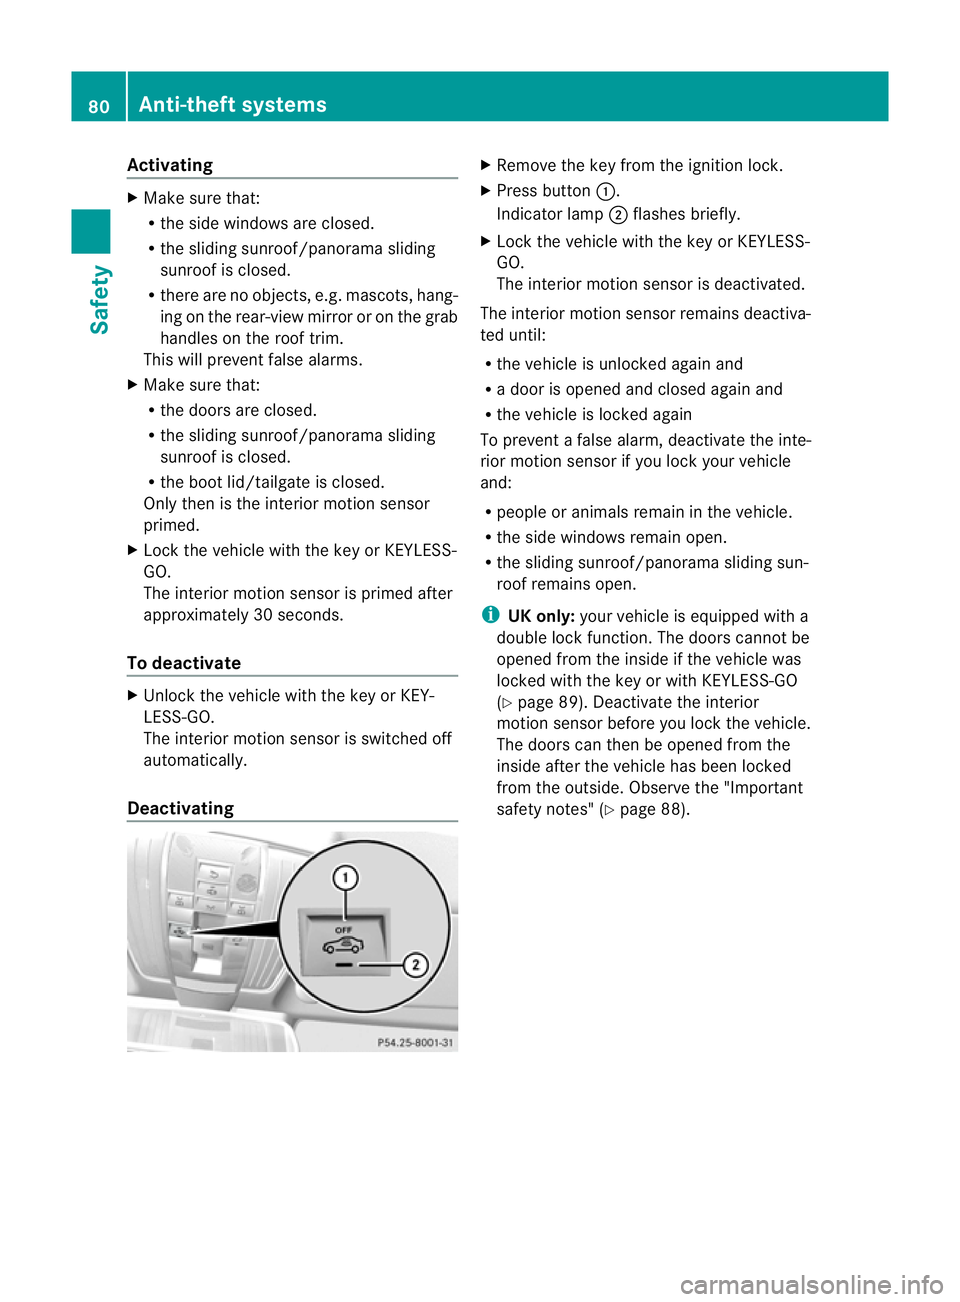
X Press button :.
Indicator lamp ;flashes briefly.
X Lock the vehicle with the key or KEYLESS-
GO.
The interior motion sensor is deactivated.
The interior motion sensor remains deactiva-
ted until:
R the vehicle is unlocked againa nd
R a door is opened and closed agai nand
R the vehicle is locked again
To prevent a false alarm, deactivate the inte-
rio rm otion sensor if you lock your vehicle
and:
R people or animals remain in the vehicle.
R the side windows remain open.
R the sliding sunroof/panorama sliding sun-
roof remains open.
i UK only: your vehicle is equipped with a
double lock function. The doors cannot be
opened from the inside if the vehicle was
locked with the key or with KEYLESS-GO
(Y page 89). Deactivate the interior
motion sensor before you lock the vehicle.
The doors can then be opened from the
inside after the vehicle has been locked
from the outside. Observe the "Important
safety notes" (Y page 88).80
Anti-theft systemsSafety
Page 86 of 457
Key functions
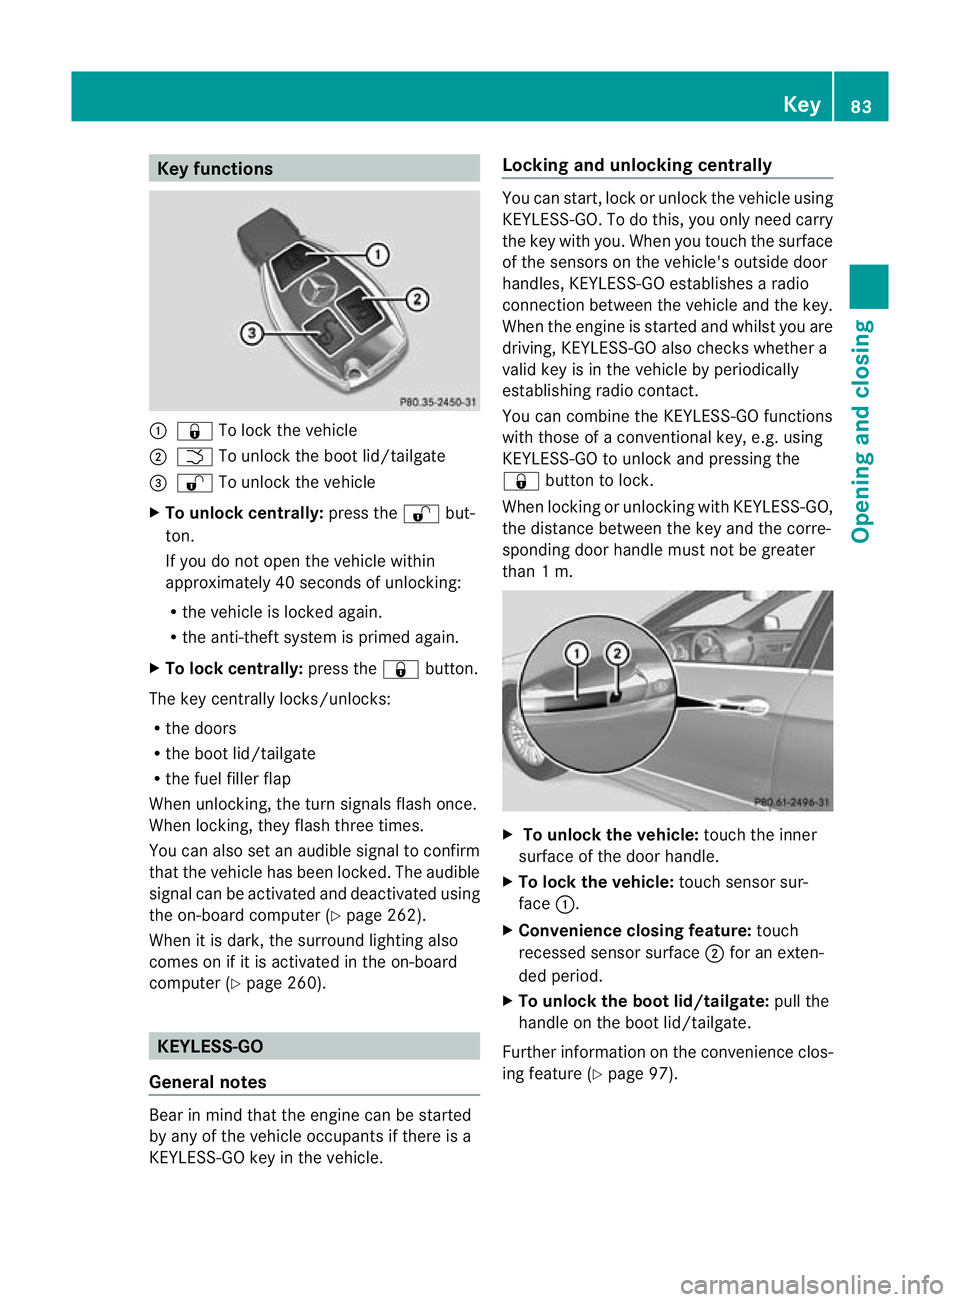
:
& To loc kthe vehicle
; F To unlock the boot lid/tailgate
= % To unlock the vehicle
X To unlock centrally: press the%but-
ton.
If you do not open the vehicle within
approximately 40 seconds of unlocking:
R the vehicle is locked again.
R the anti-theft system is primed again.
X To lock centrally: press the&button.
The key centrally locks/unlocks:
R the doors
R the boot lid/tailgate
R the fuel filler flap
When unlocking, the turn signals flash once.
When locking, they flash three times.
You can also set an audible signal to confirm
that the vehicle has been locked. The audible
signal can be activated and deactivated using
the on-board computer (Y page 262).
When it is dark, the surround lighting also
comes on if it is activated in the on-board
computer (Y page 260). KEYLESS-GO
General notes Bear in mind that the engine can be started
by any of the vehicle occupants if there is a
KEYLESS-GO key in the vehicle. Locking and unlocking centrally You can start, lock or unlock the vehicle using
KEYLESS-GO. To do this, you only need carry
the key with you. When you touch the surface
of the sensors on the vehicle's outside door
handles, KEYLESS-GO establishes a radio
connection between the vehicle and the key.
When the engine is started and whilst you are
driving, KEYLESS-GO also checks whether a
valid key is in the vehicle by periodically
establishing radio contact.
You can combine the KEYLESS-GO functions
with those of a conventional key, e.g. using
KEYLESS-GO to unlock and pressing the
&
button to lock.
When locking or unlocking with KEYLESS-GO,
the distance between the key and the corre-
sponding door handle must not be greater
than 1 m. X
To unlock the vehicle: touch the inner
surface of the door handle.
X To lock the vehicle: touch sensor sur-
face :.
X Convenience closing feature: touch
recessed sensor surface ;for an exten-
ded period.
X To unlock the boot lid/tailgate: pull the
handle on the boot lid/tailgate.
Further information on the convenience clos-
ing feature (Y page 97). Key
83Opening and closing Z
Page 87 of 457
Changing the settings of the locking
system
You can change the settings of the locking
system. This means that only the driver's door
and the fuel fille rflap are unlocked when the
vehicle is unlocked. This is useful if you fre-
quently travel on your own.
X To change the setting: press and hold
down the %and& buttons on the
key simultaneously for approximately six
seconds until the battery chec klamp
flashes twice ( Ypage 85).
i If the setting of the locking system is
changed within the signal range of the vehi-
cle, pressing the &or% button:
R locks or
R unlocks the vehicle
The key now functions as follows:
X To unlock the driver's door: press the
% button once.
X To unlock centrally: press the%but-
ton twice.
X To lock centrally: press the&button.
The KEYLESS-GO function is changed as fol-
lows:
X To unlock the driver's door: touch the
inner surface of the door handle on the
driver's door.
X To unlock centrally: touch the inner sur-
face of the door handle on the front-
passenger door or the rear door.
X To lock centrally: touch the outer sensor
surface on one of the door handles.
X To restore the factory settings: press
and hold down the %and& buttons
simultaneously for approximately six sec-
onds until the battery check lamp flashes
twice (Y page 85). Emergency key element
General notes If the vehicle can no longer be locked or
unlocked with the key, use the emergency
key element.
If you use the emergenc
ykey element to
unlock and open the driver's door or the boot
lid/tailgate, the anti-thef talarm system will
be triggered (Y page 78).
There are several ways to tur noff the alarm:
X To turn the alarm off with the key: press
the % or& button on the key.
or
X Insert the key into the ignition lock.
or
X To deactivate the alarm with KEYLESS-
GO: press the Start/Stop button in the igni-
tion lock. The key must be in the vehicle.
or
X Lock or unlock the vehicle using KEYLESS-
GO. The key must be outside the vehicle.
If you unlock the vehicle using the emergency
key element, the fuel filler flap will not be
unlocked automatically.
X To unlock the fuel filler flap: insert the
key into the ignition lock.
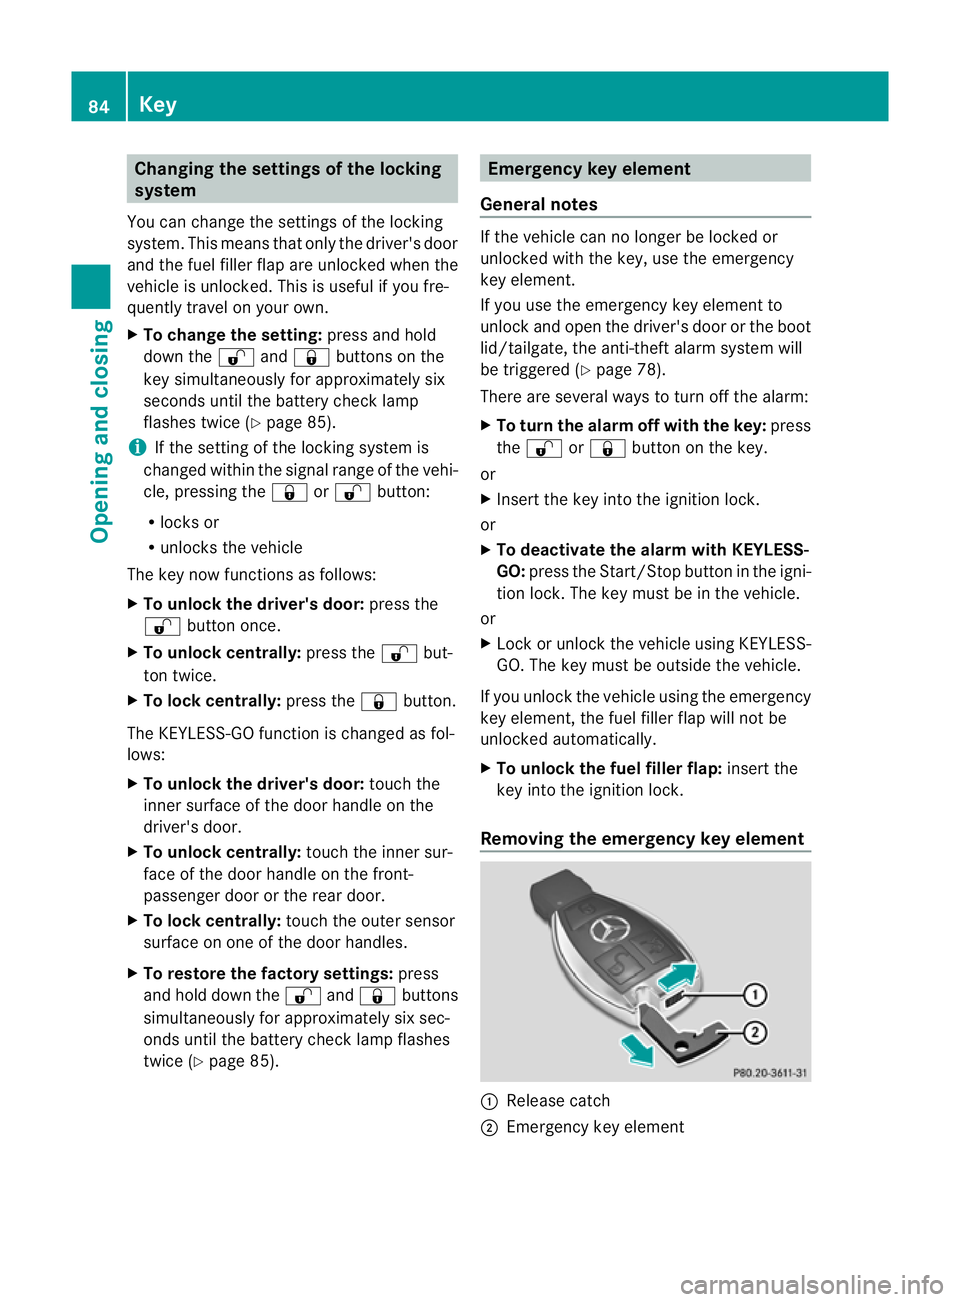
Removing the emergency key element :
Release catch
; Emergency key element 84
KeyOpening and closing
Page 93 of 457
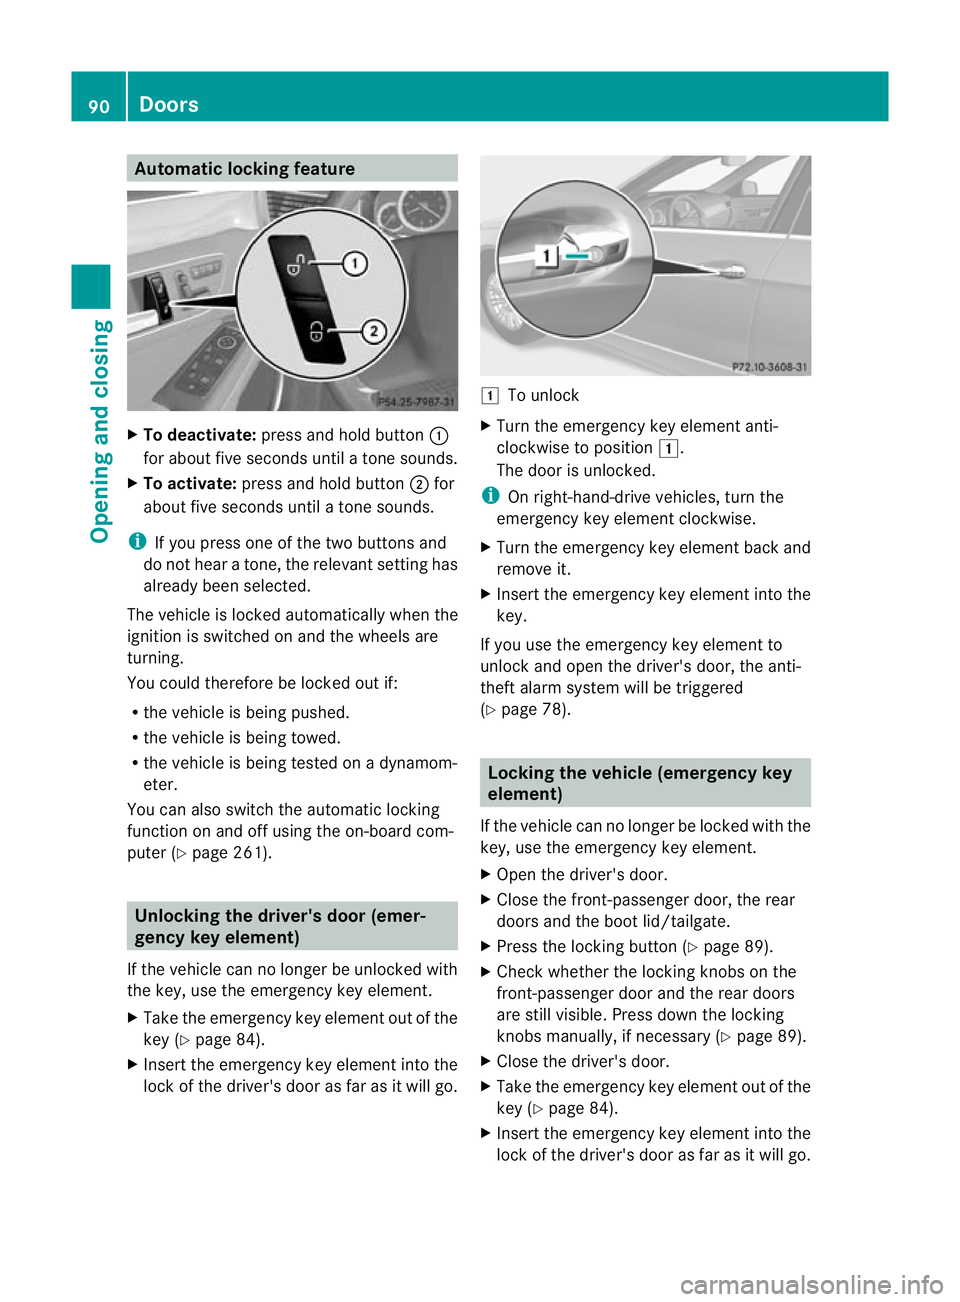
Automatic locking feature
X
To deactivate: press and hold button :
for about five seconds until a tone sounds.
X To activate: press and hold button ;for
about five seconds until a tone sounds.
i If you press one of th etwo buttons and
do not hear a tone, the relevant setting has
already been selected.
The vehicle is locked automatically when the
ignitio nis switched on and the wheels are
turning.
You could therefore be locked out if:
R the vehicle is being pushed.
R the vehicle is being towed.
R the vehicle is being tested on a dynamom-
eter.
You can also switch the automatic locking
function on and off using the on-board com-
puter (Y page 261). Unlocking the driver's door (emer-
gencyk
ey element)
If the vehicle can no longer be unlocked with
the key, use the emergency key element.
X Take the emergency key element out of the
key (Y page 84).
X Inser tthe emergency key element into the
lock of the driver's door as far as it will go. 1
To unlock
X Turn the emergency key element anti-
clockwise to position 1.
The door is unlocked.
i On right-hand-drive vehicles, turn the
emergency key element clockwise.
X Turn the emergency key element back and
remove it.
X Insert the emergency key element into the
key.
If you use the emergency key element to
unlock and open the driver's door, the anti-
theft alarm system will be triggered
(Y page 78). Locking the vehicle (emergency key
element)
If the vehicle can no longer be locked with the
key, use the emergency key element.
X Open the driver's door.
X Close the front-passenger door, the rear
doors and the boot lid/tailgate.
X Press the locking button (Y page 89).
X Check whether the locking knobs on the
front-passenger door and the rear doors
are still visible. Press down the locking
knobs manually, if necessary (Y page 89).
X Close the driver's door.
X Take the emergency key element out of the
key (Y page 84).
X Insert the emergency key element into the
lock of the driver's door as far as it will go. 90
DoorsOpening and closing
Page 94 of 457
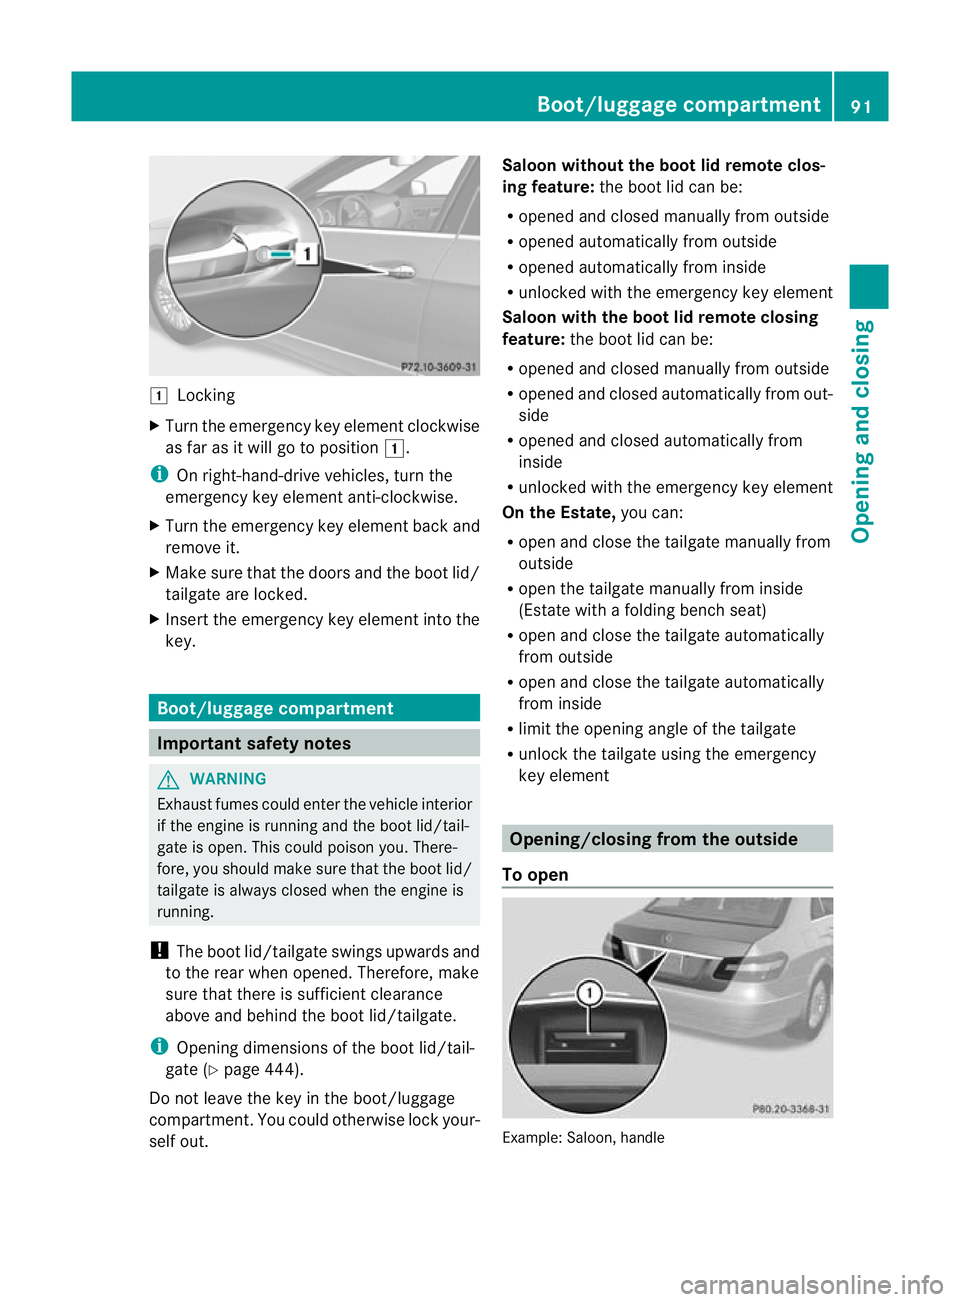
1
Locking
X Turn the emergency key element clockwise
as far as it will go to position 1.
i On right-hand-drive vehicles, turn the
emergency key element anti-clockwise.
X Turn the emergency key element back and
remove it.
X Make sure that the doors and the boot lid/
tailgate are locked.
X Insert the emergency key element into the
key. Boot/luggage compartment
Important safety notes
G
WARNING
Exhaust fumes could enter the vehicle interior
if the engine is running and the boot lid/tail-
gate is open. This could poiso nyou. There-
fore, you should make sure that the boot lid/
tailgate is always closed when the engine is
running.
! The boot lid/tailgate swings upwards and
to the rear when opened. Therefore, make
sure that there is sufficient clearance
above and behind the boot lid/tailgate.
i Opening dimensions of the boot lid/tail-
gate (Y page 444).
Do not leave the key in the boot/luggage
compartment. You could otherwise lock your-
self out. Saloon without the boot lid remote clos-
ing feature: the boot lid can be:
R opened and closed manually from outside
R opened automatically from outside
R opened automatically from inside
R unlocked with the emergenc ykey element
Saloon with the boot lid remote closing
feature: the boot lid can be:
R opened and closed manually from outside
R opened and closed automatically from out-
side
R opened and closed automatically from
inside
R unlocked with the emergency key element
On the Estate, you can:
R open and close the tailgate manually from
outside
R open the tailgate manually from inside
(Estate with a folding bench seat)
R open and close the tailgate automatically
from outside
R open and close the tailgate automatically
from inside
R limit the opening angle of the tailgate
R unlock the tailgate using the emergency
key element Opening/closing from the outside
To open Example: Saloon, handle Boot/luggage compartment
91Opening and closing Z