turn signal bulb MERCEDES-BENZ E-CLASS ESTATE 2012 Owners Manual
[x] Cancel search | Manufacturer: MERCEDES-BENZ, Model Year: 2012, Model line: E-CLASS ESTATE, Model: MERCEDES-BENZ E-CLASS ESTATE 2012Pages: 457, PDF Size: 11.62 MB
Page 10 of 457
Car wash (care)
................................. 351
CD player/CD changer(on-board
computer) .......................................... 253
Central locking Automatic locking (on-board com-
puter) ............................................. 261
Locking/unlocking (key ).................. 83
Centre console
Lowe rsection .................................. 37
Uppe rsection .................................. 36
Changing bulbs
Dipped-bea mheadlamps ............... 136
Important safety notes ..................135
Infrared lamp ................................. 137
Main-beam headlamps ................... 136
Overview of bul btypes .................. 135
Parking lamps (front) .....................137
Standing lamps .............................. 137
Turn signals (front) ......................... 137
Child-proof locks
Important safety notes ....................69
Rea rdoors ....................................... 69
Children
Fastening seat belts ......................... 62
In the vehicle ................................... 55
Restraint systems ............................ 55
Child seat
Automatic recognition .....................57
Integrated ........................................ 61
Integrated, ICS padded pla ytable ....63
Integrated, side head restraints .......64
Integrated ,storing ........................... 65
ISOFIX .............................................. 58
On the front-passenger sea t............ 56
Problem (malfunction) .....................61
Recommendations ...........................67
Suitable positions ............................ 65
Top Tether ....................................... 59
Cigarette lighter ................................ 331
Cleaning Mirro rturn signal ........................... 354
Trailer tow hitch ............................. 355
Climate control
Auxiliary heating/ventilation .......... 151
Controlling automatically ...............146
Convenience opening/closing
(air-recirculatio nmode) ................. 150
Cooling with aird ehumidification..145 Demisting the windows .................. 149
Demisting the windscreen .............148
Important safety notes ..................142
Indicator lamp ................................ 146
Information on using
THERMOTRONIC automatic cli-
mate control .................................. 145
Notes on using THERMATIC auto-
matic climate control .....................143
Overview of systems ......................142
Problems with cooling with air
dehumidification ............................ 146
Problem with the rear window
heating .......................................... 149
Rea rcontrol panel ......................... 144
Setting the aird istribution.............147
Setting the airflow .........................148
Setting the airv ents...................... 155
Setting the climate mode .............. .146
Setting the temperature ................147
Switching air-recirculation mode
on/off ............................................ 149
Switching on/off ........................... 145
Switching residual hea ton/off ......150
Switching the rear window heat-
ing on/off ...................................... 149
Switching the ZONE function on/
off .................................................. 148
THERMATIC automatic climate
control (2-zone) ............................. 143
THERMOTRONIC (3-zone) auto-
matic climate control .....................144
Coat hooks ......................................... 322
Cockpit Overview .......................................... 30
see Instrument cluster
Collapsible emergency spare
wheel
see Emergency spare wheel
COMAND display
Cleaning ......................................... 355
COMAND Online
see separate operating instructions
Combination switch ..........................128
Combine dluggage cover and net ....320
Consumption statistics (on-board
computer) .......................................... 249
Convenience box ............................... 322 Index
7
Page 17 of 457
Switching the daytime driving
lights on/of
f(on-board computer) .259
Switching the exterio rlighting
delayed switch-off on/off (on-
board computer )............................ 260
Switching the surround lighting
on/off (on-board computer) ..........260
Turn signals ................................... 128
see Changing bulbs
see Interior lighting
Light sensor (display message) .......278
LIM indicator lamp Cruise control ................................ 190
DISTRONI CPLUS ........................... 196
Variabl eSPEEDTRONIC .................193
Limiting the speed
see SPEEDTRONIC
Loading guidelines ............................310
Loading sill protector ........................ 326
Locking see Centra llocking
Locking (doors)
Automatic ........................................ 90
Emergency locking ........................... 90
From inside (central locking but-
ton) .................................................. 89
Locking centrally
see Centra llocking
Locking verification signal (on-
board computer) ............................... 262
Luggage compartment cover ...........319
Luggage compartment enlarge-
ment ................................................... 317
Luggage compartment floor ............325
Luggage holde r(EASY-PACK load-
securing kit) ...................................... .324
Lumbar support Adjusting ....................................... 113
Adjusting the 4-way lumba rsup-
por t................................................ 113
Luxu ry head restraint .......................110 M
M+S tyres ........................................... 382
Main-beam headlamps Changing bulbs .............................. 136
Display message ............................ 277Switching Adaptive Highbeam
Assist on/off
................................. 132
Switching on/off ........................... 129
Manual transmission
Engaging neutral (ECO start/stop
function) ........................................ 170
Engaging revers egear ................... 170
Gea rlever ...................................... 169
Pulling away ................................... 163
Shifting to neutra l.......................... 170
Shift recommendatio n................... 170
Starting the engine ........................163
Massage function (PULSE) ...............112
Matt finish (cleaning instructions) ..353
Memory card (audio) .........................253
Memory function ............................... 121
Mercedes-Benz Service Centre see Qualified specialist workshop
Message memory (on-board com-
puter) ................................................. .268
Messages see Display messages
Mirror
see Vanity mirror (in sun visor)
Mirrors
see Exterior mirrors
see Rear-view mirror
Mobile phone
Frequencies ................................... 433
Installatio n..................................... 433
Menu (on-board computer) ............254
Notes/placing in the bracket ......... 333
Sliding adapter ............................... 335
Transmission output (maximum) .... 433
Mobile telephone
Pre-installe dbracket ...................... 334
Modifying the programming (key) .....84
MOExtended tyres .............................363
Motorway mode ................................ 131
MP3 Operating ...................................... .253
see Separate operating instructions
Multifunction display
Function/notes ............................. 248
Permanent displa y......................... 25914
Index
Page 23 of 457
Outside temperature ......................2
47
Setting (climate control) ................147
TEMPOMAT
Function/notes ............................. 189
Theft-deterrent system
ATA (Anti-Theft Alarm system) .........78
Immobiliser ...................................... 78
Through-loading ................................ 315
Through-loading feature ...................315
Time see Separate Owner' smanual
Timing (RACETIMER) .........................265
Tiredness Assist see ATTENTION ASSIST
TIREFIT kit .......................................... 364
Top Tether ............................................ 59
Total distance recorder ....................249
Tow-away protection ..........................79
Towing Important safety notes ..................372
With the rear axle raised ................373
Towing atrailer
Activ eBlind Spot Assist .................232
Active Lane Keeping Assist ............234
Axle load, permissible ....................450
Bulb failure indicator for LED
lamps ............................................. 241
ESP ®
(Electroni cStability Pro-
gram) ............................................... 75
Towing away
Fitting the towing eye. ...................373
Removing the towing eye. ..............373
With both axles on the ground .......374
Tow-starting
Emergency engine starting ............375
Important safety notes ..................372
Removing the towing eye. ..............373
Trailer
Display message ............................ 295
Trailer coupling
see Towing atrailer
Trailer towing
7-pin connector ............................. 241
Blind Spot Assist ............................ 227
Cleaning the trailer tow hitch ......... 355
Coupling up atrailer ...................... 238
Decoupling atrailer ....................... 239Driving tips
.................................... 236
Folding in the ball coupling ............239
Folding out the ball coupling ..........237
Important safety notes ..................234
Lights displa ymessage .................. 275
Mounting dimensions ....................447
Parking Guidance ........................... 218
Parktroni c...................................... 214
Power supply ................................. 240
Shift range ..................................... 174
Trailer loads ................................... 448
Transmission
see Automatic transmission
see Manual transmission
Transmission position display .........172
Transmission position display
(DIRECT SELECTl ever)...................... 172
Transporting the vehicle ..................374
Trim pieces (cleaning instructions) .356
Trip computer (on-board com-
puter) ................................................. .249
Trip meter Calling up ....................................... 249
Resetting (on-board computer) ......251
Turn signal
see Turn signals
Turn signals
Changing bulbs (front) ...................137
Switching on/off ........................... 128
TV
Operating (on-board computer) .....253
see Separate operating instructions
Two-way radio
Frequencies ................................... 433
Installatio n..................................... 433
Transmission output (maximum) .... 433
Type identification plate
see Vehicle identification plate
Tyre pressure
Calling up (on-board computer) .....386
Display message ............................ 289
Not reached (TIREFIT) ....................366
Reached (TIREFIT) ..........................366
Recommended ............................... 383
Tyre pressure loss warning
Important safety notes ..................385
Restarting ...................................... 38520
Index
Page 138 of 457
Replacing bulbs
Important safety notes
Xenon bulbs G
DANGER
Xeno nbulbs are unde rhigh voltage. If you
touch the electrical contacts of a xenon bulb,
you could suffe ranelectric shoc kand be seri-
ously or eve nfatally injured. For this reason,
do not remove the cover of xenon bulbs.
Do no tchange the xenon bulbs yourself, but
have them replaced at a qualified workshop.
If your vehicle is equipped with xenon bulbs,
you can recognise this by the following: the
cone of light from the xenon bulbs moves
from the top to the bottom and back again
when you start the engine. For this to be
observed, the lights must be switched on
before starting the engine.
Bulbs and lamps are an important aspect of
vehicle safety. You must therefore make sure
that these function correctly at all times.
Have the headlamp setting checked regularly.
Other bulbs G
WARNING
Bulbs and lamps can be very hot. You should
therefore allow them to cool down before you
change them. Otherwise, you could be burned
if you touch them.
Keep bulbs out of the reach of children. Oth-
erwise, they could damage the bulbs, for
example, and injure themselves.
Never use a bulb which has been dropped.
Such a bulb may break or even explode and
injure you.
Halogen bulbs are pressurised and can
explode when you change them, particularly
if they are very hot. You should therefore wear
eye protection and gloves when you are
changing them.
There are bulbs other than the xenon bulbs
that you cannot replace. Replace only the bulbs listed (Y
page 135). Have the bulbs that
you cannot replace yourself changed at a
qualified specialist workshop.
If you require assistance changing bulbs, con-
sult a qualified specialist workshop.
Do not touch the glass tube of new bulbs with
your bare hands. Even minor contamination
can burn into the glass surface and reduce
the service life of the bulbs. Always use a lint-
free cloth or only touch the base of the bulb
when fitting.
Only use bulbs of the correct type.
If the new bulb still does not light up, consult
a qualified specialist workshop.
Bulbs and lamps are an important aspect of
vehicle safety. You must therefore make sure
that these function correctly at all times.
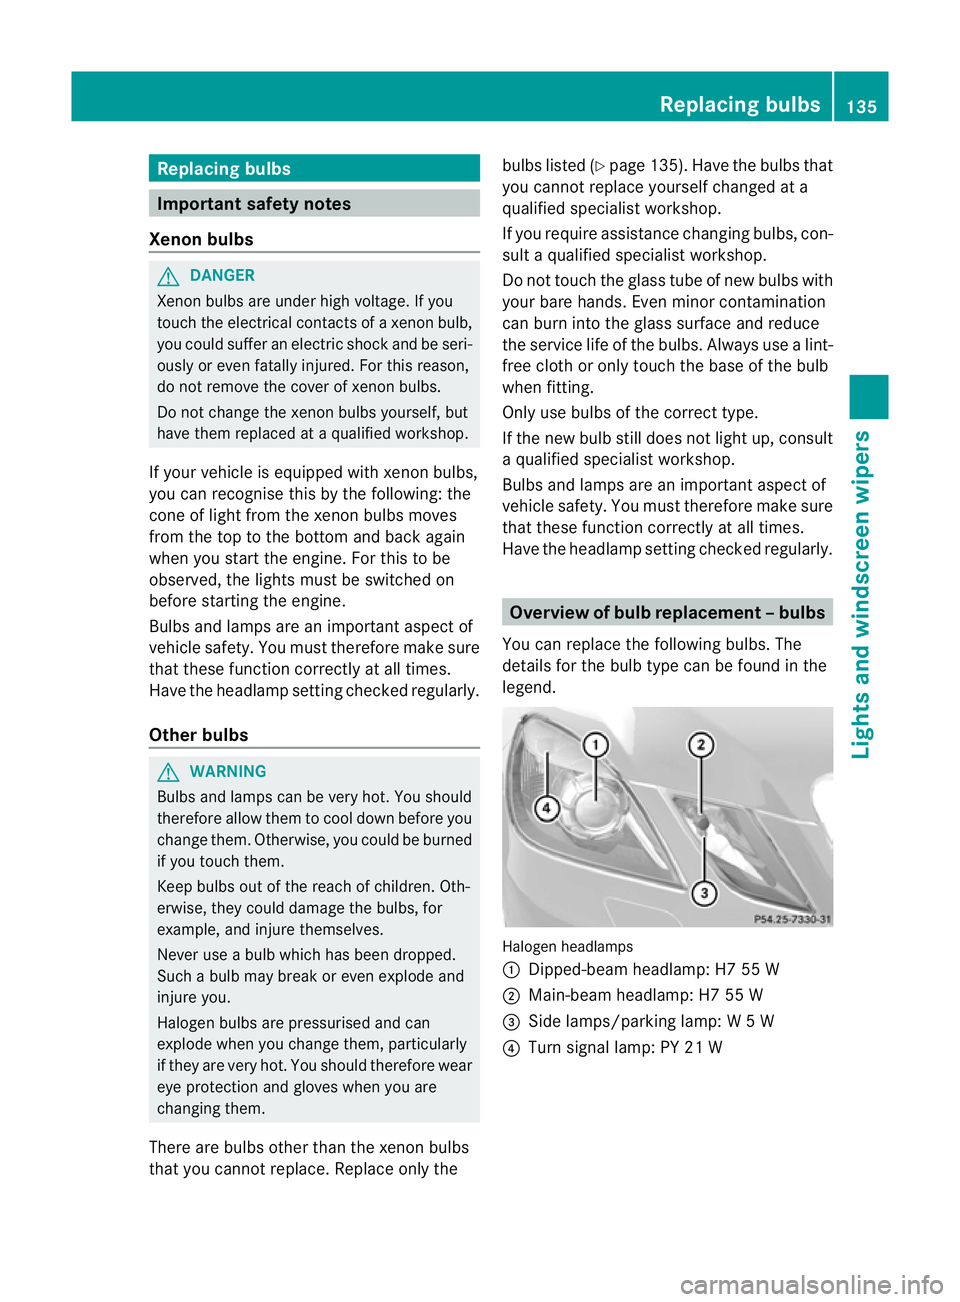
Have the headlamp setting checked regularly. Overview of bulb replacement
–bulbs
You can replace the following bulbs. The
details for the bulb type can be found in the
legend. Halogen headlamps
:
Dipped-bea mheadlamp: H7 55 W
; Main-beam headlamp: H7 55 W
= Side lamps/parking lamp: W5W
? Turn signal lamp: PY 21 W Replacing bulbs
135Lights and windscreen wipers Z
Page 140 of 457
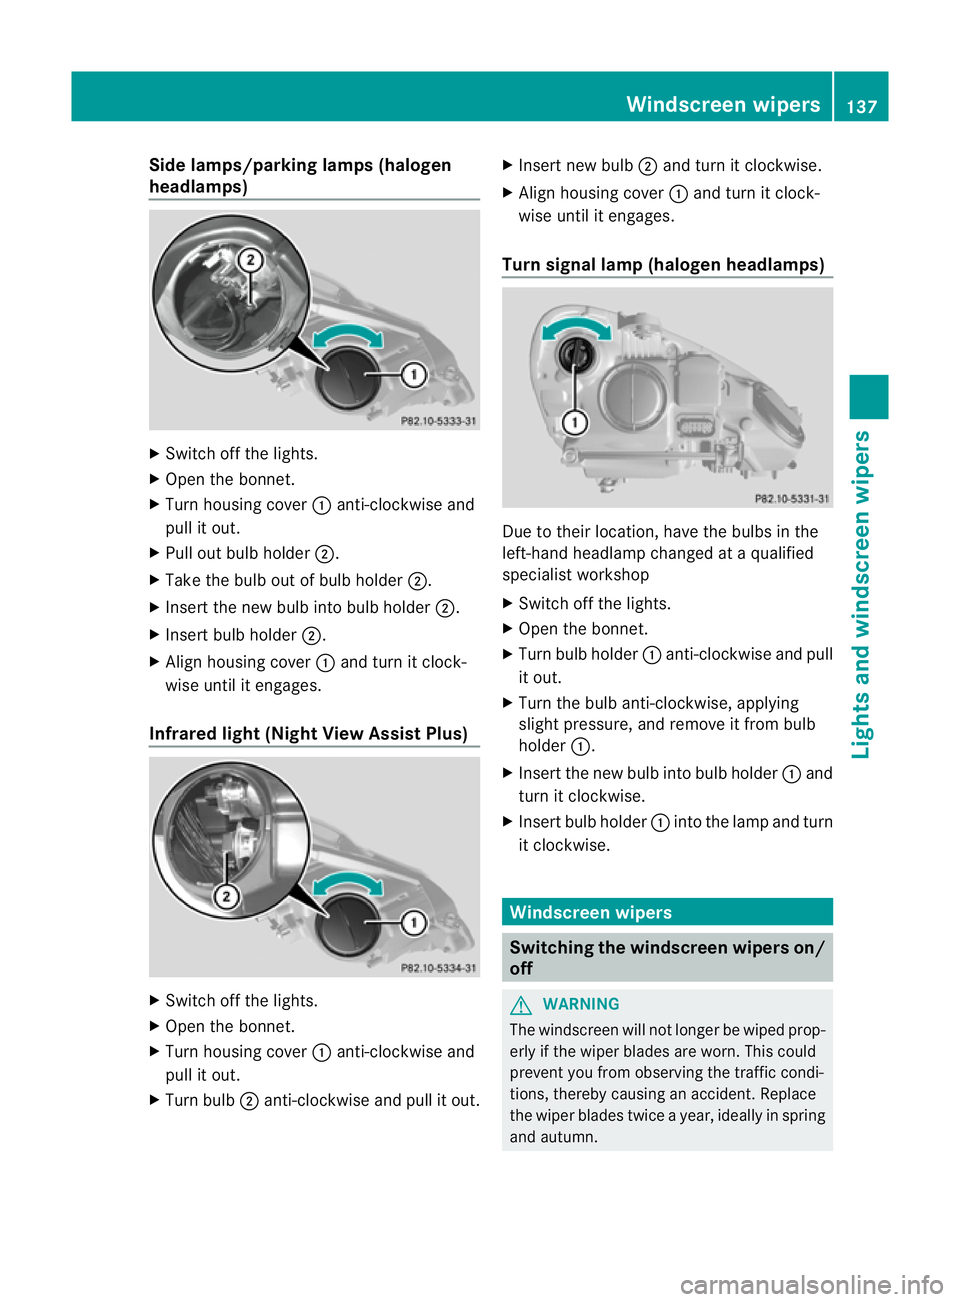
Side lamps/parking lamps(
halogen
headlamps) X
Switch off the lights.
X Open the bonnet.
X Turn housing cover :anti-clockwise and
pull it out.
X Pull out bulb holder ;.
X Take the bulb out of bulb holder ;.
X Insert the new bulb into bulb holder ;.
X Insert bulb holder ;.
X Align housing cover :and turn it clock-
wise until it engages.
Infrared light (Night View Assist Plus) X
Switch off the lights.
X Open the bonnet.
X Turn housing cover :anti-clockwise and
pull it out.
X Turn bulb ;anti-clockwise and pull it out. X
Insert new bulb ;and turn it clockwise.
X Align housing cover :and turn it clock-
wise until it engages.
Turn signal lamp (halogen headlamps) Due to their location, have the bulbs in the
left-hand headlamp changed at a qualified
specialist workshop
X
Switch off the lights.
X Open the bonnet.
X Turn bulb holder :anti-clockwise and pull
it out.
X Turn the bulb anti-clockwise, applying
slight pressure, and remove it from bulb
holder :.
X Insert the new bulb into bulb holder :and
turn it clockwise.
X Insert bulb holder :into the lamp and turn
it clockwise. Windscreen wipers
Switching the windscreen wipers on/
off
G
WARNING
The windscreen will not longe rbe wiped prop-
erly if the wiper blades are worn. This could
prevent you from observing the traffic condi-
tions, thereby causing an accident. Replace
the wiper blades twice a year, ideally in spring
and autumn. Windscreen wipers
137Lights and windscreen wipers Z
Page 279 of 457
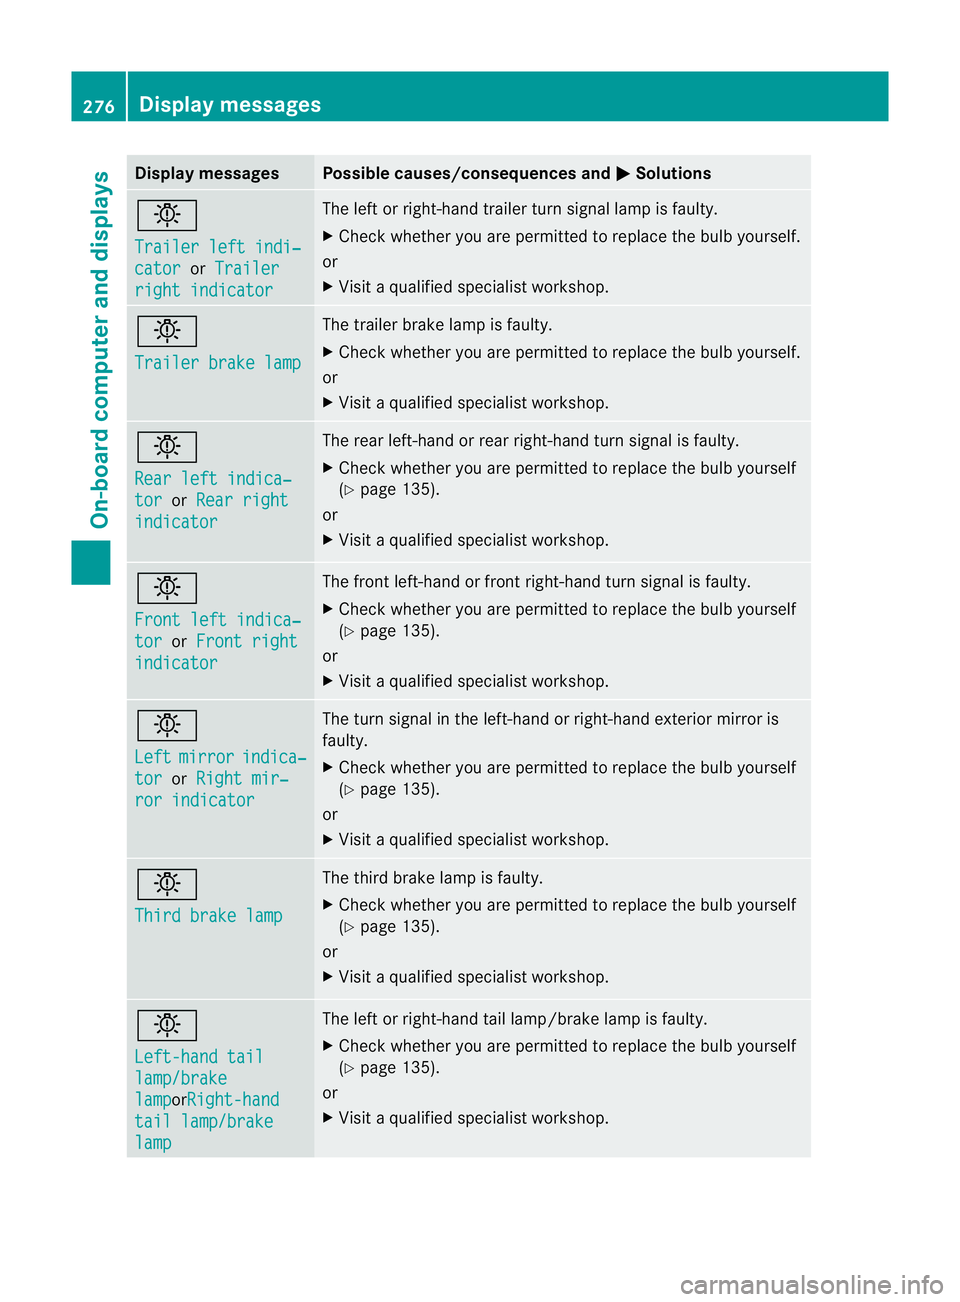
Display messages Possible causes/consequences and
M Solutions
b
Trailer left indi‐
cator or
Trailer right indicator The lef
torright-hand trailer tur nsignal lamp is faulty.
X Check whether you are permitted to replace the bulb yourself.
or
X Visit a qualified specialist workshop. b
Trailer brake lamp The trailer brake lamp is faulty.
X
Check whether you are permitted to replace the bulb yourself.
or
X Visit a qualified specialist workshop. b
Rear left indica‐
tor or
Rear right indicator The rear left-hand or rear right-hand tur
nsignal is faulty.
X Check whether you are permitted to replace the bulb yourself
(Y page 135).
or
X Visit a qualified specialist workshop. b
Front left indica‐
tor or
Front right indicator The front left-hand or front right-hand turn signal is faulty.
X
Check whether you are permitted to replace the bulb yourself
(Y page 135).
or
X Visit a qualified specialist workshop. b
Left
mirror indica‐
tor or
Right mir‐ ror indicator The turn signal in the left-hand or right-hand exterior mirror is
faulty.
X
Check whether you are permitted to replace the bulb yourself
(Y page 135).
or
X Visit a qualified specialist workshop. b
Third brake lamp The third brake lamp is faulty.
X
Check whether you are permitted to replace the bulb yourself
(Y page 135).
or
X Visit a qualified specialist workshop. b
Left-hand tail
lamp/brake
lamp orRight-hand
tail lamp/brake
lamp The left or right-hand tail lamp/brake lamp is faulty.
X
Check whether you are permitted to replace the bulb yourself
(Y page 135).
or
X Visit a qualified specialist workshop. 276
Display messagesOn-board computer and displays