service MERCEDES-BENZ E-CLASS ESTATE 2015 Owner's Manual
[x] Cancel search | Manufacturer: MERCEDES-BENZ, Model Year: 2015, Model line: E-CLASS ESTATE, Model: MERCEDES-BENZ E-CLASS ESTATE 2015Pages: 497, PDF Size: 16.23 MB
Page 213 of 497
New brak
epads/linings Brake pads/lining
sand discs tha tare either
new or have been replaced onl yachieve opti-
mu mb raking effect after several hundred kil-
ometres of driving. Compensate for the
reduced braking effect by applying greater
force to the brake pedal.
For safety reasons, Mercedes-Benz recom-
mend stha tyou onl yhaveb rake pads/linings
fitted to your vehicl ewhich have been
approved for Mercedes-Benz vehicles or
which correspond to an equivalent quality
standard. Brake pads/lining swhich have not
been approved for Mercedes-Benz vehicles or
which ar enot of an equivalent quality could
affec tyou rv ehicle' soperating safety.
AM Gh igh-performanc eand ceramic
brakes Th
eh igh- performance brake syste misonly
availabl eonAMG vehicles.
Th eA MG brake systems ar edesig nedf or
heav yloads .Thism aylead to noise when
braking .Thisisd ependent on:
R speed
R braking force
R environmenta lconditions ,suc hast emper-
ature and humidity
Th ew earofi ndividua lcomponents of the
brake system, such as the brake pads/linings
or brake discs ,depen ds on the individua ldriv-
ing style and operating conditions.
For thi sreason, it is impossibl etostate a
mileag e(service life) tha twillbev alidunder
al lc ircumstances .Anaggressive driving style
will lead to high wear .You can obtai nfurther
information abou tthisf romy ourM ercedes-
Benz Service Centre.
Brake pads/lining sand discs tha tare either
new or have been replaced onl yachieve opti-
mu mb raking effect after several hundred kil-
ometres of driving. Compensate for the
reduced braking effect by applying greater
force to the brake pedal. Alway sbeawareofthi
sa nd adap tyou rd riving and braking
accordingly during the running-in period.
Excessive heav ybraking results in corre-
spondingly high brake wear .Obser ve the
brake wear warning lamp in the instrument
cluste rand note any brake status messages
in the multifunctio ndisplay .Ifyouregularly
drive at high speeds ,itisparticularl yimpor-
tant to have the brake syste mchecked and
maintaine dregularly. Driving on we
troads
Aquaplaning If water ha
saccumulate dtoacertaindepth
on the roa dsurface, there is adangerofa qua-
planing occurring, eve nif:
R yo ua redriving at lo wspeeds
R the tyres have adequate trea ddepth
For thi sreason, drive in the following manner
in the event of heav yrainorinc onditions in
which aquaplaning can occur:
R lowe ryours peed
R avoi dtyrer uts
R avoi dsudde nsteering movements
R brake carefully
Driving on flooded roads !
Bea
rinm indt hatv ehicles travelling in
front or in the opposite directio ncreate
waves .Thism aycause the maximum per-
missibl ewater depth to be exceeded.
Thes enote sm ustbeo bservedu nder all
circumstances .You could otherwis edam-
ag et he engine ,the electronics or the trans-
mission. 210
Driving
tipsDriving an dparking
Page 288 of 497
You will see one of the followin
gdisplay mes-
sages in the multifunction display:
R Telephon eready
Telephon eready or the name of the net-
work provider: the mobile phon ehas found
an etwork and is ready to receive.
R Telephon eNoservice
Telephon eNoservice:t here is no net-
work available or the mobile phon eis
searching for anetwork.
i You can obtain further information about
suitable mobile phones and connecting
mobile phones via Bluetooth ®
:
R fro ma ny Mercedes-Ben zService Centre
R on the Internet at http://
www.mercedes-benz.com/connect
Accepting acall X
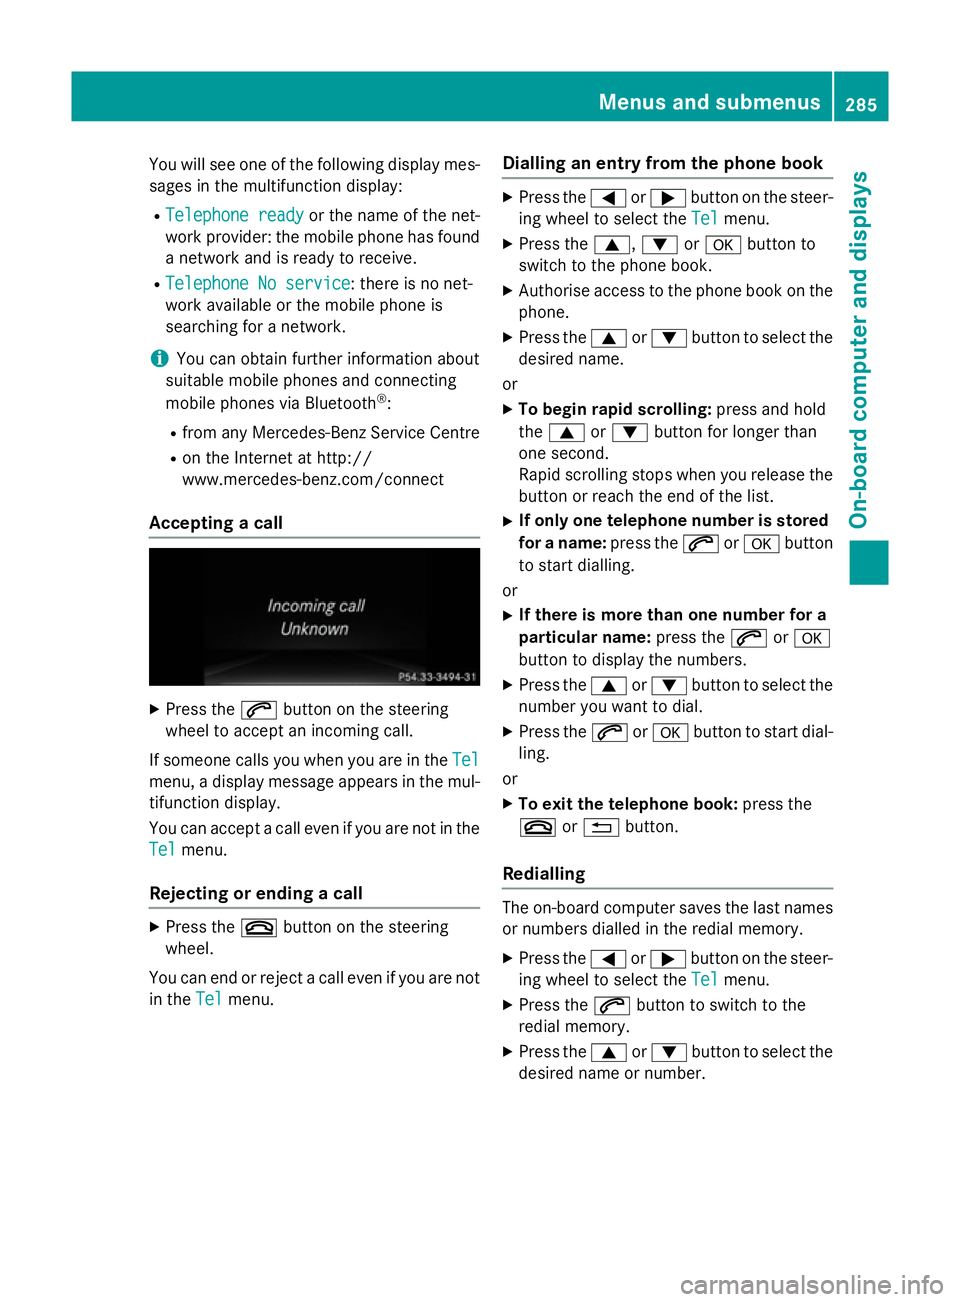
Press the 6button on the steering
wheel to accept an incomin gcall.
If someone calls you when you are in the Tel Tel
menu, adisplay message appears in the mul-
tifunction display.
You can accept acall even if you are not in the
Tel
Tel menu.
Rejecting or ending acall X
Press the ~button on the steering
wheel.
You can end or reject acall even if you are not
in the Tel
Tel menu. Dialling an entr
yfromt hephone book X
Press the =or; button on the steer-
ing wheel to selec tthe Tel Tel menu.
X Press the 9,:ora button to
switc htot he phon ebook.
X Authoris eaccess to the phon ebook on the
phone.
X Press the 9or: button to selec tthe
desired name.
or
X To begin rapid scrolling: press and hold
the 9 or: button for longer than
one second.
Rapid scrolling stops when you release the
button or reach the end of the list.
X If only one telephone number is stored
for aname: press the 6ora button
to star tdialling.
or
X If there is mor ethano ne number for a
particular name: press the6ora
button to display the numbers.
X Press the 9or: button to selec tthe
number you want to dial.
X Press the 6ora button to star tdial-
ling.
or
X To exit th etelephone book: press the
~ or% button.
Redialling The on-board computer saves the last names
or numbers dialled in the redial memory.
X Press the =or; button on the steer-
ing wheel to selec tthe Tel Tel menu.
X Press the 6button to switc htothe
redial memory.
X Press the 9or: button to selec tthe
desired name or number. Menus and submenus
285On-board computer and displays Z
Page 291 of 497
Activating/deactivating Steering
Assis tand Stop&Go Pilot X
Press the =or; buttononthesteer-
ing whee ltos elect the Assist.
Assist. menu.
X Using 9or:,s electDTR+:
DTR+: steer.
steer.
asst.
asst.
X Press the abutton.
The curren tselection is displayed.
X To activate/deactivate: press thea
butto nagain.
When Steering Assis tand Stop&Go Pilot
are activated, th emultifunction display
shows the DTR+: steering assistant
DTR+: steering assistant
On
On message.
Further information about DISTRONI CPLUS
wit hS teering Assis tand Stop&Go Pilot
(Y page 226).
Activating/deactivating ATTENTION
ASSIST X
Press the =or; buttononthesteer-
ing whee ltos elect the Assist.
Assist. menu.
X Press the 9or: buttontos elect
Attention Assist
Attention Assist .
X Press the abutton.
The curren tselection is displayed.
X Press ato confirm.
X Press the :or9 buttontos etOff Off ,
Standard
Standard orSensitive
Sensitive .
X Press the abuttontos avet he setting.
When ATTENTION ASSIST is deactivated,
the é symbol appear sinthemultifunc-
tion display in th eassistanc egraphic dis-
play.
Fo rfurther information about ATTENTION
ASSIST ,see (Y page 253).
Activating/deactivating Blind Spot
Assist X
Press the =or; buttononthesteer-
ing whee ltos elect the Assist.
Assist. menu.
X Press the 9or: buttontos elect
Blind Spo tAssist
Blind Spo tAssist . X
Press the abutton.
The curren tselection appears.
X To activate/deactivate: press thea
butto nagain.
Further information about Blind Spot Assist
(Y page 257).
Further information about Active Blind Spot
Assis t(Y page 261).
Activating/deactivating Lan eKeeping
Assist X
Press the =or; buttononthesteer-
ing whee ltos elect the Assist. Assist.menu.
X Press the 9or: buttontos elect
Lan eK eep. Assist
Lan eK eep. Assist .
X Press the abutton.
The curren tselection appears.
X Press ato confirm.
X Press the :or9 buttontos etOff
Off ,
Standard
Standard orAdaptive
Adaptive.
X Press the abuttontos avet he setting.
When Lan eKeepin gAssistorA ctiveLane
Keepin gAssistisa ctivated, th emultifunc-
tion display shows th elan em arking sas
bright lines in th eassistanc egraphic.
Further information about Lan eKeeping
Assis t(Ypage 259).
Further information about Active Lan eKeep-
ing Assis t(Y page 263). Service menu
Dependin
gontheequipmen tfitte dint he
vehicle, you hav ethe followin goption sinthe
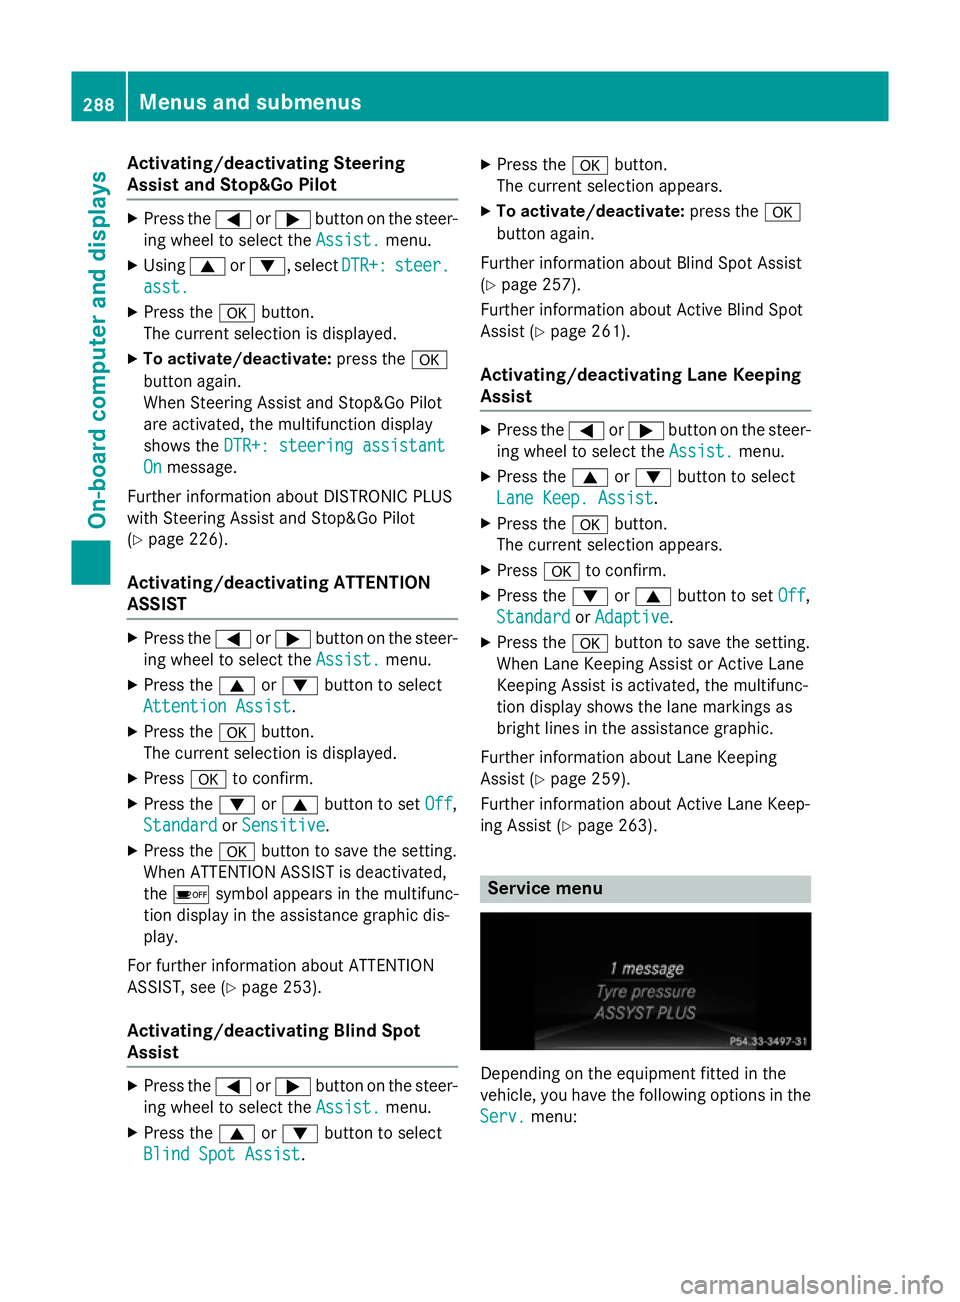
Serv.
Serv. menu: 288
Menu
sand sub menusOn-boardcomputer an ddisplays
Page 345 of 497
Useful information
i This Owner's Manual describes all mod-
els, series and optional equipment for your
vehicle that were available at the time of
going to press. National variation sare pos-
sible. Not ethat your vehicle may not be
equipped with all of the function sdescri-
bed. This is also the case for system sand
function srelevan ttosafety.
i Read the information on qualified special-
ist workshops: (Y page 27). Stowage areas
Loading guidelines
G
WARNING
If objects, luggage or loads are not secured or not secured sufficiently, they could slip, tip
over or be flung around and thereby hit vehicle
occupants .There is arisk of injury, especially
when brakin gorabruptly changing directions.
Always stor eobjects so that they cannot be
flung around. Secure objects, luggage or
loads against slipping or tippin gbefore the
journey. G
WARNING
Combustion engines emit poisonous exhaust
gases such as carbon monoxide. Exhaust
gases can enter the vehicle interior if the boot
lid/tailgat eisopen when the engin eisrun-
ning, especially if the vehicle is in motion.
There is arisk of poisoning.
Always switc hoff the engin ebefore opening
the boot lid/tailgate. Never drive with the
boot lid/tailgat eopen. G
WARNING
The exhaust tail pipe and tail pipe trim can
becom every hot. If you come int ocontact
with thes eparts of the vehicle, you could burn
yourself. There is arisk of injury. Always be particularly careful around the
exhaust tail pipe and the tail pipe trim .Allow
thes ecomponents to cool down before touch-
ing them.
The handling characteristic sofaladen vehi-
cle are dependen tonthe distribution of the
load within the vehicle. For this reason ,you
should observ ethe following notes when
transporting aload:
R neve rexceed the maximum permissible
gross vehicle weight or the permissible axle loads for the vehicle (includin goccupants).
R the boot/luggage compartment is the pre-
ferred place to stor eobjects.
R position heavy loads as far forwards as pos-
sible and as low down in the boot/luggagecompartment as possible.
R the load must not protrude above the upper
edge of the seat backrests.
R always place the load against the rear or
fron tseat backrests .Make sure that the
seat backrests are securely locked into
place.
R always place the load behind unoccupied
seats if possible.
R use the lashing eyelets and the luggage
net stot ransport loads and luggage.
R only use lashing eyelets and fastenin gcom-
ponents that are suitable for the weight and size of the load.
R when transporting objects in the luggage
compartment,t he combined luggage cover
and net must always be installed (luggage
compartment cove rand safet ynet).
R secure the load with sufficiently strong and
wear-resistan tlashing material. Pad sharp
edges for protection.
i Load restraint
sare available at any quali-
fied specialist workshop, e.g. aMercedes-
Ben zService Centre. 342
Stowage areasStowing and features
Page 371 of 497
More information on suitable mobile phones,
mobile phone brackets and on connecting
Bluetooth ®
-capable mobile phones to
COMAND Online/Audio 20 can be obtained:
R at your Mercedes-Ben zService Centre
R on the Internet at http://www.mercedes-
benz.com/connect
The functions and services available when
you use the phone depend on your mobile
phone model and service provider.
Using amobile phone To connect
amobile phone to the exterior
aerial and charge it, insert it into the mobile
phone bracket.
X Open the telephone compartment
(Y page 344).
X Place the mobile phone bracket into the
pre-installed fitting; see the separate instal-
lation instructions for the mobile phone fit-
ting.
X Insert the mobile phone into the mobile
phone bracket; see the separate installa-
tion instructions for the mobile phone fit-
ting.
i The mobile phone can also be operated
without being in the bracket. However, the charging function and aerial function are
not available.
In order to use Bluetooth ®
(SAP profile) on
your telephone module, you must first insert
the telephone module into the pre-installed
fitting. This connects it to the exterior aerial.
If you wish to charge the mobile phone, then
you must connect it to aUSB port.
Further information on the telephone module
with Bluetooth ®
(SAP profile) can be found in
the Digital Owner's Manual.
Operating the mobile phone You can operate the telephone using the
6 and~ buttons on the multifunction
steering wheel. You can operate other mobile phone functions via the on-board computer
(Y page 284).
When you remove the key from the ignition
lock, the mobile phone is disconnected from
the hands-free system. Active calls will first
be transferred to the mobile phone directly.
Mobile phone bracket in the stowage
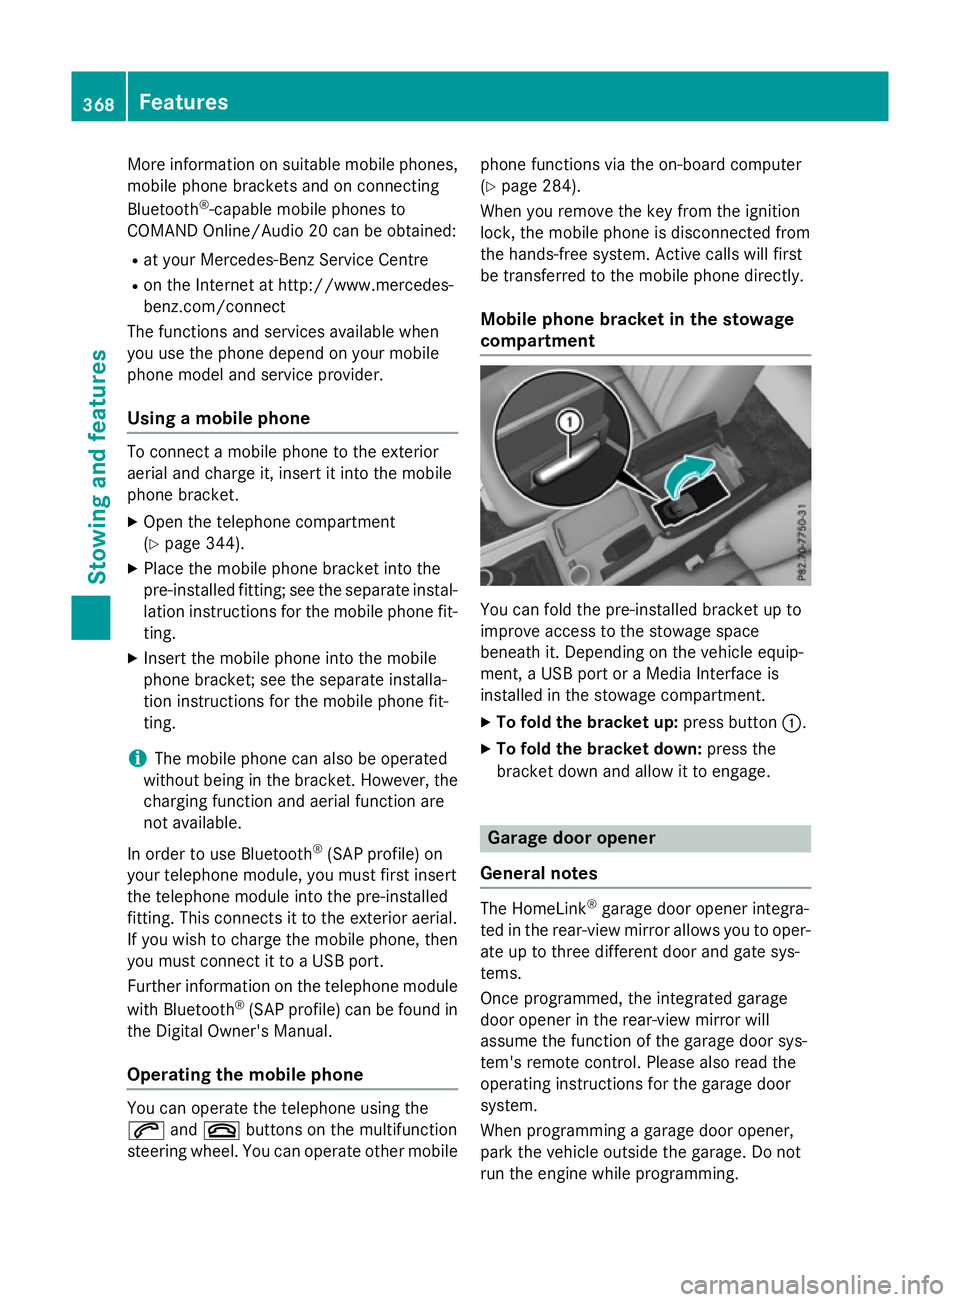
compartment You can fold the pre-installed bracket up to
improve access to the stowage space
beneath it. Depending on the vehicle equip-
ment,aU
SB port or aMedia Interface is
installed in the stowage compartment.
X To fold the bracket up: press button:.
X To fold the bracket down: press the
bracket down and allow it to engage. Garage door opener
General notes The HomeLink
®
garage door opener integra-
ted in the rear-view mirror allowsy ou to oper-
ate up to three different door and gate sys-
tems.
Once programmed, the integrated garage
door opener in the rear-view mirror will
assume the function of the garage door sys-
tem's remote control. Please also read the
operating instructions for the garage door
system.
When programming agarage door opener,
park the vehicle outside the garage. Do not
run the engine while programming. 368
FeaturesStowing and features
Page 380 of 497
Useful information
............................378
Engine compartment ........................378
Service ............................................... 384
Care .................................................... 385 377Maintenance and care
Page 385 of 497
G
WARNING
If engine oil comes into contact with hot com- ponents in the engine compartment, it may
ignite. There is arisk of fire and injury.
Make sure that engine oil does not spil lout
over the filler neck. Allow the engine to cool
downa nd thoroughly clea nthe components
that have come into contact with engine oil
before you start the engine. H
Environmental note
When topping up the oil,t ake care not to spill
any. If oil enters the soil or waterways, it is
harmfu ltothe environment.
! Only use engine oilsa
nd oil filters that
have been approved for vehicles with aser-
vice system. You can obtai nalistoft he
engine oilsa nd oil filters tested and
approved in accordance with the
Mercedes-Benz Specifications for Service
Products at any Mercedes-Benz Service
Centre.
Damag etothe engine or exhaust system is
caused by the following:
R using engine oilsa nd oil filters that have
not been specifically approved for the
service system
R changing the engine oil and oil filter after
missing the change interval required by
the service system
R using engine oil additives
! Do not add too much oil.T
opping up with
too much engine oil can result in damage to
the engine or to the catalytic converter.
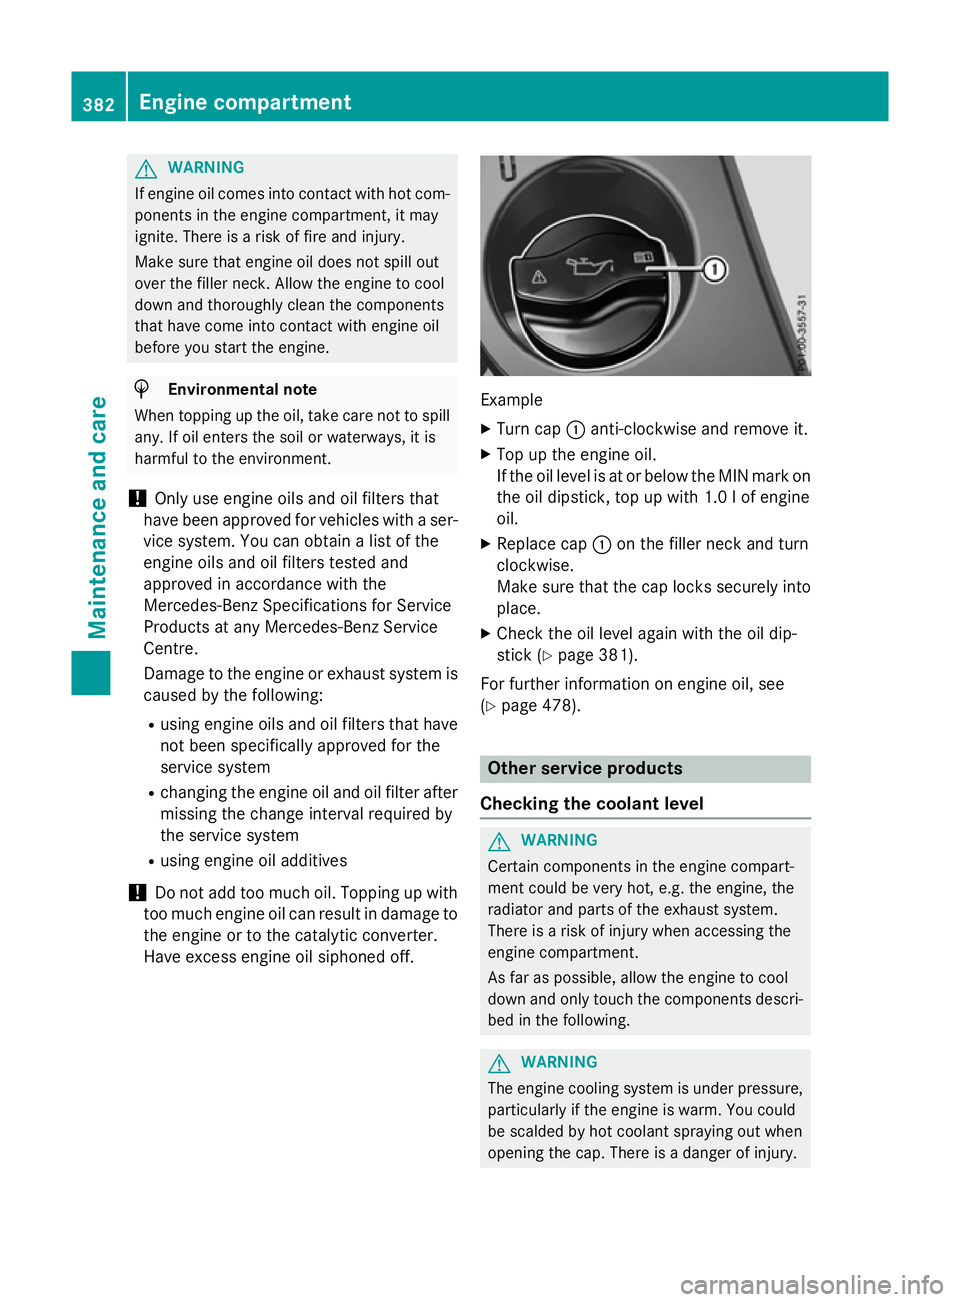
Have excess engine oil siphoned off. Example
X Turn cap :anti-clockwise and remove it.
X Top up the engine oil.
If the oil leve lisatorbelow the MIN mark on
the oil dipstick, top up with 1.0 lofe ngine
oil.
X Replace cap :on the filler neck and turn
clockwise.
Make sure that the cap locks securely into place.
X Check the oil level again with the oil dip-
stick (Y page 381).
For further information on engine oil, see
(Y page 478). Other service products
Checking the coolant level G
WARNING
Certain components in the engine compart-
ment could be very hot, e.g. the engine, the
radiator and parts of the exhaust system.
There is arisk of injury when accessing the
engine compartment.
As far as possible, allow the engine to cool
down and only touch the components descri- bed in the following. G
WARNING
The engine cooling system is under pressure, particularly if the engine is warm. You could
be scalded by hot coolant spraying out when
opening the cap. There is adanger of injury. 382
Engine compartmentMaintenance and care
Page 387 of 497
Further information on windscreen washer
fluid/antifreeze (Y page 480).Service
ASSYST PLUS
Servic emessages The ASSYST PLUS service interval display
informs yo uofthe next service du edate.
Information on the typ eofservice and service
interval s(seet he separate Service Booklet).
You can obtain further information from a
Mercedes-Benz Service Centre.
i The ASSYST PLUS service interval display
doe snot sho wany information on the
engine oil level .Observe the notes on the
engine oil level (Y page 380).
The multifunction display shows aservice
messag efor afew seconds, e.g.:
R Service Ain..d ays
Service Ain..d ays
R Service Aoverdue
Service Aoverdue
R Service Aoverdue by .. days
Service Aoverdue by .. days
Depending on the operating conditions of the vehicle, the remaining time or distance until
the next service du edateisd isplayed.
The letter indicates which service is due. A A
stand sfor am inorservice and B
B for am ajor
service. Anumber or another letter may be
displayed afte rthe letter.
Only for certain countries :the positio nafter
the letter A
A or B
Bindicates any necessar yaddi-
tiona lmaintenance work to be performed. If
yo un otify aquali fied specialist worksho pof
this display ,you will receive astatement on
the associated costs.
The ASSYST PLUS service interval display
doe snot take into account any period sof
time during which the battery is disconnec-
ted. Maintaining the time-dependent service
schedule:
X Note dow nthe service du edated isplayed
in the multifunction display before discon-
necting the battery.
or
X After reconnecting the battery ,sub tract
the battery disconnection period sfrom the
service date shown on the display.
Hiding servic emessages X
Pres sthe a or% button on the steer-
ing wheel.
Displayin gservic em essages X
Switch the ignition on.
X Pres sthe = or; button on the steer-
ing wheel to select the Service Servicemenu.
X Pres sthe 9 or: button to select the
ASSYST PLUS
ASSYST PLUS submenu and confir mby
pressing the abutton.
The service du edatea ppears in the multi-
function display.
Informatio nabout Service Resettin
gthe ASSYST PLU Sservic einter-
val display
! If the ASSYST PLUS service interval dis-
play ha sbeeni nadvertently reset, this set-
ting can be corrected at aquali fied special-
ist workshop.
Have service work carried ou tasd escribed
in the Service Booklet. Thi smay otherwise
lead to increase dweara nd damag etothe
majo rassemblies or the vehicle.
Aq uali fied specialist workshop, e.g. a
Mercedes-Benz Service Centre, will rese tthe
ASSYST PLUS service interval display after
the service work ha sbeenc arried out. You
can also obtain further information on main-
tenance work, for example. 384
ServiceMaintenance and care
Page 388 of 497
Special service requirements
The prescribed service interval is based on
normal operation of the vehicle. Service work
will need to be performed more often if the
vehicle is operated under arduousc onditions
or increased loads, for example:
R regular city driving with frequent intermedi-
ate stops
R if the vehicle is primarily used to travel
short distances
R for frequent operation in mountainous ter-
rain or on poor road surfaces
R if the engine is often left idling for long peri-
ods
In these or similar operating conditions, have,
for example, the air filter, engine oil and oil
filter changed more frequently. The tyres
must be checked more frequently if the vehi-
cle is operated under increased loads. Fur-
ther information can be obtained at aquali-
fied specialist workshop, e.g. aMercedes-
Benz Service Centre.
Driving abroad
An extensive Mercedes-Benz Service network is also available in other countries. You can
obtain further information from any
Mercedes-Benz Service Centre. AdBlue
®
service indicator
i For BlueTEC vehicles only.
To function properly, BlueTEC exhaust gas
aftertreatment must be operated with the
reducing agent AdBlue ®
.A dBlue ®
is topped
up as part of the service. Under normal oper-
ating conditions, afull tank of AdBlue ®
should
last until the next service due date.
Depending on how and where the vehicle is
used, there may be an increase in the
AdBlue ®
consumption, resulting in the next
service due date being brought forward.
Certain display messages show that AdBlue ®
must be topped up, e.g.: Refill AdBlue at workshop See Own‐ Refill AdBlue at workshop See Own‐
er's Manual er's Manual
Refill AdBlue at workshop No start Refill AdBlue at workshop No start
in .. km in .. km
Aw
arning signal also sounds.
You can no longer start the vehicle when the
AdBlue ®
supply has been used up
(Y page 314).
! Have the AdBlue ®
tank topped up at a
qualified specialist workshop only. The
vehicle may otherwise be damaged or
soiled.
Before driving your vehicle outside Europe,
have the AdBlue ®
supply checked at aquali-
fied specialist workshop. If necessary, have
AdBlue ®
topped up. Before aprolonged stay
outside of Europe, consult aqualified special-
ist workshop.
Observe the notes on AdBlue ®
(Y page 477).
Further information about BlueTEC exhaust
gas aftertreatment and AdBlue ®
can be
obtained at aqualified specialist workshop,
e.g. aMercedes-Benz Service Centre. Care
General notes
H
Environmental note
Dispose of empty packaging and cleaning
cloths in an environmentally responsible man- ner.
! For cleaning your vehicle, do not use any
of the following:
R dry, rough or hard cloths
R abrasive cleaning agents
R solvents
R cleaning agents containing solvents
Do not scrub.
Do not touch the surfaces or protective
films with hard objects, e.g. aring or ice
scraper. You could otherwise scratchor
damage the surfaces and protective film. Care
385Maintenance and care Z
Page 404 of 497
ment cluster where it willbee
asily seen by
the driver.
! After use, excess tyre sealant may run out
of the filler hose. This could caus estains.
Therefore, place the filler hose in the plastic
bag which contained the TIREFIT kit. H
Environmental note
Have the used tyre sealant bottle disposed of
professionally, e.g. at aqualified specialist
workshop.
If at yre pressure of 180 kPa (1.8 bar/26 psi)
has been attained after five minutes:
X Switch off the tyre inflation compressor.
X Unscrew the filler hose from the valve of
the faulty tyre.
X Stow the tyre sealant bottle, the tyre infla-
tion compresso rand the warning triangle.
X Pull away immediately.
X Stop after driving for approximatel yten
minutes and check the tyre pressure with
the tyre inflation compressor.
The tyre pressure must now be at least
130 kPa (1.3 bar/19 psi). G
WARNING
If the required tyre pressure is not reached
after driving for ashort period, the tyre is too
badly damaged. The tyre sealant cannot
repair the tyre in this instance. Damage dtyres
and atyre pressure that is too low can signif-
icantly impair the vehicle's braking and driv-
ing characteristics. There is arisk of accident.
Do not continue driving. Contact aqualified
specialist workshop.
i In yourv
ehicle, you willf indasticker with
the Mercedes-Benz Service24h telephone
number, e.g. on the B-pillar on the driver's
side.
X Correct the tyre pressure if it is still at least
130 kPa (1.3 bar/19 psi). See the fuel filler
flap for values.
X To increase the tyre pressure: switch on
the tyre inflation compressor. X
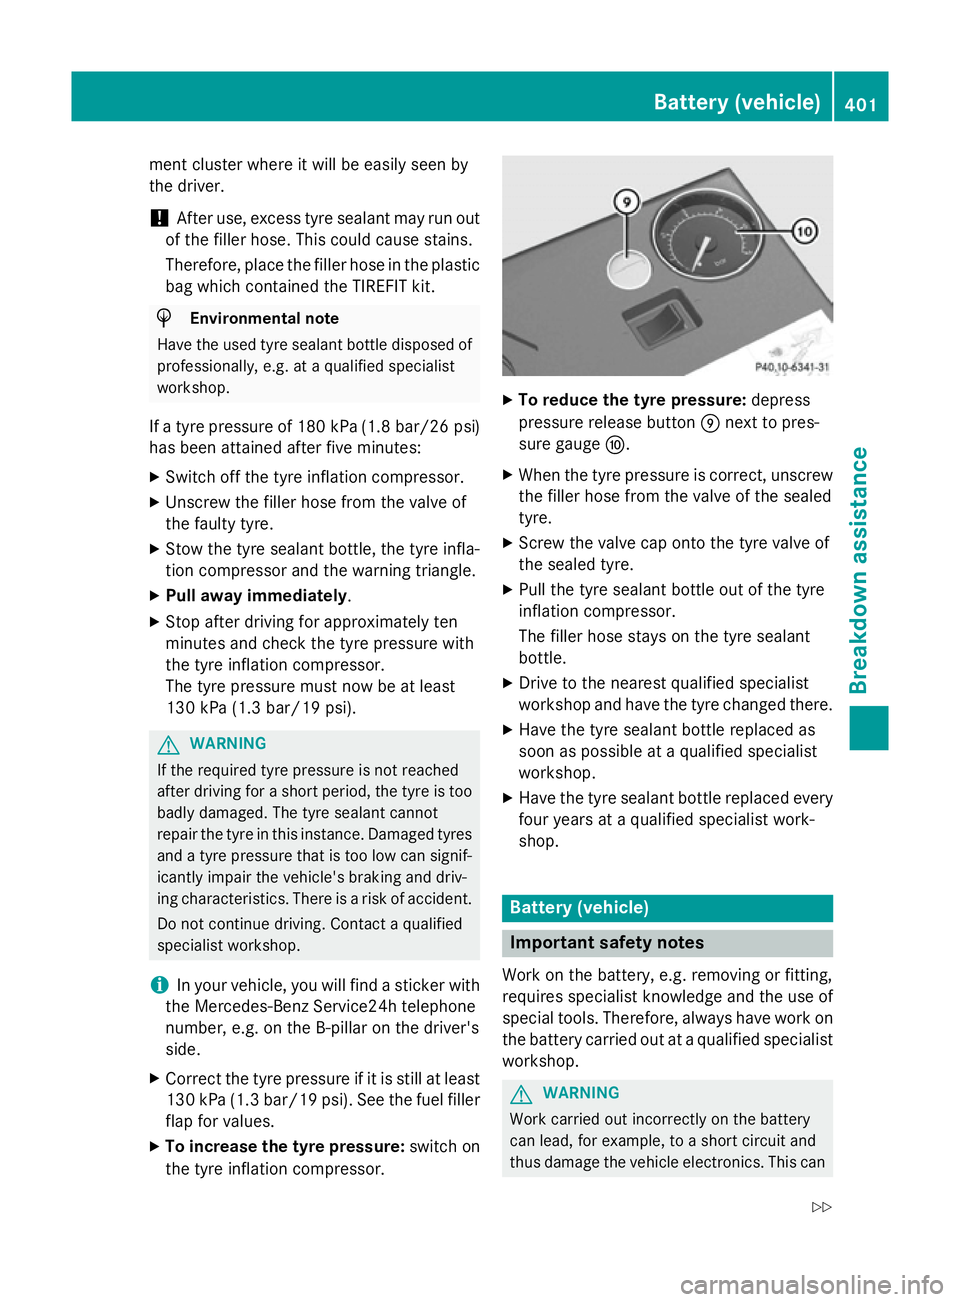
To reduce the tyre pressure: depress
pressure release button Enext to pres-
sure gauge F.
X When the tyre pressure is correct, unscrew
the filler hose from the valve of the sealed
tyre.
X Screw the valve cap onto the tyre valve of
the sealed tyre.
X Pullt he tyre sealant bottle out of the tyre
inflation compressor.
The filler hose stays on the tyre sealant
bottle.
X Drive to the nearest qualified specialist
workshop and have the tyre changed there.
X Have the tyre sealant bottle replaced as
soon as possible at aqualified specialist
workshop.
X Have the tyre sealant bottle replaced every
four years at aqualified specialist work-
shop. Battery (vehicle)
Important safety notes
Work on the battery ,e.g. removing or fitting,
requires specialist knowledge and the use of
specia ltools. Therefore, alwaysh ave work on
the battery carrie dout at aqualified specialist
workshop. G
WARNING
Work carried out incorrectly on the battery
can lead, for example, to ashort circuit and
thus damage the vehicl eelectronics. This can Battery (vehicle)
401Breakdown assistance
Z