check oil MERCEDES-BENZ E-CLASS ESTATE 2015 Owners Manual
[x] Cancel search | Manufacturer: MERCEDES-BENZ, Model Year: 2015, Model line: E-CLASS ESTATE, Model: MERCEDES-BENZ E-CLASS ESTATE 2015Pages: 497, PDF Size: 16.23 MB
Page 14 of 497
Electronic Stability Program
see ESP ®
(Electronic Stabilit yProgram)
Emergency
Automatic measures after an acci-
den t................................................. 58
Emergency key
Unlockin gthe driver' sdoor ............ 102
Emergency key element
Function/notes ................................ 96
Insertin g......................................... .97
Lockin gvehicle .............................. 103
Removing ........................................ .97
Emergency release
Driver's door .................................. 102
Fuel filler flap ................................ .202
Emergency spare wheel
General notes ................................ 465
Important safety notes .................. 465
Inflating the collapsibl espare
wheel ............................................. 467
Removing ....................................... 465
Storage location ............................ 465
Stowing .......................................... 466
Technical data ............................... 468
Emergency unlocking
Tailgate .......................................... 110
Vehicle .......................................... .102
Engine
Display message ............................ 311
ECO start/stop function ................ 183
Engine numbe r............................... 473
Jump-starting ................................. 405
Running irregularl y......................... 187
Starting problems .......................... 187
Starting the engine with the key .... 182
Starting with KEYLESS GO ............. 182
Stopping ........................................ 206
Tow-starting (vehicle )..................... 411
Warning lamp (engine diagnos-
tics) ............................................... 336
Engine electronics
Note s............................................. 470
Problem (fault) ............................... 187
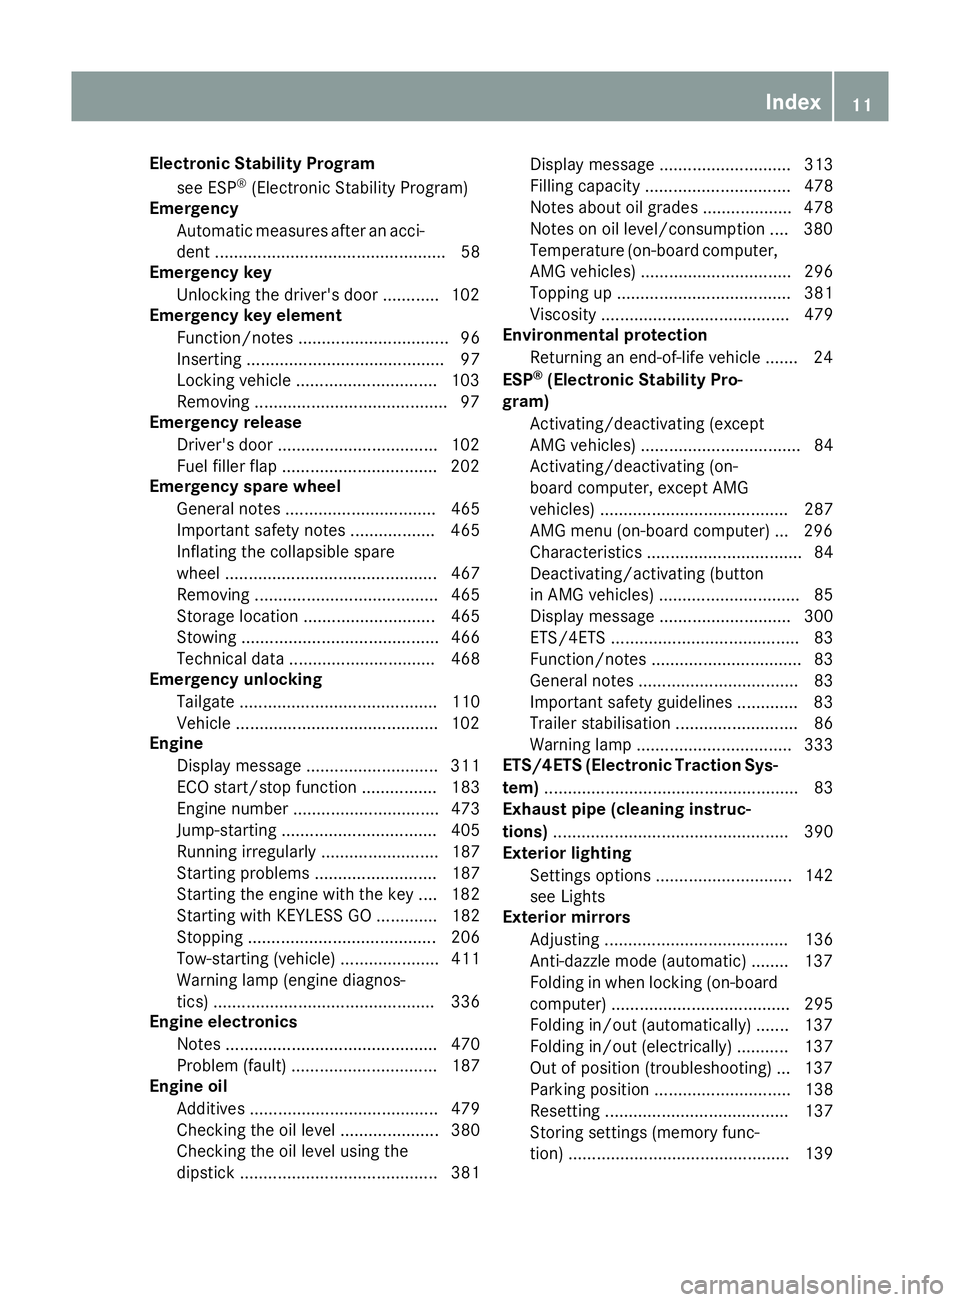
Engine oil
Additives ........................................ 479
Checking the oi llev el ..................... 380
Checking the oi llev el using the
dipstick .......................................... 381 Displa
ymessage ............................ 313
Filling capacity ............................... 478
Note sabout oilg rade s................... 478
Note sono illevel/consumption .... 380
Temperature (on-board computer, AMG vehicles) ................................ 296
Topping up ..................................... 381
Viscosity ........................................ 479
Environmental protection
Returning an end-of-life vehicl e....... 24
ESP ®
(Electroni cStability Pro-
gram)
Activating/deactivating (except
AMG vehicles) .................................. 84
Activating/deactivating (on-
board computer, except AMG
vehicles) ........................................ 287
AMG menu (on-board computer) ... 296
Characteristics ................................. 84
Deactivating/activating (button
in AMG vehicles) .............................. 85
Displa ymessage ............................ 300
ETS/4ETS ........................................ 83
Function/note s................................ 83
Genera lnotes .................................. 83
Important safety guideline s............. 83
Trailer stabilisation .......................... 86
Warning lamp ................................. 333
ETS/4ETS (Electroni cTraction Sys-
tem) ...................................................... 83
Exhaus tpipe (cleaning instruc-
tions) .................................................. 390
Exterior lighting
Setting soptions ............................. 142
see Lights
Exterior mirrors
Adjusting ....................................... 136
Anti-dazzle mod e(automatic) ........ 137
Folding in when locking (on-board computer) ...................................... 295
Folding in/out (automatically )....... 137
Folding in/out (electrically) ........... 137
Ou tofp osition (troubleshooting )... 137
Parking position ............................. 138
Resetting ....................................... 137
Storing settings (memory func-
tion) ............................................... 139 Index
11
Page 24 of 497
Opening/closing (automatically
from outside) ................................. 105
Opening/closing (from outside) ..... 104
Tank
see Fuel tank
Technical data
Capacities ...................................... 473
Emergencys pare wheel ................. 468
Information .................................... 470
Trailerl oads ................................... 484
Tyres/wheels. ................................ 431
Vehicle data ................................... 481
Telephone
Accepting acall ............................. 285
Display message ............................3 28
Menu (on-board computer) ............ 284
Number from the phone book ....... .285
Redialling ....................................... 285
Rejecting/ending acall ................. 285
Telephone compartment ................ 344
Telescopic rod (Easy-Pac kfix kit) .... 356
Temperature
Coolant .......................................... 276
Coolant (on-board computer,
AMG vehicles) ................................ 296
Engine oil (on-board computer,
AMG vehicles) ................................ 296
Outside temperature ..................... .277
Setting (climate control) ................ 163
TEMPOMAT
Function/notes ............................ .212
Through-loading ................................ 348
Through-loading feature ................... 348
Timing (RACETIMER) ......................... 296
TIREFIT kit .......................................... 399
Top Tether ............................................ 60
Total distanc erecorder .................... 280
Tow-away protection
Activating ......................................... 90
Deactivating ..................................... 90
Function .......................................... .90
Tow-starting
Emergency engine starting ............ 411
Important safety notes .................. 407
Towing
Important safety notes .................. 407
With the rea raxler aise d................ 410 Towin
gatrailer
Active Blind Spo tAssist ................. 263
Active Lane Keeping Assist ............ 266
Active Parking Assist ..................... 244
Axle load ,permissibl e.................... 489
ESP ®
(Electronic Stability Pro-
gram) ............................................... 86
Failure check for LEDs ................... 272
Genera lnotes ................................ 267
Trailer tow hitch display message .. 327
Towin gaway
Fitting the towing ey e.................... 409
Removing the towing ey e............... 409
With both axles on the ground ....... 409
Towin geye......................................... 395
Traffi cSignA ssist
Activating/deactivating the warn- ing function .................................... 286
Displa ymessage ............................ 316
Function/note s............................. 255
Important safety notes .................. 255
Instrument cluster display ............. 256
Trailer coupling
see Towing atrailer
Trailer towing
7-pi nconnecto r............................. 272
Blind Spot Assist ............................ 259
Cleaning the traile rtow hitch ......... 390
Coupling up atraile r...................... 270
Decoupling atraile r....................... 270
Driving tip s.................................... 267
Folding in the ball coupling ............ 270
Folding ou tthe ball coupling .......... 268
Important safety notes .................. 266
Lights display message .................. 307
Mounting dimensions .................... 482
Parktroni c...................................... 238
Power supply ................................. 272
Trailer load s................................... 484
Transmission
see Automati ctransmission
see Manua ltransmission
Transmissio nposition display ......... 190
Transmissio nposition display
(DIRECT SELECT lever) ...................... 190
Transporting the vehicle .................. 410 Index
21
Page 203 of 497
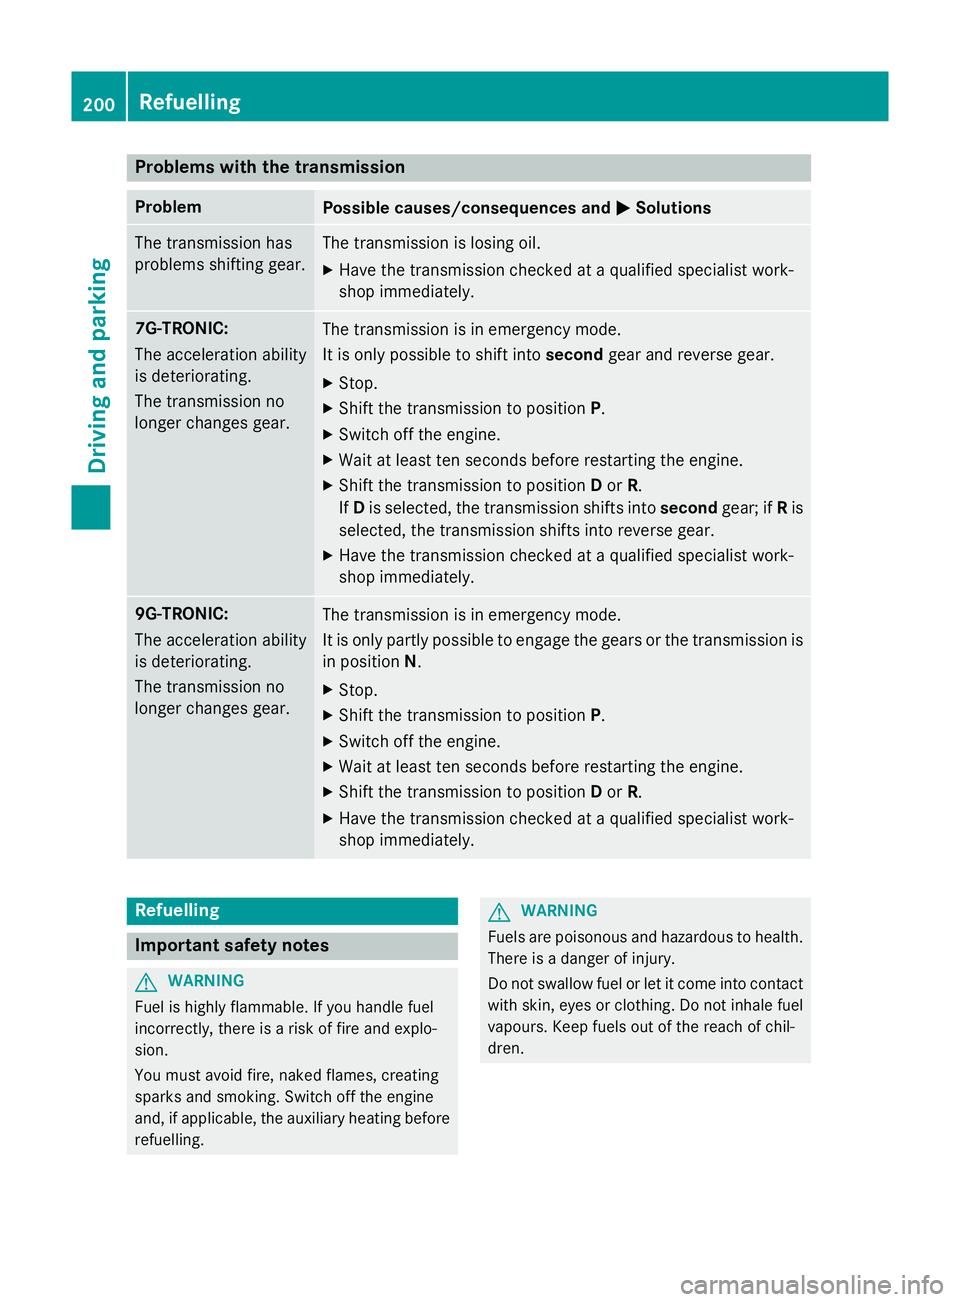
Problems with the transmission
Problem
Possible causes/consequences and
M
MSolutions The transmission has
problems shifting gear. The transmission is losing oil.
X Have the transmission checked at aqualified specialist work-
shop immediately. 7G-TRONIC:
The acceleration ability
is deteriorating.
The transmission no
longer changes gear.
The transmission is in emergency mode.
It is only possible to shift into
secondgear and reverse gear.
X Stop.
X Shift the transmission to position P.
X Switch off the engine.
X Wait at least ten seconds before restarting the engine.
X Shift the transmission to position Dor R.
If D is selected, the transmission shifts into secondgear; ifRis
selected, the transmission shifts into reverse gear.
X Have the transmission checked at aqualified specialist work-
shop immediately. 9G-TRONIC:
The acceleration ability
is deteriorating.
The transmission no
longer changes gear.
The transmission is in emergency mode.
It is only partly possible to engage the gears or the transmission is
in position N.
X Stop.
X Shift the transmission to position P.
X Switch off the engine.
X Wait at least ten seconds before restarting the engine.
X Shift the transmission to position Dor R.
X Have the transmission checked at aqualified specialist work-
shop immediately. Refuelling
Important safety notes
G
WARNING
Fuel is highly flammable. If you handle fuel
incorrectly, there is arisk of fire and explo-
sion.
You must avoid fire, naked flames, creating
sparks and smoking. Switch off the engine
and, if applicable, the auxiliary heating before refuelling. G
WARNING
Fuels are poisonous and hazardous to health. There is adanger of injury.
Do not swallow fuel or let it come into contact
with skin, eyes or clothing. Do not inhale fuel
vapours. Keep fuels out of the reach of chil-
dren. 200
RefuellingDriving and parking
Page 316 of 497
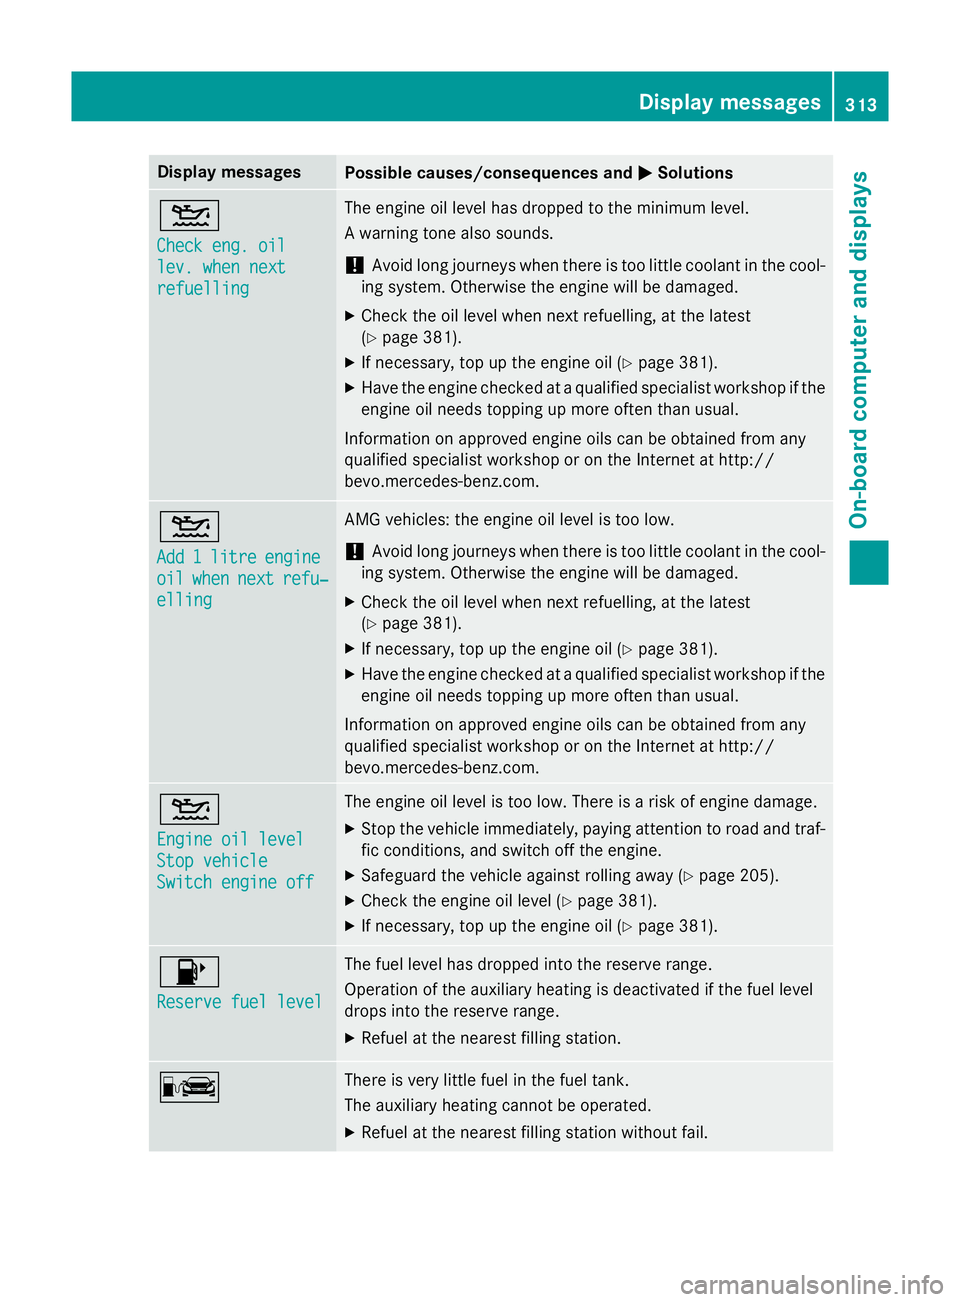
Display messages
Possible causes/consequences and
M
MSolutions 4
Check eng
.oil
Check eng .oil
lev .w henn ext
lev .w henn ext
refuelling refuelling The engin
eoil level has dropped to th eminimum level.
Aw arnin gtonea lso sounds.
! Avoid lon
gjou rneys when there is to olittl ec oolan tint hecool-
in gs ystem. Otherwise th eenginew ill be damaged.
X Chec kthe oil level when next refuelling, at th elatest
(Y page 381).
X If necessary, to puptheengin eoil (Y page 381).
X Hav ethe engin echecked ataq ualified specialist workshop if the
engin eoil needs toppin gupmoreo ften than usual.
Information on approve dengineo ils can be obtained from any
qualified specialist workshop or on th eInterne tathttp://
bevo.mercedes-benz.co m.4
Add 1 Add 1
litre
litre engine
engine
oil
oil when
when next
next refu‐
refu‐
elling
elling AMG vehicles: the engine oil level is too low.
!
Avoid long journeys when there is too little coolant in the cool-
ing system. Otherwise the engine will be damaged.
X Check the oil level when next refuelling, at the latest
(Y page 381).
X If necessary, top up the engine oil (Y page 381).
X Have the engine checked at aqualified specialist workshop if the
engine oil needs topping up more often than usual.
Information on approved engine oils can be obtained from any
qualified specialist workshop or on the Internet at http://
bevo.mercedes-benz.com. 4
Engine oil level Engine oil level
Stop vehicle Stop vehicle
Switch engine off Switch engine off The engine oil level is too low. There is
arisk of engine damage.
X Stop the vehicle immediately, paying attention to road and traf-
fic conditions, and switch off the engine.
X Safeguard the vehicle against rolling away( Ypage 205).
X Check the engine oil level (Y page 381).
X If necessary, top up the engine oil (Y page 381).8
Reserve fuel level Reserve fuel level The fuel level has dropped into the reserve range.
Operation of the auxiliary heating is deactivated if the fuel level
drops into the reserve range.
X Refuelatt he nearest filling station. C There is very little fuel in the fuel tank.
The auxiliary heating cannot be operated.
X Refuelatt he nearest filling station without fail. Display messages
313On-board computer and displays Z
Page 383 of 497
Opening the bonnet
G
WARNING
Certain componentsint he engine compart-
ment could be very hot, e.g. the engine, the
radiator and parts of the exhaust system.
There is arisk of injur ywhen accessin gthe
engin ecompartment.
As far as possible, allow the engine to cool
down and only touch the componentsd escri-
bed in the following. G
WARNING
When the bonnet is open, and the windscreen wipers are set in motion ,you can be injured by
the wiper linkage. There is arisk of injury.
Always switch off the windscreen wipers and
the ignition before opening the bonnet.
! Make sure that the windscreen wipers are
not folded away from the windscreen. Oth-
erwise, you could damage the windscreen
wipers or the bonnet. X
Make sure that the windscreen wipers are
switched off.
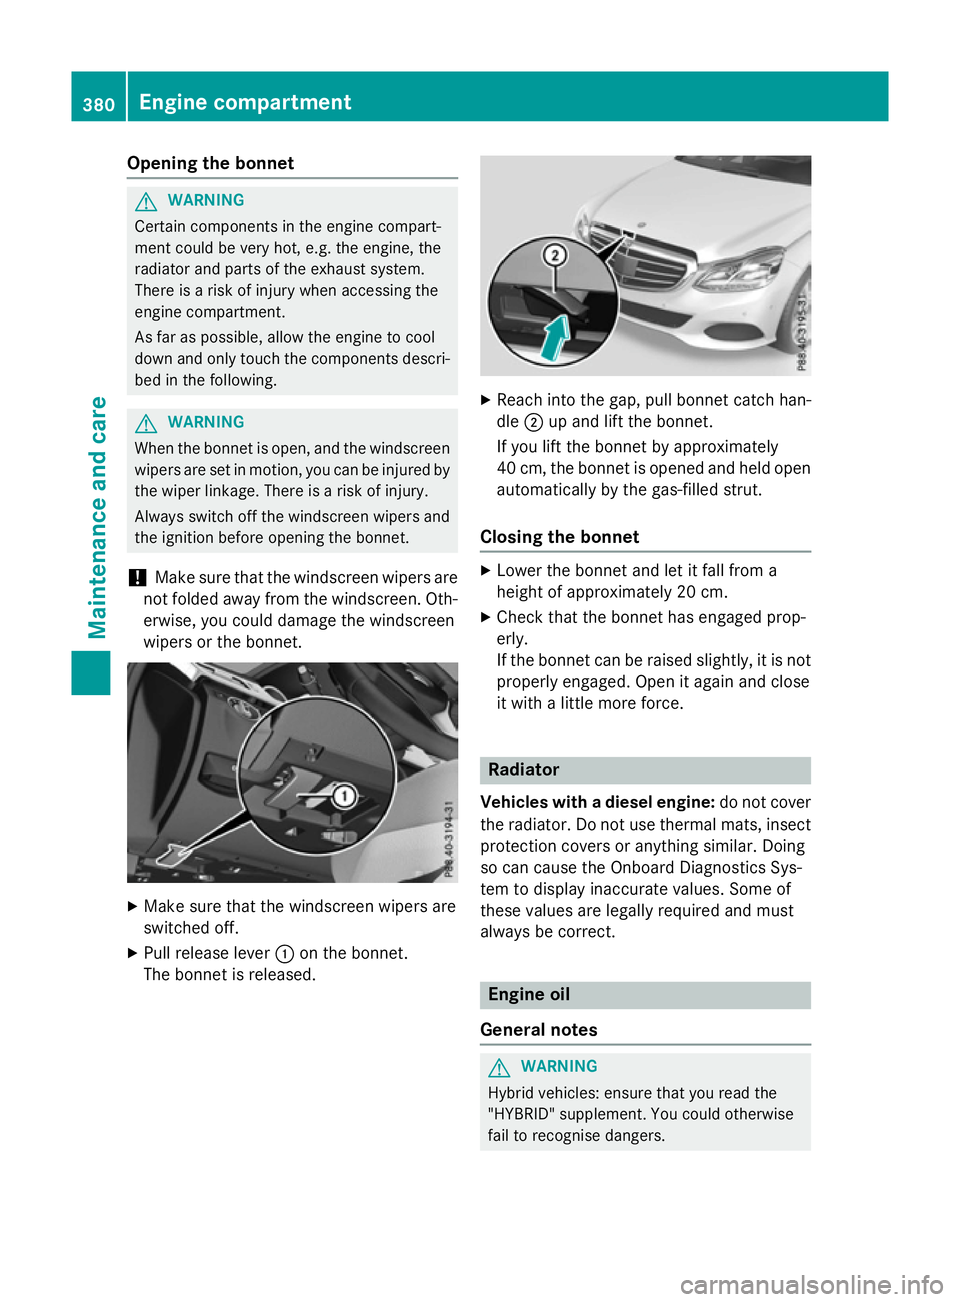
X Pull release lever :on the bonnet.
The bonnet is released. X
Reach intot he gap, pull bonnet catc hhan-
dle ;up and lift the bonnet.
If you lift the bonnet by approximately
40 cm, the bonnet is opened and held open automatically by the gas-filled strut.
Closing the bonnet X
Lower the bonnet and let it fall from a
height of approximately 20 cm.
X Check that the bonnet has engaged prop-
erly.
If the bonnet can be raised slightly, it is not
properly engaged. Open it again and close
it with alittle more force. Radiator
Vehicles with adiesel engine: do not cover
the radiator. Do not use thermal mats, insect
protection cover soranythin gsimilar. Doing
so can cause the Onboard Diagnostics Sys-
tem to display inaccurate values. Some of
these values are legally required and must
alway sbec orrect. Engine oil
General notes G
WARNING
Hybrid vehicles: ensure that you read the
"HYBRID "supplement .You could otherwise
fail to recognise dangers. 380
Engine compartmentMaintenance and care
Page 384 of 497
Depending on your driving style
,the vehicle
consumes up to 0.8 litres of oi lper 1000 km.
Th eo ilconsumption ma ybehighertha nt his
when the vehicl eisnew or if yo ufrequently
drive at high engine speeds.
Depending on the engine ,the oi ldipst ick may
be installe datadifferent location.
When checking the oi llev el:
R park the vehicl eonalevel surface
R the engine shoul dbeswitched off for
approximately fiv eminute sift he engine is
at normal operating temperature
R if the engine is not at normal operating
temperature, e.g .ifthe engine wa sonly
started briefly, wait approximately
30 minute sbefor ec arrying ou tthe meas-
urement
Checking the oi llevel using the oi ldip-
stick G
WARNING
Certain components in the engine compart-
ment could be ver yhot,e .g.t he engine ,the
radiato rand parts of the exhaust system.
There is ariskofi njury when accessing the
engine compartment.
As fa rasp ossible, allo wthe engine to cool
down and onl ytouch the components descri-
be dint he following. Example: vehicles with
apetrol engine Example: vehicles with
adiese lengine
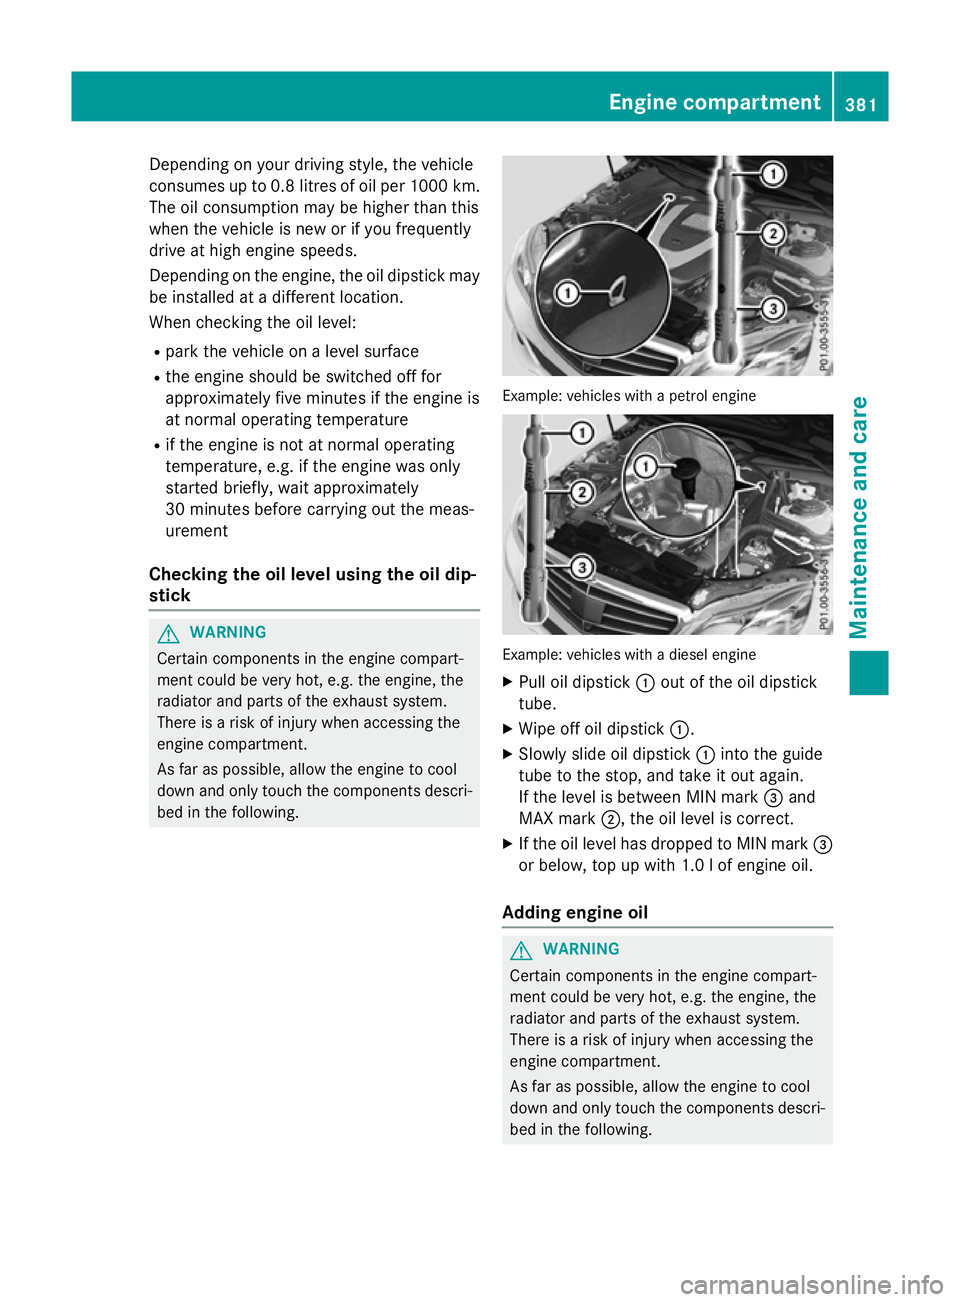
X Pull oi ldipst ick:outoft he oi ldipst ick
tube.
X Wipe off oi ldipst ick:.
X Slowl yslide oild ipst ick:into the guide
tub etot he stop ,and take it ou tagain.
If the level is between MIN mark =and
MAX mark ;,the oi llev el is correct.
X If the oi llev el ha sdropped to MIN mark =
or below, top up with 1.0 lofengine oil.
Addin gengin eoil G
WARNING
Certain components in the engine compart-
ment could be ver yhot,e .g.t he engine ,the
radiato rand parts of the exhaust system.
There is ariskofi njury when accessing the
engine compartment.
As fa rasp ossible, allo wthe engine to cool
down and onl ytouch the components descri-
be dint he following. Engine compartment
381Maintenance and care Z
Page 385 of 497
G
WARNING
If engine oil comes into contact with hot com- ponents in the engine compartment, it may
ignite. There is arisk of fire and injury.
Make sure that engine oil does not spil lout
over the filler neck. Allow the engine to cool
downa nd thoroughly clea nthe components
that have come into contact with engine oil
before you start the engine. H
Environmental note
When topping up the oil,t ake care not to spill
any. If oil enters the soil or waterways, it is
harmfu ltothe environment.
! Only use engine oilsa
nd oil filters that
have been approved for vehicles with aser-
vice system. You can obtai nalistoft he
engine oilsa nd oil filters tested and
approved in accordance with the
Mercedes-Benz Specifications for Service
Products at any Mercedes-Benz Service
Centre.
Damag etothe engine or exhaust system is
caused by the following:
R using engine oilsa nd oil filters that have
not been specifically approved for the
service system
R changing the engine oil and oil filter after
missing the change interval required by
the service system
R using engine oil additives
! Do not add too much oil.T
opping up with
too much engine oil can result in damage to
the engine or to the catalytic converter.
Have excess engine oil siphoned off. Example
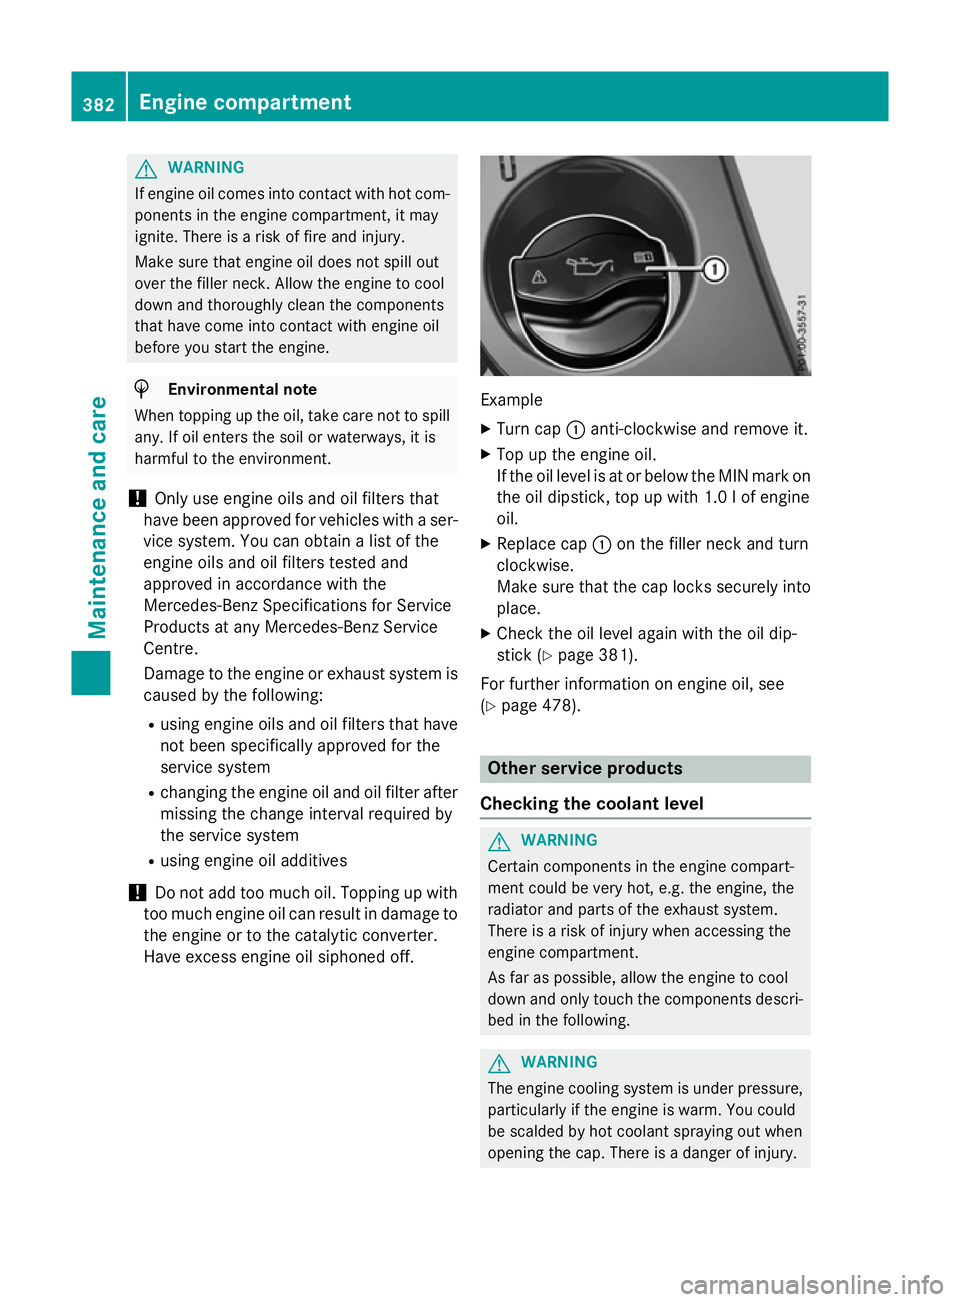
X Turn cap :anti-clockwise and remove it.
X Top up the engine oil.
If the oil leve lisatorbelow the MIN mark on
the oil dipstick, top up with 1.0 lofe ngine
oil.
X Replace cap :on the filler neck and turn
clockwise.
Make sure that the cap locks securely into place.
X Check the oil level again with the oil dip-
stick (Y page 381).
For further information on engine oil, see
(Y page 478). Other service products
Checking the coolant level G
WARNING
Certain components in the engine compart-
ment could be very hot, e.g. the engine, the
radiator and parts of the exhaust system.
There is arisk of injury when accessing the
engine compartment.
As far as possible, allow the engine to cool
down and only touch the components descri- bed in the following. G
WARNING
The engine cooling system is under pressure, particularly if the engine is warm. You could
be scalded by hot coolant spraying out when
opening the cap. There is adanger of injury. 382
Engine compartmentMaintenance and care
Page 388 of 497
Special service requirements
The prescribed service interval is based on
normal operation of the vehicle. Service work
will need to be performed more often if the
vehicle is operated under arduousc onditions
or increased loads, for example:
R regular city driving with frequent intermedi-
ate stops
R if the vehicle is primarily used to travel
short distances
R for frequent operation in mountainous ter-
rain or on poor road surfaces
R if the engine is often left idling for long peri-
ods
In these or similar operating conditions, have,
for example, the air filter, engine oil and oil
filter changed more frequently. The tyres
must be checked more frequently if the vehi-
cle is operated under increased loads. Fur-
ther information can be obtained at aquali-
fied specialist workshop, e.g. aMercedes-
Benz Service Centre.
Driving abroad
An extensive Mercedes-Benz Service network is also available in other countries. You can
obtain further information from any
Mercedes-Benz Service Centre. AdBlue
®
service indicator
i For BlueTEC vehicles only.
To function properly, BlueTEC exhaust gas
aftertreatment must be operated with the
reducing agent AdBlue ®
.A dBlue ®
is topped
up as part of the service. Under normal oper-
ating conditions, afull tank of AdBlue ®
should
last until the next service due date.
Depending on how and where the vehicle is
used, there may be an increase in the
AdBlue ®
consumption, resulting in the next
service due date being brought forward.
Certain display messages show that AdBlue ®
must be topped up, e.g.: Refill AdBlue at workshop See Own‐ Refill AdBlue at workshop See Own‐
er's Manual er's Manual
Refill AdBlue at workshop No start Refill AdBlue at workshop No start
in .. km in .. km
Aw
arning signal also sounds.
You can no longer start the vehicle when the
AdBlue ®
supply has been used up
(Y page 314).
! Have the AdBlue ®
tank topped up at a
qualified specialist workshop only. The
vehicle may otherwise be damaged or
soiled.
Before driving your vehicle outside Europe,
have the AdBlue ®
supply checked at aquali-
fied specialist workshop. If necessary, have
AdBlue ®
topped up. Before aprolonged stay
outside of Europe, consult aqualified special-
ist workshop.
Observe the notes on AdBlue ®
(Y page 477).
Further information about BlueTEC exhaust
gas aftertreatment and AdBlue ®
can be
obtained at aqualified specialist workshop,
e.g. aMercedes-Benz Service Centre. Care
General notes
H
Environmental note
Dispose of empty packaging and cleaning
cloths in an environmentally responsible man- ner.
! For cleaning your vehicle, do not use any
of the following:
R dry, rough or hard cloths
R abrasive cleaning agents
R solvents
R cleaning agents containing solvents
Do not scrub.
Do not touch the surfaces or protective
films with hard objects, e.g. aring or ice
scraper. You could otherwise scratchor
damage the surfaces and protective film. Care
385Maintenance and care Z
Page 394 of 497
!
Please note the care instructions in the
trailer coupling manufacturer's operating
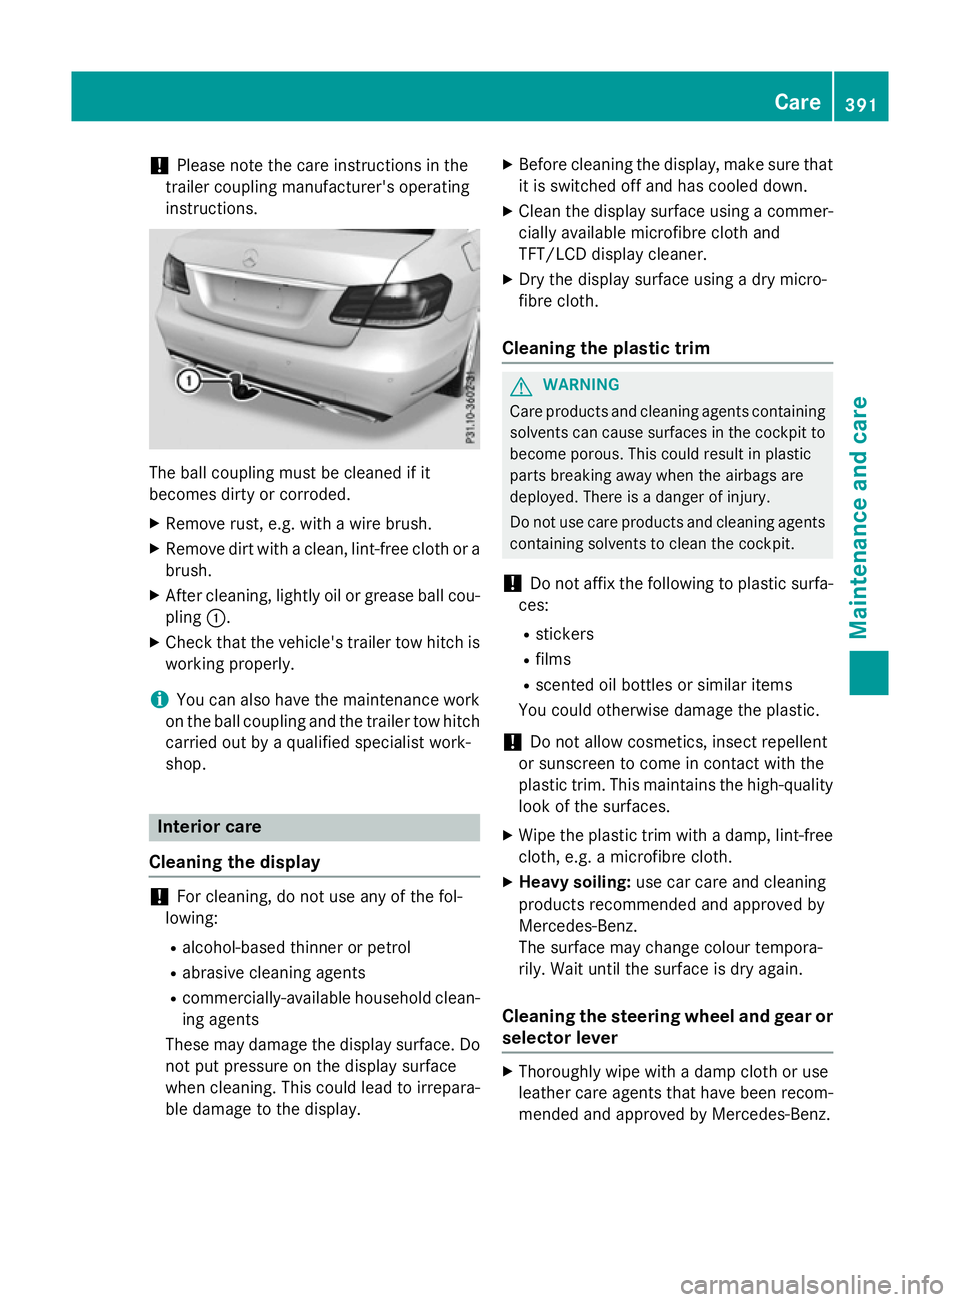
instructions. The ball coupling must be cleaned if it
becomes dirty or corroded.
X Remove rust, e.g. with awire brush.
X Remove dirt with aclean, lint-free cloth or a
brush.
X After cleaning, lightly oil or grease ball cou-
pling :.
X Check that the vehicle's trailer tow hitch is
working properly.
i You can also have the maintenance work
on the ball coupling and the trailer tow hitch
carried out by aqualified specialist work-
shop. Interior care
Cleaning the display !
For cleaning, do not use any of the fol-
lowing:
R alcohol-based thinner or petrol
R abrasive cleaning agents
R commercially-available householdc lean-
ing agents
These may damage the displays urface. Do
not put pressure on the displays urface
when cleaning. This could lead to irrepara-
ble damage to the display. X
Before cleaning the display, make sure that
it is switched off and has cooled down.
X Cleant he displays urface using acommer-
cially available microfibre cloth and
TFT/LCD displayc leaner.
X Dry the displays urface usingadry micro-
fibre cloth.
Cleaning the plastic trim G
WARNING
Care products and cleaning agents containing solvents can cause surfaces in the cockpit to
become porous. This could result in plastic
parts breaking awayw hen the airbags are
deployed. There is adanger of injury.
Do not use care products and cleaning agents containing solvents to clean the cockpit.
! Do not affix the following to plastic surfa-
ces:
R stickers
R films
R scented oil bottles or similari tems
You could otherwise damage the plastic.
! Do not allowc
osmetics, insect repellent
or sunscreen to come in contact with the
plastic trim. This maintains the high-quality look of the surfaces.
X Wipe the plastic trim with adamp, lint-free
cloth, e.g. amicrofibre cloth.
X Heavy soiling: use car care and cleaning
products recommended and approved by
Mercedes-Benz.
The surface may change colour tempora-
rily. Wait until the surface is dry again.
Cleaning the steering wheela nd gear or
selector lever X
Thoroughlyw ipe withadamp cloth or use
leather care agents that have been recom-
mended and approved by Mercedes-Benz. Care
391Maintenance and care Z
Page 433 of 497
X
Unscrew the remaining wheel bolts fully.
X Remove the wheel.
Fitting anew wheel G
WARNING
Oiled or greased wheel bolts or damaged
wheel bolts/hub threads can cause the wheel bolts to come loose. As aresult, you could
lose awheel while driving. There is arisk of
accident.
Never oil or grease wheel bolts. In the event of damage to the threads, contact aqualified
specialist workshop immediately.H ave the
damagedw heel bolts or hub threads
replaced/renewed. Do not continue driving. G
WARNING
If you tighten the wheel bolts or wheel nuts
when the vehicle is raised, the jack could tip
over. There is arisk of injury.
Only tighten the wheel bolts or wheel nuts
when the vehicle is on the ground.
Observe the instructions and safety notes on "Changing awheel" (Y page 426).
Only use wheel bolts that have been designed
for the wheel and the vehicle. For safety rea-
sons, Mercedes-Benz recommends that you
only use wheel bolts which have been
approved for Mercedes-Benz vehicles and the
respective wheel.
! AMG vehicles:
during removal and repo-
sitioning of the wheel, the wheel rim can
strike the ceramic-brake disc and damage
it. Therefore, take precautions and have a
second person assist you. Alternatively,
you can use asecond centring pin. X
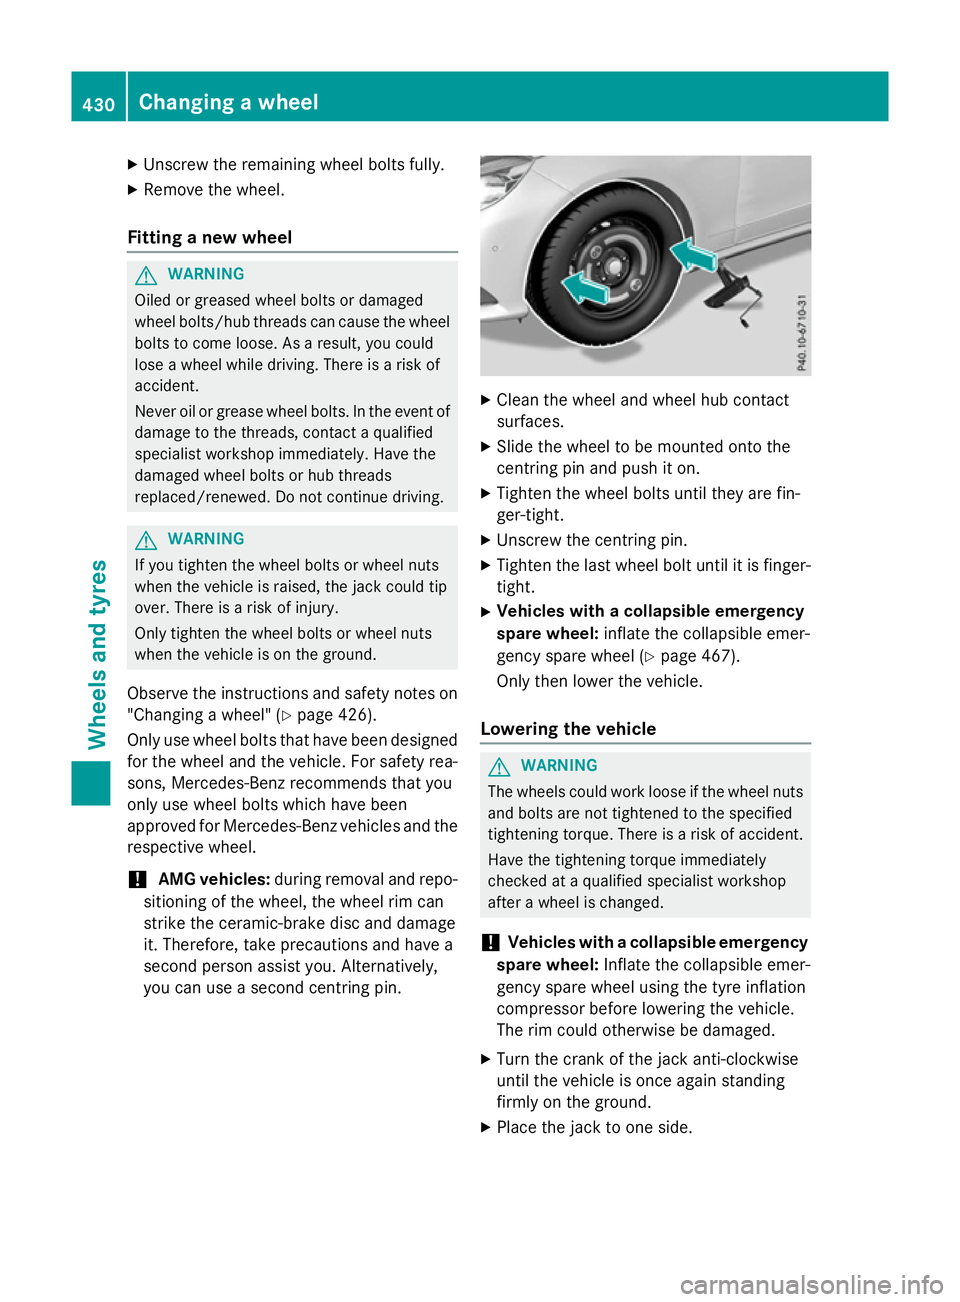
Cleant he wheel and wheel hub contact
surfaces.
X Slide the wheel to be mounted onto the
centring pin and push it on.
X Tighten the wheel bolts until they are fin-
ger-tight.
X Unscrew the centring pin.
X Tighten the last wheel bolt until it is finger-
tight.
X Vehiclesw ithacollapsible emergency
spare wheel: inflate the collapsible emer-
gency spare wheel (Y page 467).
Only then lower the vehicle.
Lowering the vehicle G
WARNING
The wheels could work loose if the wheel nuts and bolts are not tightened to the specified
tightening torque. There is arisk of accident.
Have the tightening torque immediately
checked at aqualified specialist workshop
after awheel is changed.
! Vehiclesw
ithacollapsible emergency
spare wheel: Inflate the collapsible emer-
gency spare wheel using the tyre inflation
compressor before lowering the vehicle.
The rim could otherwise be damaged.
X Turn the crank of the jack anti-clockwise
until the vehicle is once agains tanding
firmly on the ground.
X Place the jack to one side. 430
Changing
awheelWheels and tyres