flat tire MERCEDES-BENZ E-Class WAGON 2013 W212 User Guide
[x] Cancel search | Manufacturer: MERCEDES-BENZ, Model Year: 2013, Model line: E-Class WAGON, Model: MERCEDES-BENZ E-Class WAGON 2013 W212Pages: 420, PDF Size: 14.26 MB
Page 288 of 420
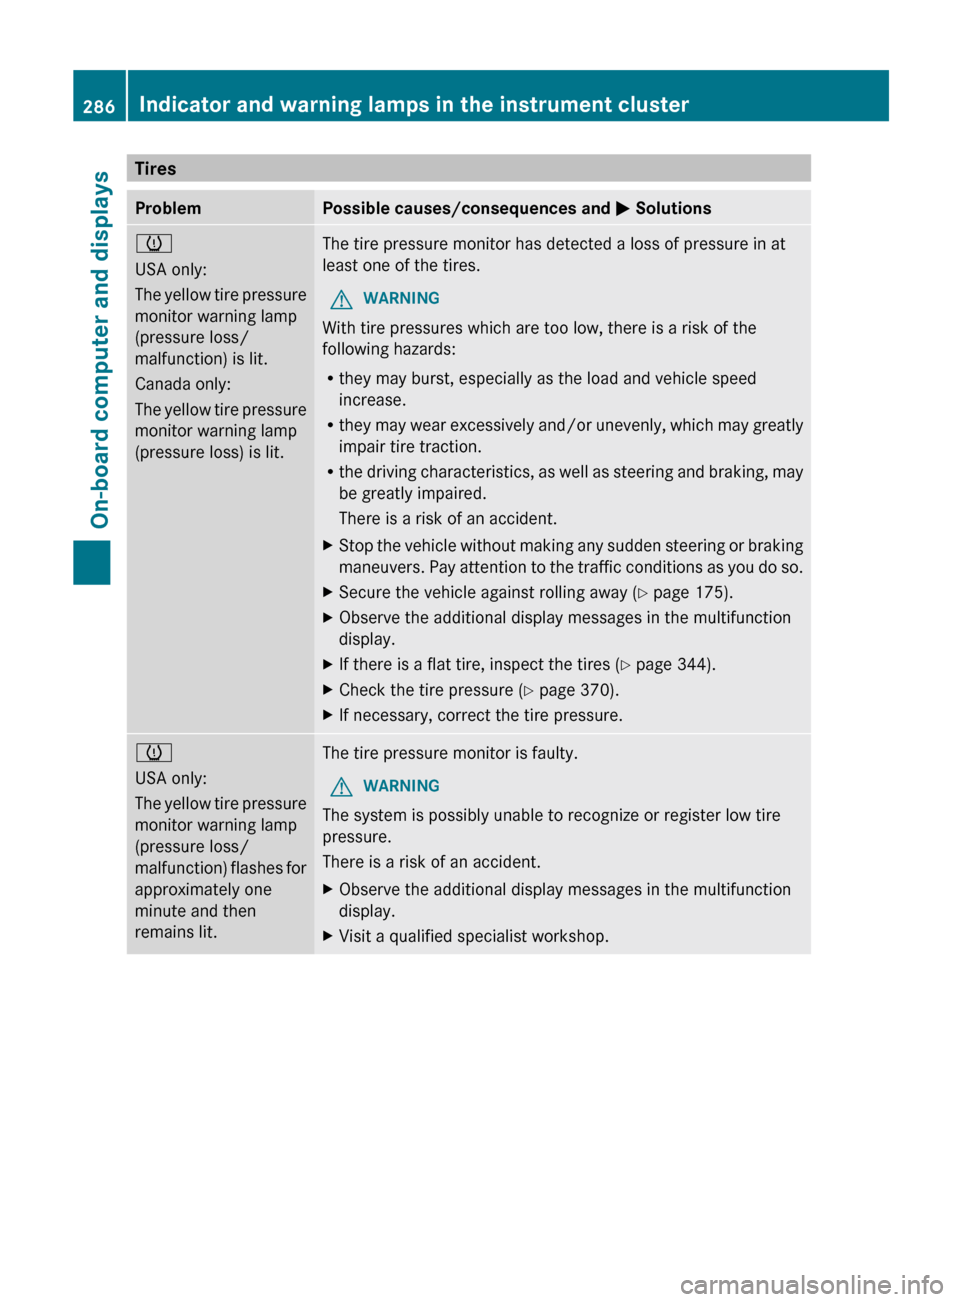
Tires
Problem Possible causes/consequences and
M Solutionsh
USA only:
The
yellow tire pressure
monitor warning lamp
(pressure loss/
malfunction) is lit.
Canada only:
The yellow tire pressure
monitor warning lamp
(pressure loss) is lit. The tire pressure monitor has detected a loss of pressure in at
least one of the tires.
G WARNING
With tire pressures which are too low, there is a risk of the
following hazards:
R they may burst, especially as the load and vehicle speed
increase.
R they
may wear excessively and/or unevenly, which may greatly
impair tire traction.
R the driving characteristics, as well as steering and braking, may
be greatly impaired.
There is a risk of an accident.
X Stop the vehicle without making any sudden steering or braking
maneuvers.
Pay attention to the traffic conditions as you do so.
X Secure the vehicle against rolling away ( Y page 175).
X Observe the additional display messages in the multifunction
display.
X If there is a flat tire, inspect the tires ( Y page 344).
X Check the tire pressure (Y page 370).
X If necessary, correct the tire pressure. h
USA only:
The
yellow tire pressure
monitor warning lamp
(pressure loss/
malfunction) flashes for
approximately one
minute and then
remains lit. The tire pressure monitor is faulty.
G WARNING
The system is possibly unable to recognize or register low tire
pressure.
There is a risk of an accident.
X Observe the additional display messages in the multifunction
display.
X Visit a qualified specialist workshop.286
Indicator and warning lamps in the instrument cluster
On-board computer and displays
Page 343 of 420

Useful information ............................
342
Where will I find...? ........................... 342
Flat tire .............................................. 344
Battery (vehicle) ................................ 348
Jump-starting .................................... 352
Towing and tow-starting .................. 354
Fuses .................................................. 357 341Breakdown assistance
Page 345 of 420

stowage well under the trunk floor/cargo
compartment floor.
Vehicles with a TIREFIT kit
Example: vehicle tool kit in the left-hand stowage
space
:
Tire sealant filler bottle
; Folding wheel chock
= One pair of gloves (under jack)
? Tire inflation compressor
A Towing eye
B Jack
C Alignment bolt
D Lug wrench
X Open the trunk lid/tailgate.
X Sedan: lift up the floor of the trunk
(Y page 301).
X Wagon: remove the seat cushions of the
folding bench seat (Y page 108). Vehicles with a spare
wheel/"Minispare" emergency spare
wheel :
Vehicle tool kit tray
; Stowage well
= Spare wheel/"Minispare" emergency
spare wheel
X Open the trunk lid/tailgate.
X Sedan: lift up the floor of the trunk
(Y page 301).
X Wagon: remove the seat cushions of the
folding bench seat (Y page 108).
The vehicle tool kit contains:
R Folding wheel chock
R Fuse allocation chart
R Jack
R Alignment bolt
R One pair of gloves
R Lug wrench
R Towing eye Where will I find...?
343Breakdown assistance
Page 346 of 420

Vehicles with a collapsible spare wheel
:
Towing eye
; One pair of gloves
= Jack
? Folding wheel chock
A Alignment bolt
B Sheet for faulty wheel
C Tire inflation compressor
D Lug wrench
E Fuse allocation chart
X Open the trunk lid.
X Lift the trunk floor upwards (Y page 301). Flat tire
Preparing the vehicle
Information on changing/mounting a wheel
(Y page 384).
Vehicle preparation is not necessary on
vehicles with MOExtended tires.
Your vehicle may be equipped with:
R MOExtended tires (tires with run-flat
characteristics) (Y page 344)
R a TIREFIT kit (Y page 345)
R an emergency spare wheel
(Y page 398)
X Stop the vehicle on solid, non-slippery and
level ground, as far away as possible from
traffic.
X Switch on the hazard warning lamps.
X Apply the parking brake. X
Bring the front wheels into the straight-
ahead position.
X Shift the transmission to position P.
X Vehicles with AIRMATIC: make sure that
"normal" level is selected
(Y page 199).
X Switch off the engine.
X Vehicles without KEYLESS-GO: remove
the SmartKey from the ignition lock.
X Vehicles with KEYLESS-GO: open the
driver's door.
The on-board electronics have status 0,
which is the same as the SmartKey having
been removed.
X Vehicles with KEYLESS-GO: remove the
Start/Stop button from the ignition lock
(Y page 154).
X All occupants must get out of the vehicle.
Make
sure that they are not endangered as
they do so.
X Make sure that no one is near the danger
area while a wheel is being changed.
Anyone who is not directly assisting in the
wheel change should, for example, stand
behind the barrier.
X Get out of the vehicle. Pay attention to
traffic conditions when doing so.
X Close the driver's door. MOExtended tires (tires with run-flat
properties)
G
WARNING
When driving in emergency mode, the driving
characteristics deteriorate, e.g. when
cornering, accelerating quickly and when
braking. There is a risk of an accident.
Do not exceed the stated maximum speed.
Avoid
abrupt steering and driving maneuvers,
and driving over obstacles (curbs, potholes,
off-road). This applies in particular to a laden
vehicle.
Stop driving in emergency mode if:
R you hear banging noises.
R the vehicle starts to shake.344
Flat tire
Breakdown assistance
Page 347 of 420

R
you see smoke and smell rubber.
R ESP ®
is intervening constantly.
R there are tears in the sidewalls of the tire.
After driving in emergency mode, have the
wheel rims checked at a qualified specialist
workshop
with regard to their further use. The
defective tire must be replaced in every case.
With MOExtended tires (tires with run flat
characteristics), you can continue to drive
your vehicle even if there is a total loss of
pressure in one or more tires.
MOExtended tires may only be used in
conjunction with an active tire pressure loss
warning system or with an active tire pressure
monitor.
The maximum driving distance is
approximately 50 miles (80 km) when the
vehicle is partially laden, and approximately
18 miles (30 km) when the vehicle is fully
laden.
In addition to the vehicle load, the driving
distance possible depends upon:
R Speed
R Road condition
R Outside temperature
The driving distance possible in run-flat mode
may be reduced by extreme driving
conditions/maneuvers, or it can be increased
through a moderate style of driving.
The maximum permissible distance which
can be driven in run-flat mode is counted from
the moment the tire pressure loss warning
appears in the multifunction display.
Do not exceed a vehicle speed of 50 mph
(80 km/h).
i When changing or replacing one or all of
the tires, note the label "MOExtended".
Take note also of the size specified for the
vehicle.
i Vehicles equipped with MOExtended tires
are not equipped with a TIREFIT kit at the
factory. It is therefore recommended that
you additionally equip your vehicle with a TIREFIT kit if you mount tires that do not
feature
run-flat properties, e.g. winter tires.
A TIREFIT kit may be obtained from a
qualified specialist workshop. TIREFIT kit
Using the TIREFIT kit TIREFIT is a tire sealant.
TIREFIT can be used to seal small punctures
of up to 0.16 inches
(4 mm), particularly on
the tire tread. You can use TIREFIT at outside
temperatures down to Ò4 ‡ (Ò20 †). G
WARNING
In the following situations, the tire sealant is
unable to provide sufficient breakdown
assistance, as it is unable to seal the tire
properly:
R there
are cuts or punctures in the tire larger
than those mentioned above.
R the wheel rim is damaged.
R you have driven at very low tire pressures
or on a flat tire.
There is a risk of an accident.
Do not drive any further. Contact a qualified
specialist workshop. G
WARNING
The tire sealant is harmful and causes
irritation. It must not come into contact with
your skin, eyes or clothing or be swallowed.
Do
not inhale TIREFIT fumes. Keep tire sealant
away from children. There is a risk of injury.
If you come into contact with the tire sealant,
observe the following:
R Rinse off the tire sealant from your skin
immediately with water.
R If the tire sealant comes into contact with
your eyes, immediately rinse them
thoroughly with clean water.
R If tire sealant is swallowed, immediately
rinse your mouth out thoroughly and drink Flat tire
345
Breakdown assistance
Z
Page 348 of 420

plenty of water. Do not induce vomiting,
and seek medical attention immediately.
R Immediately change out of clothing which
has come into contact with tire sealant.
R If
an allergic reaction occurs, seek medical
attention immediately.
! Do not operate the tire inflation
compressor for longer than eight minutes
at a time without a break. It may otherwise
overheat.
The tire inflation compressor can be
operated again once it has cooled down. TIREFIT sticker, 2-part
X
Do not remove any foreign objects which
have penetrated the tire, e.g. screws or
nails.
X Remove the tire sealant bottle, the
accompanying TIREFIT sticker and the tire
inflation
compressor from the stowage well
underneath the trunk floor/cargo
compartment floor (Y page 342).
X Affix part : of the TIREFIT sticker within
the driver's field of vision.
X Affix part ;
of the TIREFIT sticker near the
valve on the wheel with the defective tire. X
Pull plug ?
with the cable and hose A out
of the housing.
X Screw hose A onto flange B of tire
sealant bottle :.
X Place tire sealant bottle : head
downwards into recess ; of the tire
inflation compressor. X
Remove the cap from valve C
on the faulty
tire.
X Screw filler hose D onto valve C.
X Insert connector ? into a 12 V socket
(Y page 309) in your vehicle.
Observe the notes on sockets
(Y page 309).
X Turn the SmartKey to position 1 in the
ignition lock ( Y page 153).
X Press on/off switch =
on the tire inflation
compressor to I.
The tire inflation compressor is switched
on. The tire is inflated.
i First, tire sealant is pumped into the tire.
The pressure may briefly rise to
approximately
500 kPa (5 bar/73 psi).346
Flat tire
Breakdown assistance
Page 349 of 420
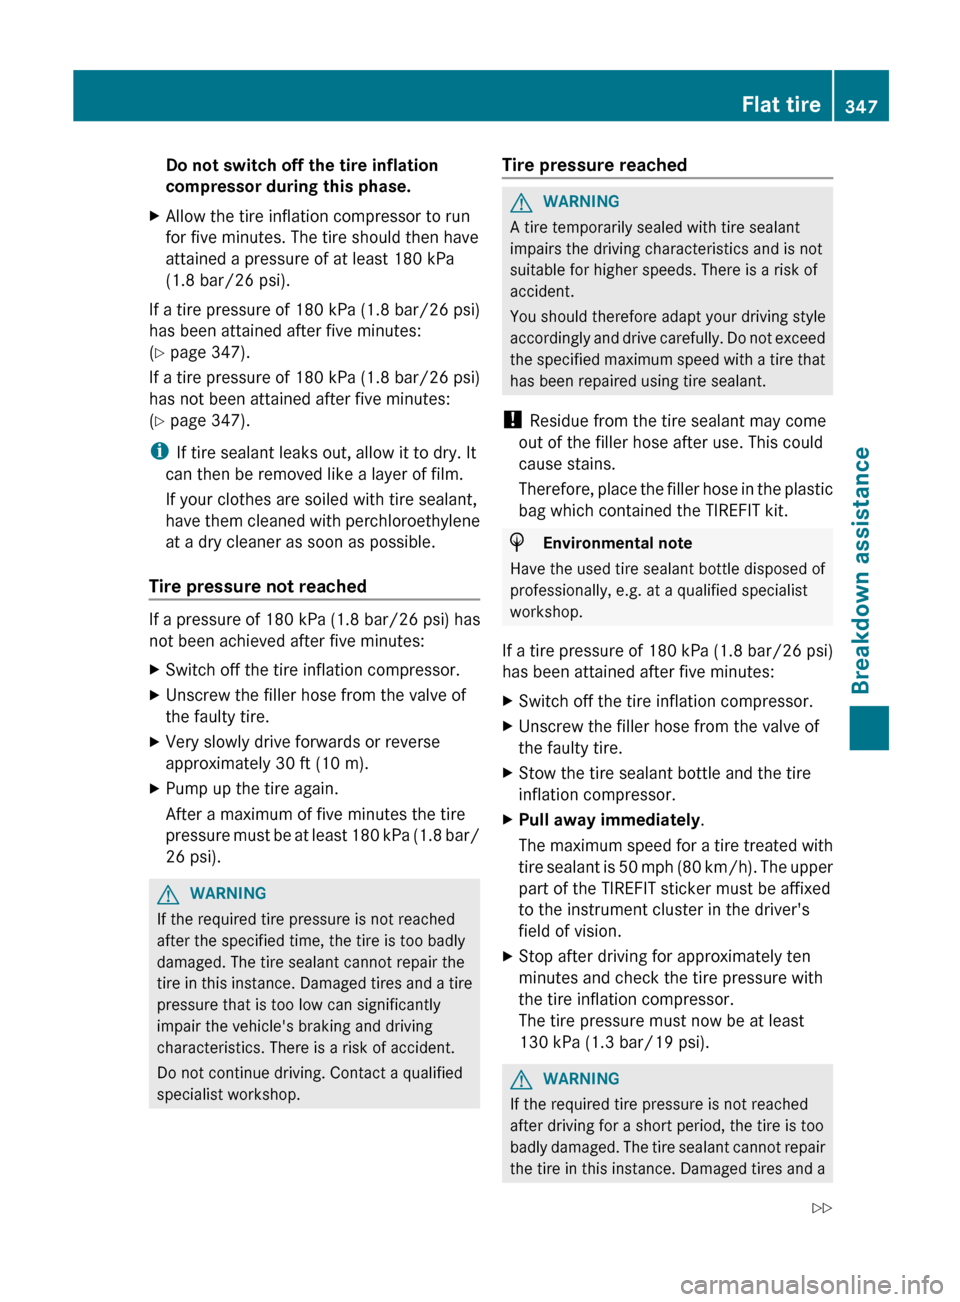
Do not switch off the tire inflation
compressor during this phase.
X Allow the tire inflation compressor to run
for five minutes. The tire should then have
attained a pressure of at least
180 kPa
(1.8 bar/26 psi).
If a tire pressure of 180 kPa
(1.8 bar/26 psi)
has been attained after five minutes:
(Y page 347).
If a tire pressure of 180 kPa (1.8 bar/26 psi)
has not been attained after five minutes:
(Y page 347).
i If tire sealant leaks out, allow it to dry. It
can then be removed like a layer of film.
If your clothes are soiled with tire sealant,
have them cleaned with perchloroethylene
at a dry cleaner as soon as possible.
Tire pressure not reached If a pressure of 180 kPa
(1.8 bar/26 psi) has
not been achieved after five minutes:
X Switch off the tire inflation compressor.
X Unscrew the filler hose from the valve of
the faulty tire.
X Very slowly drive forwards or reverse
approximately
30 ft (10 m).
X Pump up the tire again.
After a maximum of five minutes the tire
pressure
must be at least 180 kPa (1.8 bar/
26 psi). G
WARNING
If the required tire pressure is not reached
after the specified time, the tire is too badly
damaged. The tire sealant cannot repair the
tire
in this instance. Damaged tires and a tire
pressure that is too low can significantly
impair the vehicle's braking and driving
characteristics. There is a risk of accident.
Do not continue driving. Contact a qualified
specialist workshop. Tire pressure reached G
WARNING
A tire temporarily sealed with tire sealant
impairs the driving characteristics and is not
suitable for higher speeds. There is a risk of
accident.
You should therefore adapt your driving style
accordingly
and drive carefully. Do not exceed
the specified maximum speed with a tire that
has been repaired using tire sealant.
! Residue from the tire sealant may come
out of the filler hose after use. This could
cause stains.
Therefore, place the filler hose in the plastic
bag which contained the TIREFIT kit. H
Environmental note
Have the used tire sealant bottle disposed of
professionally, e.g. at a qualified specialist
workshop.
If
a tire pressure of 180 kPa (1.8 bar/26 psi)
has been attained after five minutes:
X Switch off the tire inflation compressor.
X Unscrew the filler hose from the valve of
the faulty tire.
X Stow the tire sealant bottle and the tire
inflation compressor.
X Pull away immediately.
The
maximum speed for a tire treated with
tire sealant is 50 mph (80 km/h). The upper
part of the TIREFIT sticker must be affixed
to the instrument cluster in the driver's
field of vision.
X Stop after driving for approximately ten
minutes and check the tire pressure with
the tire inflation compressor.
The tire pressure must now be at least
130 kPa (1.3 bar/19 psi). G
WARNING
If the required tire pressure is not reached
after driving for a short period, the tire is too
badly
damaged. The tire sealant cannot repair
the tire in this instance. Damaged tires and a Flat tire
347
Breakdown assistance
Z
Page 350 of 420
tire pressure that is too low can significantly
impair the vehicle's braking and driving
characteristics. There is a risk of accident.
Do not continue driving. Contact a qualified
specialist workshop.
X Correct the tire pressure if it is still at least
130 kPa (1.3 bar/19 psi) (for the values,
see the Tire and Loading Information
placard on the driver's side
B-pillar or tire
pressure table on the fuel filler flap).
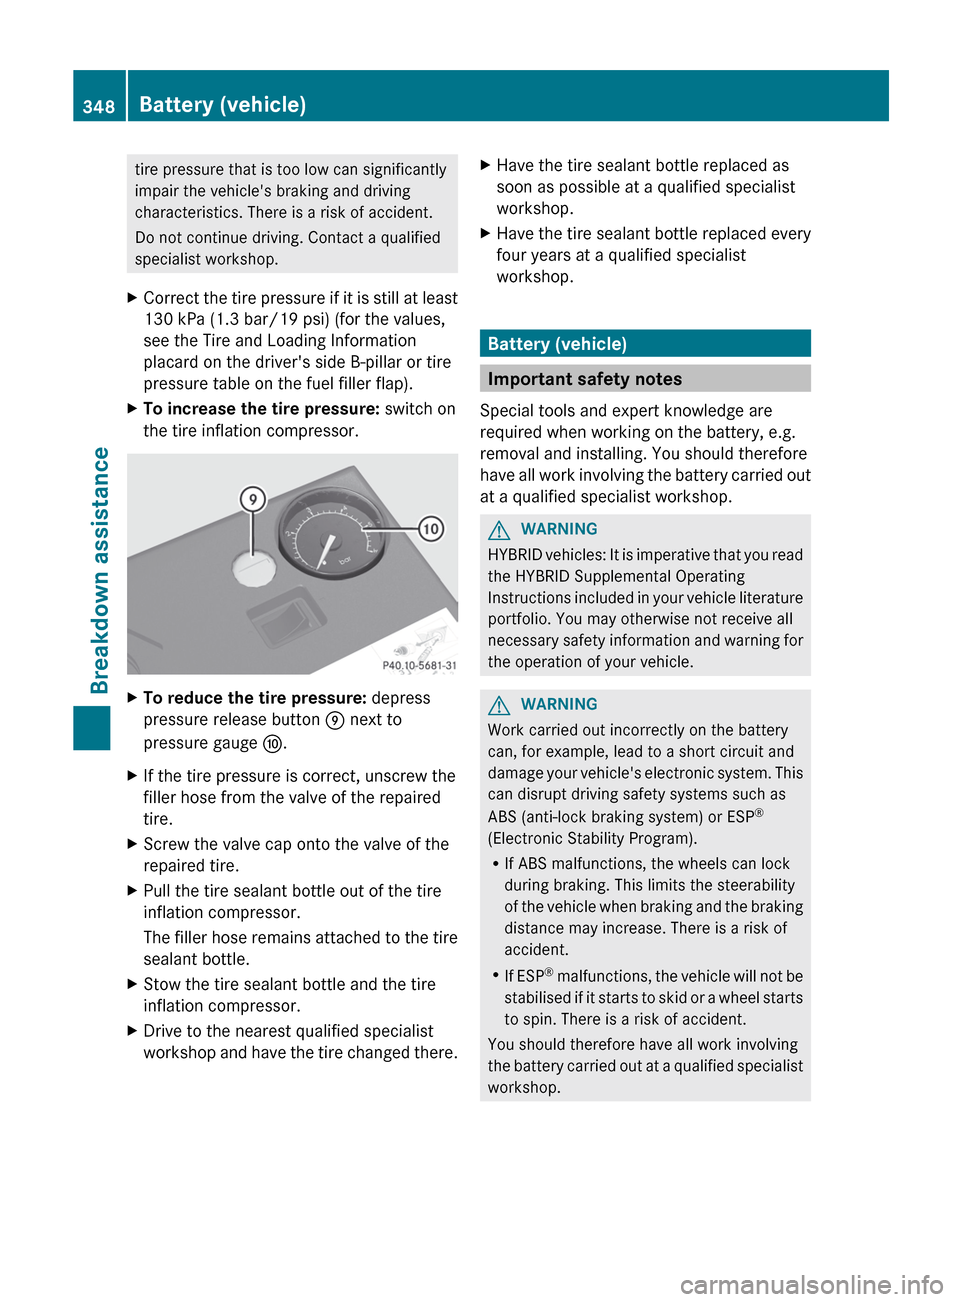
X To increase the tire pressure: switch on
the tire inflation compressor. X
To reduce the tire pressure: depress
pressure release button E next to
pressure gauge F.
X If the tire pressure is correct, unscrew the
filler hose from the valve of the repaired
tire.
X Screw the valve cap onto the valve of the
repaired tire.
X Pull the tire sealant bottle out of the tire
inflation compressor.
The
filler hose remains attached to the tire
sealant bottle.
X Stow the tire sealant bottle and the tire
inflation compressor.
X Drive to the nearest qualified specialist
workshop
and have the tire changed there. X
Have the tire sealant bottle replaced as
soon as possible at a qualified specialist
workshop.
X Have the tire sealant bottle replaced every
four years at a qualified specialist
workshop. Battery (vehicle)
Important safety notes
Special tools and expert knowledge are
required when working on the battery, e.g.
removal and installing. You should therefore
have
all work involving the battery carried out
at a qualified specialist workshop. G
WARNING
HYBRID vehicles: It is imperative that you read
the HYBRID Supplemental Operating
Instructions
included in your vehicle literature
portfolio. You may otherwise not receive all
necessary safety information and warning for
the operation of your vehicle. G
WARNING
Work carried out incorrectly on the battery
can, for example, lead to a short circuit and
damage
your vehicle's electronic system. This
can disrupt driving safety systems such as
ABS (anti-lock braking system) or ESP ®
(Electronic Stability Program).
R If ABS malfunctions, the wheels can lock
during braking. This limits the steerability
of the vehicle when braking and the braking
distance may increase. There is a risk of
accident.
R If ESP ®
malfunctions, the vehicle will not be
stabilised if it starts to skid or a wheel starts
to spin. There is a risk of accident.
You should therefore have all work involving
the battery carried out at a qualified specialist
workshop. 348
Battery (vehicle)
Breakdown assistance
Page 364 of 420
Useful information
i This Operator's Manual describes all
models and all standard and optional
equipment of your vehicle available at the
time of publication of the Operator's
Manual. Country-specific differences are
possible.
Please note that your vehicle may
not be equipped with all features
described. This also applies to safety-
related systems and functions.
i Read the information on qualified
specialist workshops: ( Y page 25).Important safety notes
G
WARNING
If wheels and tires of the wrong size are used,
the wheel brakes or suspension components
may be damaged. There is a risk of accident.
Always replace wheels and tires with those
that fulfill the specifications of the original
part (designation, manufacturer, model). G
WARNING
A flat tire severely impairs the driving,
steering and braking characteristics of the
vehicle. There is a risk of accident.
Tires without run-flat characteristics:
R do not drive with a flat tire.
R immediately replace the flat tire with your
emergency spare wheel or spare wheel, or
consult a qualified specialist workshop.
Tires with run-flat characteristics:
R pay attention to the information and
warning
notices on MOExtended tires (tires
with run-flat characteristics).
Accessories that are not approved for your
vehicle by Mercedes-Benz or are not being
used correctly can impair the operating
safety. Before purchasing and using non-approved
accessories, visit a qualified specialist
workshop and inquire about:
R
suitability
R legal stipulations
R factory recommendations
Information on the dimensions and types of
wheels
and tires for your vehicle can be found
under "Wheel/tire combinations"
(Y page 389).
Information on air pressure for the tires on
your vehicle can be found:
R on the vehicle's Tire and Loading
Information placard on the B-pillar
(Y page 373)
R on the tire pressure label on the fuel filler
flap ( Y page 170)
R under "Tire pressure" ( Y page 366)
R in the "Tire pressure" section Operation
Information on driving
If the vehicle is heavily laden, check the tire
pressures and correct them if necessary.
While driving, pay attention to vibrations,
noises and unusual handling characteristics,
e.g.
pulling to one side. This may indicate that
the wheels or tires are damaged. If you
suspect that a tire is defective, reduce your
speed immediately. Stop the vehicle as soon
as possible to check the wheels and tires for
damage. Hidden tire damage could also be
causing the unusual handling characteristics.
If you find no signs of damage, have the tires
and wheels checked at a qualified specialist
workshop.
When parking your vehicle, make sure that
the tires do not get deformed by the curb or
other obstacles. If it is necessary to drive over
curbs, speed humps or similar elevations, try
to do so slowly and at an obtuse angle.
Otherwise, the tires, particularly the
sidewalls, may be damaged. 362
Operation
Wheels and tires
Page 365 of 420

Regular checking of wheels and tires
G
WARNING
Damaged tires can cause tire inflation
pressure loss. As a result, you could lose
control of your vehicle. There is a risk of
accident.
Check the tires regularly for signs of damage
and replace any damaged tires immediately.
Regularly check the wheels and tires of your
vehicle
for damage at least once a month, as
well as after driving off-road or on rough
roads. Damaged wheels can cause a loss of
tire pressure. Pay particular attention to
damage such as:
R cuts in the tires
R punctures
R tears in the tires
R bulges on tires
R deformation or severe corrosion on wheels
Regularly check the tire tread depth and the
condition of the tread across the whole width
of the tire (Y page 363). If necessary, turn
the front wheels to full lock in order to inspect
the inner side of the tire surface.
All wheels must have a valve cap to protect
the valve against dirt and moisture. Do not
mount anything onto the valve other than the
standard valve cap or other valve caps
approved by Mercedes-Benz for your vehicle.
Do not use any other valve caps or systems,
e.g. tire pressure monitoring systems.
Regularly check the pressure of all the tires
particularly prior to long trips. Adjust the tire
pressure as necessary ( Y page 366).
Observe the notes on the emergency spare
wheel (Y page 398).
The service life of tires depends on the
following factors amongst other things:
R Driving style
R Tire pressure
R Distance covered Tire tread
G
WARNING
Insufficient tire tread will reduce tire traction.
The tire is no longer able to dissipate water.
This
means that on wet road surfaces, the risk
of hydroplaning increases, in particular where
speed is not adapted to suit the driving
conditions. There is a risk of accident.
If the tire pressure is too high or too low, tires
may exhibit different levels of wear at
different locations on the tire tread. Thus, you
should regularly check the tread depth and
the condition of the tread across the entire
width of all tires.
Minimum tire tread depth for:
R Summer tires: â in (3 mm)
R M+S tires: ã in (4 mm)
For safety reasons, replace the tires before
the legally prescribed limit for the minimum
tire tread depth is reached. Bar indicator : for tread wear is integrated
into the tire tread.
Tread wear indicators (TWI) are required by
law. Six indicators are positioned on the tire
tread. They are visible once the tread depth
is
approximately á in (1.6 mm). If this is the
case, the tire is so worn that it must be
replaced. Operation
363
Wheels and tires Z