MERCEDES-BENZ E-Class WAGON 2016 W213 Owner's Manual
Manufacturer: MERCEDES-BENZ, Model Year: 2016, Model line: E-Class WAGON, Model: MERCEDES-BENZ E-Class WAGON 2016 W213Pages: 350, PDF Size: 6.71 MB
Page 231 of 350
COMAND or deactivate Bluetooth®on your
mob ilephone.
If you no longer want the Bluetooth
®connec-
tion to beestablished automatically, the
mob ilephone must be de-authorized (discon-
nected) (
Ypage 231).
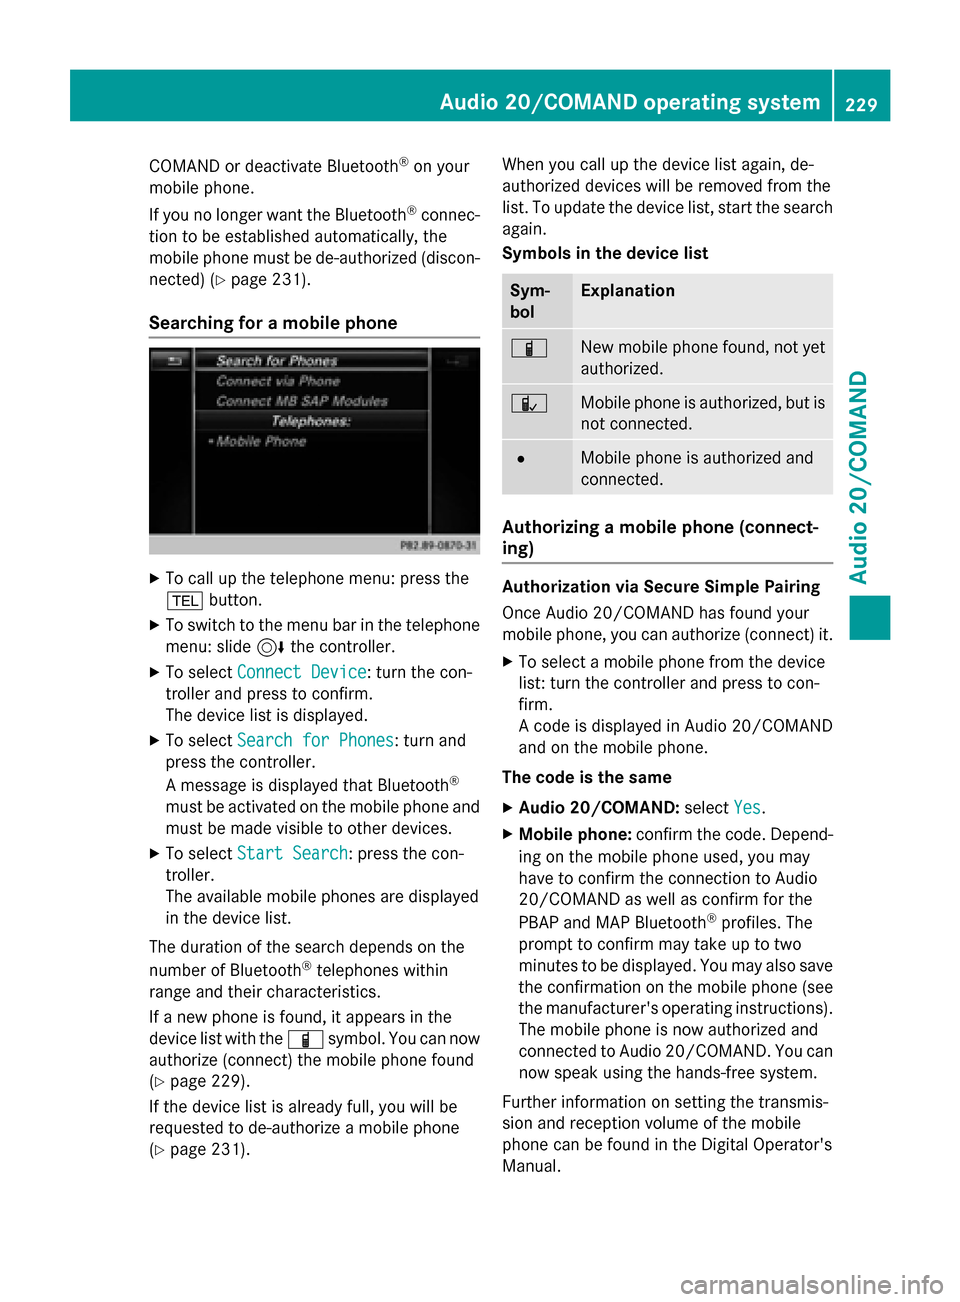
Searching for a mobile phone
XTo call up the telephone menu: press the
% button.
XToswit ch to the menu bar inthe telephone
menu: slide6the controller.
XTo select Connect Device: turn the con-
troller and press to confirm.
The device list isdisplayed.
XTo select Search for Phones: turn and
press the controller.
A message is displayed that Bluetooth
®
must beactivated on the mobile phone and
must bemade vis ibleto other devices.
XTo select Start Search: press the con-
troller.
The available mobile phones are displayed
in the device list.
The duration of the search depends on the
number of Bluetooth
®telephones within
range and their characteristics.
If a new phone is found, itappears in the
device list with theÏ symbol. You can now
authorize (connect) the mobile phone found
(
Ypage 229).
If the device listis already full, you will be
requested to de-authorize a mobile phone
(
Ypage 231). When you call up the device list again, de-
authorized devices
will beremoved from the
list . To update the device list, start the search
again.
Symbols in the device list
Sym-
bolExplanation
ÏNew mobile phone foun d,not yet
authorize d.
ÑMobilephoneisauthorize d,but is
not connected.
#Mobile phoneisauthorized and
connected.
Authorizing a mobile phone (connect-
ing)
Authorization via Secure Simple Pairing
Once Aud io20/COMAND has found your
mobile phone, you can authorize (connect) it.
XTo select a mobile phone from the device
list: turn the controller and press to con-
firm.
A co de is displayed inAud io20/COMAND
and on the mob ilephone.
The code is the same
XAudio 20/COMAND: selectYes.
XMobile phone: confirm the code. Depend-
ing on the mobile phone used, you may
have to confirm the connection to Aud io
20 /CO MAND as wellas confirm for the
PBAP and MAP Bluetooth
®profiles. The
prompt to confirm may take up to two
minutes to be displayed. You may also save
the confirmation on the mobile phone (see
the manufacturer's operating instructions). The mob ilephone isnow authorized and
connected to Aud io20 /CO MAND. You can
now speak using the hands-free system.
Further information on setting the transmis-
sion and reception volume of the mob ile
phone can befound inthe Dig ital Operator's
Manual.
Audio 20/COMAND operating system229
Audio 20/COMAND
Z
Page 232 of 350
The code is different
XAudio 20/COMAND:selectNo.
The process is canceled. Repeat the
authorization.
Authorization via passkey entry (access
code)
Once Audio 20/COMAND has found your
mobile phone, you can authorize (connect) it.
XTo select the Bluetooth®name of the
desired mobile phone in the device list: turn
and press the controller.
The input menu for the passkey is dis-
played.
The passkey is a one- to sixteen-digit num-
ber combination which you can choose
yourself.
XAudio 20/COMAND: enter the passkey
using the character bar.
XSelect ¬once all the numbers have
been entered.
XMobile phone: enter the same passkey
and confirm your entry. Depending on the
mobile phone used, you may have to con-
firm the connection to Audio 20/COMAND as well as confirm for the PBAP and MAP
Bluetooth
®profiles. The prompt to confirm
may take up to two minutes to be dis-
played. You may also save the confirmation
on the mobile phone (see the manufactur-
er's operating instructions).
The mobile phone is now authorized and
connected to Audio 20/COMAND. You can now speak using the hands-free system.
Further information on setting the transmis-
sion and reception volume of the mobile
phone can be found in the Digital Operator's
Manual.
If the
Authorization Failed
message
appears, you may have entered a different
passkey or exceeded the prescribed time
limit. Repeat the procedure.
iSome mobile phones require a passkey
with four or more digits.
iIf you wish to re-authorize the mobile
phone after de-authorizing it, you can
choose another passkey for it.
Establishing the connection from the
mobile phone
The Bluetooth®device name of Audio 20/
COMAND is "MB Bluetooth".
XAudio 20/COMAND: call up the telephone
menu.
XTo switch to the menu bar: slide 6the
controller.
XTo select Connect Device: turn the con-
troller and press to confirm.
The device list is displayed.
XTo select Connect via Phone: turn and
press the controller.
A message is displayed, stating that you
can start the search on your mobile phone.
XMobile phone: start the search for a Blue-
tooth®device (see manufacturer's operat-
ing instructions).
Audio 20/COMAND is displayed with the
name "MB Bluetooth" in the mobile phone's
device list.
XSelect "MB Bluetooth".
A prompt appears in the Audio 20/
COMAND display asking whether the
mobile phone should be authorized.
XAudio 20/COMAND: selectYes.
If No
is selected, the procedure is canceled.
If your mobile phone supports Secure Sim-
ple Pairing, a code is now displayed on both
devices.
The code is the same
XAudio 20/COMAND: selectYes.
XMobile phone: confirm the code. Depend-
ing on the mobile phone used, you may
have to confirm the connection to Audio
20/COMAND as well as confirm for the
PBAP and MAP Bluetooth
®profiles. The
prompt to confirm may take up to two
minutes to be displayed. You may also save
230Audio 20/COMAND operating system
Audio 20/COMAND
Page 233 of 350
the confirmation on the mobile phone (see
the manufacturer's operating instructions).The mobile phone is now authorized and
connected to Audio 20/COMAND. You can
now speak using the hands-free system.
The code is different
XAudio 20/COMAND: selectNo.
The process is canceled. Repeat the pro-
cedure.
If your mobile phone does not support Secure
Simple Pairing, you can find more information
about connecting the mobile phone in the
Digital Operator's Manual.
Reconnecting automatically
Audio 20/COMAND always searches for the
last connected mobile phone.
If no connection can be made to the most
recently connected mobile phone, the system
searches for the mobile phone that was con-
nected before that one.
Switching between mobile phones
If you have authorized more than one mobile
phone, you can switch between the individual
phones.
XTo call up the telephone menu: press the
% button.
XTo show the menu bar: slide 6the con-
troller.
XTo select Connect Device: turn the con-
troller and press to confirm.
The device list is displayed.
XTo select the desired mobile phone: turn
and press the controller.
The selected mobile phone is searched for
and connected if it is within Bluetooth
®
range and if Bluetooth®is activated.
Only one mobile phone can be connected at
any one time. The currently connected mobile
phone is indicated by the #dot in the device
list.
iYou can only switch to another authorized
mobile phone if you are not currently mak- ing a call.
De-authorizing (disconnecting) a mobile
phone
Mercedes-Benz USA, LLC recommends De-
authorization in Audio 20/COMAND and on
the mobile phone. Subsequent authorization
may otherwise fail.
XTo call up the telephone menu: press the
% button.
XTo show the menu bar: slide 6the con-
troller.
XTo select Connect Device: turn the con-
troller and press to confirm.
XTo highlight the desired mobile phone in the
device list: turn the controller.
XTo select G: slide 9the controller.
XTo select Deauthorize: turn and press the
controller.
A prompt appears, asking whether you
really wish to de-authorize this device.
XTo select Yes: turn and press the controller.
The mobile phone is de-authorized.
iBefore re-authorizing the mobile phone,
you should also delete the device name MB
Bluetoothfrom your mobile phone's Blue-
tooth®list.
Using the telephone
Accepting a call
XTo select Accept: press the controller.
or
XPress 6on the multifunction steering
wheel.
The call is accepted.
Further information on the functions you can
use during a call can be found in the Digital
Operator's Manual.
Audio 20/COMAND operating system231
Audio 20/COMAND
Z
Page 234 of 350
iYou can also accept the call by voice com-
mand using the Voice Control System (see
the separate operating instructions).
iIf the phone number of the caller is trans-
ferred, it appears in the display. If the
phone number is saved in the phone book,
the contact's name is also displayed. If the phone number is not transferred,
Unknown
is shown in the display.
Rejecting a call
XTo select Reject: turn the controller and
press to confirm.
or
XPress ~on the multifunction steering
wheel.
Ending an active call
XTo select =in the telephone menu: turn
and press the controller.
or
XPress ~on the multifunction steering
wheel.
The active call is ended.
Making a call
Using the telephone menu
XTo call up the telephone menu: press the
% button.
XTo select all numbers one after the other in
the telephone menu: turn and press the
controller each time.
XTo select win the telephone menu: turn
and press the controller.
The call is made.
Using call lists
XTo call up the telephone menu: press the
% button.
XTo switch to the menu bar: slide 6the
controller.
XTo select Call Lists: turn and press the
controller.
XTo select Calls ReceivedorCalls
Dialed: turn and press the controller.
The relevant list is displayed.
XTo select an entry and make a call: turn and
press the controller.
Using the phone book
XTo call up the telephone menu: press the
% button.
XTo select Namein the telephone menu: turn
and press the controller.
The phone book is displayed with an active
character bar.
XTo select characters: turn the controller
and press to confirm.
The first contact with the selected first
character is highlighted in the phone book.
XSelect the characters of the contact you are
searching for one by one, pressing and con- firming with the controller each time.
XTo end the search: select ¬.
The contacts in the phone book are dis-
played.
XTo select a contact: turn and press the con-
troller.
If a contact contains more than one phone
number:
XTo select a telephone number: turn and
press the controller.
Further information on the phone book can be
found in the Digital Operator's Manual.
Setting up an Internet connection
Procedure and general information
USA: to use Mercedes-Benz Apps and Inter-
net access, mbrace must be activated and
operational. Furthermore, mbrace must be
activated for Mercedes-Benz Apps and Inter-
net access. No further settings are required.
Canada: in order to set up a mobile phone for
Internet access, your mobile phone must be
connected via Bluetooth
®to Audio 20/
COMAND. If you are using Internet access for
232Audio 20/COMAND operating system
Audio 20/COMAND
Page 235 of 350
the first time, you must enable the connected
mobile phone for Internet access
(
Ypage 233). If the connected mobile phone
supports the Bluetooth®PAN profile, you do
not need to make additional settings. The
Internet connection is established. If the con-
nected mobile phone does not support the
named Bluetooth
®profile, predefined
(
Ypage 233) or manual access data
(
Ypage 233) must be set.
Enabling the mobile phone for Internet
access
XTo call up the telephone menu: press the
% button.
XTo switch to the main function bar: slide
5the controller.
XTo select TEL/®: press the controller.
XTo selectInternet: turn and press the
controller.
The menu with the Internet functions is dis-
played.
XTo switch to the menu bar: slide 6the
controller.
XTo select Settings: turn and press the
controller.
XTo select Configure Internet Set‐
tings: turn and press the controller.
The device list is displayed.
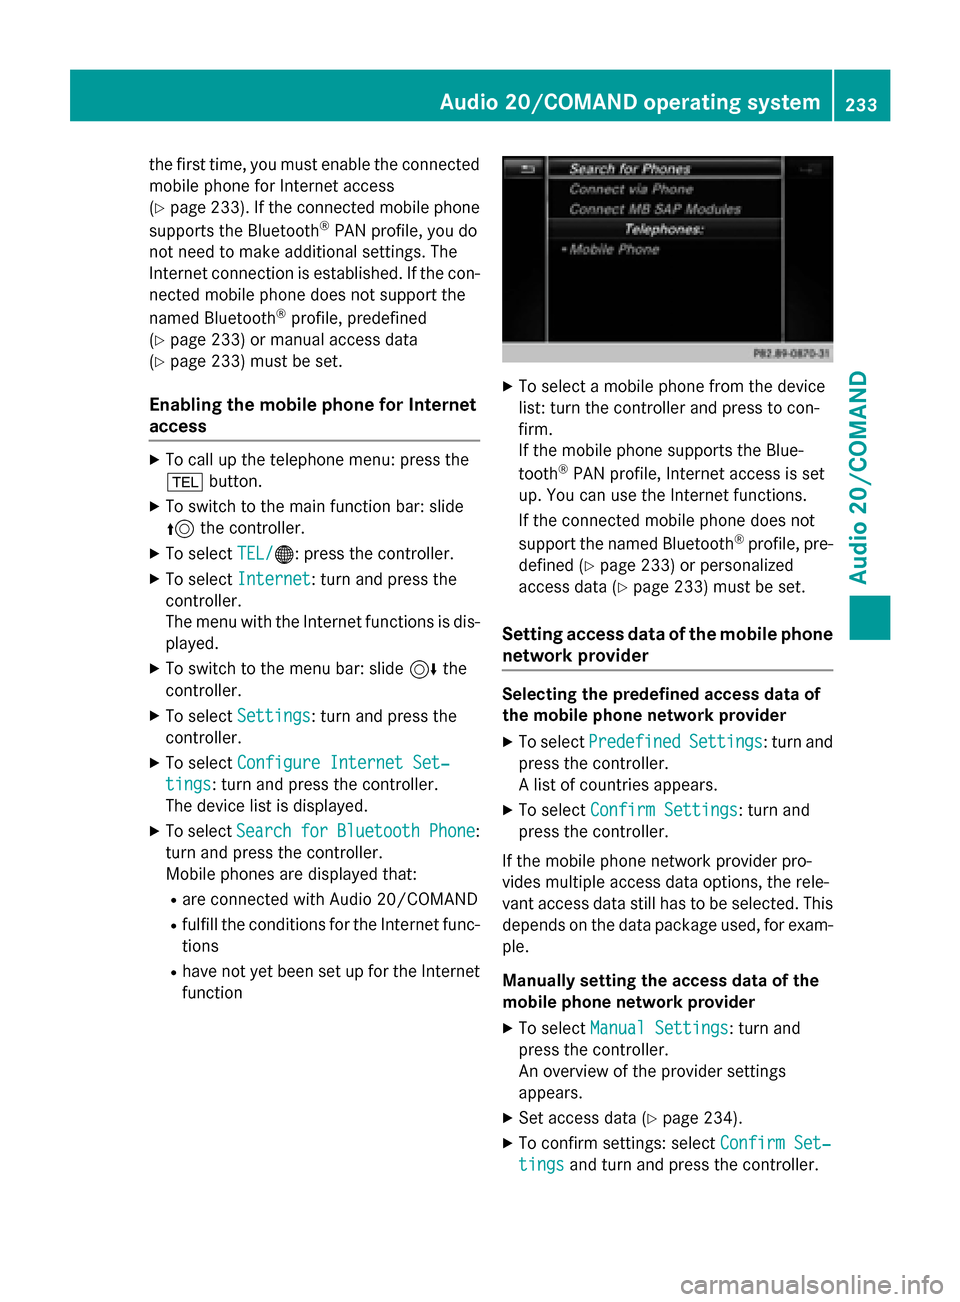
XTo select SearchforBluetoothPhone:
turn and press the controller.
Mobile phones are displayed that:
Rare connected with Audio 20/COMAND
Rfulfill the conditions for the Internet func-
tions
Rhave not yet been set up for the Internet
function
XTo select a mobile phone from the device
list: turn the controller and press to con-
firm.
If the mobile phone supports the Blue-
tooth
®PAN profile, Internet access is set
up. You can use the Internet functions.
If the connected mobile phone does not
support the named Bluetooth
®profile, pre-
defined (
Ypage 233) or personalized
access data (
Ypage 233) must be set.
Setting access data of the mobile phone
network provider
Selecting the predefined access data of
the mobile phone network provider
XTo select PredefinedSettings: turn and
press the controller.
A list of countries appears.
XTo select Confirm Settings: turn and
press the controller.
If the mobile phone network provider pro-
vides multiple access data options, the rele-
vant access data still has to be selected. This
depends on the data package used, for exam-
ple.
Manually setting the access data of the
mobile phone network provider
XTo select Manual Settings: turn and
press the controller.
An overview of the provider settings
appears.
XSet access data (Ypage 234).
XTo confirm settings: select Confirm Set‐
tingsand turn and press the controller.
Audio 20/COMAND operating system233
Audio 20/COMAND
Z
Page 236 of 350
The access data for the mobile phone net-
work provider is selected once for the mobile
phone connected and is loaded again each
time the mobile phone is connected.
You must set the access data of the mobile
phone network provider who provides the
SIM card and the associated data package
(access settings) for the connected mobile
phone. The access data remains the same
when you are in a different country (roaming).
The access data of another network isnot
selected.
Setting access data
Set the access data in accordance with your
data package. You can contact your mobile
phone network provider to obtain the precise
access data.
Explanation of the access data
Input fieldMeaning
Phone Num‐
ber:
Access number for estab-
lishing the connection
The access number
depends on the mobile
phone used. For GSM/
UMTS mobile phones,
*99***1#
is used as a
standard.
Access
Point:
APN network access point
(Access PointName)
You can obtain this infor-
mation from your mobile
phone network provider.
Entry is not necessary for
all mobile phone network
providers and mobile
phones.
PDP Type:Internet protocol used.
You can obtain this infor-
mation from your mobile
phone network provider.
Input fieldMeaning
User ID:The user identification
can be obtained from your
mobile phone network
provider.
Entry is not necessary for
all mobile phone network
providers.
Password:The password can be
obtained from your
mobile phone network
provider.
Entry is not necessary for
all mobile phone network
providers.
Auto DNS:Automatic allocation of
DNS servers is activated.
If the function is deactiva-
ted, the DNS server
addresses must be
entered manually.
DNS ( Domain Name
Service)
DNS1:
DNS2:
Fields for entering the
DNS server addresses
manually. The address
can be obtained from your
mobile phone network
provider.
Radio mode
Switching to
XPress the $button.
The radio display appears. You will hear the
last station played on the last waveband
selected.
234Audio 20/COMAND operating system
Audio 20/COMAND
Page 237 of 350
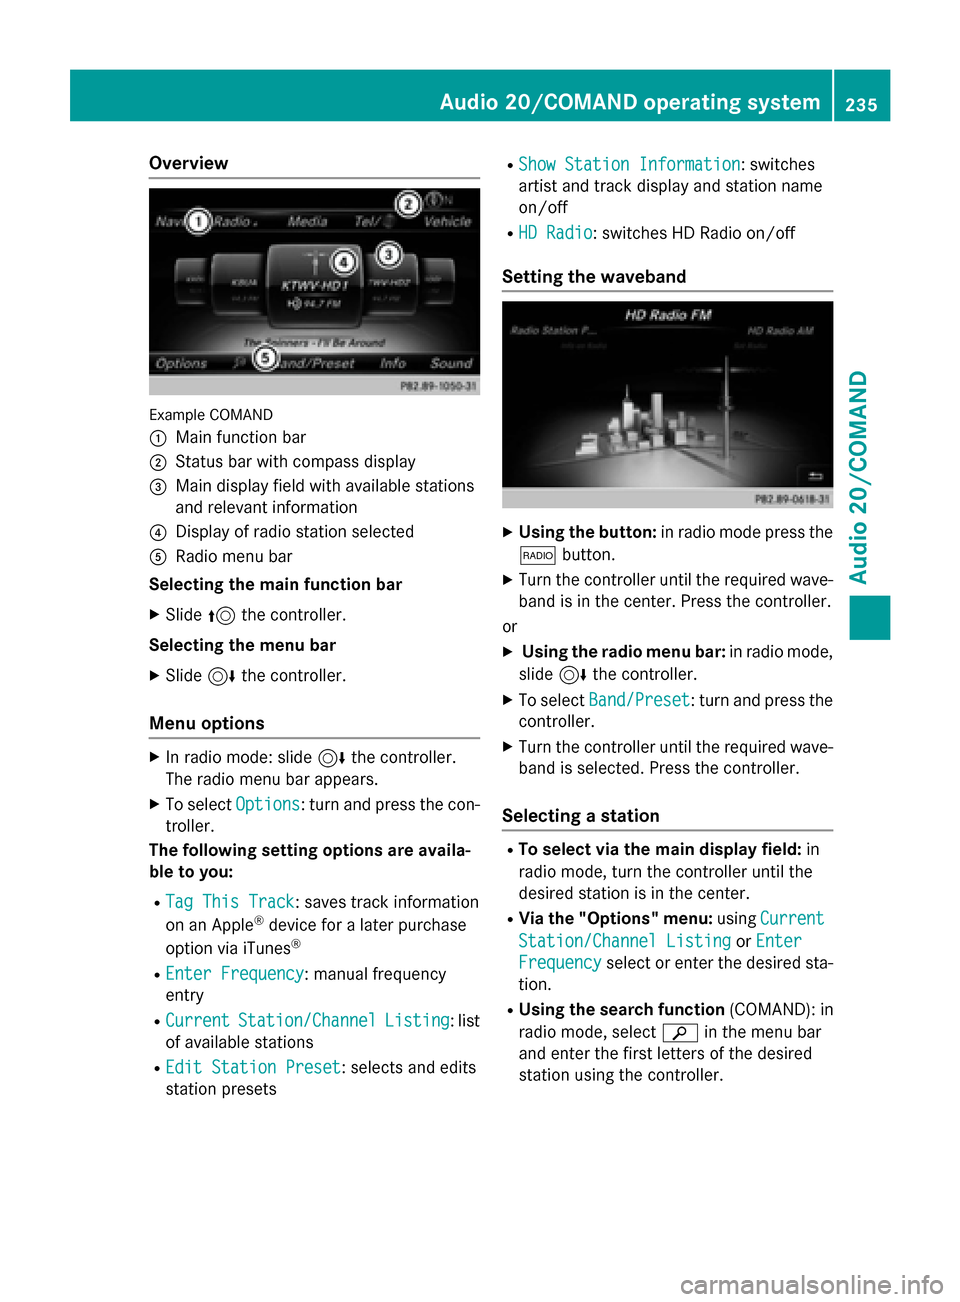
Overview
Example COMAND
:
Main function bar
;Status bar with compass display
=Main display field with available stations
and relevant information
?Display of radio station selected
ARadio menu bar
Selecting the main function bar
XSlide 5the controller.
Selecting the menu bar
XSlide 6the controller.
Menu options
XIn radio mode: slide 6the controller.
The radio menu bar appears.
XTo select Options: turn and press the con-
troller.
The following setting options are availa-
ble to you:
RTag This Track: saves track information
on an Apple®device for a later purchase
option via iTunes®
REnter Frequency: manual frequency
entry
RCurrentStation/ChannelListing: list
of available stations
REdit Station Preset: selects and edits
station presets
RShow Station Information: switches
artist and track display and station name
on/off
RHD Radio: switches HD Radio on/off
Setting the waveband
XUsing the button: in radio mode press the
$ button.
XTurn the controller until the required wave-
band is in the center. Press the controller.
or
XUsing the radio menu bar: in radio mode,
slide 6the controller.
XTo select Band/Preset: turn and press the
controller.
XTurn the controller until the required wave-
band is selected. Press the controller.
Selecting a station
RTo select via the main display field: in
radio mode, turn the controller until the
desired station is in the center.
RVia the "Options" menu: usingCurrent
Station/Channel ListingorEnter
Frequencyselect or enter the desired sta-
tion.
RUsing the search function (COMAND): in
radio mode, select èin the menu bar
and enter the first letters of the desired
station using the controller.
Audio 20/COMAND operating system235
Audio 20/COMAND
Z
Page 238 of 350
Radio text/radio text plus
This function is not available in all countries.
XTo switch on radio text:in radio mode,
select Info
in the menu bar.
Additional information from the current
station is displayed.
236Audio 20/COMAND operating system
Audio 20/COMAND
Page 239 of 350
Useful information............................238
Stowage areas ................................... 238
Features ............................................. 251
237
Stowage and features
Page 240 of 350
Useful information
i
This Operator's Manual describes all
models and all standard and optional equip-
ment of your vehicle available at the time of
publication of the Operator's Manual.
Country-specific differences are possible.
Please note that your vehicle may not be
equipped with all features described. This
also applies to safety-related systems and
functions.
iRead the information on qualified special-
ist workshops (
Ypage 31).
Stowage areas
Loading guidelines
GWARNING
If objects, luggage or loads are not secured or
not secured sufficiently, they could slip, tip
over or be flung around and thereby hit vehicle
occupants. There is a risk of injury, particu-
larly in the event of sudden braking or a sud-
den change in direction.
Always store objects so that they cannot be
flung around. Secure objects, luggage or
loads against slipping or tipping before the
journey.
GWARNING
Combustion engines emit poisonous exhaust
gases such as carbon monoxide. Exhaust
gases can enter the vehicle interior if the
trunk lid/tailgate is open when the engine is
running, especially if the vehicle is in motion.
There is a risk of poisoning.
Always switch off the engine before opening
the trunk lid/tailgate. Never drive with the
trunk lid/tailgate open.
GWARNING
The exhaust tail pipe and tail pipe trim can
become very hot. If you come into contact
with these parts of the vehicle, you could burn
yourself. There is a risk of injury.
Always be particularly careful around the
exhaust tail pipe and the tail pipe trim. Allow
these components to cool down before touch-
ing them.
The handling characteristics of a laden vehi-
cle are dependent on the distribution of the
load within the vehicle. For this reason, you
should observe the following notes when
transporting a load:
RNever exceed the maximum permissible
gross vehicle mass or the gross axle weight
rating for the vehicle (including occupants).
The values are specified on the vehicle
identification plate on the B-pillar of the
driver's door.
RThe trunk/cargo compartment is the pre-
ferred place to store objects.
RPosition heavy loads as far forwards as pos-
sible and as low down in the trunk/cargo
compartment as possible.
RThe load must not protrude above the
upper edge of the seat backrests.
RAlways place the load against the rear or
front seat backrests. Make sure that the
seat backrests are securely locked into
place.
RAlways place the load behind unoccupied
seats if possible.
RUse the cargo tie-down rings and the parcel
nets to transport loads and luggage.
RUse cargo tie-down rings and fastening
materials appropriate for the weight and
size of the load.
RWhen transporting objects in the cargo
compartment, the combined cargo cover
and net must always be installed (cargo
compartment cover and cargo net).
RSecure the load with sufficiently strong and
wear-resistant tie-downs. Pad sharp edges
for protection.
238Stowage areas
Stowage and features