display MERCEDES-BENZ E-Class WAGON 2016 W213 Workshop Manual
[x] Cancel search | Manufacturer: MERCEDES-BENZ, Model Year: 2016, Model line: E-Class WAGON, Model: MERCEDES-BENZ E-Class WAGON 2016 W213Pages: 350, PDF Size: 6.71 MB
Page 163 of 350
When DISTRONIC PLUS is activated, the
transmission is shifted automatically to posi-
tionPif:
Rthe driver's door is open and the driver's
seat belt is unfastened.
Rthe engine is switched off, unless it is auto-
matically switched off by the ECO start/
stop function.
Ra system malfunction occurs.
Rthe power supply is not sufficient.
Information in the Digital Operator's
Manual
In the Digital Operator's Manual you will find
information on the following topics:
RSetting a speed
RSetting the specified minimum distance
RDISTRONIC PLUS displays in the instru-
ment cluster
Deactivating DISTRONIC PLUS
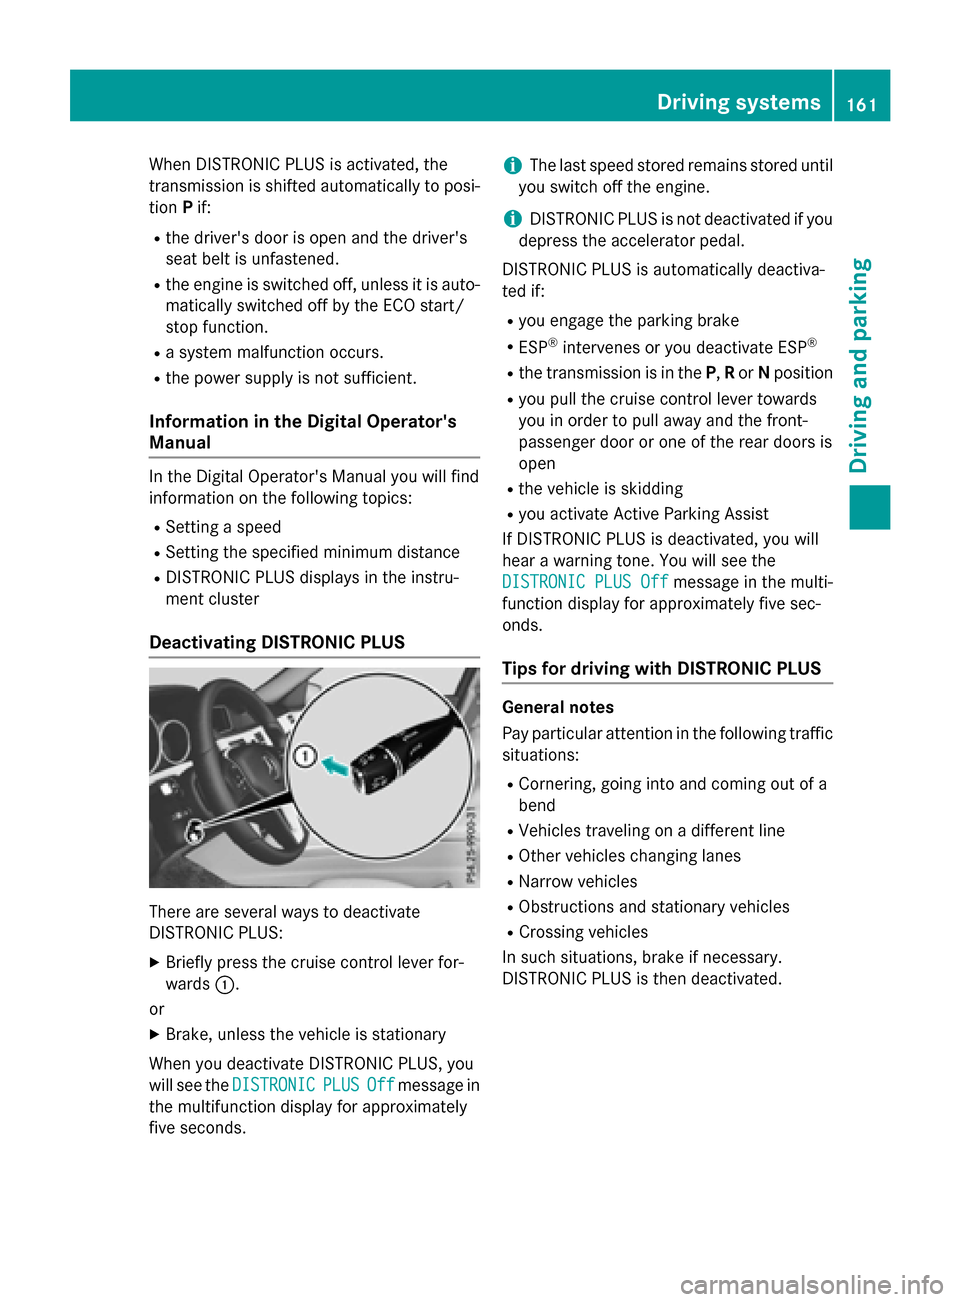
There are several ways to deactivate
DISTRONIC PLUS:
XBriefly press the cruise control lever for-
wards :.
or
XBrake, unless the vehicle is stationary
When you deactivate DISTRONIC PLUS, you
will see the DISTRONIC
PLUSOffmessage in
the multifunction display for approximately
five seconds.
iThe last speed stored remains stored until
you switch off the engine.
iDISTRONIC PLUS is not deactivated if you
depress the accelerator pedal.
DISTRONIC PLUS is automatically deactiva-
ted if:
Ryou engage the parking brake
RESP®intervenes or you deactivate ESP®
Rthe transmission is in the P,Ror Nposition
Ryou pull the cruise control lever towards
you in order to pull away and the front-
passenger door or one of the rear doors is
open
Rthe vehicle is skidding
Ryou activate Active Parking Assist
If DISTRONIC PLUS is deactivated, you will
hear a warning tone. You will see the
DISTRONIC PLUS Off
message in the multi-
function display for approximately five sec-
onds.
Tips for driving with DISTRONIC PLUS
General notes
Pay particular attention in the following traffic
situations:
RCornering, going into and coming out of a
bend
RVehicles traveling on a different line
ROther vehicles changing lanes
RNarrow vehicles
RObstructions and stationary vehicles
RCrossing vehicles
In such situations, brake if necessary.
DISTRONIC PLUS is then deactivated.
Driving systems161
Driving and parking
Z
Page 166 of 350
The support provided by the system can be
impaired if:
Rthere is poor visibility, e.g. due to insuffi-
cient illumination of the road, or due to
snow, rain, fog or spray
Rthere is glare, e.g. from oncoming traffic,
the sun or reflections (e.g. when the road
surface is wet)
Rthe windshield is dirty, fogged up, damagedor covered, for instance by a sticker, in the
vicinity of the camera
Rno, or several, unclear lane markings are
present for one lane, e.g. in a construction
area
Rthe lane markings are worn away, dark or
covered up, e.g. by dirt or snow
Rthe distance to the vehicle in front is too
small and the lane markings thus cannot be
detected
Rthe lane markings change quickly, e.g.
lanes branch off, cross one another or
merge
Rthe road is narrow and winding
Rthere are strong shadows cast on the road
The system is switched to passive and no lon-
ger assists you by performing steering inter-
ventions if:
Ryou actively change lanes
Ryou switch on the turn signal
Rtake your hands off the steering wheel or do
not steer for a prolonged period of time
iAfter you have finished changing lanes,
Steering Assist and Stop&Go Pilot are auto-
matically active again.
DISTRONIC PLUS Steering Assist does not
provide assistance:
Ron very sharp corners
Rwhen a loss of tire pressure or a defective
tire has been detected and displayed.
Pay attention also to the important safety
notes for DISTRONIC PLUS (
Ypage 157).
The steering interventions are carried out
with a limited steering moment. The system requires the driver to keep his hands on the
steering wheel and to steer himself.
If you do not steer yourself or if you take your
hands off the steering wheel for a prolonged
period of time, the system will first alert you
with a visual warning. A steering wheel sym-
bol appears in the multifunction display. If you
have still not started to steer and have not
taken hold of the steering wheel
after five
seconds at t
he latest, a warning tone also
sounds to remind you to take control of the
vehicle. Steering Assist and Stop&Go Pilot are
switched to passive. DISTRONIC PLUS
remains active.
Activating Steering Assist and Stop&Go
Pilot
XActivate the DISTRONIC PLUS with Steer-
ing Assist and Stop&Go Pilot function using
the on-board computer (
Ypage 190).
The DTR+:
SteeringAssistantOnmes-
sage appears in the multifunction display.
Steering Assist and Stop&Go Pilot are
active.
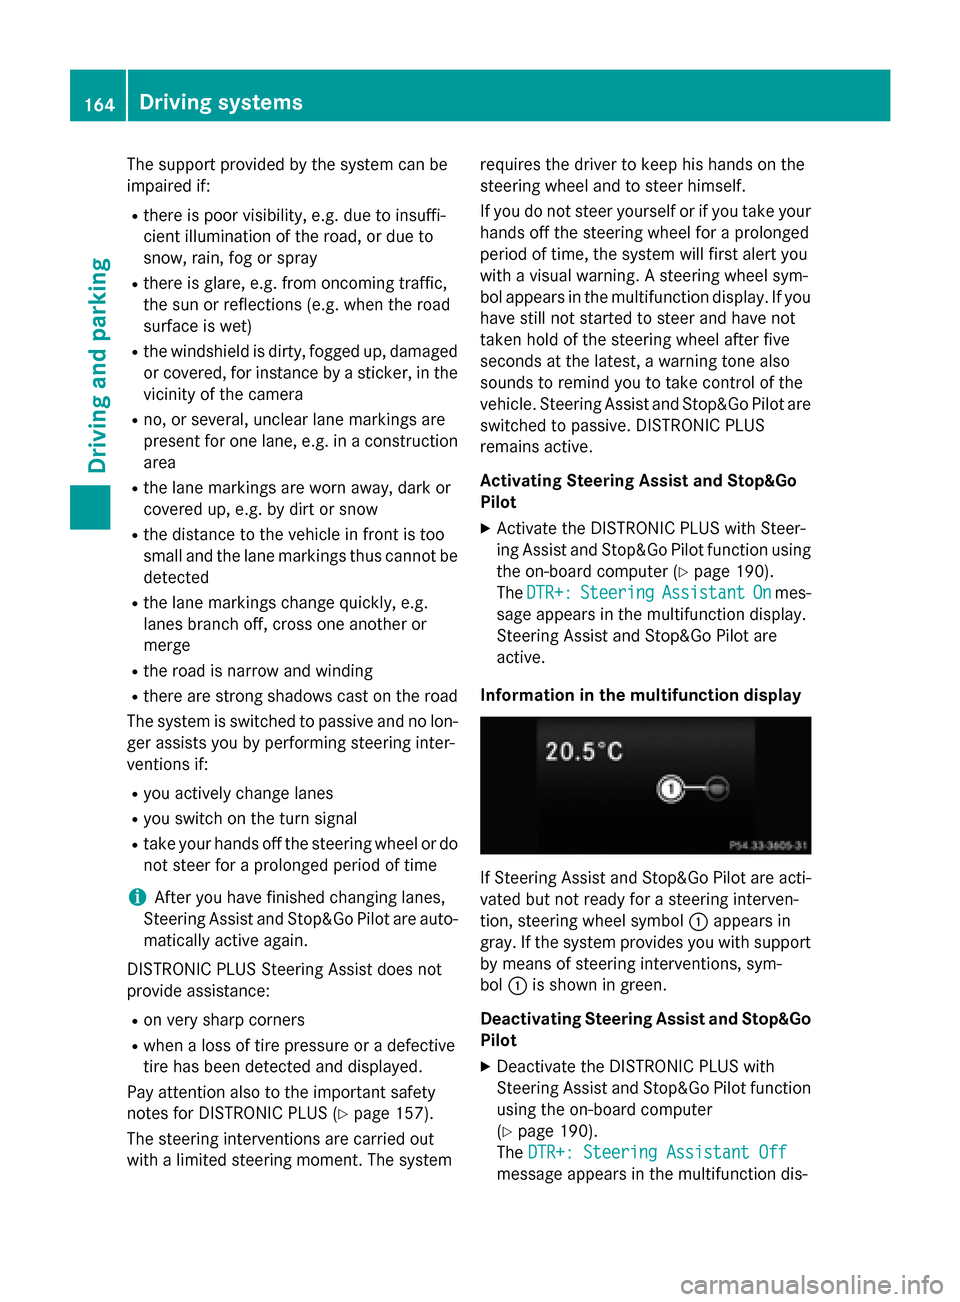
Information in the multifunction display
If Steering Assist and Stop&Go Pilot are acti-
vated but not ready for a steering interven-
tion, steering wheel symbol :appears in
gray. If the system provides you with support
by means of steering interventions, sym-
bol :is shown in green.
Deactivating Steering Assist and Stop&Go Pilot
XDeactivate the DISTRONIC PLUS with
Steering Assist and Stop&Go Pilot function
using the on-board computer
(
Ypage 190).
The DTR+: Steering Assistant Off
message appears in the multifunction dis-
164Driving systems
Driving and parking
Page 167 of 350
play. Steering Assist and Stop&Go Pilot are
deactivated.
When DISTRONIC PLUS is deactivated or not
available, Steering Assist and Stop&Go Pilot
are deactivated automatically.
HOLD function
General notes
The HOLD function can assist the driver in the
following situations:
Rwhen pulling away, especially on steep
slopes
Rwhen maneuvering on steep slopes
Rwhen waiting in traffic
The vehicle is kept stationary without the
driver having to depress the brake pedal.
The braking effect is canceled and the HOLD
function deactivated when you depress the
accelerator pedal to pull away.
Important safety notes
GWARNING
When leaving the vehicle, it can still roll away despite being braked by the HOLD function if:
Rthere is a malfunction in the system or in
the voltage supply.
Rthe HOLD function has been deactivated by
pressing the accelerator pedal or the brake
pedal, e.g. by a vehicle occupant.
Rthe electrical system in the engine com-
partment, the battery or the fuses have
been tampered with.
Rthe battery is disconnected
There is a risk of an accident.
If you wish to exit the vehicle, always turn off the HOLD function and secure the vehicle
against rolling away.
!If DISTRONIC PLUS or the HOLD function
is activated, the vehicle brakes automati-
cally in certain situations. To prevent damage to the vehicle, deacti-
vate DISTRONIC PLUS and the HOLD func-
tion in the following or other similar situa-
tions:
Rwhen towing the vehicle
Rin the car wash
Activation conditions
You can activate the HOLD function if:
Rthe vehicle is stationary
Rthe engine is running or if it has been auto-
matically switched off by the ECO start/
stop function
Rthe driver's door is closed or your seat beltis fastened
Rthe parking brake is released
Rthe transmission is in position D,Ror N
RDISTRONIC PLUS is deactivated
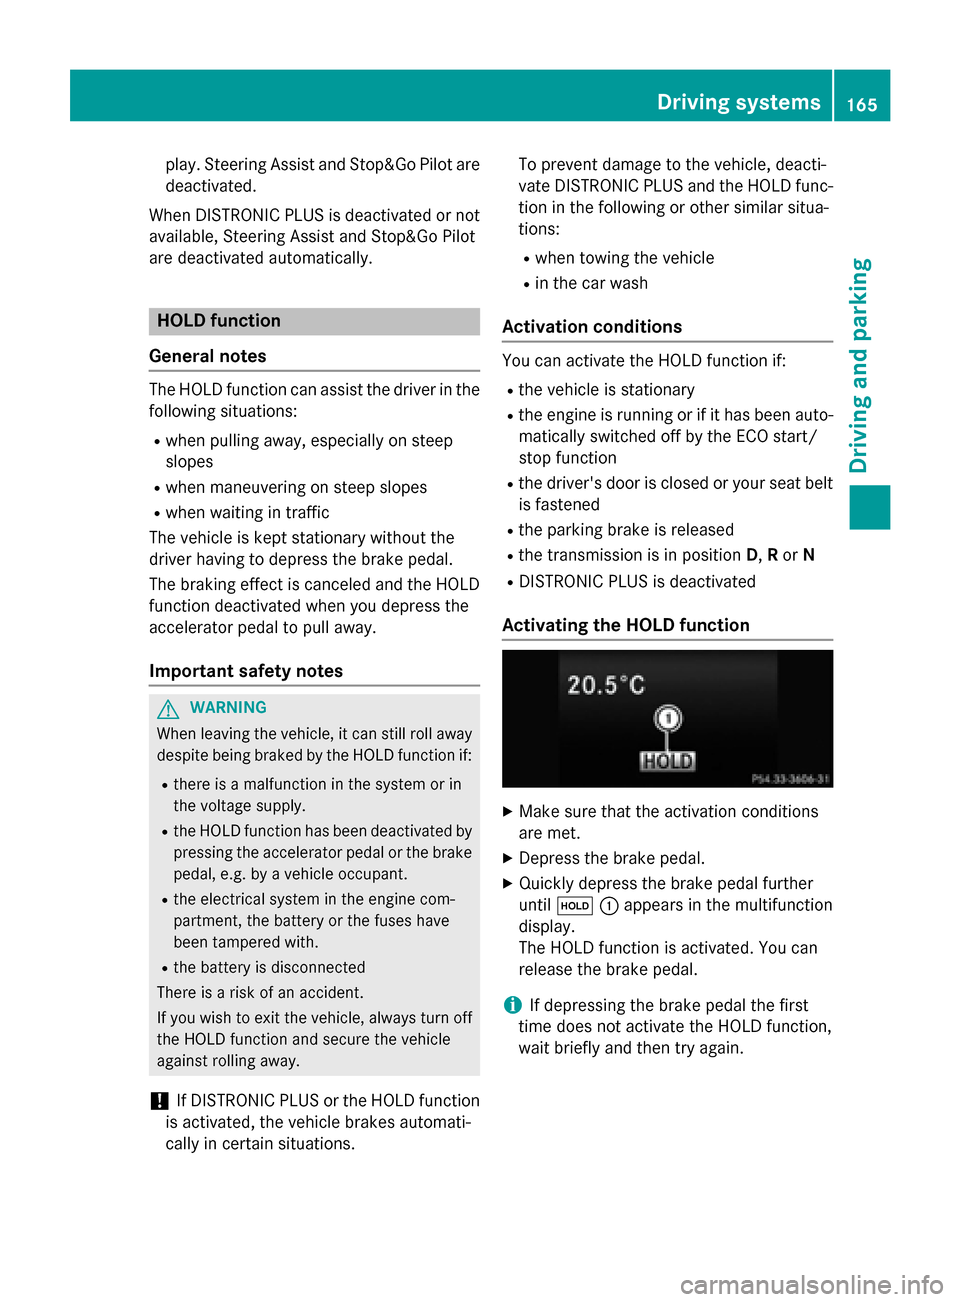
Activating the HOLD function
XMake sure that the activation conditions
are met.
XDepress the brake pedal.
XQuickly depress the brake pedal further
until ë :appears in the multifunction
display.
The HOLD function is activated. You can
release the brake pedal.
iIf depressing the brake pedal the first
time does not activate the HOLD function,
wait briefly and then try again.
Driving systems165
Driving and parking
Z
Page 168 of 350
Deactivating theHOL Dfunction
The HOLD function is deactivated automati-
cally if:
Ryou accelerat eand th etransmissio nis in
position Dor R.
Ryou shift th etransmissio nto position P.
Ryou depress th ebrake peda lagain wit h a
certain amount of pressure until ëdis-
appears from th emultifunction display.
Ryou activat eDISTRONIC PLUS.
Whe nth eHOLD function is activated, th e
transmissio nis shifted automatically to posi-
tion Pif:
Rthedriver's doo ris ope nand th edriver's
seat belt is unfastened.
Rth eengin eis switched off, unless it is auto-
matically switched of fby th eEC Ostart /
stop function .
Rasystem malfunction occurs.
Rth epowe rsupply is no tsufficient.
RACE START
Important safet ynotes
iObserv eth esafet ynote sfo rth eSPORT
handlin gmode (
Ypage 82).
RAC ESTART is intended solely fo ractivation
on dedicated rac ecircuits.
RAC ESTART enables optimal acceleration
from astandin gstart .The precondition fo r
this is asuitable high-grip road surface.
iRAC ESTART is only available in AM Gvehi-
cles.
Information in th eDigital Operator's
Manual
In th eDigital Operator's Manual you will fin d
information on th efollowing topics:
RCondition sfo ractivation
RActivatin gRAC ESTART
AIRMATI C
Vehicl elevel
Important safet ynotes
GWARNING
Whe nth evehicle is bein glowered ,people
could becom etrappe dif their limbs are
between th evehicle bod yand th ewheels or
underneat hth evehicle. There is aris kof
injury.
Mak esur eno on eis underneat hth evehicle or
in th eimmediate vicinit yof th ewhee larches
when th evehicle is bein glowered .
GWARNING
Vehicles wit hlevel control:
The vehicle is slightly lowered if:
Ryou hav eselecte dcomfor tsuspensio ntun-
in g and
Ryou loc kth evehicle within approximately
60 seconds of switchin gof fth eengin e
You and people in th evicinit yof th ewhee l
arc hor th eunderbody may thus becom etrap-
ped. There is aris kof injury.
Mak esur ethat nobod yis in th evicinit yof th e
whee larc hor th eunderbody when you loc k
th evehicle.
!The vehicle is lowered by about 15 mm if:
Ryou hav eselecte d"Comfort tuning "
Ryou switch offth eengin eand then
Ryou loc kth evehicle within approximately
60 seconds
Whe nparking ,position your vehicle so that
it doe sno tmak econtact wit hth ecur bas
th evehicle is lowered .Your vehicle could
otherwise be damaged .
If you unloc kth evehicle within 60 seconds of
havin gswitched th eengin eoff, th evehicle is
lowered slightly when Comfort suspensio n
mode is selected.
Your vehicle regulates it sheight automati-
cally. All-round level contro lensures th ebes t
possible suspensio nand constant groun d
166Driving systems
Driving and parking
Page 169 of 350
clearance, even with a laden vehicle. Further
general information on the vehicle level can
be found in the Digital Operator's Manual.
Setting the vehicle level
Select the "Normal" setting for normal road
surfaces and "Raised" for driving with snow
chains or on particularly poor road surfaces.
Your selection remains stored even if you
remove the SmartKey from the ignition lock.
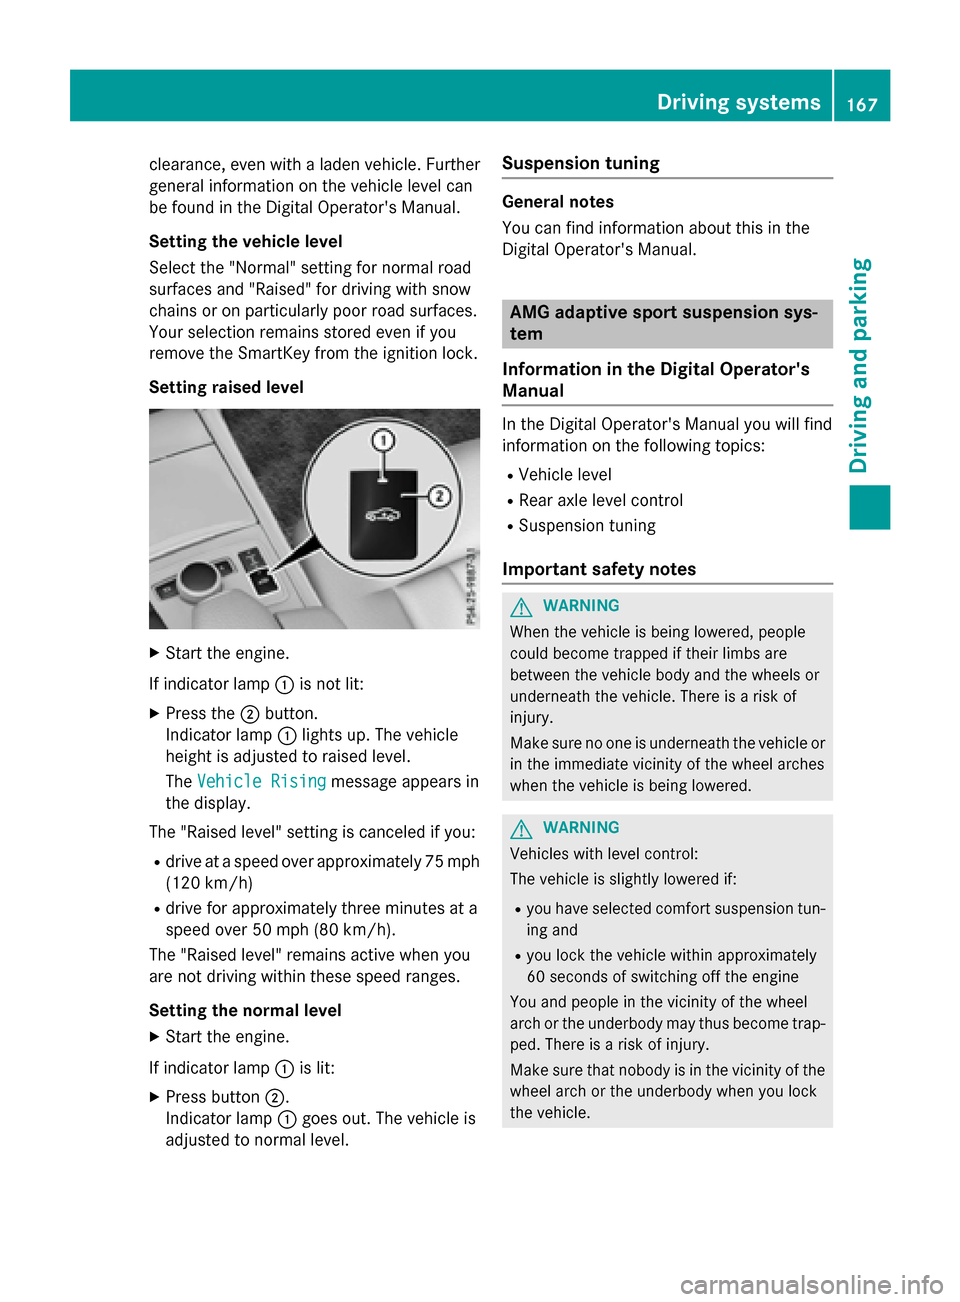
Setting raised level
XStart the engine.
If indicator lamp :is not lit:
XPress the ;button.
Indicator lamp :lights up. The vehicle
height is adjusted to raised level.
The Vehicle Rising
message appears in
the display.
The "Raised level" setting is canceled if you:
Rdrive at a speed over approximately 75 mph
(120 km/h)
Rdrive for approximately three minutes at a
speed over 50 mph (80 km/h).
The "Raised level" remains active when you
are not driving within these speed ranges.
Setting the normal level
XStart the engine.
If indicator lamp :is lit:
XPress button ;.
Indicator lamp :goes out. The vehicle is
adjusted to normal level.
Suspension tuning
General notes
You can find information about this in the
Digital Operator's Manual.
AMG adaptive sport suspension sys-
tem
Information in the Digital Operator's
Manual
In the Digital Operator's Manual you will find
information on the following topics:
RVehicle level
RRear axle level control
RSuspension tuning
Important safety notes
GWARNING
When the vehicle is being lowered, people
could become trapped if their limbs are
between the vehicle body and the wheels or
underneath the vehicle. There is a risk of
injury.
Make sure no one is underneath the vehicle or
in the immediate vicinity of the wheel arches
when the vehicle is being lowered.
GWARNING
Vehicles with level control:
The vehicle is slightly lowered if:
Ryou have selected comfort suspension tun-
ing and
Ryou lock the vehicle within approximately
60 seconds of switching off the engine
You and people in the vicinity of the wheel
arch or the underbody may thus become trap-
ped. There is a risk of injury.
Make sure that nobody is in the vicinity of the
wheel arch or the underbody when you lock
the vehicle.
Driving systems167
Driving and parking
Z
Page 172 of 350

Front sensors
CenterApprox. 40 in (approx.
100 cm)
CornersApprox. 24 in (approx.
60 cm)
Rear sensors
CenterApprox. 48 in (approx.
120 cm)
CornersApprox. 32 in (approx.
80 cm)
Minimum distance
CenterApprox. 8 in (approx.
20 cm)
CornersApprox. 6 in (approx.
15 cm)
If there is an obstacle within this range, the
relevant warning displays light up and a warn-
ing tone sounds. If the distance falls below
the minimum, the distance may no longer be
shown.
Information in the Digital Operator's
Manual
In the Digital Operator's Manual you will find
information on the following topics:
RWarning displays
RDeactivating/activating PARKTRONIC
RProblems with PARKTRONIC
Active Parking Assist
General notes
Active Parking Assist is an electronic parking
aid with ultrasound. It measures the road on
both sides of the vehicle. A parking symbol
indicates a suitable parking space. Active
steering intervention and brake application can assist you during parking. You may also
use PARKTRONIC (
Ypage 168).
iThe active braking application is only
available on vehicles with automatic trans-
mission.
Important safety notes
Active Parking Assist is merely an aid. It is not
a replacement for your attention to your
immediate surroundings. You are always
responsible for safe maneuvering, parking
and exiting a parking space. Make sure that
no persons, animals or objects are in the
maneuvering range.
When PARKTRONIC is switched off, Active
Parking Assist is also unavailable.
GWARNING
If there are objects above the detection range:
RActive Park Assist may steer too early
Rthe vehicle may not stop in front of these
objects.
You may cause a collision as a result. There is
a risk of an accident.
If there are objects above the detection range,
stop and deactivate Active Parking Assist.
GWARNING
While parking or pulling out of a parking
space, the vehicle swings out and can drive
onto areas of the oncoming lane. This could
result in a collision with another road user.
There is a risk of an accident.
Pay attention to other road users. Stop the
vehicle if necessary or cancel the Active Park- ing Assist parking procedure.
!If unavoidable, you should drive over
obstacles such as curbs slowly and not at a
sharp angle. Otherwise, you may damage
the wheels or tires.
170Driving systems
Driving and parking
Page 173 of 350
Active Parking Assist may possibly indicate
parking spaces which are not suitable for
parking, for example:
Rwhere parking or stopping is prohibited
Rin front of driveways or entrances and exits
Ron unsuitable surfaces
Parking tips:
ROn narrow roads, drive as close to the park-
ing space as possible.
RParking spaces that are littered or over-
grown might be identified or measured
incorrectly.
RParking spaces that are partially occupied
by trailer drawbars might not be identified
as such or be measured incorrectly.
RSnowfall or heavy rain may lead to a parking
space being measured inaccurately.
RPay attention to the PARKTRONIC
(
Ypage 170 )warning messages during the
parking procedure.
RYou can intervene in the steering procedure
to correct it at any time. Active Parking
Assist will then be canceled.
RWhen transporting a load which protrudes
from your vehicle, you should not use
Active Parking Assist.
RNever use Active Parking Assist when snow
chains are installed.
RMake sure that the tire pressures are
always correct. This has a direct influence
on the parking characteristics of the vehi-
cle.
Use Active Parking Assist for parking spaces:
Rparallel or at right angles to the direction of
travel
Rthat are on straight roads, not bends
Rthat are on the same level as the road, e.g.
not on the pavement
Information in the Digital Operator's
Manual
In the Digital Operator's Manual you will find
information on the following topics:
RDetecting parking spaces
RParking
RExiting a parking space
RCanceling Active Parking Assist
Rear view camera
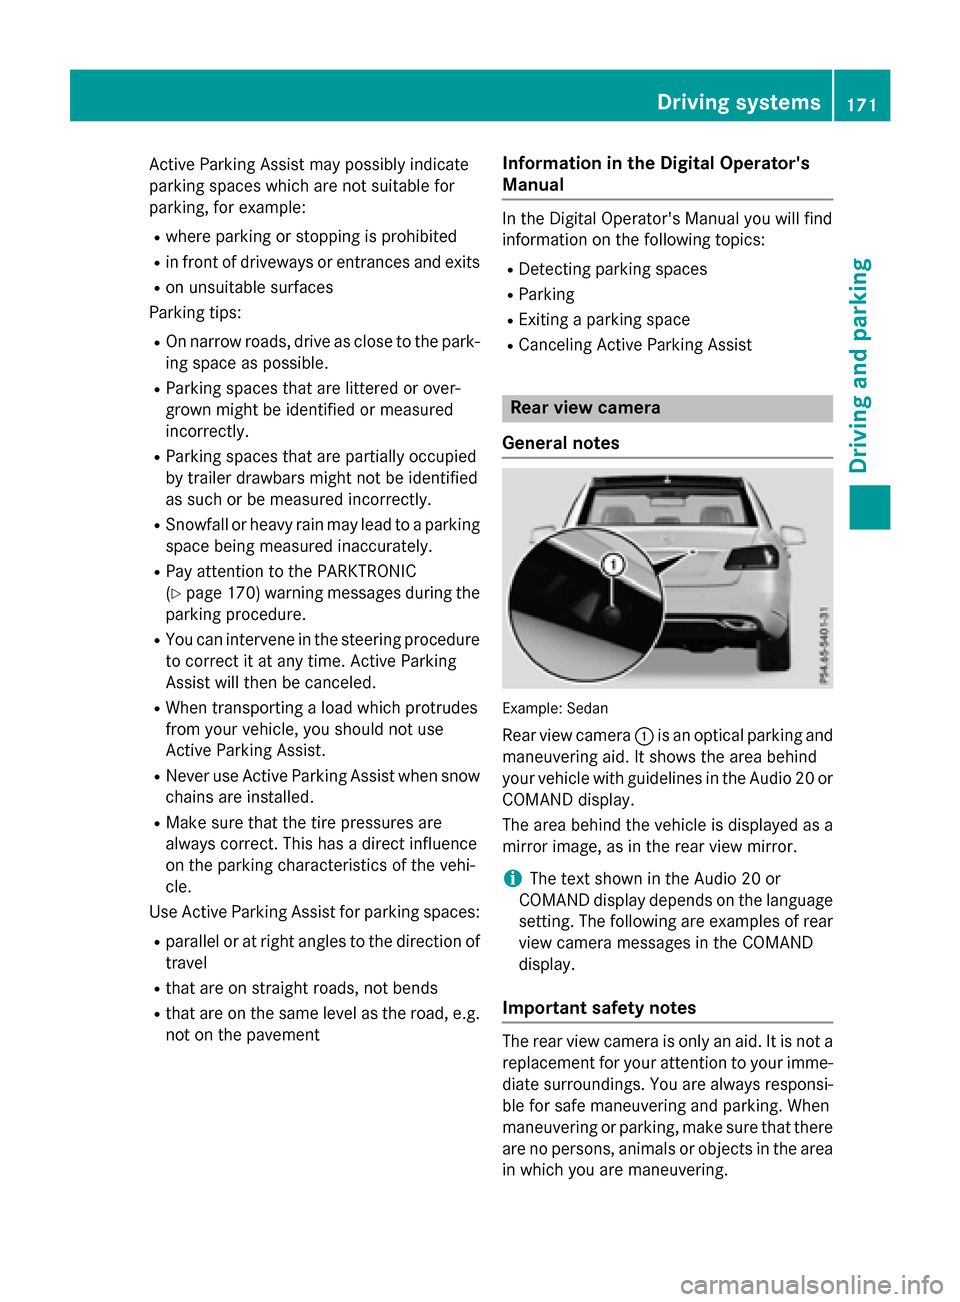
General notes
Example :Sedan
Rear view camera :is an optical parking and
maneuvering aid. It shows the area behind
your vehicle with guidelines in the Audio 20 or
COMAND display.
The area behind the vehicle is displayed as a
mirror image, as in the rear view mirror.
iThe text shown in the Audio 20 or
COMAND display depends on the language
setting. The following are examples of rear
view camera messages in the COMAND
display.
Important safety notes
The rear view camera is only an aid. It is not a
replacement for your attention to your imme- diate surroundings. You are always responsi-
ble for safe maneuvering and parking. When
maneuvering or parking, make sure that there
are no persons, animals or objects in the area
in which you are maneuvering.
Driving systems171
Driving and parking
Z
Page 174 of 350
Under the following circumstances, the rear
view camera will not function, or will function
in a limited manner:
Rif the trunk lid or tailgate is open
Rin heavy rain, snow or fog
Rat night or in very dark places
Rif the camera is exposed to very bright light
Rif the area is lit by fluorescent bulbs or LED
lighting (the display may flicker)
Rif there is a sudden change in temperature,
e.g. when driving into a heated garage in
winter
Rif the camera lens is dirty or obstructed.
Observe the notes on cleaning
(
Ypage 268)
Rif the rear of your vehicle is damaged. In this
event, have the camera position and setting
checked at a qualified specialist workshop
The field of vision and other functions of the
rear view camera may be restricted due to
additional accessories on the rear of the vehi-
cle (e.g. license plate holder, bicycle rack).
On vehicles with height-adjustable chassis,
leaving the standard height can result in inac-
curacies in the guide lines, depending on
technical conditions.
iThe rear view camera is protected from
raindrops and dust by means of a flap.
When the rear view camera is activated,
this flap opens.
The flap closes again when:
Ryou have finished the maneuvering proc-
ess
Ryou switch off the engine
Ryou open the trunk
Observe the notes on cleaning
(
Ypage 268).
For technical reasons, the flap may remain
open briefly after the rear view camera has
been deactivated.
!Objects not at ground level may appear to
be further away than they actually are, e.g.:
Rthe bumper of a parked vehicle
Rthe drawbar of a trailer
Rthe ball coupling of a trailer tow hitch
Rthe rear section of an HGV
Ra slanted post
Use the guidelines only for orientation.
Approach objects no further than the bot-
tom-most guideline.
The rear view camera may show a distorted
view of obstacles, show them incorrectly or
not at all. The rear view camera does not show
objects in the following positions:
Rvery close to the rear bumper
Runder the rear bumper
Rin the area immediately above the tailgate
handle
Activating/deactivating the rear view
camera
XTo activate: make sure that the SmartKey
is in position 2in the ignition lock.
XMake sure that the Activation by R
gearfunction is selected in Audio 20 or
COMAND, see the Digital Operator's Man-
ual.
XEngage reverse gear.
The rear view camera flap opens. The area
behind the vehicle is shown with guide lines
in the Audio 20 or COMAND display.
The image from the rear view camera is
available throughout the maneuvering
process.
To deactivate: the rear view camera deacti-
vates if you shift the transmission to Por after
driving forwards a short distance.
172Driving systems
Driving and parking
Page 175 of 350
Information in the Digital Operator's
Manual
Inthe Digital Operator's Manual you willfind
information on the following topics:
RMessages inthe Audio 20 or COMAND dis-
play
R"Reverse parking" function
RWide-ang lefunction
360° camera
General notes
The 360° camera isa system consisting of
four cameras.
The system analyzes images from the fol low-
ing cameras:
RRear view camera
RFront camera
RTwo cameras inthe exterior rear view mir-
rors
The cameras capture the immediate sur-
roun dings of the vehicle. The system sup-
ports you, e.g. when parking or if vision is
restricted at an exit.
You can show pictures from the 360° camera
in full-screen mode or in six different split-
screen views on the COMAND/A udio20 dis-
play. A split-screen view also includes a top
view of the vehicle. This view iscalculated
from the data supplied by the installed cam-
eras (virtual camera).
The six split-screen views are:
Rtop view and picture from the rear view
camera (130° viewing angle)
Rtop view and image from the front camera
(130° viewing angle without displaying the
maximum steering wheel angle)
Rtop view and enlarged rear view
Rtop view and enlarged front view
Rtop view and images from the side mirror
cameras (rear wheel view)
Rtop view and images from the sidemirror
cameras (front wheel view) When the function
isactive and you shift the
transmission from Dor Rto N, the dynamic
guidelines are hidden.
When you change between transmission
posit ionsDand R, you see the prev
iously
selected front or rear view.
Distances measured byPARKTRONIC will
also beoptical lydisplayed:
Rin split screen viewas red or yellow brack-
ets around the vehicle icon inthe top view,
or
Rat the bottom right as red or yellow brack-
ets around the vehicle symbol infull-screen
mode
The line thickness and color of the brackets
show how far the vehicle isfrom an object.
Ryellow brackets with th inlines:
PARKTRONIC isactive
Ryellow brackets with normal lines: an
object ispresent inclose range of the veh i-
cle
Rred line: an object ispresent inthe imme-
diat e close range of the vehicle
Important safety notes
The 360°camera isonly an aid and may show
a distorted viewof obstacles, show them
incorrectly or not at all. The 360°camera is
not a substitute for attenti vedriving.
You are always responsible for safe maneu-
vering and parking. When maneuvering or
parking, make sure that there are no persons,
animals or objects inthe area in which you are
maneuvering.
You are always responsible for safety, and
must always pay attention to your surround-
ings when parking and maneuvering. This
applie s to the areas behind, infront of and
beside the vehicle. You could otherwise
endanger yourself and others.
The 360° camera willnot function or will
function ina limited manner:
Rifthe doors are open
Rifthe exterior mirrors are folded in
Driving systems173
Driving and parking
Z
Page 176 of 350
Rif the trunk lid/tailgate is open
Rin heavy rain, snow or fog
Rat night or in very dark places
Rif the cameras are exposed to very bright
light
Rif the area is lit by fluorescent bulbs or LED
lighting (the display may flicker)
Rif there is a sudden change in temperature,
e.g. when driving into a heated garage in
winter
Rif the camera lenses are dirty or covered
Rif the vehicle components in which the
cameras are installed are damaged. In this
event, have the camera position and setting
checked at a qualified specialist workshop.
Do not use the 360° camera in this case. You
can otherwise injure others or cause damage to objects or the vehicle.
Guide lines are always shown at road level.
On vehicles with height-adjustable chassis,
depending on technical conditions, leaving
the standard height can result in:
Rinaccuracies in the guide lines
Rinaccuracies in the display of generated
images (top view)
Activation conditions
The 360° camera image can be displayed if:
Ryour vehicle is equipped with a 360° cam-
era
Rthe SmartKey is in position 2in the ignition
lock
RCOMAND/Audio 20 is switched on
Rthe 360° Camerafunction is switched on
Switching on the 360° camera
XPress the Øbutton in the center con-
sole for longer than two seconds.
Depending on whether position Dor Ris
engaged, the following is shown:
Ra split screen with top view and the
image from the front camera or
Ra split screen with top view and the
image from the rear view camera
or
XPress the Øbutton in the center con-
sole.
The vehicle menu is displayed.
XSelect 360° Cameraand press 7to con-
firm.
Depending on whether position Dor Ris
engaged, the following is shown:
Ra split screen with top view and the
image from the front camera or
Ra split screen with top view and the
image from the rear view camera
Activating the 360° camera using
reverse gear
The 360° camera images can be automati-
cally displayed by engaging reverse gear.
XMake sure that the SmartKey is in position
2 in the ignition lock.
XMake sure that the Activation by R
gearfunction is selected in COMAND/
Audio 20 (see the separate COMAND/
Audio 20 operating instructions).
XTo show the 360° camera image: engage
reverse gear.
The area behind the vehicle is shown in the
COMAND/Audio 20 display in split-screen
mode. You see the top view of the vehicle
and the image from the rear view camera.
Selecting the split-screen and full
screen displays
Switching between split screen views
XTo switch to the line with the vehicle icons:
slide 5the controller.
XTo select one of the vehicle icons: turn
3 the controller.
174Driving systems
Driving and parking