MERCEDES-BENZ G-Class 2014 W463 Owner's Manual
Manufacturer: MERCEDES-BENZ, Model Year: 2014, Model line: G-Class, Model: MERCEDES-BENZ G-Class 2014 W463Pages: 354, PDF Size: 7.63 MB
Page 311 of 354
Before changing a fuse
X Park the vehicle and apply the parking
brake.
X Switch off all electrical consumers.
X Remove the SmartKey from the ignition
lock.
All indicator lamps in the instrument cluster
must be off.
The fuses are located in various fuse boxes:
R Main fuse box on the driver's side of the
dashboard
R Fuse box in the front-passenger footwell
R Fuse box in the transmission tunnel
R Fuse box in the battery case
R Fuse box in the cargo compartment
The fuse allocation chart and the spare fuses
are in the main fuse box on the dashboard
(Y page 309).
You will find the fuse removal device in the
vehicle tool kit (Y page 296). Dashboard fuse box
! Do not use a pointed object such as a
screwdriver to open the cover in the
dashboard. You could damage the
dashboard or the cover.
! Make sure that no moisture can enter the
fuse box when the cover is open.
! When closing the cover, make sure that it
is lying correctly on the fuse box. Moisture
seeping in or dirt could otherwise impair
the operation of the fuses. X
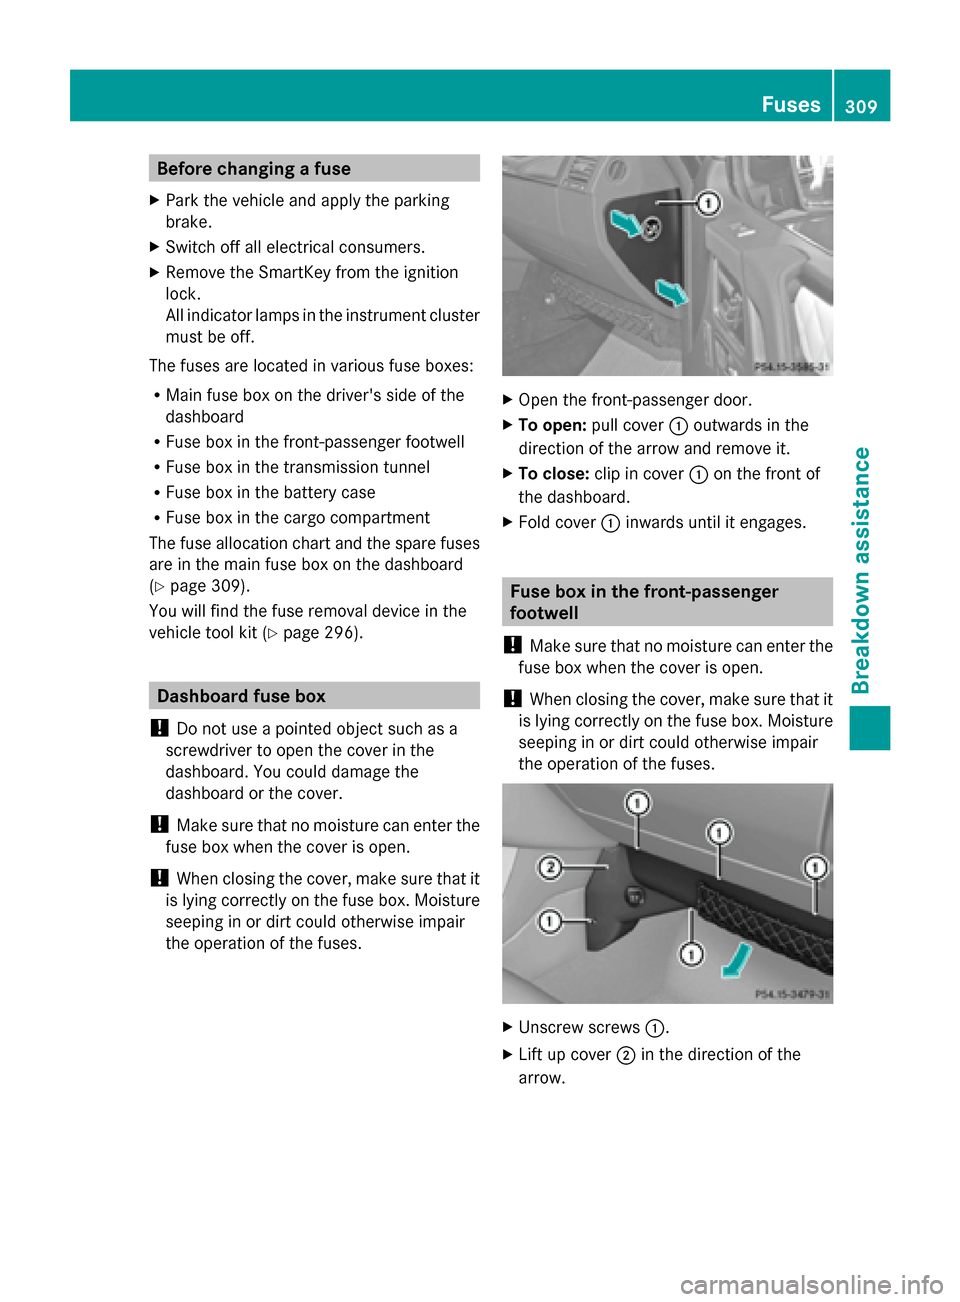
Open the front-passenger door.
X To open: pull cover 0043outwards in the
direction of the arrow and remove it.
X To close: clip in cover 0043on the front of
the dashboard.
X Fold cover 0043inwards until it engages. Fuse box in the front-passenger
footwell
! Make sure that no moisture can enter the
fuse box when the cover is open.
! When closing the cover, make sure that it
is lying correctly on the fuse box. Moisture
seeping in or dirt could otherwise impair
the operation of the fuses. X
Unscrew screws 0043.
X Lift up cover 0044in the direction of the
arrow. Fuses
309Breakdo wn assis tance Z
Page 312 of 354
0087
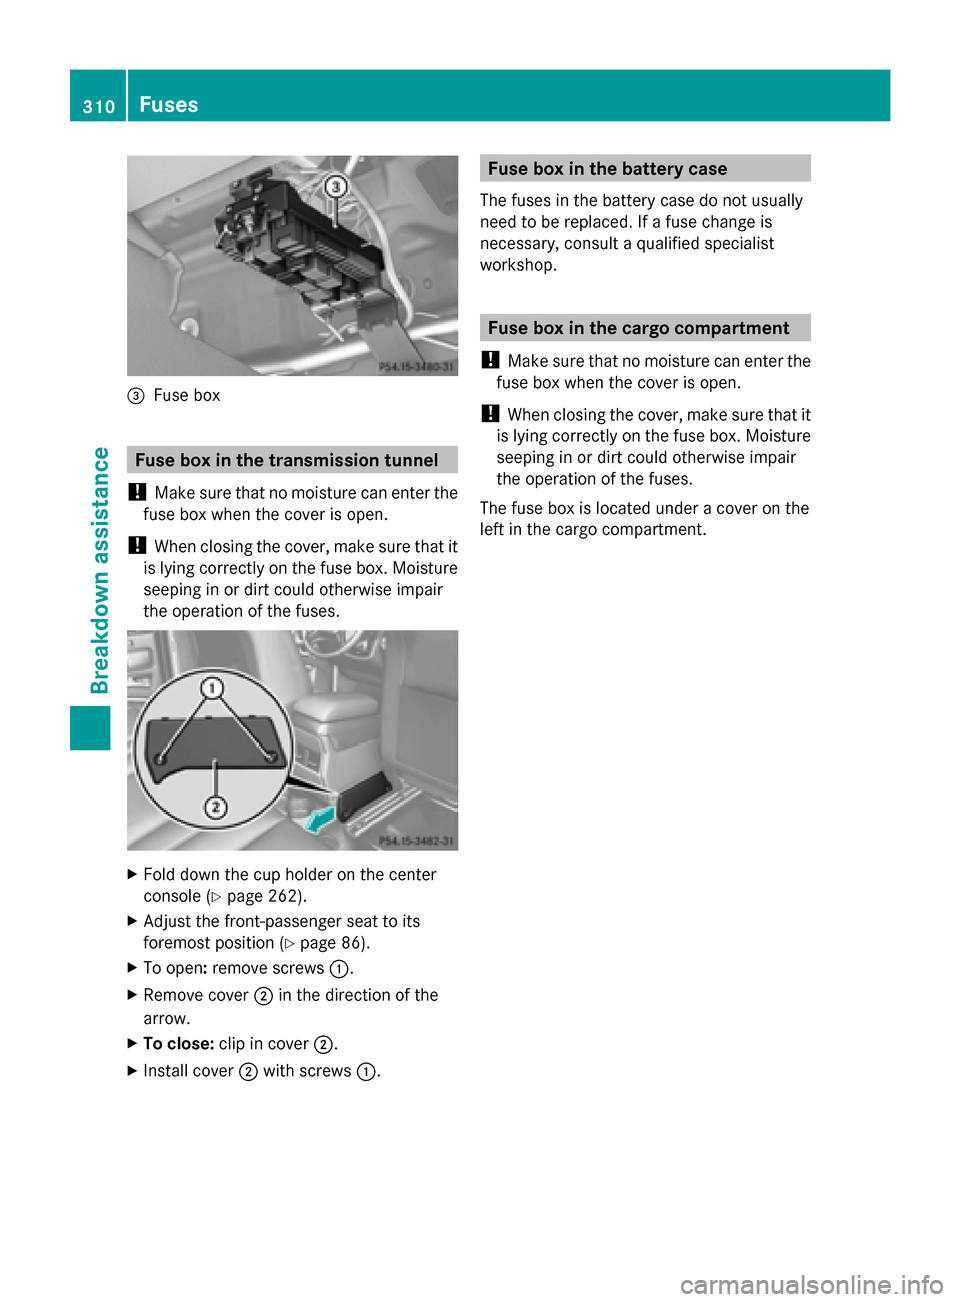
Fuse box Fuse box in the transmission tunnel
! Make sure that no moisture can enter the
fuse box when the cover is open.
! When closing the cover, make sure that it
is lying correctly on the fuse box. Moisture
seeping in or dirt could otherwise impair
the operation of the fuses. X
Fold down the cup holder on the center
console (Y page 262).
X Adjust the front-passenger seat to its
foremost position (Y page 86).
X To open: remove screws 0043.
X Remove cover 0044in the direction of the
arrow.
X To close: clip in cover 0044.
X Install cover 0044with screws 0043. Fuse box in the battery case
The fuses in the battery case do not usually
need to be replaced. If a fuse change is
necessary, consult a qualified specialist
workshop. Fuse box in the cargo compartment
! Make sure that no moisture can enter the
fuse box when the cover is open.
! When closing the cover, make sure that it
is lying correctly on the fuse box. Moisture
seeping in or dirt could otherwise impair
the operation of the fuses.
The fuse box is located under a cover on the
left in the cargo compartment. 310
FusesBreakdown assistance
Page 313 of 354
Useful information
............................312
Important safety notes ....................312
Operation ........................................... 313
Winter operation ............................... 314
Tire pressure ..................................... 316
Loading the vehicle ..........................322
Uniform Tire Quality Grading
Standards .......................................... 326
Tire labeling ....................................... 328
Changing a wheel ............................. 334
Wheel and tire combinations ...........338 311Wheels and tires
Page 314 of 354
Useful information
i This Operator's Manual describes all
models and all standard and optional
equipment of your vehicle available at the
time of publication of the Operator's
Manual. Country-specific differences are
possible. Please note that your vehicle may
not be equipped with all features
described. This also applies to safety-
related systems and functions.
i Read the information on qualified
specialist workshops: (Y page 24).Important safety notes
G
WARNING
Replace rims or tires with the same
designation, manufacturer and type as shown
on the original part. For further information
contact an authorized Mercedes-Benz Center.
If incorrectly sized rims and tires are
mounted, the wheel brakes or suspension
components can be damaged. Also, the
operating clearance of the wheels and the
tires may no longer be correct. G
WARNING
Worn, old tires can cause accidents. If the tire
tread is worn to minimum tread depth, or if
the tires have sustained damage, replace
them.
When replacing rims, only use genuine
Mercedes-Benz wheel bolts specified for the
particular rim type. Failure to do so can result
in the bolts loosening and possibly an
accident.
Retreaded tires are not tested or
recommended by Mercedes-Benz, since
previous damage cannot always be
recognized on retreads. The operating safety
of the vehicle cannot be assured when such
tires are used. G
WARNING
If you notice sudden significant vibrations or
unusual handling performance or if you
suspect that damage has occurred to the
vehicle, you should activate the hazard
warning lamps, gently reduce speed and
carefully head for an area that is located at a
safe distance from the road.
Check the tires and the underside of the
vehicle for damage. If the vehicle seems
unsafe, have the vehicle towed away to the
nearest Mercedes-Benz Center or tire dealer
to be repaired. G
WARNING
Do not drive with a flat tire. A flat tire affects
the ability to steer or brake the vehicle. You
might lose control of the vehicle. Continued
driving with a flat tire or driving at high speed
with a flat tire will cause excessive heat build-
up and possibly a fire. G
Warning
A flat tire severely impairs the driving,
steering and braking characteristics of the
vehicle. There is a risk of an accident.
do not drive with a flat tire. Immediately
replace the flat tire with your spare wheel, or
consult a qualified specialist workshop.
Consult an authorized Mercedes-Benz Center
if you require information on approved and
recommended tires and wheels for summer
and winter operation. Advice on purchasing
and caring for tires is also available there.
Accessories that are not approved for your
vehicle by Mercedes-Benz or are not being
used correctly can impair the operating
safety.
Before purchasing and using non-approved
accessories, visit a qualified specialist
workshop and ask about:
R suitability
R legal stipulations
R factory recommendations 312
Important safety notesWheels and tires
Page 315 of 354
Information on the dimensions and types of
wheels and tires for your vehicle can be found
in the "Wheel/tire combinations" section
(Y page 338).
Information on air pressure for the tires on
your vehicle can be found:
R on the tire pressure label on the fuel filler
flap
R in the "Tire pressure" section
i Further information on wheels and tires
can be obtained at any qualified specialist
workshop. Operation
Notes on driving
If the vehicle is heavily loaded, check the tire
pressures and correct them if necessary.
When parking your vehicle, make sure that
the tires do not get deformed by the curb or
other obstacles. If it is necessary to drive over
curbs, speed humps or similar elevations, try
to do so slowly and at an obtuse angle.
Otherwise, the tires, particularly the
sidewalls, may be damaged. Regular checking of wheels and tires
G
WARNING
Regularly check the tires for damage.
Damaged tires can cause tire inflation
pressure loss. As a result, you could lose
control of your vehicle.
Worn, old tires can cause accidents. If the tire
tread is worn to minimum tread depth, or if
the tires have sustained damage, replace
them.
R Regularly check the wheels and tires of
your vehicle for damage at least once a
month, as well as after driving off-road or
on rough roads. Damage includes bulges
and deformation on tires, cuts, punctures,
cracks or severe corrosion on wheels, for example. Damaged wheels can cause a
loss of tire pressure.
R Regularly check the tire tread depth and
the condition of the tread across the whole
width of the tire (Y page 313). In order to
inspect the inner side of the tire surface,
turn the steering wheel to full lock.
R All wheels must have a valve cap to protect
the valve against dirt and moisture. Do not
install anything onto the valve other than
the standard valve cap or a valve cap
approved by Mercedes-Benz for your
vehicle.
Do not install anything onto the valve, such
as tire pressure monitoring systems.
R You should regularly check the pressure of
all your tires including the spare wheel,
particularly prior to long trips. Adjust the
tire pressure as necessary (Y page 321).
The service life of tires depends, among other
things, on the following factors:
R driving style
R tire pressure
R distance covered Tire tread
G
WARNING
Although the applicable federal motor vehicle
safety laws consider a tire to be worn when
the treadwear indicators (TWI) become visible
at approximately 00CDinches (1.6 mm), we
recommend that you do not allow your tires
to wear down to that level. As tread depth
approaches 00CEinches (3 mm) the adhesion
properties on a wet road are sharply reduced.
Depending upon the weather and/or road
surface (conditions), the tire traction varies
widely. Operation
313Wheels and tires Z
Page 316 of 354
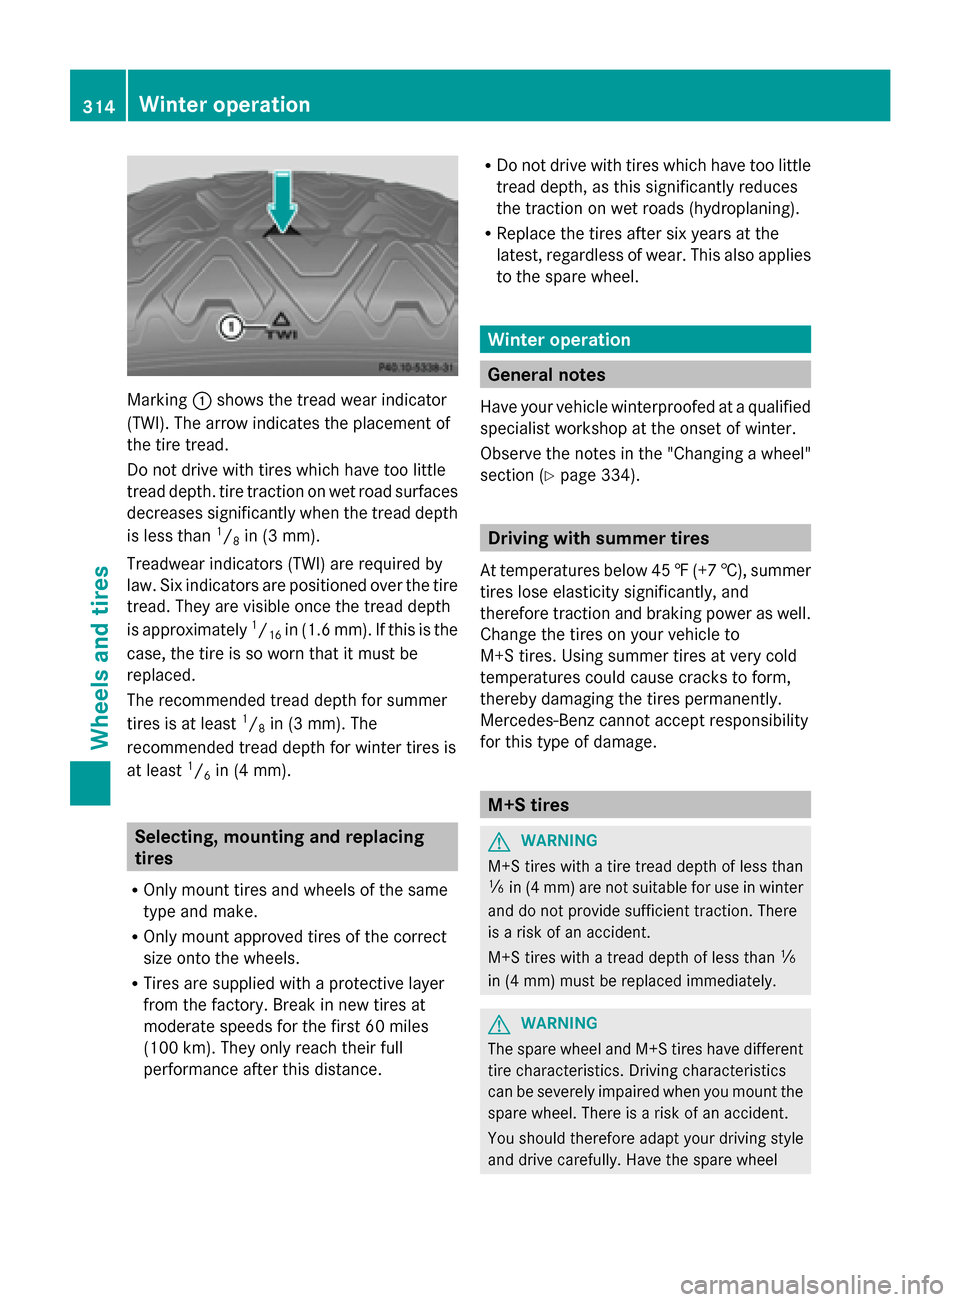
Marking
0043shows the tread wear indicator
(TWI). The arrow indicates the placement of
the tire tread.
Do not drive with tires which have too little
tread depth. tire traction on wet road surfaces
decreases significantly when the tread depth
is less than 1
/ 8 in (3 mm).
Treadwear indicators (TWI) are required by
law. Six indicators are positioned over the tire
tread. They are visible once the tread depth
is approximately 1
/ 16 in (1.6 mm). If this is the
case, the tire is so worn that it must be
replaced.
The recommended tread depth for summer
tires is at least 1
/ 8 in (3 mm). The
recommended tread depth for winter tires is
at least 1
/ 6 in (4 mm). Selecting, mounting and replacing
tires
R Only mount tires and wheels of the same
type and make.
R Only mount approved tires of the correct
size onto the wheels.
R Tires are supplied with a protective layer
from the factory. Break in new tires at
moderate speeds for the first 60 miles
(100 km). They only reach their full
performance after this distance. R
Do not drive with tires which have too little
tread depth, as this significantly reduces
the traction on wet roads (hydroplaning).
R Replace the tires after six years at the
latest, regardless of wear. This also applies
to the spare wheel. Winter operation
General notes
Have your vehicle winterproofed at a qualified
specialist workshop at the onset of winter.
Observe the notes in the "Changing a wheel"
section (Y page 334). Driving with summer tires
At temperatures below 45 ‡(+7 †), summer
tires lose elasticity significantly, and
therefore traction and braking power as well.
Change the tires on your vehicle to
M+S tires. Using summer tires at very cold
temperatures could cause cracks to form,
thereby damaging the tires permanently.
Mercedes-Benz cannot accept responsibility
for this type of damage. M+S tires
G
WARNING
M+S tires with a tire tread depth of less than
00CF in (4 mm) are not suitable for use in winter
and do not provide sufficient traction. There
is a risk of an accident.
M+S tires with a tread depth of less than 00CF
in (4 mm) must be replaced immediately. G
WARNING
The spare wheel and M+S tires have different
tire characteristics. Driving characteristics
can be severely impaired when you mount the
spare wheel. There is a risk of an accident.
You should therefore adapt your driving style
and drive carefully. Have the spare wheel 314
Winter operationWheels and tires
Page 317 of 354
replaced with a new wheel with an M+S tire
at the nearest qualified specialist workshop.
At temperatures below 45 ‡(+7 †), use all-
season tires or winter tires. Both types of tire
are identified by the M+S marking.
Not all tires with the M+S marking provide the
driving characteristics of winter tires. In
addition to the M+S marking, winter tires also
have the 004Dsnowflake symbol on the tire
wall. Tires with this marking fulfill the
requirements of the Rubber Manufacturers
Association (RMA) and the Rubber
Association of Canada (RAC) regarding snow
traction, and were specially developed for
driving on snow. Only these tires will allow
driving safety systems such as ABS and
ESP ®
to function optimally in winter, since
these tires have been designed specifically
for driving on snow.
Use M+S tires of the same make and tread on
all wheels to maintain safe handling
characteristics.
Always observe the maximum permissible
speed specified for the M+S tires you have
mounted.
When you have mounted the M+S tires:
X Check the tire pressures (Y page 316).
X Restart the tire pressure monitor
(Y page 321).
i You can obtain information about winter
tires that have been approved by
Mercedes-Benz especially for your vehicle
at any Mercedes-Benz Service center.
i For further information about tires, see
(Y page 340). Snow chains
! Information about the use of snow chain
compatible AMG winter tires is applicable
for AMG tires. Use of snow chains is only
permissible with these tires. !
On some tire sizes there is not enough
space for snow chains. To avoid damage to
the vehicle or tires, observe the "Wheel and
tire combinations" section under "Tires and
wheels".
! If snow chains are mounted on the front
wheels, the snow chains could grind
against the bodywork or components of the
chassis. This could result in damage to the
vehicle or the tires.
For safety reasons, Mercedes-Benz
recommends that you only use snow chains
that have been specially approved for your
vehicle by Mercedes-Benz, or are of a
corresponding standard of quality.
R Only use snow chains when driving on
roads completely covered by snow.
Remove the snow chains as soon as
possible when you come to a road that is
not snow-covered.
R Local regulations may restrict the use of
snow chains. Observe the appropriate
regulations if you wish to mount snow
chains.
R Do not exceed the maximum permissible
speed of 30 mph (50 km/h).
If you intend to mount snow chains, please
bear the following points in mind:
R Snow chains cannot be mounted on all
wheel/tire combinations (Y page 338).
R Mount snow chains only in pairs and only
on the rear wheels. Observe the
manufacturer's mounting instructions.
i You can deactivate ESP ®
(Y page 62)
when pulling away with snow chains
installed. You can thereby allow the wheels
to spin in a controlled manner, achieving an
increased driving force (cutting action). Winter operation
315Wheels and tires Z
Page 318 of 354
Tire pressure
Tire pressure specifications
Important safety notes G
WARNING
Underinflated or overinflated tires pose the
following risks:
R the tires may burst, especially as the load
and vehicle speed increase.
R the tires may wear excessively and/or
unevenly, which may greatly impair tire
traction.
R the driving characteristics, as well as
steering and braking, may be greatly
impaired.
There is a risk of an accident.
Follow recommended tire inflation pressures
and check the pressure of all the tires
including the spare wheel:
R monthly, at least
R if the load changes
R before beginning a long journey
R under different operating conditions, e.g.
off-road driving
If necessary, correct the tire pressure.
i The specifications on the sample Tire and
Loading Information placard and tire
pressure tables are examples. Tire
pressure specifications are vehicle-specific
and may deviate from the data shown here.
The tire pressure specifications that are
valid for your vehicle can be found on the
Tire and Loading Information placard and
tire pressure table on the vehicle.
General notes The recommended tire pressures for the tires
mounted at the factory can be found on the
labels described here.
Operation with a trailer:
the applicable
value for the rear tires is the maximum tire
pressure value stated in the table inside the
fuel filler flap. Further information on tire pressures can be
obtained at a qualified specialist workshop.
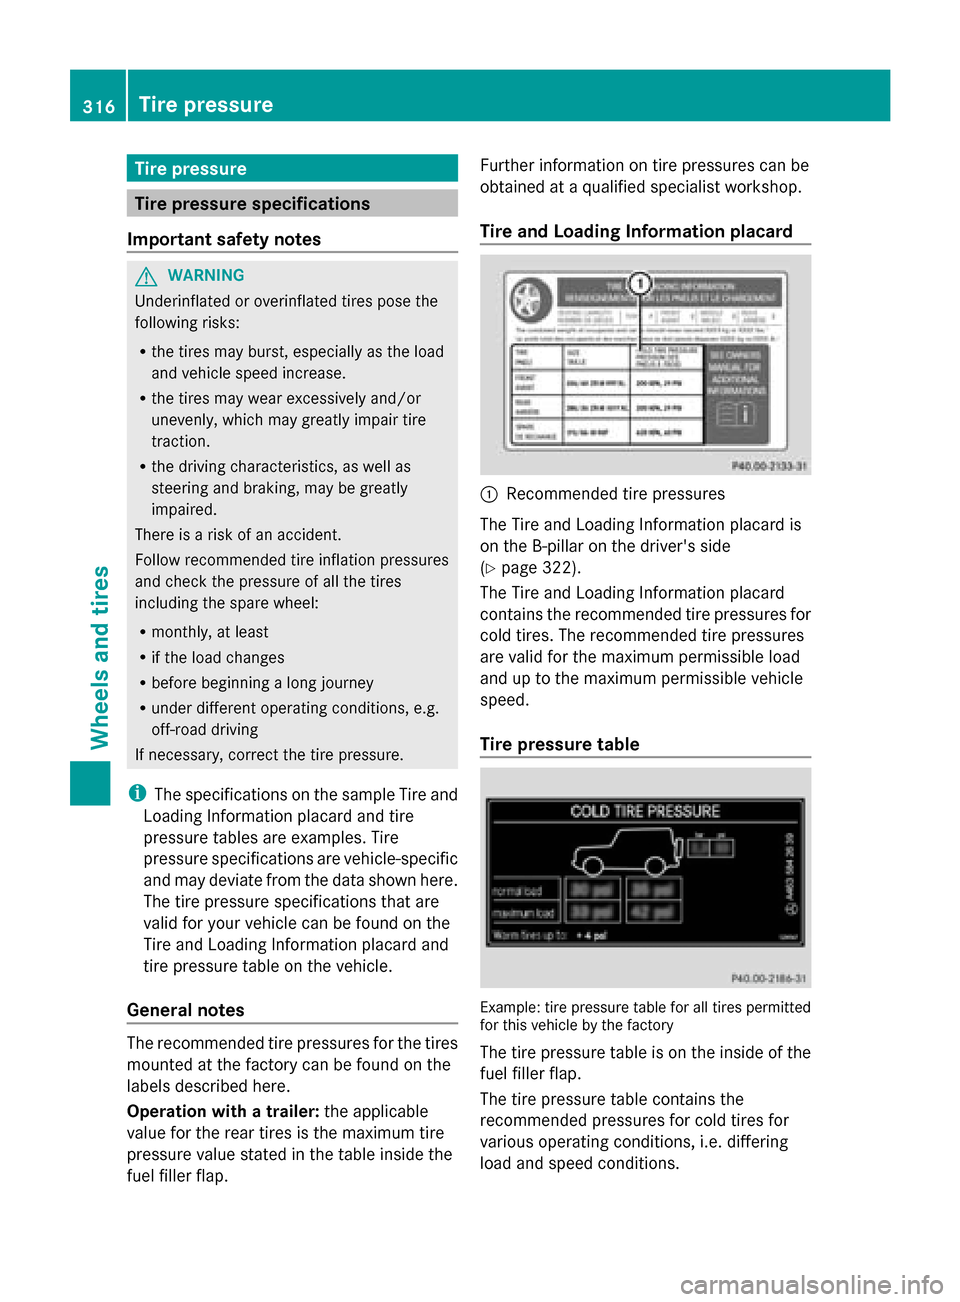
Tire and Loading Information placard 0043
Recommended tire pressures
The Tire and Loading Information placard is
on the B-pillar on the driver's side
(Y page 322).
The Tire and Loading Information placard
contains the recommended tire pressures for
cold tires. The recommended tire pressures
are valid for the maximum permissible load
and up to the maximum permissible vehicle
speed.
Tire pressure table Example: tire pressure table for all tires permitted
for this vehicle by the factory
The tire pressure table is on the inside of the
fuel filler flap.
The tire pressure table contains the
recommended pressures for cold tires for
various operating conditions, i.e. differing
load and speed conditions.316
Tire pressureWheels and tires
Page 319 of 354
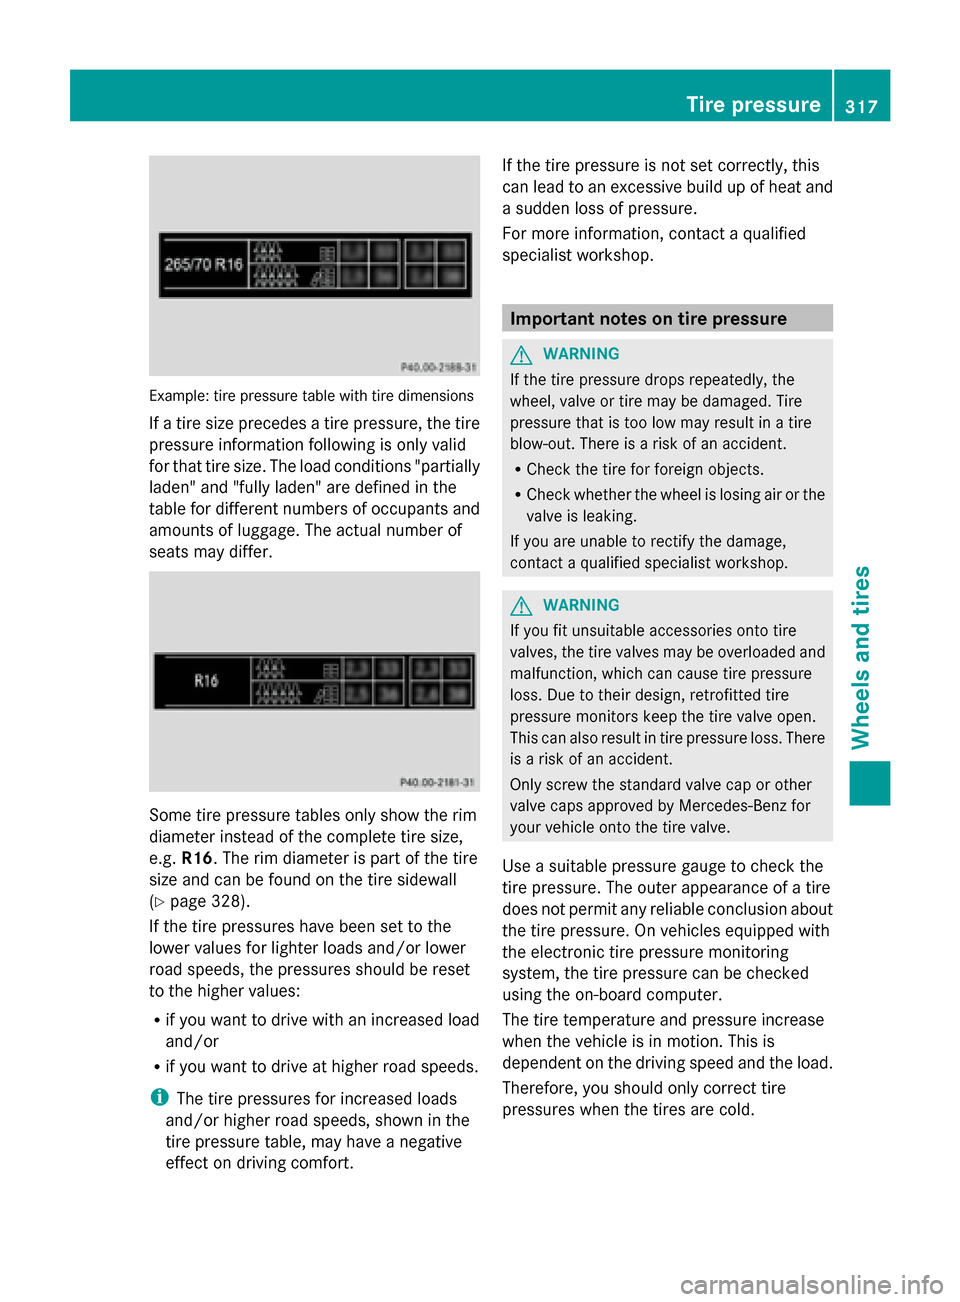
Example: tire pressure table with tire dimensions
If a tire size precedes a tire pressure, the tire
pressure information following is only valid
for that tire size. The load conditions "partially
laden" and "fully laden" are defined in the
table for different numbers of occupants and
amounts of luggage. The actual number of
seats may differ. Some tire pressure tables only show the rim
diameter instead of the complete tire size,
e.g. R16 . The rim diameter is part of the tire
size and can be found on the tire sidewall
(Y page 328).
If the tire pressures have been set to the
lower values for lighter loads and/or lower
road speeds, the pressures should be reset
to the higher values:
R if you want to drive with an increased load
and/or
R if you want to drive at higher road speeds.
i The tire pressures for increased loads
and/or higher road speeds, shown in the
tire pressure table, may have a negative
effect on driving comfort. If the tire pressure is not set correctly, this
can lead to an excessive build up of heat and
a sudden loss of pressure.
For more information, contact a qualified
specialist workshop. Important notes on tire pressure
G
WARNING
If the tire pressure drops repeatedly, the
wheel, valve or tire may be damaged. Tire
pressure that is too low may result in a tire
blow-out. There is a risk of an accident.
R Check the tire for foreign objects.
R Check whether the wheel is losing air or the
valve is leaking.
If you are unable to rectify the damage,
contact a qualified specialist workshop. G
WARNING
If you fit unsuitable accessories onto tire
valves, the tire valves may be overloaded and
malfunction, which can cause tire pressure
loss. Due to their design, retrofitted tire
pressure monitors keep the tire valve open.
This can also result in tire pressure loss. There
is a risk of an accident.
Only screw the standard valve cap or other
valve caps approved by Mercedes-Benz for
your vehicle onto the tire valve.
Use a suitable pressure gauge to check the
tire pressure. The outer appearance of a tire
does not permit any reliable conclusion about
the tire pressure. On vehicles equipped with
the electronic tire pressure monitoring
system, the tire pressure can be checked
using the on-board computer.
The tire temperature and pressure increase
when the vehicle is in motion. This is
dependent on the driving speed and the load.
Therefore, you should only correct tire
pressures when the tires are cold. Tire pressure
317Wheels and tires Z
Page 320 of 354
The tires are cold:
R
if the vehicle has been parked without
direct sunlight on the tires for at least three
hours and
R if the vehicle has been driven for less than
1 mile (1.6 km).
The tire temperature changes depending on
the outside temperature, the vehicle speed
and the tire load. If the tire temperature
changes by 18 ‡ (10 †), the tire pressure
changes by approximately 10 kPa (0.1 bar/
1.5 psi). Take this into account when
checking the pressure of warm tires. Only
correct the tire pressure if it is too low for the
current operating conditions. If you check the
tire pressure when the tires are warm, the
resulting value will be higher than if the tires
were cold. This is normal. Do not reduce the
tire pressure to the value specified for cold
tires. The tire pressure would otherwise be
too low.
Observe the recommended tire pressures for
cold tires:
R on the Tire and Loading Information placard
on the B-pillar on the driver's side
R in the tire pressure table on the inside of
the fuel filler flap
Observe the following for the tire pressure on
the spare wheel:
R the tire and loading information table on
the B-pillar on the driver's side.
R the tire pressure sticker on the inside of the
fuel filler flap. Underinflated or overinflated tires
Underinflation G
WARNING
Tires with pressure that is too low can
overheat and burst as a consequence. In
addition, they also suffer from excessive and/
or irregular wear, which can severely impair
the braking properties and the driving
characteristics. There is a risk of an accident. Avoid tire pressures that are too low in all the
tires, including the spare wheel.
Underinflated tires may:
R overheat, leading to tire defects
R have an adverse effect on handling
characteristics
R wear quickly and unevenly
R have an adverse effect on fuel consumption
Overinflation G
WARNING
Tires with excessively high pressure can burst
because they are damaged more easily by
road debris, potholes etc. In addition, they
also suffer from irregular wear, which can
severely impair the braking properties and the
driving characteristics. There is a risk of an
accident.
Avoid tire pressures that are too high in all the
tires, including the spare wheel.
Overinflated tires may:
R increase the braking distance
R have an adverse effect on handling
characteristics
R wear quickly and unevenly
R have an adverse effect on ride comfort
R be more susceptible to damage
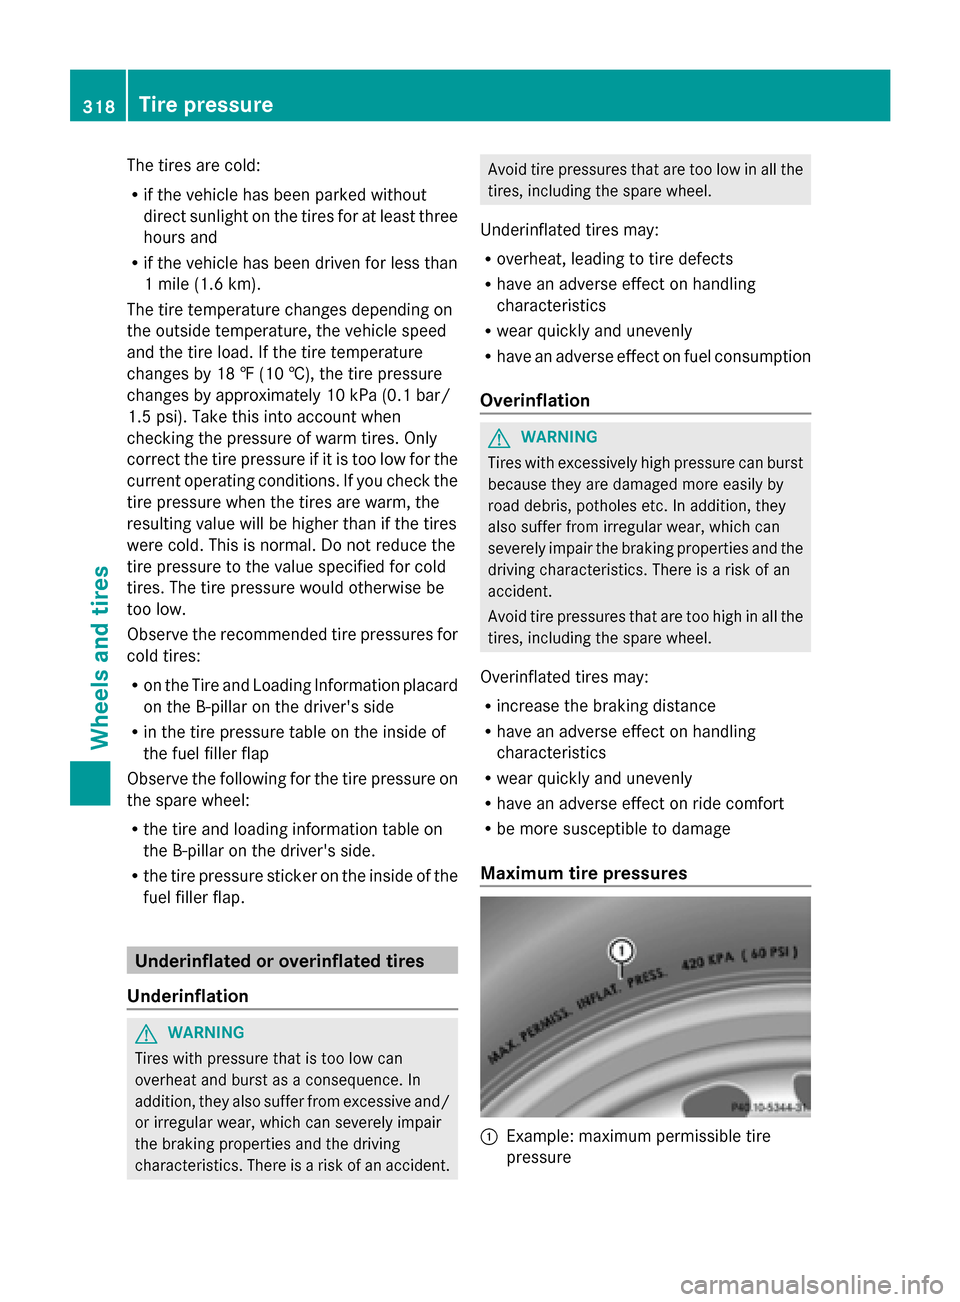
Maximum tire pressures 0043
Example: maximum permissible tire
pressure 318
Tire pressureWheels and tires