parking brake MERCEDES-BENZ G-Class 2015 W463 Owner's Manual
[x] Cancel search | Manufacturer: MERCEDES-BENZ, Model Year: 2015, Model line: G-Class, Model: MERCEDES-BENZ G-Class 2015 W463Pages: 350, PDF Size: 6.44 MB
Page 7 of 350
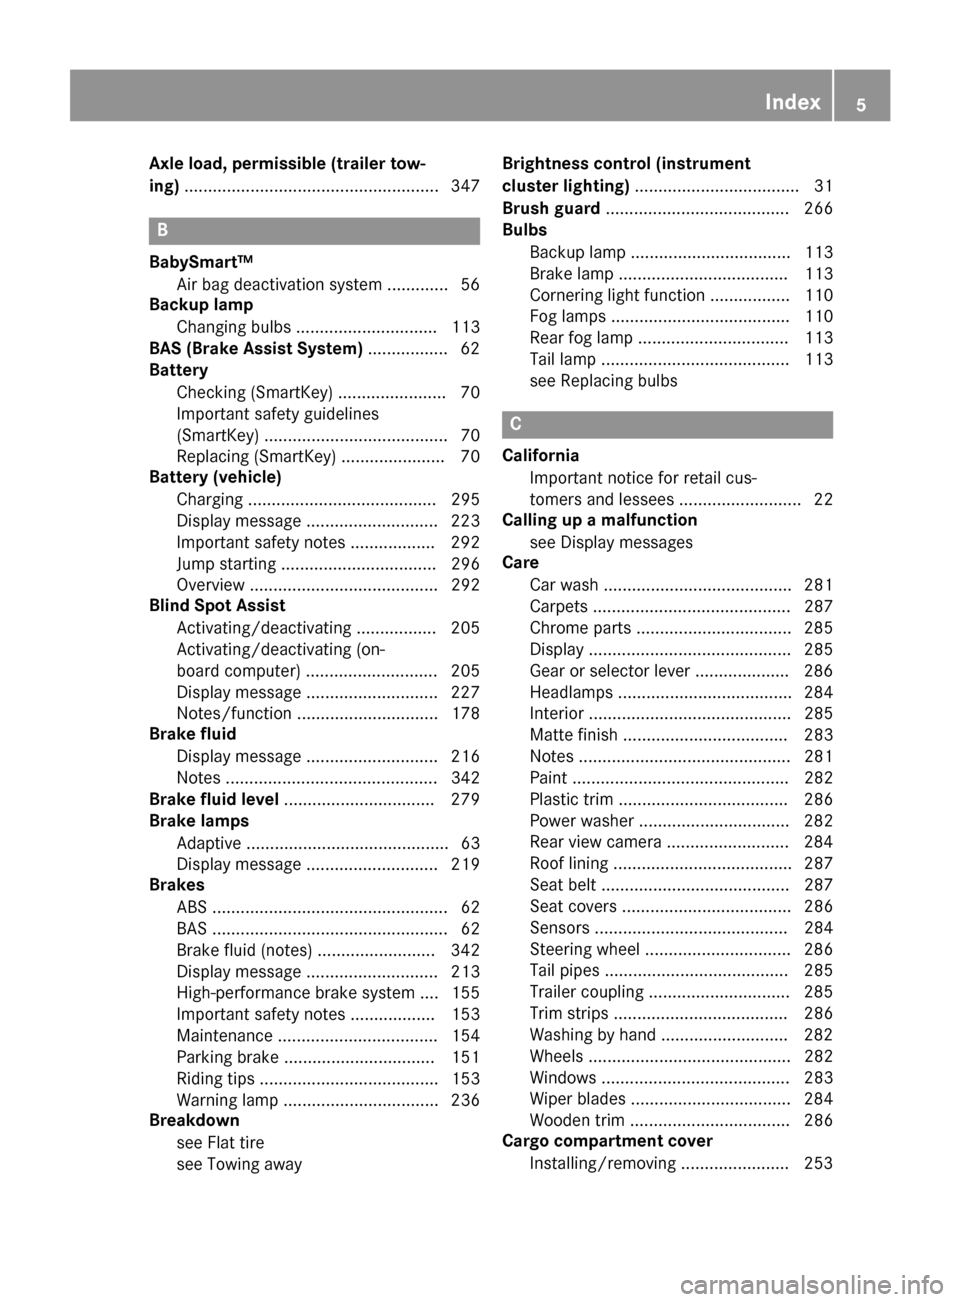
Axle load, permissible (trailer tow-
ing)
...................................................... 347 B
BabySmart™ Air bag deactivation system ............ .56
Backup lamp
Changing bulb s.............................. 113
BAS (Brake Assist System) ................. 62
Battery
Checking (SmartKey) ....................... 70
Important safety guidelines
(SmartKey) ....................................... 70
Replacing (SmartKey) ...................... 70
Battery (vehicle)
Charging ........................................ 295
Display message ............................ 223
Important safety notes .................. 292
Jump starting ................................. 296
Overview ........................................ 292
Blind Spot Assist
Activating/deactivating ................. 205
Activating/deactivating (on-
board computer) ............................ 205
Display message ............................ 227
Notes/function .............................. 178
Brake fluid
Display message ............................ 216
Notes ............................................. 342
Brake fluid level ................................ 279
Brake lamps
Adaptive ........................................... 63
Display message ............................ 219
Brakes
ABS .................................................. 62
BAS .................................................. 62
Brake fluid (notes) ......................... 342
Display message ............................ 213
High-performance brake system .... 155
Important safety notes .................. 153
Maintenance .................................. 154
Parking brake ................................ 151
Riding tips ...................................... 153
Warning lamp ................................. 236
Breakdown
see Flat tire
see Towing away Brightness control (instrument
cluster lighting)
................................... 31
Brush guard ....................................... 266
Bulbs
Backup lamp .................................. 113
Brake lamp .................................... 113
Cornering light function ................. 110
Fog lamps ...................................... 110
Rear fog lamp ................................ 113
Tail lamp ........................................ 113
see Replacing bulbs C
California Important notice for retail cus-
tomers and lessees .......................... 22
Calling up a malfunction
see Display messages
Care
Car wash ........................................ 281
Carpets .......................................... 287
Chrome parts ................................. 285
Display ........................................... 285
Gear or selector lever .................... 286
Headlamps ..................................... 284
Interior ........................................... 285
Matte finish ................................... 283
Note s............................................. 281
Paint .............................................. 282
Plastic trim .................................... 286
Power washer ................................ 282
Rear view camera .......................... 284
Roof lining ...................................... 287
Seat belt ........................................ 287
Seat covers .................................... 286
Sensors ......................................... 284
Steering wheel ............................... 286
Tail pipe s....................................... 285
Trailer coupling .............................. 285
Trim strips ..................................... 286
Washing by hand ........................... 282
Wheels ........................................... 282
Windows ........................................ 283
Wiper blades .................................. 284
Wooden trim .................................. 286
Cargo compartment cover
Installing/removing ....................... 253 Index
5
Page 15 of 350
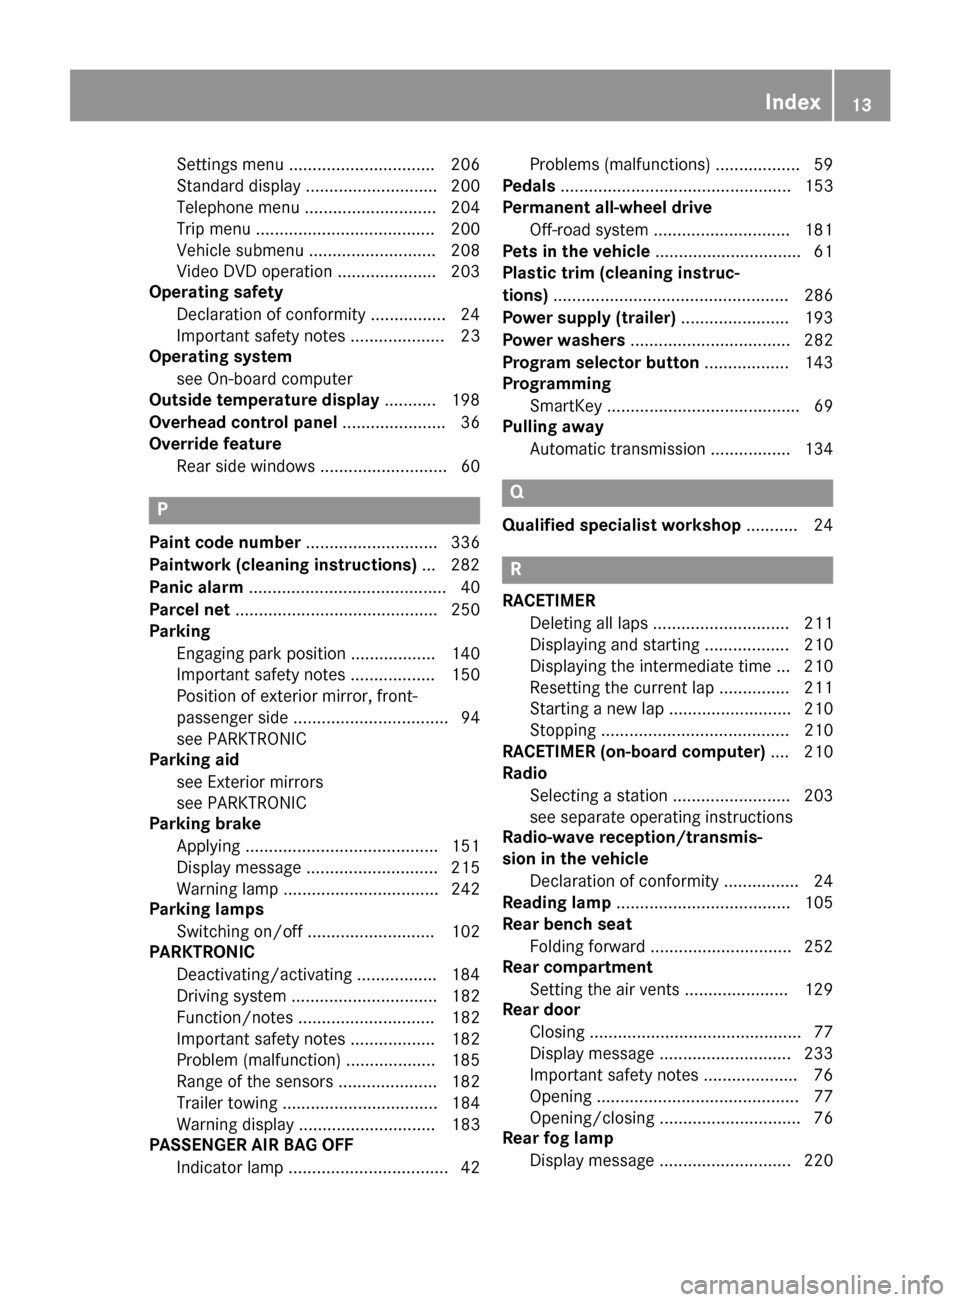
Settings menu ............................... 206
Standard display ............................ 200
Telephone menu ............................ 204
Trip menu ...................................... 200
Vehicle submenu ........................... 208
Video DVD operation ..................... 203
Operating safety
Declaration of conformity ................ 24
Important safety notes .................... 23
Operating system
see On-board computer
Outside temperature display ........... 198
Overhead control panel ...................... 36
Override feature
Rear side window s........................... 60 P
Paint code number ............................ 336
Paintwork (cleaning instructions) ... 282
Panic alarm .......................................... 40
Parcel net ........................................... 250
Parking
Engaging park position .................. 140
Important safety notes .................. 150
Position of exterior mirror, front-
passenger side ................................. 94
see PARKTRONIC
Parking aid
see Exterior mirrors
see PARKTRONIC
Parking brake
Applying ......................................... 151
Display message ............................ 215
Warning lamp ................................. 242
Parking lamps
Switching on/of f........................... 102
PARKTRONIC
Deactivating/activating ................. 184
Driving system ............................... 182
Function/note s............................. 182
Important safety notes .................. 182
Problem (malfunction) ................... 185
Range of the sensors ..................... 182
Trailer towing ................................. 184
Warning display ............................. 183
PASSENGER AIR BAG OFF
Indicator lamp .................................. 42 Problems (malfunctions) .................. 59
Pedals ................................................. 153
Permanent all-wheel drive
Off-road system ............................. 181
Pets in the vehicle ............................... 61
Plastic trim (cleaning instruc-
tions) .................................................. 286
Power supply (trailer) ....................... 193
Power washers .................................. 282
Program selector button .................. 143
Programming
SmartKey ......................................... 69
Pulling away
Automatic transmission ................. 134 Q
Qualified specialist workshop ........... 24 R
RACETIMER Deleting all laps ............................. 211
Displaying and starting .................. 210
Displaying the intermediate time ... 210
Resetting the current lap ............... 211
Starting a new lap .......................... 210
Stopping ........................................ 210
RACETIMER (on-board computer) .... 210
Radio
Selecting a station ......................... 203
see separate operating instructions
Radio-wave reception/transmis-
sion in the vehicle
Declaration of conformity ................ 24
Reading lamp ..................................... 105
Rear bench seat
Folding forward .............................. 252
Rear compartment
Setting the air vents ...................... 129
Rear door
Closing ............................................. 77
Display message ............................ 233
Important safety notes .................... 76
Opening ........................................... 77
Opening/closing .............................. 76
Rear fog lamp
Display message ............................ 220 Index
13
Page 21 of 350
W
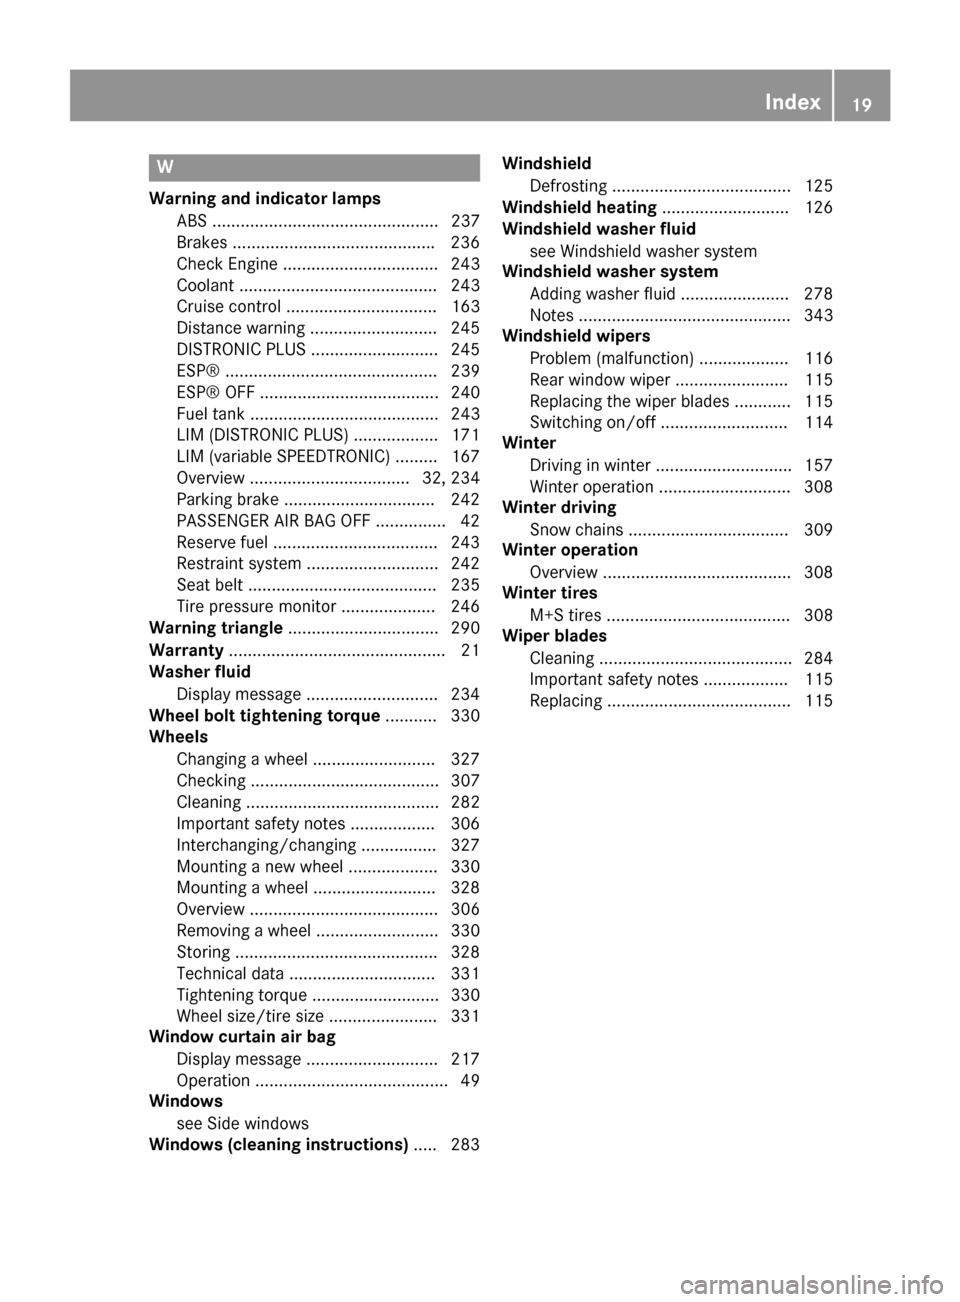
Warning and indicator lamps ABS ................................................ 237
Brakes .......................................... .236
Check Engine ................................. 243
Coolant .......................................... 243
Cruise control ................................ 163
Distance warning ........................... 245
DISTRONIC PLUS ........................... 245
ESP® ............................................. 239
ESP® OFF ...................................... 240
Fuel tank ........................................ 243
LIM (DISTRONIC PLUS) .................. 171
LIM (variable SPEEDTRONIC) ......... 167
Overview .................................. 32, 234
Parking brake ................................ 242
PASSENGER AIR BAG OFF .............. .42
Reserve fuel .................................. .243
Restraint system ............................ 242
Seat belt ........................................ 235
Tire pressure monitor .................... 246
Warning triangle ................................ 290
Warranty .............................................. 21
Washer fluid
Display message ............................ 234
Wheel bolt tightening torque ........... 330
Wheels
Changing a wheel .......................... 327
Checking ........................................ 307
Cleaning ......................................... 282
Important safety notes .................. 306
Interchanging/changing ................ 327
Mounting a new wheel ................... 330
Mounting a wheel .......................... 328
Overview ........................................ 306
Removing a wheel .......................... 330
Storing .......................................... .328
Technical data ............................... 331
Tightening torque ........................... 330
Wheel size/tire size ....................... 331
Window curtain air bag
Display message ............................ 217
Operation ......................................... 49
Windows
see Side windows
Windows (cleaning instructions) ..... 283Windshield
Defrosting ...................................... 125
Windshield heating ........................... 126
Windshield washer fluid
see Windshield washer system
Windshield washer system
Adding washer fluid ....................... 278
Notes ............................................. 343
Windshield wipers
Problem (malfunction) ................... 116
Rear window wiper ........................ 115
Replacing the wiper blades ............ 115
Switching on/off ........................... 114
Winter
Driving in winter ............................ .157
Winter operation ............................ 308
Winter driving
Snow chains .................................. 309
Winter operation
Overview ........................................ 308
Winter tires
M+S tires ....................................... 308
Wiper blades
Cleaning ......................................... 284
Important safety notes .................. 115
Replacing ....................................... 115 Index
19
Page 37 of 350
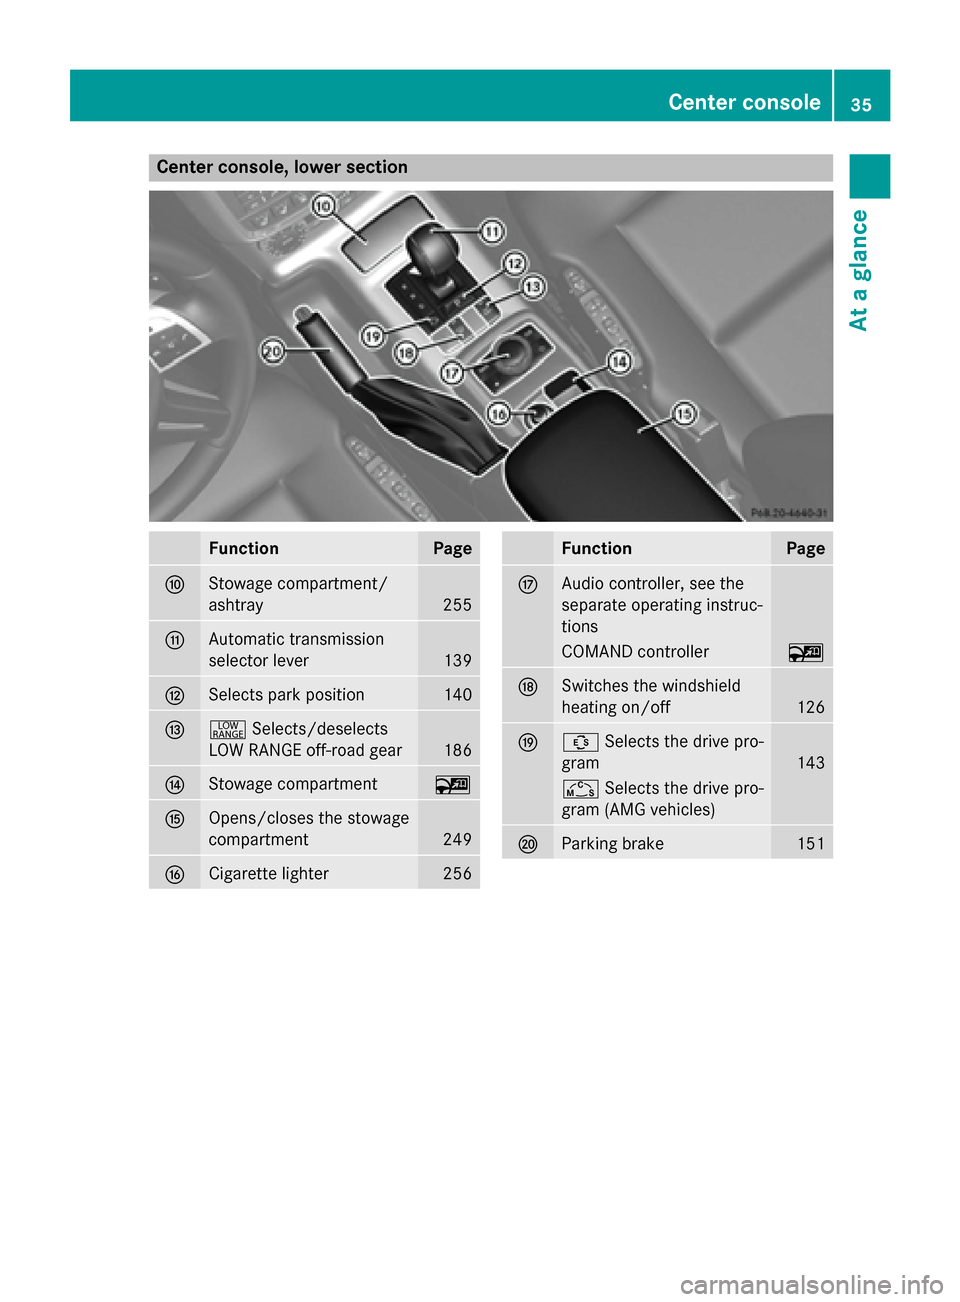
Center console, lower section
Function Page
F
Stowage compartment/
ashtray
255
G
Automatic transmission
selector lever 139
H
Selects park position 140
I
+
Selects/deselects
LOW RANGE off-road gear 186
J
Stowage compartment ~
K
Opens/closes the stowage
compartment 249
L
Cigarette lighter 256 Function Page
M
Audio controller, see the
separate operating instruc-
tions
COMAND controller ~
N
Switches the windshield
heating on/off
126
O
Û
Selects the drive pro-
gram 143
Ñ
Selects the drive pro-
gram (AMG vehicles) P
Parking brake 151Center console
35At a glance
Page 55 of 350
appropriate to the age, weight and size of
the child
R be sure to observe the instructions and
safety notes in this section in addition to
the child restraint system manufacturer's
installation instructions G
WARNING
If you leave children unsupervised in the vehi- cle, they could set it in motion by, for example:
R release the parking brake.
R shift the automatic transmission out of the
parking position P.
R start the engine.
In addition, they may operate vehicle equip-
ment and become trapped. There is a risk of
an accident and injury.
When leaving the vehicle, always take the
SmartKey with you and lock the vehicle. Never
leave children unsupervised in the vehicle. G
WARNING
If persons, particularly children are subjected to prolonged exposure to extreme heat or
cold, there is a risk of injury, possibly even
fatal. Never leave children unattended in the
vehicle. G
WARNING
If the child restraint system is subjected to
direct sunlight, parts may get very hot. Chil-
dren may burn themselves on these parts,
particularly on the metal parts of the child
restraint system. There is a risk of injury.
If you leave the vehicle, taking the child with
you, always ensure that the child restraint
system is not exposed to direct sunlight. Pro- tect it with a blanket, for example. If the child
restraint system has been exposed to direct
sunlight, let it cool down before securing the
child in it. Never leave children unattended in the vehicle.
Always ensure that all vehicle occupants have
their seat belts fastened correctly and are sit- ting properly. Particular attention must be
paid to children.
Observe the safety notes on the seat belt
(Y page 43) and the notes on correct use of
seat belts (Y page 44).
A booster seat may be necessary to achieve
proper seat belt positioning for children over
41 lbs (18 kg) or until they reach a height
where a lap/shoulder belt can be fastened
properly without a booster seat. Special seat belt retractor
G
WARNING
If the seat belt is released while driving, the
child restraint system will no longer be
secured properly. The special seat belt retrac- tor is disabled and the inertia real draws in a
portion of the seat belt. The seat belt cannot
be immediately refastened. There is an
increased risk of injury, possibly even fatal.
Stop the vehicle immediately, paying atten-
tion to road and traffic conditions. Reactivate
the special seat belt retractor and secure the
child restraint system properly.
All seat belts in the vehicle, except the driv-
er's seat belt, are equipped with a special seat belt retractor. When activated, the special
seat belt retractor ensures that the seat belt
cannot slacken once the child seat is secured.
Installing a child restraint system:
X Make sure you observe the child restraint
system manufacturer's installation instruc- tions.
X Pull the seat belt smoothly out of the belt
sash guide.
X Engage seat belt tongue in belt buckle. Children in the vehicle
53Safety Z
Page 70 of 350
Useful information
i This Operator's Manual describes all
models and all standard and optional equip- ment of your vehicle available at the time of
publication of the Operator's Manual.
Country-specific differences are possible.
Please note that your vehicle may not be
equipped with all features described. This
also applies to safety-related systems and
functions.
i Read the information on qualified special-
ist workshops: (Y page 24). SmartKey
Important safety notes
G
WARNING
If persons, particularly children are subjected to prolonged exposure to extreme heat or
cold, there is a risk of injury, possibly even
fatal. Never leave children unattended in the
vehicle. G
WARNING
If you attach heavy or large objects to the
SmartKey, the SmartKey could be uninten-
tionally turned in the ignition lock. This could
cause the engine to be switched off. There is a risk of an accident.
Do not attach any heavy or large objects to the
SmartKey. Remove any bulky key rings before
inserting the SmartKey into the ignition lock. G
WARNING
If you attach heavy or large objects to the
SmartKey, the SmartKey could be uninten-
tionally turned in the ignition lock. This could
cause the engine to be switched off. There is a risk of an accident.
Do not attach any heavy or large objects to the
SmartKey. Remove any bulky key rings before
inserting the SmartKey into the ignition lock. SmartKey functions
G
WARNING
If children are left unsupervised in the vehicle, they could:
R open the doors, thus endangering other
people or road users.
R get out and disrupt traffic.
R operate the vehicle's equipment.
Additionally, children could set the vehicle in
motion if, for example, they:
R release the parking brake.
R shift the automatic transmission out of park
position P or shift manual transmission into
neutral.
R start the engine.
There is a risk of an accident and injury.
When leaving the vehicle, always take the
SmartKey with you and lock the vehicle. Never leave children or animals unattended in the
vehicle. Always keep the SmartKey out of
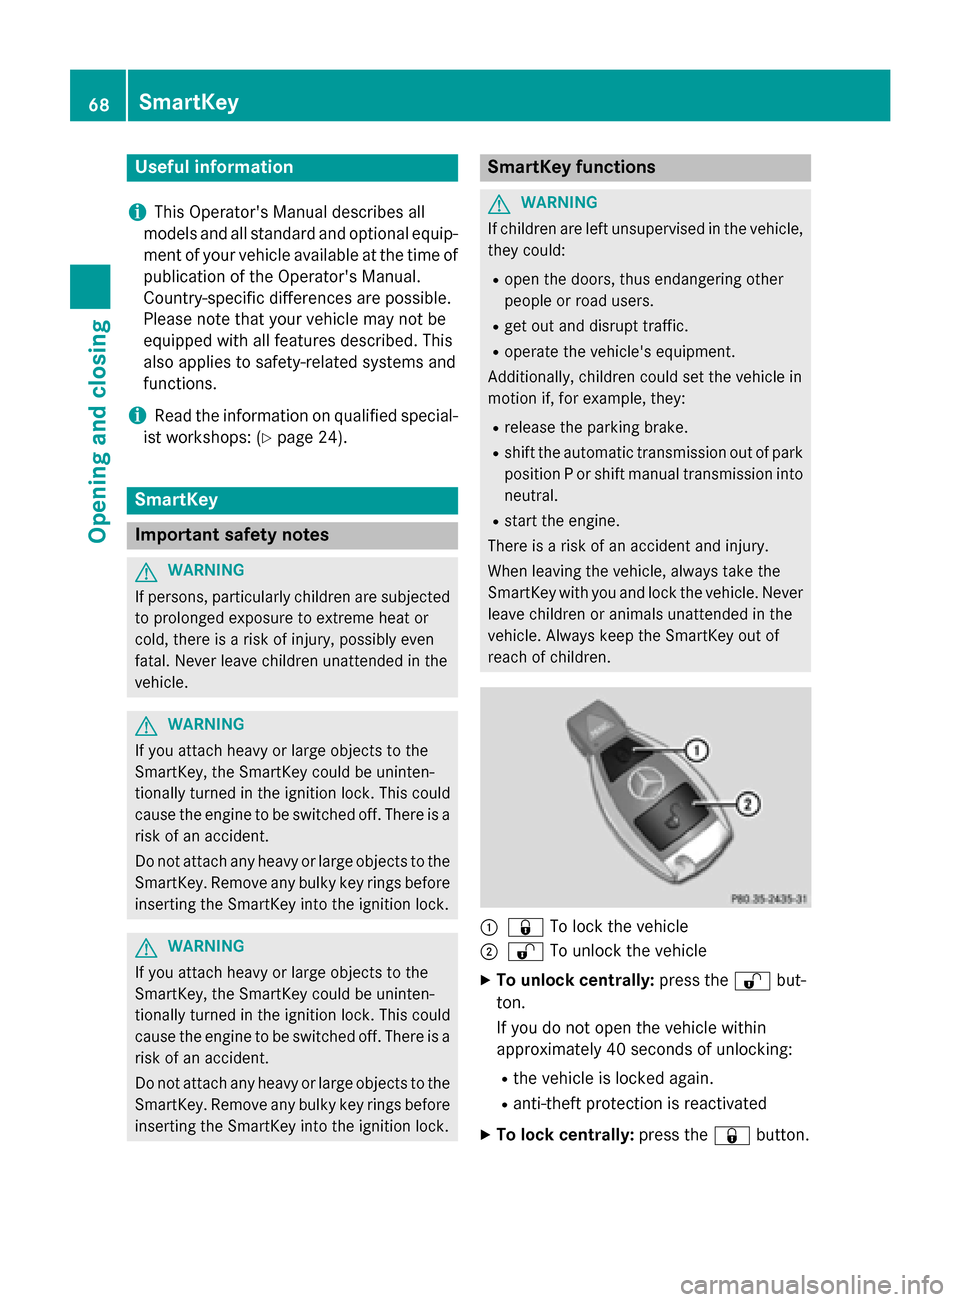
reach of children. :
& To lock the vehicle
; % To unlock the vehicle
X To unlock centrally: press the%but-
ton.
If you do not open the vehicle within
approximately 40 seconds of unlocking:
R the vehicle is locked again.
R anti-theft protection is reactivated
X To lock centrally: press the&button. 68
SmartKeyOpening and closing
Page 75 of 350
Doors
Important safety notes
G
WARNING
When leaving the vehicle, always remove the
SmartKey from the ignition lock. Always take
the SmartKey with you and lock the vehicle.
Do not leave children unsupervised in the
vehicle, even if they are secured in a child
restraint system, and do not give them access to an unlocked vehicle. A child's unsupervised
access to a vehicle could result in an accident
and/or serious personal injury. They could:
R injure themselves on vehicle parts
R be seriously or fatally injured by extreme
heat or cold
R injure themselves or have an accident with
vehicle equipment that may still be in oper-
ation even after the SmartKey has been
removed from the ignition, such as the seat
adjustment, steering wheel adjustment or
memory function.
If children open a door, they could cause
severe or even fatal injury to other persons; if they get out of the vehicle, they could injure
themselves when doing so or be seriously or
even fatally injured by any passing traffic.
Do not expose the child restraint system to
direct sunlight. The child restraint system's
metal parts, for example, could become very
hot, and a child could be burned on these
parts. G
WARNING
Do not carry heavy or hard objects in the
passenger compartment or cargo compart-
ment unless they are firmly secured in place.
Unsecured or improperly positioned cargo
increases a child's risk of injury in the event of
R strong braking maneuvers
R sudden changes of direction
R an accident G
WARNING
If children are left unsupervised in the vehicle, they could:
R open the doors, thus endangering other
people or road users.
R get out and disrupt traffic.
R operate the vehicle's equipment.
Additionally, children could set the vehicle in
motion if, for example, they:
R release the parking brake.
R shift the automatic transmission out of park
position P or shift manual transmission into
neutral.
R start the engine.
There is a risk of an accident and injury.
When leaving the vehicle, always take the
SmartKey with you and lock the vehicle. Never leave children or animals unattended in the
vehicle. Always keep the SmartKey out of
reach of children. Unlocking and opening doors from
the inside
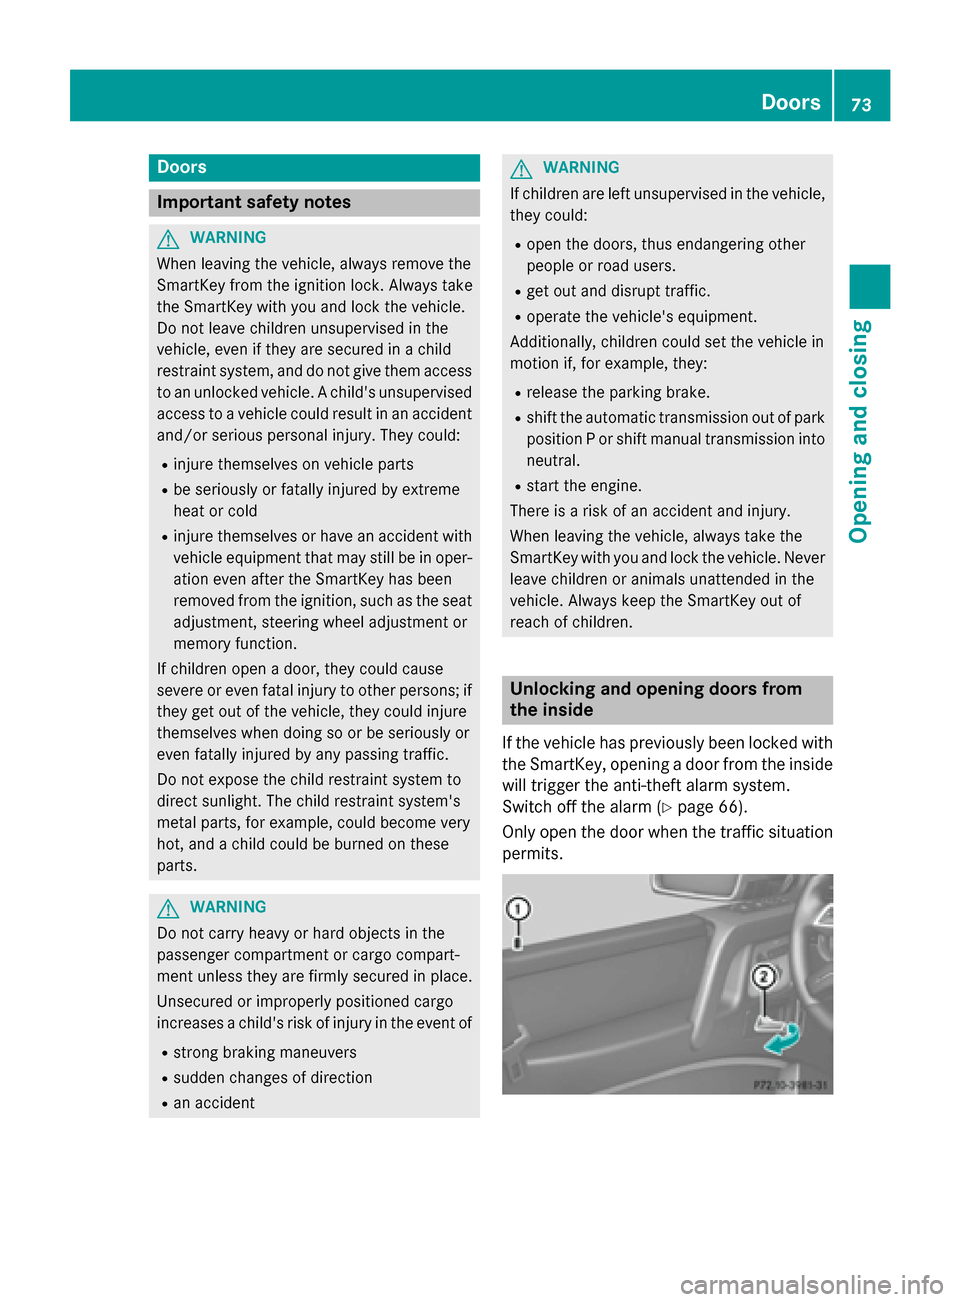
If the vehicle has previously been locked with the SmartKey, opening a door from the inside
will trigger the anti-theft alarm system.
Switch off the alarm (Y page 66).
Only open the door when the traffic situation
permits. Doors
73Opening and closing Z
Page 76 of 350
X
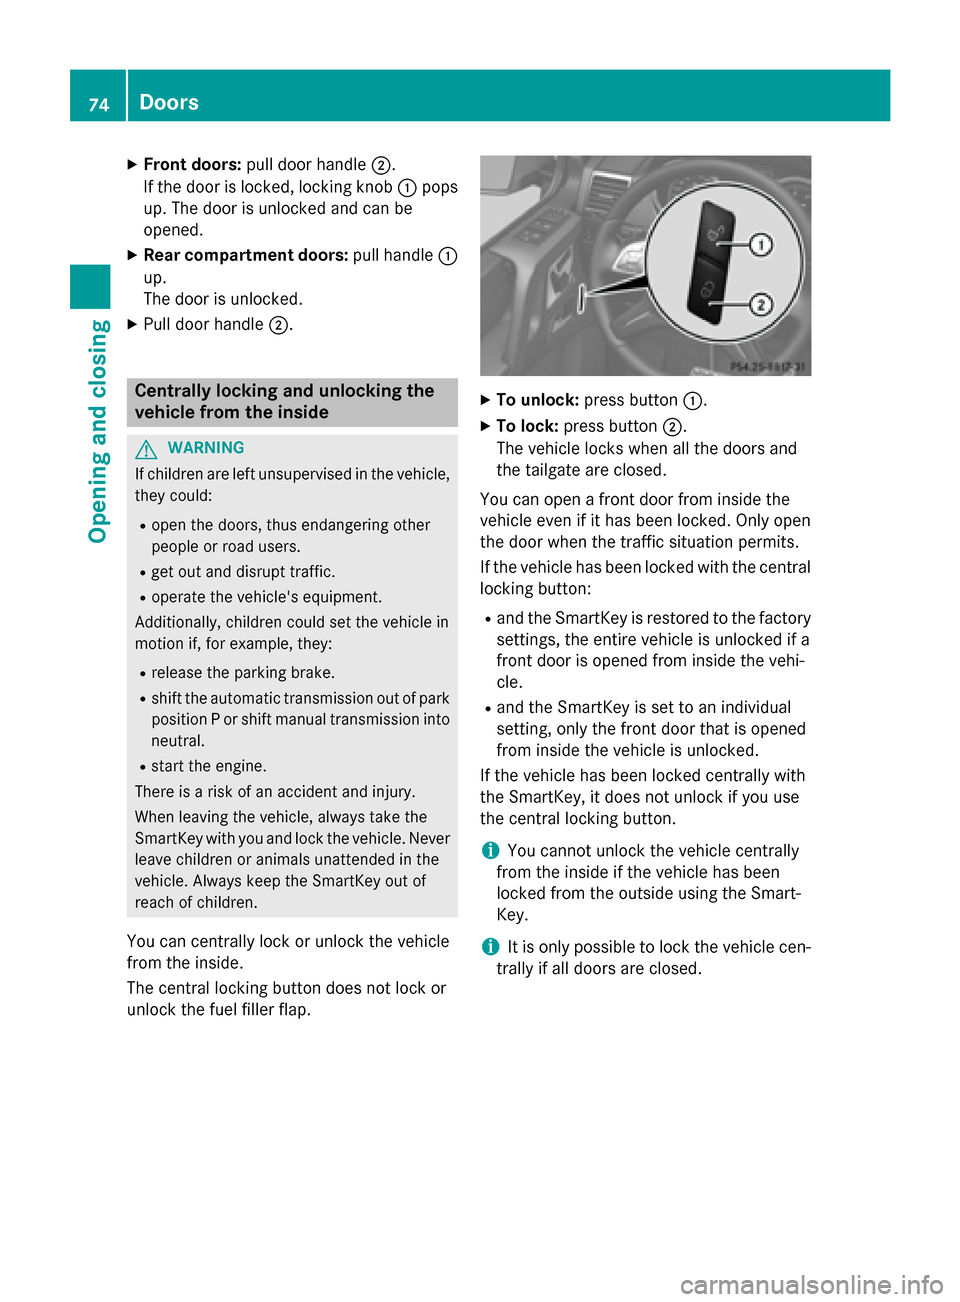
Front doors: pull door handle ;.
If the door is locked, locking knob :pops
up. The door is unlocked and can be
opened.
X Rear compartment doors: pull handle:
up.
The door is unlocked.
X Pull door handle ;. Centrally locking and unlocking the
vehicle from the inside G
WARNING
If children are left unsupervised in the vehicle, they could:
R open the doors, thus endangering other
people or road users.
R get out and disrupt traffic.
R operate the vehicle's equipment.
Additionally, children could set the vehicle in
motion if, for example, they:
R release the parking brake.
R shift the automatic transmission out of park
position P or shift manual transmission into
neutral.
R start the engine.
There is a risk of an accident and injury.
When leaving the vehicle, always take the
SmartKey with you and lock the vehicle. Never leave children or animals unattended in the
vehicle. Always keep the SmartKey out of
reach of children.
You can centrally lock or unlock the vehicle
from the inside.
The central locking button does not lock or
unlock the fuel filler flap. X
To unlock: press button :.
X To lock: press button ;.
The vehicle locks when all the doors and
the tailgate are closed.
You can open a front door from inside the
vehicle even if it has been locked. Only open
the door when the traffic situation permits.
If the vehicle has been locked with the central
locking button:
R and the SmartKey is restored to the factory
settings, the entire vehicle is unlocked if a
front door is opened from inside the vehi-
cle.
R and the SmartKey is set to an individual
setting, only the front door that is opened
from inside the vehicle is unlocked.
If the vehicle has been locked centrally with
the SmartKey, it does not unlock if you use
the central locking button.
i You cannot unlock the vehicle centrally
from the inside if the vehicle has been
locked from the outside using the Smart-
Key.
i It is only possible to lock the vehicle cen-
trally if all doors are closed. 74
DoorsOpening and closing
Page 111 of 350
with your bare hands. If necessary, clean the
glass tube when cold with alcohol or spirit and
rub it off with a lint-free cloth.
Protect bulbs from moisture during opera-
tion. Do not allow bulbs to come into contact
with liquids.
Xenon bulbs
If your vehicle is equipped with Xenon bulbs,
you can recognize this by the following: the
cone of light from the Xenon bulbs moves
from the top to the bottom and back again
when you start the engine. For this to be
observed, the lights must be switched on
before starting the engine.
Bulbs and lamps are an important aspect of
vehicle safety. You must therefore make sure that these function correctly at all times.
Have the headlamp setting checked regularly.
LED lamps
You can replace neither Xenon bulbs nor LED
bulbs. Have LED bulbs changed at a qualified specialist workshop.
Bulbs and lamps are an important aspect of
vehicle safety. You must therefore make sure
that these function correctly at all times.
Have the headlamp setting checked regularly.
Before changing bulbs
Have the following bulbs replaced at a quali-
fied specialist workshop:
R Additional turn signals in the exterior mir-
rors
R High-mounted brake lamp
R High-beam/low-beam headlamps (Xenon
bulbs)
R Daytime running lamps
R Parking lamps/standing lamps
R License plate lamp
i Individual segments of the license plate
lamp LEDs may fail without a display mes-
sage appearing in the multifunction dis-
play. Regularly check the license plate
lamp. If necessary, visit a qualified special-
ist workshop. You can replace the following bulbs:
R Fog lamp/cornering light with fog lamp
function
R Turn signal lamp (front)
R Brake/tail lamp
R Turn signal lamp (rear)
R Tail lamps/standing lamps
R Backup lamp
R Rear Fog Lamp
R Side marker lamps
Other bulbs
There are bulbs other than the Xenon bulbs
that you cannot replace yourself. Only replace the bulbs listed (Y page 109). Have the bulbs
that you cannot replace yourself replaced at a
qualified specialist workshop.
If you require assistance replacing bulbs, con-
sult a qualified specialist workshop.
Do not touch the glass tube of new bulbs with
your bare hands. Even minor contamination
can burn into the glass surface and reduce
the service life of the bulbs. Always use a lint- free cloth or only touch the base of the bulb
when installing.
Only use bulbs of the correct type.
If the new bulb still does not light up, consult a qualified specialist workshop.
Bulbs and lamps are an important aspect of
vehicle safety. You must therefore make sure
that these function correctly at all times.
Have the headlamp setting checked regularly. Overview: changing bulbs/bulb types
Front bulbs You can replace the following bulbs. The bulb
type can be found in the legend. Replacing bulbs
109Lights and windshield wipers Z
Page 134 of 350
Useful information
i This Operator's Manual describes all
models and all standard and optional equip- ment of your vehicle available at the time of
publication of the Operator's Manual.
Country-specific differences are possible.
Please note that your vehicle may not be
equipped with all features described. This
also applies to safety-related systems and
functions.
i Read the information on qualified special-
ist workshops: (Y page 24). Notes on breaking-in a new vehicle
Important safety notes
New and replaced brake pads and discs only
reach their optimum braking effect after sev-
eral hundred kilometers of driving. Compen-
sate for this by applying greater force to the
brake pedal. The first 1000 miles (1500 km)
The more you look after the engine when it is
new, the more satisfied you will be with its
performance in the future.
R You should therefore drive at varying vehi-
cle and engine speeds for the first
1,000 miles (1,500 km).
R Avoid heavy loads, e.g. driving at full throt-
tle, during this period.
R Change gear in good time, before the tach-
ometer needle is Ôof the way to the red
area of the tachometer.
R Do not manually shift to a lower gear to
brake the vehicle.
R If possible, do not depress the accelerator
pedal past the point of resistance (kick-
down).
R Only select shift ranges 3,2or 1when driv-
ing slowly, e.g. in mountainous terrain. After 1,000 miles (1,500 km), you can
increase the engine speed gradually and bring
the vehicle to full speed.
Additional breaking-in notes for AMG vehi-
cles:
R Do not drive faster than 85 mph
(140 km/ h)for the first 1,000 miles
(1,500 km).
R Only allow the engine to reach a maximum
engine speed of 4,500 rpm briefly.
R Change gear in good time.
R Avoid driving off-road before the differen-
tial oil change at 2,000 miles (3,000 km).
R Ideally, for the first 1,000 miles (1,500 km),
drive in program C.
i You should also observe these breaking-
in notes if the engine or parts of the drive
train on your vehicle have been replaced.
i Always observe the respective speed lim-
its. AMG vehicles with rear axle locking
differential
Change the oil after a breaking-in period of
2,000 miles (3,000 km) to improve protection of the differential. This oil change will
lengthen the service life of the differential.
Have the oil change carried out at a qualified
specialist workshop. Mercedes-Benz recom-
mends that you use an authorized Mercedes- Benz Center for this purpose. Driving
Important safety notes
G
WARNING
Objects in the driver's footwell can restrict the pedal travel or obstruct a depressed pedal.
The operating and road safety of the vehicle is
jeopardized. There is a risk of an accident.
Make sure that all objects in the vehicle are
stowed correctly, and that they cannot enter 132
DrivingDriving and parking