instrument cluster MERCEDES-BENZ G-Class 2017 W463 User Guide
[x] Cancel search | Manufacturer: MERCEDES-BENZ, Model Year: 2017, Model line: G-Class, Model: MERCEDES-BENZ G-Class 2017 W463Pages: 286, PDF Size: 4.91 MB
Page 88 of 286
XTo switchonthe daytime runnin glamps:
switch on the DaytimeRunningLights
functionvia the on-board computer
(Ypage 165).
XTurn the light switch to the Ãposition.
With the engine running :depen ding on the
ambient light, the daytime running lamps or
the low-bea mheadlamps are switched on.
Whe nthe low-bea mheadlamps are switched
on, the green Lindicator lamp in the
instrument cluster lights up.
If the engine is running and yo uturn the light
switch to the TorL position, the manual
settings take precedence overt he daytime run-
ning lamps.
Automati cheadlamp mode
GWARNING
Whe nthe light switch is set to Ã,the low-
beam headlamps mayn ot be switched on
automaticall yifthereisf og,snow or other
causes of poor visibility du etothe weather
conditions such as spray .There is ariskofa n
accident.
In such situations, turn the light switch to
L.
The automatic headlamp feature is onlyana id.
The driver is responsibl efor the vehicle's light-
ing at al ltimes.
à is the favoredl ight switch setting.
The light setting is automaticall yselected
according to the brightness of the ambient light,
bu tn ot in the event of poor visibility du eto
weather conditions such as fog,s now or spray.
XTo switchonthe automatic headlamps:
turn the light switch to the Ãposition.
With the SmartKey in position 1in the igni-
tio nlock, the parking lamps are switched on
or off automaticall ydepen ding on the bright-
ness of the ambient light.
If yo uhaves witched on the DaytimeRun‐
ningLightsfunctionvia the on-board com-
puter, the daytime running lamps or the park-
ing lamps and low-bea mheadlamps will
switch on or off automaticall ywhile the
engine is running.
Whe nthe low-bea mheadlamps are switched
on, the green Lindicator lamp in the
instrument cluster lights up.
Rear fog lamp
The rearf og lamp improvesv isibility of your
vehicl efor the traffic behind in the event of thick
fog.Y oumust observe the legalr equirements
for the country in which yo uare currentlyd riving
when operating the rearf og lamp.
XTo switchonthe rear fog lamp: turn the
SmartKey in the ignition lock to position 2or
start the engine.
XTurn the light switch to the LorÃ
position.
XPress the Rbutton.
The yellow Rindicator lamp on the instru-
ment cluster lights up.
Parking lamps
!
If the battery charge is very low, the parking
lamps or standing lamps are automatically
switched off to enabl ethe next engine start.
Alway sparky ourvehicl esafelya nd in awelllit
area, in accordance with the relevant legal
stipulations. Avoi dusing the Tparking
lamps overap eriodofs everalhours. If pos-
sible, switch on the right-hand Xor left-
hand W standing lamps.
XTo switc hon:turn the light switch to the
T position.
The green Tindicator lamp on the instru-
ment cluster lights up.
Standin glamps
Switching on the standing lamps ensures the
corresponding side of the vehicl eisilluminated.
XTo switc honthe standin glamp: turn the
SmartKey to position uin the ignition lock or
remove the SmartKey.
XTurn the light switch to the W(left-hand
side of the vehicle) or X(right-hand side of
the vehicle) position.
Headlamp cleanin gsystem
The headlamps are cleane dautomaticall yifthe
"Wip ewithw asherf luid"functio niso perated
ten time swhile the lights are on and the engine
is running (
Ypage 92). Whe nyou switch off
86Exterior lighting
Lights and windshield wiper s
Page 106 of 286
Do not switch off the ignition whiledriving.
GWARNING
If the parkin gbrake hasn ot been fully
released when driving, the parkin gbrake can:
Roverheat and cause afire
Rlose its hol dfunction.
There is ariskoff irea nd an accident. Release
the parkin gbrake full ybefor ed rivin goff.
!Warm up the engine quickly. Do not us ethe
engine's full performance unti lithasreached
operating temperature.
Onlys hift the automatic transmission to the
desired drive positio nwhent he vehicl eissta-
tionary.
Where possible, avoi dspinning the drive
wheels when pulling away on slippery roads.
Yo uc ould otherwis edamag ethe drive train.
!Avoi dhighe ngine speeds when the engine
is cold. The engine's servic elifec ould other-
wise be significantl yshortened. Do not use
the engine's full performance unti lithas
reachedo perating temperature.
!Mercedes-AMG vehicles: at lowengine oil
temperatures belo w68‡ (+20† ),the max-
imu me ngine spee disrestricted in order to
protect the engine .Toprotect the engine and
maintain smooth engine operation, avoi ddriv-
ing at full throttle when the engine is cold.
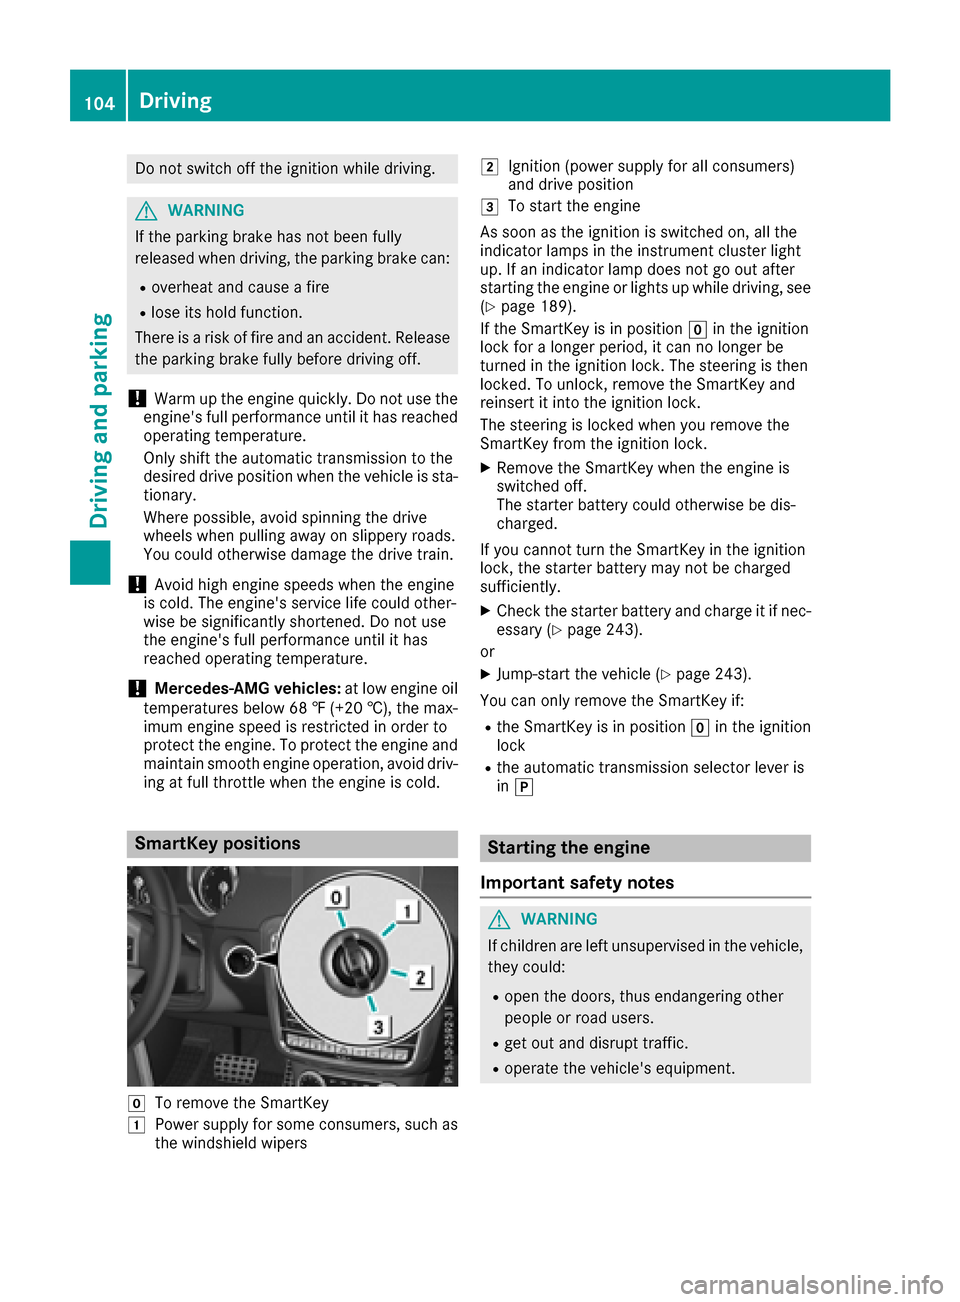
SmartKey positions
gTo remove the SmartKey
1Powe rsuppl yfor som econsumers ,suc ha s
the windshiel dwiper s
2Ignitio n(powe rsuppl yfor al lconsumers)
and drive position
3To start the engine
As soo nasthe ignition is switched on, al lthe
indicator lamps in the instrument cluster light
up .Ifani ndicator lamp does not go ou tafter
startin gthe engine or lights up whil edriving, see
(
Ypage 189).
If the SmartKeyisinp osition gin the ignition
lock for alon gerp eriod, it can no longe rbe
turned in the ignition lock. The steerin gisthen
locked .Tounlock, remove the SmartKeya nd
reinsert it into the ignition lock.
The steerin gislocked when yo uremove the
SmartKeyf romthe ignition lock.
XRemov ethe SmartKeyw hent he engine is
switched off.
The starter battery could otherwis ebedis-
charged.
If yo ucanno tturnt he SmartKeyint he ignition
lock, the starter battery mayn ot be charged
sufficiently.
XCheck the starter battery and charge it if nec-
essar y(Ypage 243).
or
XJump-star tthe vehicl e(Ypage 243).
Yo uc an onl yremove the SmartKeyi f:
Rthe SmartKeyisinpositiongin the ignition
lock
Rthe automatic transmission selecto rlev er is
in j
Starting the engine
Important safety notes
GWARNING
If children ar eleftu nsupervised in the vehicle,
theyc ould:
Ropen the doors ,thuse ndangering other
people or roa dusers.
Rgeto utand disrupt traffic.
Roperate the vehicle's equipment.
104Driving
Driving an dparking
Page 118 of 286
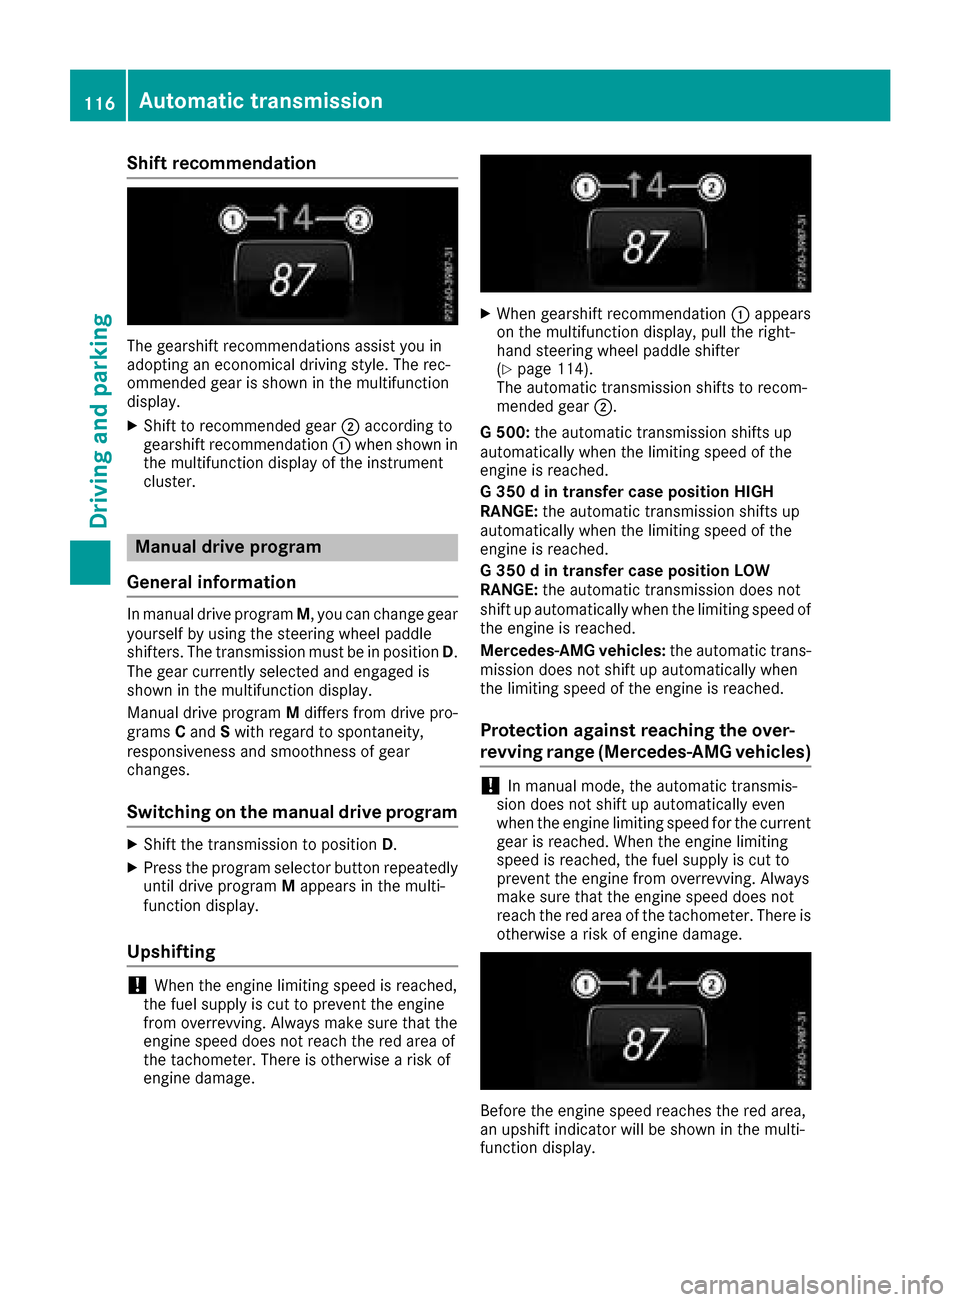
Shift recommendation
The gearshift recommendations assist you in
adopting an economical driving style. The rec-
ommended gear is shown in the multifunction
display.
XShift to recommended gear;according to
gearshift recommendation :when shown in
the multifunction display of the instrument
cluster.
Manual drive program
General information
In manual drive program M,you can change gear
yourself by using the steering wheel paddle
shifters. The transmission must be in position D.
The gear currently selected and engaged is
shown in the multifunction display.
Manual drive program Mdiffers from drive pro-
grams Cand Swith regard to spontaneity,
responsiveness and smoothness of gear
changes.
Switching on the manuald rive program
XShift the transmission to position D.
XPress the program selector button repeatedly
until drive program Mappears in the multi-
function display.
Upshifting
!When the engine limiting speed is reached,
the fuel supply is cut to prevent the engine
from overrevving. Always make sure that the
engine speed does not reach the red area of
the tachometer. There is otherwise arisk of
engine damage.
XWhen gearshift recommendation :appears
on the multifunction display,p ull the right-
hand steering wheel paddle shifter
(
Ypage 114).
The automatic transmission shifts to recom-
mended gear ;.
G5 00: the automatic transmission shifts up
automatically when the limiting speed of the
engine is reached.
G3 50dint ransfer case position HIGH
RANGE: the automatic transmission shifts up
automatically when the limiting speed of the
engine is reached.
G3 50dint ransfer case position LOW
RANGE: the automatic transmission does not
shift up automatically when the limiting speed of
the engine is reached.
Mercedes-AMG vehicles: the automatic trans-
mission does not shift up automatically when
the limiting speed of the engine is reached.
Protection against reaching the over-
revving range (Mercedes-AMG vehicles)
!In manual mode, the automatic transmis-
sion does not shift up automatically even
when the engine limiting speed for the current
gear is reached. When the engine limiting
speed is reached, the fuel supply is cut to
prevent the engine from overrevving. Always
make sure that the engine speed does not
reach the red area of the tachometer. There is
otherwise arisk of engine damage.
Before the engine speed reaches the red area,
an upshift indicator will be shown in the multi-
function display.
116Automatic transmission
Driving and parking
Page 120 of 286
Refueling
Important safety notes
GWARNING
Fue lish ighly flammable. If yo uhandlef uel
incorrectly, there is ariskoff ire and explo-
sion.
Yo um usta void fire ,ope nf lames ,creating
sparks and smoking. Switch off the engine
and ,ifa pplicable, the auxiliary heating before
refueling.
GWARNING
Fue lisp oisonous and hazardoustoh ealth.
There is ariskofi njury.
Yo um ustm ake sure that fue ldoe sn ot come
into contact with your skin, eyes or clothing
and that it is not swallowed. Do not inhale fuel
vapors. Keepf uelawa yfrom children.
If yo uoro thers come into contact with fuel,
observe the following:
RWash away fue lfrom skin immediately
using soapa nd water.
RIf fuelcomesi nto contact with your eyes,
immediately rins ethem thoroughly with
clean water. Seek medica lassistance with-
outd elay.
RIf fuelisswallowed, seekm edicalassis-
tance withoutd elay.Don ot induce vomit-
ing.
RImmediately change outofc lothing which
hasc ome into contact with fuel.
GWARNING
Electrostatic buildu pcan create sparks and
ignite fue lvapors. There is ariskoff ire and
explosion.
Alway stouch the vehicl ebodyb efore opening
the fue lfille rflaport ouching the fue lpum p
nozzle .Any existing electrostati cbuildup is
thereby discharged.
Do not get into the vehicl eagain during the refu-
eling process .otherwise electrostati ccharge
could buil dupagain.
!Do not us ediese ltor efuel vehicles with a
gasoline engine. Do not switch on the ignition
if yo uaccidentall yrefuel with the wrong fuel.
Otherwise, the fue lwille nter the fue lsys tem.
Even small amounts of the wrong fue lcould
resul tind amagetot he fue lsystem and the
engine. Notify aquali fied specialist workshop
and have the fue ltank and fue llin es drained
completely.
!Overfilling the fue ltank could damag ethe
fue lsystem.
!Take care not to spill any fue lonpainted
surfaces. Yo ucould otherwise damag ethe
paintwork.
!Use afilter when adding fue lfrom afue lcan.
The fue llin es and/or the fue linjection system
could otherwise be blocked by particles from
the fue lcan.
If yo uoverfil lthe fue ltank, fue lcould spray out
when the fue lpum pnozzle is removed.
If yo uoverfil lthe fue ltank, pressure may build
up in the fue ltank. Thisc ould ca
use fue
ltospray
outw hent he fue lpum pnozzle is removed.
There is ariskofi njury. The fue ltank is ful lwhen
the fue lpum pnozzle firs tswitches off. End the
refueling process.
For further information on fue land fue lquali ty
(
Ypage 276).
Refueling
General information
Paya ttention to the important safety notes
(Ypage 118).
If yo uunlock/lock the vehicl efrom the outside,
the fue lfille rflapa lsou nlocks/locks.
The position of the fue lfille rcap is displayed in
the instrument cluster 8.The arrow next to
the filling pump indicates the sid eofthe vehicle.
118Refueling
Driving and parking
Page 121 of 286
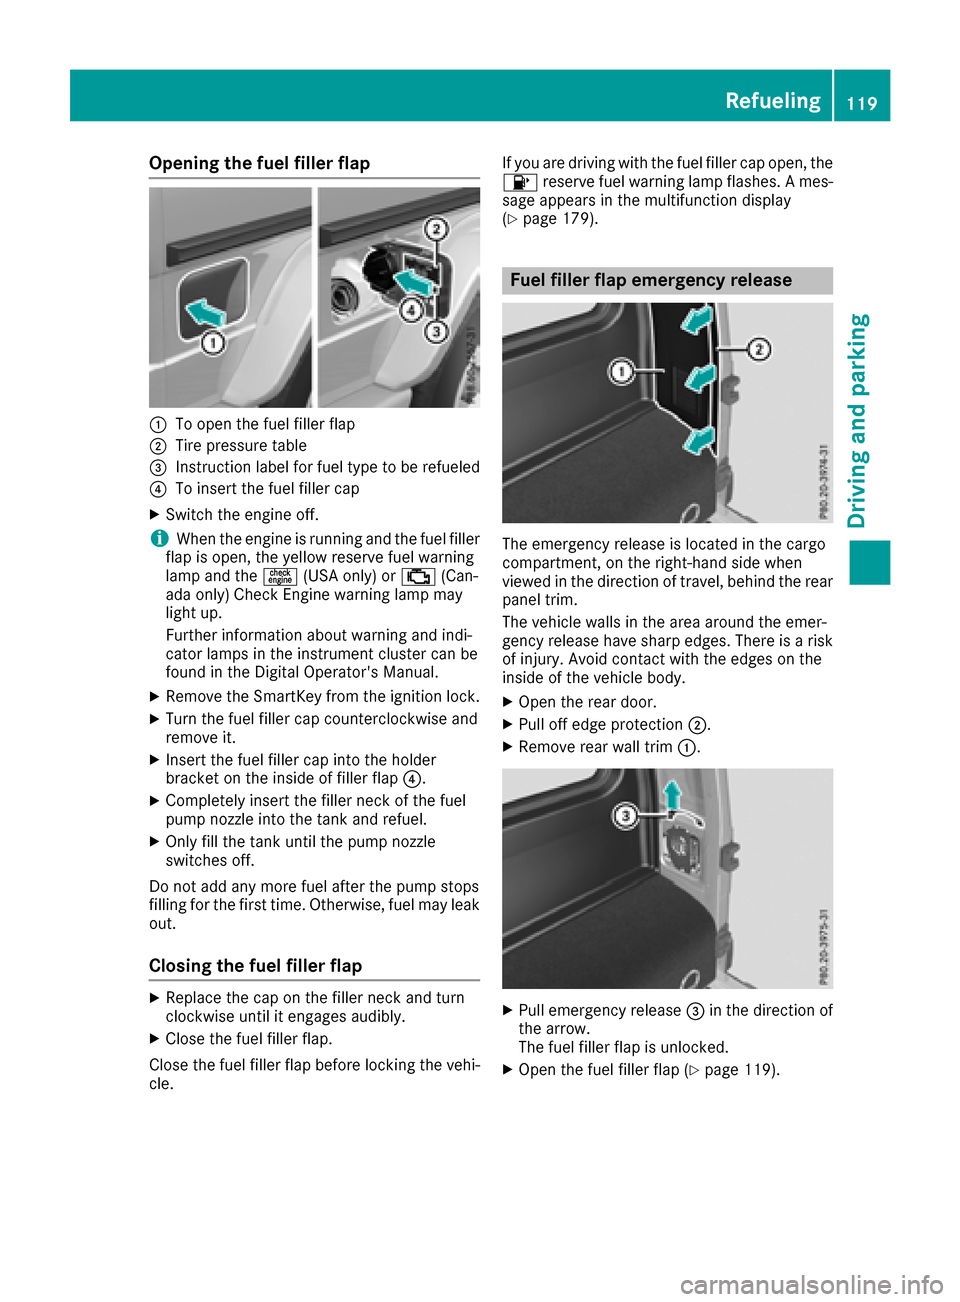
Opening the fuel filler flap
:To open the fuel filler flap
;Tire pressure table
=Instruction label for fuel type to be refueled
?To insert the fuel filler cap
XSwitchthe engine off.
iWhen the engine is running and the fuel filler
flap is open, the yellow reserve fuel warning
lamp and the =(USA only) or ;(Can-
ada only) Check Engine warning lamp may
light up.
Further information about warning and indi-
cator lamps in the instrument cluster can be
found in the Digital Operator's Manual.
XRemove the SmartKey from the ignition lock.
XTurn the fuel filler cap counterclockwise and
remove it.
XInser tthe fuel filler cap into the holder
bracket on the inside of filler flap ?.
XCompletely insert the filler neck of the fuel
pump nozzle into the tank and refuel.
XOnly fill the tank until the pump nozzle
switches off.
Do not add any more fuel after the pump stops
filling for the first time. Otherwise, fuel may leak
out.
Closing the fuel filler flap
XReplace the cap on the filler neck and turn
clockwise until it engages audibly.
XClose the fuel filler flap.
Close the fuel filler flap before lockin gthe vehi-
cle. If you are driving with the fuel filler cap open, the
8
reservef uel warning lamp flashes. Ames-
sage appears in the multifunction display
(
Ypage 179).
Fuel filler flap emergency release
The emergency release is located in the cargo
compartment ,onthe right-hand side when
viewed in the direction of travel, behind the rear
panel trim.
The vehicle walls in the area around the emer-
genc yrelease have sharp edges. There is arisk
of injury. Avoid contact with the edges on the
inside of the vehicle body.
XOpen the rear door.
XPull off edge protection ;.
XRemove rear wall trim:.
XPull emergency release =in the direction of
the arrow.
The fuel filler flap is unlocked.
XOpen the fuel filler flap (Ypage 119).
Refueling119
Driving and parking
Z
Page 124 of 286
XTo apply:pull parking brake lever ;up
firmly.
Whe nthe ignition is switched on, the F
(US Aonly) or J(Canada only) indicator
lamp in the instrument cluster lights up.
XTo release: pull parking brake lever ;
slightly.
XPress release button :and guid eparking
brake ;down to the stop.
The F (USAonly) or !(Canada only)
indicator lamp in the instrument cluster goes
out.
The vehicl ecan also be braked during an emer-
genc ybyu sing the parking brake.
XTo brake in an emergency: press and hold
release button :and carefull ypullp arking
brake lever ;upwards.
If yo udrive on we troads or dirt-covered surfa-
ces, roads alta nd/or dirt could get into the
parking brake.
In order to prevent corrosion and areduction in
the braking powe rofthe parking brake, observe
the following:
Rpull the parking brake up with release but-
ton :depressedf rom time to time before
beginning ajourney.
Rdrive for approximately1 10 yds(100 m) at a
maximu mspeed of 12 mph (20 km/h)
Parking the vehicle for alon gp eriod
If yo uleave the vehicl eparked for longer than
fourw eeks, the battery maybed amaged by
exhaustive discharging.
If yo ulea ve the vehicl eparked for longer thans ix
weeks, the vehicl emaysuffer damage as a
resul toflackofu se.
XVisit aquali fied specialist workshop and seek
advice.
iYo uc an obtai ninformatio nabout trickle
chargers from aquali fied specialist work-
shop.
Driving tips
General driving tips
Important safety notes
GWARNING
If yo uswitch off the ignition whil edriving,
safety-relevant functions are onlya vailable
with limitations, or not at all. Thi scould affect,
for example, the powe rsteering and the brake
boosting effect. Yo uwillr equire considerably
more effort to steera nd brake. There isarisk
of an accident.
Do not switch off the ignition whil edriving.
GWARNING
If yo uoperate mobil ecommunication equip-
ment whil edriving ,you will be distracted from
traffic conditions. Yo ucould also lose control
of the vehicle. There is ariskofana ccident.
Onlyo perate thise quipment when the vehicle
is stationary.
Observe the legalr equirements for the country
in which yo uare driving .Some jurisdictions pro-
hibi tthe driver from using amobilephone while
driving avehicle.
If yo umakeac allw hile driving ,alway suse
hands-free mode. Onlyo perate the telephone
when the traffic situatio npermits. If yo uare
unsure, pull overtoas afel oc ation and stop
before operating the telephone.
Bea rinm ind thatata speed of only30m ph
(approximately50k m/h), the vehiclecovers a
distance of 44 ft (approximately1 4m)per sec-
ond.
Drive sensibly –save fuel
Observe the following tips to save fuel:
XThe tires should always be inflated to the rec-
ommended tire pressure.
XRemove unnecessary loads.
XRemove roof carriersw hen they are not nee-
ded.
XWarm up the engin eatlow engin espeeds.
XAvoid frequenta cceleration or braking.
XHave all servicea nd maintenancework car-
ried out at the specified intervals.
122Driving tips
Driving and parking
Page 135 of 286
·distanc ewarning lamp in the instrument
cluster lights up. Brakei mmediately in order to
increase the distance to the vehicle in fronto r
take evasive action provided it is safe to do so.
DISTRONIC PLUS operates in the speed range
between 0mph (0 km/h) and 120 mph
(200 km/h).
Do not use DISTRONIC PLUS while driving on
roads with steep gradients.
As DISTRONIC PLUS transmits radar waves, it
can resemble the radar detectors of the respon-
sible authorities. You can refer to the relevant
chapte rinthe Operator's Manual if questions
are asked about this.
iUSA only: This device has been approved by
the FCC as a"Vehicular Radar System". The
radar sensor is intended for use in an auto-
motiv eradar system only. Removal, tamper-
ing, or alterin gofthe device will void any war-
ranties, and is not permitted by the FCC. Do
not tamper with, alter, or use in any non-
approved way.
An yu nauthorized modification to this device
could void the user's authorit ytooperate the
equipment.
iCanada only: This device complies with
RSS-210 of Industry Canada. Operation is
subjec ttothe following two conditions:
1. This device may not cause interference,
and
2. This device must accept any interference
received, includin ginterferenc ethat may
cause undesired operation of the device.
Removal, tampering, or alterin gofthe device
will void any warranties, and is not permitted. Do not tamper with, alter, or use in any non-
approved way.
An yu nauthorized modification to this device
could void the user's authorit ytooperate the
equipment.
Important safetyn otes
GWARNING
DISTRONIC PLUS does not react to:
Rpeople or animals
Rstationary obstacles on the road, e.g. stop- ped or parked vehicles
Roncoming and crossing traffic
As aresult, DISTRONIC PLUS may neither give
warning snor interveneins uch situations.
There is arisk of an accident.
Always pay careful attention to the traffic sit-
uation and be ready to brake.
GWARNING
DISTRONIC PLUS cannot always clearly iden-
tify other road users and complex traffic sit-
uations.
In such cases, DISTRONIC PLUS may:
Rgive an unnecessary warning and then
brake the vehicle
Rneither give awarning nor intervene
Raccelerateorb rake unexpectedly
There is arisk of an accident.
Continue to drive carefully and be ready to
brake, in particular when warned to do so by
DISTRONIC PLUS.
GWARNING
DISTRONIC PLUS brakes your vehicle with up to 40% of the maximum brakin gforce. If this
brakin gforceisi nsufficient ,DISTRONIC PLUS
warns you visually and audibly. There is arisk
of an accident.
In such cases, apply the brakes yourself and
try to take evasive action.
If you fail to adapt your driving style, DISTRONIC
PLUS can neither reduce the risk of an accident
nor override the laws of physics. DISTRONIC
PLUS cannot take accountofr oad, weather and
traffic conditions. DISTRONIC PLUS is only an
aid. You are responsible for maintaining asafe
distanc etothe vehicle in front, for vehicle
speed, for brakin gingood time and for staying in
lane.
Do not use DISTRONIC PLUS:
Rin road and traffic condition sthat do not allow
you to maintain aconstan tspeed, e.g. in
heavy traffic or on winding roads
Ron slippery road surfaces.B raking or accel-
eratin gcan cause the drive wheels to lose
traction and the vehicle could then skid
Rwhen ther eispoor visibility, e.g. due to fog,
heavy rain or snow
Driving systems133
Driving and parking
Z
Page 151 of 286
Disengagethe differential locks immediately
on fir msurfaces with good grip.
!Onlye ngagethe differential locks when:
Ryoua redrivin gatw alking pace
Rthe drive wheels ar enot spinning
Ryoua renot drivin gonafirmr oads urface
Differential lock fort he transfercase
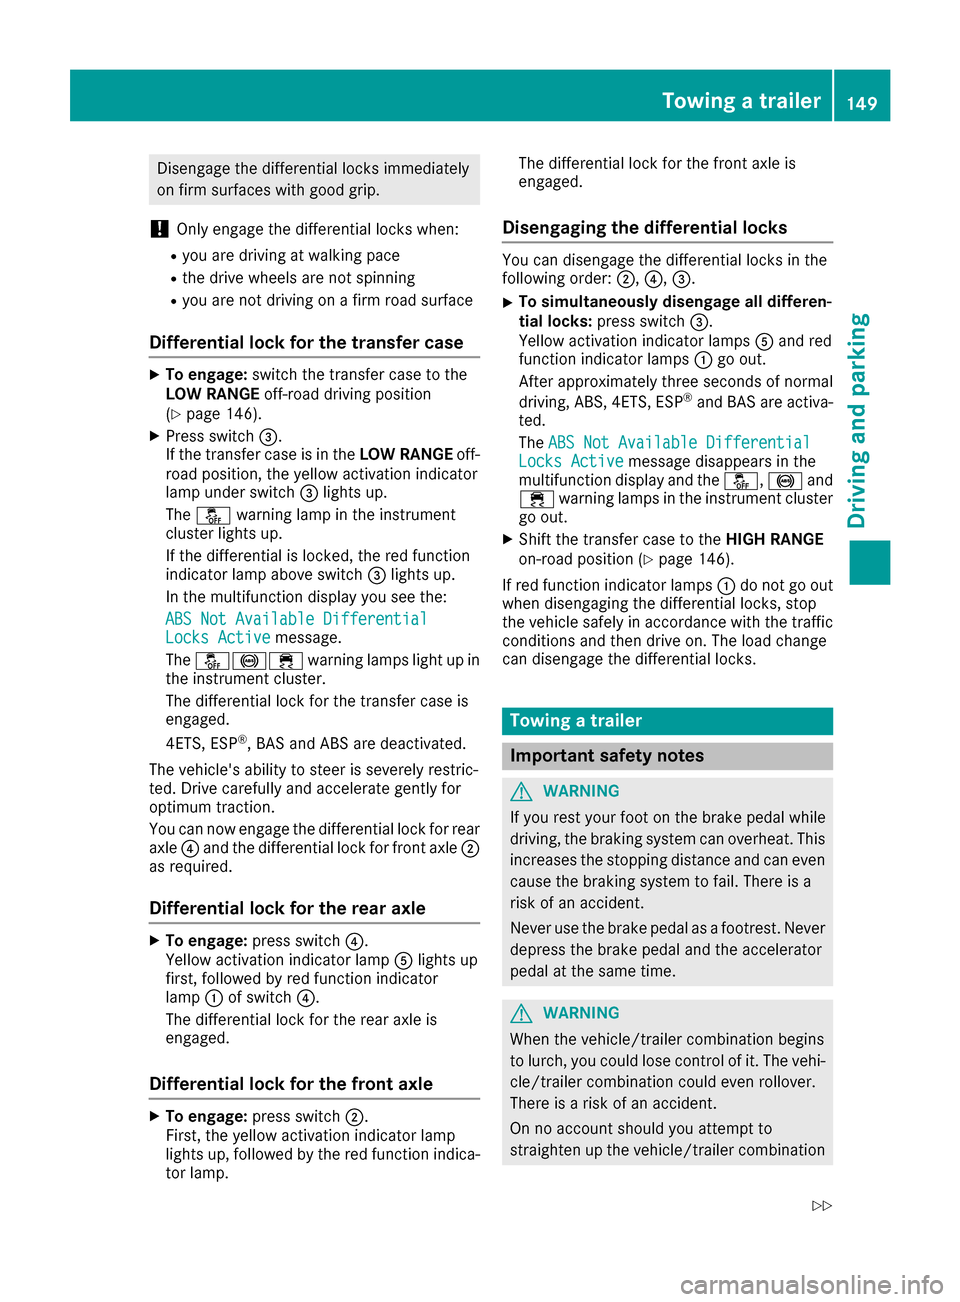
XTo engage: switch the transferc asetot he
LO WR ANGE off-roaddrivin gposit ion
(
Ypage 146).
XPress switch =.
If the transferc aseisint heLOWR ANGE off-
roa dposit ion, the yellow activatio nindicator
lamp under switch =lights up.
The å warning lamp in the instrument
cluster lights up.
If the differential is locked ,the red function
indicator lamp above switch =lights up.
In the multifunctio ndisplay yous ee the:
ABS Not Available Differential
Locks Activemessage.
The å!÷ warning lamps light up in
the instrument cluster.
The differential lock for the transferc asei s
engaged.
4ETS, ESP
®,B AS and ABS ar edeactivated.
The vehicle's ability to stee risseverely restric-
ted .Drivec arefull yand accelerate gently for
optimu mtraction.
Yo uc an now engag ethe differential lock for rear
axle ?and the differential lock for front axle ;
as required.
Differential lock fort he rear axle
XTo engage:press switch ?.
Yellow activatio nindicator lamp Alights up
first, followe dbyred functio nindicator
lamp :of switch ?.
The differential lock for the rea raxlei s
engaged.
Differential lock fort he front axle
XTo engage:press switch ;.
First, the yellow activatio nindicator lamp
lights up ,followe dbythe red functio nindica-
tor lamp. The differential lock for the front axl
eis
engaged.
Disengaging the differential locks
Yo uc an disengage the differential locks in the
following order: ;,?,=.
XTo simultaneously disengag eall differen-
tial locks: press switch =.
Yellow activatio nindicator lamps Aand red
functio nindicator lamps :go out.
After approximately threes econdsofnormal
driving, ABS, 4ETS, ESP
®and BAS ar eactiva-
ted.
The ABS Not Available Differential
Locks Activemessage disappears in the
multifunctio ndisplay and the å,!and
÷ warning lamps in the instrument cluster
go out.
XShift the transferc asetot heHIGH RANGE
on-road positio n(Ypage 146).
If red functio nindicator lamps :do not go out
when disengaging the differential locks, stop
the vehicl esafelyina ccordance with the traffic
conditions and thend rive on. The load change
can disengage the differential locks.
Towin gatrailer
Important safety notes
GWARNING
If yo uresty ou rfoo tont he brake peda lwhile
driving, the braking system can overheat. This increases the stopping distance and can even
cause the braking system to fail .There is a
ris kofana ccident.
Never us ethe brake peda lasafootrest. Never
depress the brake peda land the accelerator
peda latthe same time.
GWARNING
When the vehicle/trailer combinatio nbegin s
to lurch, yo ucould lose contro lofit. The vehi-
cle/trailer combinatio ncould eve nrollover.
There is ariskofana ccident.
On no account shoul dyou attempt to
straightenu pthe vehicle/trailer combination
Towin gatrailer149
Driving an dparking
Z
Page 166 of 286
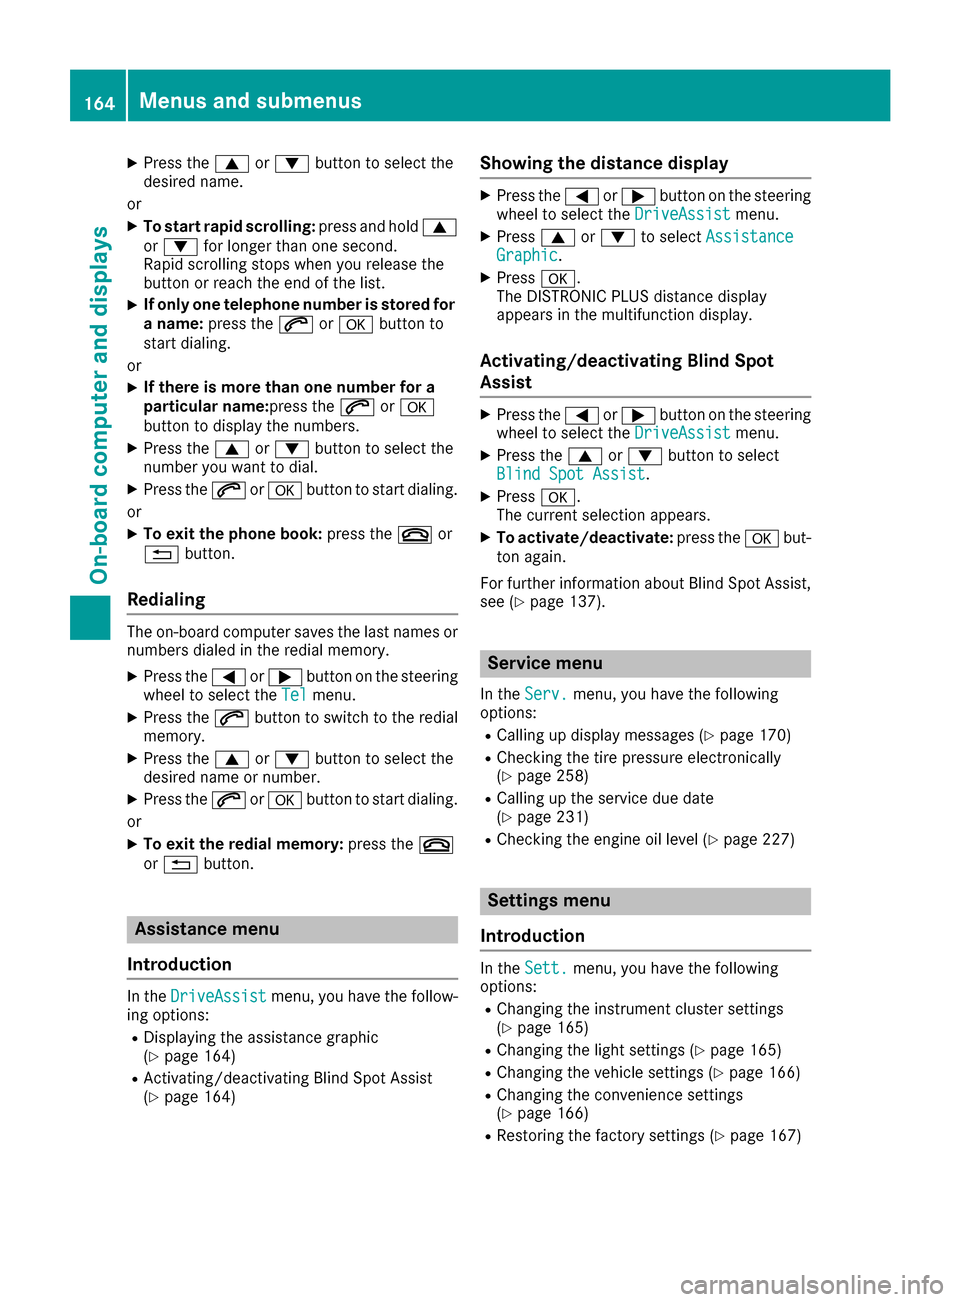
XPress the9or: button to select the
desired name.
or
XTo startr apid scrolling: press and hold9
or : for longer than one second.
Rapid scrolling stops when you release the
button or reach the end of the list.
XIf only one telephone number is stored for
an ame: press the 6ora button to
start dialing.
or
XIf thereism ore thanone number for a
particular name:press the 6ora
button to display the numbers.
XPress the 9or: button to select the
number you want to dial.
XPress the 6ora button to start dialing.
or
XTo exit the phone book: press the~or
% button.
Redialing
The on-board computer saves the last names or
numbers dialed in the redial memory.
XPress the =or; button on the steering
wheel to select the Telmenu.
XPress the6button to switch to the redial
memory.
XPress the 9or: button to select the
desired name or number.
XPress the 6ora button to start dialing.
or
XTo exit the redial memory: press the~
or % button.
Assistance menu
Introduction
In the DriveAssistmenu, you have the follow-
ing options:
RDisplaying the assistanc egraphic
(Ypage 164)
RActivating/deactivatin gBlind Spot Assist
(Ypage 164)
Showing the distance display
XPress the =or; button on the steering
wheel to select the DriveAssistmenu.
XPress9or: to select AssistanceGraphic.
XPressa.
The DISTRONIC PLUS distanc edisplay
appears in the multifunction display.
Activating/deactivating Blind Spot
Assist
XPress the =or; button on the steering
wheel to select the DriveAssistmenu.
XPress the9or: button to select
Blind Spot Assist.
XPress a.
The currents election appears.
XTo activate/deactivate: press theabut-
ton again.
For further information about Blind Spot Assist,
see (
Ypage 137).
Service menu
In the Serv.menu, you have the following
options:
RCalling up display messages (Ypage 170)
RChecking the tire pressure electronically
(Ypage 258)
RCalling up the service due date
(Ypage 231)
RChecking the engine oil level (Ypage 227)
Settings menu
Introduction
In the Sett.menu, you have the following
options:
RChanging the instrument cluster settings
(Ypage 165)
RChanging the light settings (Ypage 165)
RChanging the vehicle settings (Ypage 166)
RChanging the conveniences ettings
(Ypage 166)
RRestoring the factor ysettings (Ypage 167)
164Menus and submenus
On-board computer and displays
Page 167 of 286
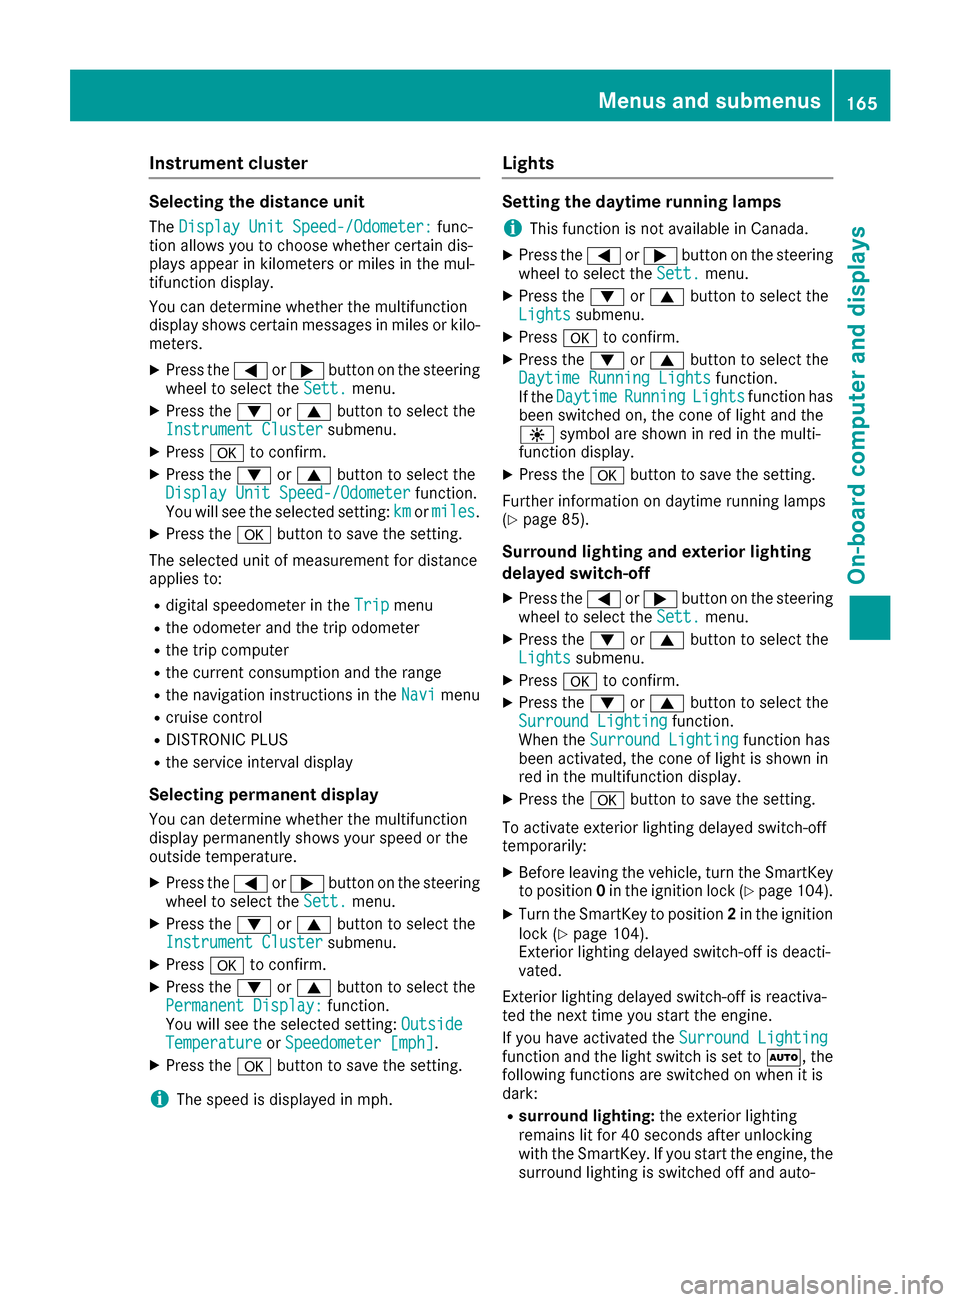
Instrumentcluster
Selecting th edistance unit
The Displa yUnitS peed-/Odometer :func-
tion allows you to choos ewhether certain dis-
plays appear in kilometers or mile sinthemul-
tifunction display.
You can determine whether th emultifunction
display shows certain message sinmilesork ilo-
meters .
XPress th e= or; buttononthesteering
whee ltos elect th eSett.menu.
XPress th e: or9 buttontos elect th e
Instrumen tCluste rsubmenu.
XPressato confirm .
XPress the: or9 buttontos elect th e
Displa yUnitS peed-/Odometerfunction .
You will see th eselected setting :kmor miles.
XPress th ea buttontos avet he setting .
The selected unit of measuremen tfor distanc e
applie sto:
Rdigital speedometer in th eTri pmen u
Rtheo dometer and th etripo dometer
Rthet ripc om puter
Rthec urren tconsum ption and th erange
Rthen avigation instruction sintheNav imen u
Rcruise control
RDISTRONI CPLUS
Rthes ervic einterval display
Selecting permanent display
You can determine whether th emultifunction
display permanentl yshows your spee dorthe
outside temperature.
XPress th e= or; buttononthesteering
whee ltos elect th eSett.menu.
XPress th e: or9 buttontos elect th e
Instrumen tCluste rsubmenu.
XPressato confirm .
XPress the: or9 buttontos elect th e
Permanent Display:function .
You will see th eselected setting :Outsid e
TemperatureorSpeedometer [mph].
XPress th ea buttontos avet he setting .
iThe spee disdisplayed in mph .
Lights
Settingthed aytime runningl amps
iThis function is no tavailable in Canada.
XPress th e= or; buttononthesteering
whee ltos elect th eSett.menu.
XPress th e: or9 buttontos elect th e
Lightssubmenu.
XPress ato confirm .
XPress the: or9 buttontos elect th e
Daytim eRunnin gLightsfunction .
If th eDaytim eRunningLightsfunction has
been switched on ,the cone of ligh tand th e
W symbol are shown in red in th emulti-
function display.
XPress th ea buttontos avet he setting .
Further information on daytime runnin glamp s
(
Ypage 85) .
Surround lighti ng and exteriorlighti ng
delayed switch-off
XPress th e= or; buttononthesteering
whee ltos elect th eSett.menu.
XPress th e: or9 buttontos elect th e
Lightssubmenu.
XPress ato confirm .
XPress the: or9 buttontos elect th e
Surround Lightingfunction .
When th eSurround Lightingfunction has
been activated, th econeofl ightiss hown in
red in th emultifunction display.
XPress th ea buttontos avet he setting .
To activat eexter iorl ighting delaye dswitch-off
temporarily:
XBefore leaving th evehicle, tur nthe SmartKey
to position 0in th eignition loc k(Ypage 104).
XTurn theSma rtKey to position 2in th eignition
loc k(Ypage 104).
Exterio rlighting delaye dswitch-off is deacti -
vated.
Exterio rlighting delaye dswitch-off is reactiva-
te dt he next time you start th eengine.
If you have activated th eSurround Lighting
function and th eligh tswitch is set to Ã,the
followin gfunction sare switched on when it is
dark :
Rsurround lighting: thee xter iorl ighting
remain slit for 40 seconds after unlocking
wit hthe SmartKey. If you start th eengine, th e
surroun dlighting is switched off and auto -
Menusand submenus165
On-boardc omputer and displays
Z