low beam MERCEDES-BENZ G-CLASS SUV 2008 Owners Manual
[x] Cancel search | Manufacturer: MERCEDES-BENZ, Model Year: 2008, Model line: G-CLASS SUV, Model: MERCEDES-BENZ G-CLASS SUV 2008Pages: 293, PDF Size: 4.49 MB
Page 8 of 293
5
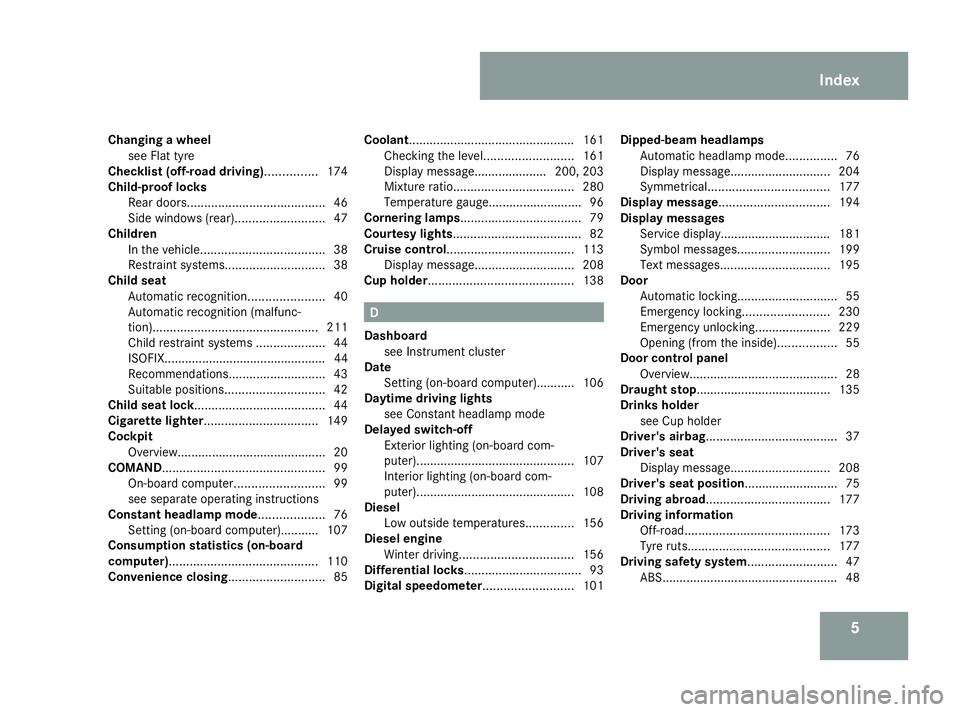
Changing a wheel
see Flat tyre
Checklist (off-road driving)............... 174
Child-proof locks Rear doors. ....................................... 46
Side windows (rear) ..........................47
Children
In the vehicle. ................................... 38
Restraint systems. ............................ 38
Child seat
Automatic recognition ......................40
Automatic recognition (malfunc-
tion). ............................................... 211
Child restraint systems ....................44
ISOFIX............................................... 44
Recommendations. ...........................43
Suitable positions. ............................ 42
Child seat lock...................................... 44
Cigarette lighter................................. 149
Cockpit Overview. .......................................... 20
COMAND............................................... 99
On-board computer. .........................99
see separate operating instructions
Constant headlamp mode................... 76
Setting (on-board computer).......... .107
Consumption statistics (on-board
computer)........................................... 110
Convenience closing............................ 85Coolant................................................
161
Checking the level. .........................161
Display message..................... 200, 203
Mixture ratio ................................... 280
Temperature gauge ...........................96
Cornering lamps................................... 79
Courtesy lights..................................... 82
Cruise control..................................... 113
Display message ............................. 208
Cup holder.......................................... 138 D
Dashboard see Instrument cluster
Date
Setting (on-board computer).......... .106
Daytime driving lights
see Constant headlamp mode
Delayed switch-off
Exterior lighting (on-board com-
puter). ............................................. 107
Interior lighting (on-board com-
puter). ............................................. 108
Diesel
Low outside temperatures. .............156
Diesel engine
Winter driving. ................................ 156
Differential locks.................................. 93
Digital speedometer.......................... 101Dipped-beam headlamps
Automatic headlamp mode. ..............76
Display message ............................. 204
Symmetrical. .................................. 177
Display message ................................ 194
Display messages Service display................................ 181
Symbol messages. ..........................199
Text messages. ............................... 195
Door
Automatic locking ............................. 55
Emergency locking .........................230
Emergency unlocking...................... 229
Opening (from the inside). ................55
Door control panel
Overview. .......................................... 28
Draught stop....................................... 135
Drinks holder
see Cup holder
Driver's airbag...................................... 37
Driver's seat Display message ............................. 208
Driver's seat position........................... 75
Driving abroad.................................... 177
Driving information Off-road .......................................... 173
Tyre ruts. ........................................ 177
Driving safety system.......................... 47
ABS. .................................................. 48 Index
463_AKB; 1; 8, en-GB
wobuchh,
Version: 2.10.6 2008-07-17T15:19:41+02:00 - Seite 5Dateiname: 6515_4091_02_buchblock.pdf; preflight
Page 26 of 293
Instrument cluster
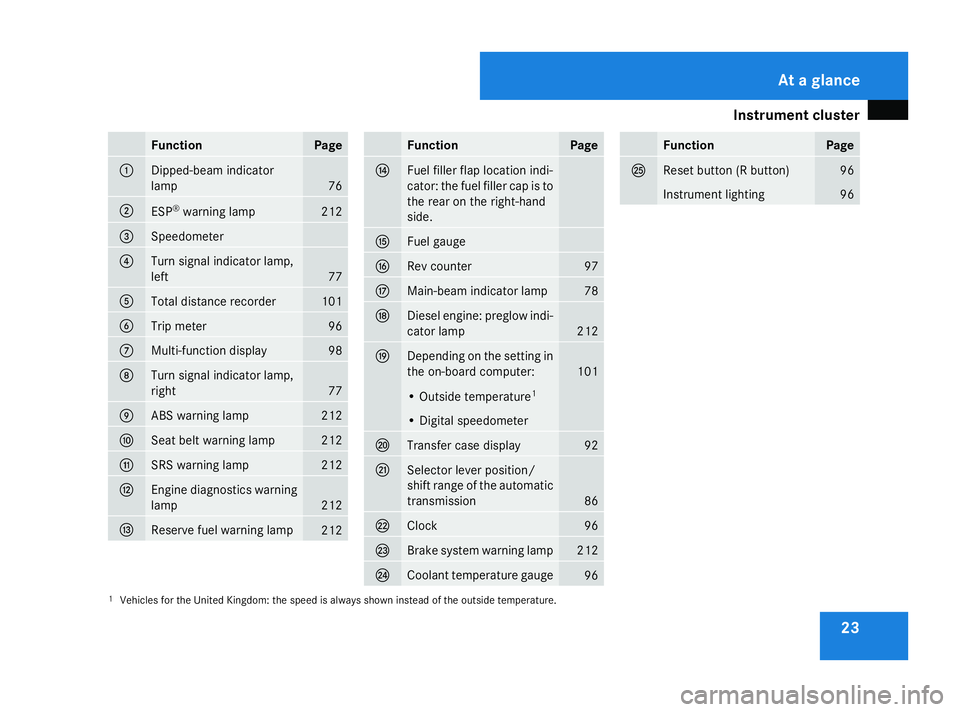
23Function Page
1
Dipped-beam indicator
lamp
76
2
ESP
®
warning lamp 212
3
Speedometer
4
Turn signal indicator lamp,
left 77
5
Total distance recorder 101
6
Trip meter 96
7
Multi-function display 98
8
Turn signal indicator lamp,
right 77
9
ABS warning lamp 212
a
Seat belt warning lamp 212
b
SRS warning lamp 212
c
Engine diagnostics warning
lamp
212
d
Reserve fuel warning lamp
212 Function Page
e
Fuel filler flap location indi-
cator: the fuel filler cap is to
the rear on the right-hand
side. f
Fuel gauge
g
Rev counter 97
h
Main-beam indicator lamp 78
j
Diesel engine: preglow indi-
cator lamp
212
k
Depending on the setting in
the on-board computer:
101
• Outside temperature
1 • Digital speedometer
l
Transfer case display 92
m
Selector lever position/
shift range of the automatic
transmission
86
n
Clock 96
o
Brake system warning lamp 212
p
Coolant temperature gauge
96 Function Page
q
Reset button (R button) 96
Instrument lighting 96
1 Vehicles for the United Kingdom: the speed is always shown instead of the outside temperature. At a glance
463_AKB; 1; 8, en-GB
wobuchh,
Version: 2.10.6 2008-07-17T15:19:41+02:00 - Seite 23Dateiname: 6515_4091_02_buchblock.pdf; preflight
Page 80 of 293
Lights
77G
Risk of accident
When it is dark or foggy, turn the light
switch from UtoB in good time.
Otherwise, the headlamps could switch off
temporarily and you could cause an acci-
dent.
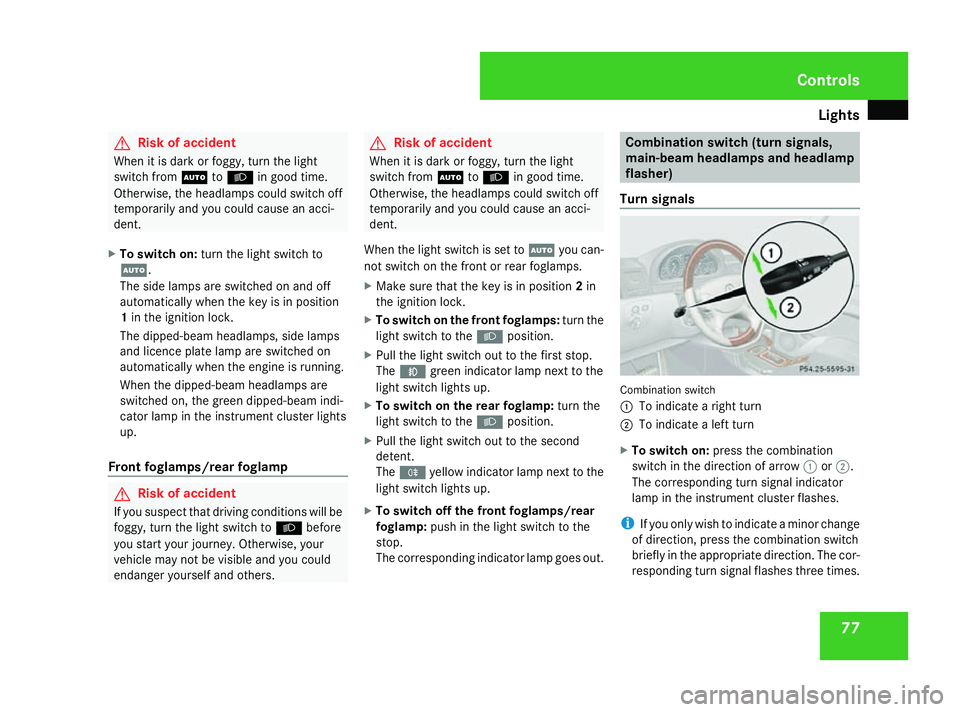
X To switch on: turn the light switch to
U.
The side lamps are switched on and off
automatically when the key is in position
1 in the ignition lock.
The dipped-beam headlamps, side lamps
and licence plate lamp are switched on
automatically when the engine is running.
When the dipped-beam headlamps are
switched on, the green dipped-beam indi-
cator lamp in the instrument cluster lights
up.
Front foglamps/rear foglamp G
Risk of accident
If you suspect that driving conditions will be
foggy, turn the light switch to Bbefore
you start your journey. Otherwise, your
vehicle may not be visible and you could
endanger yourself and others. G
Risk of accident
When it is dark or foggy, turn the light
switch from UtoB in good time.
Otherwise, the headlamps could switch off
temporarily and you could cause an acci-
dent.
When the light switch is set to Uyou can-
not switch on the front or rear foglamps.
X Make sure that the key is in position 2in
the ignition lock.
X To switch on the front foglamps: turn the
light switch to the Bposition.
X Pull the light switch out to the first stop.
The ¥ green indicator lamp next to the
light switch lights up.
X To switch on the rear foglamp: turn the
light switch to the Bposition.
X Pull the light switch out to the second
detent.
The † yellow indicator lamp next to the
light switch lights up.
X To switch off the front foglamps/rear
foglamp: push in the light switch to the
stop.
The corresponding indicator lamp goes out. Combination switch (turn signals,
main-beam headlamps and headlamp
flasher)
Turn signals Combination switch
1
To indicate a right turn
2 To indicate a left turn
X To switch on: press the combination
switch in the direction of arrow 1or2.
The corresponding turn signal indicator
lamp in the instrument cluster flashes.
i If you only wish to indicate a minor change
of direction, press the combination switch
briefly in the appropriate direction. The cor-
responding turn signal flashes three times. Controls
463_AKB; 1; 8, en-GB
wobuchh,
Version: 2.10.6 2008-07-17T15:19:41+02:00 - Seite 77 ZDateiname: 6515_4091_02_buchblock.pdf; preflight
Page 110 of 293
On-board computer
107
Setting the date
X
Press the jbutton to select Date Set
day (orDate Set month orDate Set
year).
X Press the æorç button to set the
date.
X Press the j,èorÿ button to
select a different display.
Setting constant headlamp mode If you have set constant headlamp mode and
the light switch is in position
MorU,
the side lamps, dipped-beam headlamps and
licence plate lighting are switched on auto-
matically when the engine is running. Turning
the light switch to a different position
switches on the corresponding lights. Make
sure the light switch is set to BorU if
you switch off the constant headlamp mode
while driving at night.
In countries in which constant headlamp
mode is a legal requirement, Constantis the
factory setting.
X Press the èor· button to select the
Settings menu.
X Press the jbutton to select submenus. X
Press the æorç button to select the
Lighting submenu.
X Press the jbutton to select Headlamp
mode.
X Press the æorç button to set the
switch-on mode for the headlamps to Man-
ual orConstant (constant headlamp
mode).
X Press the j,èorÿ button to
select a different display.
Switching the surround lighting on or
off If the surround lighting is switched on, the
following lights will be switched on automat-
ically in the dark after you have unlocked the
vehicle using the key:
R
the side lamps
R the tail lamps
R the licence plate lighting
R the front foglamps
The surround lighting switches off automati-
cally if you open the driver's door or after 40
seconds. X
Press the èor· button to select the
Settings menu.
X Press the jbutton to select submenus.
X Press the æorç button to select the
Lighting submenu.
X Press the jbutton to select Surround
lighting.
X Press the æorç button to switch
the Surround lighting on or off.
X Press the j,èorÿ button to
select a different display.
Activating/deactivating the exterior
lighting delayed switch-off Using the
Headl. delayed switch-off
function, you can set whether the exterior
lighting should remain on for 15 seconds after
the doors are closed when it is dark.
When you have set a delayed switch-off time
and then switch off the engine, the following
remain lit:
R the side lamps
R the tail lamps
R the licence plate lighting
R the front foglamps Controls
463_AKB; 1; 8, en-GB
wobuchh
,V ersion: 2.10.6
2008-07-17T15:19:41+02:00 - Seite 107 ZDateiname: 6515_4091_02_buchblock.pdf; preflight
Page 180 of 293
Driving ab
road 177
R
Clean an y mud from the tyre tread after
crossing a ford.
R Apply the brakes to dry them after crossing
a ford. Driving on sand
Observe the following rules when driving on
sand:
R shift the transfer case to
LOW (Ypage 92).
R avoid high engine speeds.
R select a shift range appropriate to the ter-
rain.
R drive quickly to overcome the rolling resist-
ance. Otherwise, the vehicle could dig itself
into the sand.
R drive in the tracks of other vehicles, if pos-
sible. Make sure that the ruts are not too
deep, that the sand is firm enough and that
your vehicle has sufficient ground clear-
ance. Ruts
Observe the following rules when driving
along ruts in off-road terrain or on roads with
loose gravel:
! Check that the ruts are not too deep and
that your vehicle has sufficient clearance.
Otherwise, your vehicle could be damaged
or bottom out and get stuck.
R shift the transfer case to
LOW (Ypage 92).
R avoid high engine speeds.
R select shift range 1.
R drive slowly.
R where ruts are too deep, drive with the
wheels on one side on the middle section
of the road if possible. Driving abroad
Points to remember
An extensive Mercedes-Benz Service network
is also available in other countries. You can
obtain the relevant workshop directories
from any Mercedes-Benz Service Centre.
Only low-octane fuel is available in certain
countries.
You can find further information about fuel
grades on (Y page 154). Symmetrical dipped beam
If your journey takes you to countries where
vehicles are driven on the opposite side of the
road to the country in which the vehicle is
registered, your headlamps must be switched
to symmetrical dipped beam. Oncoming traf-
fic will be dazzled less. G
Risk of injury
Xenon bulbs are under high voltage. You
could get an electric shock and be seriously
or even fatally injured if you touch the elec-
tric contacts on xenon bulbs. Therefore, do
not, remove the cover on xenon bulbs.
Do not change xenon headlamps yourself,
but have them replaced at a qualified spe- Operation
463_AKB; 1; 8, en-GB
wobuchh,
Version: 2.10.6 2008-07-17T15:19:41+02:00 - Seite 177 ZDateiname: 6515_4091_02_buchblock.pdf; preflight
Page 181 of 293
Trailer towing*
178 cialist workshop which has the necessary
specialist knowledge and tools to carry out
the work required.
Mercedes-Benz recommends that you use
a Mercedes-Benz Service Centre for this
purpose. In particular, work relevant to
safety or on safety-related systems must be
carried out at a qualified specialist work-
shop.
X Have the headlamps switched over at a
qualified specialist workshop, e. g. a
Mercedes-Benz Service Centre. G
Risk of accident
Have your headlamps switched back to
asymmetrical dipped beam if you are driv-
ing in a country in which traffic drives on
the same side of the road as in the country
in which your vehicle was registered. Oth-
erwise, you may dazzle the oncoming traffic
and could cause an accident. Trailer towing*
Notes on towing a trailer
G
Risk of accident
When reversing the vehicle towards the
trailer, make sure there is nobody between
the trailer and the vehicle.
Couple and uncouple the trailer carefully. If
you do not couple the trailer to the towing
vehicle correctly, the trailer could become
detached.
Make sure that the following values are not
exceeded:
R the permissible trailer drawbar nose-
weight
R the permissible trailer load
R the permissible rear axle load of the tow-
ing vehicle
R the maximum permissible gross vehicle
weight of both the towing vehicle and the
trailer
You will find the applicable permissible val-
ues, which must not be exceeded, in the
vehicle documents.
You will find the values approved by the
manufacturer on the vehicle identification plates and those for the towing vehicle in
the "Technical data" section.
You will find installation dimensions and loads
in the "Technical data" section
(Y page 274).
The maximum permissible trailer drawbar
noseweight on the ball coupling is:
R 140 kg (long-wheelbase station wagon)
R 115 kg (short-wheelbase station wagon
and cabriolet)
However, the actual noseweight must not
exceed the value given on the trailer coupling
and trailer identification plates. The lowest
weight applies.
! Use a drawbar noseweight as close as
possible to the maximum permissible nose-
weight. Do not use a noseweight of less
than 80 kg; otherwise, the trailer may come
loose.
Note that the payload and the rear axle load
are reduced by the actual payload.
i The height of the ball coupling changes
with the load of the vehicle. If necessary,
use a trailer with a height-adjustable draw-
bar. Operation
* optional
463_AKB; 1; 8, en-GB
wobuchh
,V ersion: 2.10.6
2008-07-17T15:19:41+02:00 - Seite 178 Dateiname: 6515_4091_02_buchblock.pdf; preflight
Page 239 of 293
Changing the bulbs
236 Do not change xenon bulbs yourself, but
have them replaced at a qualified specialist
workshop which has the necessary special-
ist knowledge and tools to carry out the
work required.
Mercedes-Benz recommends that you use
a Mercedes-Benz Service Centre for this
purpose. In particular, work relevant to
safety or on safety-related systems must be
carried out at a qualified specialist work-
shop.
! Do not change the LEDs yourself. You
could otherwise damage the LEDs or parts
of the vehicle. Overview
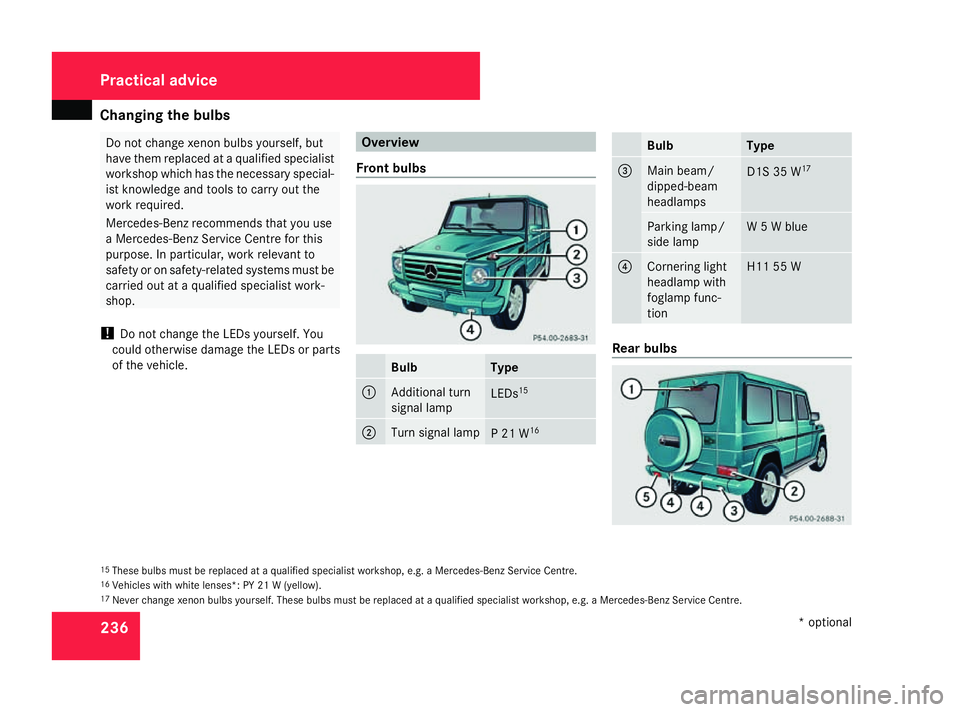
Front bulbs Bulb Type
1
Additional turn
signal lamp
LEDs
15 2
Turn signal lamp
P 21 W
16 Bulb Type
3
Main beam/
dipped-beam
headlamps
D1S 35 W
17 Parking lamp/
side lamp W 5 W blue
4
Cornering light
headlamp with
foglamp func-
tion H11 55 W
Rear bulbs
15
These bulbs must be replaced at a qualified specialist workshop, e.g. a Mercedes-Benz Service Centre.
16 Vehicles with white lenses*: PY 21 W (yellow).
17 Never change xenon bulbs yourself. These bulbs must be replaced at a qualified specialist workshop, e.g. a Mercedes-Benz Service Centre. Practical advice
* optional
463_AKB; 1; 8, en-GB
wobuchh,
Version: 2.10.6 2008-07-17T15:19:41+02:00 - Seite 236Dateiname: 6515_4091_02_buchblock.pdf; preflight