tyre pressure MERCEDES-BENZ G-CLASS SUV 2008 Owners Manual
[x] Cancel search | Manufacturer: MERCEDES-BENZ, Model Year: 2008, Model line: G-CLASS SUV, Model: MERCEDES-BENZ G-CLASS SUV 2008Pages: 293, PDF Size: 4.49 MB
Page 10 of 293
7F
Fire extinguisher................................ 192
First-aid kit Cabriolet. ........................................ 191
Long-wheelbase station wagon....... 189
Short-wheelbase station wagon. .....190
Flat tyre
Preparing the vehicle. .....................243
Floormat............................................. .153
Foglamps Display message ............................. 206
Fording........................................ 172, 176
Frequencies Garage door opene r........................ 282
Telephone. ...................................... 261
Front airbag .......................................... 37
Front-passenger airbag........................ 37
Front-passenger seat Display message ............................. 208
Fuel...................................................... 276
Diesel. ............................................ 156
Loss. ............................................... 219
Petrol .............................................. 155
Fuel/water separator........................ 182
Fuel consumption...................... 277, 278
Fuel filler flap Emergency release. ........................230
Opening/closing ............................ 154Fuel filter
Display message ............................. 202
Fuel level
Calling up the range (on-board
computer). ...................................... 111
Fuel line
Malfunction..................................... 219
Fuel tank
Malfunction..................................... 219
Fuse allocation chart......................... 255
Fuse box Battery case................................... .258
Dashboard. ..................................... 256
Front-passenger footwell ................256
Transmission tunnel........................ 257
Fuse extractor.................................... 255
Fuses................................................... 255 G
Garage door Opening/closing (with the remote
control) ........................................... 153
Garage door opener........................... 151
Clearing the memory. .....................153
Frequencies. ................................... 282
Programming the remote control ....152
Genuine Mercedes-Benz parts.......... 259
Glove compartment........................... 147Gradient-climbing capability (max-
imum)..................................................
175
Gross vehicle weight, maximum
permissible................................. 271, 272 H
Handbrake see Parking brake
Headlamp mode (automatic) ...............76
Headlamps Cleaning ......................................... 184
Cleaning system. .............................. 78
Misting up. ...................................... 223
Headlamps delayed switch-off
see Exterior lighting delayed switch-off
Head restraint
Adjusting (front) ................................ 61
Adjusting (rear). ................................ 62
Removing (rear). ............................... 62
Head restraints
Removing (front). .............................. 61
Resetting (front)................................ 62
Heating
see Air conditioning
High-pressure cleaners..................... 183
Hill start assist..................................... 87 Index
463_AKB; 1; 8, en-GB
wobuchh,
Version: 2.10.6 2008-07-17T15:19:41+02:00 - Seite 7Dateiname: 6515_4091_02_buchblock.pdf; preflight
Page 16 of 293
13
Trailer towing
Driving tips. .................................... 178
Mounting dimensions. ....................274
Ultrasonic reversing aid. .................119
Transfer case
Display message ............................. 202
Shift range ........................................ 92
Transmission
Display message ............................. 198
Transmission output (maximum)
Telephone/two-way radio ...............260
Transport (vehicle)............................. 254
Travelling uphill .................................. 174
Trip computer Menu (on-board computer). ............110
Trip meter........................................... 100
Resetting. ......................................... 96
Turn signal lamps
Display message ............................. 205
Two-way radio
Installation. ..................................... 260
Tyre grip.............................................. 171
Tyre pressure ..................................... 164
Calling up (on-board computer) .....165
Display message ............................. 198
see Tyre pressure
Tyres
Direction of rotatio n....................... 164
General notes. ................................ 162
Technical data. ............................... 267Tyre tread............................................ 164 U
Ultrasonic reversing aid.................... 118
Malfunction..................................... 222
Range of the sensors. .....................118
Trailer towing. ................................. 119
Warning displa y.............................. 119
Unladen weight.......................... 271, 272
Unlocking Emergency unlocking...................... 229
From the inside (central unlocking
button) .............................................. 56 V
Variable Speedtronic .........................115
Vehicle Emergency unlocking .............229, 230
Individual settings (on-board com-
puter). ............................................. 104
Leaving parked up. .........................228
Towing. ........................................... 254
Transporting ................................... 254
Vehicle battery................................... 247
Vehicle dimensions............................ 269
Vehicle electronics............................ 260
Vehicle identification number
(VIN)............................................ 261, 262
Vehicle identification plates............. 261Vehicle tool kit
Cabriolet. ........................................ 191
Long-wheelbase station wagon....... 189
Short-wheelbase station wagon. .....190
Vehicle weights.................................. 271 W
Warning and indicator lamp ABS (yellow).................................... 212
LIM (cruise control)......................... 114
LIM (variable Speedtronic). .............116
Warning and indicator lamps
ESP ®
......................................... 48, 213
Warning signal
Audible. .......................................... 217
Warning triangle
Cabriolet. ........................................ 191
Long-wheelbase station wagon
............................................... 188, 190
Washer fluid
Display message ............................. 209
Wearing seat belts............................... 71
Wheel bolts Tightening torque............................ 246
Wheels
General notes. ................................ 162
Interchanging.................................. 167
Technical data. ............................... 267
Windowbags......................................... 37 Index
463_AKB; 1; 8, en-GB
wobuchh,
Version: 2.10.6 2008-07-17T15:19:41+02:00 - Seite 13Dateiname: 6515_4091_02_buchblock.pdf; preflight
Page 18 of 293
Protection of the environment
15Protection of the environment
H
Environmental note
Daimler's declared policy is one of integra-
ted environmental protection.
The objectives are for the natural resources
which form the basis of our existence on
this planet to be used sparingly and in a
manner which takes the requirements of
both nature and humanity into account.
You too can help to protect the environ-
ment by operating your vehicle in an envi-
ronmentally-responsible manner.
Fuel consumption and the rate of engine,
transmission, brake and tyre wear depend
on the following factors:
R Operating conditions of your vehicle
R Your personal driving style
You can influence both factors.
You should bear the following in mind:
Operating conditions
R Avoid short trips as these increase fuel
consumption.
R Make sure that the tyre pressures are
always correct. R
Do not carry any unnecessary weight.
R Keep an eye on the vehicle's fuel con-
sumption.
R Remove roof racks once you no longer
need them.
R A regularly serviced vehicle will contrib-
ute to environmental protection. You
should therefore adhere to the service
intervals.
R Always have maintenance work carried
out at a qualified specialist workshop,
e.g. a Mercedes-Benz Service Centre.
Personal driving style
R Do not depress the accelerator pedal
when starting the engine.
R Do not warm up the engine with the vehi-
cle stationary.
R Drive carefully and maintain a safe dis-
tance from the vehicle in front.
R Avoid frequent, sudden acceleration.
R Change gear in good time and use each
gear only up to 2
/ 3of its maximum engine
speed.
R Switch off the engine in stationary traffic. Returning used vehicles
Mercedes-Benz will take back your
Mercedes-Benz to dispose of it in an environ-
mentally-responsible manner, in accordance
with the European Union (EU) End of Life
Vehicles Directive.
The End of Life Vehicles Directive applies to
vehicles of up to 3.5 t gross vehicle weight, in
accordance with national regulations. For
several years, Mercedes-Benz has been
meeting all the legal requirements for a
design which allows for recycling and re-use.
There is a network of return points and dis-
assembly plants which can recycle your vehi-
cle in an environmentally-responsible man-
ner. The options for recycling vehicles and
parts are constantly being developed and
improved. This means that your Mercedes-
Benz will also continue to meet even the
increased recycling quotas in the future in
good time. You can obtain further information
from your national Mercedes-Benz homepage
or your national hotline number. Introduction
463_AKB; 1; 8, en-GB
wobuchh,
Version: 2.10.6 2008-07-17T15:19:41+02:00 - Seite 15 ZDateiname: 6515_4091_02_buchblock.pdf; preflight
Page 22 of 293
Exterior view
19Function Page
1
Opening and closing the
rear door 56
Cabriolet: opening and
closing the tailgate
58
2
Reversing camera* 119
3
Rear window heating 128
4
Rear lights 240
5
Fuel filler flap 154
6
Opening and closing the
doors 54 Function Page
7
Exterior mirrors 68
Parking position 69
8
Front lights 237
9
Opening the bonnet 157
Engine oil 159
Coolant
161 Function Page
a
Windscreen wiper opera-
tion
82
Cleaning the wiper blades 183
Replacing the wiper blades 242
b
Cleaning the windows 184
c
Tyres and wheels 266
Tyre pressure monitor* 165
Flat tyre, fitting the spare
wheel
244
d
Towing eyes 253At a glance
* optional
463_AKB; 1; 8, en-GB
wobuchh,
Version: 2.10.6 2008-07-17T15:19:41+02:00 - Seite 19Dateiname: 6515_4091_02_buchblock.pdf; preflight
Page 51 of 293
Driving safety sys
tems48 conditions. Maintain sufficient distance
from other road users and objects on the
road. ABS (Anti-lock Braking System)
ABS regulates brake pressure in such a way
that the wheels do not lock when you brake.
This allows you to continue steering the vehi-
cle when braking.
ABS works from a speed of about 8 km/h
upwards, regardless of road surface condi-
tions. ABS works on slippery surfaces, even
when you only brake gently. G
Risk of accident
Do not depress the brake pedal several
times in quick succession (pumping).
Depress the brake firmly and evenly. Pump-
ing the brake pedal reduces the braking
effect.
Braking If ABS intervenes when braking, you will feel
a pulsing in the brake pedal.
X If ABS intervenes: continue to depress the
brake pedal with force until the braking sit-
uation is over. X
To make a full brake application:
depress the brake pedal with full force. G
Risk of accident
If ABS is faulty, the wheels could lock when
braking. This limits the steerability of the
vehicle when braking and the braking dis-
tance may increase.
If ABS is deactivated due to a malfunction,
then BAS, ESP ®
and 4ETS are also deacti-
vated. There is an increased risk of your
vehicle skidding in certain situations.
You should always adapt your driving style
to suit prevailing road and weather condi-
tions. BAS (Brake Assist)
BAS operates in emergency braking situa-
tions. If you depress the brake pedal quickly,
BAS automatically boosts the braking force,
thus shortening the stopping distance.
X Keep the brake pedal firmly depressed until
the emergency braking situation is over.
ABS prevents the wheels from locking.
The brakes will function as usual once you
release the brake pedal. BAS is deactivated. G
Risk of accident
If BAS has malfunctioned, the braking sys-
tem remains available with full brake boost-
ing effect. However, braking force is not
automatically increased in emergency
braking situations and the stopping dis-
tance may increase. ESP
®
(Electronic Stability Program)
ESP ®
monitors driving stability and traction,
i.e. power transmission between tyres and
the road surface.
If ESP ®
detects that the vehicle is deviating
from the direction desired by the driver, one
or more wheels are braked to stabilise the
vehicle. The engine output is also modified, if
necessary, to keep the vehicle on the desired
course within physical limits. ESP ®
assists
the driver when pulling away on wet or slip-
pery roads. ESP ®
can also stabilise the vehi-
cle during braking.
When ESP ®
intervenes, the vwarning
lamp flashes in the speedometer. G
Risk of accident
If the v warning lamp in the speedom-
eter flashes, proceed as follows: Safety
463_AKB; 1; 8, en-GB
wobuchh
,V ersion: 2.10.6
2008-07-17T15:19:41+02:00 - Seite 48 Dateiname: 6515_4091_02_buchblock.pdf; preflight
Page 103 of 293
On-board computer
100 Function
1
Operation
menu (Ypage 100)
R trip meter and total distance
recorder (standard display)
(Y page 101)
R tyre pressure moni-
tor*(Y page 165)
R digital speedometer or outside tem-
perature (Y page 101)
R ASSYST service display
(Y page 181)
R engine oil level* (Y page 159) 2
Audio/DVD*
menu (Ypage 101)
R radio station (Y page 101)
R audio drive or
media* ( Ypage 102)
R DVD video* (Y page 102) 3
Navigation* menu (NAV)
(Y
page 103) 4
Message memory
menu9
(fault and
warning messages) (Y page 103) Function
5
Settings
menu (Ypage 104)
R resetting to factory settings
(Y page 104)
R selecting submenus (Y page 104) 6
Trip computer
menu (Ypage 110)
R consumption statistics
(Y page 110)
R range (Y page 111) 7
Telephone* menu (Y
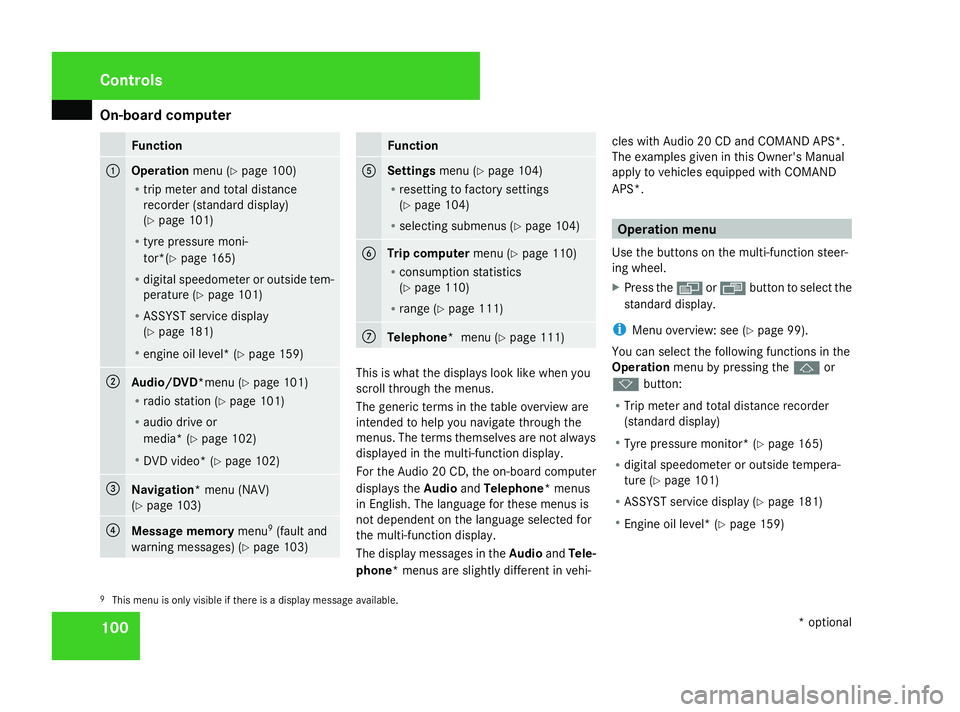
page 111) This is what the displays look like when you
scroll through the menus.
The generic terms in the table overview are
intended to help you navigate through the
menus. The terms themselves are not always
displayed in the multi-function display.
For the Audio 20 CD, the on-board computer
displays the
AudioandTelephone* menus
in English. The language for these menus is
not dependent on the language selected for
the multi-function display.
The display messages in the AudioandTele-
phone* menus are slightly different in vehi- cles with Audio 20 CD and COMAND APS*.
The examples given in this Owner's Manual
apply to vehicles equipped with COMAND
APS*. Operation menu
Use the buttons on the multi-function steer-
ing wheel.
X Press the èor· button to select the
standard display.
i Menu overview: see ( Ypage 99).
You can select the following functions in the
Operation menu by pressing the jor
k button:
R Trip meter and total distance recorder
(standard display)
R Tyre pressure monitor* (Y page 165)
R digital speedometer or outside tempera-
ture (Y page 101)
R ASSYST service display (Y page 181)
R Engine oil level* (Y page 159)
9 This menu is only visible if there is a display message available. Controls
* optional
463_AKB; 1; 8, en-GB
wobuchh
,V ersion: 2.10.6
2008-07-17T15:19:41+02:00 - Seite 100 Dateiname: 6515_4091_02_buchblock.pdf; preflight
Page 166 of 293
Tyres and wheels
163
!
Retreaded tyres are neither tested nor
recommended by Mercedes-Benz, since
previous damage cannot always be detec-
ted on retreaded tyres. As a result,
Mercedes-Benz cannot guarantee vehicle
safety if retreaded tyres are fitted. Do not
fit used tyres if you have no information
about their previous usage. G
Risk of accident
If wheels or tyres other than those which
have been tested are fitted:
R the brakes or chassis components could
be damaged.
R wheel and tyre clearances can no longer
be guaranteed.
This could cause an accident.
Modification work on the brake system and
wheels is not permitted, nor is the use of
spacer plates or brake dust shields. This inva-
lidates the General Operating Permit for the
vehicle. Notes on selecting, fitting and replacing
tyres R
only fit tyres and wheels of the same type
and make.
R only fit tyres of the correct size onto the
wheels.
R after fitting new tyres, run them in at mod-
erate speeds for the first 100 km as they
only reach their full performance after this
distance.
R fit new tyres on the front wheels first if tyres
of the same size are required on the front
and rear wheels.
R replace the tyres after six years at the lat-
est, regardless of wear. This also applies to
the spare wheel.
R do not drive with tyres which have too little
tread depth, as this significantly reduces
the traction on wet roads (aquaplaning).
! Store tyres that are not being used in a
cool, dry and preferably dark place. Protect
the tyres against oil, grease, petrol and die-
sel. Notes on regularly inspecting wheels
and tyres R
regularly check the wheels and tyres of
your vehicle for damage (e.g. cuts, punctu-
res, tears, bumps on tyres and deforma-
tion, cracks or severe corrosion on wheels),
at least every 14 days, as well as after driv-
ing off-road or on rough roads. Damaged
wheels could cause a loss of tyre pressure.
R regularly check the tyre tread depth and the
condition of the tread across the whole
width of the tyre (Y page 164). If neces-
sary, turn the front wheels to full lock in
order to inspect the inner side of the tyre
surface.
R all wheels must have a valve cap to protect
the valve against dirt and moisture.
R regularly check the pressure of all your
tyres including the spare tyre, particularly
prior to long trips, and correct the pressure
as necessary (Y page 164).
Notes on driving R
while driving, pay attention to vibrations,
noises and unusual handling characteris-
tics, e.g. pulling to one side. This may indi-
cate that the wheels or tyres are damaged.
If you suspect that a tyre is defective, Operation
463_AKB; 1; 8, en-GB
wobuchh
,V ersion: 2.10.6
2008-07-17T15:19:41+02:00 - Seite 163 ZDateiname: 6515_4091_02_buchblock.pdf; preflight
Page 167 of 293
Tyres and wheels
164reduce your speed and stop the vehicle as
soon as possible to check the wheels and
tyres for damage. Hidden tyre damage
could also be causing the unusual handling
characteristics. If you find no signs of dam-
age, have the tyres and wheels checked at
a specialist workshop, e.g. a Mercedes-
Benz Service Centre.
R when parking your vehicle, make sure that
the tyres do not get deformed by the kerb
or other obstacles. If it is necessary to drive
over kerbs, speed humps or similar eleva-
tions, try to do so slowly and at an obtuse
angle. Otherwise, the tyres, particularly the
sidewalls, could get damaged. Direction of rotation
Tyres with a specified direction of rotation
have additional benefits, e.g. if there is a risk
of aquaplaning. You will only gain these ben-
efits if the correct direction of rotation is
observed.
An arrow on the sidewall of the tyre indicates
its correct direction of rotation.
i You may fit a spare tyre against the direc-
tion of rotation. Tyr
e tread G
Risk of accident
Bear in mind that:
R tyre grip decreases rapidly on wet roads
when the tread depth is less than 3 mm.
Thus, you should replace tyres that have
insufficient tread.
R winter tyres should be replaced when the
tread depth is 4 mm or less as they will
no longer provide adequate grip.
R the tread on a tyre may not wear evenly.
Thus, you should regularly check the
tread depth and the condition of the
tread across the entire width of all tyres.
If necessary, turn the steering wheel so
that you can see the tyre tread more eas-
ily.
Otherwise, you could lose control of the
vehicle and cause an accident due to the
reduced grip of the tyres on the road. Tyre pressures
i You will find a table of tyre pressures for
various operating conditions on the inside
of your vehicle's fuel filler flap
(Y page 154). G
Risk of accident
Tyre pressure that is either too high or too
low has a negative effect on the vehicle’s
driving safety, which could lead you to
cause an accident. You should therefore
regularly check the pressure of all your
tyres (including the spare tyre), particularly
prior to long trips, and correct the pressure
as necessary.
To test tyre pressure, use a suitable pressure
gauge. The outer appearance of a tyre does
not permit any reliable conclusion about the
tyre pressure. On vehicles fitted with the elec-
tronic tyre pressure monitor*, the tyre pres-
sure can be checked in the on-board com-
puter.
If the vehicle is to be heavily laden or driven
at high speeds, the tyre pressure must be
adapted according to the specifications given
in the fuel filler flap. Use the highest specified
tyre pressure for the spare wheel. Operation
* optional
463_AKB; 1; 8, en-GB
wobuchh,
Version: 2.10.6 2008-07-17T15:19:41+02:00 - Seite 164Dateiname: 6515_4091_02_buchblock.pdf; preflight
Page 168 of 293
Tyres and wheels
165G
Risk of accident
Should the tyre pressure drop repeatedly:
R Check the tyre for foreign bodies.
R Check whether the wheel is losing air or
the valve is leaking.
Tyre pressure that is too low has a negative
effect on the vehicle’s active safety, which
could lead to your causing an accident.
Tyre pressure changes by approximately
0.1 bar for every 10 °C change in ambient
temperature.
If you measure the tyre pressure in enclosed
spaces where the temperature differs from
the outside temperature, you will have to cor-
rect the measured value accordingly.
When the vehicle is driven, the tyre tempera-
ture, and with it the tyre pressure, will
increase depending on the road speed and
the load on the tyres.
Therefore, you should only correct tyre pres-
sures when the tyres are cold.
The pressure of warm tyres should only be
corrected if it is too low for the current oper-
ating conditions. Driving with tyre pressure that is too high or
too low can:
R
shorten the service life of the tyres
R increase the likelihood of tyre damage
R have a negative effect on handling charac-
teristics (e.g. by causing aquaplaning)
i The tyre pressure values given for low
loads are minimum values which offer you
good ride comfort characteristics.
However, you can, also use the values given
for higher loads. These are permissible and
will not adversely affect the running of the
vehicle.
Also check the tyre pressure of the spare
wheel regularly. H
Environmental note
Check the tyre pressure regularly, at least
every 14 days. Tyre pressure monitor*
The tyre pressure monitor only functions if
the correct wheel electronics are fitted to all
wheels. These monitor the pressure in all four
tyres, which you have set when restarting the
tyre pressure monitor. The monitor warns you
when the pressure drops in one or more of
the tyres.
The function of the tyre pressure monitor is
limited or delayed if:
R snow chains are fitted to your vehicle's
tyres
R road conditions are wintry
R you are driving on sand or gravel
R you adopt a very sporty driving style (cor-
nering at high speeds or driving with high
rates of acceleration)
R you are towing a very heavy or large trailer
R you are driving with a heavy load (in the
vehicle or on the roof) G
Risk of accident
The tyre pressure monitor does not warn
you of an incorrectly set tyre pressure. The
table on the inside of the fuel filler flap will Operation
* optional
463_AKB; 1; 8, en-GB
wobuchh
,V ersion: 2.10.6
2008-07-17T15:19:41+02:00 - Seite 165 ZDateiname: 6515_4091_02_buchblock.pdf; preflight
Page 169 of 293
Tyres and wheels
166 help you decide whether the tyre pressures
should be corrected.
The tyre pressure monitor is not able to
warn you of a sudden loss of pressure, e.g.
if the tyre is penetrated by a foreign object.
In the event of a sudden loss of pressure,
bring the vehicle to a halt by braking care-
fully. Do not make any sudden steering
movements when doing so.
i The operation of the tyre pressure moni-
tor can be affected by interference from
radio transmitting equipment (e.g. radio
headphones, two-way radios) that may be
being operated in or near the vehicle.
i If you are carrying a deflated tyre in the
vehicle, you may only reactivate the tyre
pressure monitor if:
R the deflated tyre is no longer in the vehi-
cle
R you have adjusted the tyre pressure cor-
rectly Calling up the tyre pressure by using
the on-board computer X
Make sure that the key is in position 2in
the ignition lock.
The standard display appears in the multi-
function display (Y page 100).
X Press the jork button to select the
tyre pressure function on the multi-function
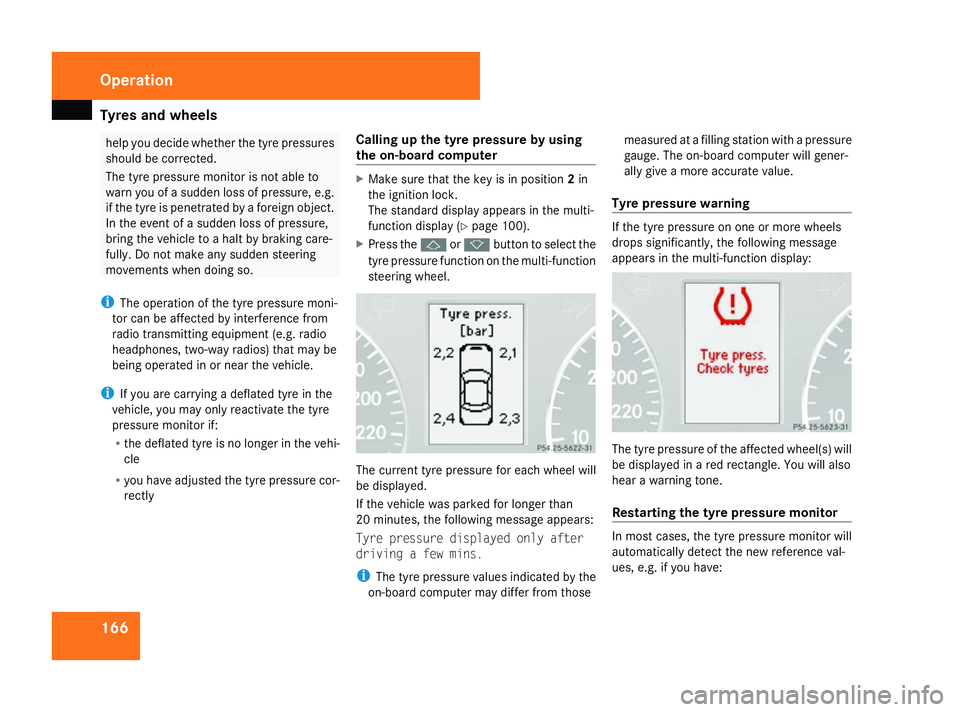
steering wheel. The current tyre pressure for each wheel will
be displayed.
If the vehicle was parked for longer than
20 minutes, the following message appears:
Tyre pressure displayed only after
driving a few mins.
i
The tyre pressure values indicated by the
on-board computer may differ from those measured at a filling station with a pressure
gauge. The on-board computer will gener-
ally give a more accurate value.
Tyre pressure warning If the tyre pressure on one or more wheels
drops significantly, the following message
appears in the multi-function display:
The tyre pressure of the affected wheel(s) will
be displayed in a red rectangle. You will also
hear a warning tone.
Restarting the tyre pressure monitor
In most cases, the tyre pressure monitor will
automatically detect the new reference val-
ues, e.g. if you have:Operation
463_AKB; 1; 8, en-GB
wobuchh,
Version: 2.10.6 2008-07-17T15:19:41+02:00 - Seite 166Dateiname: 6515_4091_02_buchblock.pdf; preflight