ad blue MERCEDES-BENZ G-CLASS SUV 2012 Owners Manual
[x] Cancel search | Manufacturer: MERCEDES-BENZ, Model Year: 2012, Model line: G-CLASS SUV, Model: MERCEDES-BENZ G-CLASS SUV 2012Pages: 357, PDF Size: 8.86 MB
Page 7 of 357
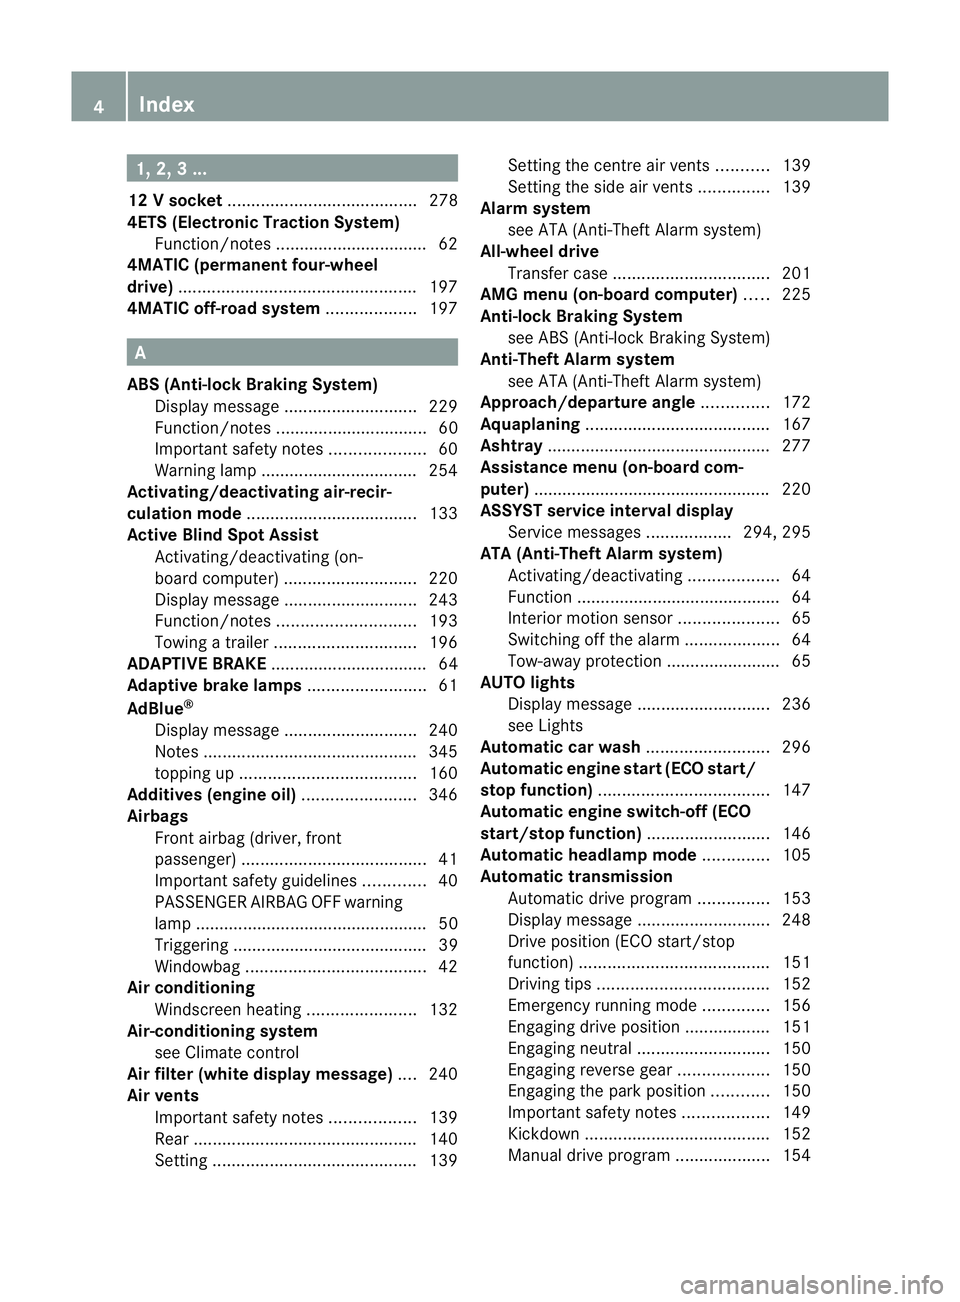
1, 2, 3 ...
12 Vsocket ........................................ 278
4ETS (Electronic Traction System) Function/notes ................................ 62
4MATIC (permanent four-wheel
drive) .................................................. 197
4MATIC off-road system ...................197 A
ABS (Anti-lock Braking System) Display message ............................ 229
Function/notes ................................ 60
Important safety notes ....................60
Warning lamp ................................. 254
Activating/deactivating air-recir-
culation mode .................................... 133
Active Blin dSpot Assist
Activating/deactivating (on-
board computer) ............................ 220
Display message ............................ 243
Function/notes ............................. 193
Towing atrailer .............................. 196
ADAPTIVE BRAKE ................................. 64
Adaptive brake lamps .........................61
AdBlue ®
Display message ............................ 240
Notes ............................................. 345
topping up ..................................... 160
Additives (engine oil) ........................346
Airbags Front airbag (driver, front
passenger )....................................... 41
Important safety guidelines .............40
PASSENGER AIRBAG OFF warning
lamp ................................................. 50
Triggering ......................................... 39
Windowba g...................................... 42
Airc onditioning
Windscreen heating .......................132
Air-conditioning system
see Climate control
Airf ilter (white display message) ....240
Airv ents
Important safet ynotes .................. 139
Rea r............................................... 140
Setting ........................................... 139Setting the centre air vents
...........139
Setting the side air vents ...............139
Alarm system
see ATA (Anti-Theft Alarm system)
All-wheel drive
Transfe rcase ................................. 201
AMG menu (on-board computer) .....225
Anti-loc kBraking System
see ABS (Anti-lock Braking System)
Anti-Theft Alarm system
see ATA (Anti-Theft Alarm system)
Approach/departure angle ..............172
Aquaplaning ....................................... 167
Ashtray ............................................... 277
Assistance menu (on-board com-
puter) ................................................. .220
ASSYST service interval display Service messages ..................294, 295
ATA (Anti-Theft Alarm system)
Activating/deactivating ...................64
Function .......................................... .64
Interior motion sensor .....................65
Switching off the alarm ....................64
Tow-away protection ........................ 65
AUTO lights
Display message ............................ 236
see Lights
Automatic car wash ..........................296
Automatic engine start (ECO start/
stop function) .................................... 147
Automatic engine switch-off (ECO
start/stop function) ..........................146
Automatic headlamp mode ..............105
Automatic transmission Automatic drive program ...............153
Display message ............................ 248
Drive position (ECO start/stop
function) ........................................ 151
Driving tips .................................... 152
Emergency running mode ..............156
Engaging drive position .................. 151
Engaging neutra l............................ 150
Engaging revers egear ................... 150
Engaging the par kposition ............ 150
Important safety notes ..................149
Kickdow n....................................... 152
Manual drive program ....................1544
Index
Page 8 of 357
Neutral (ECO start/stop function)
.150
Overview ........................................ 149
Problem (fault) ............................... 156
Progra mselector button ................152
Pulling away ................................... 144
Selector leve r................................ 149
Shift range s................................... 153
Steering wheel gearshift paddle s... 153
Trailer towing ................................. 152
Transmissio nposition display ........150
Automatic transmission emer-
gency running mode .........................156
Auxiliary heating Activating/deactivating .................134
Activating/deactivating (on the
centre console ).............................. 135
Display message ............................ 250
Important safety notes ..................134
Malfunction ................................... .138
Problem (display message) ............138
Remote control .............................. 135
Setting ........................................... 223
Setting the departur etime ............ .136
Auxiliary ventilation
Activating/deactivating .................134
Activating/deactivating (on the
centre console ).............................. 135
Problem (display message) ............138
Remote control .............................. 135
Axle load, permissible (traile rtow-
ing) ...................................................... 350 B
Backrest (display message) .............249
BAS (Brake Assist System) .................61
Battery Changing (auxiliary heating
remote control) .............................. 137
Changing (key )................................. 71
Checking (key )................................. 71
Important safety guidelines (key )..... 70
Battery (vehicle)
Charging ........................................ 311
Display message ............................ 239
Important safety notes ..................309
Jump starting ................................. 313
Overview ........................................ 309Belt tensioner
Activation ......................................... 39
Function .......................................... .47
Blind Spo tAssist
Activating/deactivating .................220
Display message ............................ 243
Notes/function .............................. 190
Trailer towing ................................. 192
see Active Blind Spot Assist
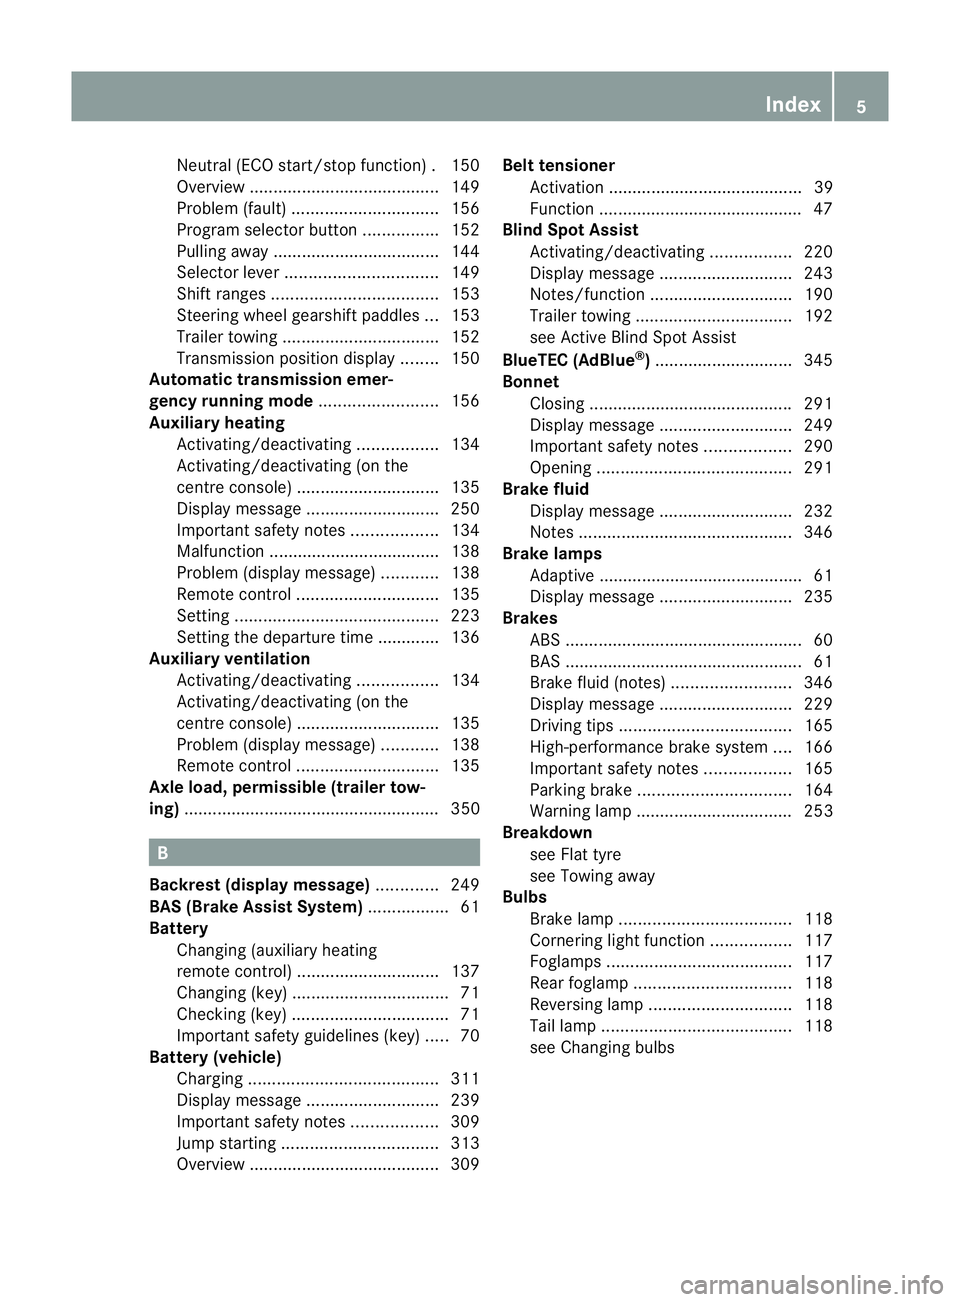
BlueTEC (AdBlue ®
) ............................. 345
Bonnet Closing .......................................... .291
Display message ............................ 249
Important safety notes ..................290
Opening ......................................... 291
Brake fluid
Display message ............................ 232
Notes ............................................. 346
Brake lamps
Adaptive .......................................... .61
Display message ............................ 235
Brakes
ABS .................................................. 60
BAS .................................................. 61
Brake fluid (notes) .........................346
Display message ............................ 229
Driving tips .................................... 165
High-performance brake system ....166
Important safety notes ..................165
Parking brake ................................ 164
Warning lamp ................................. 253
Breakdown
see Flat tyre
see Towing away
Bulbs
Brake lamp .................................... 118
Cornering light function .................117
Foglamps ....................................... 117
Rea rfoglamp ................................. 118
Reversing lamp .............................. 118
Tai llamp ........................................ 118
see Changing bulbs Index
5
Page 18 of 357
Bel
ttensioner .................................. 47
Cleaning ......................................... 301
Display message ............................ 232
Fastening ......................................... 44
Fastening, front ............................... 44
Fastening in the rear, centre ............45
Important safety guidelines .............43
Rea rseat belt status indicator .........47
Releasing ......................................... 46
Warning lamp ................................. 252
Warning lamp (function) ................... 47
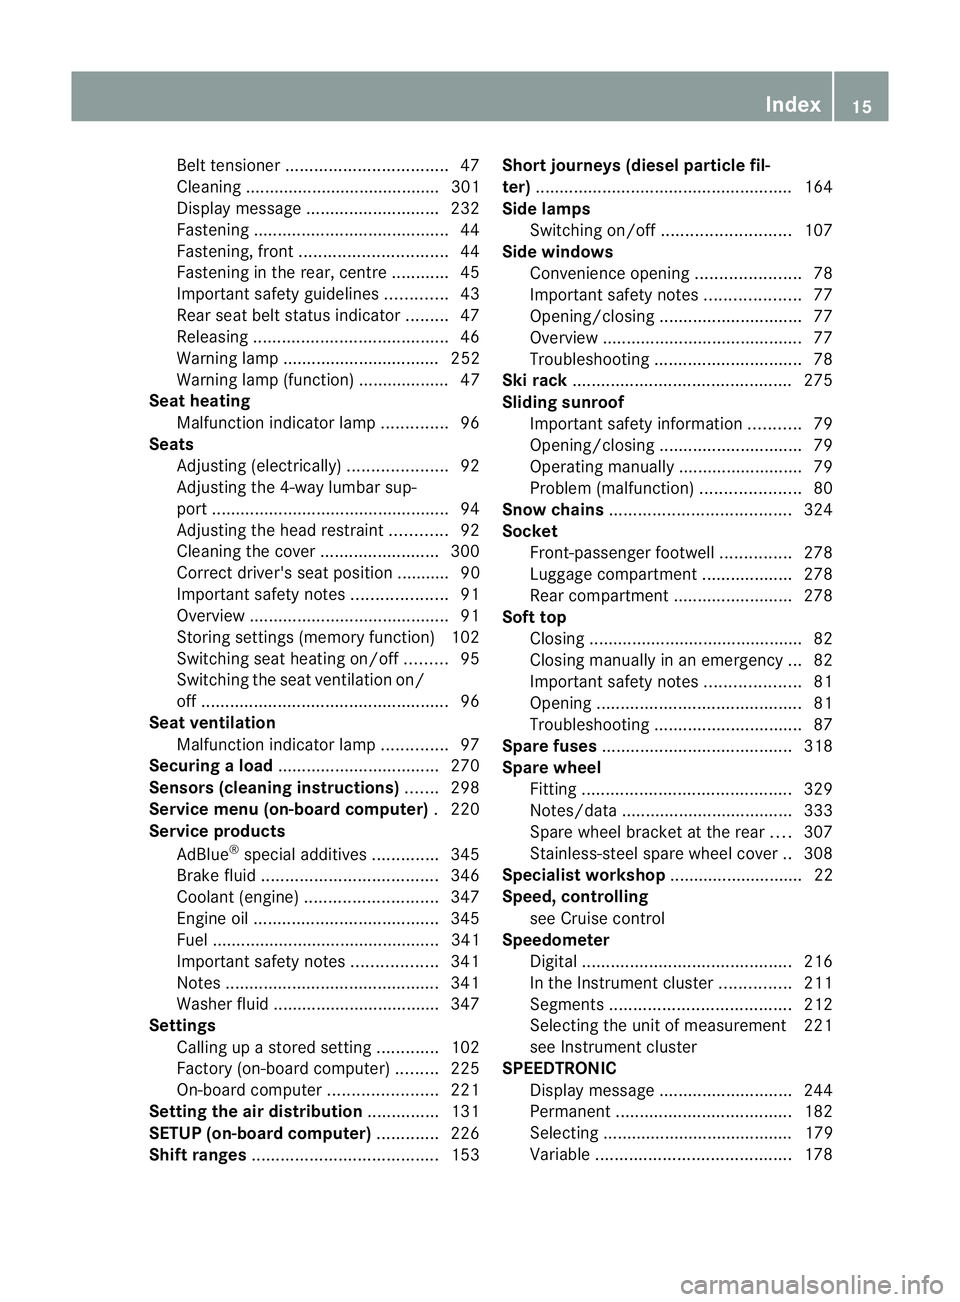
Seat heating
Malfunction indicator lamp ..............96
Seats
Adjusting (electrically). ....................92
Adjusting the 4-way lumba rsup-
por t.................................................. 94
Adjusting the head restraint ............92
Cleaning the cover .........................300
Correct driver's seat position ........... 90
Important safety notes ....................91
Overview .......................................... 91
Storing settings (memory function) 102
Switching sea theating on/off .........95
Switching the sea tventilation on/
off .................................................... 96
Seat ventilation
Malfunction indicator lamp ..............97
Securing aload .................................. 270
Sensors (cleaning instructions) .......298
Service menu (on-board computer) .220
Service products
AdBlue ®
special additive s.............. 345
Brake fluid ..................................... 346
Coolant (engine) ............................ 347
Engine oil ....................................... 345
Fuel ................................................ 341
Important safety notes ..................341
Notes ............................................. 341
Washer fluid .................................. .347
Settings
Calling up a stored setting .............102
Factory (on-board computer) .........225
On-board computer .......................221
Setting the air distribution ...............131
SETUP (on-board computer) .............226
Shift ranges ....................................... 153Short journeys (diesel particle fil-
ter)
...................................................... 164
Side lamps Switching on/off ........................... 107
Side windows
Convenience opening ......................78
Important safety notes ....................77
Opening/closing .............................. 77
Overview .......................................... 77
Troubleshooting ............................... 78
Ski rack .............................................. 275
Sliding sunroof Important safety information ...........79
Opening/closing .............................. 79
Operating manually ..........................79
Problem (malfunction) .....................80
Snow chains ...................................... 324
Socket Front-passenger footwell ...............278
Luggage compartment ...................278
Rea rcompartmen t......................... 278
Soft top
Closing ............................................ .82
Closing manually in an emergenc y... 82
Important safety notes ....................81
Opening ........................................... 81
Troubleshooting ............................... 87
Spare fuses ........................................ 318
Spare wheel Fitting ............................................ 329
Notes/data .................................... 333
Spare wheel bracket at the rear ....307
Stainless-steel spare wheel cover ..308
Specialist workshop ............................ 22
Speed, controlling see Cruise control
Speedometer
Digita l............................................ 216
In the Instrument cluster ...............211
Segments ...................................... 212
Selecting the unit of measurement 221
see Instrument cluster
SPEEDTRONIC
Display message ............................ 244
Permanent ..................................... 182
Selecting ........................................ 179
Variabl e......................................... 178 Index
15
Page 99 of 357
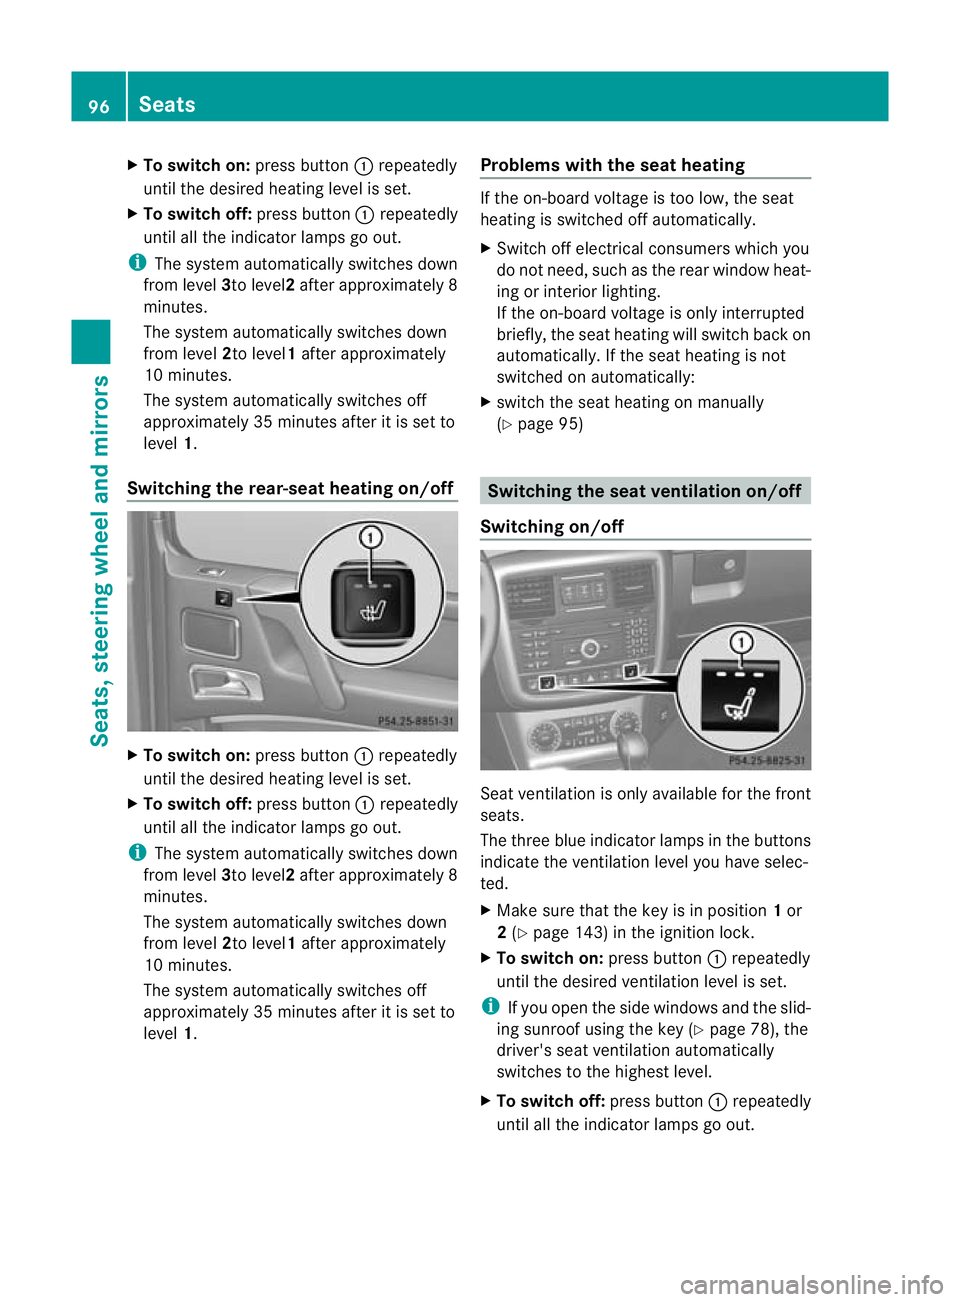
X
To switc hon:press button :repeatedly
until the desired heating level is set.
X To switch off: press button:repeatedly
until all the indicator lamps go out.
i The system automatically switches down
from level 3to level2after approximately 8
minutes.
The system automatically switches down
from level 2to level1 after approximately
10 minutes.
The system automatically switches off
approximately 35 minutes after it is set to
level 1.
Switching the rear-seat heating on/off X
To switch on: press button:repeatedly
until the desired heating level is set.
X To switch off: press button:repeatedly
until all the indicator lamps go out.
i The system automatically switches down
from level 3to level2after approximately 8
minutes.
The system automatically switches down
from level 2to level1 after approximately
10 minutes.
The system automatically switches off
approximately 35 minutes after it is set to
level 1. Problems with the seat heating If the on-board voltage is too low, the seat
heating is switched off automatically.
X
Switch off electrical consumers which you
do not need, such as the rear window heat-
ing or interior lighting.
If the on-board voltage is only interrupted
briefly, the seat heating will switch back on
automatically. If the seat heating is not
switched on automatically:
X switch the seat heating on manually
(Y page 95) Switching the seat ventilation on/off
Switching on/off Seat ventilation is only available for the front
seats.
The three blue indicator lamps in the buttons
indicate the ventilation level you have selec-
ted.
X
Make sure that the key is in position 1or
2 (Y page 143) in the ignition lock.
X To switch on: press button:repeatedly
until the desired ventilation level is set.
i If you open the side windows and the slid-
ing sunroof using the key (Y page 78), the
driver's seat ventilation automatically
switches to the highest level.
X To switch off: press button:repeatedly
until all the indicator lamps go out. 96
SeatsSeats, steering wheel and mirrors
Page 112 of 357
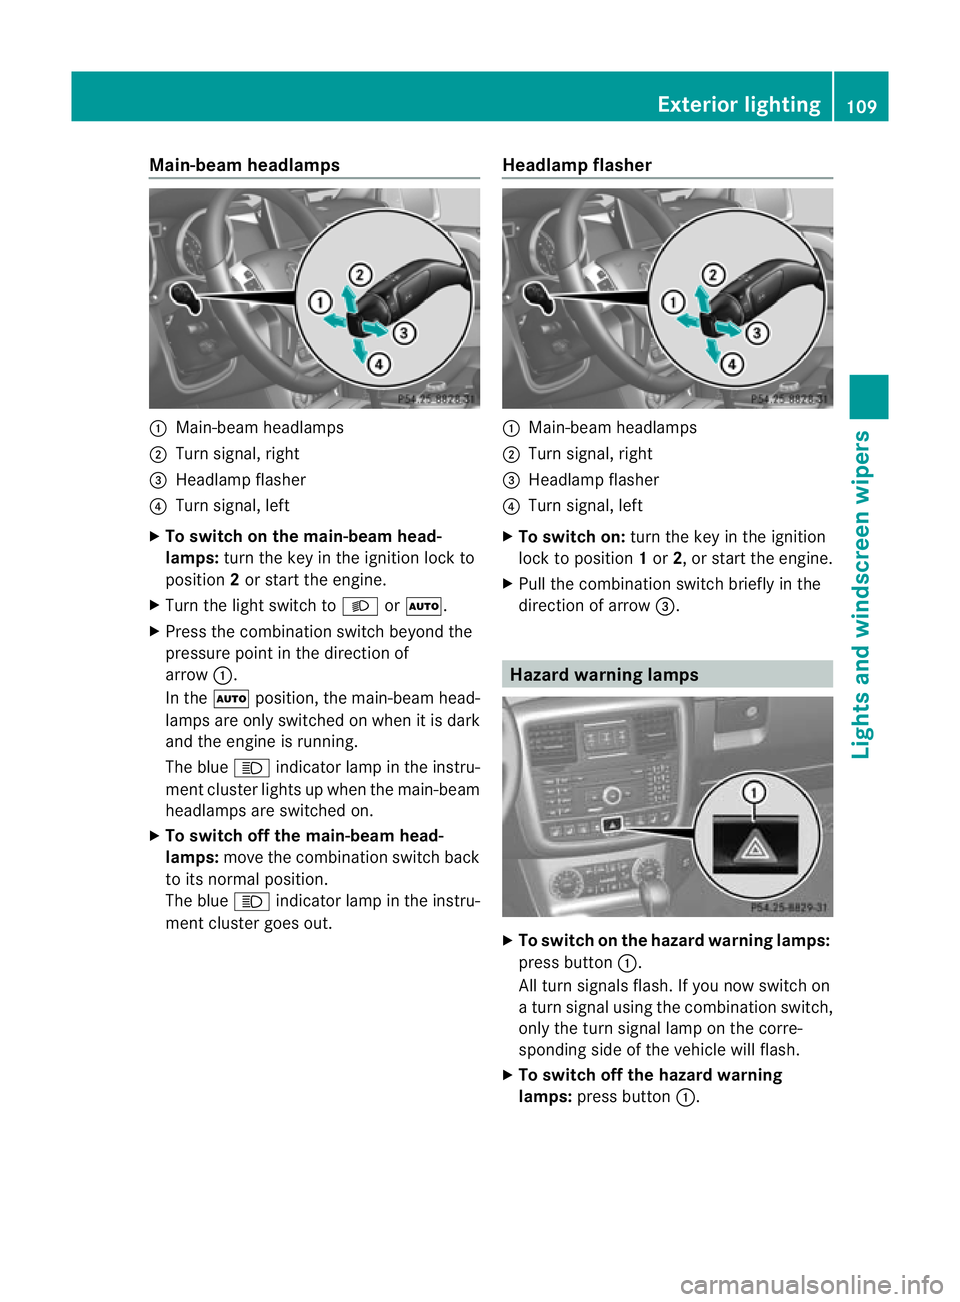
Main-beam headlamps
:
Main-beam headlamps
; Turn signal, right
= Headlamp flasher
? Turn signal, left
X To switch on the main-beam head-
lamps: turn the key in the ignition lock to
position 2or start the engine.
X Turn the light switch to LorÃ.
X Press the combination switch beyond the
pressure point in the direction of
arrow :.
In the Ãposition, the main-beam head-
lamps are only switched on when it is dark
and the engine is running.
The blue Kindicator lamp in the instru-
ment cluster lights up when the main-beam
headlamps are switched on.
X To switch off the main-beam head-
lamps: move the combination switch back
to its normal position.
The blue Kindicator lamp in the instru-
ment cluster goes out. Headlamp flasher :
Main-beam headlamps
; Turn signal, right
= Headlamp flasher
? Turn signal, left
X To switch on: turn the key in the ignition
lock to position 1or 2, or start the engine.
X Pull the combination switch briefly in the
direction of arrow =. Hazard warning lamps
X
To switch on the hazard warnin glamps:
press button :.
All turn signals flash. If you now switch on
a turn signal using the combination switch,
only the turn signal lamp on the corre-
sponding side of the vehicle will flash.
X To switch off the hazard warning
lamps: press button :. Exterior lighting
109Lights and windscreen wipers Z
Page 118 of 357
Before changing bulbs
Have the following bulbs changed at a quali-
fied specialist workshop:
R
additional turn signals in the exterio rmir-
rors
R third brake lamp
R main-beam/dipped-beam headlamps
(xenon bulbs)
R daytime driving lights
R licence plate lamp
i Individual segments of the licence plate
lamp LEDs may fail without a display mes-
sage appearing in the multifunction dis-
play. Regularly chec kthe licence plate
lighting. If necessary, visit a qualified spe-
cialist workshop.
You can replace the following bulbs:
R side lamps/parking lamps
R foglamp/cornering lamp with foglamp
function
R turn signal lamp (front)
R brake/tail lamp
R turn signal lamp (rear)
R tail lamp/parking lamp
R reversing lamp
R rear foglamp Overview of bulb replacement
–bulbs
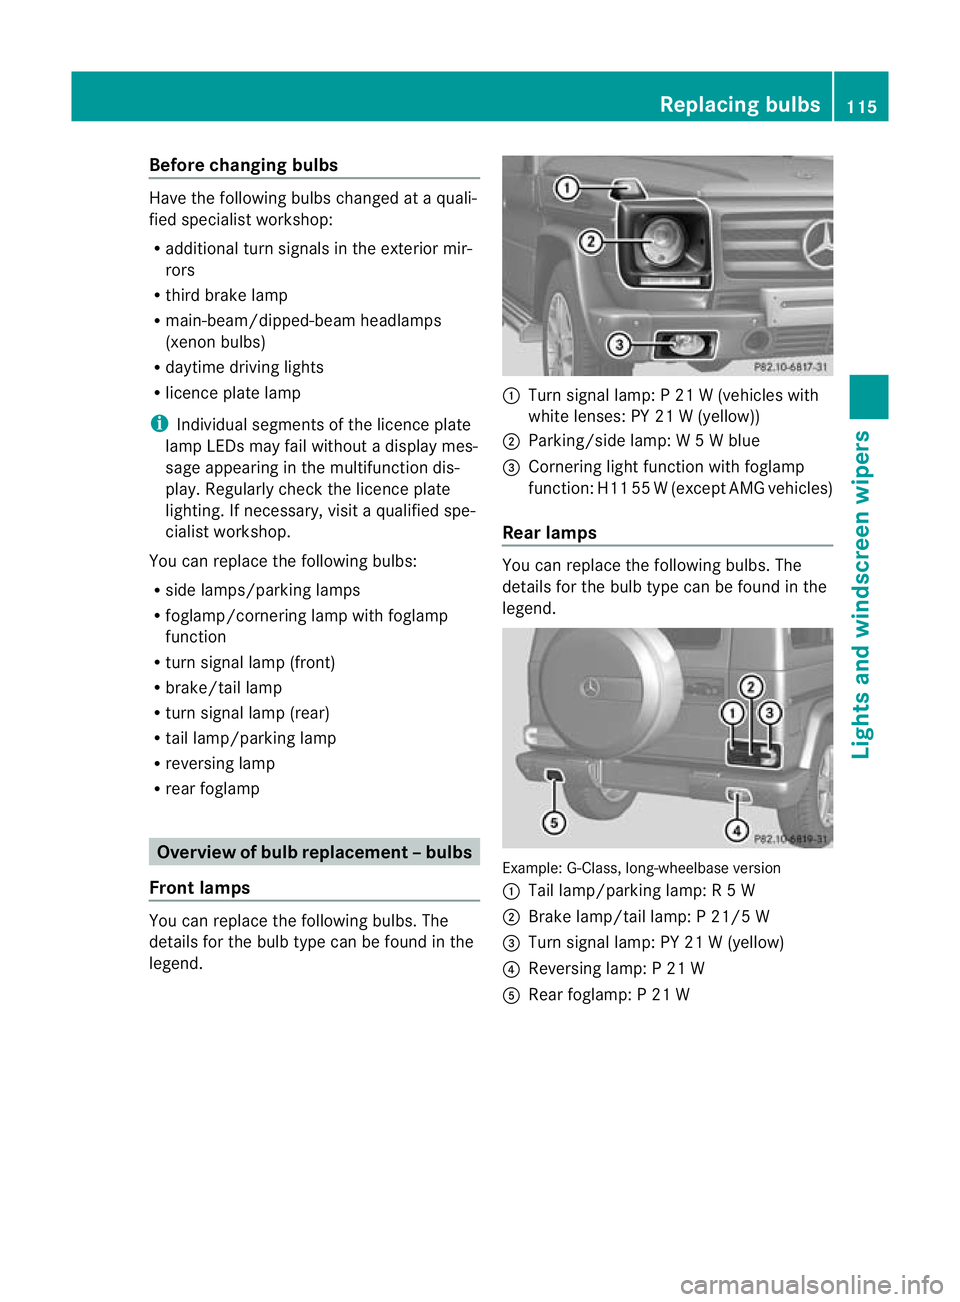
Front lamps You can replace the following bulbs. The
details for the bulb type can be found in the
legend. :
Turn signal lamp: P 21 W (vehicles with
white lenses: PY 21 W (yellow))
; Parking/side lamp: W 5Wblue
= Cornering light function with foglamp
function: H11 55 W(except AMG vehicles)
Rear lamps You can replace the following bulbs. The
details for the bulb type can be found in the
legend.
Example: G-Class, long-wheelbase version
:
Tail lamp/parking lamp: R 5W
; Brake lamp/tail lamp: P 21/5 W
= Turn signal lamp: PY 21 W (yellow)
? Reversing lamp: P 21 W
A Rear foglamp: P 21 W Replacing bulbs
115Lights and windscreen wipers Z
Page 138 of 357
The on-board computer can be used to spec-
ify up to three departure times, one of which
may be preselected (Y page 223).
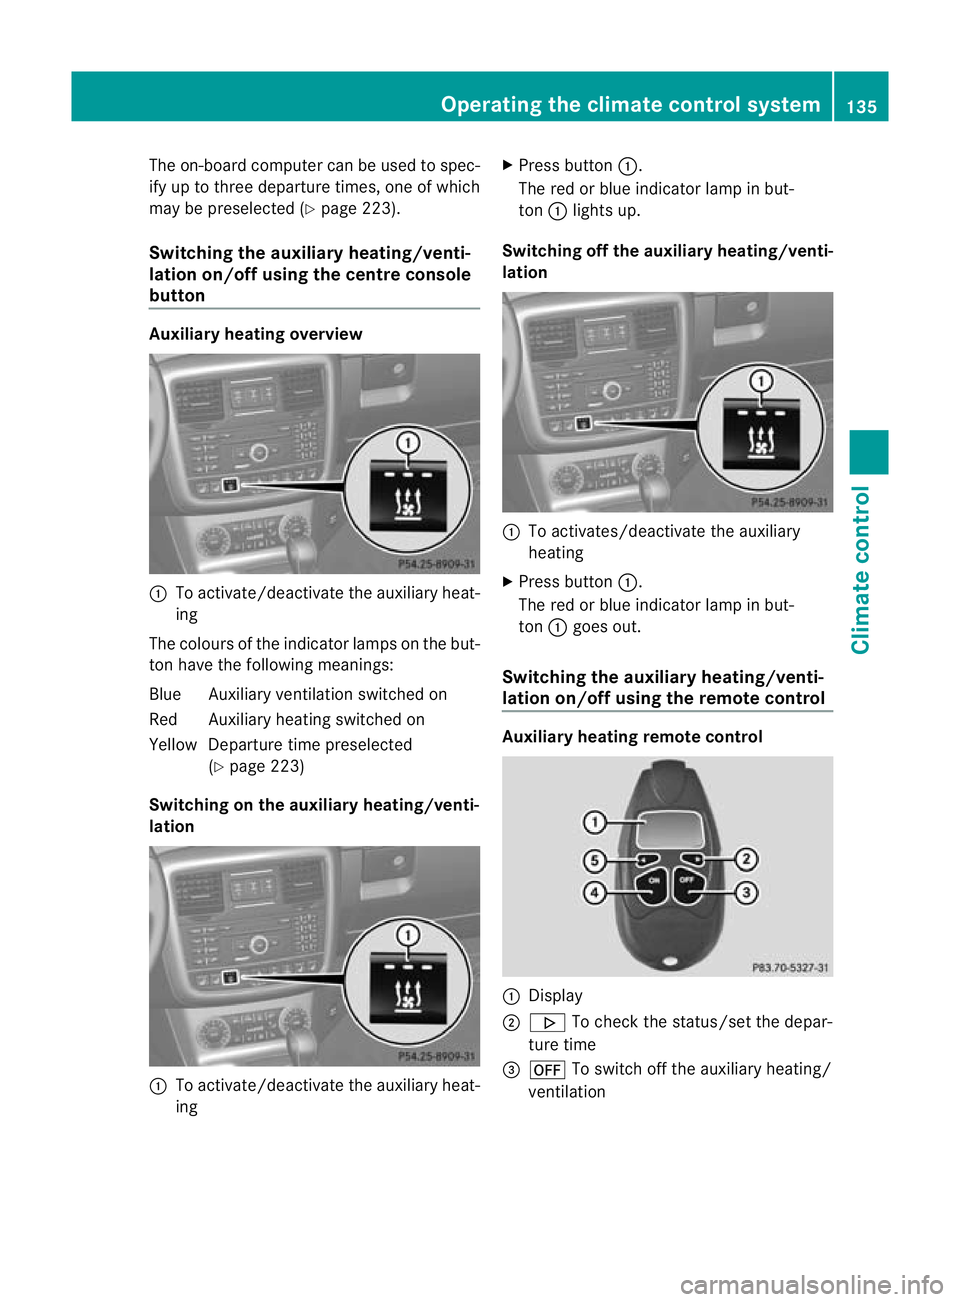
Switching the auxiliar yheating/venti-
lation on/off using the centre console
button Auxiliar
yheating overview :
To activate/deactivate th eauxiliary heat-
ing
The colours of the indicator lamps on the but-
to nh ave the following meanings:
Blue Auxiliary ventilatio nswitched on
Red Auxiliary heating switched on
Yellow Departure time preselected (Ypage 223)
Switching on the auxiliary heating/venti-
lation :
To activate/deactivate th eauxiliary heat-
ing X
Press button :.
The red or blue indicator lamp in but-
ton :lights up.
Switching off the auxiliary heating/venti-
lation :
To activates/deactivate th eauxiliary
heating
X Press button :.
The red or blue indicator lamp in but-
ton :goes out.
Switching the auxiliary heating/venti-
lation on/off using the remote control Auxiliar
yheating remote control :
Display
; . To check the status/set the depar-
ture time
= ^ To switch off the auxiliary heating/
ventilation Operating the climate control system
135Climate control Z
Page 160 of 357
would result in damage to the fuel system and
engine, which could lead to a vehicle fire.
! Do not use petrol to refuel vehicles with a
diesel engine. Do not use diesel to refuel
vehicles with a petrol engine. Even small
amounts of the wrong fuel result in damage
to the fuel system and the engine.
! Do not switch on the ignition if you acci-
dentally refuel with the wrong fuel. Other-
wise, the fuel will enter the fuel lines .Notify
a qualified specialist workshop and have
the fuel tank and fuel lines drained com-
pletely.
! Overfilling the fuel tank could damage the
fuel system.
! Take care not to spill any fuel on painted
surfaces. You could otherwise damage the
paintwork.
! Use a filter when adding fuel from a fuel
can. The fuel lines and/or the diesel injec-
tion system could otherwise be blocked by
particles from the fuel can.
For further information on fuel and fuel quality
(Y page 341). Refuelling
Fuel filler flap !
AdBlue ®
is not a fuel additive and must
not be added to the fuel tank.IfA dBlue®
is
added to the fuel tank, this can lead to
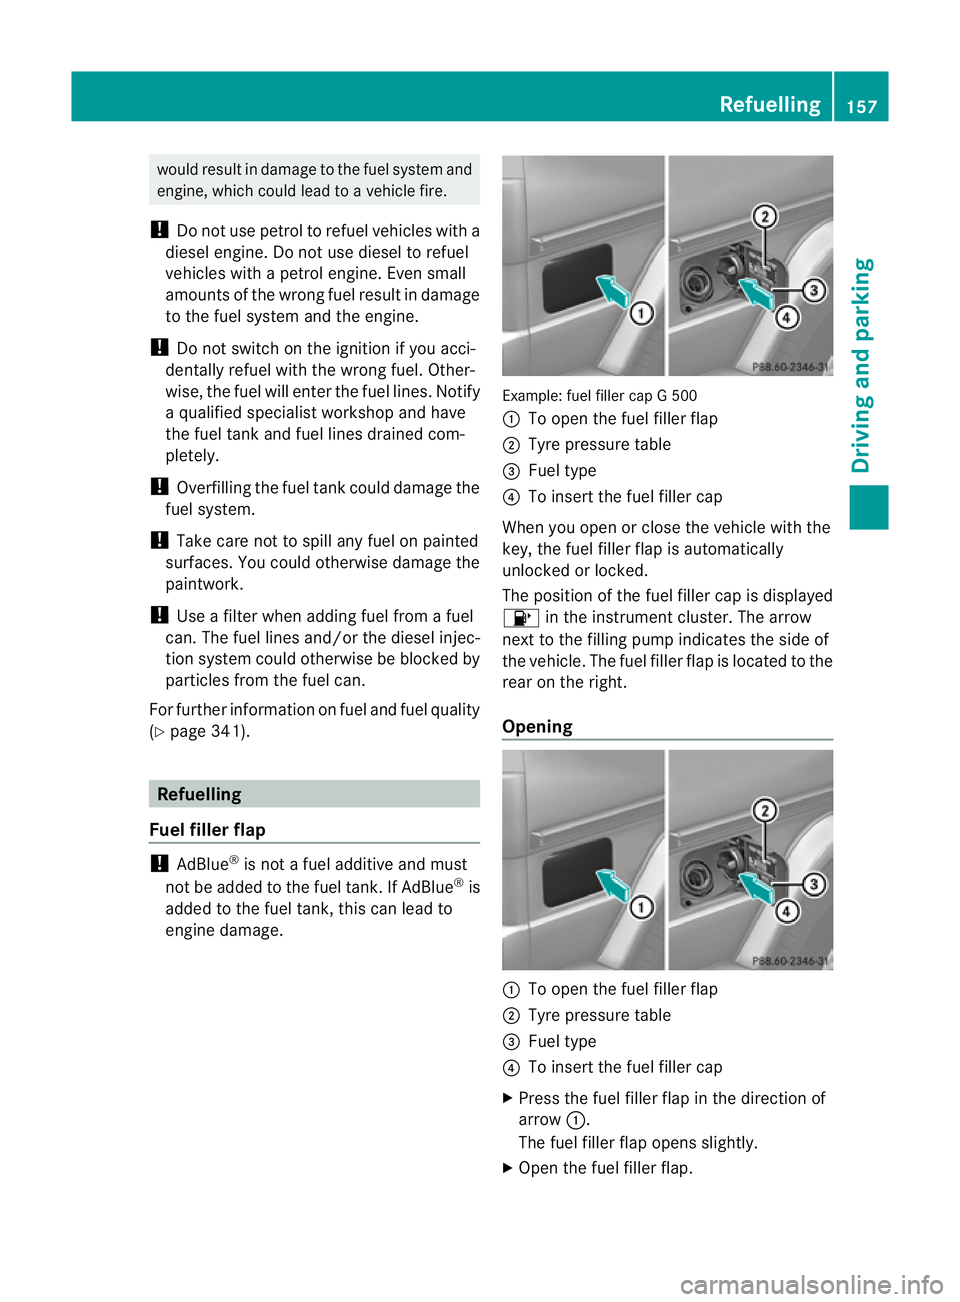
engine damage. Example: fuel filler cap G 500
:
To open the fuel filler flap
; Tyre pressure table
= Fuel type
? To insert the fuel filler cap
When you open or close the vehicle with the
key, the fuel filler flap is automatically
unlocked or locked.
The position of the fuel filler cap is displayed
8 in the instrument cluster. The arrow
nex tto the filling pump indicates the side of
the vehicle. The fuel filler flap is located to the
rear on the right.
Opening :
To open the fuel filler flap
; Tyre pressure table
= Fuel type
? To insert the fuel filler cap
X Press the fuel filler flap in the direction of
arrow :.
The fuel filler flap opens slightly.
X Open the fuel filler flap. Refuelling
157Driving and parking Z
Page 161 of 357
X
Turn the fuel filler cap anti-clockwise and
remove it.
AdBlue ®
vehicles: do not confuse the fuel
filler cap with the blue AdBlue ®
filler cap.
X Insert the fuel filler cap into the holder
bracket on the inside of filler flap ?.
i AdBlue ®
vehicles do not have a bracket
on the inside of the filler flap.
X Completely insert the filler neck of the fuel
pump nozzle into the tank and refuel.
i Do not add any more fuel after the pump
stops filling for the first time. Otherwise,
fuel may leak out.
Closing X
Replace the fuel filler cap and turn it clock-
wise. The fuel filler cap audibly engages.
X Press the fuel filler flap closed until it
engages. Fuel filler flap emergency release
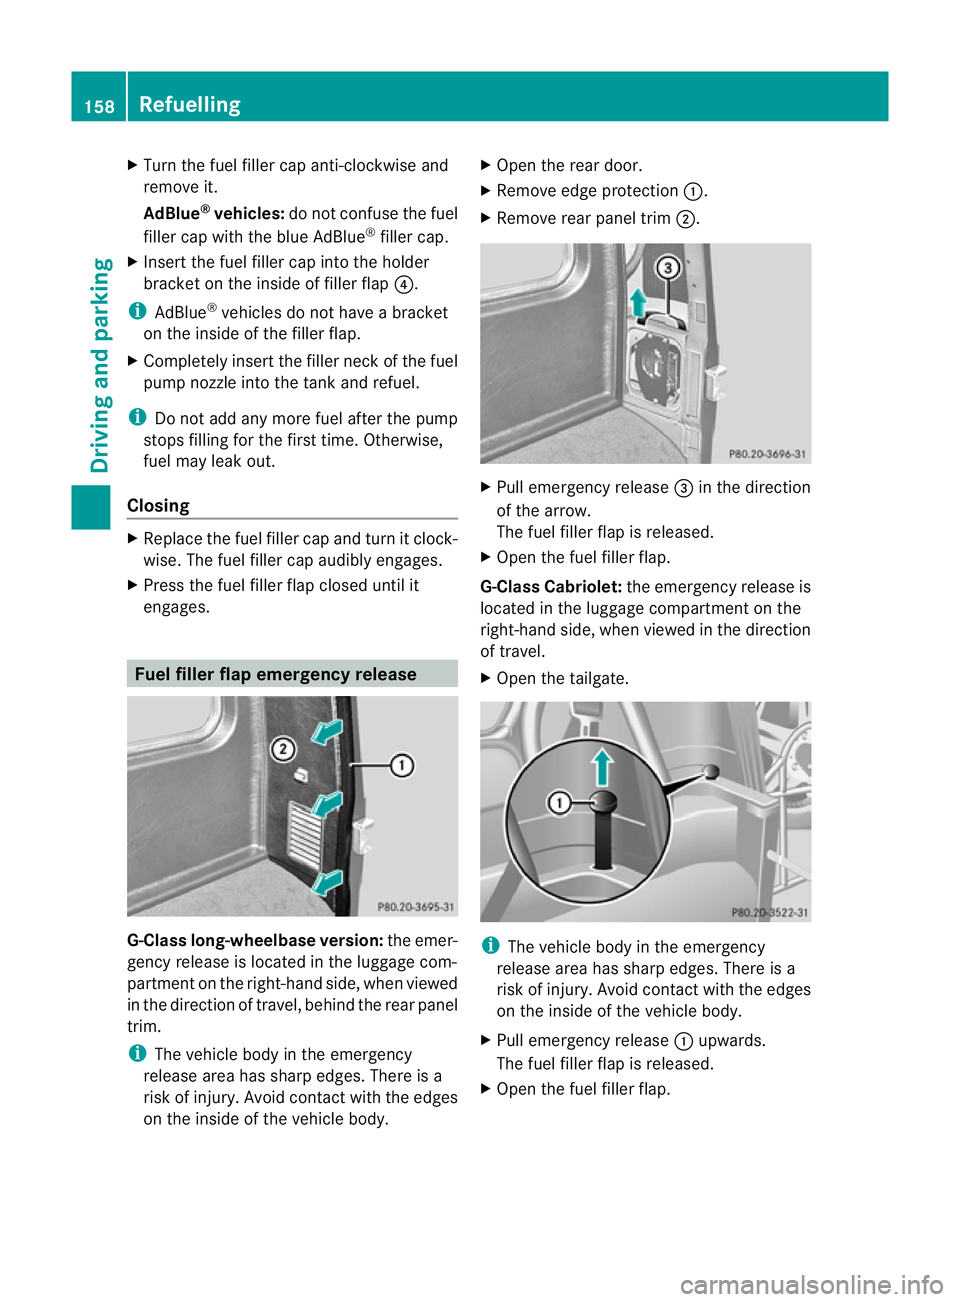
G-Class long-wheelbase version:
the emer-
gency release is located in the luggage com-
partmen tonthe right-hand side, when viewed
in the direction of travel, behind the rear panel
trim.
i The vehicle body in the emergency
release area has sharp edges. There is a
risk of injury. Avoid contact with the edges
on the inside of the vehicle body. X
Open the rear door.
X Remove edge protection :.
X Remove rear panel trim ;. X
Pull emergency release =in the direction
of the arrow.
The fuel filler flap is released.
X Open the fuel filler flap.
G-Class Cabriolet: the emergency release is
located in the luggage compartmentont he
right-hand side, when viewed in the direction
of travel.
X Open the tailgate. i
The vehicle body in the emergency
release area has sharp edges. There is a
risk of injury. Avoid contact with the edges
on the inside of the vehicle body.
X Pull emergency release :upwards.
The fuel filler flap is released.
X Open the fuel filler flap. 158
RefuellingDriving and parking
Page 163 of 357
AdBlue
®
Important notes on use To function properly, BlueTEC exhaust gas
aftertreatment 1
mus tbe operated with the
reducing agent AdBlue ®
.
When the supply of AdBlue ®
is almost used
up, the Refill AdBlue See Owner's Man‐
ual message is shown in the multifunction
display. Awarning tone also sounds.
If the Refill AdBlue No start in: .. km message is shown in the multifunction dis-
play, you can still driv ethe vehicle over the
distance shown. Awarning tone also sounds.
If the AdBlue ®
is no ttopped up, you will sub-
sequently be unable to start the engine.
After receiving the warning message, it is
preferable to fill the AdBlue ®
tank with
10 litres of AdBlue ®
.Int his way, you can
ensure that the AdBlue ®
supply lasts until the
next regular service date.
Further information about BlueTEC exhaust
gas aftertreatment and about AdBlue ®
can
be obtained from any Mercedes-Ben zService
Centre.
Topping up AdBlue ®!
Only use AdBlue ®
in accordance with
ISO 22241. Do not mix any additives with
AdBlue ®
, and do not dilute AdBlue ®
with
water. This may destroy the BlueTEC
exhaust gas aftertreatmen tsystem.
! In order to fill the AdBlue ®
tank, the vehi-
cle mus tbe parked on a level surface. The
AdBlue ®
tank can only be filled as intended
with the vehicle parked on a level surface.
Fluctuations in capacity will thus be avoi-
ded. Filling a vehicle standing on an uneven
surface is not permitted. There is a danger
of overfilling, which can cause damage to
BlueTEC exhaust gas aftertreatmen tcom-
ponents. !
Do not fill the AdBlue ®
container with a
pump nozzle.
! If there are steep gradients while driving
off-road, a sufficient filling level in the
AdBlue ®
tank must be ensured. Make sure
for this reason that there is a minimum fill
level of ten litres before driving off-road.
! Surfaces which have come into contact
with AdBlue ®
while refilling should be
rinsed immediately with water, or remove
AdBlue ®
with a moist cloth and cold water.
If AdBlue ®
has already crystallised, use a
sponge and cold water to clean the area.
AdBlue ®
residue crystallises after a certain
amount of time and soils the affected sur-
faces.
! AdBlue ®
is not a fuel additive and must
not be added to the fuel tank.IfA dBlue®
is
added to the fuel tank, this can lead to
engine damage.
If you open the AdBlue ®
tank cap, small
amounts of ammonia vapour may be
released.
Ammonia vapours have a pungen todour and
are particularly irritating to:
R skin
R mucous membranes
R eyes
You may experience a burning sensation in
your eyes, nose and throat, as well as cough-
ing and watering of the eyes.
Do not inhale any ammonia vapours that may
be released. Fill the AdBlue ®
tank only in well-
ventilated areas.
1 BlueTEC vehicles only. 160
RefuellingDriving and parking