seats MERCEDES-BENZ G-CLASS SUV 2012 Owners Manual
[x] Cancel search | Manufacturer: MERCEDES-BENZ, Model Year: 2012, Model line: G-CLASS SUV, Model: MERCEDES-BENZ G-CLASS SUV 2012Pages: 357, PDF Size: 8.86 MB
Page 6 of 357
Index
....................................................... 4Introduction
......................................... 20 At
ag lance ........................................... 25 Safety
................................................... 37 Opening and closing
...........................67 Seats, steering wheel and mirrors
....89 Lights and windscreen wipers
.........103 Climate control
................................. 123 Driving and parking
..........................141 On-board computer and displays
....209 Stowing and features
.......................265 Maintenance and care
......................289 Breakdown assistance
.....................303 Wheels and tyres
.............................. 321 Technical data
................................... 337 Contents
3
Page 18 of 357
Bel
ttensioner .................................. 47
Cleaning ......................................... 301
Display message ............................ 232
Fastening ......................................... 44
Fastening, front ............................... 44
Fastening in the rear, centre ............45
Important safety guidelines .............43
Rea rseat belt status indicator .........47
Releasing ......................................... 46
Warning lamp ................................. 252
Warning lamp (function) ................... 47
Seat heating
Malfunction indicator lamp ..............96
Seats
Adjusting (electrically). ....................92
Adjusting the 4-way lumba rsup-
por t.................................................. 94
Adjusting the head restraint ............92
Cleaning the cover .........................300
Correct driver's seat position ........... 90
Important safety notes ....................91
Overview .......................................... 91
Storing settings (memory function) 102
Switching sea theating on/off .........95
Switching the sea tventilation on/
off .................................................... 96
Seat ventilation
Malfunction indicator lamp ..............97
Securing aload .................................. 270
Sensors (cleaning instructions) .......298
Service menu (on-board computer) .220
Service products
AdBlue ®
special additive s.............. 345
Brake fluid ..................................... 346
Coolant (engine) ............................ 347
Engine oil ....................................... 345
Fuel ................................................ 341
Important safety notes ..................341
Notes ............................................. 341
Washer fluid .................................. .347
Settings
Calling up a stored setting .............102
Factory (on-board computer) .........225
On-board computer .......................221
Setting the air distribution ...............131
SETUP (on-board computer) .............226
Shift ranges ....................................... 153Short journeys (diesel particle fil-
ter)
...................................................... 164
Side lamps Switching on/off ........................... 107
Side windows
Convenience opening ......................78
Important safety notes ....................77
Opening/closing .............................. 77
Overview .......................................... 77
Troubleshooting ............................... 78
Ski rack .............................................. 275
Sliding sunroof Important safety information ...........79
Opening/closing .............................. 79
Operating manually ..........................79
Problem (malfunction) .....................80
Snow chains ...................................... 324
Socket Front-passenger footwell ...............278
Luggage compartment ...................278
Rea rcompartmen t......................... 278
Soft top
Closing ............................................ .82
Closing manually in an emergenc y... 82
Important safety notes ....................81
Opening ........................................... 81
Troubleshooting ............................... 87
Spare fuses ........................................ 318
Spare wheel Fitting ............................................ 329
Notes/data .................................... 333
Spare wheel bracket at the rear ....307
Stainless-steel spare wheel cover ..308
Specialist workshop ............................ 22
Speed, controlling see Cruise control
Speedometer
Digita l............................................ 216
In the Instrument cluster ...............211
Segments ...................................... 212
Selecting the unit of measurement 221
see Instrument cluster
SPEEDTRONIC
Display message ............................ 244
Permanent ..................................... 182
Selecting ........................................ 179
Variabl e......................................... 178 Index
15
Page 46 of 357
cannot provide the intended level of protec-
tion. Do not use head restraint covers.
The NECK-PRO head restraints increase pro-
tectio nto the driver's and the front passeng-
er's head and neck.T he NECK-PRO head
restraints on the driver's and front-passenger
seats are moved forwards and upwards in the
event of a rear-end collision of a certain
severity. This provides better head support.
If the NECK-PRO head restraints have been
triggered in an accident, reset the NECK-PRO
head restraints on the driver’s and front-
passenger seat (Y page 43). Otherwise, the
additional protection will not be available in
the event of another rear-end collision. You
can recognise if NECK-PRO head restraints
have been triggered by the fact that they have
moved forwards and can no longer be adjus-
ted.
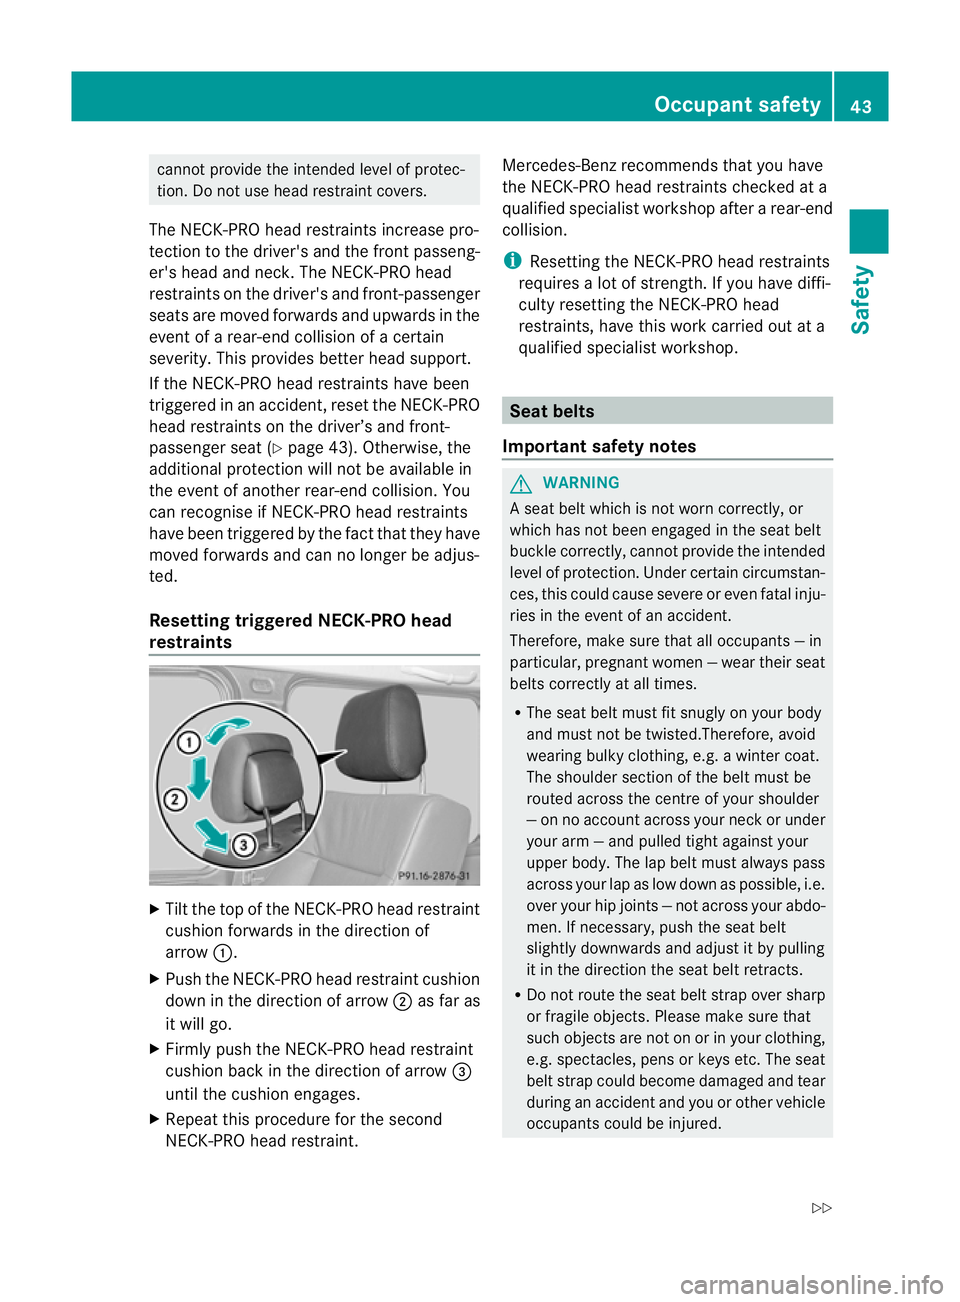
Resetting triggered NECK-PRO head
restraints X
Tilt the top of the NECK-PRO head restraint
cushion forwards in the direction of
arrow :.
X Push the NECK-PRO head restraint cushion
down in the direction of arrow ;as far as
it will go.
X Firmly push the NECK-PRO head restraint
cushion back in the direction of arrow =
until the cushion engages.
X Repeatt his procedure for the second
NECK-PRO head restraint. Mercedes-Ben
zrecommends that you have
the NECK-PRO head restraints checked at a
qualified specialist workshop after a rear-end
collision.
i Resetting the NECK-PRO head restraints
requires a lot of strength. If you have diffi-
culty resetting the NECK-PRO head
restraints, have this work carried out at a
qualified specialist workshop. Seat belts
Important safety notes G
WARNING
A seat belt which is not worn correctly, or
which has not been engaged in the seat belt
buckle correctly, cannot provide the intended
level of protection. Under certain circumstan-
ces, this could cause severe or even fatal inju-
ries in the event of an accident.
Therefore, make sure that all occupants —in
particular, pregnan twomen —wear their seat
belts correctly at all times.
R The seat belt must fit snugly on your body
and must not be twisted.Therefore, avoid
wearing bulky clothing, e.g. a winter coat.
The shoulder section of the belt must be
routed across the centre of your shoulder
—onn o account across your neck or under
your arm —and pulled tight against your
uppe rbody. The lap belt must always pass
across your lap as low down as possible, i.e.
over your hip joints —not across your abdo-
men. If necessary, push the seat belt
slightly downwards and adjust it by pulling
it in the direction the seat belt retracts.
R Do not route the seat belt strap over sharp
or fragile objects. Please make sure that
such objects are not on or in your clothing,
e.g. spectacles, pens or keys etc. The seat
belt strap could become damaged and tear
during an accident and you or other vehicle
occupants could be injured. Occupant safety
43Safety
Z
Page 49 of 357
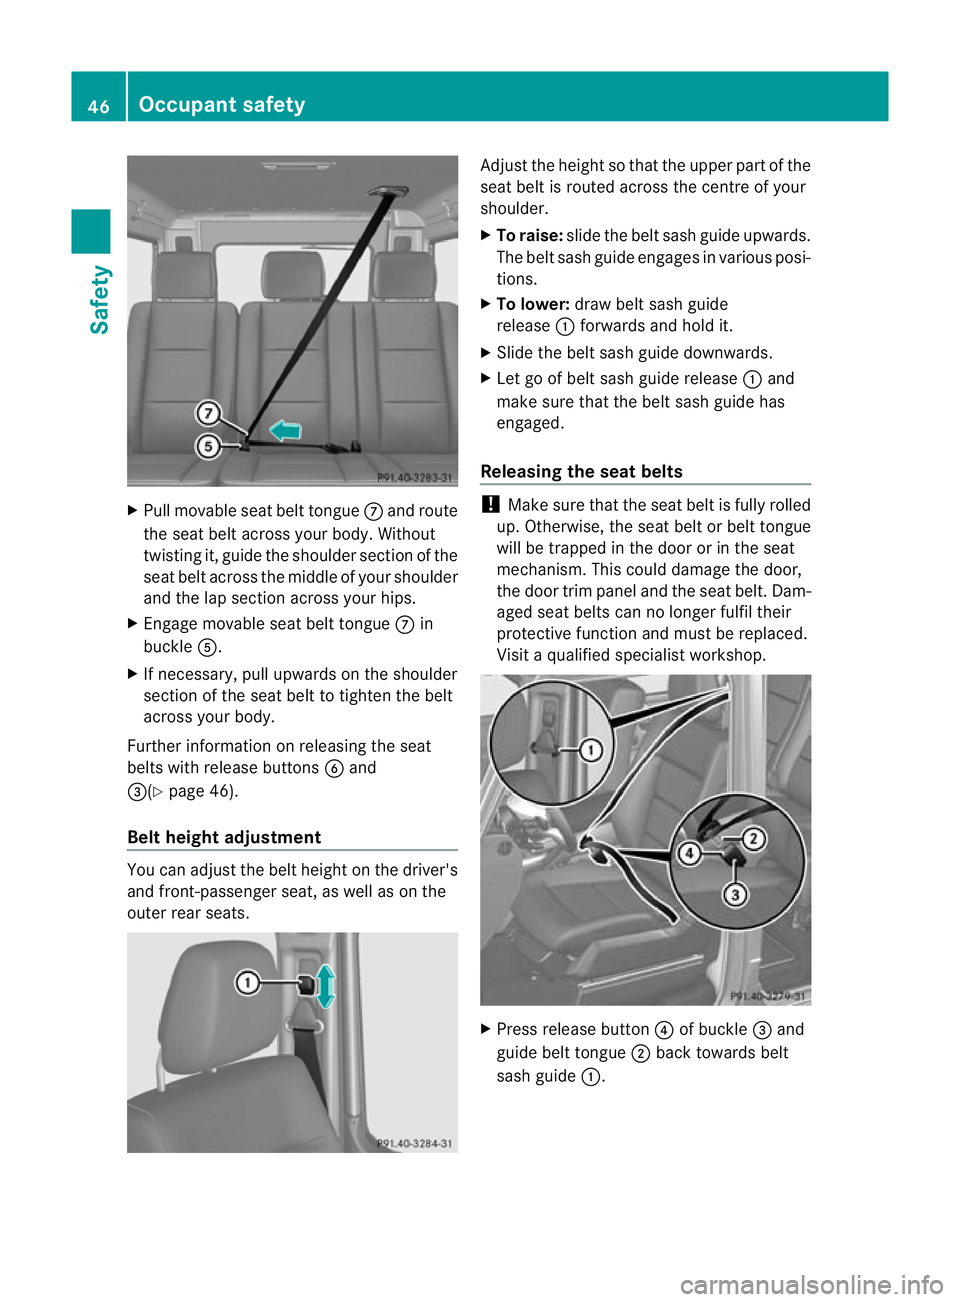
X
Pull movable seat belt tongue Cand route
the seat belt across your body. Without
twisting it, guide the shoulder section of the
seat belt across the middle of your shoulder
and the lap section across your hips.
X Engage movable seat belt tongue Cin
buckle A.
X If necessary, pull upwards on the shoulder
section of the seat belt to tighten the belt
across your body.
Further information on releasing the seat
belts with release buttons Band
=(Y page 46).
Belt height adjustment You can adjust the belt height on the driver's
and front-passenger seat, as well as on the
outer rear seats. Adjust the height so that the upper part of the
seat belt is routed across the centre of your
shoulder.
X
To raise: slide the belt sash guide upwards.
The belt sash guide engages in various posi-
tions.
X To lower: draw belt sash guide
release :forwards and hold it.
X Slide the belt sash guide downwards.
X Let go of belt sash guide release :and
make sure that the belt sash guide has
engaged.
Releasing the seat belts !
Make sure that the seat belt is fully rolled
up. Otherwise, the seat belt or belt tongue
will be trapped in the door or in the seat
mechanism .This could damage the door,
the door trim panel and the seat belt. Dam-
aged seat belts can no longer fulfil their
protective function and must be replaced.
Visit a qualified specialist workshop. X
Press release button ?of buckle =and
guide belt tongue ;back towards belt
sash guide :. 46
Occupant safetySafety
Page 51 of 357
Belt tensioners do not correct incorrect seat
positions or incorrectly fastened sea
tbelts.
Belt tensioners do not pull vehicle occupants
back towards the backrest.
If the seat belt is also fitted with a belt force
limiter and this is triggered, the force exerted
by the seat belt on the vehicle occupan tis
reduced.
The front beltf orce limiters are synchronised
with the front airbags, which take on a part of
the deceleration force. Thus, the force exer-
ted on the occupant is distributed over a
greater area.
The belt tensioners can only be activated if:
R the key is in position 1or 2in the ignition
lock.
R the restraint systems are operational; see
"SRS warning lamp" (Y page 39).
R for each three-point seat belt in front and
for the outer rear seats, the seat belt
tongue is engaged in the belt buckle.
R the front-passenger seat is occupied and
the belt tongue is engaged in the buckle on
the front-passenger side.
The belt tensioners are triggered depending
on the type and severity of an accident:
R if, in the event of a head-on or rear-end col-
lision, the vehicle decelerates or acceler-
ates rapidly in a longitudinal direction dur-
ing the initial stages of the impact
R if, in the event of a side impact, on the side
opposite the impact the vehicle deceler-
ates or accelerates rapidly in a lateral direc-
tion
R in certain situations where the vehicle over-
turns and the system determines that it can
provide additional protection
If the airbags are deployed, you will hear a
bang, and a small amount of powder may also
be released. Only in rare cases will the bang
affect your hearing. The powder that is
released generally does not constitute a
health hazard. The 6SRS warning lamp
lights up. Children in the vehicle
Child restraint systems
Important safety notes G
WARNING
To reduce the risk of serious or even fatal
injury to the child in the event of a sudden
change in direction, braking or an accident:
R children less than 1.50 m tall and under
twelve years of age must always be secured
in special child restraint systems on a suit-
able vehicle seat. This is necessary
because the seat belts are not designed for
children.
R do not secure children less than 1.50 m tall
and under twelve years of age on the front-
passenger seat. Exception: if the vehicle is
equipped with automatic child seat recog-
nition on the front-passenger seat and the
child is secured in a child restraint system
with transponders for automatic child seat
recognition
R if you secure a forward-facing child
restraint system to the front-passenger
seat, you must move the front-passenger
seat as far back as possible.
R children must never travel sitting on the lap
of another occupant. Due to the forces
which occur in the event of a sudden
change of direction, heavy braking or an
accident, it would not be possible to
restrain the child. The child could be thrown
against parts of the vehicle interior and be
seriously or even fatally injured. G
WARNING
The child restraint system cannot perform its
protective function if it is not correctly fitted
to a suitable vehicle seat. The child cannot be
restrained in the event of an accident, heavy
braking or sudden changes of direction .The
child could be seriously or even fatally injured.
For this reason, when fitting a child restraint
system, observe the manufacturer's installa- 48
Children in the vehicleSafety
Page 52 of 357
tion instructions and the correct use of the
child restraint system.
Child restraint systems shoul dbe fitted to the
rear seats. Children are generally better pro-
tected there.
The entire base of the child restraint system
must always rest on the seat cushion. There-
fore, never place objects, e.g. a cushion,
under the child restraint system.
Only use child restraint systems with the orig-
inal cover designed for them. Only replace
damaged covers with genuine Mercedes-Benz
covers.
We recommend the use of child restraint sys-
tems which have been approved for
Mercedes-Benz vehicles. G
WARNING
When leaving the vehicle, it can still roll away
despite being braked by the HOLD function if:
R there is a malfunction in the system or in
the voltage supply
R the HOLD function is deactivated by the
accelerator pedal being depressed, e.g. by
a vehicle occupant
R the electrical system in the engine com-
partment, the battery or the fuses are tam-
pered with
R the battery is disconnected
There is a risk of an accident.
Before leaving the vehicle, always deactivate
the HOLD function and secure the vehicle
from rolling away. G
WARNING
Unsecured or incorrectly positioned loads
increase the risk of injury for children and all
other occupants in the event of:
R an accident
R a braking manoeuvre
R a sudden change of direction
Do not carry heavy or hard objects in the vehi-
cle interior unless they are secured. You will find further information under "Loading guide-
lines" in the index.
If a child is travelling in your vehicle, secure
the child using a child restraint system which
is appropriate to the size, age and weight of
the child and recommended for Mercedes-
Benz vehicles. You should preferably fit the
restraint system to a suitable rear seat. Make
sure that the child is secured in a child
restraint system throughout the trip.
Mercedes-Benz recommends that you only
use the child restraint systems listed under
(Y page 56).
You can obtain information about the correct
child restraint system from any Mercedes-
Benz Service Centre.
i It is advisable to use Mercedes-Benz care
products to clean child restraint systems.
You can obtain information about this at
any Mercedes-Benz Service Centre.
Child restraint system on the front-
passenger seat G
WARNING
If the front-passenger airbag is not disabled:
R a child secured in a child restraint system
on the front-passenger seat could be seri-
ously and even fatally injured by the front-
passenger airbag deploying. This is espe-
cially a risk if the child is in the immediate
vicinity of the front-passenger airbag when
it deploys.
R never secure a child on the front-passenger
seat in a rearward-facing child restraint sys-
tem. Only secure a rearward-facing child
restraint system on a suitable rear seat.
R always move the front-passenger seat to
the rearmost position if you secure a child
in a forward-facing child restraint system
on the front-passenger seat. Children in the vehicle
49Safety
Z
Page 54 of 357
Signals from electronic equipment can cause
interference in the automatic child seat rec-
ognition sensor system. This can lead to a
system malfunction. This may cause the
4 PASSENGER AIRBAG OFF indicator
lamp to light up withou tthere being a child
seat with transponders for automatic child
seat recognition fitted. The front-passenger
airbag will not then deploy during an accident.
It is also possible that the 6SRS warning
lamp lights up and/or the 4PASSENGER
AIRBAG OFF indicator lamp does not light up
briefly when you turn the key in the ignition
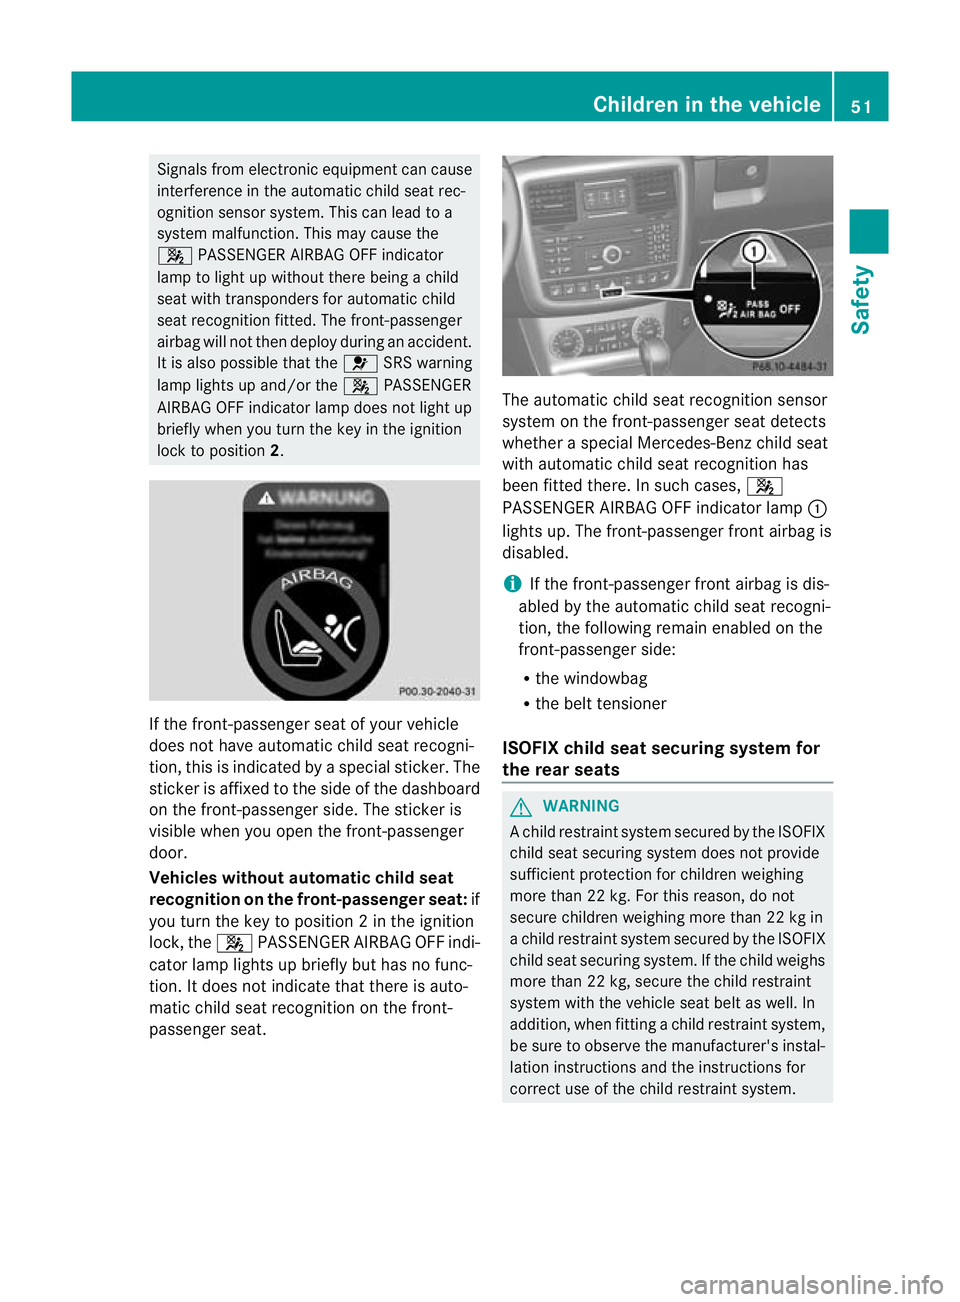
lock to position 2. If the front-passenger seat of your vehicle
does not have automatic child seat recogni-
tion, this is indicated by a special sticker. The
sticker is affixed to the side of the dashboard
on the front-passenger side. The sticker is
visible when you open the front-passenger
door.
Vehicles without automatic child seat
recognition on the front-passenger seat: if
you turn the key to position 2inthe ignition
lock, the 4PASSENGER AIRBAG OFF indi-
cator lamp lights up briefly but has no func-
tion. It does not indicate that there is auto-
matic child seat recognition on the front-
passenger seat. The automatic child seat recognition sensor
system on the front-passenger seat detects
whether a special Mercedes-Ben
zchild seat
with automatic child seat recognition has
been fitted there. In such cases, 4
PASSENGER AIRBAG OFF indicator lamp :
lights up. The front-passenger front airbag is
disabled.
i If the front-passenger front airbag is dis-
abled by the automatic child seat recogni-
tion, the following remain enabled on the
front-passenger side:
R the windowbag
R the belt tensioner
ISOFIX child seat securing system for
the rear seats G
WARNING
Ac hild restraint system secured by the ISOFIX
child seat securing system does not provide
sufficient protection for children weighing
more than 22 kg. For this reason, do not
secure children weighing more than 22 kg in
a child restraint system secured by the ISOFIX
child seat securing system. If the child weighs
more than 22 kg, secure the child restraint
system with the vehicle seat belt as well. In
addition, when fitting a child restraint system,
be sure to observe the manufacturer's instal-
lation instructions and the instructions for
correct use of the child restraint system. Children in the vehicle
51Safety Z
Page 55 of 357
G
WARNING
The child restraint system cannot perform its
protective function if it is not correctly fitted
to a suitable vehicle seat. The child cannot be
restrained in the event of an accident, heavy
braking or sudden changes of direction. The
child could be seriously or even fatally injured.
For this reason, when fitting a child restraint
system, be sure to observe the manufactur-
er's installation instructions and the instruc-
tions for correct use of the child restraint sys-
tem.
For safety reasons, when installing child
restraint systems on the rear seats, only use
child restraint systems with the ISOFIX child
seat securing system, which are specially tes-
ted and approved for Mercedes-Benz vehi-
cles.
An incorrectly fitted child restraint system
could come loose and seriously or even fatally
injure the child or other vehicle occupants.
When fitting the child restraint system, always
make sure that it is engaged correctly in the
securing rings on both sides. G
WARNING
Please note that if child restraint systems, or
their retaining systems, are damaged or sub-
jected to a load in an accident, they may not
be able to provide their protective function.
This could result in serious or even fatal inju-
ries to the secured child in the event of an
accident, heavy braking or a sudden change
in direction.
For this reason, have child restraint systems
and their anchorages which have been dam-
aged or subjected to a loadinana ccident
checked immediately at a qualified specialist
workshop.
! Whe nfitting the child restraint system,
make sure that the seat belt for the centre
seat does not get trapped. Otherwise, the
seat belt could be damaged.
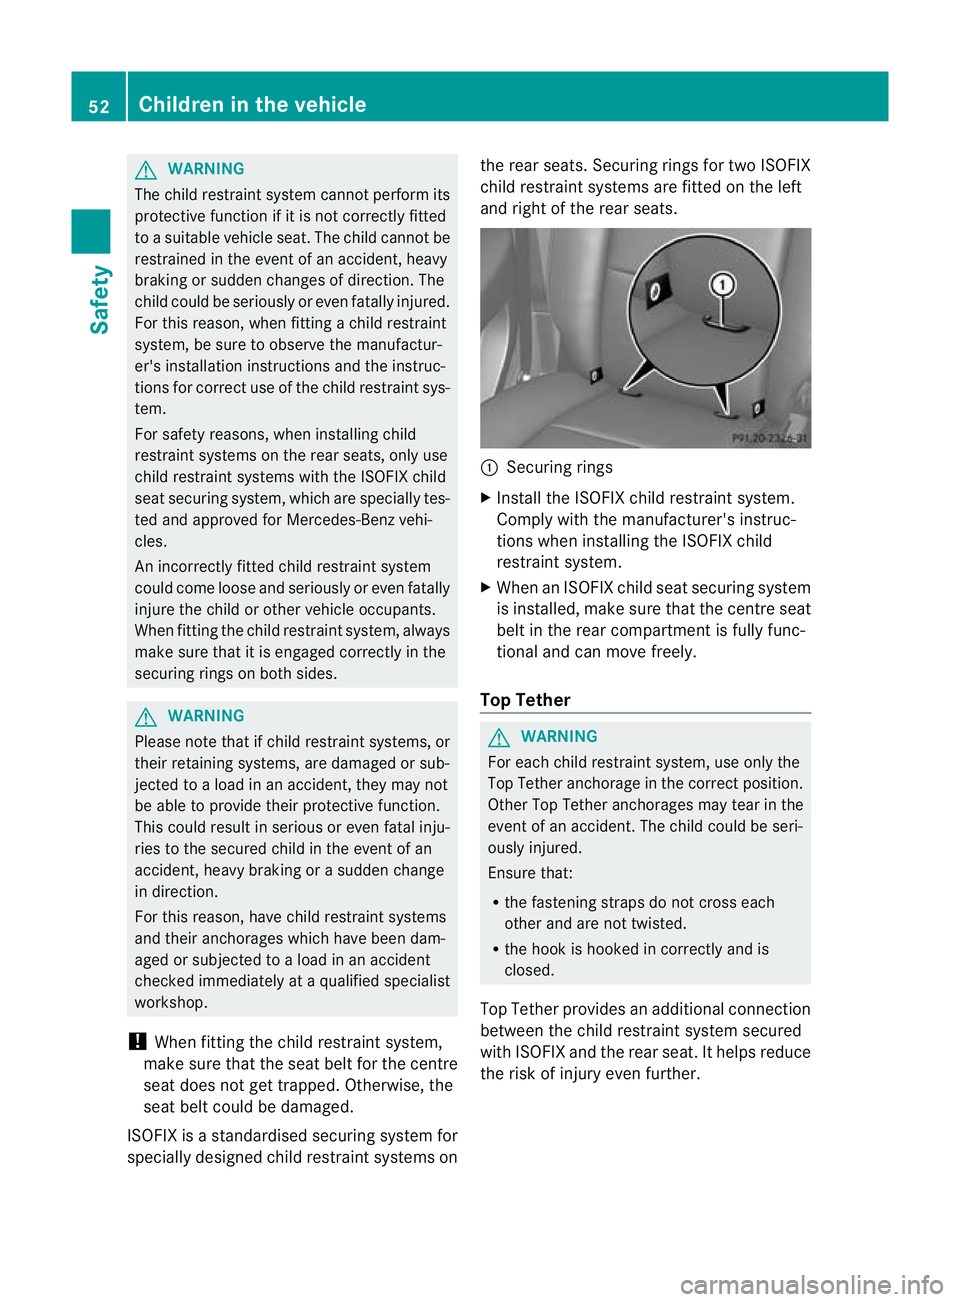
ISOFIX is a standardised securing system for
specially designed child restraint systems on the rear seats. Securing rings for two ISOFIX
child restraint systems are fitted on the left
and right of the rear seats.
:
Securing rings
X Install the ISOFIX child restraint system.
Comply with the manufacturer's instruc-
tions when installing the ISOFIX child
restraint system.
X When an ISOFIX child seat securing system
is installed, make sure that the centre seat
belt in the rear compartment is fully func-
tional and can move freely.
Top Tether G
WARNING
For each child restraint system, use only the
Top Tether anchorage in the correc tposition.
Other Top Tether anchorages may tear in the
event of an accident .The child could be seri-
ously injured.
Ensure that:
R the fastening straps do not cross each
other and are not twisted.
R the hook is hooked in correctly and is
closed.
Top Tether provides an additional connection
between the child restraint system secured
with ISOFIX and the rear seat. It helps reduce
the risk of injury even further. 52
Children in the vehicleSafety
Page 58 of 357
Weight categories Front-passenger airbag is
not disabled: Front-passenger front air-
bag is disabled:
Category II: 15 to 25 kg
L U
Group III: 22 to 36 kg
L U
Vehicles with automatic chil
dseat recognition in the front-passenger seat: a "Universal"
category child restrain tsystem with a transponder fo rautomatic child seat recognition must
be fitted when the front-passenger airbag is disabled. The 4PASSENGER AIRBAG OFF
indicator lamp must be lit.
Rear seats Weight categories Rear seat left, right
Category 0: up to 10 kg
U
Group 0+: up to 13 kg
U
Category I: 9 to 18 kg
U
Category II: 15 to 25 kg
U
Group III: 22 to 36 kg
U
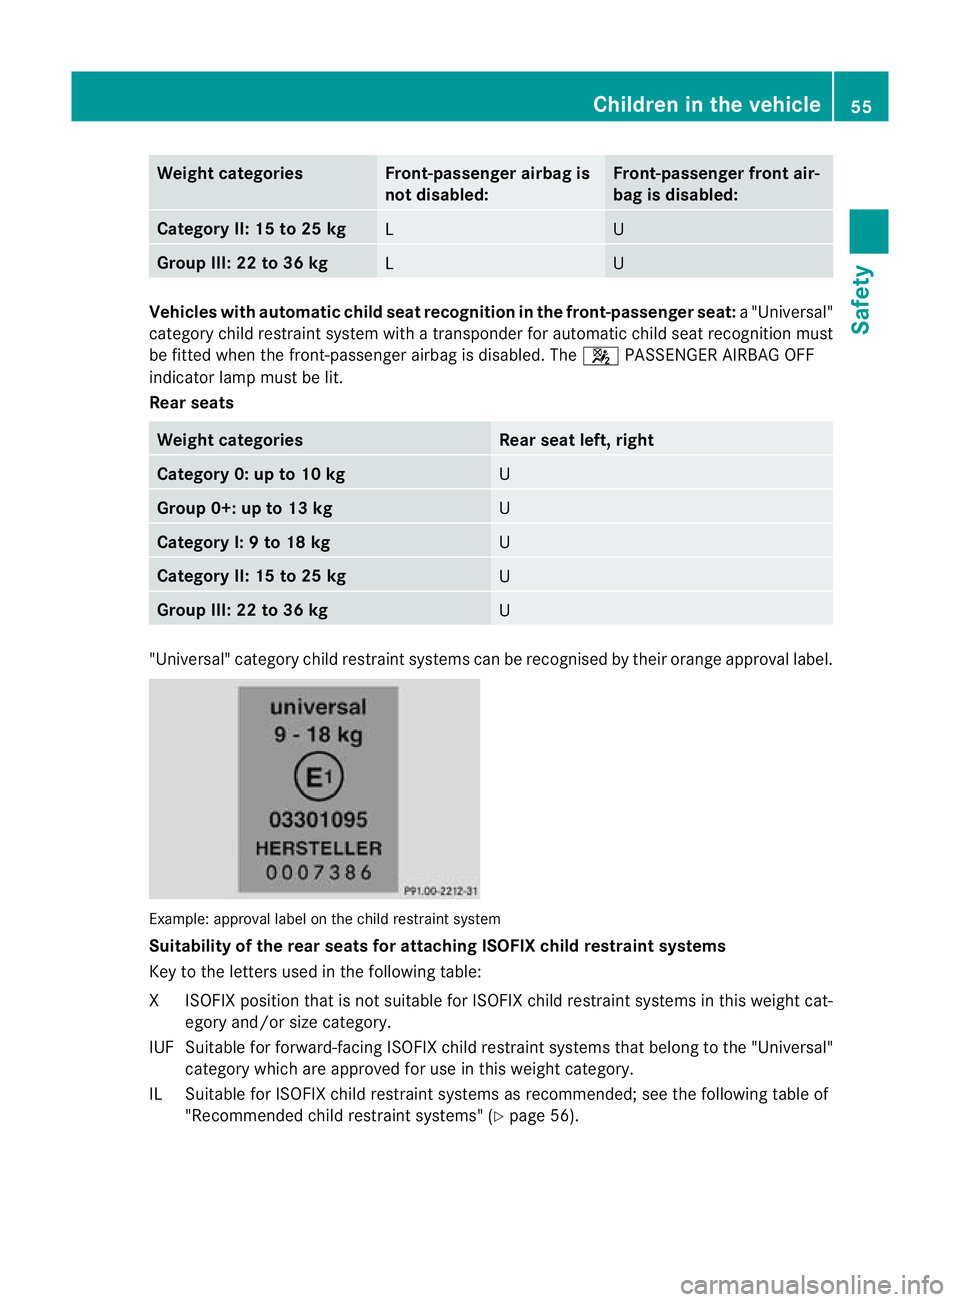
"Universal" category child restraint systems can be recognised by their orange approval label.
Example: approval label on the child restrain
tsystem
Suitability of the rear seats for attaching ISOFIX child restraint systems
Key to the letters used in the following table:
XI SOFIX position tha tis not suitable for ISOFIX child restraint systems in this weight cat-
egory and/or size category.
IUF Suitable for forward-facing ISOFIX child restraint systems that belong to the "Universal" category which are approved for use in this weight category.
IL Suitable for ISOFIX child restraint systems as recommended; see the following table of "Recommended child restraint systems" (Y page 56). Children in the vehicle
55Safety Z
Page 92 of 357
Useful information
..............................90
Correct driver's seat position ............90
Seats .................................................... 91
Steering wheel .................................... 97
Mirrors ................................................. 99
Memor yfunctions ............................. 102 89Seats, steering wheel and mirrors