MERCEDES-BENZ G-CLASS SUV 2014 Owners Manual
Manufacturer: MERCEDES-BENZ, Model Year: 2014, Model line: G-CLASS SUV, Model: MERCEDES-BENZ G-CLASS SUV 2014Pages: 272, PDF Size: 39.13 MB
Page 101 of 272
!
If a warning tone sounds and the
Release Park. Brake
Release Park. Brake message appears
in the multifunction display, the parking
brake is still applied. Release the parking
brake.
X Depress the brake pedal and keep it
depressed.
X Shift the automatic transmission to
position Dor R.
i Before driving off, wait until the gear
change is fully completed.
X Release the parking brake (Y page 105).
X Release the brake pedal.
X Carefully depress the accelerator pedal.
i It is only possible to shift the automatic
transmission from position Pto a different
position if you depress the brake pedal.
Only then is the selector lever lock
released.
i The vehicle locks centrally once you have
pulled away. The locking knobs in the doors
drop down.
You can open the doors from the inside at
any time.
You can also deactivate the automatic
locking feature (Y page 144).
i Upshifts take place at higher engine
speeds after a cold start. This helps the
catalytic converter to reach its operating
temperature more quickly.
Hill start assist G
WARNING
After a short time, hill start assist will no
longer brake your vehicle and it could roll
away. There is a risk of an accident and injury.
Therefore, quickly move your foot from the
brake pedal to the accelerator pedal. Never
leave the vehicle when it is held by hill start
assist.
Hill start assist helps you when pulling away
forwards or in reverse on an uphill gradient. It holds the vehicle for a short time after you
have removed your foot from the brake pedal.
This gives you enough time to move your foot
from the brake pedal to the accelerator pedal
and to depress it before the vehicle begins to
roll.
X
Take your foot off the brake pedal.
i Once you have taken your foot off the
brake pedal, the vehicle is held for around
one second.
X Pull away.
Hill start assist will not function if:
R you are pulling away on a level road or on
a downhill gradient.
R the transmission is in position N.
R the parking brake is applied.
R ESP ®
is malfunctioning. ECO start/stop function (AMG
vehicles)
In the Digital Operator's Manual, you will find
general notes on and information about:
R Deactivating/activating the ECO start/
stop function
R Automatic engine switch-off/engine start Automatic transmission
Important safety notes
G
WARNING
If the engine speed is above the idling speed
and you engage transmission position Dor
R, the vehicle could pull away suddenly. There
is a risk of an accident.
When engaging transmission position Dor R,
always firmly depress the brake pedal and do
not simultaneously accelerate. G
WARNING
The automatic transmission switches to
neutral position Nwhen you switch off the Automatic transmission
99Driving and parking
Z
Page 102 of 272
engine. The vehicle may roll away. There is a
risk of an accident.
After switching off the engine, always switch
to parking position P. Prevent the parked
vehicle from rolling away by applying the
parking brake.
i Bear in mind that the power transmission
between the engine and the transmission
is interrupted when the engine is switched
off. For this reason, shift the automatic
transmission to Pwhen the engine is
switched off and the vehicle is at a
standstill. Apply the parking brake to
prevent the vehicle from rolling away. Selector lever
Overview of transmission positions !
If the engine speed is too high or if the
vehicle is rolling, do not shift the
transmission directly from Dto R, from R
to Dor directly to P.
Do not open the driver's door while the
vehicle is in motion. At low speeds in
transmission position Dor R, park position
P is otherwise engaged automatically.
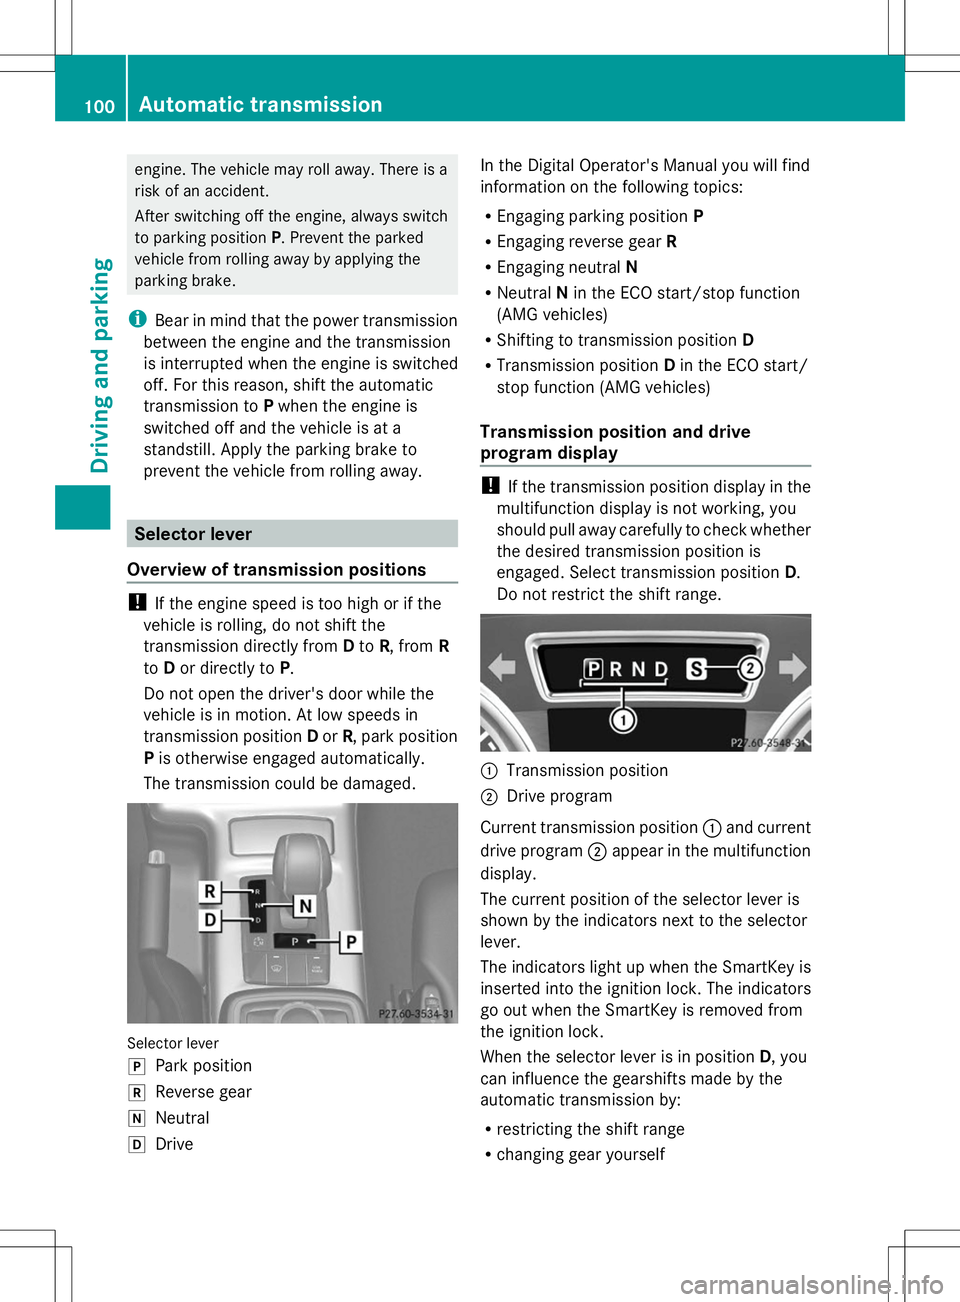
The transmission could be damaged. Selector lever
j
Park position
k Reverse gear
i Neutral
h Drive In the Digital Operator's Manual you will find
information on the following topics:
R
Engaging parking position P
R Engaging reverse gear R
R Engaging neutral N
R Neutral Nin the ECO start/stop function
(AMG vehicles)
R Shifting to transmission position D
R Transmission position Din the ECO start/
stop function (AMG vehicles)
Transmission position and drive
program display !
If the transmission position display in the
multifunction display is not working, you
should pull away carefully to check whether
the desired transmission position is
engaged. Select transmission position D.
Do not restrict the shift range. :
Transmission position
; Drive program
Current transmission position :and current
drive program ;appear in the multifunction
display.
The current position of the selector lever is
shown by the indicators next to the selector
lever.
The indicators light up when the SmartKey is
inserted into the ignition lock. The indicators
go out when the SmartKey is removed from
the ignition lock.
When the selector lever is in position D, you
can influence the gearshifts made by the
automatic transmission by:
R restricting the shift range
R changing gear yourself 100
Automatic transmissionDriving and parking
Page 103 of 272
Information in the Digital Operator's
Manual
In the Digital Operator's Manual you will find
information on the following topics:
R Transmission position and drive program
display
R Transmission positions
R Changing gear
R Driving tips
R Program selector button
R Steering wheel paddle shifters
R Automatic drive program
R Manual drive program
R Shift ranges
R Problems with the transmission Manual drive program
Introduction In drive program
M, you can change gear
manually using the steering wheel paddle
shifters. For this, the transmission must be in
position D. The gear currently selected and
engaged is shown in the multifunction
display.
Manual drive program Mdiffers from drive
programs Eand Swith regard to spontaneity,
responsiveness and smoothness of gear
changes.
Switching on the manual drive program X
Press the program selector button until the
multifunction display Mappears, see
Digital Operator's Manual.
Upshifting (except AMG vehicles) X
Pull the right-hand paddle ( Ypage 101).
Pull the right-hand paddle; see the Digital
Operator's Manual
The automatic transmission shifts up to the
next gear. Shifting up (AMG vehicles) !
In manual drive program M, the automatic
transmission does not shift up
automatically even when the engine
limiting speed for the current gear is
reached. When the engine limiting speed is
reached, the fuel supply is cut to prevent
the engine from overrevving. Always make
sure that the engine speed does not reach
the red area of the tachometer. There is
otherwise a risk of engine damage.
X Pull the right-hand paddle ( Ypage 101).
Pull the right-hand paddle; see the Digital
Operator's Manual
The automatic transmission shifts up to the
next gear.
Before the engine speed reaches the red area,
an upshift indicator will be shown in the
multifunction display.
X If the color in the speedometer
multifunction display changes to red and
the UP
UP display message is shown, shift up
a gear.
Information in the Digital Operator's
Manual In the Digital Operator's Manual you will find
information on the following topics:
R
Downshifting
R Selecting the optimal gear for maximum
acceleration
R Kickdown
R Switching off the manual drive program Refueling
Important safety notes
G
WARNING
Gasoline is highly flammable and poisonous.
It burns violently and can cause serious
personal injury. Refueling
101Driving and pa rking
Z
Page 104 of 272
Never allow sparks, flames or smoking
materials near gasoline.
Turn off the engine before refueling.
Whenever you are around gasoline, avoid
inhaling fumes and any skin or clothing
contact.
Direct skin contact with fuels and the
inhalation of fuel vapors are damaging to your
health.
! Do not use diesel to refuel vehicles with a
gasoline engine. Even small amounts of the
wrong fuel result in damage to the fuel
system and engine.
! Do not switch on the ignition if you
accidentally refuel with the wrong fuel.
Otherwise, the fuel will enter the fuel lines.
Notify a qualified specialist workshop and
have the fuel tank and fuel lines drained
completely.
! Overfilling the fuel tank could damage the
fuel system.
! Take care not to spill any fuel on painted
surfaces. You could otherwise damage the
paintwork.
! Use a filter when refueling from a fuel can.
Otherwise, the fuel lines and/or injection
system could be blocked by particles from
the fuel can.
If you overfill the fuel tank, pressure may build
up in the fuel tank. This could cause fuel to
spray out when the fuel pump nozzle is
removed. There is a risk of injury. The fuel
tank is full when the fuel pump nozzle first
switches off. End the refueling process.
Further information on fuel and fuel quality
(Y page 258) Refueling
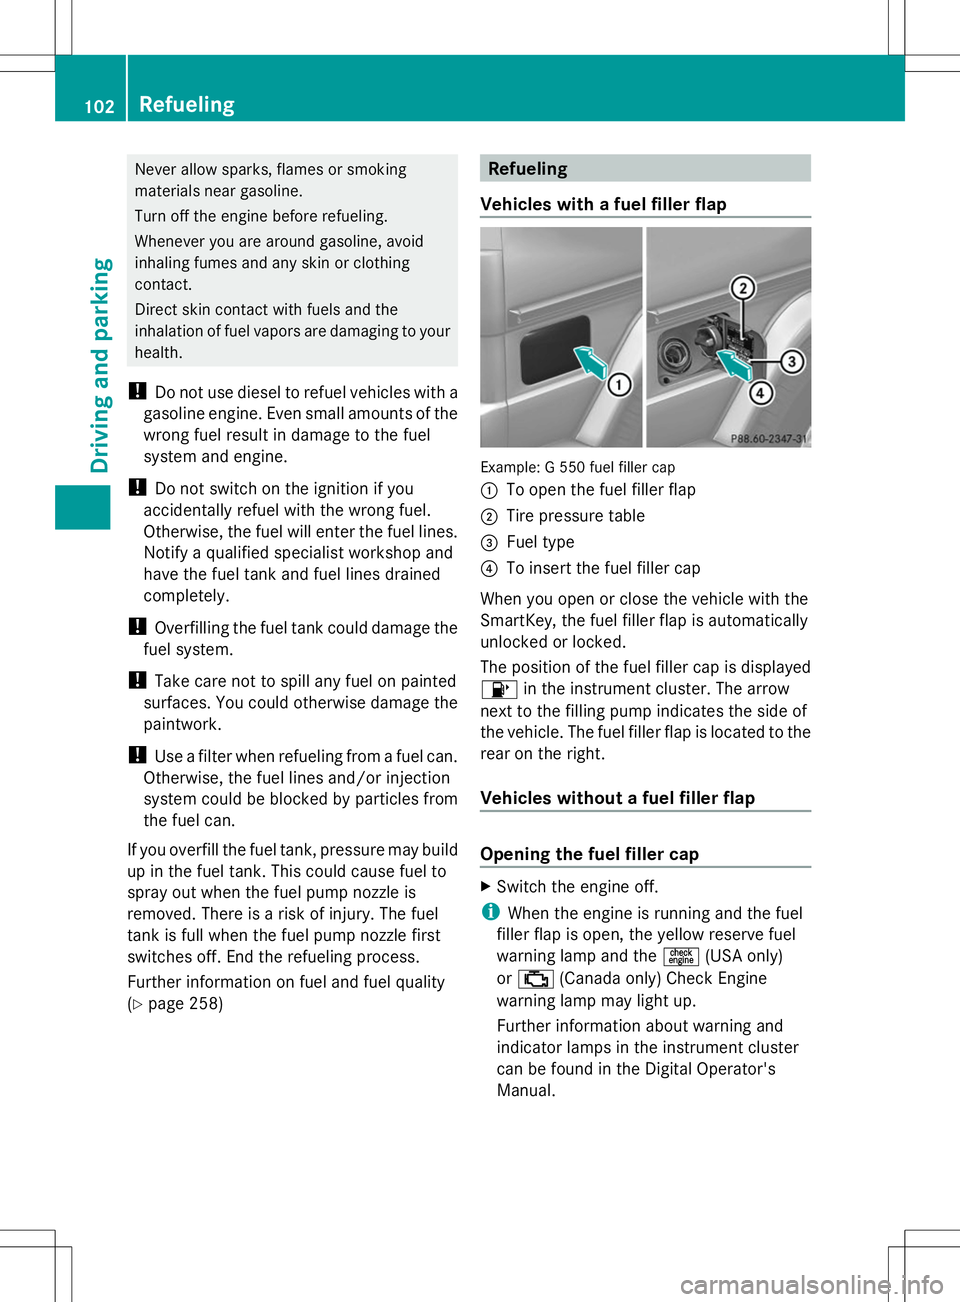
Vehicles with a fuel filler flap Example: G 550 fuel filler cap
:
To open the fuel filler flap
; Tire pressure table
= Fuel type
? To insert the fuel filler cap
When you open or close the vehicle with the
SmartKey, the fuel filler flap is automatically
unlocked or locked.
The position of the fuel filler cap is displayed
8 in the instrument cluster. The arrow
next to the filling pump indicates the side of
the vehicle. The fuel filler flap is located to the
rear on the right.
Vehicles without a fuel filler flap Opening the fuel filler cap
X
Switch the engine off.
i When the engine is running and the fuel
filler flap is open, the yellow reserve fuel
warning lamp and the =(USA only)
or ; (Canada only) Check Engine
warning lamp may light up.
Further information about warning and
indicator lamps in the instrument cluster
can be found in the Digital Operator's
Manual. 102
RefuelingDriving and parking
Page 105 of 272
X
Remove the SmartKey from the ignition
lock.
X Turn the fuel filler cap counterclockwise
and remove it.
X Insert the fuel filler cap into the holder
bracket on the inside of filler flap ?.
Refueling X
Completely insert the filler neck of the fuel
pump nozzle into the tank and refuel.
i Do not add any more fuel after the pump
stops filling for the first time. Otherwise,
fuel may leak out.
Closing X
Replace the fuel filler cap and turn it
clockwise. The fuel filler cap audibly
engages.
X Close the fuel filler flap.
i Close the fuel filler flap before locking the
vehicle. A locking pin otherwise prevents
the fuel filler flap from closing after the
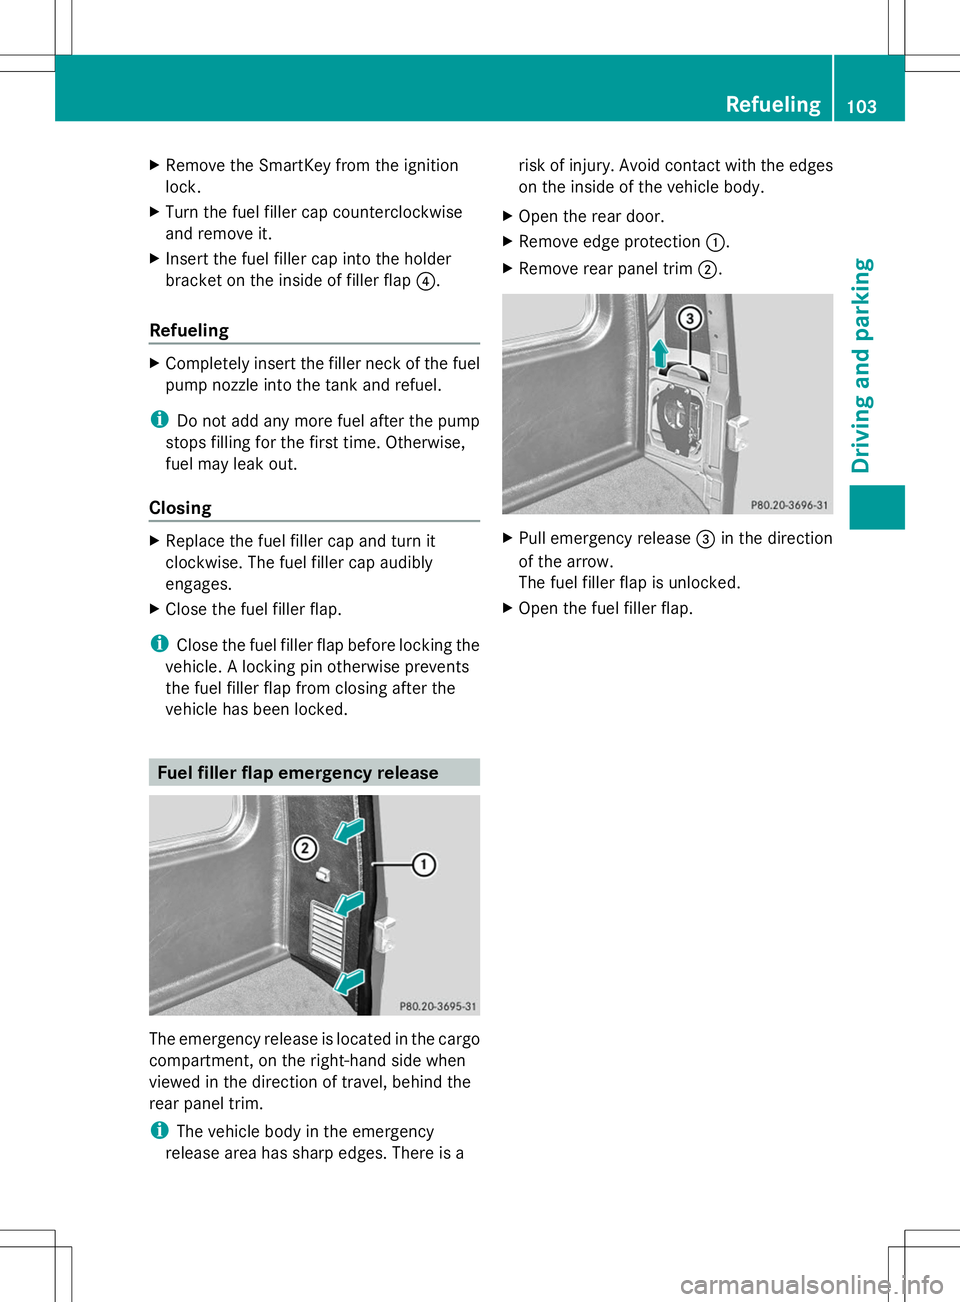
vehicle has been locked. Fuel filler flap emergency release
The emergency release is located in the cargo
compartment, on the right-hand side when
viewed in the direction of travel, behind the
rear panel trim.
i The vehicle body in the emergency
release area has sharp edges. There is a risk of injury. Avoid contact with the edges
on the inside of the vehicle body.
X Open the rear door.
X Remove edge protection :.
X Remove rear panel trim ;. X
Pull emergency release =in the direction
of the arrow.
The fuel filler flap is unlocked.
X Open the fuel filler flap. Refueling
103Driving and pa rking Z
Page 106 of 272
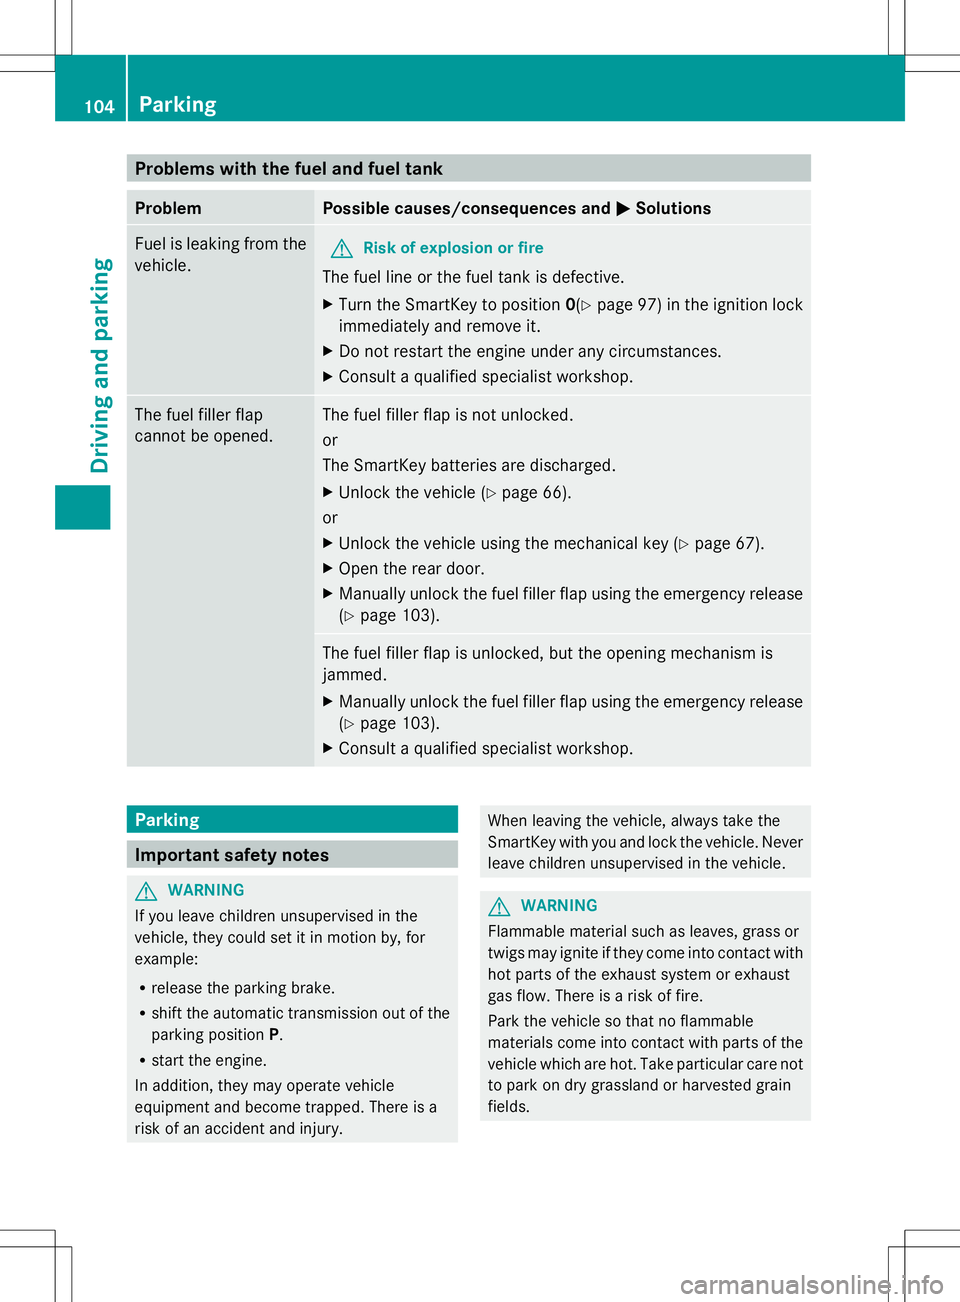
Problems with the fuel and fuel tank
Problem Possible causes/consequences and
M
MSolutions Fuel is leaking from the
vehicle.
G
Risk of explosion or fire
The fuel line or the fuel tank is defective.
X Turn the SmartKey to position 0(Ypage 97) in the ignition lock
immediately and remove it.
X Do not restart the engine under any circumstances.
X Consult a qualified specialist workshop. The fuel filler flap
cannot be opened. The fuel filler flap is not unlocked.
or
The SmartKey batteries are discharged.
X
Unlock the vehicle (Y page 66).
or
X Unlock the vehicle using the mechanical key (Y page 67).
X Open the rear door.
X Manually unlock the fuel filler flap using the emergency release
(Y page 103). The fuel filler flap is unlocked, but the opening mechanism is
jammed.
X
Manually unlock the fuel filler flap using the emergency release
(Y page 103).
X Consult a qualified specialist workshop. Parking
Important safety notes
G
WARNING
If you leave children unsupervised in the
vehicle, they could set it in motion by, for
example:
R release the parking brake.
R shift the automatic transmission out of the
parking position P.
R start the engine.
In addition, they may operate vehicle
equipment and become trapped. There is a
risk of an accident and injury. When leaving the vehicle, always take the
SmartKey with you and lock the vehicle. Never
leave children unsupervised in the vehicle.
G
WARNING
Flammable material such as leaves, grass or
twigs may ignite if they come into contact with
hot parts of the exhaust system or exhaust
gas flow. There is a risk of fire.
Park the vehicle so that no flammable
materials come into contact with parts of the
vehicle which are hot. Take particular care not
to park on dry grassland or harvested grain
fields. 104
ParkingDriving and parking
Page 107 of 272
G
WARNING
If you switch off the ignition while driving,
safety-relevant functions are only available
with limitations, or not at all. This could affect,
for example, the power steering and the brake
boosting effect. You will require considerably
more effort to steer and brake. There is a risk
of an accident.
Do not switch off the ignition while driving. Switching off the engine
Important safety notes G
WARNING
If you switch off the ignition while driving,
safety-relevant functions are only available
with limitations, or not at all. This could affect,
for example, the power steering and the brake
boosting effect. You will require considerably
more effort to steer and brake. There is a risk
of an accident.
Do not switch off the ignition while driving. G
WARNING
The automatic transmission switches to
neutral position Nwhen you switch off the
engine. The vehicle may roll away. There is a
risk of an accident.
After switching off the engine, always switch
to parking position P. Prevent the parked
vehicle from rolling away by applying the
parking brake.
Information in the Digital Operator's
Manual A description of how to switch off the engine
can be found in the Digital Operator's Manual.
Parking brake
G
WARNING
If you must brake the vehicle with the parking
brake, the braking distance is considerably longer and the wheels could lock. There is an
increased danger of skidding and accidents.
Only use the parking brake to brake the
vehicle when the service brake is faulty. Do
not apply the parking brake too firmly. If the
wheels lock, release the parking brake until
the wheels begin turning again.
G
WARNING
If you leave children unsupervised in the
vehicle, they could set it in motion by, for
example:
R releasing the parking brake
R shifting the automatic transmission out of
the parking position P
R starting the engine.
They could also operate the vehicle's
equipment. There is a risk of an accident and
injury.
When leaving the vehicle, always take the
SmartKey with you and lock the vehicle. Never
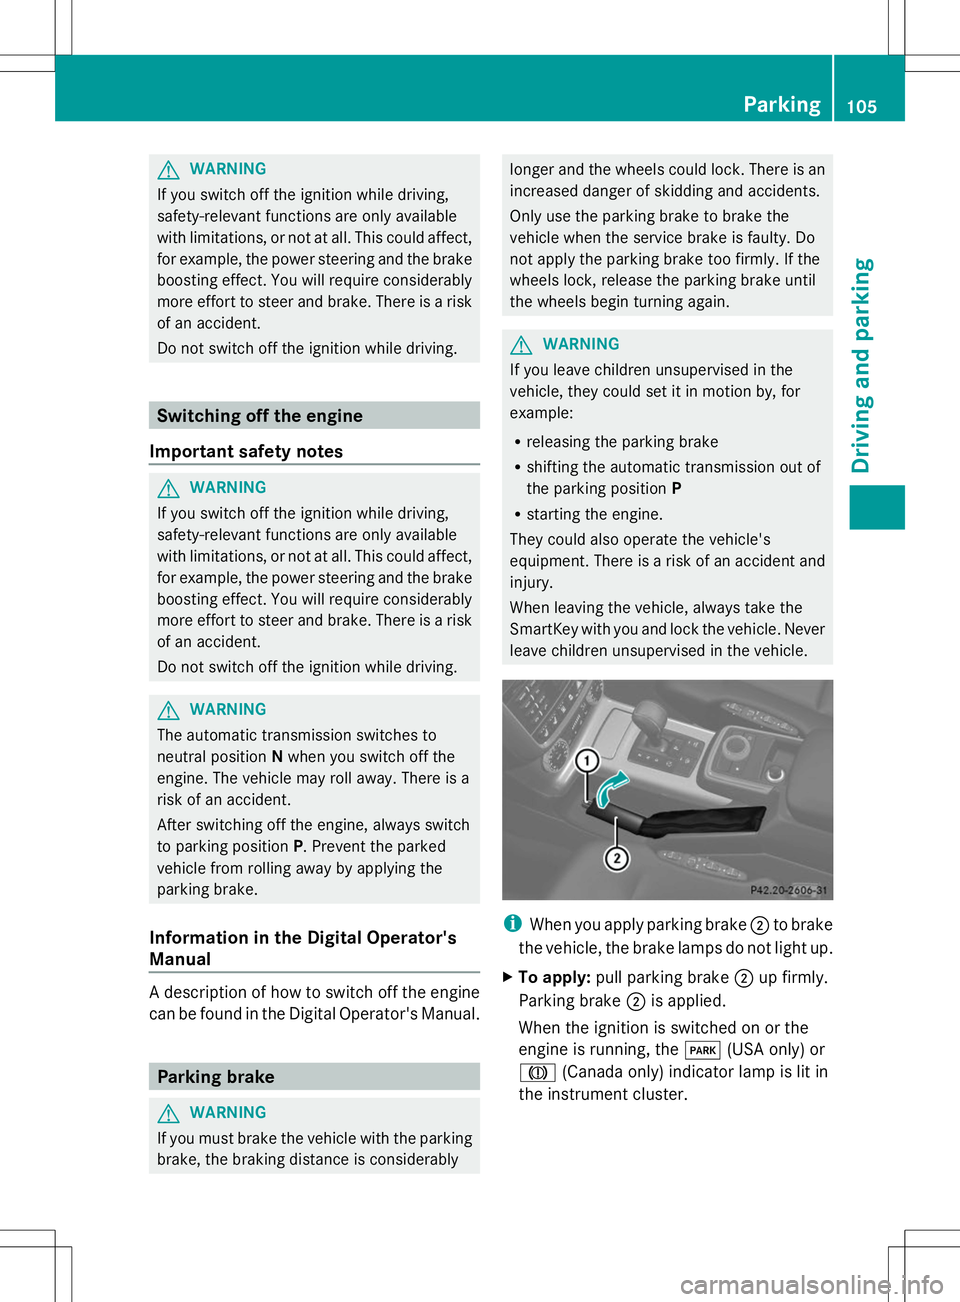
leave children unsupervised in the vehicle. i
When you apply parking brake ;to brake
the vehicle, the brake lamps do not light up.
X To apply: pull parking brake ;up firmly.
Parking brake ;is applied.
When the ignition is switched on or the
engine is running, the F(USA only) or
J (Canada only) indicator lamp is lit in
the instrument cluster. Parking
105Driving and parking Z
Page 108 of 272
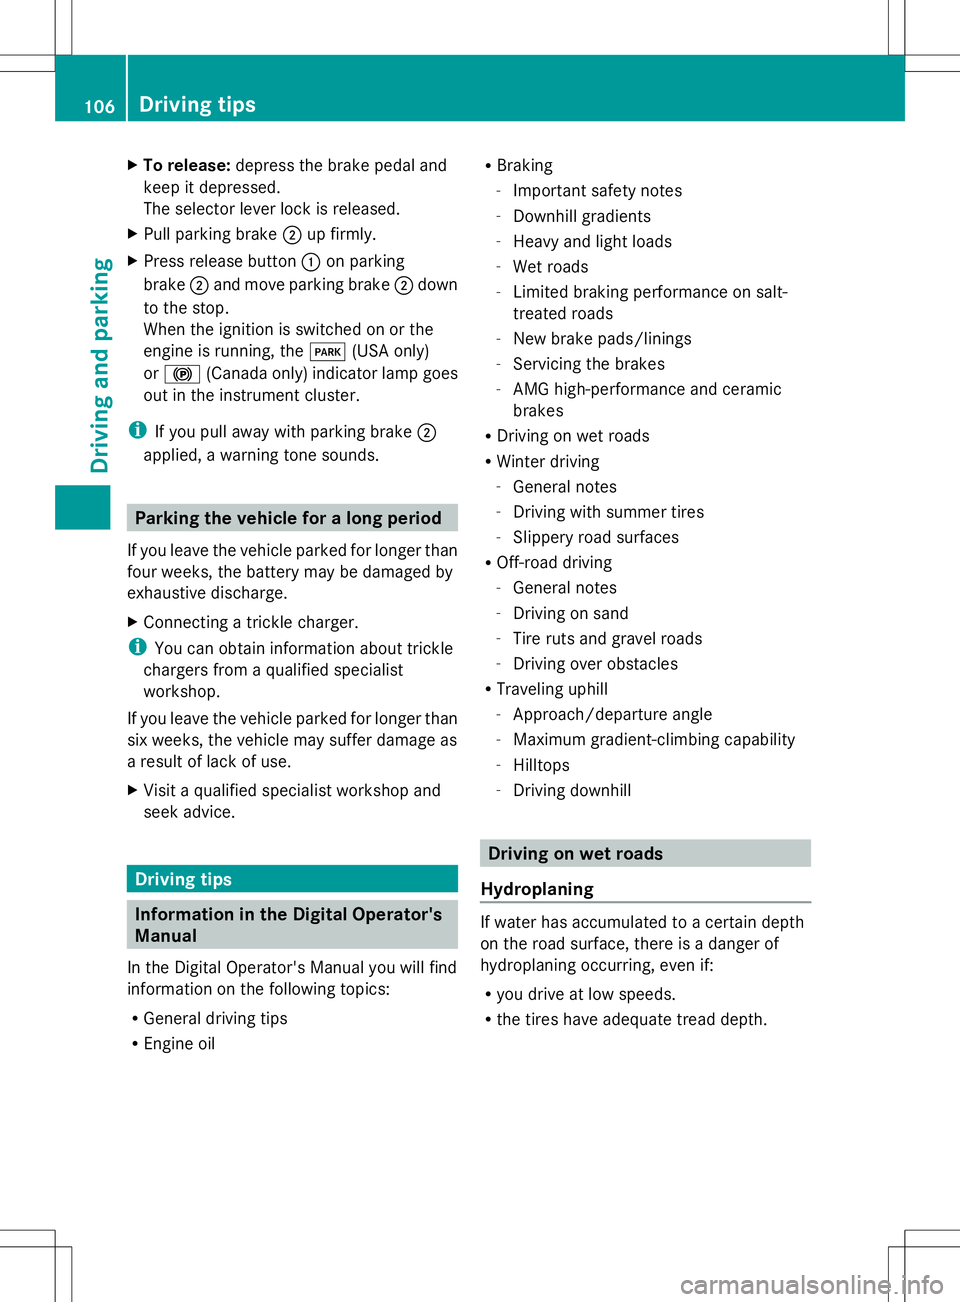
X
To release: depress the brake pedal and
keep it depressed.
The selector lever lock is released.
X Pull parking brake ;up firmly.
X Press release button :on parking
brake ;and move parking brake ;down
to the stop.
When the ignition is switched on or the
engine is running, the F(USA only)
or ! (Canada only) indicator lamp goes
out in the instrument cluster.
i If you pull away with parking brake ;
applied, a warning tone sounds. Parking the vehicle for a long period
If you leave the vehicle parked for longer than
four weeks, the battery may be damaged by
exhaustive discharge.
X Connecting a trickle charger.
i You can obtain information about trickle
chargers from a qualified specialist
workshop.
If you leave the vehicle parked for longer than
six weeks, the vehicle may suffer damage as
a result of lack of use.
X Visit a qualified specialist workshop and
seek advice. Driving tips
Information in the Digital Operator's
Manual
In the Digital Operator's Manual you will find
information on the following topics:
R General driving tips
R Engine oil R
Braking
-Important safety notes
- Downhill gradients
- Heavy and light loads
- Wet roads
- Limited braking performance on salt-
treated roads
- New brake pads/linings
- Servicing the brakes
- AMG high-performance and ceramic
brakes
R Driving on wet roads
R Winter driving
-General notes
- Driving with summer tires
- Slippery road surfaces
R Off-road driving
-General notes
- Driving on sand
- Tire ruts and gravel roads
- Driving over obstacles
R Traveling uphill
-Approach/departure angle
- Maximum gradient-climbing capability
- Hilltops
- Driving downhill Driving on wet roads
Hydroplaning If water has accumulated to a certain depth
on the road surface, there is a danger of
hydroplaning occurring, even if:
R you drive at low speeds.
R the tires have adequate tread depth. 106
Driving tipsDriving an
d parking
Page 109 of 272
For this reason, in the event of heavy rain or
in conditions in which hydroplaning may
occur, you must drive in the following
manner:
R lower your speed.
R avoid ruts.
R brake carefully.
Driving on flooded roads !
Do not drive through flooded areas.
Check the depth of any water before driving
through it. Drive slowly through standing
water. Otherwise, water may enter the
vehicle interior or the engine compartment.
This can damage the electronic
components in the engine or the automatic
transmission. Water can also be drawn in
by the engine's air suction nozzles and this
can cause engine damage.
If you have to drive on stretches of road on
which water has collected, please bear in
mind that:
R the maximum permissible still water depth
depends on the vehicle equipment
R you should drive no faster than at walking
pace
Off-road fording !
Under no circumstances should you
accelerate before entering the water. The
bow wave could cause water to enter and
damage the engine and other assemblies.
! Do not open any of the vehicle's doors
while fording. Otherwise, water could get
into the vehicle interior and damage the
vehicle's electronics and interior
equipment. :
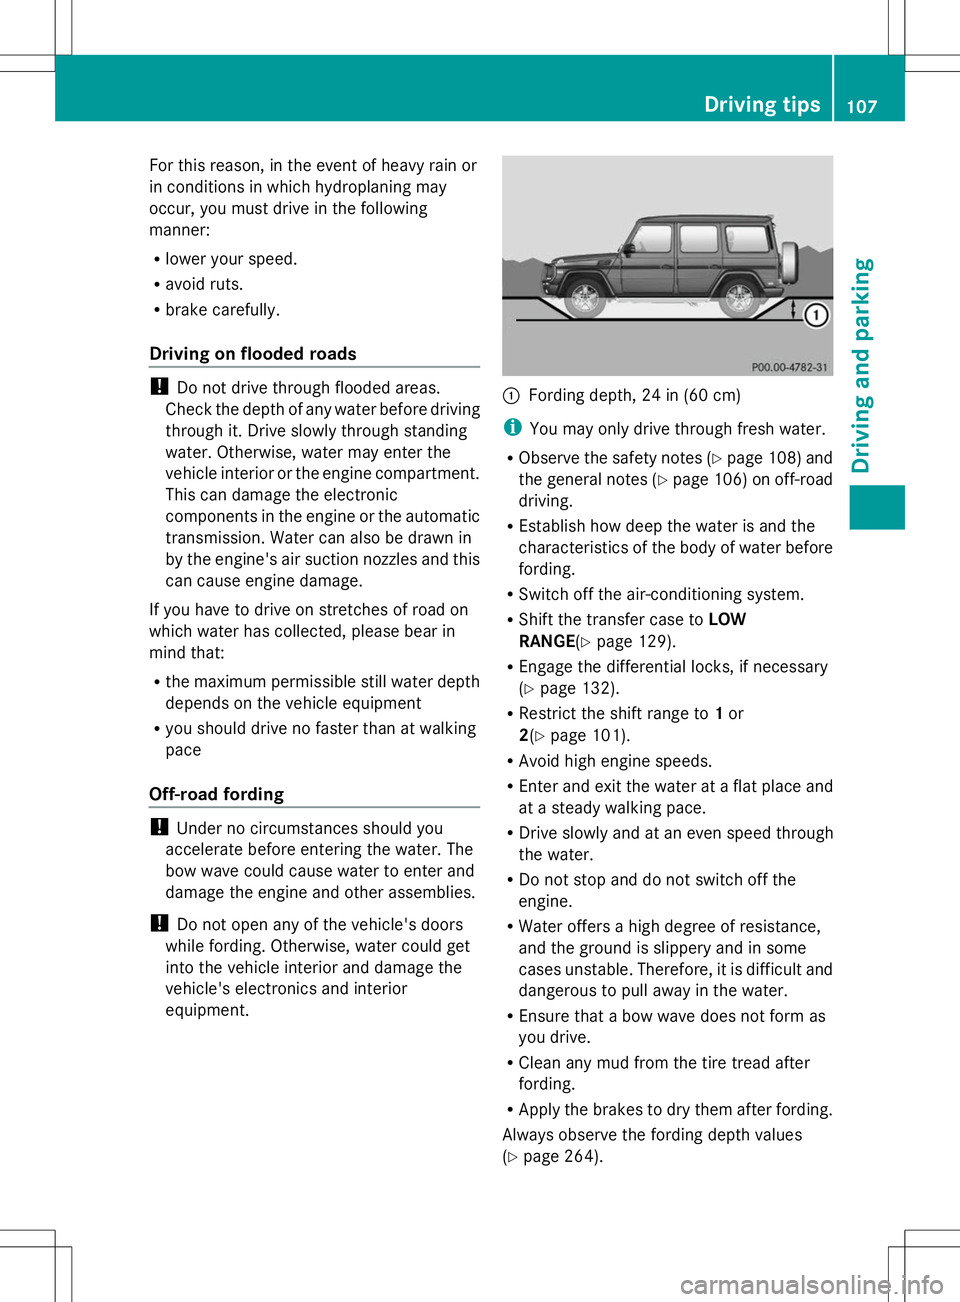
Fording depth, 24 in (60 cm)
i You may only drive through fresh water.
R Observe the safety notes (Y page 108) and
the general notes (Y page 106) on off-road
driving.
R Establish how deep the water is and the
characteristics of the body of water before
fording.
R Switch off the air-conditioning system.
R Shift the transfer case to LOW
RANGE (Ypage 129).
R Engage the differential locks, if necessary
(Y page 132).
R Restrict the shift range to 1or
2(Y page 101).
R Avoid high engine speeds.
R Enter and exit the water at a flat place and
at a steady walking pace.
R Drive slowly and at an even speed through
the water.
R Do not stop and do not switch off the
engine.
R Water offers a high degree of resistance,
and the ground is slippery and in some
cases unstable. Therefore, it is difficult and
dangerous to pull away in the water.
R Ensure that a bow wave does not form as
you drive.
R Clean any mud from the tire tread after
fording.
R Apply the brakes to dry them after fording.
Always observe the fording depth values
(Y page 264). Driving tips
107Driving and parking Z
Page 110 of 272
Off-road driving
Important safety notes G
WARNING
Do not load items on the basic carrier bars. It
may cause instability during some maneuvers
which could result in an accident.
Drive slowly in unknown terrain. This will
make it easier to recognize unexpected
obstacles and avoid damage to the vehicle.
To help avoid the vehicle rolling over, never
turn it around on steep inclines. If the vehicle
cannot complete the attempted climb, back it
down in reverse gear.
Do not drive along the side of a slope. The
vehicle might otherwise rollover. If in doing so
the vehicle begins to show a tendency to roll,
immediately steer into a line of gravity
(straight up or downhill).
Never let the vehicle roll backwards in idle.
You may lose control of the vehicle if you use
only the service brake. For information on
driving downhill, see "Driving downhill".
When driving off-road, sand, mud and water,
possibly mixed with oil, for example, could get
into the brakes. This could result in a reduced
braking effect or in total brake failure and also
in increased wear and tear. The braking
characteristics change depending on the
material ingressing the brakes. Clean the
brakes after driving off-road. If you detect a
reduced braking effect or grinding noises,
have the brake system checked in a qualified
specialist workshop as soon as possible.
Adapt your driving style to the different
braking characteristics.
Driving off-road increases the likelihood of
damage to the vehicle, which, in turn, can lead
to failure of the mechanical assembly or
systems. Adapt your driving style to suit the
terrain conditions. Drive carefully. Have
damage to the vehicle rectified immediately
at a qualified specialist workshop. Checklist before driving off-road !
If the engine oil warning lamp lights up
while the vehicle is in motion, stop the
vehicle in a safe place as soon as possible.
Check the engine oil level. The engine oil
warning lamp warning must not be ignored.
Continuing the journey while the symbol is
displayed could lead to engine damage.
X Engine oil level: check the engine oil level
and add oil if necessary.
Only then does the engine receive enough
oil when the vehicle is standing on a steep
incline.
X Tire-changing tool kit: check that the jack
is working and make sure you have the lug
wrench, a robust tow cable and a folding
spade in the vehicle.
X Wheels and tires: check the tire tread
depth and tire pressure.
X Check for damage and remove any foreign
objects, e.g. small stones, from the
wheels/tires.
X Replace any missing valve caps.
X Replace dented or damaged wheels.
X Carry a sound spare wheel.
Checklist after driving off-road Driving over rough terrain places greater
demands on your vehicle than driving on
normal roads. After driving off-road, check
the vehicle. This allows you to detect damage
promptly and reduce the risk of an accident
to yourself and other road users.
X Shift the transfer case to HIGH
RANGE(Y page 130).
X Disengage the differential locks
(Y page 134).
X Clean the headlamps and rear lights and
check for damage.
X Clean the front and rear license plates.
X Clean the wheels and tires with a water jet
and remove any foreign objects. 108
Driving tipsDriving and parking