key MERCEDES-BENZ G-CLASS SUV 2014 Repair Manual
[x] Cancel search | Manufacturer: MERCEDES-BENZ, Model Year: 2014, Model line: G-CLASS SUV, Model: MERCEDES-BENZ G-CLASS SUV 2014Pages: 272, PDF Size: 39.13 MB
Page 227 of 272
Before changing a fuse
X Park the vehicle and apply the parking
brake.
X Switch off all electrical consumers.
X Remove the SmartKey from the ignition
lock.
All indicator lamps in the instrument cluster
must be off.
The fuses are located in various fuse boxes:
R Main fuse box on the driver's side of the
dashboard
R Fuse box in the front-passenger footwell
R Fuse box in the transmission tunnel
R Fuse box in the battery case
R Fuse box in the cargo compartment
The fuse allocation chart and the spare fuses
are in the main fuse box on the dashboard
(Y page 225).
You will find the fuse removal device in the
vehicle tool kit (Y page 212). Dashboard fuse box
! Do not use a pointed object such as a
screwdriver to open the cover in the
dashboard. You could damage the
dashboard or the cover.
! Make sure that no moisture can enter the
fuse box when the cover is open.
! When closing the cover, make sure that it
is lying correctly on the fuse box. Moisture
seeping in or dirt could otherwise impair
the operation of the fuses. X
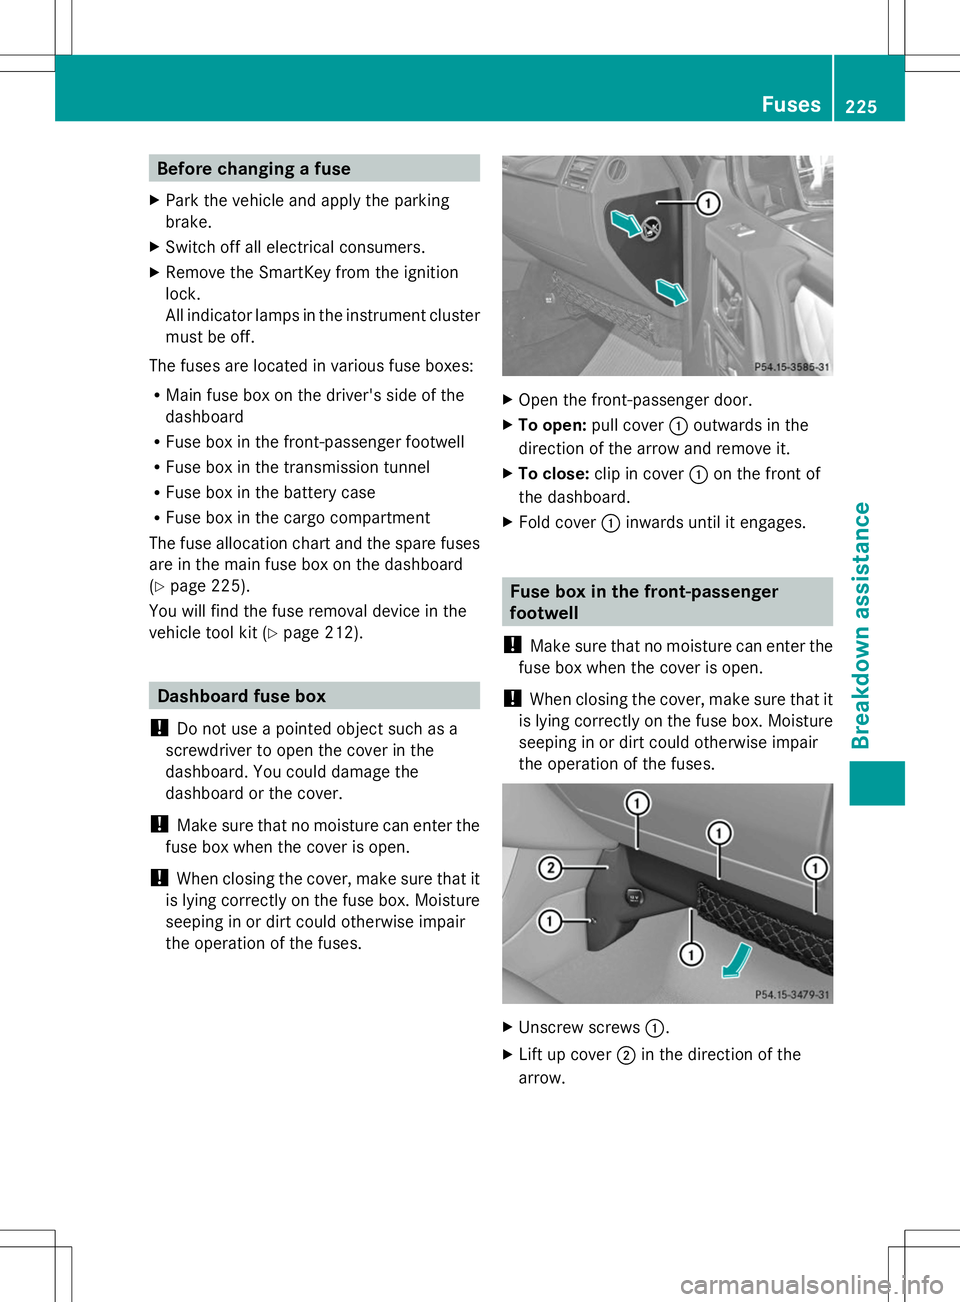
Open the front-passenger door.
X To open: pull cover :outwards in the
direction of the arrow and remove it.
X To close: clip in cover :on the front of
the dashboard.
X Fold cover :inwards until it engages. Fuse box in the front-passenger
footwell
! Make sure that no moisture can enter the
fuse box when the cover is open.
! When closing the cover, make sure that it
is lying correctly on the fuse box. Moisture
seeping in or dirt could otherwise impair
the operation of the fuses. X
Unscrew screws :.
X Lift up cover ;in the direction of the
arrow. Fuses
225Breakdo wn assis tance Z
Page 238 of 272
i
Canada only:
This device complies with RSS-210 of
Industry Canada. Operation is subject to
the following two conditions:
1. This device may not cause interference,
and
2. this device must accept any interference
received, including interference that may
cause undesired operation.
Any unauthorized modification to this
device could void the user's authority to
operate the equipment.
Checking tire pressure electronically X
Make sure that the SmartKey is in
position 2(Y page 97) in the ignition lock.
X Press the =or; button on the
steering wheel to select the Serv.
Serv. menu.
X Press the 9or: button to select
Tire Pressure
Tire Pressure.
X Press button a.
The current tire pressure for each wheel will
be displayed in the multifunction display.
If the vehicle has been parked for over
20 minutes, the message Tire pressure Tire pressure
will be displayed after driving a
will be displayed after driving a
few minutes
few minutes appears.
After a teach-in period, the tire pressure
monitor automatically recognizes new wheels
or new sensors. As long as a clear allocation
of the tire pressure values to the individual
wheels is not possible, the Tire Pressure
Tire Pressure
Monitor Active
Monitor Active display message is shown
instead of the tire pressure display. The tire
pressures are already being monitored.
i If a spare wheel is mounted, the system
may continue to show the tire pressure of
the wheel that has been removed for a few
minutes. If this occurs, note that the value
displayed for the position where the spare
wheel is mounted is not the same as the
spare wheel's current tire pressure. Tire pressure monitor warning
messages If the tire pressure monitor detects a
significant pressure loss on one or more tires,
a warning message is shown in the
multifunction display. A warning tone also
sounds and the tire pressure warning lamp
lights up in the instrument cluster.
Each tire that is affected by a significant loss
of pressure is highlighted in the pressure
display.
X If the Correct Tire PressureCorrect Correct Tire PressureCorrect
Tire Pressure
Tire Pressure message appears in the
multifunction display, check the tire
pressure on all four wheels and correct it if
necessary.
i If the wheel positions on the vehicle are
interchanged, the tire pressures may be
displayed for the wrong positions for a
short time. This is rectified after a few
minutes of driving, and the tire pressures
are displayed for the correct positions.
Restarting the tire pressure monitor When you restart the tire pressure monitor,
all existing warning messages are deleted and
the warning lamps go out. The monitor uses
the currently set tire pressures as the
reference values for monitoring. In most
cases, the tire pressure monitor will
automatically detect the new reference
values after you have changed the tire
pressure. However, you can also define
reference values manually as described here.
X Set the tire pressure to the value
recommended for the corresponding
driving situation on the Tire and Loading
Information placard on the driver's side
B-pillar (Y page 230).
Additional tire pressure values for different
loads can also be found on the tire pressure
table on the inside of the fuel filler flap
(Y page 230).
X Make sure that the tire pressure is correct
on all four wheels. 236
Tire pressureWheels and ti
res
Page 239 of 272
X
Make sure that the SmartKey is in
position 2(Y page 97) in the ignition lock.
X Press the =or; button on the
steering wheel to select the Serv. Serv.menu.
X Press the 9or: button to select
Tire Pressure
Tire Pressure.
X Press the abutton.
The multifunction display shows the
current tire pressure for the individual tires
or the Tire pressure will be
Tire pressure will be
displayed after driving a few displayed after driving a few
minutes minutes message.
X Press the :button.
The Use Current Pressures as New
Use Current Pressures as New
Reference Values
Reference Values message appears in
the multifunction display.
If you wish to confirm the restart:
X Press the abutton.
The Tire Press. Monitor Restarted
Tire Press. Monitor Restarted
message appears in the multifunction
display.
After driving for a few minutes, the system
checks whether the current tire pressures
are within the specified range. The new tire
pressures are then accepted as reference
values and monitored.
If you wish to cancel the restart:
X Press the %button.
The tire pressure values stored at the last
restart will continue to be monitored. Loading the vehicle
Instruction labels for tires and loads
G
WARNING
Overloaded tires can overheat, causing a
blowout. Overloaded tires can also impair the
steering and driving characteristics and lead
to brake failure. There is a risk of accident.
Observe the load rating of the tires. The load
rating must be at least half of the GAWR of
your vehicle. Never overload the tires by
exceeding the maximum load. :
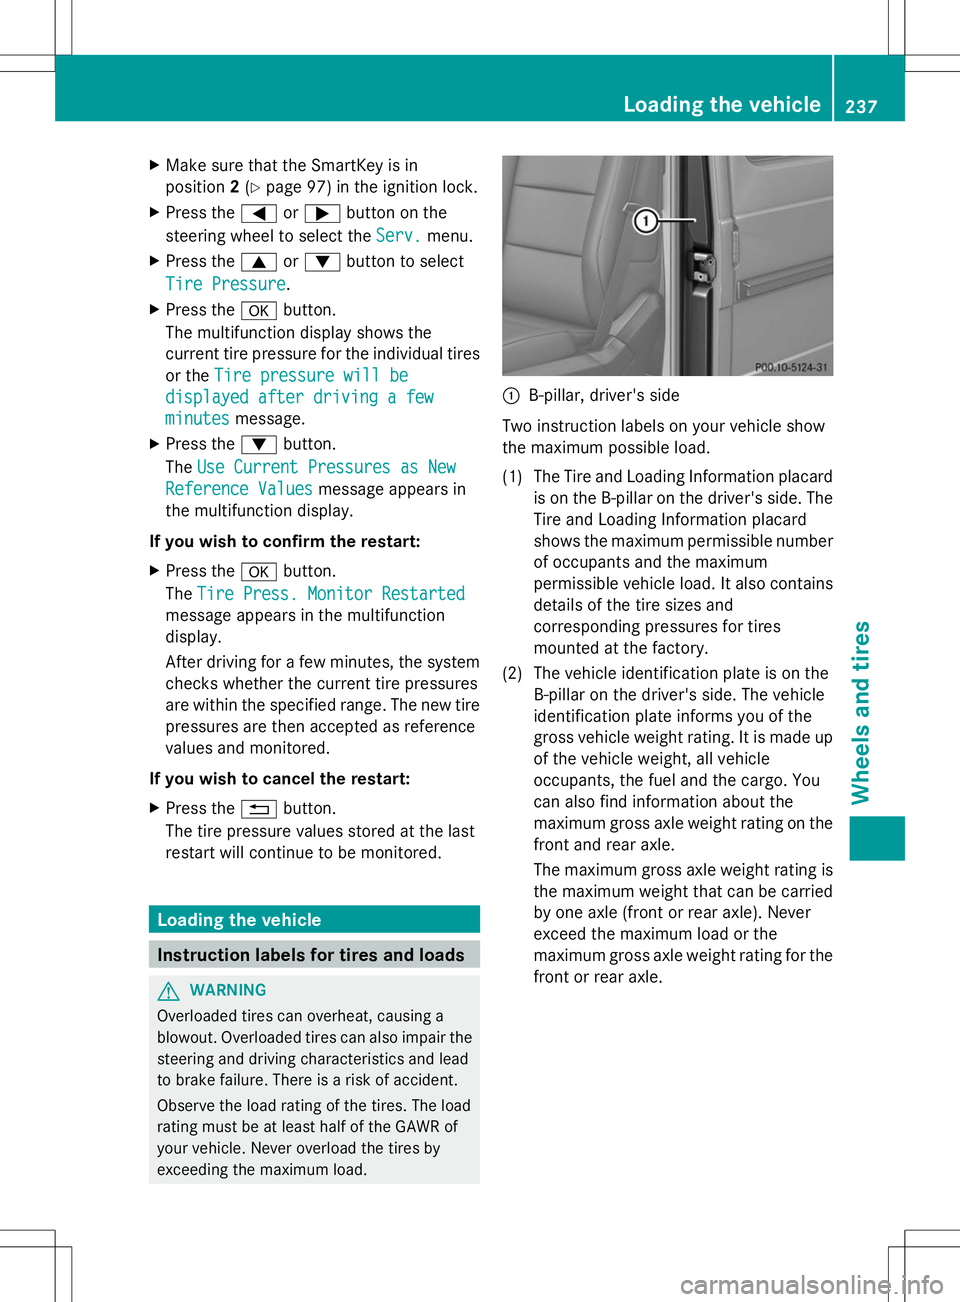
B-pillar, driver's side
Two instruction labels on your vehicle show
the maximum possible load.
(1) The Tire and Loading Information placard is on the B-pillar on the driver's side. The
Tire and Loading Information placard
shows the maximum permissible number
of occupants and the maximum
permissible vehicle load. It also contains
details of the tire sizes and
corresponding pressures for tires
mounted at the factory.
(2) The vehicle identification plate is on the B-pillar on the driver's side. The vehicle
identification plate informs you of the
gross vehicle weight rating. It is made up
of the vehicle weight, all vehicle
occupants, the fuel and the cargo. You
can also find information about the
maximum gross axle weight rating on the
front and rear axle.
The maximum gross axle weight rating is
the maximum weight that can be carried
by one axle (front or rear axle). Never
exceed the maximum load or the
maximum gross axle weight rating for the
front or rear axle. Loading the vehicle
237Wheels and tires Z