ESP MERCEDES-BENZ GL-Class 2014 X166 Workshop Manual
[x] Cancel search | Manufacturer: MERCEDES-BENZ, Model Year: 2014, Model line: GL-Class, Model: MERCEDES-BENZ GL-Class 2014 X166Pages: 462, PDF Size: 32.46 MB
Page 184 of 462
Problems with the transmission
Problem Possible causes/consequences and
M
MSolutions The transmission has
problems shifting gear. The transmission is losing oil.
X
Have the transmission checked at a qualified specialist
workshop immediately. The acceleration ability
is deteriorating.
The transmission no
longer changes gear. The transmission is in emergency mode.
It is only possible to shift into
secondgear and reverse gear.
X Stop the vehicle.
X Shift the transmission to position P.
X Switch off the engine.
X Wait at least ten seconds before restarting the engine.
X Shift the transmission to position Dor R.
If D is selected, the transmission shifts into secondgear; ifRis
selected, the transmission shifts into reverse gear.
X Have the transmission checked at a qualified specialist
workshop immediately. Transfer case
! Performance tests may only be carried
out on a 2-axle dynamometer. The brake
system or transfer case could otherwise be
damaged. Contact a qualified specialist
workshop for a performance test.
! Because ESP ®
is an automatic system,
the engine and ignition must be switched
off (SmartKey in position 0or 1or Start/
Stop button in position 0or 1) when the
electric parking brake is being tested on a
brake dynamometer (maximum
10 seconds).
Braking triggered automatically by ESP ®
may seriously damage the brake system.
! Vehicles with 4MATIC must not be towed
with either the front or the rear axle raised,
as doing so will damage the transmission.
This section is only valid for vehicles with 4-
wheel drive (4MATIC). Power is always
transmitted to both axles. Refueling
Important safety notes
G
WARNING
Fuel is highly flammable. If you handle fuel
incorrectly, there is a risk of fire and
explosion.
You must avoid fire, open flames, creating
sparks and smoking. Switch off the engine
and, if applicable, the auxiliary heating before
refueling. G
WARNING
Fuel is poisonous and hazardous to health.
There is a risk of injury.
You must make sure that fuel does not come
into contact with your skin, eyes or clothing
and that it is not swallowed. Do not inhale fuel
vapors. Keep fuel away from children. 182
RefuelingDriving and parking
Page 186 of 462
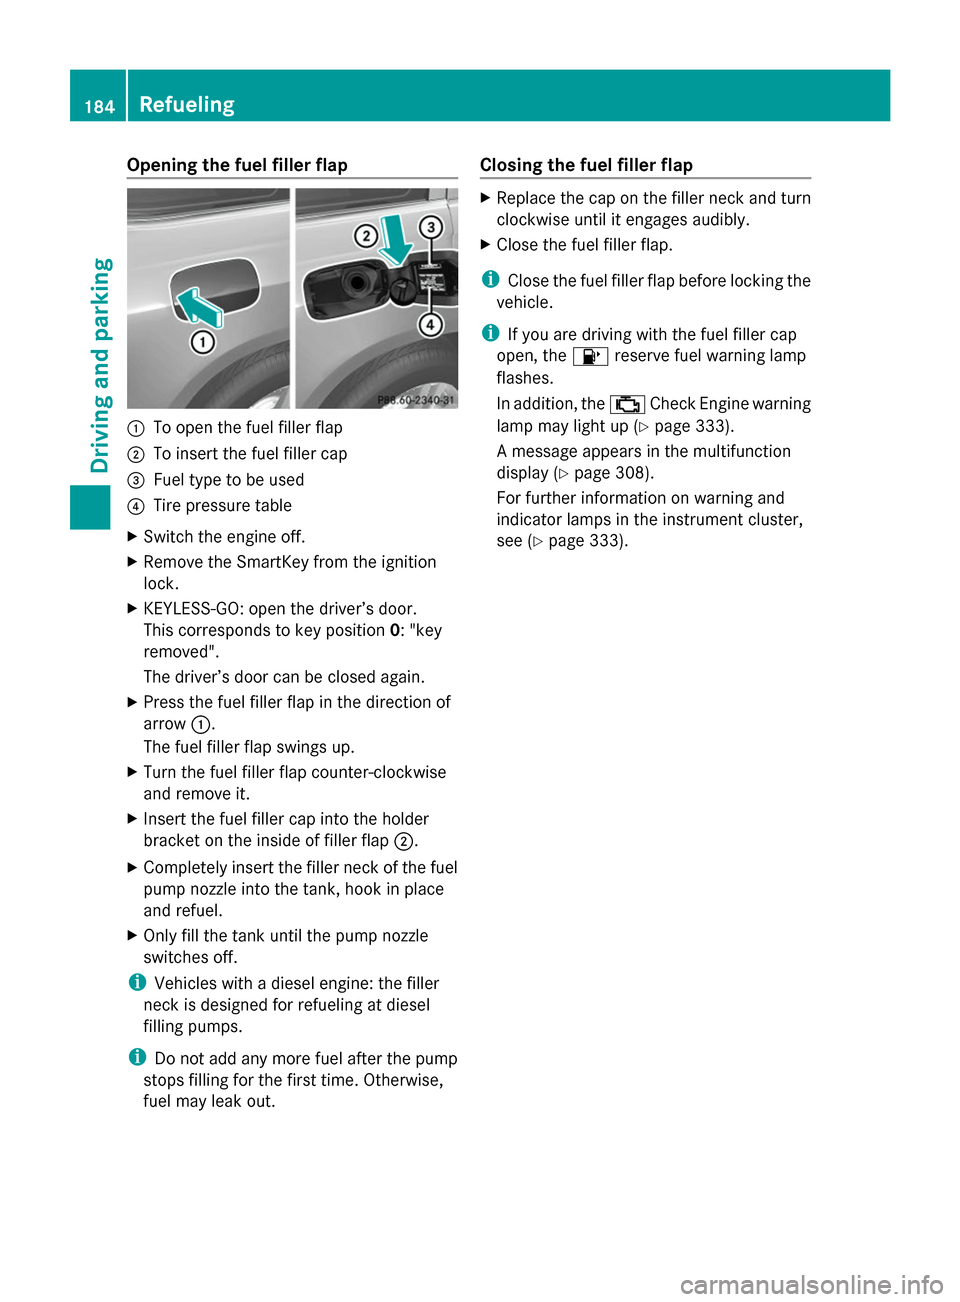
Opening the fuel filler flap
:
To open the fuel filler flap
; To insert the fuel filler cap
= Fuel type to be used
? Tire pressure table
X Switch the engine off.
X Remove the SmartKey from the ignition
lock.
X KEYLESS-GO: open the driver’s door.
This corresponds to key position 0: "key
removed".
The driver’s door can be closed again.
X Press the fuel filler flap in the direction of
arrow :.
The fuel filler flap swings up.
X Turn the fuel filler flap counter-clockwise
and remove it.
X Insert the fuel filler cap into the holder
bracket on the inside of filler flap ;.
X Completely insert the filler neck of the fuel
pump nozzle into the tank, hook in place
and refuel.
X Only fill the tank until the pump nozzle
switches off.
i Vehicles with a diesel engine: the filler
neck is designed for refueling at diesel
filling pumps.
i Do not add any more fuel after the pump
stops filling for the first time. Otherwise,
fuel may leak out. Closing the fuel filler flap X
Replace the cap on the filler neck and turn
clockwise until it engages audibly.
X Close the fuel filler flap.
i Close the fuel filler flap before locking the
vehicle.
i If you are driving with the fuel filler cap
open, the 8reserve fuel warning lamp
flashes.
In addition, the ;Check Engine warning
lamp may light up (Y page 333).
A message appears in the multifunction
display ( Ypage 308).
For further information on warning and
indicator lamps in the instrument cluster,
see (Y page 333). 184
RefuelingDriving and parking
Page 195 of 462
in the ECO display does not indicate a fixed
consumption.
Apart from driving style, consumption is
dependent on many factors such as, e.g.:
R Load
R Tire pressure
R Cold start
R Choice of route
R Electrical consumers switched on
These factors are not included in the ECO
display.
The evaluation of your driving style is carried
out using the following three categories:
R Acceleration
Acceleration (evaluation of all
acceleration processes):
- The bar fills up: moderate acceleration,
especially at higher speeds
- The bar empties: sporty acceleration
R Constant Constant (assessment of driving behavior
at all times):
- The bar fills up: constant speed and
avoidance of unnecessary acceleration
and deceleration
- The bar empties: fluctuations in speed
R Coasting
Coasting (assessment of all deceleration
processes):
- The bar fills up: anticipatory driving,
keeping your distance and early release
of the accelerator. The vehicle can coast
without use of the brakes.
- The bar empties: frequent braking
i An economical driving style specially
requires driving at moderate engine
speeds.
To achieve a higher value in the categories
Acceleration
Acceleration andConstant Constant , observe the
gearshift recommendations.
i On long journeys at a constant speed, e.g.
on the highway, only the bar for Constant
Constant
will change.
i The ECO display summarizes the driving
characteristics from the start of the journey
to its completion. For this reason, the bars change dynamically at the beginning of the
journey. On longer journeys, there are
fewer changes. For more dynamic changes,
carry out a manual reset.
For further information on the ECO display,
see (Y page 276). Braking
Important safety notes G
WARNING
If you shift down on a slippery road surface in
an attempt to increase the engine's braking
effect, the drive wheels could lose their grip.
There is an increased danger of skidding and
accidents.
Do not shift down for additional engine
braking on a slippery road surface.
Downhill gradients !
On long and steep gradients, you must
reduce the load on the brakes by shifting
early to a lower gear. This allows you to take
advantage of the engine braking effect and
helps avoid overheating and excessive
wear of the brakes.
When you take advantage of the engine
braking effect, a drive wheel may not turn
for some time, e.g. on a slippery road
surface. This could cause damage to the
drive train. This type of damage is not
covered by the Mercedes-Benz warranty.
Do not depress the brake pedal continuously
while the vehicle is in motion, e.g. causing the
brakes to rub by constantly applying light
pressure to the pedal. This results in
excessive and premature wear to the brake
pads.
Heavy and light loads G
WARNING
If you rest your foot on the brake pedal while
driving, the braking system can overheat. This Driving tips
193Driving and parking
Z
Page 196 of 462
increases the stopping distance and can even
cause the braking system to fail. There is a
risk of an accident.
Never use the brake pedal as a footrest. Never
depress the brake pedal and the accelerator
pedal at the same time.
! Depressing the brake pedal constantly
results in excessive and premature wear to
the brake pads.
If the brakes have been subjected to a heavy
load, do not stop the vehicle immediately.
Drive on for a short while. This allows the
airflow to cool the brakes more quickly.
Wet roads If you have driven for a long time in heavy rain
without braking, there may be a delayed
reaction from the brakes when braking for the
first time. This may also occur after the
vehicle has been washed or driven through
deep water.
You then have to depress the brake pedal
more firmly. Maintain a greater distance from
the vehicle in front.
After driving on a wet road or having the
vehicle washed, brake firmly while paying
attention to the traffic conditions. This will
warm up the brake discs, thereby drying them
more quickly and protecting them against
corrosion.
Limited braking performance on salt-
treated roads If you drive on salted roads, a layer of salt
residue may form on the brake discs and
brake pads. This can result in a significantly
longer braking distance.
R Brake occasionally to remove any possible
salt residue. Make sure that you do not
endanger other road users when doing so.
R Carefully depress the brake pedal and the
beginning and end of a journey.
R Maintain a greater distance to the vehicle
ahead. Servicing the brakes !
If the red brake warning lamp lights up in
the instrument cluster and you hear a
warning tone while the engine is running,
the brake fluid level may be too low.
Observe additional warning messages in
the multifunction display.
The brake fluid level may be too low due to
brake pad wear or leaking brake lines.
Have the brake system checked
immediately. This work should be carried
out at a qualified specialist workshop.
! A function or performance test should
only be carried out on a 2-axle
dynamometer. If you are planning to have
the vehicle tested on such a dynamometer,
contact an authorized Mercedes-Benz
Center to obtain further information first.
Otherwise, you could damage the drive
train or the brake system.
! Because ESP ®
is an automatic system,
the engine and ignition must be switched
off (SmartKey in position 0or 1or Start/
Stop button in position 0or 1) when the
electric parking brake is being tested on a
brake dynamometer (maximum
10 seconds).
Braking triggered automatically by ESP ®
may seriously damage the brake system.
All checks and maintenance work on the
brake system must be carried out at a
qualified specialist workshop. Consult a
qualified specialist workshop to arrange this.
Have brake pads installed and brake fluid
replaced at a qualified specialist workshop.
If the brake system has only been subject to
moderate loads, you should test the
functionality of your brakes at regular
intervals. To do so, press firmly on the brake
pedal when driving at a high speed. This
improves the grip of the brake pads.
You can find a description of Brake Assist
(BAS) on (Y page 68) or of BAS PLUS on
(Y page 68). 194
Driving tipsDriving and parking
Page 197 of 462
Mercedes-Benz recommends that you only
have brake pads/linings installed on your
vehicle which have been approved for
Mercedes-Benz vehicles or which correspond
to an equivalent quality standard. Brake
pads/linings which have not been approved
for Mercedes-Benz vehicles or which are not
of an equivalent quality could affect your
vehicle's operating safety.
Mercedes-Benz recommends that you only
use brake fluid that has been specially
approved for your vehicle by Mercedes-Benz,
or which corresponds to an equivalent quality
standard. Brake fluid which has not been
approved for Mercedes-Benz vehicles or
which is not of an equivalent quality could
affect your vehicle's operating safety.
High-performance brake system for
AMG vehicles The high-performance brake system is
designed for heavy loads. This may lead to
noise when braking. This will depend on:
R Speed
R Braking force
R Environmental conditions, such as
temperature and humidity
The wear of individual components of the
brake system, such as the brake pads/linings
or brake discs, depends on the individual
driving style and operating conditions.
For this reason, it is impossible to state a
mileage that will be valid under all
circumstances. An aggressive driving style
will lead to high wear. You can obtain further
information about this from your authorized
Mercedes-Benz Center.
New and replaced brake pads and discs only
reach their optimum braking effect after
several hundred kilometers of driving.
Compensate for this by applying greater force
to the brake pedal. Keep this in mind, and
adapt your driving and braking accordingly
during this break-in period. Excessive heavy braking results in
correspondingly high brake wear. Observe
the
# brake wear warning lamp in the
instrument cluster and note any brake status
messages in the multifunction display.
Especially for high performance driving, it is
important to maintain and have the brake
system checked regularly. Driving on wet roads
Hydroplaning If water has accumulated to a certain depth
on the road surface, there is a danger of
hydroplaning occurring, even if:
R
you drive at low speeds.
R the tires have adequate tread depth.
For this reason, in the event of heavy rain or
in conditions in which hydroplaning may
occur, you must drive in the following
manner:
R lower your speed.
R avoid ruts.
R brake carefully.
Driving on flooded roads !
Do not drive through flooded areas.
Check the depth of any water before driving
through it. Drive slowly through standing
water. Otherwise, water may enter the
vehicle interior or the engine compartment.
This can damage the electronic
components in the engine or the automatic
transmission. Water can also be drawn in
by the engine's air suction nozzles and this
can cause engine damage.
i Vehicles with the AIRMATIC package:
set the raised level before driving through
standing water.
Off-road fording !
Under no circumstances should you
accelerate before entering the water. The Driving tips
195Driving and parking Z
Page 198 of 462
bow wave could cause water to enter and
damage the engine and other assemblies.
! Do not open any of the vehicle's doors
while fording. Otherwise, water could get
into the vehicle interior and damage the
vehicle's electronics and interior
equipment.
R Establish how deep the water is and the
characteristics of the body of water before
fording.
R Vehicles with the AIRMATIC package:
select the highest possible vehicle level.
R Shift to a lower gear using the left-hand
steering wheel paddle shifter.
R Avoid high engine speeds.
R Enter and exit the water at a flat place and
at a steady walking pace.
R Drive slowly and at an even speed through
the water.
R Do not stop.
R Water offers a high degree of resistance,
and the ground is slippery and in some
cases unstable. Therefore, it is difficult and
dangerous to pull away in the water.
R Ensure that a bow wave does not form as
you drive.
R Clean any mud from the tire tread after
fording.
R Apply the brakes to dry them after fording.
Always observe the fording depth values
(Y page 454). Winter driving
G
WARNING
If you shift down on a slippery road surface in
an attempt to increase the engine's braking
effect, the drive wheels could lose their grip.
There is an increased danger of skidding and
accidents.
Do not shift down for additional engine
braking on a slippery road surface. G
DANGER
If the exhaust pipe is blocked or adequate
ventilation is not possible, poisonous gases
such as carbon monoxide (CO) may enter the
vehicle. This is the case, e.g. if the vehicle
becomes trapped in snow. There is a risk of
fatal injury.
If you leave the engine or the auxiliary heating
running, make sure the exhaust pipe and area
around the vehicle are clear of snow. To
ensure an adequate supply of fresh air, open
a window on the side of the vehicle that is not
facing into the wind.
Have your vehicle winterproofed at a qualified
specialist workshop at the onset of winter.
Drive particularly carefully on slippery road
surfaces. Avoid sudden acceleration, steering
and braking maneuvers. Do not use the cruise
control or DISTRONIC PLUS.
If the vehicle threatens to skid or cannot be
stopped when moving at low speed:
X Shift the transmission to position N.
Vehicles with the ON&OFFROAD
package: if driving in snow or with snow
chains, select the snow program
(Y page 255) with the off-road program
selector wheel in the center console.
i Vehicles with a diesel engine: do not
cover the radiator, e.g. with a protective
cover. The measuring function of the
onboard diagnosis system may otherwise
provide inaccurate values. Some of these
values are required by law and must
therefore always be accurate.
The outside temperature indicator is not
designed to serve as an ice-warning device
and is therefore unsuitable for that purpose.
Changes in the outside temperature are
displayed after a short delay.
Indicated temperatures just above the
freezing point do not guarantee that the road
surface is free of ice. The road may still be icy,
especially in wooded areas or on bridges. You
should pay special attention to road 196
Driving tipsDriving and parking
Page 201 of 462
X
Clean the wheels, wheel housings and the
vehicle underside with a water jet; check
for any foreign objects and damage.
X Check whether twigs or other parts of
plants have become trapped. These
increase the risk of fire and can damage
fuel pipes, brake hoses or the rubber
bellows of the axle joints and propeller
shafts.
X After the trip, examine without fail the
entire undercarriage, wheels, tires, brakes,
bodywork structure, steering, chassis and
exhaust system for damage.
X After driving for extended periods across
sand, mud, gravel, water or in similarly dirty
conditions, have the brake discs, wheels,
brake pads/linings and axle joints checked
and cleaned.
X If you detect strong vibrations after off-road
travel, check for foreign objects in the
wheels and drive train and remove them if
necessary. Foreign objects can disturb the
balance and cause vibrations.
Driving over rough terrain places greater
demands on your vehicle than driving on
normal roads. After driving off-road, check
the vehicle. This allows you to detect damage
promptly and reduce the risk of an accident
to yourself and other road users.
Driving on sand Observe the following rules when driving on
sand:
R Vehicles with the ON&OFFROAD
package: select off-road program 1
(Y page 258).
R Vehicles with the AIRMATIC package:
select a raised vehicle level.
R Avoid high engine speeds.
R Use the left-hand steering wheel paddle
shifter to shift to a lower gear appropriate
to the terrain. R
Drive quickly to overcome the rolling
resistance. Otherwise the vehicle's wheels
could become stuck in loose ground.
R Drive in the tracks of other vehicles if
possible. Make sure that:
-the tire ruts are not too deep.
- the sand is sufficiently firm.
- the ground clearance of the vehicle is
sufficient.
Tire ruts and gravel roads !
Check that the ruts are not too deep and
that your vehicle has sufficient clearance.
Otherwise, your vehicle could be damaged
or bottom out and get stuck.
Observe the following rules when driving
along ruts in off-road terrain or on roads with
loose gravel:
R Vehicles with the AIRMATIC package:
select a raised vehicle level.
R Avoid high engine speeds.
R Shift to a lower gear using the left-hand
steering wheel paddle shifter.
R Drive slowly.
R Where ruts are too deep, drive with the
wheels of one side on the center grassy
area, if possible.
Driving over obstacles !
Obstacles could damage the floor of the
vehicle or components of the chassis. Ask
passengers for guidance when driving over
large obstacles. The passenger should
always keep a safe distance from the
vehicle when doing so in order to avoid
injury as a result of unexpected vehicle
movements. After driving off-road or over
obstacles, check the vehicle for possible
damage, especially to the underbody and
the components of the chassis. Driving tips
199Driving and pa rking Z
Page 202 of 462
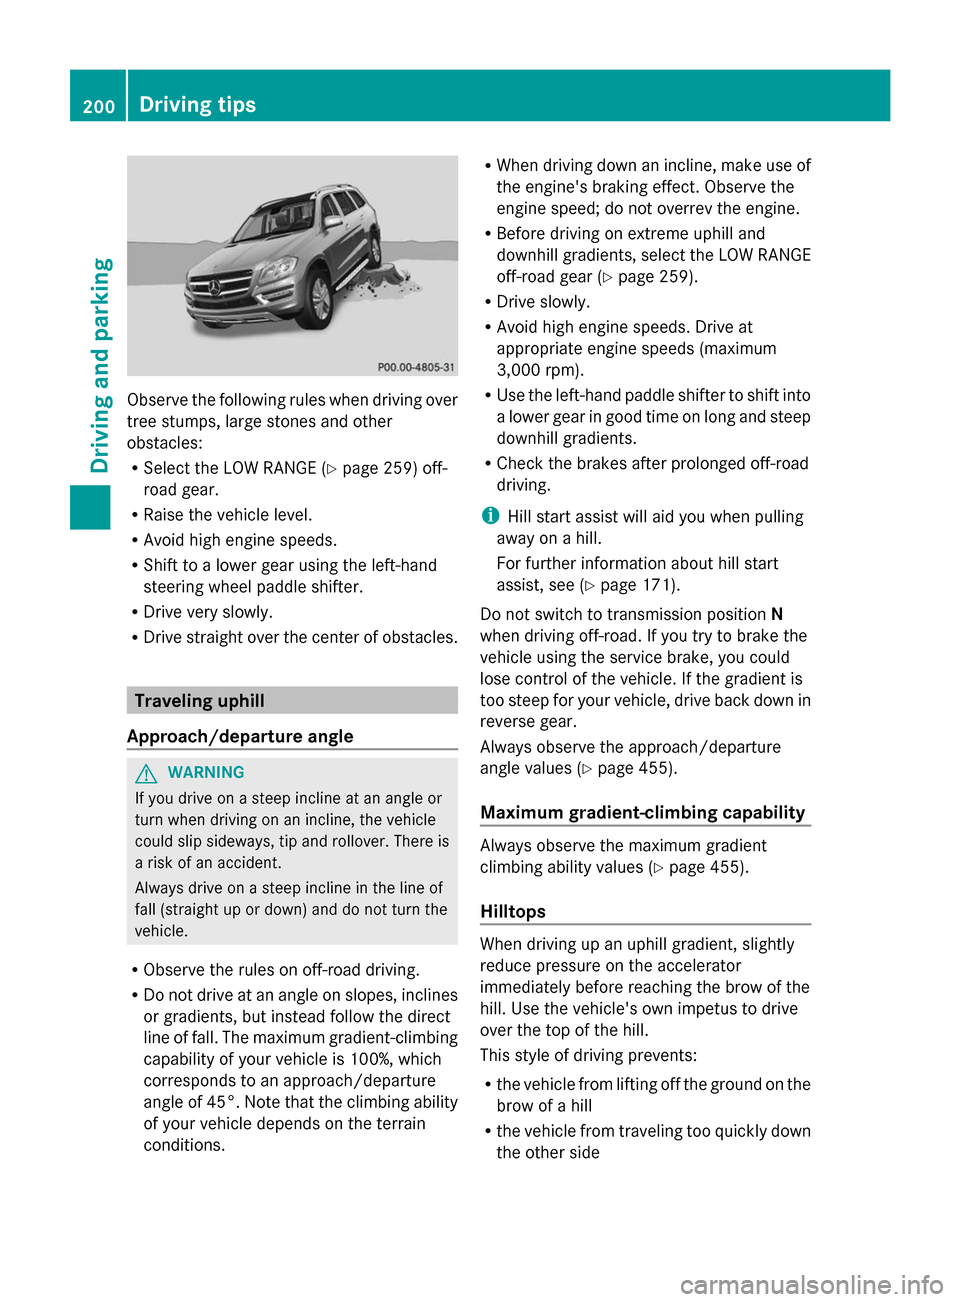
Observe the following rules when driving over
tree stumps, large stones and other
obstacles:
R Select the LOW RANGE (Y page 259) off-
road gear.
R Raise the vehicle level.
R Avoid high engine speeds.
R Shift to a lower gear using the left-hand
steering wheel paddle shifter.
R Drive very slowly.
R Drive straight over the center of obstacles. Traveling uphill
Approach/departure angle G
WARNING
If you drive on a steep incline at an angle or
turn when driving on an incline, the vehicle
could slip sideways, tip and rollover. There is
a risk of an accident.
Always drive on a steep incline in the line of
fall (straight up or down) and do not turn the
vehicle.
R Observe the rules on off-road driving.
R Do not drive at an angle on slopes, inclines
or gradients, but instead follow the direct
line of fall. The maximum gradient-climbing
capability of your vehicle is 100%, which
corresponds to an approach/departure
angle of 45°. Note that the climbing ability
of your vehicle depends on the terrain
conditions. R
When driving down an incline, make use of
the engine's braking effect. Observe the
engine speed; do not overrev the engine.
R Before driving on extreme uphill and
downhill gradients, select the LOW RANGE
off-road gear (Y page 259).
R Drive slowly.
R Avoid high engine speeds. Drive at
appropriate engine speeds (maximum
3,000 rpm).
R Use the left-hand paddle shifter to shift into
a lower gear in good time on long and steep
downhill gradients.
R Check the brakes after prolonged off-road
driving.
i Hill start assist will aid you when pulling
away on a hill.
For further information about hill start
assist, see (Y page 171).
Do not switch to transmission position N
when driving off-road. If you try to brake the
vehicle using the service brake, you could
lose control of the vehicle. If the gradient is
too steep for your vehicle, drive back down in
reverse gear.
Always observe the approach/departure
angle values (Y page 455).
Maximum gradient-climbing capability Always observe the maximum gradient
climbing ability values (Y
page 455).
Hilltops When driving up an uphill gradient, slightly
reduce pressure on the accelerator
immediately before reaching the brow of the
hill. Use the vehicle's own impetus to drive
over the top of the hill.
This style of driving prevents:
R the vehicle from lifting off the ground on the
brow of a hill
R the vehicle from traveling too quickly down
the other side 200
Driving tipsDriving and parking
Page 203 of 462
Driving downhill
R
Drive slowly.
R Do not drive at an angle down steep
inclines. Steer into the line of fall and drive
with the front wheels aligned straight.
Otherwise, the vehicle could slip sideways,
tip and rollover.
R Shift to a lower gear using the left-hand
paddle shifter before tackling steep
downhill gradients.
R Activate DSR. If this is not sufficient, brake
gently. When doing so, make sure that the
vehicle is facing in the direction of the line
of fall.
R Check that the brakes are working normally
after a long downhill stretch.
i The special off-road ABS setting enables
a precise, brief and repeated locking of the
front wheels. This causes them to dig into
loose earth. Be aware that the front wheels
easily skid across the ground surface if
completely braked and therefore lose their
ability to steer. Driving systems
Cruise control
General notes Cruise control maintains a constant road
speed for you. It brakes automatically in order
to avoid exceeding the set speed. You must
select a lower gear in good time on long and
steep downhill gradients, especially if the
vehicle is laden or towing a trailer. By doing
so, you will make use of the braking effect of
the engine. This relieves the load on the brake
system and prevents the brakes from
overheating and wearing too quickly.
Use cruise control only if road and traffic
conditions make it appropriate to maintain a
steady speed for a prolonged period. You can
store any road speed above 20 mph
(30 km/h). i
Cruise control should not be activated
when driving off-road.
Important safety notes If you fail to adapt your driving style, cruise
control can neither reduce the risk of an
accident nor override the laws of physics.
Cruise control cannot take into account the
road, traffic and weather conditions. Cruise
control is only an aid. You are responsible for
the distance to the vehicle in front, for vehicle
speed, for braking in good time and for
staying in your lane.
Do not use cruise control:
R in road and traffic conditions which do not
allow you to maintain a constant speed e.g.
in heavy traffic or on winding roads
R on slippery road surfaces. Braking or
accelerating could cause the drive wheels
to lose traction and the vehicle could then
skid
R when there is poor visibility, e.g. due to fog,
heavy rain or snow
If there is a change of drivers, advise the new
driver of the speed stored.
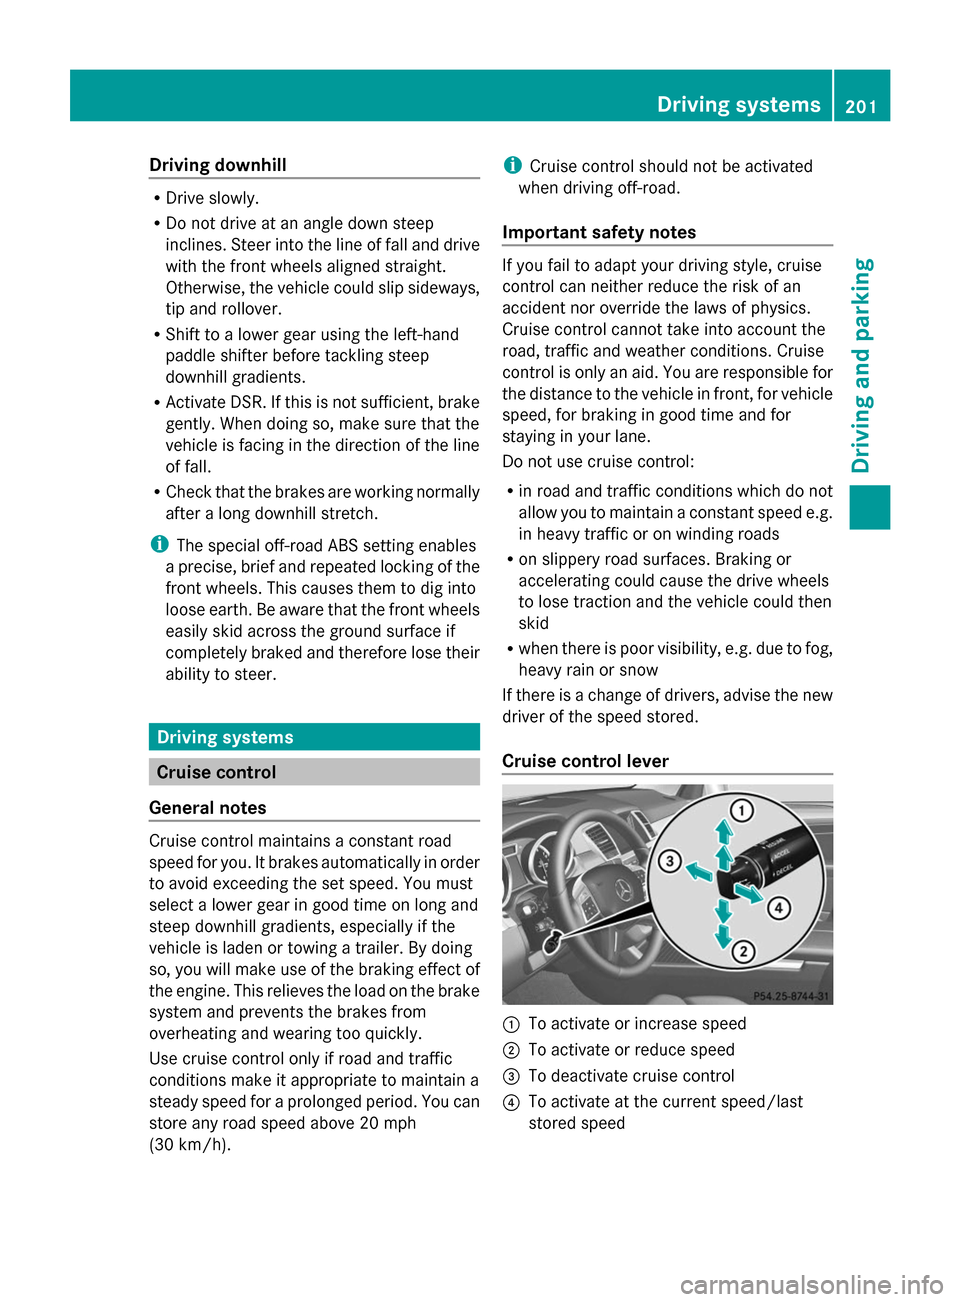
Cruise control lever :
To activate or increase speed
; To activate or reduce speed
= To deactivate cruise control
? To activate at the current speed/last
stored speed Driving syste
ms
201Driving an d parking Z
Page 204 of 462
When you activate cruise control, the stored
speed is shown in the multifunction display
for five seconds.
Activation conditions To activate cruise control, all of the following
activation conditions must be fulfilled:
R the electric parking brake must be
released.
R you are driving faster than 20 mph
(30 km/h).
R ESP ®
must be active, but not intervening.
R the transmission must be in position D.
R DSR must be deactivated.
R off-road program 2 must be deactivated
(vehicles with the ON&OFFROAD package).
Storing, maintaining and calling up a
speed Storing and maintaining a speed
X
Accelerate the vehicle to the desired
speed.
X Briefly press the cruise control lever
up : or down ;.
X Remove your foot from the accelerator
pedal.
Cruise control is activated. The vehicle
automatically maintains the stored speed.
You can accept the current speed if you are
driving faster than 20 mph (30 km/h).
i Cruise control may be unable to maintain
the stored speed on uphill gradients. The stored speed is resumed when the gradient
evens out. Cruise control maintains the
stored speed on downhill gradients by
automatically applying the brakes.
Storing or calling up a speed G
WARNING
If you call up the stored speed and it differs
from the current speed, the vehicle
accelerates or decelerates. If you do not know
the stored speed, the vehicle could accelerate
or brake unexpectedly. There is a risk of an
accident.
Pay attention to the road and traffic
conditions before calling up the stored speed.
If you do not know the stored speed, store the
desired speed again. X
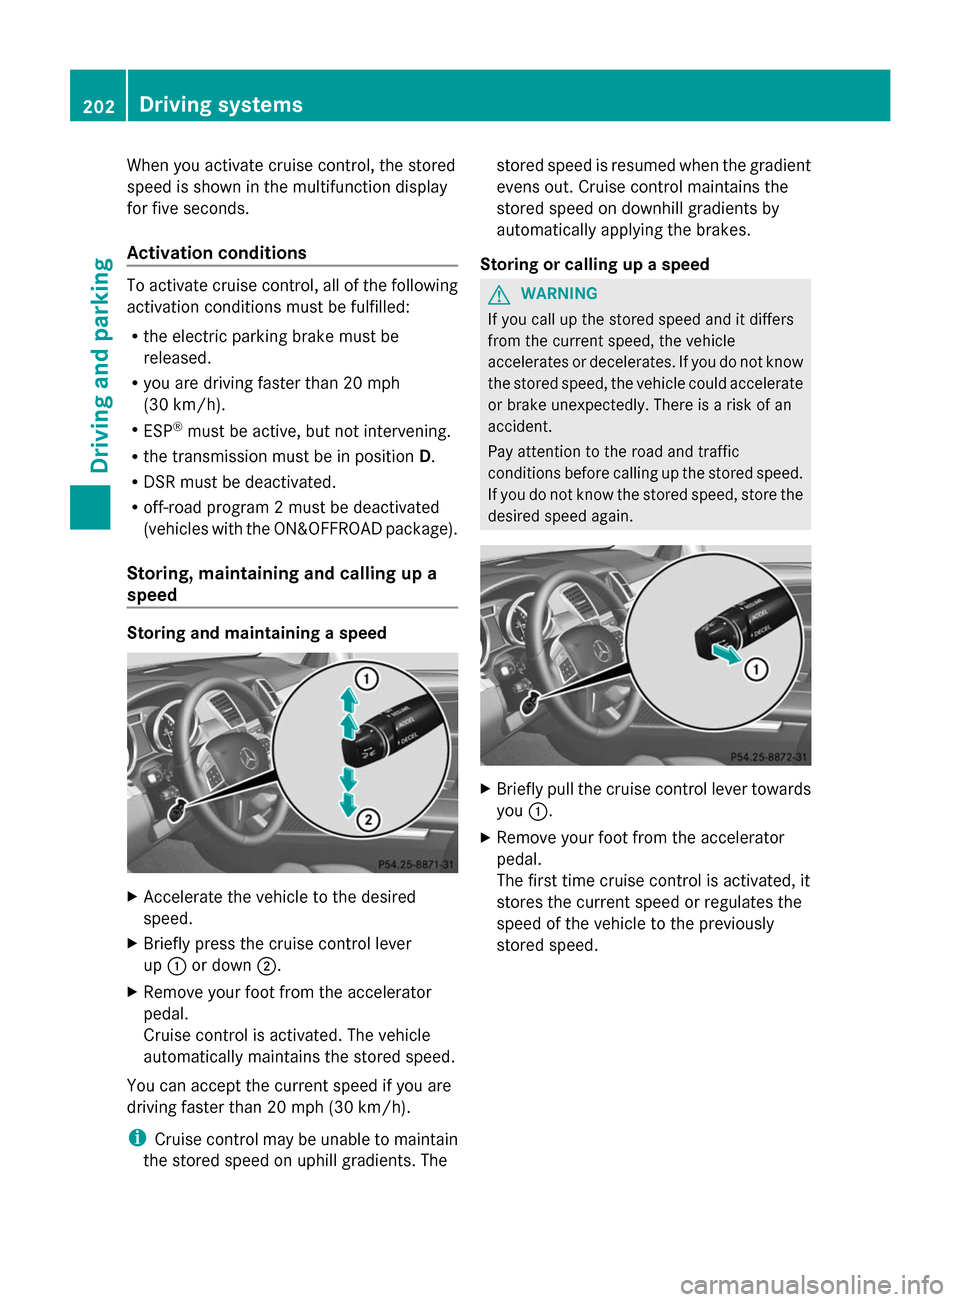
Briefly pull the cruise control lever towards
you :.
X Remove your foot from the accelerator
pedal.
The first time cruise control is activated, it
stores the current speed or regulates the
speed of the vehicle to the previously
stored speed. 202
Driving systemsDriving and parking