audio MERCEDES-BENZ GLC-Class 2016 X253 Comand Manual
[x] Cancel search | Manufacturer: MERCEDES-BENZ, Model Year: 2016, Model line: GLC-Class, Model: MERCEDES-BENZ GLC-Class 2016 X253Pages: 222, PDF Size: 6.39 MB
Page 184 of 222
CGraphic time display
DCover view (if available)
Inserting and ejecting an SD memory
card
Important safety notes
GWAR NING
SD memory car dsare small parts. They can be
swallo wed and cause asphyxiation. This
poses an increased risk of injury or even fatal injury.
Keep SDmemory car dsout of the reach of
ch ildr en. Ifan SD memory card is swallowed,
seek immediate medical attention.
!If you are no longer using the SD memory
card, you should remove it and take it out of
the vehicle. High temperatures can dam-
age the card.
COMAND supports SD memory cards
(Secure Digital), SDHC memory cards
(Secure DigitalHigh Capacity), and SDXC
memory cards ( SecureDigital e Xtended
Capacity.
Inserting an SD memory card
XInsert the SD memory card into the SD card
slot until it engages. The side with the con- tacts must face downwards.
If the memory card has been selected as a
media source, the medium is played and
the files are loaded in the background. If
there are no supported audio/video files,
you will see a message to this effect.
XSelect the media source (Ypage 178).
Ejecting an SD memory card
XPress the memory card.
The memory card is ejected.
XRemove the memory card.
Connecting USB devices
There are two USB ports in the stowage space
under the armrest.
XConnect the USB device to the USB port.
If the corresponding media display is visi-
ble, the medium is played and the files are
loaded in the background. If there are no
supported audio/video files, you will see a
message to this effect.
iMP3 players must support Media Transfer
Protocol (MTP).
Activating media mode
Switching on automatically
After inserting a CD/DVD, this media mode is
automatically switched on by COMAND.
If playable music files are found, they will be
played by COMAND.
If a media function is already switched on in
COMAND, this will be interrupted and the
basic display of the CD/DVD mode will
appear. If another function, such as naviga-
tion, is being operated, the basic display will
not change. Only the music from the last
inserted CD/DVD will be played.
Depending on the vehicle equipment, the
default display must already be turned on
when using with USB devices or SD memory
cards.
XInsert the CDs/DVDs (Ypage 181)
or
XInsert an SD memory card: (Ypage 182)
or
XConnect a USB device: (Ypage 182)
COMAND loads the medium inserted and
starts to play it automatically.
Further options for switching on
RUsing the main function bar: (Ypage 178)
RUsing the device list: (Ypage 179)
RUsing the Õbutton: (Ypage 178)
182Audio/video mode
Media
Page 185 of 222
Playback options
XIn media mode, slide6the controller.
The media menu bar is shown.
XTo select Options: turn and press the con-
troller.
Playing similar tracks
XTo select PlayMoreLikeThis: turn and
press the controller.
COMAND automatically creates and plays
a track list with similar tracks. If there are
no comparable tracks on the data carrier,
you will see a message to this effect.
XSelect the required track.
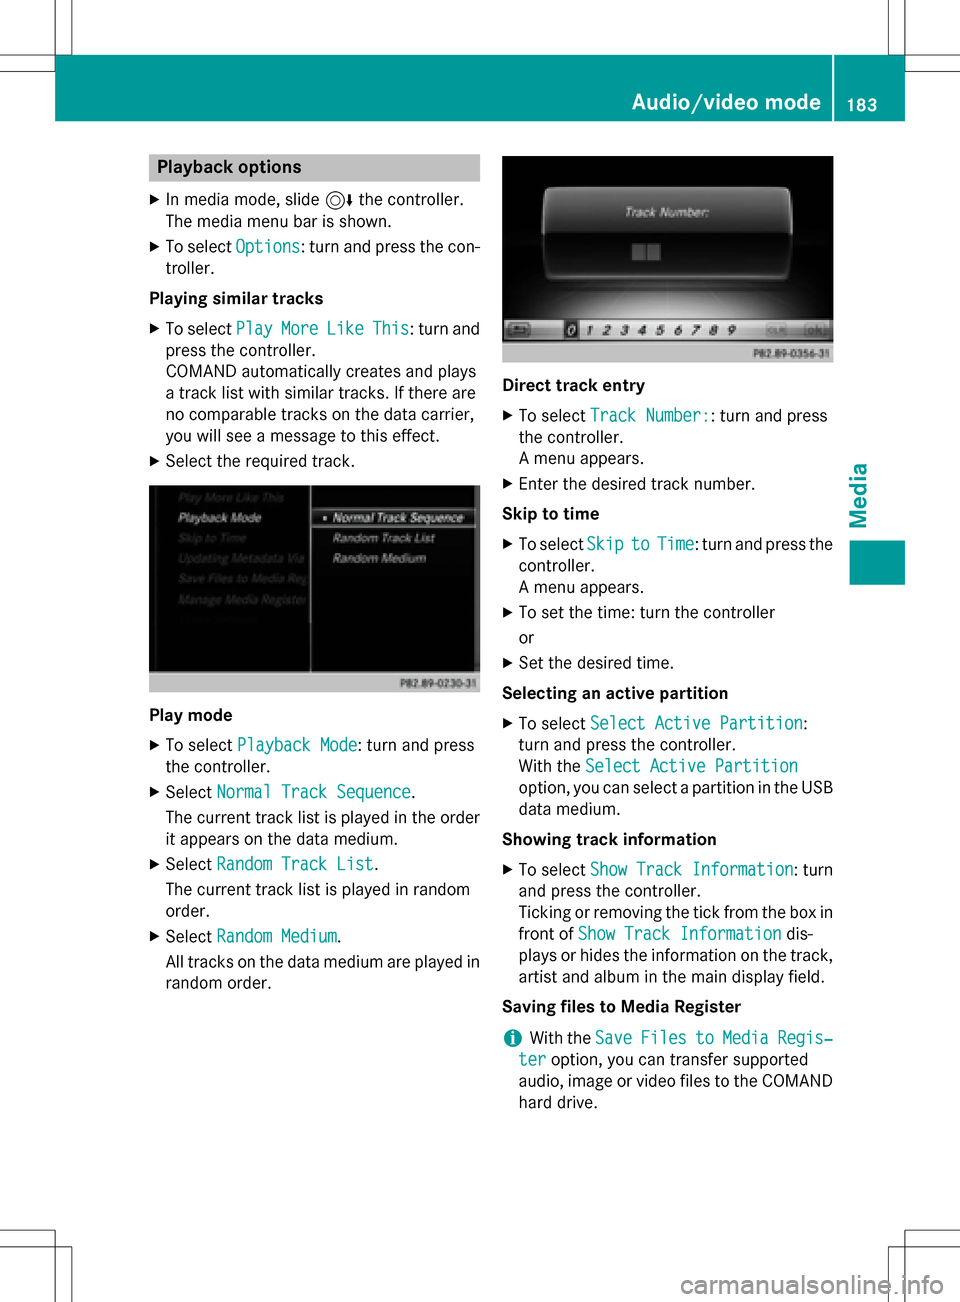
Play mode
XTo select Playback Mode: turn and press
the controller.
XSelect Normal Track Sequence.
The current track list is played in the order
it appears on the data medium.
XSelect Random Track List.
The current track list is played in random
order.
XSelect Random Medium.
All tracks on the data medium are played in
random order.
Direct track entry
XTo select Track Number:: turn and press
the controller.
A menu appears.
XEnter the desired track number.
Skip to time
XTo select SkiptoTime: turn and press the
controller.
A menu appears.
XTo set the time: turn the controller
or
XSet the desired time.
Selecting an active partition
XTo select Select Active Partition:
turn and press the controller.
With the Select Active Partition
option, you can select a partition in the USB
data medium.
Showing track information
XTo select Show Track Information: turn
and press the controller.
Ticking or removing the tick from the box in
front of Show Track Information
dis-
plays or hides the information on the track,
artist and album in the main display field.
Saving files to Media Register
iWith the SaveFilestoMediaRegis‐
teroption, you can transfer supported
audio, image or video files to the COMAND
hard drive.
Audio/video mode183
Media
Z
Page 186 of 222
XTo select theSaveFilestoMediaReg‐
isteroption: turn and press the controller.
A menu appears (
Ypage 188).
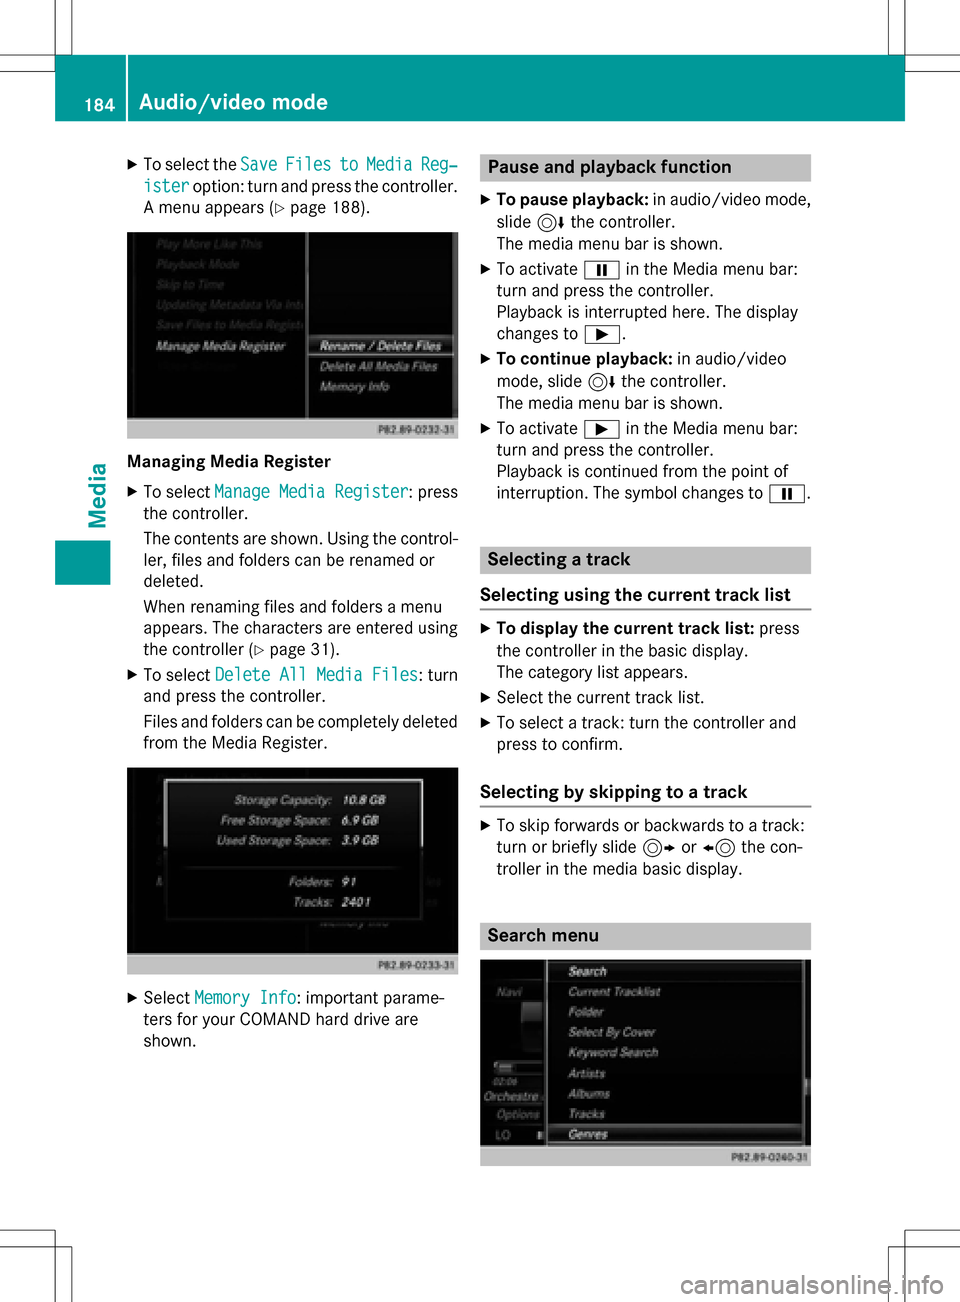
Managing Media Register
XTo select Manage Media Register: press
the controller.
The contents are shown. Using the control-
ler, files and folders can be renamed or
deleted.
When renaming files and folders a menu
appears. The characters are entered using
the controller (
Ypage 31).
XTo select Delete All Media Files: turn
and press the controller.
Files and folders can be completely deleted
from the Media Register.
XSelect Memory Info: important parame-
ters for your COMAND hard drive are
shown.
Pause and playback function
XTo pause playback: in audio/video mode,
slide 6the controller.
The media menu bar is shown.
XTo activate Ëin the Media menu bar:
turn and press the controller.
Playback is interrupted here. The display
changes to Ì.
XTo continue playback: in audio/video
mode, slide 6the controller.
The media menu bar is shown.
XTo activate Ìin the Media menu bar:
turn and press the controller.
Playback is continued from the point of
interruption. The symbol changes to Ë.
Selecting a track
Selecting using the current track list
XTo display the current track list: press
the controller in the basic display.
The category list appears.
XSelect the current track list.
XTo select a track: turn the controller and
press to confirm.
Selecting by skipping to a track
XTo skip forwards or backwards to a track:
turn or briefly slide 9or8 the con-
troller in the media basic display.
Search menu
184Audio/video mode
Media
Page 187 of 222
XIn media mode, slide6the controller.
The media menu bar is shown.
XTo select Search: turn and press the con-
troller.
The category list is shown.
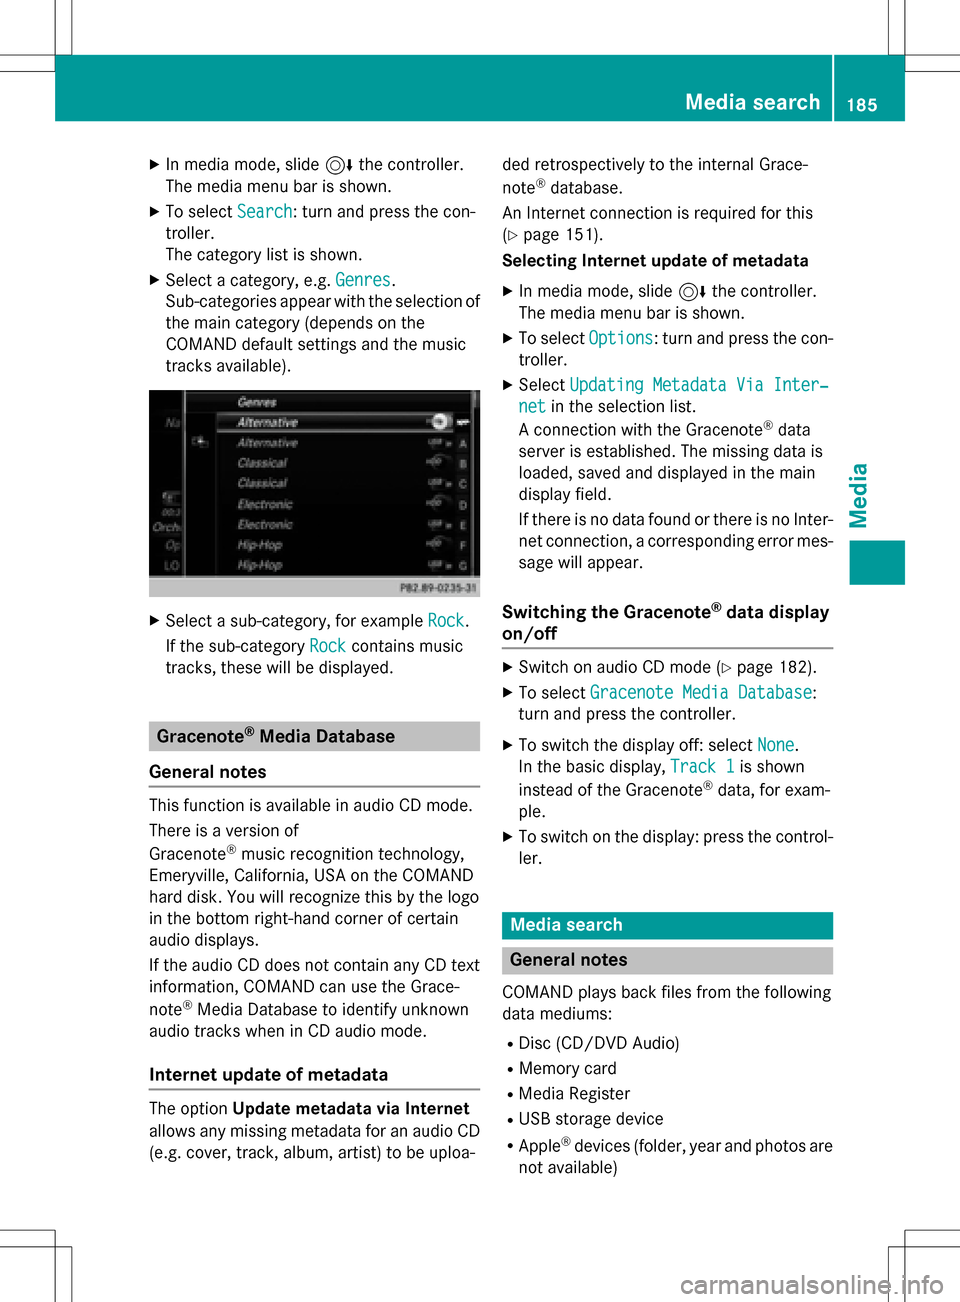
XSelect a category, e.g. Genres.
Sub-categories appear with the selection of
the main category (depends on the
COMAND default settings and the music
tracks available).
XSelect a sub-category, for example Rock.
If the sub-category Rock
contains music
tracks, these will be displayed.
Gracenote®Media Database
General notes
This function is available in audio CD mode.
There is a version of
Gracenote
®music recognition technology,
Emeryville, California, USA on the COMAND
hard disk. You will recognize this by the logo
in the bottom right-hand corner of certain
audio displays.
If the audio CD does not contain any CD text
information, COMAND can use the Grace-
note
®Media Database to identify unknown
audio tracks when in CD audio mode.
Internet update of metadata
The option Update metadata via Internet
allows any missing metadata for an audio CD (e.g. cover, track, album, artist) to be uploa- ded retrospectively to the internal Grace-
note
®database.
An Internet connection is required for this
(
Ypage 151).
Selecting Internet update of metadata
XIn media mode, slide 6the controller.
The media menu bar is shown.
XTo select Options: turn and press the con-
troller.
XSelect Updating Metadata Via Inter‐
netin the selection list.
A connection with the Gracenote®data
server is established. The missing data is
loaded, saved and displayed in the main
display field.
If there is no data found or there is no Inter-
net connection, a corresponding error mes-
sage will appear.
Switching the Gracenote®data display
on/off
XSwitch on audio CD mode (Ypage 182).
XTo select Gracenote Media Database:
turn and press the controller.
XTo switch the display off: select None.
In the basic display, Track 1
is shown
instead of the Gracenote®data, for exam-
ple.
XTo switch on the display: press the control- ler.
Media search
General notes
COMAND plays back files from the following
data mediums:
RDisc (CD/DVD Audio)
RMemory card
RMedia Register
RUSB storage device
RApple®devices (folder, year and photos are
not available)
Media search185
Media
Z
Page 188 of 222
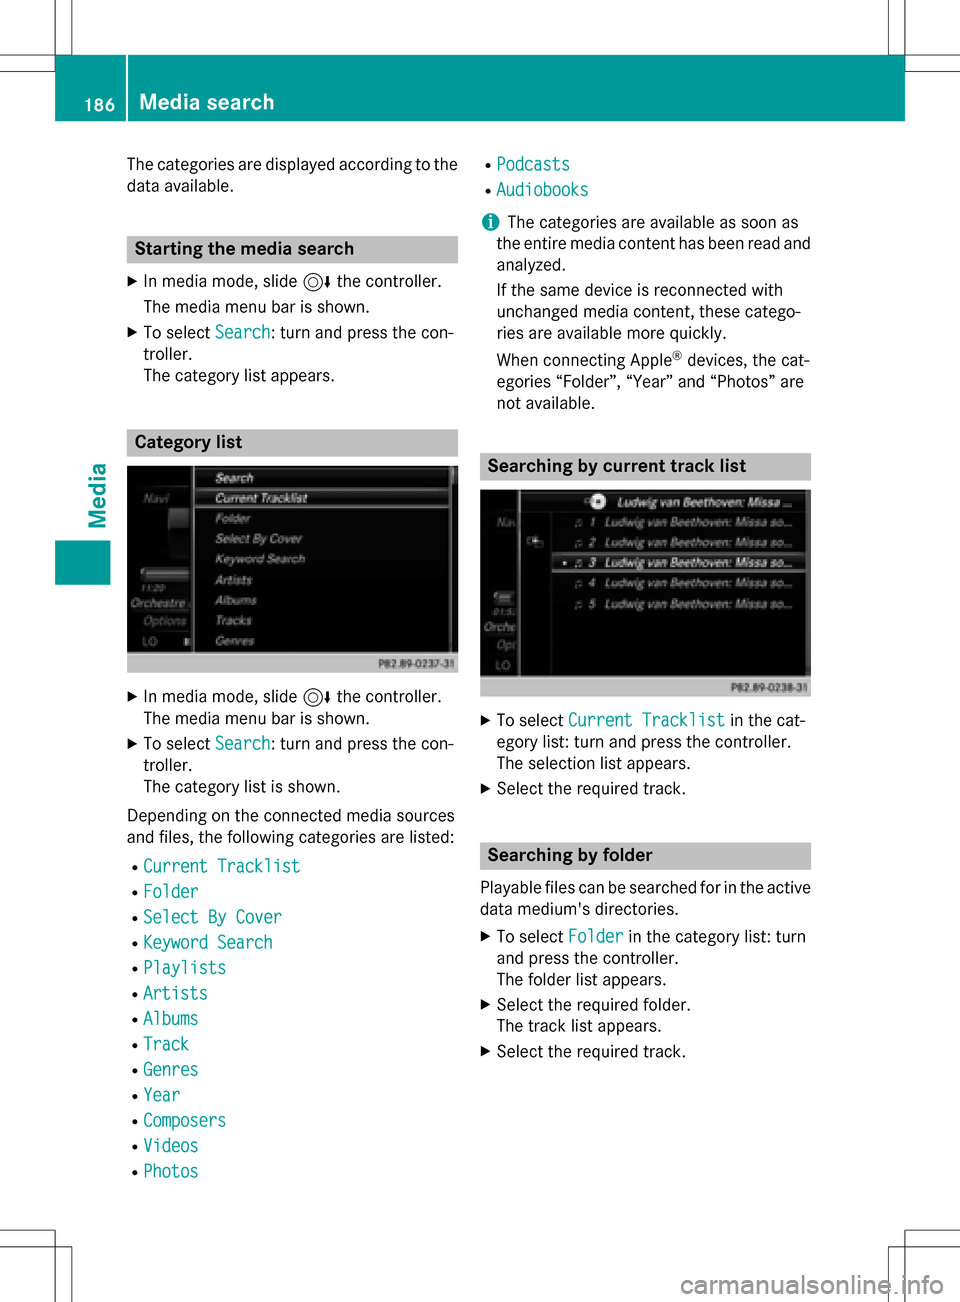
The categories are displayed according to the
data available.
Starting the media search
XIn media mode, slide6the controller.
The media menu bar is shown.
XTo select Search: turn and press the con-
troller.
The category list appears.
Category list
XIn media mode, slide 6the controller.
The media menu bar is shown.
XTo select Search: turn and press the con-
troller.
The category list is shown.
Depending on the connected media sources
and files, the following categories are listed:
RCurrent Tracklist
RFolder
RSelect By Cover
RKeyword Search
RPlaylists
RArtists
RAlbums
RTrack
RGenres
RYear
RComposers
RVideos
RPhotos
RPodcasts
RAudiobooks
iThe categories are available as soon as
the entire media content has been read and
analyzed.
If the same device is reconnected with
unchanged media content, these catego-
ries are available more quickly.
When connecting Apple
®devices, the cat-
egories “Folder”, “Year” and “Photos” are
not available.
Searching by current track list
XTo select Current Tracklistin the cat-
egory list: turn and press the controller.
The selection list appears.
XSelect the required track.
Searching by folder
Playable files can be searched for in the active
data medium's directories.
XTo select Folderin the category list: turn
and press the controller.
The folder list appears.
XSelect the required folder.
The track list appears.
XSelect the required track.
186Media search
Media
Page 194 of 222
XIn media mode: press theÕbutton.
The menu appears with the available media sources.
XTo select the media source: turn the con-
troller and press to confirm.
XTo switch to the menu bar: slide 6the
controller.
XTo select Options: turn and press the con-
troller.
XSelect Playback Mode.
The options list appears. The #dot indi-
cates the current setting.
XSelect the desired option.
The option is switched on. For all options
except Normal Track Sequence
, you will
see a corresponding icon in the main dis-
play.
iThe Normal Track Sequenceoption is
automatically selected when you change
the disc you are currently listening to or
when you select a different medium. If an
option is selected, it remains selected after
COMAND is switched on or off.
Bluetooth®audio mode
Connecting Bluetooth®audio devices
Prerequisites
XActivate the Bluetooth®function in
COMAND (
Ypage 44).
Bluetooth
®audio mode requires a Blue-
tooth®-capable audio device.
Check your Bluetooth
®audio device for the
following (see the manufacturer's operating
instructions):
RBluetooth®audio profile
The Bluetooth
®audio device must support
the A2DP and AVRCP Bluetooth®audio
profiles.
RBluetooth®visibility
Certain Bluetooth
®audio devices do not
just require activation of the Bluetooth®
function. In addition, your device must be
made "visible" to other devices.
RBluetooth®device name
This device name is predetermined but can
usually be changed. For a clear selection of the Bluetooth
®device, Mercedes-Benz rec-
ommends that you customize the device
name.
iA2DP ( Advanced Audio Distribution
Profile): Bluetooth®audio profile for audio
data transmission
AVRCP (A udioVideo Remote Control
Profile): Bluetooth
®audio profile for audio
data playback.
iThe Bluetooth®device must be visible for
authorization. After authorization,
COMAND even finds the Bluetooth
®device
when it is not visible.
General notes
Before using your Bluetooth®audio device
with COMAND for the first time, you will need
to authorize it.
When you authorize a new Bluetooth
®audio
device, it is connected automatically. Con-
nection involves first searching for a Blue-
tooth
®audio device and then authorizing it.
You can authorize up to fifteen Bluetooth
®
devices.
iIf you authorize a mobile phone that sup-
ports Bluetooth®audio, the A2DP and
AVRCP Bluetooth®audio profiles are con-
nected automatically.
The mobile phone is then entered:
Rin the Bluetooth®telephone list
(
Ypage 113)
Rin the Bluetooth®device list
(
Ypage 193)
Mercedes-Benz recommends authorizing a
mobile phone in Bluetooth
®telephony
(
Ypage 114).
192Bluetooth®audio mode
Media
Page 195 of 222
iIf the mobile phone that is connected only
supports two Bluetooth®profiles at the
same time, COMAND functions may
behave as follows:
Rwhen connecting to the Internet, play-
back is stopped on the Bluetooth®audio
device.
Rwhen starting playback on the Blue-
tooth®audio device, the Internet con-
nection is ended.
Searching for and authorizing a Blue-
tooth®audio device
Switching to Bluetooth®audio mode
XTo call up the media menu: press the Õ
button.
The last media source you have set is dis-
played.
XTo display the main function bar: slide 5
the controller.
XTo select Media: turn and press the con-
troller.
XTo select Bluetooth Audio: turn and
press the controller.
A menu appears.
If you see the No Bluetooth Audio
Device Connectedmessage, you will
need to authorize the Bluetooth®audio
device first.
XTo select Optionsin the Bluetooth audio
menu: slide 6the controller and press to
confirm.
XTo select Bluetooth Audio Devices:
press the controller.
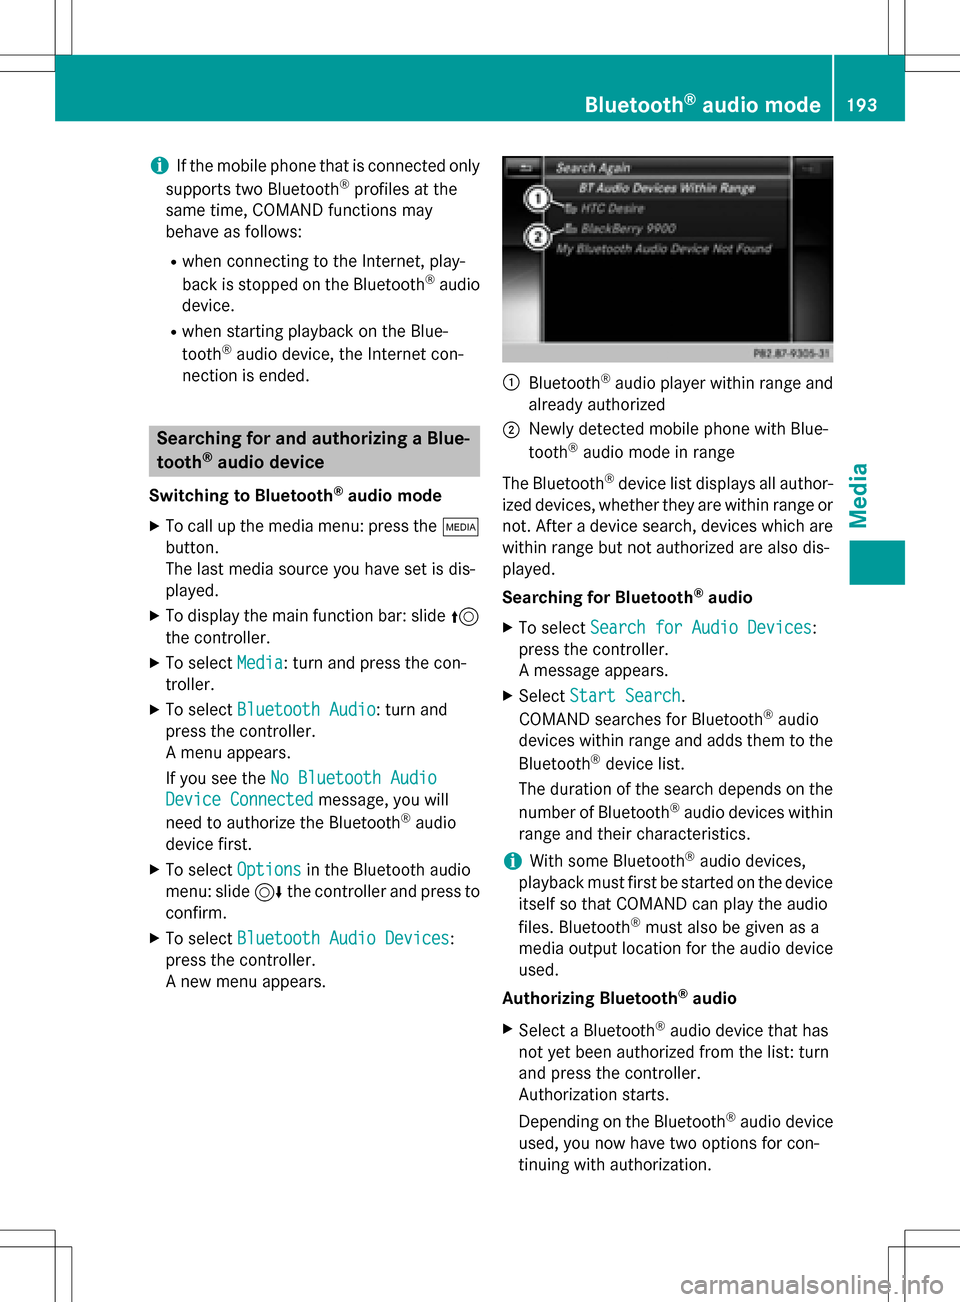
A new menu appears.
:Bluetooth®audio player within range and
already authorized
;Newly detected mobile phone with Blue-
tooth®audio mode in range
The Bluetooth
®device list displays all author-
ized devices, whether they are within range or not. After a device search, devices which are
within range but not authorized are also dis-
played.
Searching for Bluetooth
®audio
XTo select Search for Audio Devices:
press the controller.
A message appears.
XSelect Start Search.
COMAND searches for Bluetooth®audio
devices within range and adds them to the
Bluetooth
®device list.
The duration of the search depends on the
number of Bluetooth
®audio devices within
range and their characteristics.
iWith some Bluetooth®audio devices,
playback must first be started on the device
itself so that COMAND can play the audio
files. Bluetooth
®must also be given as a
media output location for the audio device
used.
Authorizing Bluetooth
®audio
XSelect a Bluetooth®audio device that has
not yet been authorized from the list: turn
and press the controller.
Authorization starts.
Depending on the Bluetooth
®audio device
used, you now have two options for con-
tinuing with authorization.
Bluetooth®audio mode193
Media
Z
Page 196 of 222

Option 1: entering the passkey
XYou can find information on this in the
"Authorizing (connecting) a mobile phone"
section (
Ypage 114).
After successful authorization, the Blue-
tooth
®audio device is connected and
starts playing.
Option 2: Secure Simple Pairing
XYou can find information on this in the
"Authorizing (connecting) a mobile phone"
section (
Ypage 114).
After successful authorization, the Blue-
tooth
®audio device is connected and
starts playing.
iThe Bluetooth®audio device must sup-
port Bluetooth®version 2.1 for connection
via Secure Simple Pairing. COMAND cre-
ates a six-digit code, which is displayed on
both devices that are to be connected
For some Bluetooth
®audio devices, the
pairing must be confirmed within 10 sec-
onds.
XIf the number code displayed on COMAND
and on the Bluetooth®audio device is the
same, select Yes
: press the controller.
If you select Yes
, authorization continues
and the Bluetooth®audio device is connec-
ted. Playback starts.
If you select No
, authorization is canceled.
External authorization
If COMAND does not find your Bluetooth®
audio device, this may be due to particular
security settings on your Bluetooth®audio
device. In this case, check whether your Blue-
tooth
®audio device can locate COMAND.
The Bluetooth
®device name for COMAND is
MB Bluetooth
.
XSwitch on Bluetooth®audio mode
(
Ypage 196).
XTo select Options: slide6and press the
controller.
XTo select Bluetooth Audio Devices:
press the controller.
XTo select Connect via Audio Device:
turn and press the controller.
Authorizing
XStart the authorization on your Bluetooth®
audio device (see the manufacturer's oper-
ating instructions).
After successful authorization, the Blue-
tooth
®audio device is connected and
starts playing.
With some Bluetooth
®audio devices, play-
back must first be started on the device itself
so that COMAND can play the audio files.
Device-specific information on authorizing
and connecting Bluetooth
®-capable mobile
phones can be found on the Internet at
http://www.mercedes-benz.com/
connect.
Reconnecting a Bluetooth®audio
device
The Bluetooth®audio profiles are connected
automatically under the following circum-
stances:
Rone of the last two mobile phones to have
been connected has also been used as a
Bluetooth
®audio player (if this function is
supported by the mobile phone).
Rthe mobile phone is automatically connec-
ted. The Bluetooth®audio player is then
connected.
iFor an automatic connection with
COMAND, the telephone must be within
range.
For most Bluetooth
®audio devices, the
"automatic connection" must be activated
by ticking a box. Depending on the device
used, this prompt often takes place when
authorizing (see the manufacturer's oper-
ating instructions).
194Bluetooth®audio mode
Media
Page 197 of 222
If theNo Bluetooth Audio Device Con‐
nectedmessage appears, you have two
options to reconnect the Bluetooth®audio
device.
Option 1:
XIn the Connect Devicebasic display:
press the controller.
If COMAND can locate the Bluetooth
®
audio device, it will be connected and will
start playing.
Option 2:
XTo select Options: slide6and press the
controller.
XTo select Bluetooth Audio Devices:
press the controller.
XTo select a Bluetooth®audio device: turn
and press the controller.
If the Bluetooth
®audio device has been
authorized, playback starts.
Bluetooth®audio device and simulta-
neous search for mobile phones
i
When searching for a mobile phone or a
new Bluetooth®audio device, the connec-
tion to an already activated Bluetooth®
audio device is stopped.
In the Bluetooth
®audio basic display , you will
see the No
BluetoothAudioDeviceCon‐
nectedmessage, and the Connect Device
menu item cannot be selected.
Displaying details
XTo select a Bluetooth®audio device from
the Bluetooth®device list: turn the control-
ler.
XTo select the symbol to the right of the
Bluetooth®audio device: slide 9the
controller.
XTo select Details: turn and press the con-
troller.
The following information concerning the
selected mobile phone is shown:
RBluetooth®name
RBluetooth®address
RAvailability status (shown after an
update)
RAuthorization status
XTo close the detailed display: press the
% button.
De-authorizing (deregistering) a Blue-
tooth®audio device
XTo select a Bluetooth®audio device from
the Bluetooth®device list: turn the control-
ler.
XTo select the symbol to the right of the
Bluetooth®audio device: slide 9and
press the controller.
XTo select Deauthorize: press the control-
ler.
A prompt appears asking whether you
really wish to deauthorize this device.
XTo select YesorNo: turn and press the con-
troller.
If you select Yes
, the device is deleted from
the Bluetooth®device list.
If you select No
the process is canceled.
iBefore re-authorizing the Bluetooth®
audio device, you should also delete the
device name MB Bluetooth
from your
Bluetooth®audio device's Bluetooth®list
(see the Bluetooth®audio device's operat-
ing instructions).
Bluetooth®audio mode195
Media
Z
Page 198 of 222
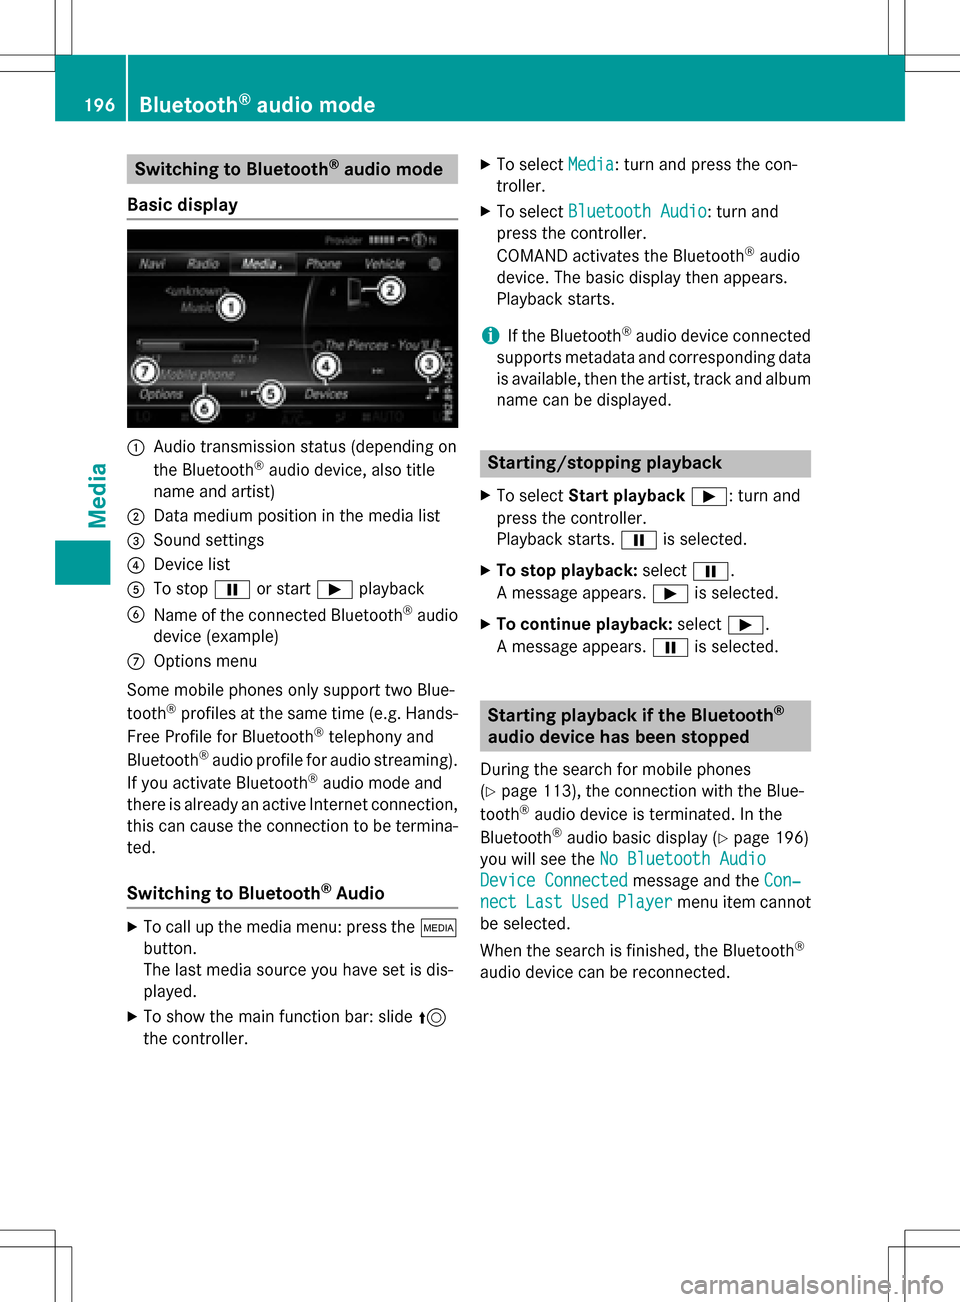
Switching to Bluetooth®audio mode
Basic display
:Audio transmission status (depending on
the Bluetooth®audio device, also title
name and artist)
;Data medium position in the media list
=Sound settings
?Device list
ATo stop Ëor start Ìplayback
BName of the connected Bluetooth®audio
device (example)
COptions menu
Some mobile phones only support two Blue-
tooth
®profiles at the same time (e.g. Hands-
Free Profile for Bluetooth®telephony and
Bluetooth®audio profile for audio streaming).
If you activate Bluetooth®audio mode and
there is already an active Internet connection, this can cause the connection to be termina-
ted.
Switching to Bluetooth®Audio
XTo call up the media menu: press the Õ
button.
The last media source you have set is dis-
played.
XTo show the main function bar: slide 5
the controller.
XTo select Media: turn and press the con-
troller.
XTo select Bluetooth Audio: turn and
press the controller.
COMAND activates the Bluetooth
®audio
device. The basic display then appears.
Playback starts.
iIf the Bluetooth®audio device connected
supports metadata and corresponding data
is available, then the artist, track and album
name can be displayed.
Starting/stopping playback
XTo select Start playback Ì: turn and
press the controller.
Playback starts. Ëis selected.
XTo stop playback: selectË.
A message appears. Ìis selected.
XTo continue playback: selectÌ.
A message appears. Ëis selected.
Starting playback if the Bluetooth®
audio device has been stopped
During the search for mobile phones
(
Ypage 113), the connection with the Blue-
tooth®audio device is terminated. In the
Bluetooth®audio basic display (Ypage 196)
you will see the No Bluetooth Audio
Device Connectedmessage and the Con‐
nectLastUsedPlayermenu item cannot
be selected.
When the search is finished, the Bluetooth
®
audio device can be reconnected.
196Bluetooth®audio mode
Media