audio MERCEDES-BENZ GLC-Class 2016 X253 Comand Manual
[x] Cancel search | Manufacturer: MERCEDES-BENZ, Model Year: 2016, Model line: GLC-Class, Model: MERCEDES-BENZ GLC-Class 2016 X253Pages: 222, PDF Size: 6.39 MB
Page 31 of 222
XTo switch from handwriting recognition
on the touchpad to character entry
using the controller:press the controller.
Character entry using the controller is
active.
Quick access for audio and telephone
Changing the station/music track
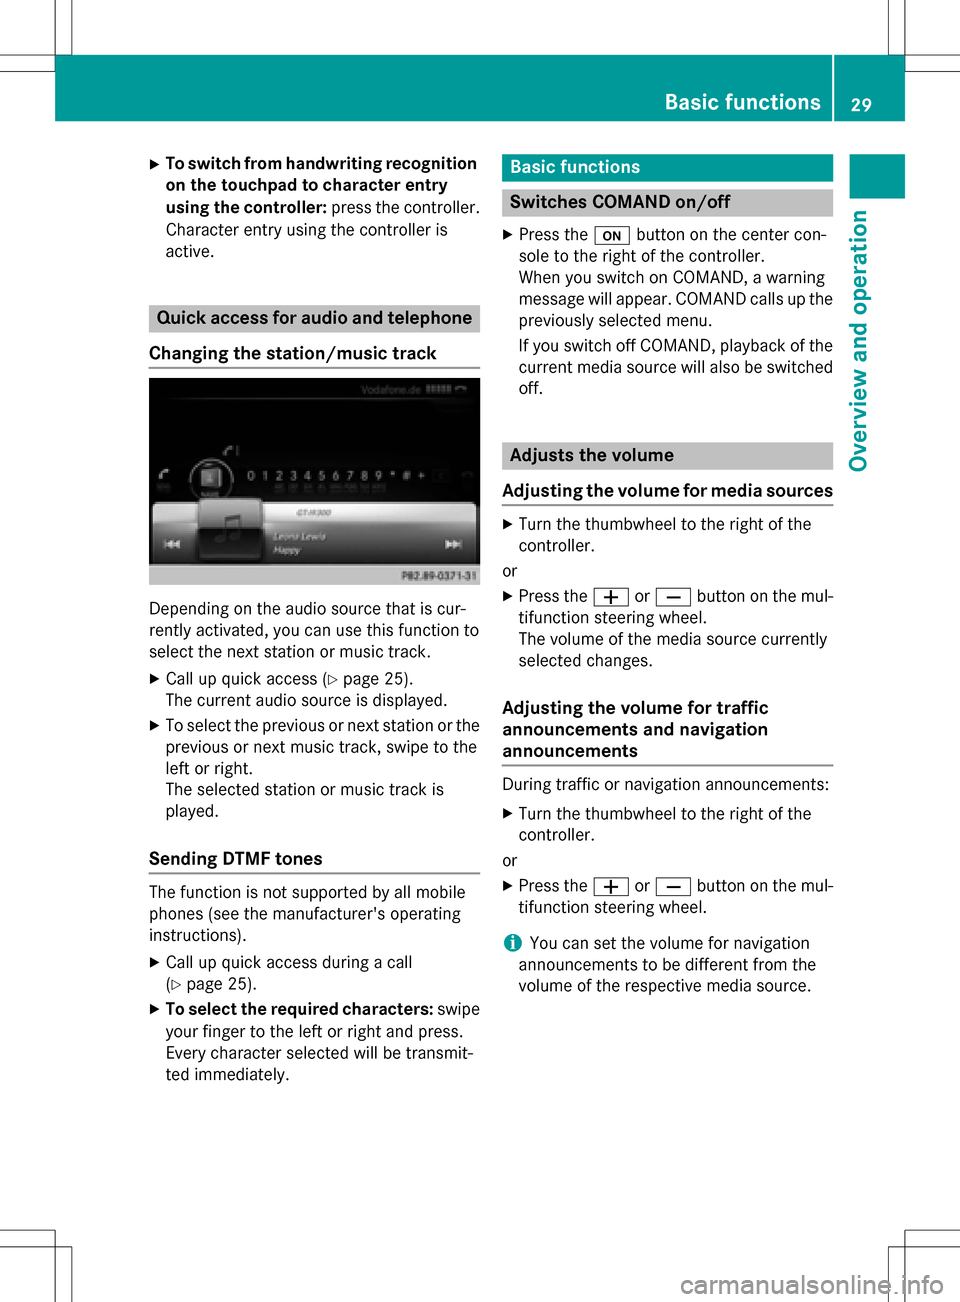
Depending on the audio source that is cur-
rently activated, you can use this function to
select the next station or music track.
XCall up quick access (Ypage 25).
The current audio source is displayed.
XTo select the previous or next station or the
previous or next music track, swipe to the
left or right.
The selected station or music track is
played.
Sending DTMF tones
The function is not supported by all mobile
phones (see the manufacturer's operating
instructions).
XCall up quick access during a call
(
Ypage 25).
XTo select the required characters: swipe
your finger to the left or right and press.
Every character selected will be transmit-
ted immediately.
Basic functions
Switches COMAND on/off
XPress the ubutton on the center con-
sole to the right of the controller.
When you switch on COMAND, a warning
message will appear. COMAND calls up the
previously selected menu.
If you switch off COMAND, playback of the
current media source will also be switched off.
Adjusts the volume
Adjusting the volume for media sources
XTurn the thumbwheel to the right of the
controller.
or
XPress the WorX button on the mul-
tifunction steering wheel.
The volume of the media source currently
selected changes.
Adjusting the volume for traffic
announcements and navigation
announcements
During traffic or navigation announcements:
XTurn the thumbwheel to the right of the
controller.
or
XPress the WorX button on the mul-
tifunction steering wheel.
iYou can set the volume for navigation
announcements to be different from the
volume of the respective media source.
Basic functions29
Overview and operation
Page 32 of 222
Adjusting the volumefor phone calls
You can adjust thevolume for hands-free
mod eduring atelephon ecall .
XTurn th ethumbwheel to th eright of th e
controller .
or
XPress th eW orX buttonon th emul-
tifunction steering wheel.
iSetting th evolume for th eVoic eControl
Syste mvoice output ,see th eseparat e
operating instructions.
Switching the sound on oroff
Media source sound
XPress th ethumbwheel to th eright of th e
controller .
or
XPress th e8 buttonon th emultifunction
steering wheel.
iIf th eaudio output is switched off ,th e
status lin ewill sho wthe8 symbol. If
you switch th emedia source or chang eth e
volume, th esoun dis automatically
switched on .
Switching navigati onannouncements
off and onagain
XTo switch offnavigation announce-
ments :press th ethumbwheel to th eright
of th econtroller during th eannouncement.
The Spoken
drivin grecommendations
havebee ndeactivated.message
appears.
XTo switch navigation announcement s
back on: switch COMAND off and then on
again (
Ypage 29).
or
XStart ane wrout ecalculation (Ypage 69).or
XSelec
t+: while rout eguidance is active ,
sho wthemen uand pre ssthecontroller
(
Ypage 87) .
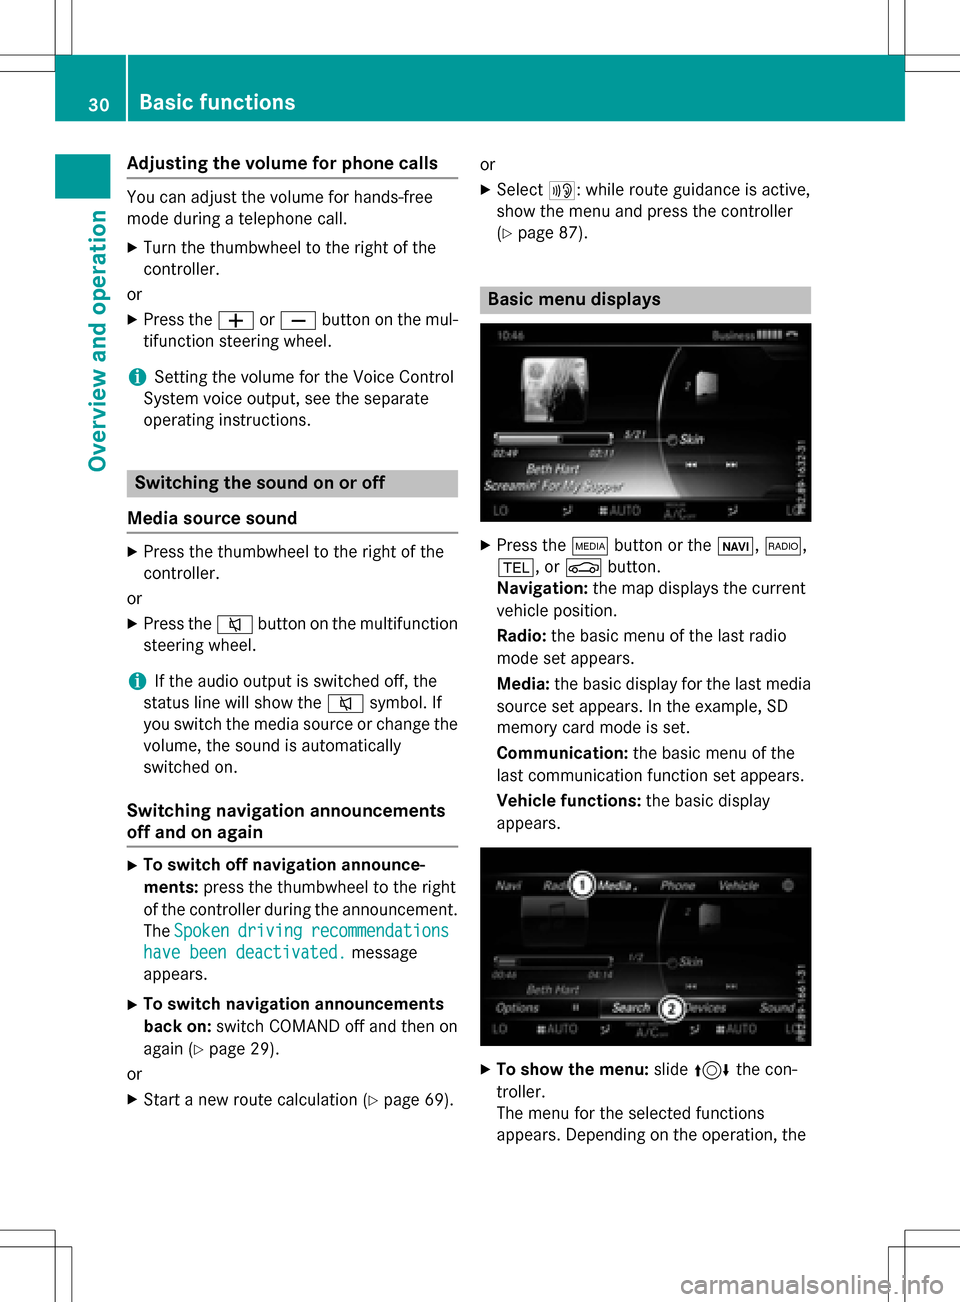
Basic menu displays
XPresstheÕ buttonor th eß, $,
%, orØ button.
Navigation: themap displays th ecurren t
vehicl eposition .
Radio :th ebasic men uof th elast radi o
mod e set appear s.
Media: thebasic display for th elast media
source set appears. In th eexample, SD
memory car dmod eis set.
Communication: thebasic men uof th e
last communication function set appears.
Vehicle functions: thebasic display
appear s.
XTo sho wthemenu: slide4 thecon-
troller .
The men ufor th eselected function s
appears. Dependin gon th eoperation ,th e
30Basic functions
Overview and operation
Page 46 of 222
XTo selectVehiclefrom the main function
bar: turn and press the controller.
XTo switch to the menu bar: slide 6the
controller.
XSelect System Settings.
The System Settings
menu appears.
XSelect WiFi.
The WiFi menu appears.
XSelect Generate Security Key.
XSelectRegenerate.
A new security key is generated.
XTo save the security key: turn the controller
and select Save
.
The WiFi menu appears. The new security
key will now be displayed and verified when
a connection is established via the security
key. The connection must be re-estab-
lished with the newly created security key.
iDevice connections established using the
previous security key will no longer work
after the security key is changed. You have
to reconnect these devices (
Ypage 42).
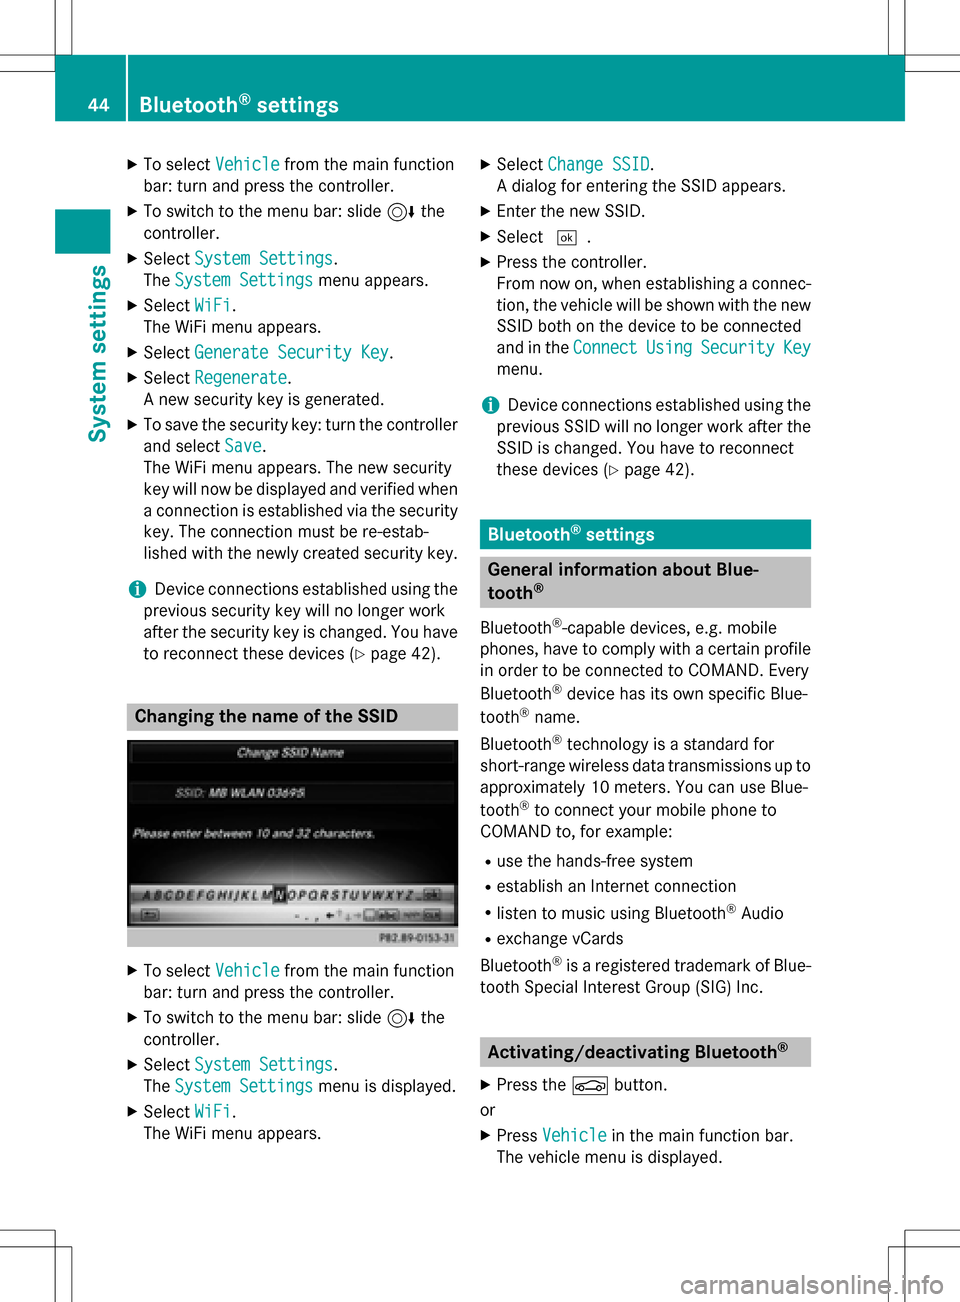
Changing the name of the SSID
XTo select Vehiclefrom the main function
bar: turn and press the controller.
XTo switch to the menu bar: slide 6the
controller.
XSelect System Settings.
The System Settings
menu is displayed.
XSelect WiFi.
The WiFi menu appears.
XSelect Change SSID.
A dialog for entering the SSID appears.
XEnter the new SSID.
XSelect ¬.
XPress the controller.
From now on, when establishing a connec-
tion, the vehicle will be shown with the new
SSID both on the device to be connected
and in the Connect
UsingSecurityKey
menu.
iDevice connections established using the
previous SSID will no longer work after the
SSID is changed. You have to reconnect
these devices (
Ypage 42).
Bluetooth®settings
General information about Blue-
tooth®
Bluetooth®-capable devices, e.g. mobile
phones, have to comply with a certain profile
in order to be connected to COMAND. Every
Bluetooth
®device has its own specific Blue-
tooth®name.
Bluetooth
®technology is a standard for
short-range wireless data transmissions up to
approximately 10 meters. You can use Blue-
tooth
®to connect your mobile phone to
COMAND to, for example:
Ruse the hands-free system
Restablish an Internet connection
Rlisten to music using Bluetooth®Audio
Rexchange vCards
Bluetooth
®is a registered trademark of Blue-
tooth Special Interest Group (SIG) Inc.
Activating/deactivating Bluetooth®
X
Press the Øbutton.
or
XPress Vehiclein the main function bar.
The vehicle menu is displayed.
44Bluetooth®settings
System settings
Page 47 of 222
XTo selectSystem Settings: slide6,
turn and press the controller.
A menu appears.
XTo select Activate Bluetooth: turn and
press the controller.
This switches Bluetooth
®on O or off ª.
Automatic volume adjustment
General information
With the Automatic Volume Adjustment
function, the volumes of different audio sour-
ces are adjusted for each other, to compen-
sate for relative differences in volume.
For example: changing from a relatively
quiet to a relatively loud radio station. The
volume for both stations sounds the same.
Manual readjustment of the volume is not
required.
The Automatic Volume Adjustment
func-
tion is deactivated ªwhen the vehicle leaves
the factory. Using this function, the dynamic
range of the music is slightly reduced. To
make the most of the audiophile sound qual- ity, it is recommended to leave it off.
Switching the automatic volume
adjustment on/off
XPress the Øbutton.
or
XPress Vehiclein the main function bar.
The vehicle menu is displayed.
XTo select System Settings: slide6,
turn and press the controller.
A menu appears.
XTo select Automatic Volume Adjust‐
ment: turn and press the controller.
Switch the Automatic Volume Adjust‐
mentfunction on Oor off ª.
Setting the system language
This function allows you to determine the lan-
guage for the menu displays and the naviga-
tion messages. The selected language affects
the characters available for entry.
iThe navigation announcements are not
available in all languages. If a language is
not available, the navigation announce-
ments will be in English.
iWhen you set the system language, the
language of the Voice Control System will
change accordingly. If it is not supported by
the Voice Control System, English will be
selected.
XPress the Øbutton.
or
XPress Vehiclein the main function bar.
The vehicle menu is displayed.
XTo select System Settings: slide6,
turn and press the controller.
A menu appears.
XTo select Language: turn and press the
controller.
The list of languages appears. The #dot
indicates the current setting.
XSelect the desired language.
COMAND loads the selected language and
sets it.
Calling up and editing the Favorites
function
The Favorites function can, depending on the
vehicle equipment, be called up as follows:
Rvia the System Settingsmenu
Rvia the Favorites button on the controller
(
Ypage 23)
Rvia the Favorites button on the touchpad
(
Ypage 24)
Calling up and editing the Favorites function45
System settings
Z
Page 68 of 222
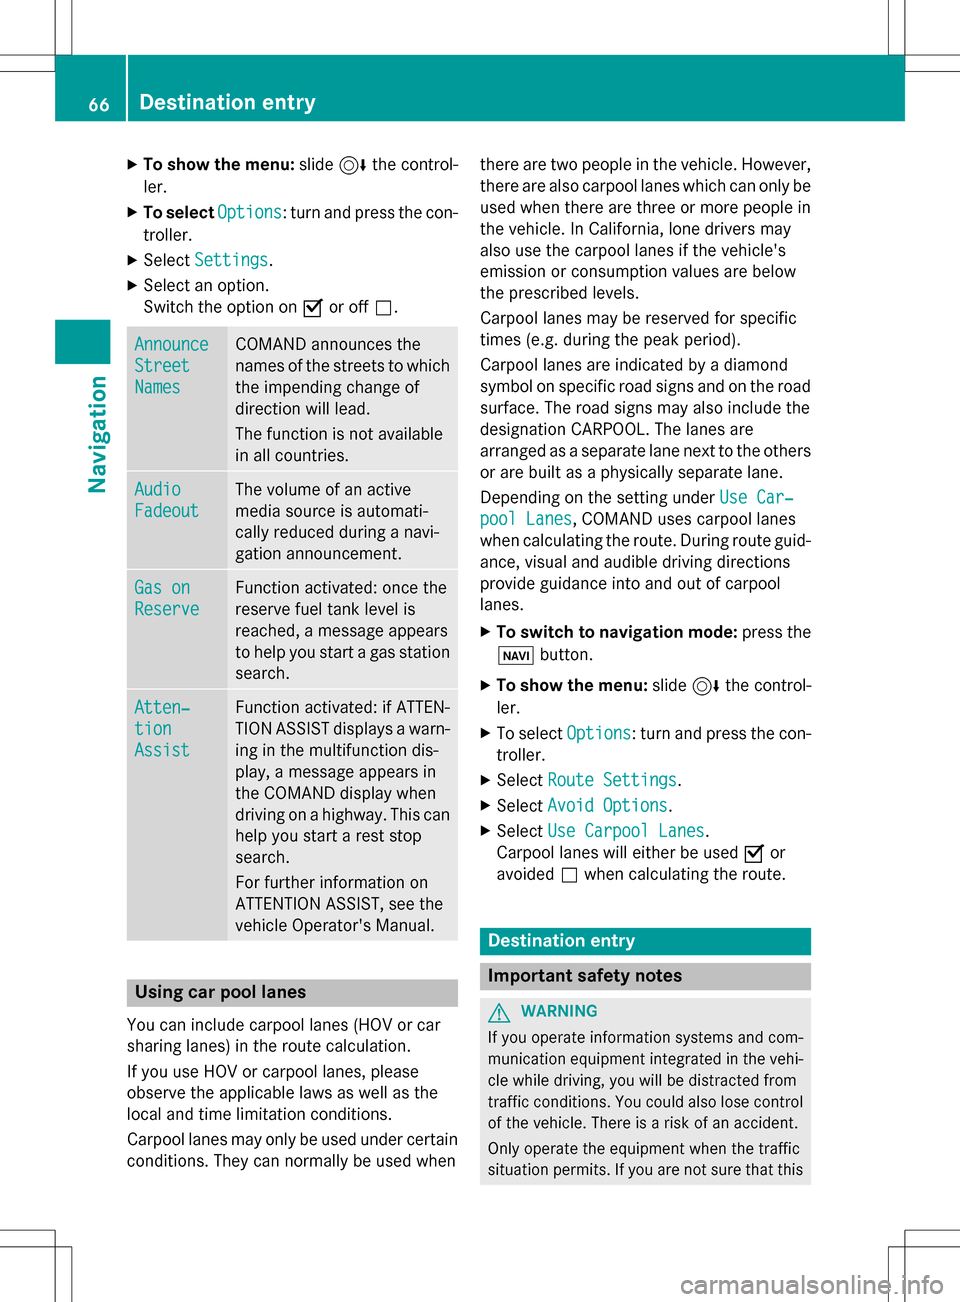
XTo show the menu:slide6the control-
ler.
XTo select Options: turn and press the con-
troller.
XSelect Settings.
XSelect an option.
Switch the option on Oor off ª.
Announce
Street
Names
COMAND announces the
names of the streets to which
the impending change of
direction will lead.
The function is not available
in all countries.
Audio
Fadeout
The volume of an active
media source is automati-
cally reduced during a navi-
gation announcement.
Gas on
Reserve
Function activated: once the
reserve fuel tank level is
reached, a message appears
to help you start a gas station
search.
Atten‐
tion
Assist
Function activated: if ATTEN-
TION ASSIST displays a warn-
ing in the multifunction dis-
play, a message appears in
the COMAND display when
driving on a highway. This can
help you start a rest stop
search.
For further information on
ATTENTION ASSIST, see the
vehicle Operator's Manual.
Using car pool lanes
You can include carpool lanes (HOV or car
sharing lanes) in the route calculation.
If you use HOV or carpool lanes, please
observe the applicable laws as well as the
local and time limitation conditions.
Carpool lanes may only be used under certain
conditions. They can normally be used when there are two people in the vehicle. However,
there are also carpool lanes which can only be
used when there are three or more people in
the vehicle. In California, lone drivers may
also use the carpool lanes if the vehicle's
emission or consumption values are below
the prescribed levels.
Carpool lanes may be reserved for specific
times (e.g. during the peak period).
Carpool lanes are indicated by a diamond
symbol on specific road signs and on the road
surface. The road signs may also include the
designation CARPOOL. The lanes are
arranged as a separate lane next to the others
or are built as a physically separate lane.
Depending on the setting under Use Car‐
pool Lanes, COMAND uses carpool lanes
when calculating the route. During route guid-
ance, visual and audible driving directions
provide guidance into and out of carpool
lanes.
XTo switch to navigation mode: press the
ß button.
XTo show the menu: slide6the control-
ler.
XTo select Options: turn and press the con-
troller.
XSelect Route Settings.
XSelectAvoid Options.
XSelectUse Carpool Lanes.
Carpool lanes will either be used Oor
avoided ªwhen calculating the route.
Destination entry
Important safety notes
GWARNING
If you operate information systems and com-
munication equipment integrated in the vehi-
cle while driving, you will be distracted from
traffic conditions. You could also lose control
of the vehicle. There is a risk of an accident.
Only operate the equipment when the traffic
situation permits. If you are not sure that this
66Destination entry
Navigation
Page 163 of 222

XTo show the menu:press the%but-
ton.
XTo select 3: turn and press the control-
ler.
A menu appears.
XSelect Settings.
You can activate or deactivate the following
settings:
RDownload Images Automatically
It may take some time to download the
contents of websites that contain a large
amount of images. Therefore, it may be
useful to deactivate this option.
RBlock Pop-Ups
Pop-ups are windows (usually with adver-
tisements) which are displayed automati-
cally when you call up a website. You can
block these displays.
RActivate Javascript
Javascript makes it possible to display and
interact with dynamic content on the web-
site.
RAllow Cookies
Some websites save information in small
text files (cookies) on your system. You can
determine whether cookies may be stored.
REnable Internet Audio
You can switch the browser's audio play-
back on or off here.
RHide Scroll Bars
You can show or hide the scroll bar here.
RShow Link Target
You can display the link's URL here.
RCharacter Size
You can select the font size which is used
when displaying the website.
RCharacter Code
You can select a different character set
here, e.g. if the characters of a website
appear distorted.
Changing settings
XTo select the desired setting: turn and
press the controller.
Switch the setting on Oor off ª.
Changing the character size or character code.
XSelect Character SizeorCharacter
Code.
XTo select the setting you require: turn and
press the controller.
iIf you change the settings, the websites
may not be displayed correctly.
Deleting private data
XTo call up Internet functions (Ypage 151).
XTo show the menu: slide 6the controller.
XTo select Settings: slide6, turn and
press the controller.
A menu appears.
XTo select DeletePrivateData: turn and
press the controller.
A menu appears. The #dot indicates the
current setting.
XTo select the setting you require: turn and
press the controller.
or
XSelect Delete All Data On Exit.
Switch the setting on Oor off ª.
Web browser161
Online and Internet functions
Z
Page 179 of 222
Your COMAND equipment................178
Activating medi amode .................... 178
Audio/video mode ............................179
Media search .................................... .185
Media Register .................................. 188
Bluetoot h
®audiomode .................... 192
Operation wit hth eMedia Inter -
face .................................................... 198
Video DVD mode .............................. .200
Pictur eviewer .................................. .205
177
Media
Page 181 of 222
XTo selectMediain media mode: slide 5
and press the controller.
The menu appears with the available media
sources.
XTo select the media source: turn the con-
troller and press to confirm.
If the media source contains music or video
files, these will be played. The correspond-
ing basic menu will be shown.
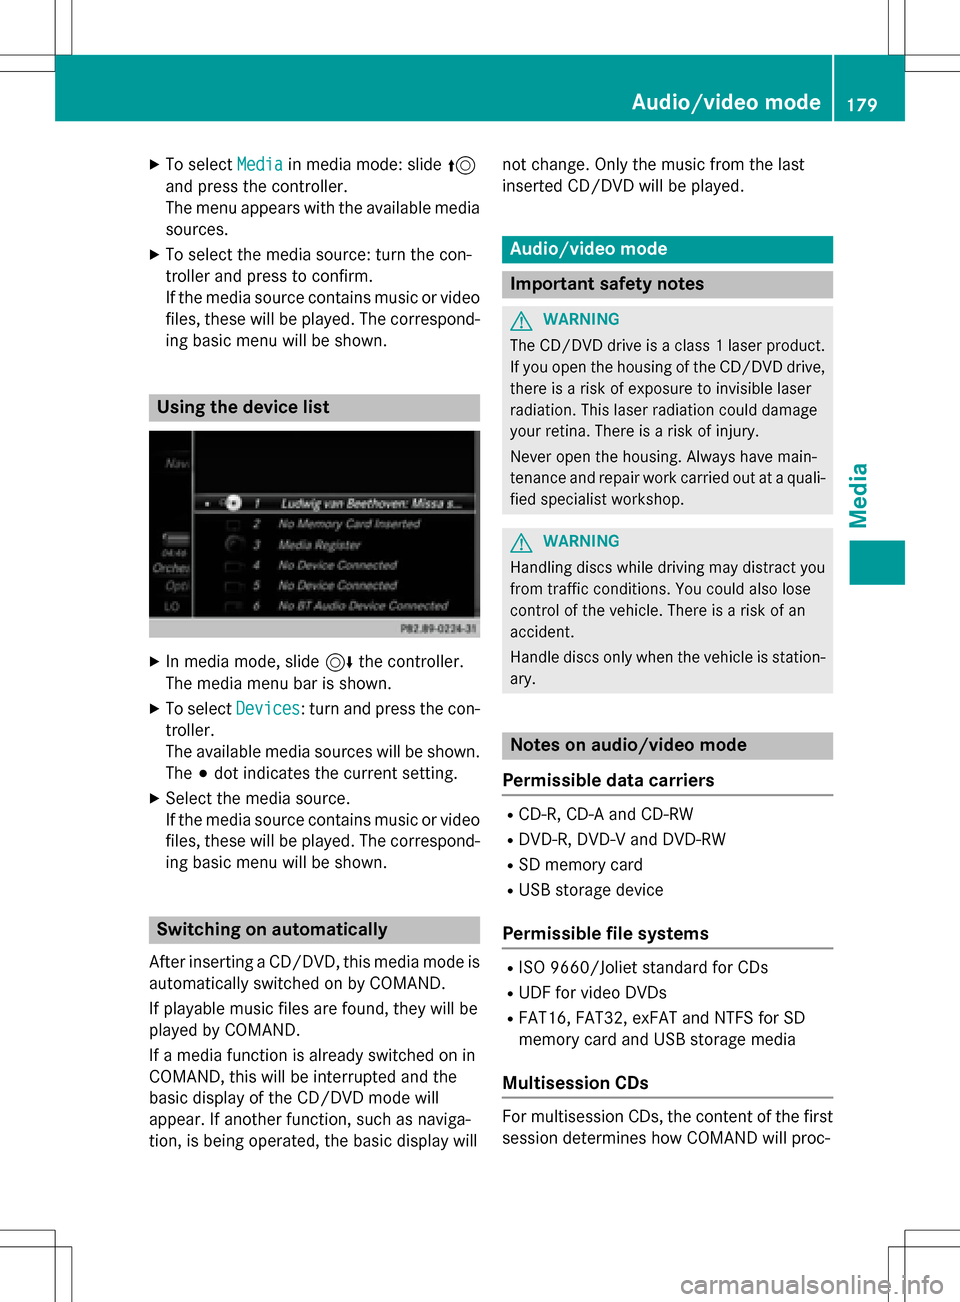
Using the device list
XIn media mode, slide 6the controller.
The media menu bar is shown.
XTo select Devices: turn and press the con-
troller.
The available media sources will be shown.
The #dot indicates the current setting.
XSelect the media source.
If the media source contains music or video
files, these will be played. The correspond-
ing basic menu will be shown.
Switching on automatically
After inserting a CD/DVD, this media mode is
automatically switched on by COMAND.
If playable music files are found, they will be
played by COMAND.
If a media function is already switched on in
COMAND, this will be interrupted and the
basic display of the CD/DVD mode will
appear. If another function, such as naviga-
tion, is being operated, the basic display will not change. Only the music from the last
inserted CD/DVD will be played.
Audio/video mode
Important safety notes
GWARNING
The CD/DVD drive is a class 1 laser product.
If you open the housing of the CD/DVD drive,
there is a risk of exposure to invisible laser
radiation. This laser radiation could damage
your retina. There is a risk of injury.
Never open the housing. Always have main-
tenance and repair work carried out at a quali- fied specialist workshop.
GWARNING
Handling discs while driving may distract you from traffic conditions. You could also lose
control of the vehicle. There is a risk of an
accident.
Handle discs only when the vehicle is station-
ary.
Notes on audio/video mode
Permissible data carriers
RCD-R, CD-A and CD-RW
RDVD-R, DVD-V and DVD-RW
RSD memory card
RUSB storage device
Permissible file systems
RISO 9660/Joliet standard for CDs
RUDF for video DVDs
RFAT16, FAT32, exFAT and NTFS for SD
memory card and USB storage media
Multisession CDs
For multisession CDs, the content of the first
session determines how COMAND will proc-
Audio/video mode179
Media
Z
Page 182 of 222
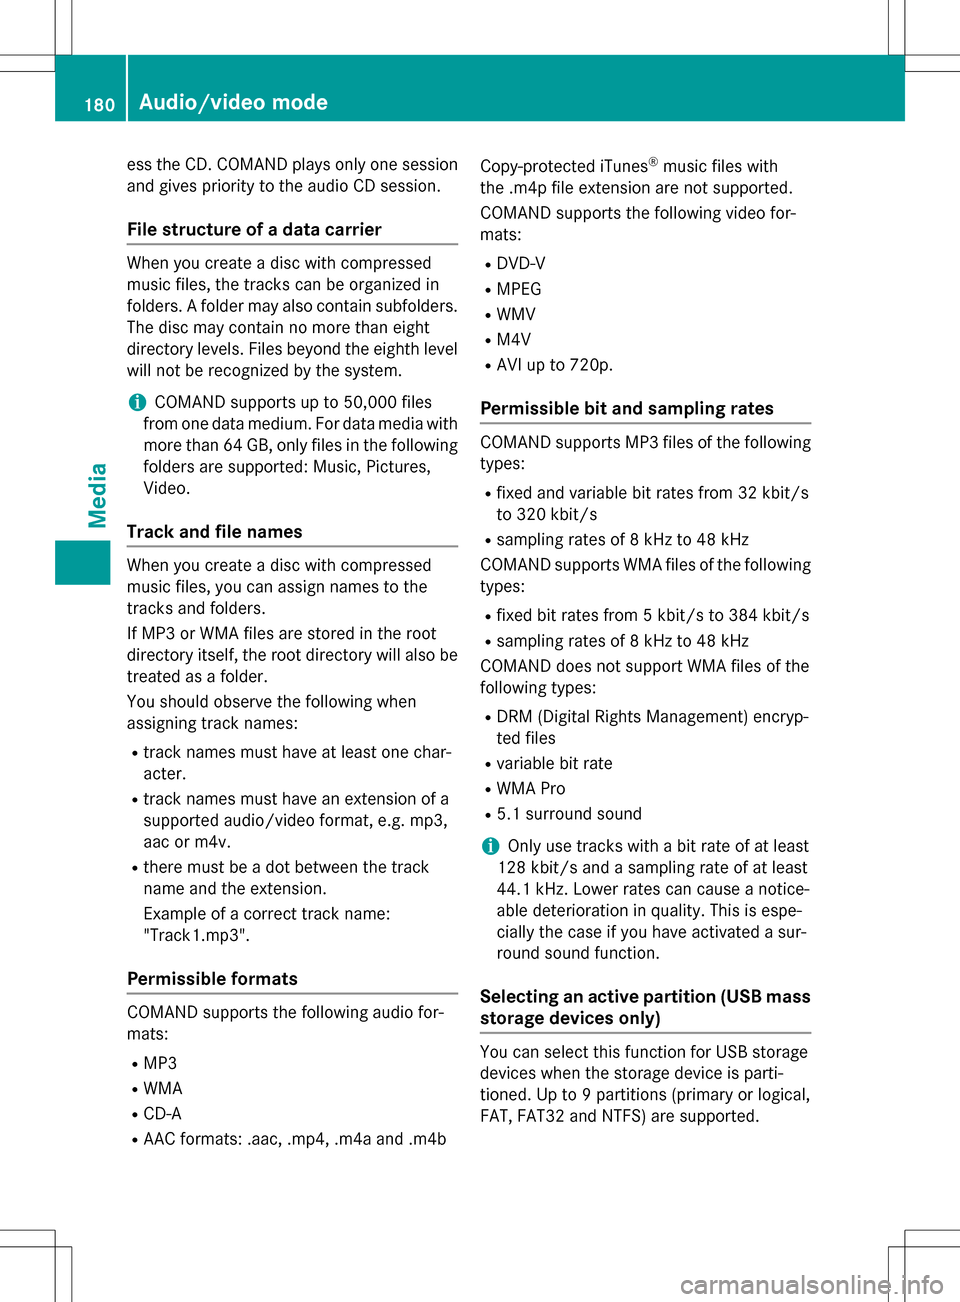
ess the CD. COMAND plays only one sessionand gives priority to the audio CD session.
File structure of a data carrier
When you create a disc with compressed
music files, the tracks can be organized in
folders. A folder may also contain subfolders.
The disc may contain no more than eight
directory levels. Files beyond the eighth level
will not be recognized by the system.
iCOMAND supports up to 50,000 files
from one data medium. For data media with more than 64 GB, only files in the following
folders are supported: Music, Pictures,
Video.
Track and file names
When you create a disc with compressed
music files, you can assign names to the
tracks and folders.
If MP3 or WMA files are stored in the root
directory itself, the root directory will also be
treated as a folder.
You should observe the following when
assigning track names:
Rtrack names must have at least one char-
acter.
Rtrack names must have an extension of a
supported audio/video format, e.g. mp3,
aac or m4v.
Rthere must be a dot between the track
name and the extension.
Example of a correct track name:
"Track1.mp3".
Permissible formats
COMAND supports the following audio for-
mats:
RMP3
RWMA
RCD-A
RAAC formats: .aac, .mp4, .m4a and .m4b Copy-protected iTunes
®music files with
the .m4p file extension are not supported.
COMAND supports the following video for-
mats:
RDVD-V
RMPEG
RWMV
RM4V
RAVI up to 720p.
Permissible bit and sampling rates
COMAND supports MP3 files of the following
types:
Rfixed and variable bit rates from 32 kbit/s
to 320 kbit/s
Rsampling rates of 8 kHz to 48 kHz
COMAND supports WMA files of the following
types:
Rfixed bit rates from 5 kbit/s to 384 kbit/s
Rsampling rates of 8 kHz to 48 kHz
COMAND does not support WMA files of the
following types:
RDRM (Digital Rights Management) encryp-
ted files
Rvariable bit rate
RWMA Pro
R5.1 surround sound
iOnly use tracks with a bit rate of at least
128 kbit/s and a sampling rate of at least
44.1 kHz. Lower rates can cause a notice-
able deterioration in quality. This is espe-
cially the case if you have activated a sur-
round sound function.
Selecting an active partition (USB mass
storage devices only)
You can select this function for USB storage
devices when the storage device is parti-
tioned. Up to 9 partitions (primary or logical,
FAT, FAT32 and NTFS) are supported.
180Audio/video mode
Media
Page 183 of 222
Selecting an active partition
XTo selectOptionsin the media menu bar:
turn and press the controller.
XSelect Select Active Partition.
Notes on copyright
Audio/video files that you create or repro-
duce yourself for playback are generally sub-
ject to copyright protection.
In many countries, reproductions, even for
private use, are not permitted without the
prior consent of the copyright holder.
Make sure that you know about the applicable
copyright regulations and that you comply
with these.
Notes on CDs/DVDs
!COMAND is designed to play discs that
comply with the EN 60908 standard. There-
fore, you can only use discs with a maxi-
mum thickness of 1.3 mm.
If you insert thicker discs, e.g. those that
contain data on both sides (DVD on one
side and audio data on the other), they can-
not be ejected and can damage the device.
Only use round discs with a diameter of
12 cm. Do not use discs with a diameter of
8 cm, even with an adapter.
Discs with copy protection are not compati-
ble with the audio CD standard and therefore
may not be able to be played by COMAND.
Playback problems may occur when playing
copied discs.
There may be playback problems if you play
CDs that you have copied yourself with a stor-
age capacity of more than 700 MB.
iCOMAND is able to play back audio CDs in
multichannel audio format.
Inserting and removing a disc from
the single CD/DVD drive
Before inserting or removing a CD/DVD,
ensure that the cup holder is empty.
XTo insert: press theþbutton on the
single drive.
If there is a disc already inserted, it will be
ejected.
XInsert a disc into the disc slot with the prin-
ted side facing upwards.
The drive closes and the disc is played.
If the CD/DVD is operated in Media mode,
the corresponding basic menu will be
shown. If the CD/DVD is started using
another application (e.g. navigation), the
display will not change.
iThe drive may not be able to play discs
with copy protection.
XTo remove: press theþbutton.
The drive ejects the disc.
XRemove the ejected disc from the slot.
If you do not take the disc out of the slot, it
is drawn in again automatically after a short
while.
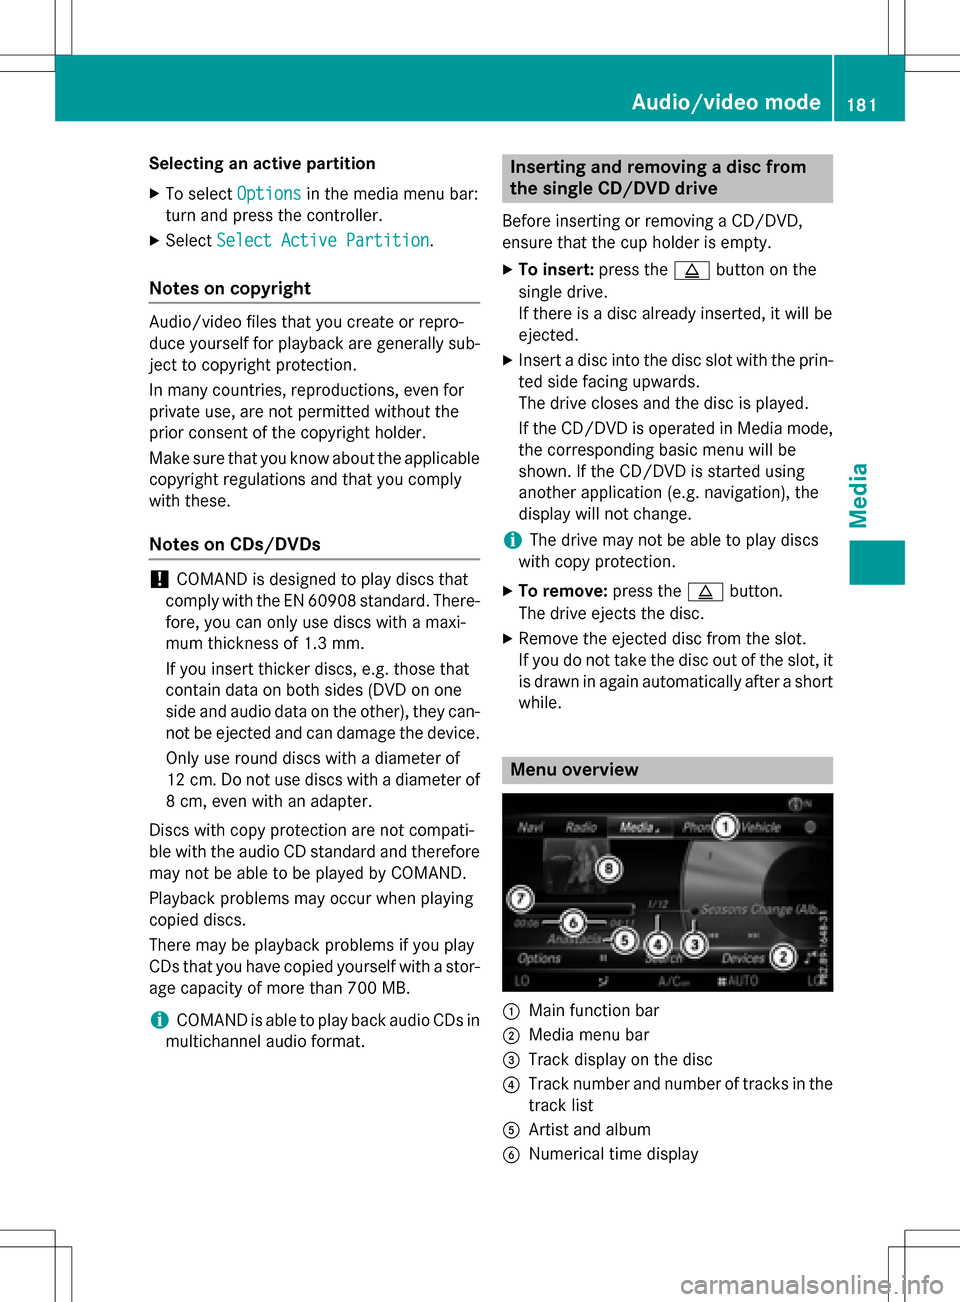
Menu overview
:Main function bar
;Media menu bar
=Track display on the disc
?Track number and number of tracks in the
track list
AArtist and album
BNumerical time display
Audio/video mode181
Media
Z