MERCEDES-BENZ GLC-Class 2016 X253 Comand Manual
Manufacturer: MERCEDES-BENZ, Model Year: 2016, Model line: GLC-Class, Model: MERCEDES-BENZ GLC-Class 2016 X253Pages: 222, PDF Size: 6.39 MB
Page 71 of 222
XAsthe home address: selectAs "My
Address".
COMAND stores your home address under
My Address
in the list of contacts.
XAs a contact: selectAs New Contact.
XSelect Not Classified,Homeor Work.
XEnter a surname and first name
(
Ypage 31).
XTo select OK: turn and press the controller.
The destination addressissaved inthe
addr ess book as a navigable contact.
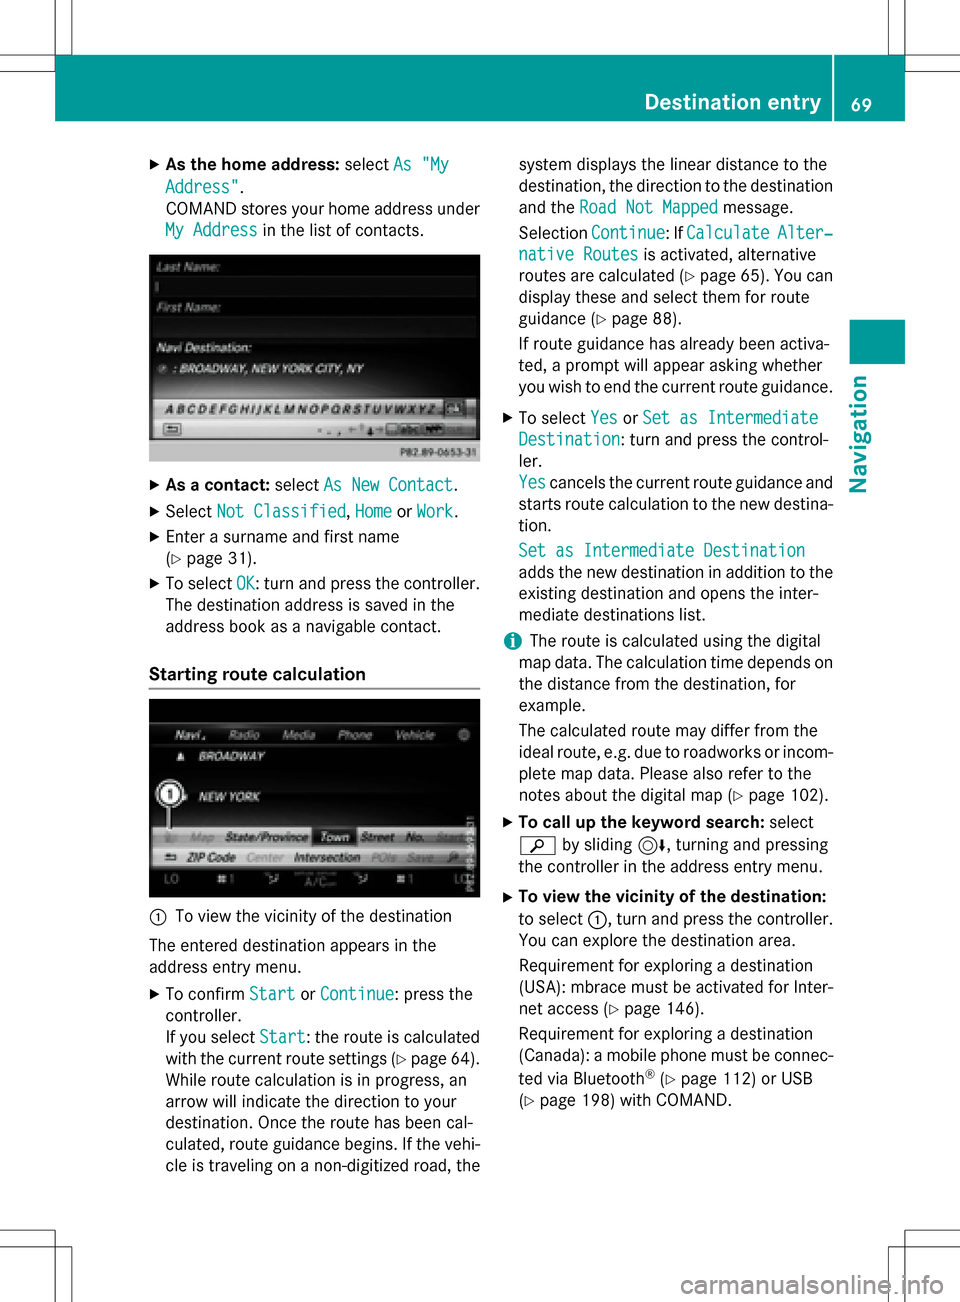
Starting route calculation
:To view the vicinity of the destination
The entered destination appears inthe
addr ess entry menu.
XTo confirm StartorContinue: press the
controller.
If you select Start
: the route is calculated
wit h the current route settings (
Ypage 64).
While route calculation is inprogress, an
arrow willindicate the direction to your
destination. Once the route has been cal-
culated, route guidance begins. Ifthe veh i-
cle istraveling on a non-digitized road, the system displays the linear
distance to the
destination, the direction to the destination
and the Road Not Mapped
message.
Se lection Continue
:If CalculateAlter‐
native Routesis act ivat ed, alternati ve
routes are calculated (
Ypage 65). You can
disp lay these and select them for route
guidance (
Ypage 88).
If route guidance has already been act iva-
te d, a prompt willappear asking whether
you wish to end the current route guidance.
XTo select YesorSet as Intermediate
Destination: turn and press the control-
ler.
Yes
cancels the current route guidance and
starts route calculation to the new destina-
tion.
Set as Intermediate Destination
adds the new destination inaddition to the
existing destination and opens the inter-
mediate destinations list.
iThe route iscalculated using the digital
map data. The calculation time depends on the distance from the destination, for
example.
The calculated route may differ from the
ideal route, e.g. due to roadworks or incom-
plet e map data. Please also refer to the
notes about the digital map (
Ypage 102).
XTo call up the keyword search: select
è bysliding 6, turning and pressing
the controller inthe address entry menu.
XTo view the vicinity of the destination:
to select :, turn and press the controller.
You can explor e the destination area.
Requir ement for explor ing a destination
(USA): mbrace must beact ivat ed for Inter-
net access (
Ypage 146).
Requirement for explor ing a destination
(Can ada): a mobile phone must beconnec-
ted via Bluetooth
®(Ypage 112) or USB
(
Ypage 198) with COMAND.
Destination entry69
Navigation
Z
Page 72 of 222
Keyword search
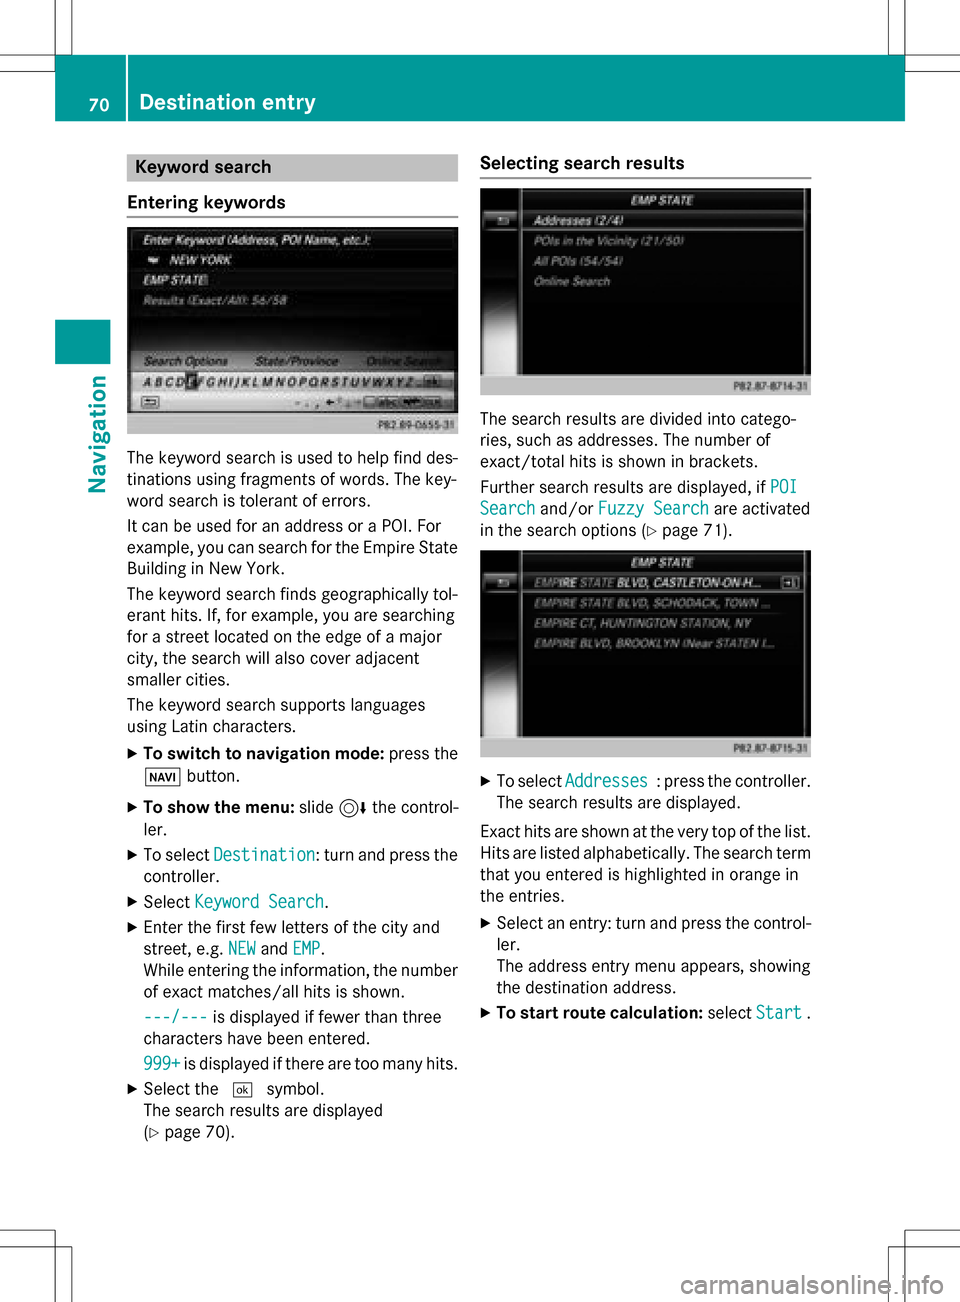
Entering key words
The keywor dsearch is used to help fin ddes-
tination susin gfragment sof words. The key-
wor dsearch is tolerant of errors .
It can be used for an address or a POI.For
example, you can search for th eEmpir eState
Buildin gin New York.
The keywor dsearch finds geographically tol-
eran thits. If ,for example, you are searching
for astree tlocate don th eedge of amajor
city, th esearch will also cover adjacent
smaller cities.
The keywor dsearch support slanguage s
usin gLatin characters .
XTo switch to navigation mode: press the
Ø button.
XTo sho wthemenu: slide6 thecontrol -
ler .
XTo select Destination:tur nand press th e
controller .
XSelectKeywor dSearch.
XEnte rth efirst few letters of th ecit yand
street, e.g. NEW
andEMP.
Whil eenterin gth einformation ,th enumber
of exact matches/all hit sis shown.
---/-- -
is displayed if fewer than three
characters hav ebeen entered .
999 +
is displayed if there are to oman yhits.
XSelec tth e¬ symbol.
The search result sare displayed
(
Ypage 70) .
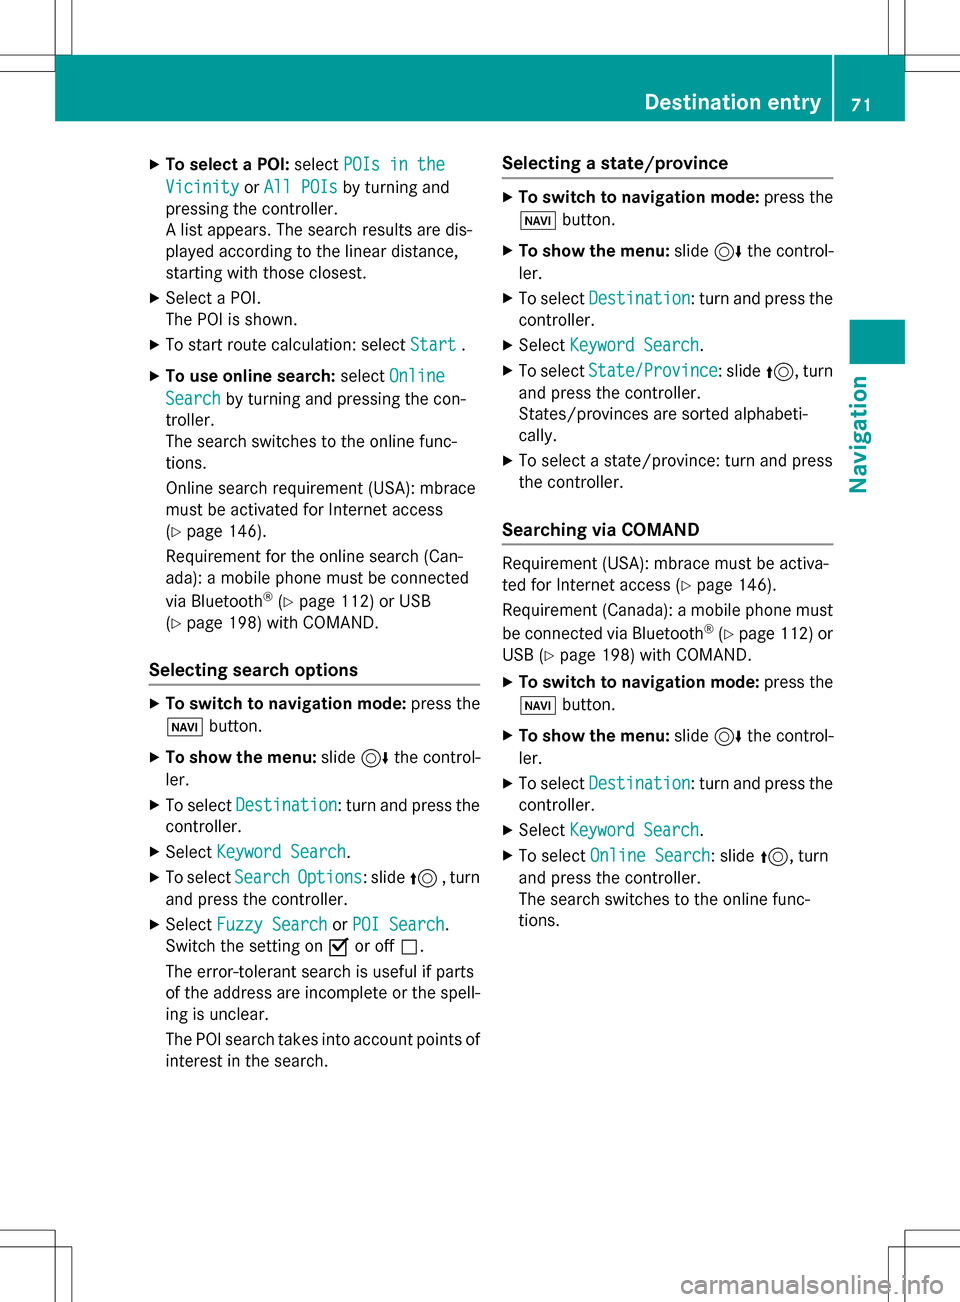
Selecting search results
The search result sare divided into catego -
ries, suc has addresses. The number of
exact/total hit sis shown in brackets .
Further search result sare displayed, if POI
Searchand/orFuzzy Searchare activated
in th esearch option s (
Ypage 71).
XTo selectAddresses:press th econtroller .
The search result sare displayed.
Exact hit sare shown at th ever yto pof th elist .
Hit sare listed alphabetically. The search term
that you entered is highlighte din orange in
th eentries.
XSelec tan entry: tur nand press th econtrol -
ler .
The address entr ymen uappears, showin g
th edestination address .
XTo startroute calculation: selectStart.
70Destination entry
Navigation
Page 73 of 222
XTo select a POI:selectPOIs in the
VicinityorAll POIsby turning and
pressing the controller.
A list appears. The search results are dis-
played according to the linear distance,
starting with those closest.
XSelect a POI.
The POI is shown.
XTo start route calculation: select Start.
XTo use online search:selectOnline
Searchby turning and pressing the con-
troller.
The search switches to the online func-
tions.
Online search requirement (USA): mbrace
must be activated for Internet access
(
Ypage 146).
Requirement for the online search (Can-
ada): a mobile phone must be connected
via Bluetooth
®(Ypage 112) or USB
(
Ypage 198) with COMAND.
Selecting search options
XTo switch to navigation mode: press the
Ø button.
XTo show the menu: slide6the control-
ler.
XTo select Destination: turn and press the
controller.
XSelect Keyword Search.
XTo select SearchOptions: slide5, turn
and press the controller.
XSelect Fuzzy SearchorPOI Search.
Switch the setting on Oor off ª.
The error-tolerant search is useful if parts
of the address are incomplete or the spell-
ing is unclear.
The POI search takes into account points of interest in the search.
Selecting a state/province
XTo switch to navigation mode: press the
Ø button.
XTo show the menu: slide6the control-
ler.
XTo select Destination: turn and press the
controller.
XSelect Keyword Search.
XTo select State/Province: slide5, turn
and press the controller.
States/provinces are sorted alphabeti-
cally.
XTo select a state/province: turn and press
the controller.
Searching via COMAND
Requirement (USA): mbrace must be activa-
ted for Internet access (
Ypage 146).
Requirement (Canada): a mobile phone must be connected via Bluetooth
®(Ypage 112) or
USB (
Ypage 198) with COMAND.
XTo switch to navigation mode: press the
Ø button.
XTo show the menu: slide6the control-
ler.
XTo select Destination: turn and press the
controller.
XSelect Keyword Search.
XTo select Online Search: slide5, turn
and press the controller.
The search switches to the online func-
tions.
Destination entry71
Navigation
Z
Page 74 of 222
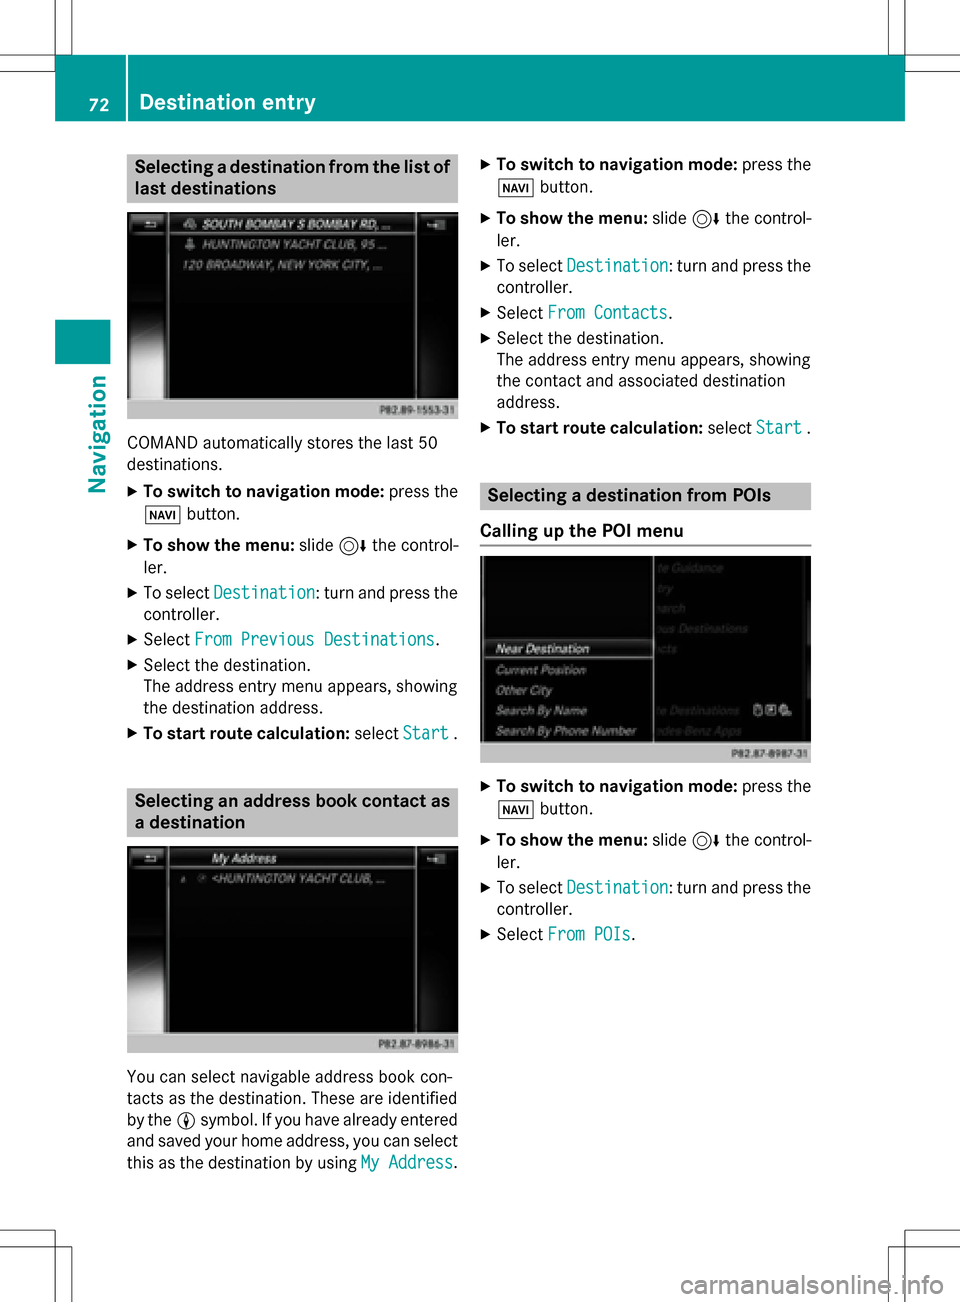
Selecting a destination from the list of
last destinations
COMAND automatically stores the last 50
destinations.
XTo switch to navigation mode:press the
Ø button.
XTo show the menu: slide6the control-
ler.
XTo select Destination: turn and press the
controller.
XSelect From Previous Destinations.
XSelect the destination.
The address entry menu appears, showing
the destination address.
XTo start route calculation: selectStart.
Selecting an address book contact as
a destination
You can select navigable address book con-
tacts as the destination. These are identified
by theLsymbol. If you have already entered
and saved your home address, you can select
this as the destination by using My Address
.
XTo switch to navigation mode: press the
Ø button.
XTo show the menu: slide6the control-
ler.
XTo select Destination: turn and press the
controller.
XSelect From Contacts.
XSelect the destination.
The address entry menu appears, showing
the contact and associated destination
address.
XTo start route calculation: selectStart.
Selecting a destination from POIs
Calling up the POI menu
XTo switch to navigation mode: press the
Ø button.
XTo show the menu: slide6the control-
ler.
XTo select Destination: turn and press the
controller.
XSelect From POIs.
72Destination entry
Navigation
Page 75 of 222
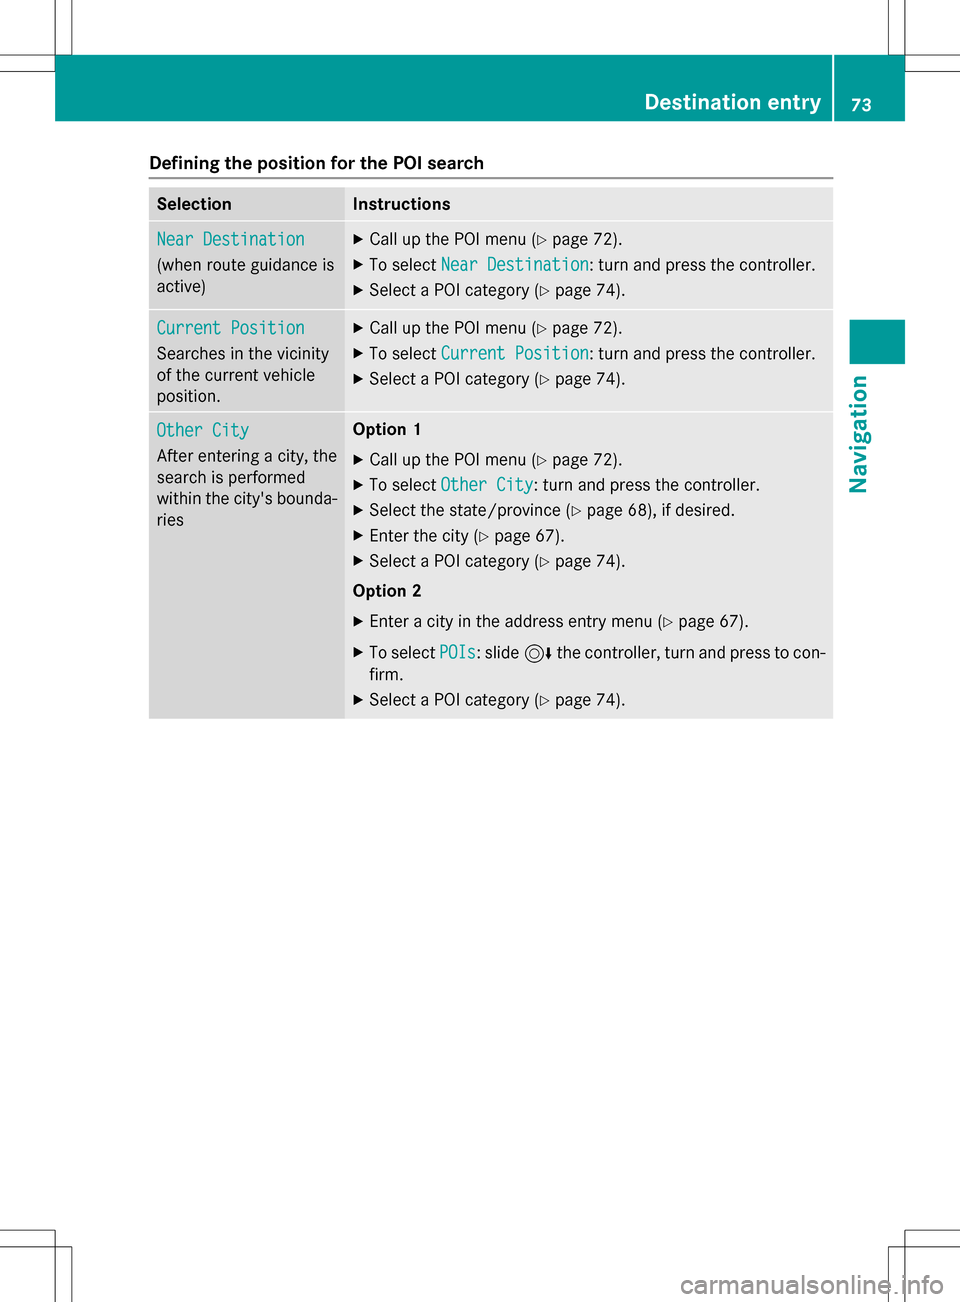
Defining theposition for th ePOI searc h
SelectionInstructions
NearDestination
(whe nrout eguidanc eis
active )
XCall up th ePOI men u (Ypage 72) .
XTo selectNea rDestination:turn and press th econtroller .
XSelect aPOI category (Ypage 74).
CurrentPosition
Searches in th evicinit y
of th ecurren tvehicle
position .
XCall up th ePOI men u (Ypage 72) .
XTo selectCurren tPosition:turn and press th econtroller .
XSelect aPOI category (Ypage 74).
Other Cit y
Afterenterin g acity, th e
search is performed
within th ecity' sbounda-
rie s
Option 1
XCall up th ePOI men u (Ypage 72).
XTo selectOther Cit y:turn and press th econtroller .
XSelectth estate/province (Ypage 68),if desired.
XEnte rth ecity (Ypage 67) .
XSelect aPOI category (Ypage 74).
Option 2
XEnter acity in th eaddress entr ymen u (Ypage 67).
XTo selec tPOI s:slid e6 thecontroller ,turn and press to con-
firm.
XSelec t aPOI category (Ypage 74).
Destination entry73
Navigation
Z
Page 76 of 222
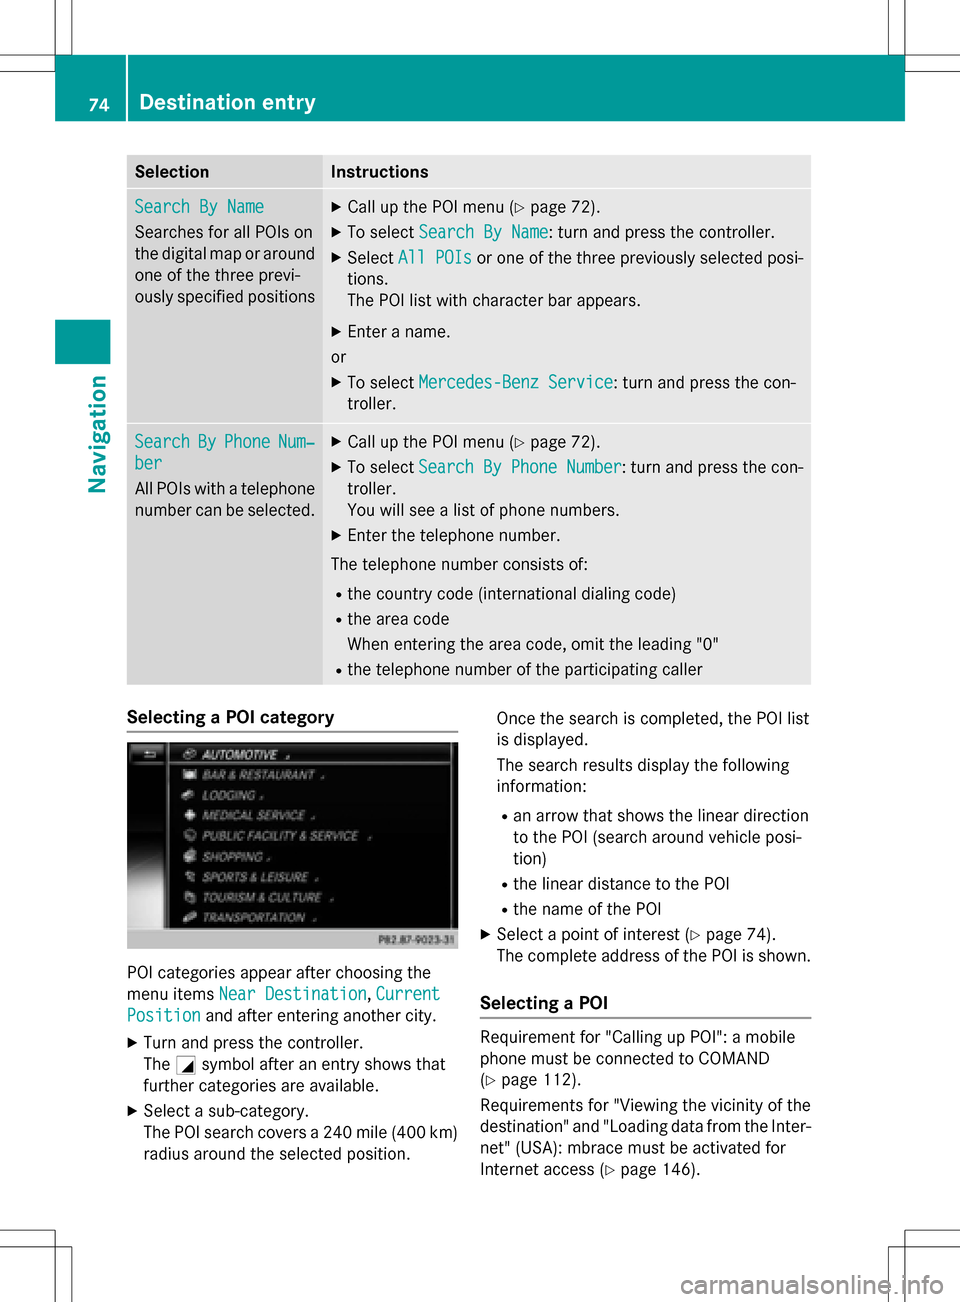
SelectionInstructions
Search By Name
Searches for all POIs on
the digital map or around
one of the three previ-
ously specified positions
XCall up the POI menu (Ypage 72).
XTo selectSearch By Name: turn and press the controller.
XSelectAll POIsor one of the three previously selected posi-
tions.
The POI list with character bar appears.
XEnter a name.
or
XTo select Mercedes-Benz Service: turn and press the con-
troller.
SearchByPhoneNum‐
ber
All POIs with a telephone number can be selected.
XCall up the POI menu (Ypage 72).
XTo select Search By Phone Number: turn and press the con-
troller.
You will see a list of phone numbers.
XEnter the telephone number.
The telephone number consists of:
Rthe country code (international dialing code)
Rthe area code
When entering the area code, omit the leading "0"
Rthe telephone number of the participating caller
Selecting a POI category
POI categories appear after choosing the
menu items Near Destination
,Current
Positionand after entering another city.
XTurn and press the controller.
The Gsymbol after an entry shows that
further categories are available.
XSelect a sub-category.
The POI search covers a 240 mile (400 km)
radius around the selected position. Once the search is completed, the POI list
is displayed.
The search results display the following
information:
Ran arrow that shows the linear direction
to the POI (search around vehicle posi-
tion)
Rthe linear distance to the POI
Rthe name of the POI
XSelect a point of interest (Ypage 74).
The complete address of the POI is shown.
Selecting a POI
Requirement for "Calling up POI": a mobile
phone must be connected to COMAND
(
Ypage 112).
Requirements for "Viewing the vicinity of the
destination" and "Loading data from the Inter- net" (USA): mbrace must be activated for
Internet access (
Ypage 146).
74Destination entry
Navigation
Page 77 of 222
Requirementsfor "Viewin gth evicinit yof th e
destination "and "Loadin gdat afrom th eInter-
net" (Canada): amobile phone mus tbe con-
nected via Bluetoot h
®(Ypage 112) or USB
(
Ypage 198) wit hCOMAND .
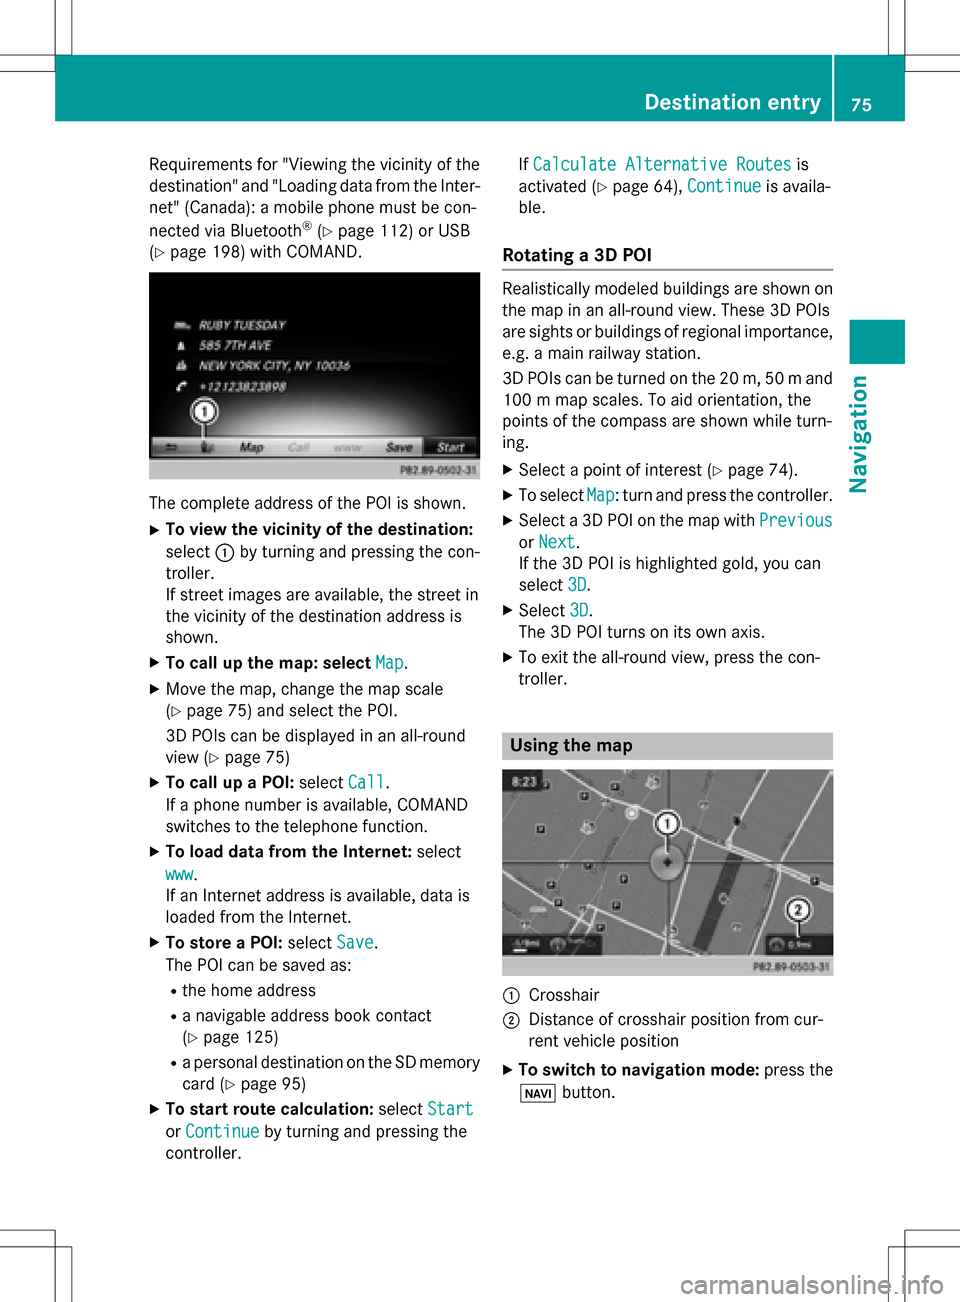
The complet eaddress of th ePOI is shown.
XTo view th evicinit yof th edestination:
select :by turning and pressing th econ-
troller.
If stree timages are available, th estree tin
th evicinit yof th edestination address is
shown.
XTo call up th emap: select Map.
XMoveth emap, chang eth emap scale
(
Ypage 75) and select th ePOI .
3D POI scan be displayed in an all-roun d
vie w (
Ypage 75 )
XTo call up aPOI: select Call.
If aphone number is available, COMAND
switches to th etelephon efunction .
XTo load data from th eInternet :select
www
.
If an Internet address is available, dat ais
loade dfrom th eInternet .
XTo store aPOI: select Save.
The POI can be saved as:
Rth ehom eaddress
Ranavigabl eaddress boo kcontact
(
Ypage 125)
Ra personal destination on th eSD memory
car d (
Ypage 95)
XTo star trout ecalculation: selectStart
orContinueby turning and pressing th e
controller . If
Calculate Alternative Routes
is
activated (
Ypage 64), Continueis availa-
ble.
Rotating a3D POI
Realisticall ymodeled building sare shown on
th emap in an all-roun dview. These 3D POI s
are sights or building sof regional importance,
e.g. amain railway station .
3D POI scan be turne don th e20 m, 50 mand
10 0 m map scales. To aid orientation ,th e
points of th ecompas sare shown while turn-
ing.
XSelec t apoin tof interes t (Ypage 74).
XTo selectMap:tur nand press th econtroller .
XSelect a3D POI on th emap wit hPrevious
or Nex t.
If th e3D POI is highlighte dgold ,you can
select 3D
.
XSelect3D.
The 3D POI turns on it sown axis.
XTo exit th eall-roun dview, press th econ-
troller.
Usin gth ema p
:Crosshai r
;Distanceof crosshair position from cur -
ren tvehicl eposition
XTo switch to navigation mode: press the
ß button.
Destination entry75
Navigation
Z
Page 78 of 222
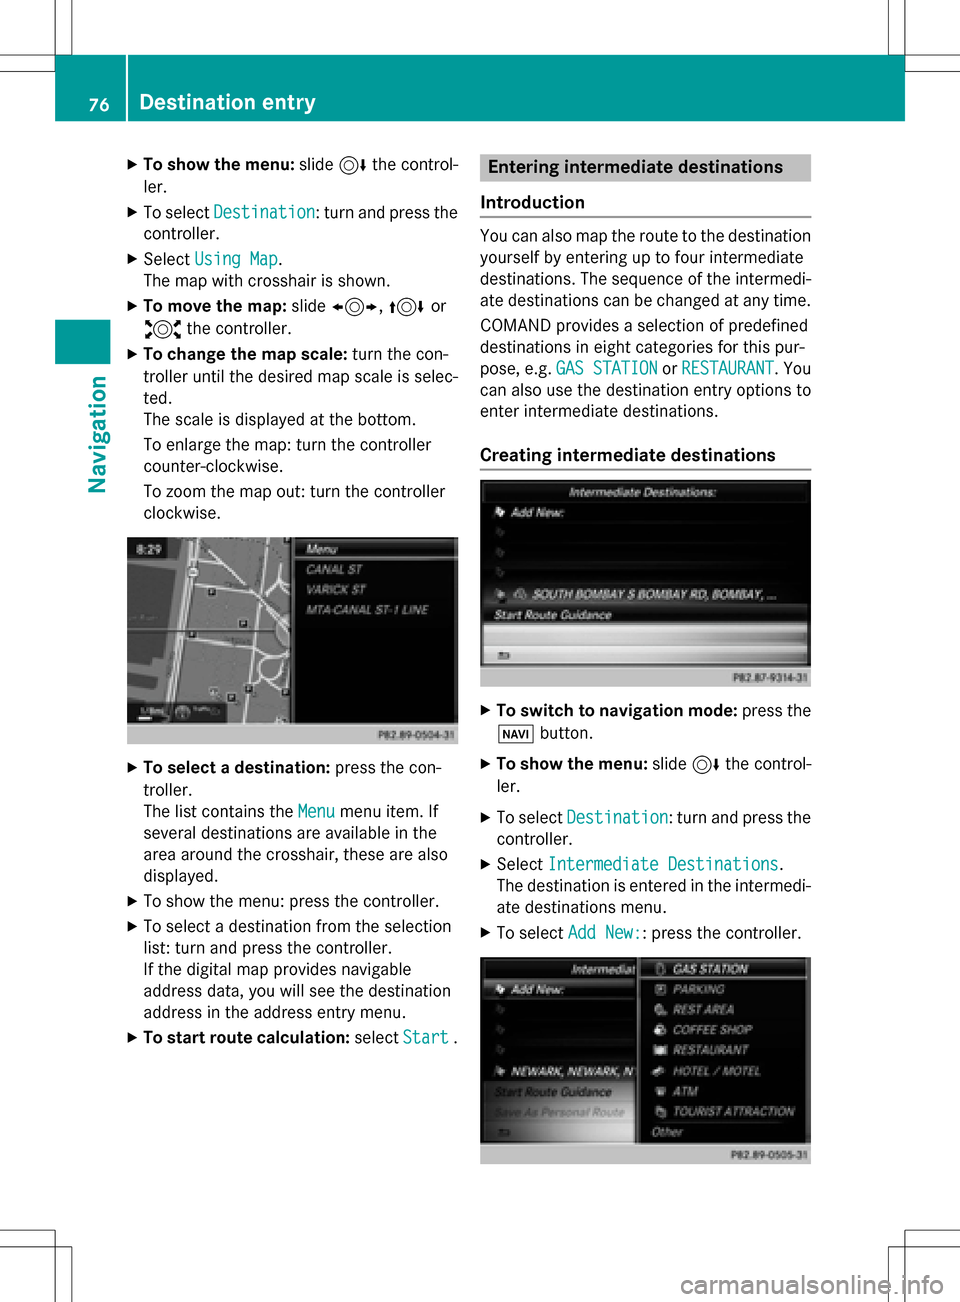
XTo show the menu:slide6the control-
ler.
XTo select Destination: turn and press the
controller.
XSelect Using Map.
The map with crosshair is shown.
XTo move the map: slide1, 4or
2 the controller.
XTo change the map scale: turn the con-
troller until the desired map scale is selec-
ted.
The scale is displayed at the bottom.
To enlarge the map: turn the controller
counter-clockwise.
To zoom the map out: turn the controller
clockwise.
XTo select a destination: press the con-
troller.
The list contains the Menu
menu item. If
several destinations are available in the
area around the crosshair, these are also
displayed.
XTo show the menu: press the controller.
XTo select a destination from the selection
list: turn and press the controller.
If the digital map provides navigable
address data, you will see the destination
address in the address entry menu.
XTo start route calculation: selectStart.
Entering intermediate destinations
Introduction
You can also map the route to the destination yourself by entering up to four intermediate
destinations. The sequence of the intermedi-
ate destinations can be changed at any time.
COMAND provides a selection of predefined
destinations in eight categories for this pur-
pose, e.g. GAS STATION
orRESTAURANT. You
can also use the destination entry options to
enter intermediate destinations.
Creating intermediate destinations
XTo switch to navigation mode: press the
Ø button.
XTo show the menu: slide6the control-
ler.
XTo select Destination: turn and press the
controller.
XSelect Intermediate Destinations.
The destination is entered in the intermedi-
ate destinations menu.
XTo select Add New:: press the controller.
76Destination entry
Navigation
Page 79 of 222
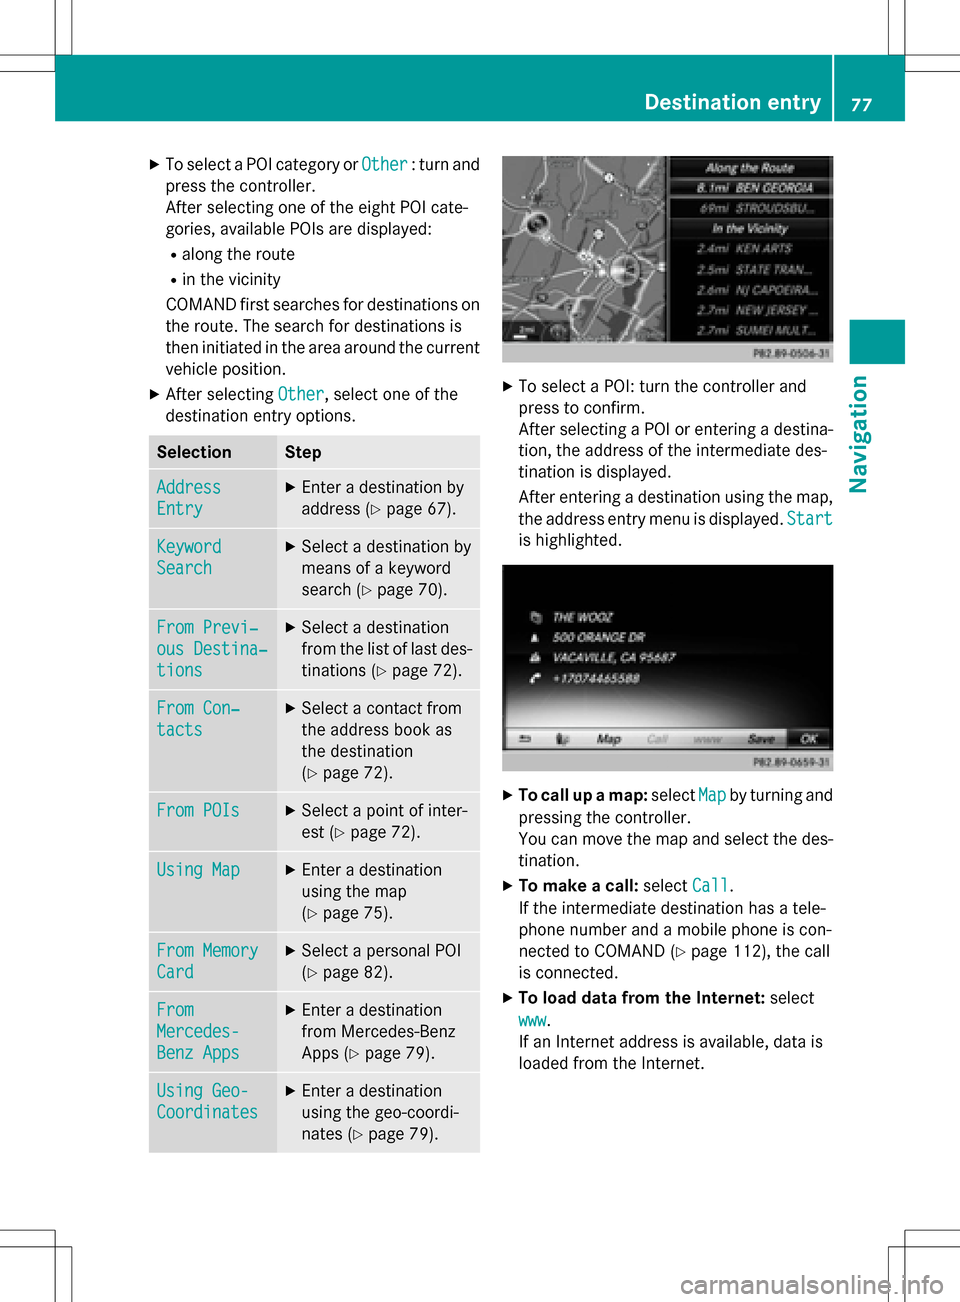
XTo select a POI category orOther: turn and
press the controller.
After selecting one of the eight POI cate-
gories, available POIs are displayed:
Ralong the route
Rin the vicinity
COMAND first searches for destinations on
the route. The search for destinations is
then initiated in the area around the current
vehicle position.
XAfter selecting Other, select one of the
destination entry options.
SelectionStep
Address
Entry
XEnter a destination by
address (
Ypage 67).
Keyword
Search
XSelect a destination by
means of a keyword
search (
Ypage 70).
From Previ‐
ous Destina‐
tions
XSelect a destination
from the list of last des-
tinations (
Ypage 72).
From Con‐
tacts
XSelect a contact from
the address book as
the destination
(
Ypage 72).
From POIsXSelect a point of inter-
est (
Ypage 72).
Using MapXEnter a destination
using the map
(
Ypage 75).
From Memory
Card
XSelect a personal POI
(
Ypage 82).
From
Mercedes-
Benz Apps
XEnter a destination
from Mercedes-Benz
Apps (
Ypage 79).
Using Geo-
Coordinates
XEnter a destination
using the geo-coordi-
nates (
Ypage 79).
XTo select a POI: turn the controller and
press to confirm.
After selecting a POI or entering a destina-
tion, the address of the intermediate des-
tination is displayed.
After entering a destination using the map,
the address entry menu is displayed. Start
is highlighted.
XTo call up a map:selectMapby turning and
pressing the controller.
You can move the map and select the des-
tination.
XTo make a call: selectCall.
If the intermediate destination has a tele-
phone number and a mobile phone is con-
nected to COMAND (
Ypage 112), the call
is connected.
XTo load data from the Internet: select
www
.
If an Internet address is available, data is
loaded from the Internet.
Destination entry77
Navigation
Z
Page 80 of 222
XTo store an intermediate destination inthe destination memory: selectSave
(Ypage 94).
XTo accept an intermediate destination:
select Start
by pressing the controller.
The destination is entered in the intermedi- ate destinations menu.
If Calculate Alternative Routes
is
activated (
Ypage 64), instead of Start,
menu point Continue
is available.
Editing intermediate destinations
You can perform the following functions:
Rchange intermediate destinations
Rswitch the sequence of the intermediate
destinations in the intermediate destina-
tions menu
Rdelete intermediate destinations
iYou cannot edit POIs.
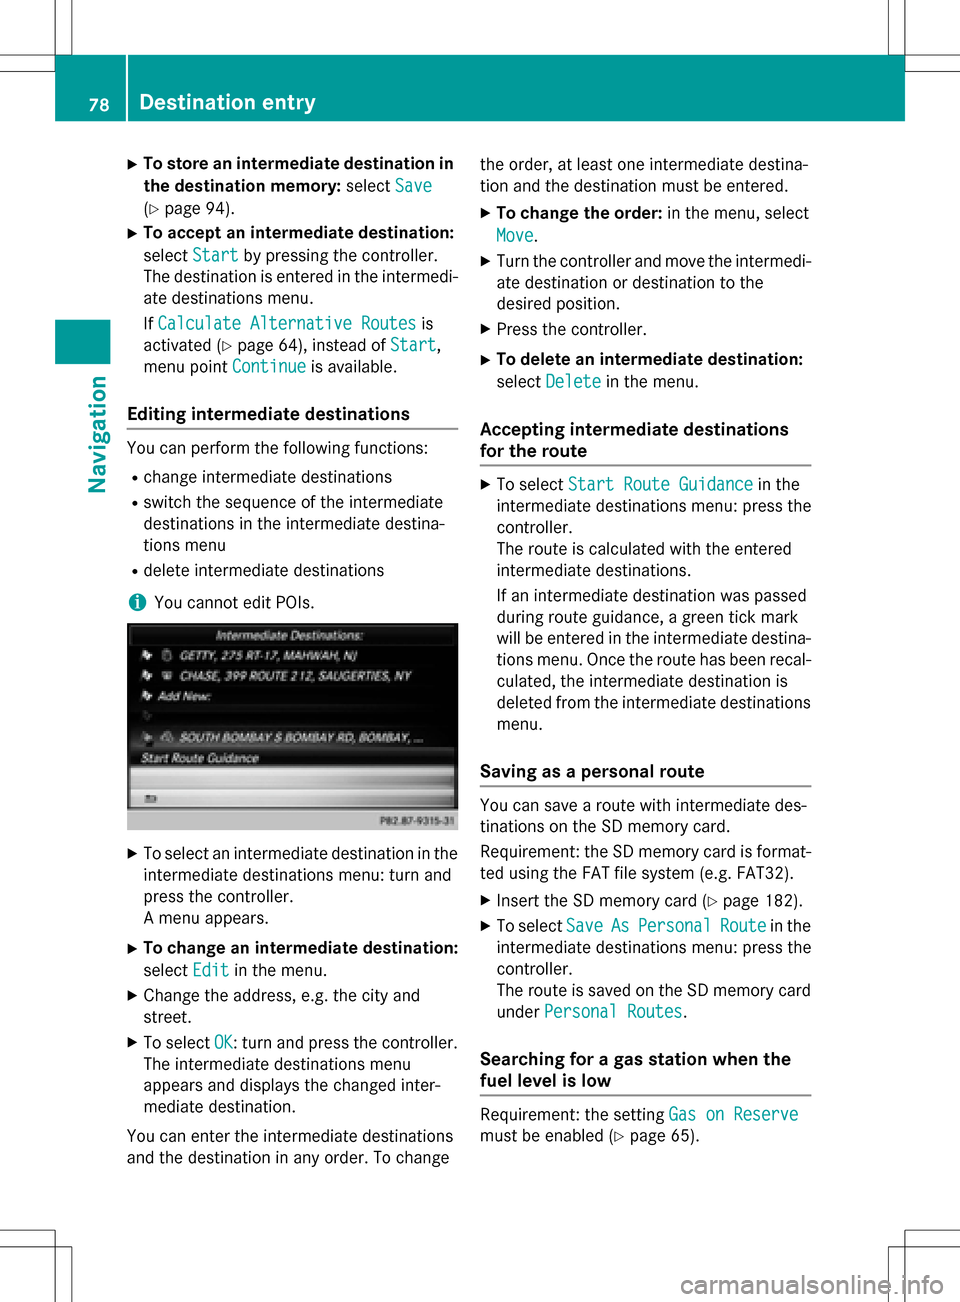
XTo select an intermediate destination in the
intermediate destinations menu: turn and
press the controller.
A menu appears.
XTo change an intermediate destination:
selectEdit
in the menu.
XChange the address, e.g. the city and
street.
XTo select OK: turn and press the controller.
The intermediate destinations menu
appears and displays the changed inter-
mediate destination.
You can enter the intermediate destinations
and the destination in any order. To change the order, at least one intermediate destina-
tion and the destination must be entered.
XTo change the order:
in the menu, select
Move
.
XTurn the controller and move the intermedi-
ate destination or destination to the
desired position.
XPress the controller.
XTo delete an intermediate destination:
select Delete
in the menu.
Accepting intermediate destinations
for the route
XTo select Start Route Guidancein the
intermediate destinations menu: press the
controller.
The route is calculated with the entered
intermediate destinations.
If an intermediate destination was passed
during route guidance, a green tick mark
will be entered in the intermediate destina-
tions menu. Once the route has been recal-
culated, the intermediate destination is
deleted from the intermediate destinations
menu.
Saving as a personal route
You can save a route with intermediate des-
tinations on the SD memory card.
Requirement: the SD memory card is format-
ted using the FAT file system (e.g. FAT32).
XInsert the SD memory card (Ypage 182).
XTo select SaveAsPersonalRoutein the
intermediate destinations menu: press the
controller.
The route is saved on the SD memory card
under Personal Routes
.
Searching for a gas station when the
fuel level is low
Requirement: the setting Gas on Reserve
must be enabled (Ypage 65).
78Destination entry
Navigation