change wheel MERCEDES-BENZ GLC COUPE 2016 User Guide
[x] Cancel search | Manufacturer: MERCEDES-BENZ, Model Year: 2016, Model line: GLC COUPE, Model: MERCEDES-BENZ GLC COUPE 2016Pages: 389, PDF Size: 7.34 MB
Page 159 of 389
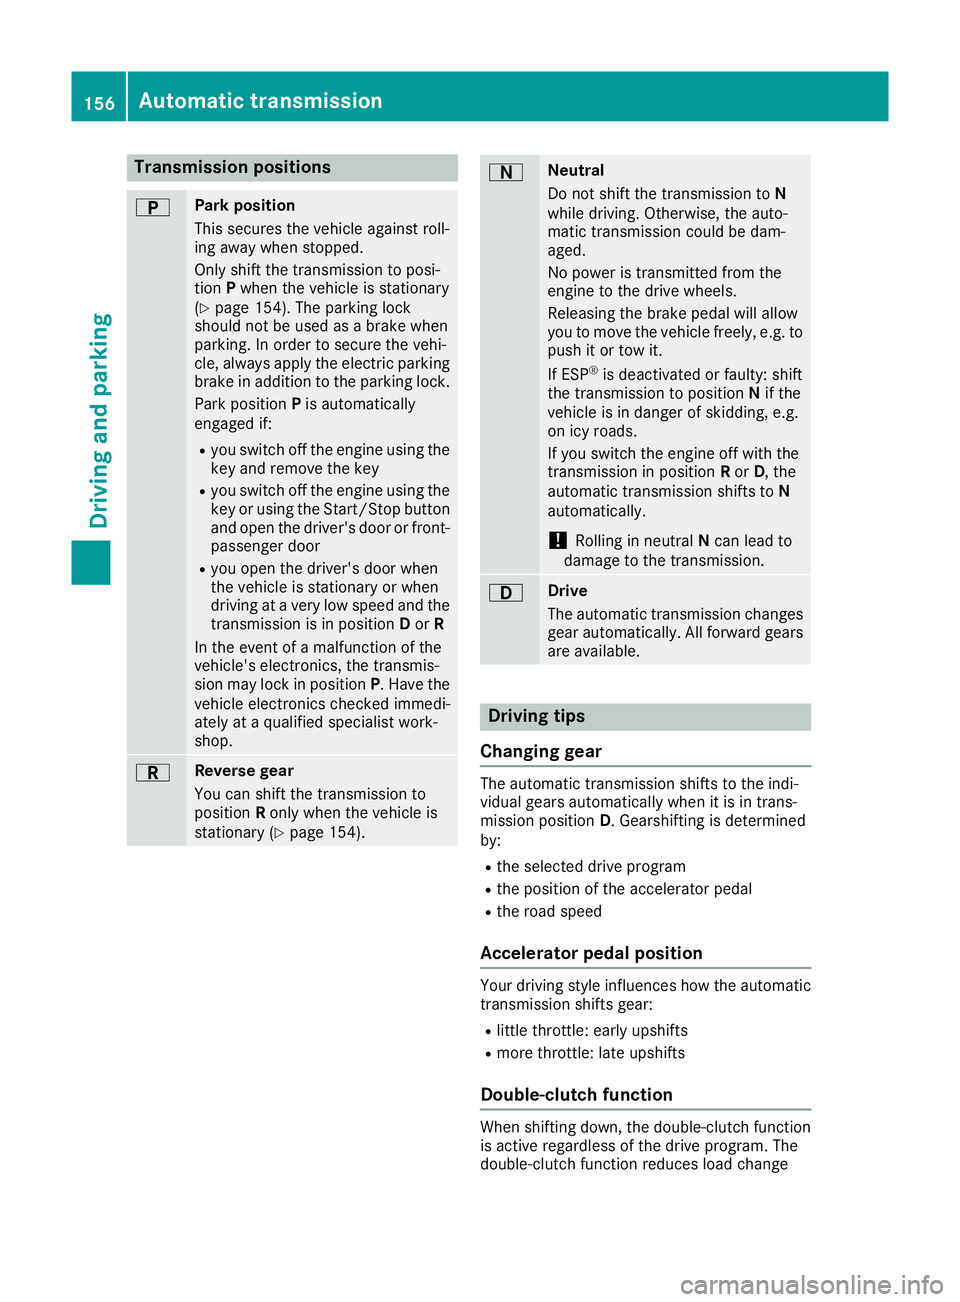
Transmission positions
B Park position
This secures the vehicle against roll-
ing away when stopped.
Only shift the transmission to posi-
tion Pwhen the vehicle is stationary
(Y page 154). The parking lock
should not be used as a brake when
parking. In order to secure the vehi-
cle, always apply the electric parking brake in addition to the parking lock.
Park position Pis automatically
engaged if:
R you switch off the engine using the
key and remove the key
R you switch off the engine using the
key or using the Start/Stop button
and open the driver's door or front- passenger door
R you open the driver's door when
the vehicle is stationary or when
driving at a very low speed and the
transmission is in position Dor R
In the event of a malfunction of the
vehicle's electronics, the transmis-
sion may lock in position P. Have the
vehicle electronics checked immedi-
ately at a qualified specialist work-
shop. C Reverse gear
You can shift the transmission to
position Ronly when the vehicle is
stationary (Y page 154). A Neutral
Do not shift the transmission to
N
while driving. Otherwise, the auto-
matic transmission could be dam-
aged.
No power is transmitted from the
engine to the drive wheels.
Releasing the brake pedal will allow
you to move the vehicle freely, e.g. to push it or tow it.
If ESP ®
is deactivated or faulty: shift
the transmission to position Nif the
vehicle is in danger of skidding, e.g.
on icy roads.
If you switch the engine off with the
transmission in position Ror D, the
automatic transmission shifts to N
automatically.
! Rolling in neutral
Ncan lead to
damage to the transmission. 7 Drive
The automatic transmission changes
gear automatically. All forward gears
are available. Driving tips
Changing gear The automatic transmission shifts to the indi-
vidual gears automatically when it is in trans-
mission position
D. Gearshifting is determined
by:
R the selected drive program
R the position of the accelerator pedal
R the road speed
Accelerator pedal position Your driving style influences how the automatic
transmission shifts gear:
R little throttle: early upshifts
R more throttle: late upshifts
Double-clutch function When shifting down, the double-clutch function
is active regardless of the drive program. The
double-clutch function reduces load change 156
Automatic transmissionDriving an
d parking
Page 160 of 389
reactions and is conducive to a sporty driving
style. The sound generated by the double-clutch
function depends on the drive program.
Kickdown Use kickdown for maximum acceleration:
X Depress the accelerator pedal beyond the
pressure point.
The automatic transmission shifts to a lower
gear depending on the engine speed.
X Ease off the accelerator pedal once the
desired speed is reached.
The automatic transmission shifts back up.
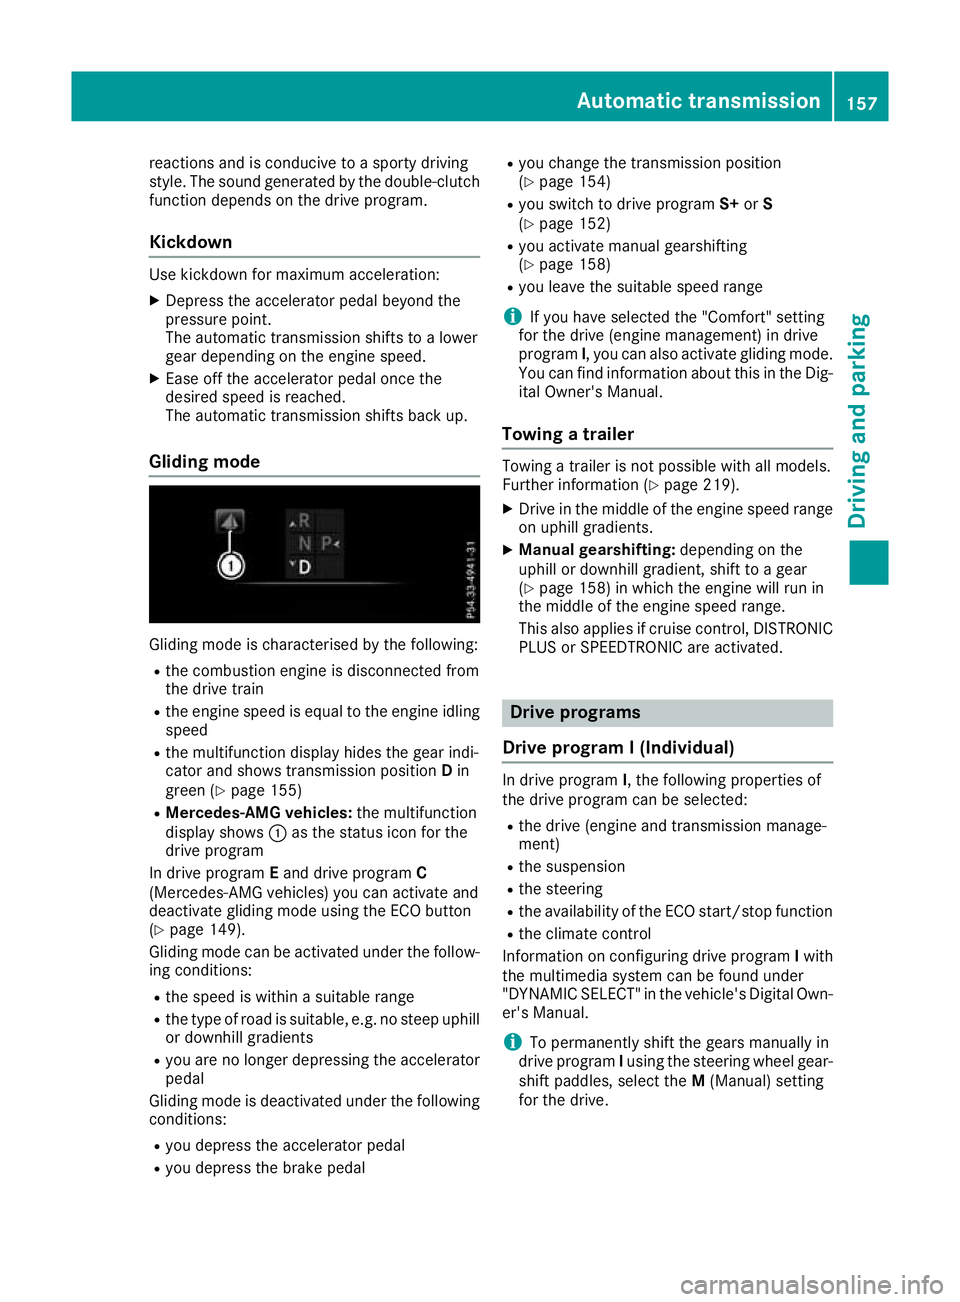
Gliding mode Gliding mode is characterised by the following:
R the combustion engine is disconnected from
the drive train
R the engine speed is equal to the engine idling
speed
R the multifunction display hides the gear indi-
cator and shows transmission position Din
green (Y page 155)
R Mercedes-AMG vehicles: the multifunction
display shows :as the status icon for the
drive program
In drive program Eand drive program C
(Mercedes-AMG vehicles) you can activate and
deactivate gliding mode using the ECO button
(Y page 149).
Gliding mode can be activated under the follow-
ing conditions:
R the speed is within a suitable range
R the type of road is suitable, e.g. no steep uphill
or downhill gradients
R you are no longer depressing the accelerator
pedal
Gliding mode is deactivated under the following
conditions:
R you depress the accelerator pedal
R you depress the brake pedal R
you change the transmission position
(Y page 154)
R you switch to drive program S+orS
(Y page 152)
R you activate manual gearshifting
(Y page 158)
R you leave the suitable speed range
i If you have selected the "Comfort" setting
for the drive (engine management) in drive
program I, you can also activate gliding mode.
You can find information about this in the Dig- ital Owner's Manual.
Towing a trailer Towing a trailer is not possible with all models.
Further information (Y
page 219).
X Drive in the middle of the engine speed range
on uphill gradients.
X Manual gearshifting: depending on the
uphill or downhill gradient, shift to a gear
(Y page 158) in which the engine will run in
the middle of the engine speed range.
This also applies if cruise control, DISTRONIC PLUS or SPEEDTRONIC are activated. Drive programs
Drive program I (Individual) In drive program
I, the following properties of
the drive program can be selected:
R the drive (engine and transmission manage-
ment)
R the suspension
R the steering
R the availability of the ECO start/stop function
R the climate control
Information on configuring drive program Iwith
the multimedia system can be found under
"DYNAMIC SELECT" in the vehicle's Digital Own- er's Manual.
i To permanently shift the gears manually in
drive program Iusing the steering wheel gear-
shift paddles, select the M(Manual) setting
for the drive. Automatic transmission
157Driving and parking Z
Page 162 of 389
Temporary setting
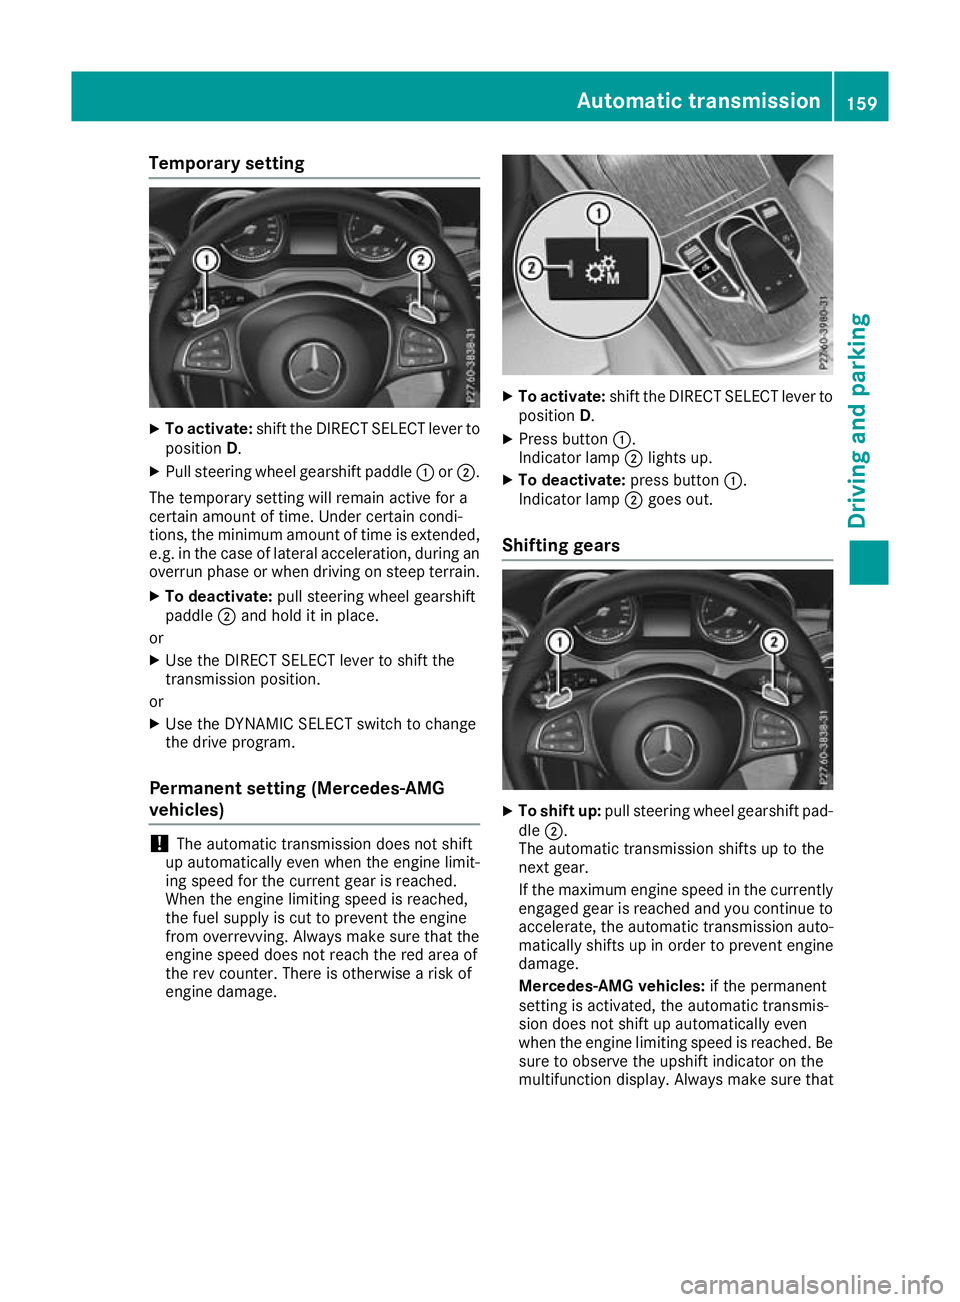
X
To activate: shift the DIRECT SELECT lever to
position D.
X Pull steering wheel gearshift paddle :or;.
The temporary setting will remain active for a
certain amount of time. Under certain condi-
tions, the minimum amount of time is extended,
e.g. in the case of lateral acceleration, during an overrun phase or when driving on steep terrain.
X To deactivate: pull steering wheel gearshift
paddle ;and hold it in place.
or X Use the DIRECT SELECT lever to shift the
transmission position.
or X Use the DYNAMIC SELECT switch to change
the drive program.
Permanent setting (Mercedes-AMG
vehicles) !
The automatic transmission does not shift
up automatically even when the engine limit-
ing speed for the current gear is reached.
When the engine limiting speed is reached,
the fuel supply is cut to prevent the engine
from overrevving. Always make sure that the
engine speed does not reach the red area of
the rev counter. There is otherwise a risk of
engine damage. X
To activate: shift the DIRECT SELECT lever to
position D.
X Press button :.
Indicator lamp ;lights up.
X To deactivate: press button:.
Indicator lamp ;goes out.
Shifting gears X
To shift up: pull steering wheel gearshift pad-
dle ;.
The automatic transmission shifts up to the
next gear.
If the maximum engine speed in the currently engaged gear is reached and you continue to
accelerate, the automatic transmission auto-
matically shifts up in order to prevent engine
damage.
Mercedes-AMG vehicles: if the permanent
setting is activated, the automatic transmis-
sion does not shift up automatically even
when the engine limiting speed is reached. Be
sure to observe the upshift indicator on the
multifunction display. Always make sure that Automatic transmission
159Driving and parking Z
Page 164 of 389
Problems with the transmission
Problem
Possible causes/consequences and
M
MSolutions The transmission has
problems shifting gear. The transmission is losing oil.
X Have the transmission checked at a qualified specialist workshop
immediately. The acceleration charac-
teristics are deteriorat-
ing.
The transmission no lon-
ger changes gear. The transmission is in emergency mode.
It is possible to shift only into
secondgear and reverse gear.
X Stop.
X Shift the transmission to position P.
X Switch off the engine.
X Wait at least ten seconds before restarting the engine.
X Shift the transmission to position Dor R.
If D is selected, the transmission shifts into secondgear; ifRis
selected, the transmission shifts into reverse gear.
X Have the transmission checked at a qualified specialist workshop
immediately. Transfer case
This section only applies to vehicles with all-
wheel drive (4MATIC). The front and rear axles
are constantly driven.
! Performance tests may only be carried out
on a two-axle roller dynamometer. Otherwise,
the braking system or the transfer case could be damaged. Contact a qualified specialist
workshop for more information on perform-
ance tests.
! Since ESP ®
engages automatically, the igni-
tion must be switched off (the key or Start/
Stop button must be in position 0or 1) if:
R the electric parking brake is being tested
using a brake dynamometer.
R the vehicle is being towed with only one
axle raised (not permitted for vehicles with
4MATIC).
The brake system could otherwise be dam-
aged.
! Vehicles with 4MATIC must not be towed
with the front or rear axle raised; otherwise,
the transmission may be damaged. Refuelling
Important safety notes
G
WARNING
Fuel is highly flammable. If you handle fuel
incorrectly, there is a risk of fire and explo-
sion.
You must avoid fire, naked flames, creating
sparks and smoking. Switch off the engine
and, if applicable, the auxiliary heating before refuelling. G
WARNING
Fuels are poisonous and hazardous to health. There is a danger of injury.
Do not swallow fuel or let it come into contact
with skin, eyes or clothing. Do not inhale fuel
vapours. Keep fuels out of the reach of chil-
dren. Refuelling
161Driving and parking
Z
Page 174 of 389
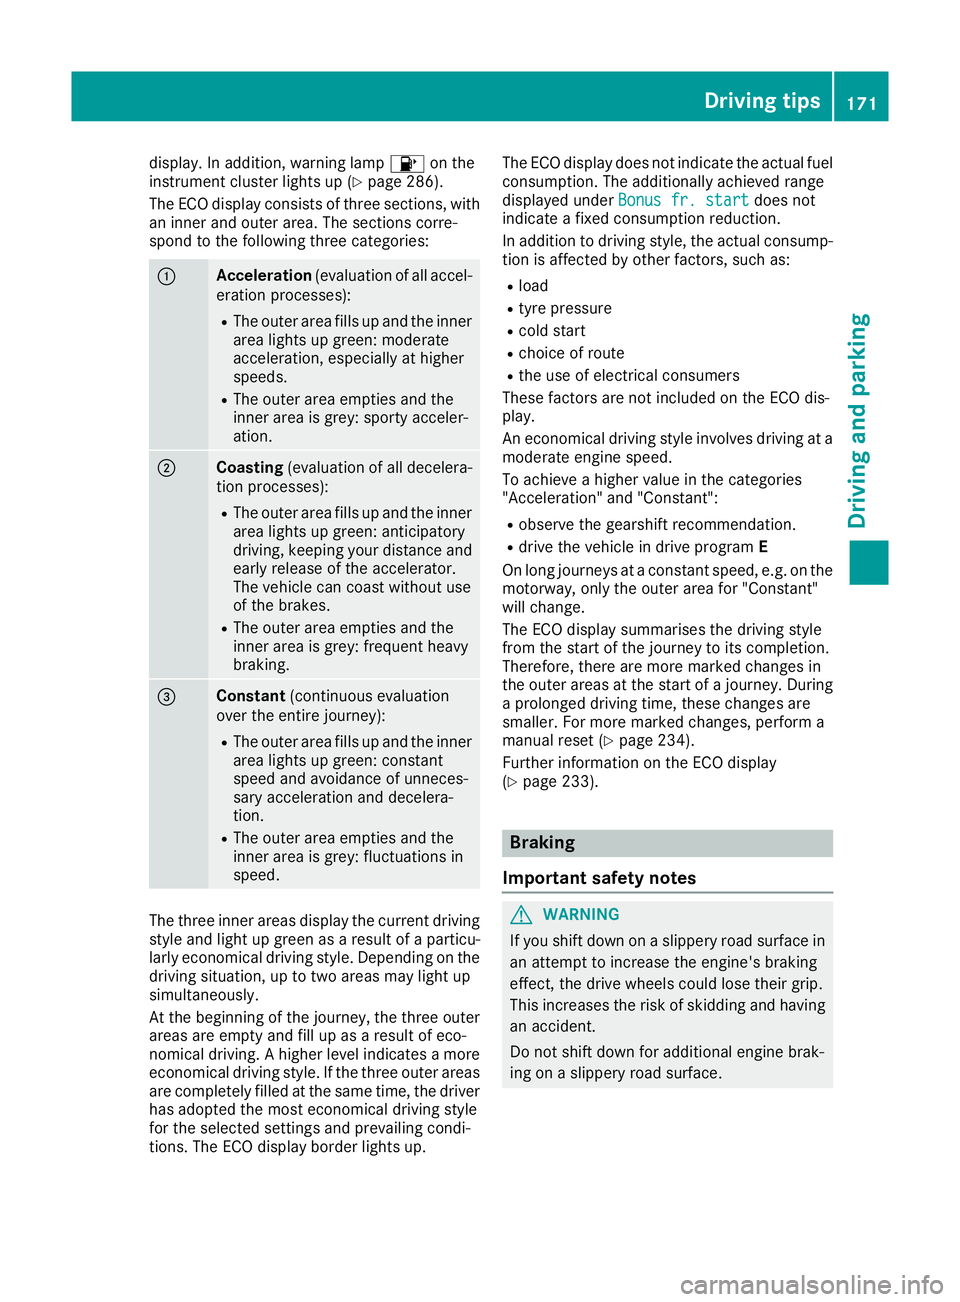
display. In addition, warning lamp
8on the
instrument cluster lights up (Y page 286).
The ECO display consists of three sections, with an inner and outer area. The sections corre-
spond to the following three categories: :
Acceleration
(evaluation of all accel-
eration processes):
R The outer area fills up and the inner
area lights up green: moderate
acceleration, especially at higher
speeds.
R The outer area empties and the
inner area is grey: sporty acceler-
ation. ;
Coasting
(evaluation of all decelera-
tion processes):
R The outer area fills up and the inner
area lights up green: anticipatory
driving, keeping your distance and early release of the accelerator.
The vehicle can coast without use
of the brakes.
R The outer area empties and the
inner area is grey: frequent heavy
braking. =
Constant
(continuous evaluation
over the entire journey):
R The outer area fills up and the inner
area lights up green: constant
speed and avoidance of unneces-
sary acceleration and decelera-
tion.
R The outer area empties and the
inner area is grey: fluctuations in
speed. The three inner areas display the current driving
style and light up green as a result of a particu-
larly economical driving style. Depending on the driving situation, up to two areas may light up
simultaneously.
At the beginning of the journey, the three outer
areas are empty and fill up as a result of eco-
nomical driving. A higher level indicates a more
economical driving style. If the three outer areas
are completely filled at the same time, the driver
has adopted the most economical driving style
for the selected settings and prevailing condi-
tions. The ECO display border lights up. The ECO display does not indicate the actual fuel
consumption. The additionally achieved range
displayed under Bonus fr. start
Bonus fr. start does not
indicate a fixed consumption reduction.
In addition to driving style, the actual consump- tion is affected by other factors, such as:
R load
R tyre pressure
R cold start
R choice of route
R the use of electrical consumers
These factors are not included on the ECO dis-
play.
An economical driving style involves driving at a moderate engine speed.
To achieve a higher value in the categories
"Acceleration" and "Constant":
R observe the gearshift recommendation.
R drive the vehicle in drive program E
On long journeys at a constant speed, e.g. on the motorway, only the outer area for "Constant"
will change.
The ECO display summarises the driving style
from the start of the journey to its completion.
Therefore, there are more marked changes in
the outer areas at the start of a journey. During
a prolonged driving time, these changes are
smaller. For more marked changes, perform a
manual reset (Y page 234).
Further information on the ECO display
(Y page 233). Braking
Important safety notes G
WARNING
If you shift down on a slippery road surface in an attempt to increase the engine's braking
effect, the drive wheels could lose their grip.
This increases the risk of skidding and having
an accident.
Do not shift down for additional engine brak-
ing on a slippery road surface. Driving tips
171Driving and parking Z
Page 175 of 389
Downhill gradients
Change into a lower gear in good time on long
and steep downhill gradients. Take particular
note of this when driving a laden vehicle and
when towing a trailer.
This also applies if cruise control, DISTRONIC
PLUS or SPEEDTRONIC is activated.
This will use the braking effect of the engine, so
less braking will be required to maintain vehicle
speed. This relieves the load on the brake sys-
tem and prevents the brakes from overheating
and wearing too quickly.
Heavy and light loads G
WARNING
The braking system can overheat if you leave your foot on the brake pedal while driving.
This increases the braking distance and could
even cause the braking system to fail. There is
a risk of an accident.
Never use the brake pedal as a footrest. Do
not simultaneously depress both the brake
pedal and the accelerator pedal while driving.
! Depressing the brake pedal constantly
results in excessive and premature wear to
the brake pads.
If heavy demands are made on the brakes, do
not park the vehicle immediately. Drive on for a
short while. This allows the airflow to cool the
brakes more quickly.
If the brakes have been used only moderately,
you should occasionally test their effectiveness.
To do this, brake more firmly from a higher
speed while paying attention to the traffic con-
ditions. This improves the grip of the brakes.
Wet road surfaces If you have driven for a long time in heavy rain
without braking, there may be a delayed reac-
tion from the brakes when braking for the first
time. This may also occur after a car wash or
after driving through deep water.
You will have to depress the brake pedal more
firmly. Maintain a greater distance to the vehicle in front.
After driving on a wet road or having the vehicle
washed, brake firmly while paying attention to
the traffic conditions. This will warm up the brake discs, thereby drying them more quickly
and protecting them against corrosion.
Limited braking performance on salt-
treated roads If you drive on salt-treated roads, a layer of salt
may form on the brake discs and pads. This can
increase the braking distance considerably.
R In order to prevent any salt build-up, apply the
brakes occasionally while paying attention to
the traffic conditions.
R Carefully depress the brake pedal at the end
of the journey and when starting the next
journey.
R Maintain a much greater distance to the vehi-
cle in front.
New brake discs and brake pads/
linings Brake pads/linings and discs that are either new
or have been replaced achieve optimum braking
effect only after several hundred kilometres of
driving. Compensate for the reduced braking
effect by applying greater force to the brake
pedal.
For safety reasons, Mercedes-Benz recom-
mends only fitting the following brake discs and brake pads/linings:
R brake discs that have been approved by
Mercedes-Benz
R brake pads/linings that have been approved
by Mercedes-Benz or that are of an equivalent
standard of quality
Other brake discs or brake pads/linings can
compromise the safety of your vehicle.
Always replace all brake discs and brake pads/
linings on an axle at the same time. Always fit
new brake pads/linings when replacing brake
discs.
The vehicle is equipped with lightweight brake
discs to which the wheel assembly with rim and threaded connection is matched.
The use of brake discs other than those
approved by Mercedes-Benz may alter track
width and is subject to approval, if applicable.
Shock-type loads when handling the brake
discs, such as when changing wheels, can lead
to a reduction in comfort when driving with light-
weight brake discs. Avoid shock-type loads on 172
Driving tipsDriving and pa
rking
Page 176 of 389
the lightweight brake discs, particularly on the
brake plate. Driving on wet roads
Aquaplaning If water has accumulated to a certain depth on
the road surface, there is a danger of aquaplan-
ing occurring, even if:
R you are driving at low speeds
R the tyres have adequate tread depth
For this reason, drive in the following manner in
the event of heavy rain or in conditions in which aquaplaning can occur:
R lower your speed
R avoid tyre ruts
R avoid sudden steering movements
R brake carefully
Driving on flooded roads !
Bear in mind that vehicles travelling in front
or in the opposite direction create waves. This may cause the maximum permissible water
depth to be exceeded.
These notes must be observed under all cir-
cumstances. You could otherwise damage
the engine, the electronics or the transmis-
sion.
If you must drive on stretches of road on which
water has collected, please bear in mind that:
R in the case of standing water, the water level
must be no higher than the lower edge of the
vehicle body
R you should drive no faster than walking pace Winter driving
G
WARNING
If you shift down on a slippery road surface in an attempt to increase the engine's braking
effect, the drive wheels could lose their grip.
This increases the risk of skidding and having
an accident.
Do not shift down for additional engine brak-
ing on a slippery road surface. G
DANGER
If the exhaust pipe is blocked or adequate
ventilation is not possible, poisonous gases
such as carbon monoxide (CO) may enter the vehicle. This is the case, e.g. if the vehicle
becomes trapped in snow. There is a risk of
fatal injury.
If you leave the engine or the auxiliary heating
running, make sure the exhaust pipe and area
around the vehicle are clear of snow. To
ensure an adequate supply of fresh air, open a window on the side of the vehicle that is not
facing into the wind.
Have your vehicle winterproofed at a qualified
specialist workshop at the onset of winter.
You should drive particularly carefully on slip-
pery road surfaces. Avoid sudden acceleration,
steering and braking manoeuvres. Do not use
cruise control or DISTRONIC PLUS.
If the vehicle threatens to skid or cannot be
stopped when moving at low speed:
X Shift the transmission to position N.
X Try to bring the vehicle under control by using
corrective steering.
The outside temperature indicator is not
designed to serve as an ice-warning device and
is therefore unsuitable for that purpose.
Changes in the outside temperature are dis-
played after a short delay.
Indicated temperatures just above the freezing
point do not guarantee that the road surface is
free of ice. The road may still be icy, especially in wooded areas or on bridges. The vehicle could
skid if you fail to adapt your driving style. Always
adapt your driving style and drive at a speed to
suit the prevailing weather conditions.
You should pay special attention to road condi-
tions when temperatures are around freezing
point.
Further information on driving with snow chains (Y page 359).
Further information on driving with summer
tyres (Y page 358).
Observe the notes in the "Winter operation" sec-
tion (Y page 358). Driving
tips
173Driving an d parking Z
Page 177 of 389
Driving systems
Mercedes-Benz Intelligent Drive
Mercedes-Benz Intelligent Drive stands for inno- vative driver assistance and safety systems
which enhance comfort and support the driver in
critical situations. With these intelligent co-ordi- nated systems Mercedes-Benz has set a mile-
stone on the path towards autonomous driving.
Mercedes-Benz Intelligent Drive embraces all
elements of active and passive safety in one well thought-out system – for the safety of the vehi-
cle occupants and that of other road users.
Further information on driving safety systems
(Y page 68). Cruise control
General notes Cruise control maintains a constant road speed
for you. It brakes automatically in order to avoid
exceeding the set speed. Shift to a lower gear in
good time on long and steep downhill gradients.
Take particular note of this when driving a laden vehicle and when towing a trailer. By doing so,
you will make use of the braking effect of the
engine. This relieves the load on the brake sys-
tem and prevents the brakes from overheating
and wearing too quickly.
Use cruise control only if road and traffic con-
ditions are appropriate for maintaining a steady speed for a prolonged period. You can store anyroad speed above 30 km/h. If you have set a
permanent limit speed, you cannot set the
speed any higher than the fixed limit speed
(Y page 177).
Important safety notes Cruise control can neither reduce the risk of an
accident if you fail to adapt your driving style nor
override the laws of physics. Cruise control can- not take into account road, weather or traffic
conditions. Cruise control is only an aid. You are
responsible for maintaining a safe distance from the vehicle in front, for vehicle speed, for brak-
ing in good time and for staying in lane. Do not use cruise control:
R in road and traffic conditions that do not allow
you to maintain a constant speed, e.g. in
heavy traffic or on winding roads.
R on smooth or slippery roads. Braking or accel-
erating can cause the drive wheels to lose
traction and the vehicle could then skid.
R when there is poor visibility, e.g. due to fog,
heavy rain or snow.
If there is a change of drivers, advise the new
driver of the speed stored.
i The speed indicated in the speedometer
may differ slightly from the speed stored.
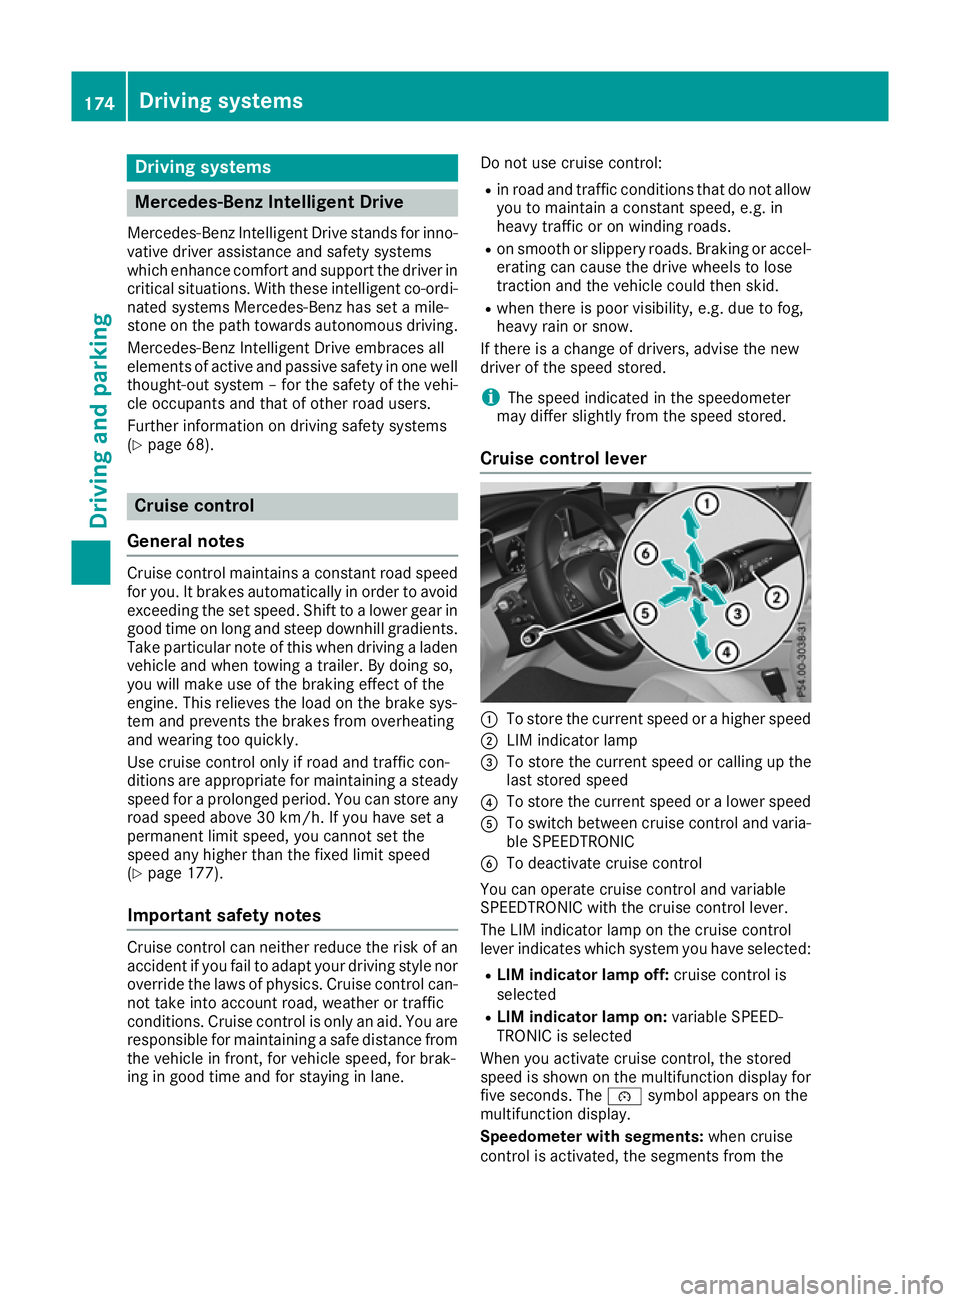
Cruise control lever :
To store the current speed or a higher speed
; LIM indicator lamp
= To store the current speed or calling up the
last stored speed
? To store the current speed or a lower speed
A To switch between cruise control and varia-
ble SPEEDTRONIC
B To deactivate cruise control
You can operate cruise control and variable
SPEEDTRONIC with the cruise control lever.
The LIM indicator lamp on the cruise control
lever indicates which system you have selected:
R LIM indicator lamp off: cruise control is
selected
R LIM indicator lamp on: variable SPEED-
TRONIC is selected
When you activate cruise control, the stored
speed is shown on the multifunction display for five seconds. The ésymbol appears on the
multifunction display.
Speedometer with segments: when cruise
control is activated, the segments from the 174
Driving syste
msDriving and parking
Page 181 of 389
DISTRONIC PLUS
General notes DISTRONIC PLUS regulates the speed and auto-
matically helps you maintain the distance to the
vehicle detected in front. Vehicles are detected with the aid of the radar sensor system.
DISTRONIC PLUS brakes automatically so that
the set speed is not exceeded.
Change into a lower gear in good time on long
and steep downhill gradients. Take particular
note of this when driving a laden vehicle. By
doing so, you will make use of the braking effect
of the engine. This relieves the load on the brake
system and prevents the brakes from overheat- ing and wearing too quickly.
If DISTRONIC PLUS detects that there is a risk of
collision with the vehicle in front, you will be
warned visually and audibly. Without your inter- vention, DISTRONIC PLUS cannot prevent a col-
lision. An intermittent warning tone will then
sound and the distance warning lamp will light
up in the instrument cluster. Brake immediately to increase the distance to the vehicle in front,
or take evasive action, provided it is safe to do
so.
DISTRONIC PLUS operates in the speed range
between 0 km/h and 200 km/h.
Do not use DISTRONIC PLUS while driving on
roads with steep gradients.
Important safety notes G
WARNING
DISTRONIC PLUS does not react to:
R people or animals
R stationary obstacles on the road, e.g. stop-
ped or parked vehicles
R oncoming and crossing traffic
As a result, DISTRONIC PLUS may neither give
warnings nor intervene in such situations.
There is a risk of an accident.
Always pay careful attention to the traffic sit- uation and be ready to brake. G
WARNING
DISTRONIC PLUS cannot always clearly rec-
ognise other road users and complex traffic
conditions. In such cases, DISTRONIC PLUS may:
R give an unnecessary warning and then
brake the vehicle
R neither give a warning nor intervene
R accelerate or brake unexpectedly
There is a risk of an accident.
Continue to drive carefully and be prepared to
brake, particularly if DISTRONIC PLUS warns
you. G
WARNING
DISTRONIC PLUS brakes your vehicle with up to 50 %of the maximum possible deceleration.
If this deceleration is not sufficient,
DISTRONIC PLUS alerts you with a visual and
acoustic warning. There is a risk of an acci-
dent.
Apply the brakes yourself in these situations
and try to take evasive action.
! When DISTRONIC PLUS or the HOLD func-
tion is activated, the vehicle brakes automat- ically in certain situations.
To avoid damage to the vehicle, deactivate
DISTRONIC PLUS and the HOLD function in
the following or similar situations:
R when towing away
R in a car wash
DISTRONIC PLUS can neither reduce the risk of
an accident if you fail to adapt your driving style
nor override the laws of physics. DISTRONIC
PLUS cannot take into account road, weather or traffic conditions. DISTRONIC PLUS is only an
aid. You are responsible for maintaining a safe
distance, for vehicle speed, for braking in good
time and for staying in lane.
Do not use DISTRONIC PLUS:
R in traffic conditions that do not allow you to
maintain a constant speed, e.g. in heavy traf-
fic or on winding roads
R on smooth or slippery roads. Braking or accel-
erating can cause the drive wheels to lose
traction and the vehicle could then skid
R when there is poor visibility, e.g. due to fog,
heavy rain or snow
DISTRONIC PLUS may not detect narrow vehi-
cles driving in front, e.g. motorcycles, or vehi-
cles driving on a different line. 178
Driving systemsDriving and parking
Page 188 of 389
towards the edge of the carriageway, your vehi-
cle could come into contact with the kerb or
other road boundaries. Be particularly aware of
other road users, e.g. cyclists, that are directly
next to your vehicle.
Obstacles such as traffic pylons on the lane or
projecting out into the lane are not detected.
An inappropriate steering intervention, e.g. after
you have intentionally driven over a lane mark-
ing, can be corrected at any time if you steer
slightly in the opposite direction.
DISTRONIC PLUS with Steering Assist and
Stop&Go Pilot cannot continuously keep your
vehicle in lane. In some cases, the steering
intervention is not sufficient to bring the vehicle back to the lane. In such cases, you must steer the vehicle yourself to ensure that it does not
leave the lane.
The system may be impaired or may not function
in the following situations:
R poor visibility, e.g. due to insufficient illumi-
nation of the road, or due to snow, rain, fog or
spray
R glare, e.g. from oncoming traffic, the sun or
reflection from other vehicles (e.g. if the road
surface is wet)
R the windscreen is dirty, misted up, damaged
or covered, for instance by a sticker, in the
vicinity of the camera
R no or several, unclear lane markings are pres-
ent for one lane, e.g. in a construction area
R the lane markings are worn away, dark or cov-
ered up, e.g. by dirt or snow
R the distance to the vehicle in front is so small
that the lane markings cannot be detected
R the lane markings change quickly, e.g. lanes
branch off, cross one another or merge
R the road is narrow and winding
R there are highly variable shade conditions on
the roadway
The system is switched to passive and no longer assists you by performing steering interventions
if:
R you actively change lane
R you switch on the turn signal
R you take your hands off the steering wheel or
do not steer for a prolonged period of time
After you have finished changing lanes, Steering Assist and Stop&Go Pilot are automatically
active again. Steering Assist and Stop&Go Pilot cannot pro-
vide assistance in the following situations:
R on very sharp corners
R when a loss of tyre pressure or a defective
tyre has been detected and displayed
Also observe the important safety notes for
DISTRONIC PLUS (Y page 178).
The steering interventions are carried out with a
limited steering moment. The system requires
the driver to keep his hands on the steering
wheel and to steer himself.
If you do not steer yourself or if you take your
hands off the steering wheel for a prolonged
period of time, the system will first alert you with a visual warning. A steering wheel symbol
appears on the multifunction display. If you have
still not started to steer and have not taken hold
of the steering wheel after five seconds at the
latest, a warning tone also sounds to remind you to take control of the vehicle. Steering Assist
and Stop&Go Pilot switch to passive mode.
DISTRONIC PLUS remains activated.
Activating Steering Assist and Stop&Go
Pilot X
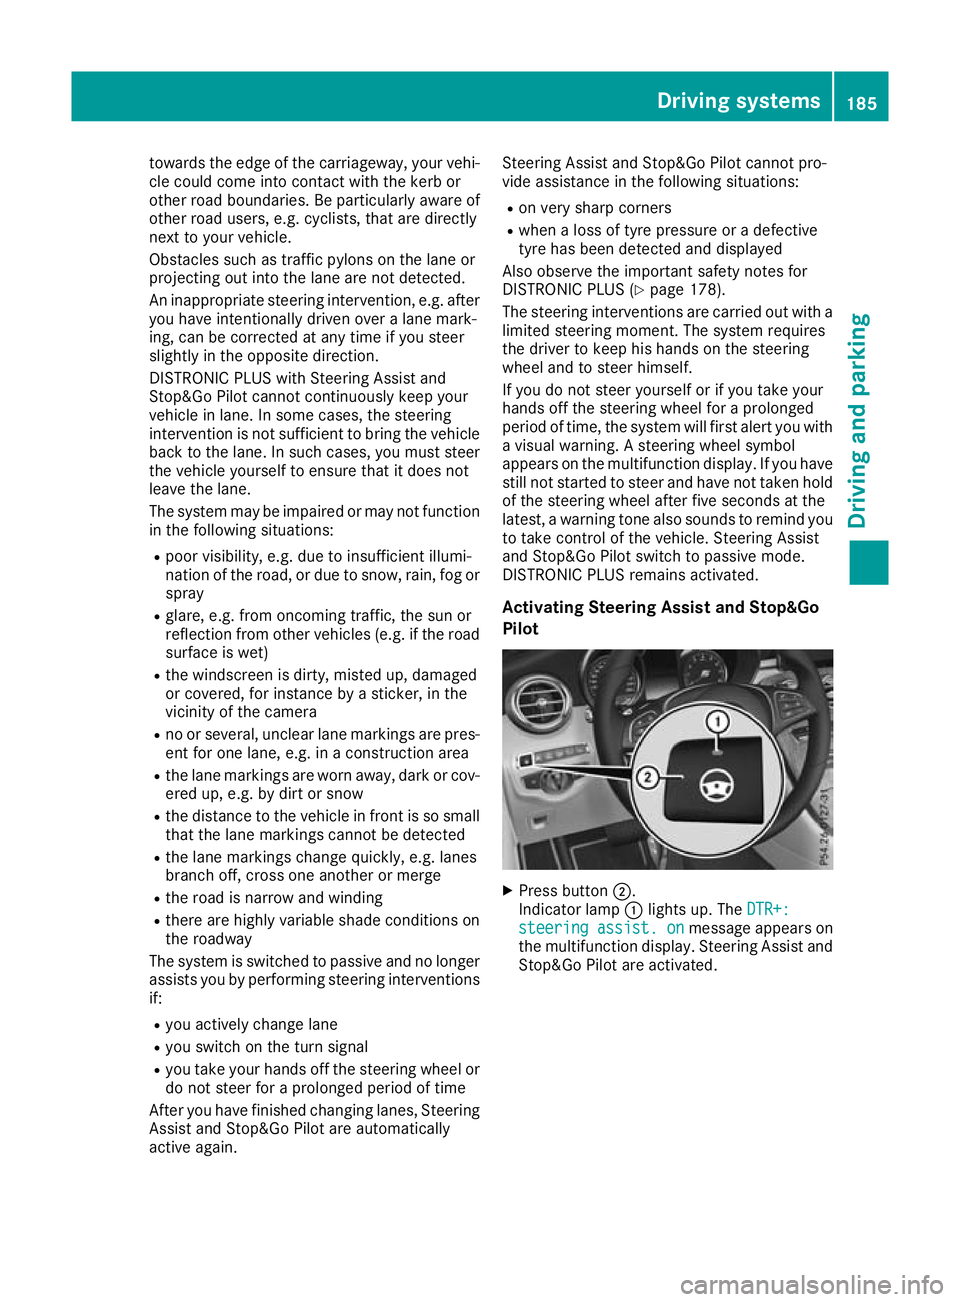
Press button ;.
Indicator lamp :lights up. The DTR+: DTR+:
steering
steering assist.
assist.on
onmessage appears on
the multifunction display. Steering Assist and Stop&Go Pilot are activated. Driving systems
185Driving and parking Z